


网上学习资料一大堆,但如果学到的知识不成体系,遇到问题时只是浅尝辄止,不再深入研究,那么很难做到真正的技术提升。
一个人可以走的很快,但一群人才能走的更远!不论你是正从事IT行业的老鸟或是对IT行业感兴趣的新人,都欢迎加入我们的的圈子(技术交流、学习资源、职场吐槽、大厂内推、面试辅导),让我们一起学习成长!
3、给elasticsearch目录设置新用户
chown elasticsearch:elasticsearch -R elasticsearch-8.3.3/
###### 3.3、Elasticsearch 目录结构解释


|  |  |
| --- | --- |
| 目录名称 | 说明 |
| bin | 可执行脚本文件目录 |
| config | 配置文件目录 |
| lib | 依赖包目录 |
| data | 默认数据保存目录,最好修改 |
| logs | 默认日志保存目录,最好修改 |
| plugins | 已经安装的插件保存目录 |
| jdk | 自带jdk目录 |
| modules | 所有Elasticsearch模块 |


###### 3.3、配置文件初解(elasticsearch.yml)
---------------------------------- Cluster -----------------------------------
Use a descriptive name for your cluster:
cluster.name: my-application
------------------------------------ Node ------------------------------------
Use a descriptive name for the node:
node.name: node-1
Add custom attributes to the node:
#node.attr.rack: r1
----------------------------------- Paths ------------------------------------
Path to directory where to store the data (separate multiple locations by comma):
#path.data: /path/to/data
Path to log files:
#path.logs: /path/to/logs
----------------------------------- Memory -----------------------------------
Lock the memory on startup:
bootstrap.memory_lock: true
Make sure that the heap size is set to about half the memory available
on the system and that the owner of the process is allowed to use this
limit.
Elasticsearch performs poorly when the system is swapping the memory.
---------------------------------- Network -----------------------------------
By default Elasticsearch is only accessible on localhost. Set a different
address here to expose this node on the network:
network.host: 192.168.0.90
By default Elasticsearch listens for HTTP traffic on the first free port it
finds starting at 9200. Set a specific HTTP port here:
http.port: 9200
For more information, consult the network module documentation.
--------------------------------- Discovery ----------------------------------
Pass an initial list of hosts to perform discovery when this node is started:
The default list of hosts is [“127.0.0.1”, “[::1]”]
#discovery.seed_hosts: [“host1”, “host2”]
Bootstrap the cluster using an initial set of master-eligible nodes:
#cluster.initial_master_nodes: [“node-1”, “node-2”]
For more information, consult the discovery and cluster formation module documentation.
--------------------------------- Readiness ----------------------------------
Enable an unauthenticated TCP readiness endpoint on localhost
#readiness.port: 9399
---------------------------------- Various -----------------------------------
Allow wildcard deletion of indices:
#action.destructive_requires_name: false
#----------------------- BEGIN SECURITY AUTO CONFIGURATION -----------------------
#----------------------- END SECURITY AUTO CONFIGURATION -------------------------
 主要有几个模块:


|  |  |
| --- | --- |
| 模块名 | 说明 |
| Cluster | 配置集群名称 |
| Node | 配置当前节点信息(**节点名称默认主机名**) |
| Paths | 指定数据和日志保存路径 |
| Memory | 内存使用相关配置 |
| Network | 网络相关配置(主机ip,端口等) |
| Discovery | 集群相关参数配置 |
| BEGIN SECURITY AUTO CONFIGURATION | ES8.0默认使用security,启动时添加的配置 |


##### ’4、Elasticsearch 启动


###### 4.1、直接启动(默认开启security)


###### 4.1.1、不修改配置文件启动


首次启动 Elasticsearch 时,会自动进行以下安全配置:


1)、为传输层和 HTTP 层生成 TLS 证书和密钥;


2)、TLS 配置设置被写入 elasticsearch.yml(BEGIN SECURITY AUTO CONFIGURATION 模块);


3)、为 elastic 用户生成密码。


4)、为 Kibana 生成一个注册令牌。
使用 elasticsearch 用户,进入bin目录执行
./elasticsearch -d
启动成功如下图:

验证服务状态,使用生成的密码登录(**用户名:elastic,密码启动成功生成的**):
###### 4.1.2、修改密码
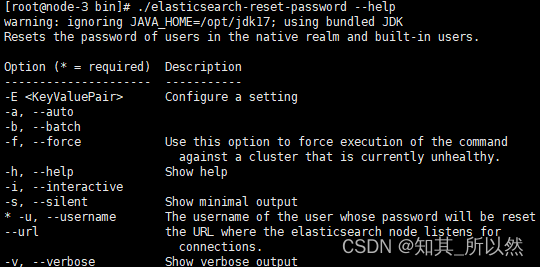
**忘记密码怎么办,使用重新生成或者自定义密码。**
1、重新生成密码
./elasticsearch-reset-password -u elastic # 可以使用./elasticsearch-reset-password --help查看使用
2、自定义密码
./elasticsearch-reset-password --username elastic -i
###### 4.1.3、Elasticsearch 启动后配置文件(elasticsearch.yml)变化
新增如下内容(这些内容是针对security自动添加的):
#----------------------- BEGIN SECURITY AUTO CONFIGURATION -----------------------#
Enable security features
xpack.security.enabled: true
xpack.security.enrollment.enabled: true
Enable encryption for HTTP API client connections, such as Kibana, Logstash, and Agents
xpack.security.http.ssl:
enabled: true
keystore.path: certs/http.p12
Enable encryption and mutual authentication between cluster nodes
xpack.security.transport.ssl:
enabled: true
verification_mode: certificate
keystore.path: certs/transport.p12
truststore.path: certs/transport.p12
Create a new cluster with the current node only
Additional nodes can still join the cluster later
cluster.initial_master_nodes: [“node-3”]
Allow HTTP API connections from anywhere
Connections are encrypted and require user authentication
http.host: 0.0.0.0
Allow other nodes to join the cluster from anywhere
Connections are encrypted and mutually authenticated
#transport.host: 0.0.0.0
#----------------------- END SECURITY AUTO CONFIGURATION -------------------------
###### 4.2、关闭security 启动


###### 4.2.1、修改配置文件


        修改elasticsearch.yml配置文件如下:
#----------------------- BEGIN SECURITY AUTO CONFIGURATION -----------------------
Enable security features
xpack.security.enabled: false # 将此处设置为false,即为关闭security
xpack.security.enrollment.enabled: true
Enable encryption for HTTP API client connections, such as Kibana, Logstash, and Agents
xpack.security.http.ssl:
enabled: true
keystore.path: certs/http.p12
Enable encryption and mutual authentication between cluster nodes
xpack.security.transport.ssl:
enabled: true


既有适合小白学习的零基础资料,也有适合3年以上经验的小伙伴深入学习提升的进阶课程,涵盖了95%以上大数据知识点,真正体系化!
由于文件比较多,这里只是将部分目录截图出来,全套包含大厂面经、学习笔记、源码讲义、实战项目、大纲路线、讲解视频,并且后续会持续更新
15670838433)]
既有适合小白学习的零基础资料,也有适合3年以上经验的小伙伴深入学习提升的进阶课程,涵盖了95%以上大数据知识点,真正体系化!
由于文件比较多,这里只是将部分目录截图出来,全套包含大厂面经、学习笔记、源码讲义、实战项目、大纲路线、讲解视频,并且后续会持续更新


 8638
8638

 被折叠的 条评论
为什么被折叠?
被折叠的 条评论
为什么被折叠?
 到【灌水乐园】发言


