


按照上述的图分析,即便主服务器出问题,那么至少还有3台从服务器可以提供服务
主从复制的作用:
(1)、数据实时热备
(2)、故障恢复(主出问题,从顶上)
(3)、负载均衡
(4)、读写分离
(5)、提升系统的高可用
常见的主从结构:
1主1从、1主多从、多主多从
1主2从集群:设定场景:1主2从 主(6379),从(6380,6381)
(1)主从复制准备
准备3份配置文件:
redis6379.conf
daemonize no
protected-mode no
requirepass 150316
#指定 从节点来连接时,需要使用的密码
masterauth 150316
#指定 服务器的IP地址,便于从节点来连接
slave-announce-ip 192.168.3.23
#指定 服务器的端口号,便于从节点来连接
slave-announce-port 6379
#0.0.0.0在服务器的环境中,指的就是服务器上所有的ipv4地址
bind 0.0.0.0
redis6380.conf
daemonize no
#关闭保护模式
protected-mode no
#设置密码
requirepass 150316
#集群中其它客户端设置密码后,这里要相应的指定
masterauth 150316
#指定主节点的IP地址 以及端口
slaveof 192.168.3.23 6379
slave-announce-ip 192.168.3.23
slave-announce-port 6380
#0.0.0.0在服务器的环境中,指的就是服务器上所有的ipv4地址
bind 0.0.0.0
redis6381.conf
daemonize no
#关闭保护模式
protected-mode no
#设置密码
requirepass 150316
#集群中其它客户端设置密码后,这里要相应的指定
masterauth 150316
#指定主节点的IP地址 端口
slaveof 192.168.3.23 6379
slave-announce-ip 192.168.3.23
slave-announce-port 6381
#0.0.0.0在服务器的环境中,指的就是服务器上所有的ipv4地址
bind 0.0.0.0
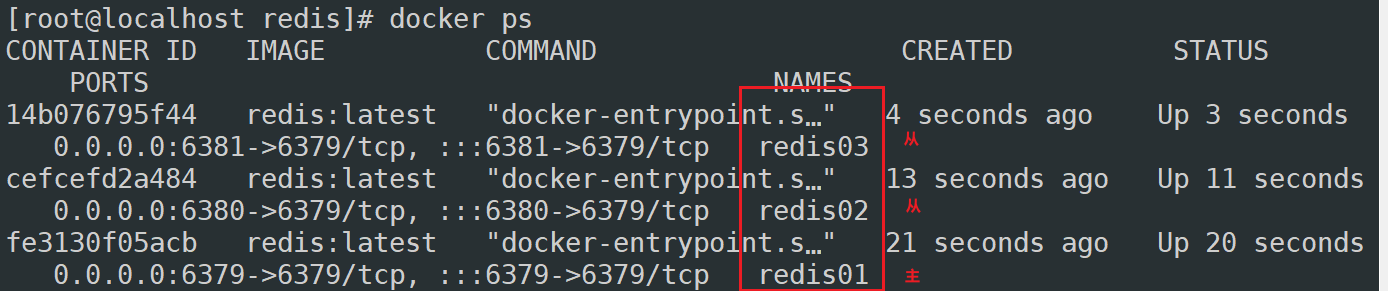
启动1主2从:
docker run --name redis01 -p 6379:6379 -v /root/redis/redis6379.conf:/usr/local/etc/redis/redis.conf -v /root/redis/data6379:/data -d redis:latest redis-server /usr/local/etc/redis/redis.conf
docker run --name redis02 -p 6380:6379 --privileged=true -v /root/redis/redis6380.conf:/usr/local/etc/redis/redis.conf -v /root/redis/data6380:/data -d redis:latest redis-server /usr/local/etc/redis/redis.conf
docker run --name redis03 -p 6381:6379 --privileged=true -v /root/redis/redis6381.conf:/usr/local/etc/redis/redis.conf -v /root/redis/data6381:/data -d redis:latest redis-server /usr/local/etc/redis/redis.conf
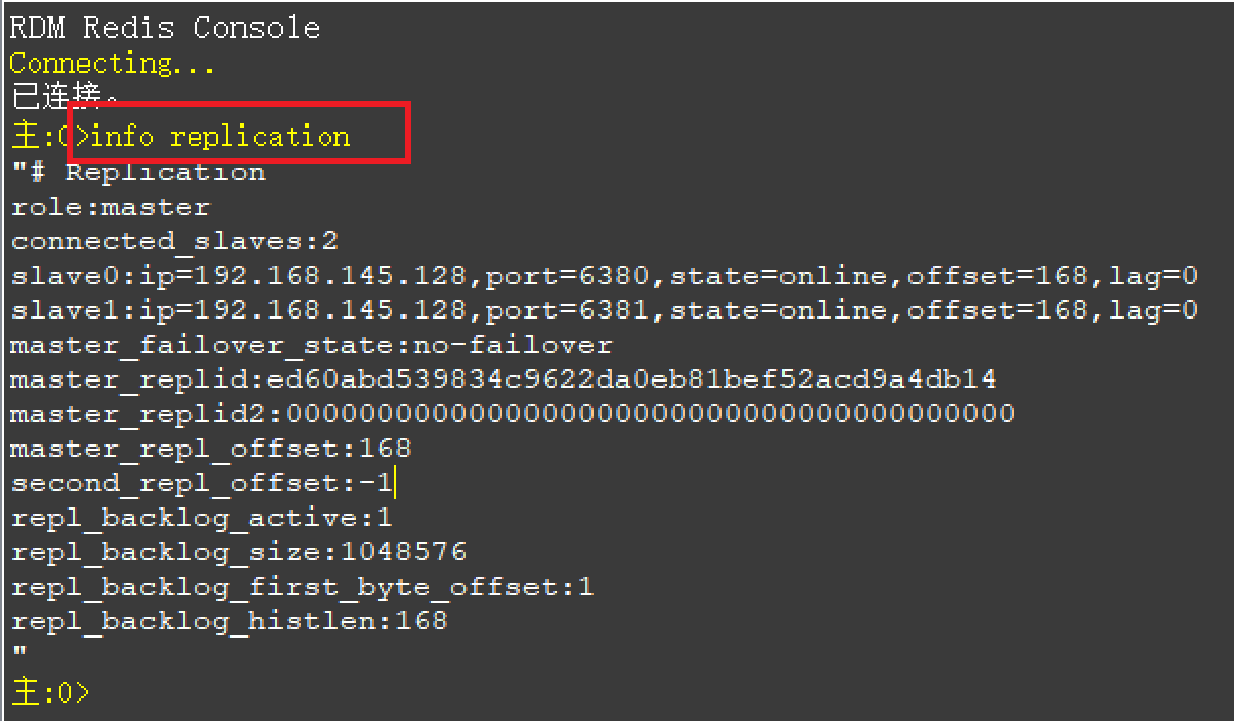
redis主从复制的原理:
主从结构:先进行全量复制,然后进行增量复制
(1)、当slave和master建立联系之后,slave节点发送psync至master上,master在收到该命令之后,开始使用bgsave进行RDB快照备份(当多个slave同时发送psync命令,主节点只备份一次)
(2)、master节点备份完成之后,将RDB快照文件推送至所有的slave从节点,slave从节点读取快照,并删除自身所有的旧数据,完成全量复制
(3)、应用程序针对master的所有写的操作,将被master以命令的方式,推送所有slave从节点上,从节点完成增量复制
如果主节点崩溃了,怎么办?
Redis的哨兵模式
问题:配置的1主2从,主机可能会宕机?它宕机之后咋办?
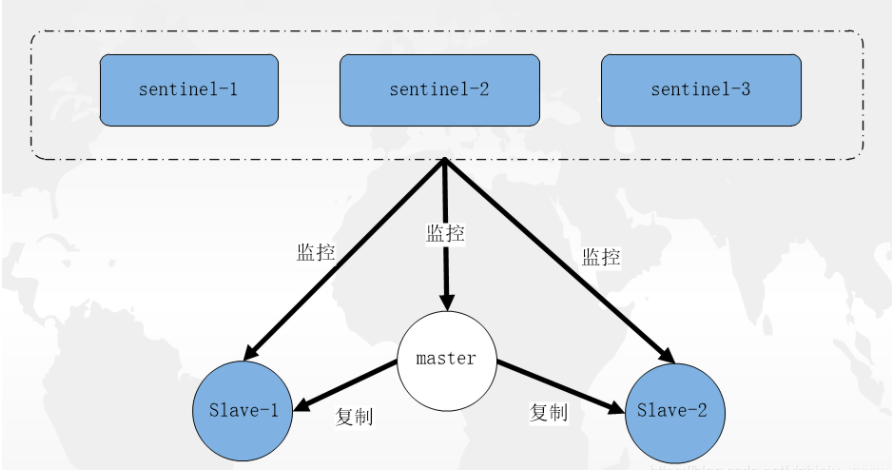
多个哨兵服务器构成一个哨兵系统,哨兵系统监控主从服务器的执行状态,当主节点下线时,哨兵可采取投票推荐机制,自动从剩余的从服务器中 ,选择出最新的主节点!
具体操作:
(1)、哨兵系统监控主从节点,每个节点都指定一个哨兵
(2)、哨兵系统主要监控主节点,当主节点宕机,主节点的哨兵会不断尝试重新连接主节点,当多次连接之后,仍旧连接失败,主节点哨兵将主观意识认为主节点已经宕机,通知哨兵系统,让哨兵系统中所有哨兵试图再去连接主节点,当所有哨兵都连接不上,哨兵系统认为主节点真正的宕机了!
(3)、哨兵系统将针对剩余的所有从节点进行“选举投票”,票数最多的从节点将会被 哨兵系统推举为新的“主节点”,其他节点默认为从节点。
(为了快速的得到投票结果,哨兵系统最好是:单数)
在/root/redis目录下,创建3个哨兵配置:

sentinel26379.conf
port 26379
dir “/data”
logfile “sentinel-26379.log”
sentinel monitor mymaster 192.168.3.23 6379 2
sentinel down-after-milliseconds mymaster 1000
sentinel failover-timeout mymaster 60000
sentinel auth-pass mymaster 150316
port 哨兵的端口
dir 哨兵的数据目录
logfire 哨兵的日志文件
sentinel monitor 哨兵监控 192.168.145.128 是主节点的IP地址 2代表(只要有2个哨兵连接不上,就认为主节点宕机)
sentinel auth-pass 主节点的密码
sentinel26380.conf
port 26380
dir “/data”
logfile “sentinel-26380.log”
sentinel monitor mymaster 192.168.3.23 6379 2
sentinel down-after-milliseconds mymaster 10000
sentinel failover-timeout mymaster 60000
sentinel auth-pass mymaster 150316
sentinel26381.conf
port 26381
dir “/data”
logfile “sentinel-26381.log”
sentinel monitor mymaster 192.168.3.23 6379 2
sentinel down-after-milliseconds mymaster 10000
sentinel failover-timeout mymaster 60000
sentinel auth-pass mymaster 150316
启动哨兵系统
—net=host 容器内部什么端口 ,容器外部也使用什么端口!替代:-p 26379:26379
docker run --net=host --restart=always --privileged=true --name sentinel-26379 -v /root/redis/sentinel26379.conf:/etc/redis/sentinel.conf -v /root/redis/sentinel-26379-data:/data -d redis:latest redis-sentinel /etc/redis/sentinel.conf
docker run --net=host --restart=always --privileged=true --name sentinel-26380 -v /root/redis/sentinel26380.conf:/etc/redis/sentinel.conf -v /root/redis/sentinel-26380-data:/data -d redis:latest redis-sentinel /etc/redis/sentinel.conf
docker run --net=host --restart=always --privileged=true --name sentinel-26381 -v /root/redis/sentinel26381.conf:/etc/redis/sentinel.conf -v /root/redis/sentinel-26381-data:/data -d redis:latest redis-sentinel /etc/redis/sentinel.conf

firewall-cmd --zone=public --add-port=26379/tcp --add-port=26380/tcp --add-port=26381/tcp --permanent
#重载防火墙的端口
firewall-cmd --reload
下载windows的Redis安装包:https://github.com/MicrosoftArchive/redis/releases
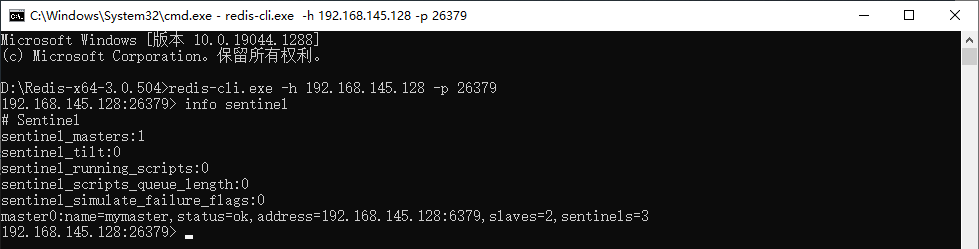
查看哨兵:

把redis01停掉,模拟主服务器宕机

哨兵系统的作用:防止redis主从集群中的主节点宕机的问题
检查哨兵系统是否正常:
redis-cli -h 192.168.3.23 -p 26379 sentinel master mymaster
redis-cli -h 192.168.3.23 -p 26380 sentinel master mymaster
redis-cli -h 192.168.3.23 -p 26381 sentinel master mymaster
如果能正常打印出 主redis的信息,就是成功的
SpringBoot配置
(1)、导入依赖
io.lettuce lettuce-core(2)、application.yml
server:
port: 8080
spring:
redis:
jedis:
pool:
max-active: 10 #最大连接数10根,默认8根
max-wait: 2000ms #2S都没获得到连接,抛出异常 -1表示永不超时
min-idle: 0 #最小连接空闲数
max-idle: 5 #最大连接空闲数
sentinel:
nodes: 192.168.3.23:26379,192.168.3.23:26380,192.168.3.23:26381
master: mymaster
password: 150316
修改配置类
@Configuration
public class RedisConfigure {
/**
* 哨兵配置(1)取得详细的哨兵节点
*/
@Value(“#{'KaTeX parse error: Expected 'EOF', got '}' at position 42: …es}'.split(',')}̲") private List…{spring.redis.sentinel.master}”)
private String master;
@Value(“${spring.redis.password}”)
private String password;
/**
* 哨兵配置(2)哨兵配置
*/
@Bean
public RedisSentinelConfiguration redisSentinelConfiguration() {
Set sentinelNodes = nodes.stream().collect(Collectors.toSet());
RedisSentinelConfiguration configuration = new RedisSentinelConfiguration(master, sentinelNodes);
configuration.setPassword(RedisPassword.of(password));
return configuration;
}
/**
* 哨兵配置(3)配置连接工厂
*/
@Bean
public LettuceConnectionFactory lettuceConnectionFactory() {
return new LettuceConnectionFactory(redisSentinelConfiguration());
}
/**
* 哨兵配置(4):配置redisTemplate
* @return
*/
@Bean
@Scope(“singleton”)
public RedisTemplate<String,Object> redisTemplate(){
RedisTemplate<String,Object> redisTemplate = new RedisTemplate<>();
//配置连接工厂
redisTemplate.setConnectionFactory(lettuceConnectionFactory());
//针对Key进行序列化
StringRedisSerializer krs = new StringRedisSerializer();
redisTemplate.setKeySerializer(krs);
redisTemplate.setHashKeySerializer(krs);
//针对Value进行序列化
Jackson2JsonRedisSerializer vrs = new Jackson2JsonRedisSerializer(Object.class);
ObjectMapper om = new ObjectMapper();
//设定Jackson工具,可以操作Value对象的所有的属性
om.setVisibility(PropertyAccessor.ALL, JsonAutoDetect.Visibility.ANY);
vrs.setObjectMapper(om);
redisTemplate.setValueSerializer(vrs);
redisTemplate.setHashValueSerializer(vrs);
//redisTemplate 在对象的属性设置之后使用
redisTemplate.afterPropertiesSet();
return redisTemplate;
}
}
哨兵配置到此结束
自我介绍一下,小编13年上海交大毕业,曾经在小公司待过,也去过华为、OPPO等大厂,18年进入阿里一直到现在。
深知大多数软件测试工程师,想要提升技能,往往是自己摸索成长或者是报班学习,但对于培训机构动则几千的学费,着实压力不小。自己不成体系的自学效果低效又漫长,而且极易碰到天花板技术停滞不前!
因此收集整理了一份《2024年软件测试全套学习资料》,初衷也很简单,就是希望能够帮助到想自学提升又不知道该从何学起的朋友,同时减轻大家的负担。

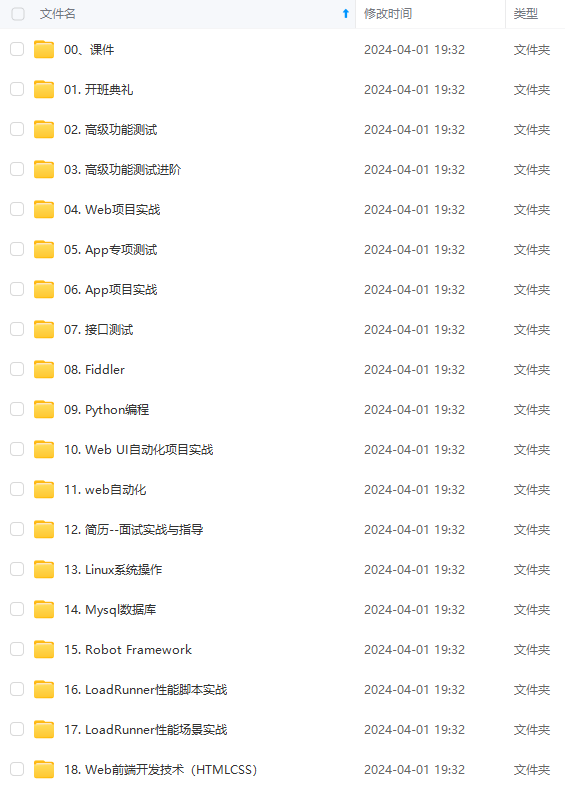
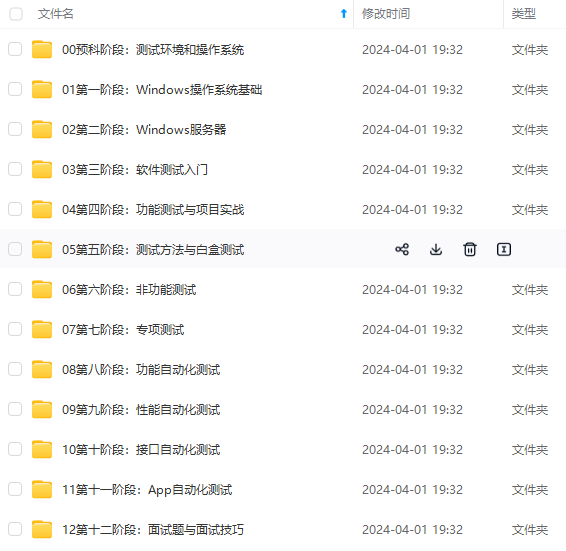
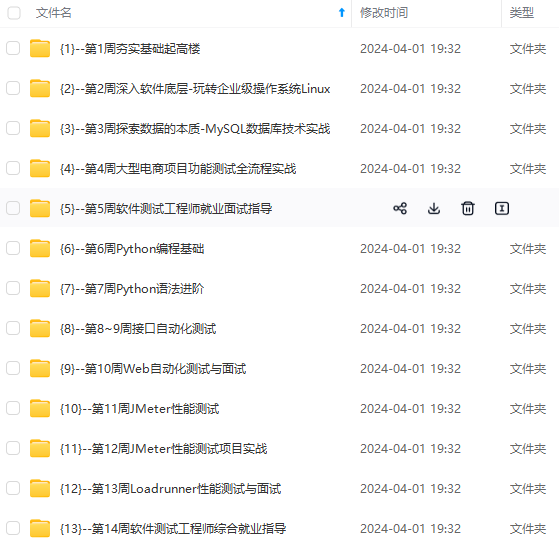
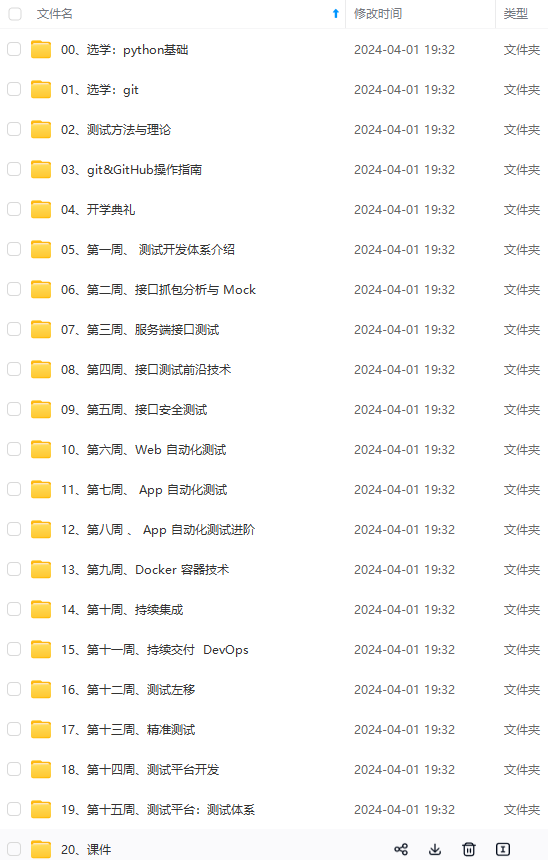
既有适合小白学习的零基础资料,也有适合3年以上经验的小伙伴深入学习提升的进阶课程,基本涵盖了95%以上软件测试开发知识点,真正体系化!
由于文件比较大,这里只是将部分目录大纲截图出来,每个节点里面都包含大厂面经、学习笔记、源码讲义、实战项目、讲解视频,并且后续会持续更新
如果你觉得这些内容对你有帮助,可以添加V获取:vip1024b (备注软件测试)

一个人可以走的很快,但一群人才能走的更远。不论你是正从事IT行业的老鸟或是对IT行业感兴趣的新人,都欢迎扫码加入我们的的圈子(技术交流、学习资源、职场吐槽、大厂内推、面试辅导),让我们一起学习成长!
[外链图片转存中…(img-5687wvda-1712911315116)]
[外链图片转存中…(img-VOP5aUEn-1712911315116)]
[外链图片转存中…(img-0yrM00TB-1712911315117)]
既有适合小白学习的零基础资料,也有适合3年以上经验的小伙伴深入学习提升的进阶课程,基本涵盖了95%以上软件测试开发知识点,真正体系化!
由于文件比较大,这里只是将部分目录大纲截图出来,每个节点里面都包含大厂面经、学习笔记、源码讲义、实战项目、讲解视频,并且后续会持续更新
如果你觉得这些内容对你有帮助,可以添加V获取:vip1024b (备注软件测试)
[外链图片转存中…(img-clpdiwn0-1712911315117)]
一个人可以走的很快,但一群人才能走的更远。不论你是正从事IT行业的老鸟或是对IT行业感兴趣的新人,都欢迎扫码加入我们的的圈子(技术交流、学习资源、职场吐槽、大厂内推、面试辅导),让我们一起学习成长!


 6485
6485


 被折叠的 条评论
为什么被折叠?
被折叠的 条评论
为什么被折叠?
 到【灌水乐园】发言


