


下面是使用 python-pptx 库来添加图表、表格以及可能的 SmartArt 示例代码。请注意,这些代码片段仅作为指导,实际使用时需根据具体需求进行调整。
添加图表
假设您想要创建一个饼图,并填充来自 pandas DataFrame 的数据。以下是一个简化的示例:
from pptx import Presentation
from pptx.chart.data import CategoryChartData
from pptx.enum.chart import XL_CHART_TYPE
from pptx.util import Inches

# 创建一个新的 PowerPoint 演示文稿
prs = Presentation()

# 添加一个新的幻灯片
slide = prs.slides.add_slide(prs.slide_layouts[6])  # 使用第6个布局(通常含有图表占位符)

# 准备图表数据
df = ...  # 假设这里有一个 pandas DataFrame,列名是标签,行是数据系列
labels = df.index.tolist()
values = df.iloc[:, 0].tolist()  # 假设只有一列数据

chart_data = CategoryChartData()
chart_data.categories = labels
chart_data.add_series('', values)

# 在幻灯片上添加图表
chart_placeholder = slide.placeholders[1]  # 获取第一个图表占位符
chart = chart_placeholder.insert_chart(XL_CHART_TYPE.PIE, chart_data)  # 插入饼图

# 调整图表大小及位置
chart.left = Inches(1)
chart.top = Inches(1)
chart.width = Inches(5)
chart.height = Inches(3)

# 保存演示文稿
prs.save('chart\_presentation.pptx')
添加表格
如果您想将 pandas DataFrame 直接转换为 PowerPoint 表格,可以这样做:
from pptx import Presentation
from pptx.util import Inches

# 创建一个新的 PowerPoint 演示文稿
prs = Presentation()

# 添加一个新的幻灯片
slide = prs.slides.add_slide(prs.slide_layouts[1])  # 使用一个空白布局

# 假设有一个名为 df 的 pandas DataFrame
df = ...

# 在幻灯片上添加表格
table_placeholder = slide.shapes.add_table(
    rows=df.shape[0]+1,  # 包括表头
    cols=df.shape[1],
    left=Inches(1),
    top=Inches(1),
    width=Inches(8),
    height=Inches(4)
).table

# 填充表格内容
for i in range(df.shape[0]):
    for j in range(df.shape[1]):
        table_placeholder.cell(i+1, j).text = str(df.iloc[i, j])

# 保存演示文稿
prs.save('table\_presentation.pptx')
总之,对于图表和表格的添加,您可以直接使用 python-pptx 提供的功能。对于 SmartArt,由于库本身不支持,您需要寻求其他解决方案或手动完成这部分内容。
- 保存演示文稿:
最后,使用 presentation.save() 方法保存创建的 PPT 文件。
presentation.save("new\_presentation.pptx")
通过以上步骤,您已经使用 python-pptx 创建了一个新的 PowerPoint 演示文稿,设置了版式,并向其中添加了文本、图片等内容。由于 python-pptx 目前不直接支持设置主题,您可以先使用 PowerPoint 自身或其他工具预设主题,再通过 python-pptx 进行内容填充和自动化处理。
四、编辑现有PPT示例代码
要使用 python-pptx 编辑已有的 PowerPoint 演示文稿(PPT),您可以按照以下步骤操作:
- 导入库并打开现有 PPT:
导入 pptx 模块,使用 Presentation() 函数打开已存在的 PPT 文件。
from pptx import Presentation

# 打开现有演示文稿
presentation = Presentation("existing\_presentation.pptx")
- 查找并修改幻灯片内容:
- 替换文本:
遍历幻灯片上的形状,找到包含目标文本的形状,然后更新其文本内容。
 ```python
 for slide in presentation.slides:
     for shape in slide.shapes:
         if hasattr(shape, "text"):
             if "旧文本" in shape.text:
                 shape.text = shape.text.replace("旧文本", "新文本")
             # 或者针对特定形状类型进行更精确的替换
             elif shape.has_text_frame and shape.text_frame.text == "待替换文本":
                 shape.text_frame.text = "新文本"
* **添加图片**:


与创建新 PPT 时添加图片的方式相同,找到合适的位置,创建并添加 `Picture` 对象。
img_path = "path/to/new_image.jpg"
pic = Picture(img_path, width=Inches(5), height=Inches(4))
slide.shapes.add_picture(pic, left=Inches(1), top=Inches(1))
* **更新图表数据**:


首先找到图表形状,然后通过其 `chart` 属性访问图表对象,进而更新数据系列、类别等。
for slide in presentation.slides:
    for shape in slide.shapes:
        if shape.has_chart:
            chart = shape.chart
            # 更新数据源(假设已有数据源列表)
            chart_data = chart.data
            chart_data.categories = ["Category1", "Category2"]
            chart_data.add_series("Series1", (20, 30, 40, 50))

            # 或使用外部 Excel 文件作为数据源
            # chart.replace_data("path/to/data.xlsx")
3. **调整布局和样式**:


**更改幻灯片版式**:


虽然 `python-pptx` 不直接支持更改已存在幻灯片的版式,但您可以复制一张具有所需版式的幻灯片,然后替换原幻灯片的内容。
desired_layout = presentation.slide_layouts[desired_layout_index]
new_slide = presentation.slides.add_slide(desired_layout)
for old_shape, new_shape in zip(old_slide.shapes, new_slide.shapes):
    if new_shape.placeholder_format.idx == old_shape.placeholder_format.idx:
        if new_shape.has_text_frame:
            new_shape.text_frame.text = old_shape.text_frame.text
        # 复制其他属性,如图片、图表等...
presentation.slides.remove(old_slide)
**修改形状样式**:


访问形状的样式属性(如填充色、边框、字体等)并进行调整。
shape.fill.solid()
shape.fill.fore_color.rgb = RGBColor(0x1F, 0x91, 0xCF)  # 蓝色背景
shape.line.color.rgb = RGBColor(0xFF, 0xFF, 0xFF)  # 白色边框
shape.text_frame.paragraphs[0].font.name = "Arial"
shape.text_frame.paragraphs[0].font.size = Pt(14)
4. **保存修改后的演示文稿**:


最后,使用 `presentation.save()` 方法保存编辑后的 PPT 文件。
presentation.save(“updated_presentation.pptx”)
通过以上步骤,您已经使用 `python-pptx` 编辑了现有的 PowerPoint 演示文稿,包括替换文本、添加图片、更新图表数据、调整布局和样式等。请注意,对于动画效果和过渡的修改,可能需要依赖其他方法或库。
### 五、批量处理示例代码

要批量处理多个 PowerPoint(PPT)文件,您可以编写一个脚本,通过循环遍历文件列表并使用 `python-pptx` 库对每个文件执行相应的修改操作。以下是一个示例代码,展示如何批量替换文本、批量插入图表数据以及批量应用样式:
from pptx import Presentation
from pptx.util import Inches, Pt
from pptx.dml.color import RGBColor
import os
定义要处理的PPT文件目录
ppt_dir = “/path/to/ppt/files”
定义要替换的文本规则
replacement_rules = {
“旧文本1”: “新文本1”,
“旧文本2”: “新文本2”,
}
定义要插入的图表数据(这里假设每个PPT中都有名为’Series1’的数据系列)
chart_data_list = [
[20, 30, 40, 50], # 数据用于第一个PPT文件
[10, 40, 60, ¾0], # 数据用于第二个PPT文件
# 更多数据…
]
定义要应用的样式
default_style = {
“fill_color”: RGBColor(0x1F, 0x91, 0xCF),
“border_color”: RGBColor(0xFF, 0xFF, 0xFF),
“font_name”: “Arial”,
“font_size”: Pt(14),
}
def process_ppt(ppt_file_path, chart_data=None):
presentation = Presentation(ppt_file_path)
# 替换文本
for slide in presentation.slides:
    for shape in slide.shapes:
        if hasattr(shape, "text"):
            for old_text, new_text in replacement_rules.items():
                if old_text in shape.text:
                    shape.text = shape.text.replace(old_text, new_text)

# 插入图表数据(假设每个PPT只有一个图表且图表名称已知)
for slide in presentation.slides:
    for shape in slide.shapes:
        if shape.has_chart:
            chart = shape.chart
            data_series = chart.series[0]  # 假设要修改第一系列数据
            data_series.values = chart_data

# 应用样式
for slide in presentation.slides:
    for shape in slide.shapes:
        if shape.has_text_frame:
            shape.fill.solid()
            shape.fill.fore_color.rgb = default_style["fill\_color"]
            shape.line.color.rgb = default_style["border\_color"]
            shape.text_frame.paragraphs[0].font.name = default_style["font\_name"]
            shape.text_frame.paragraphs[0].font.size = default_style["font\_size"]

presentation.save(ppt_file_path)  # 保存修改后的PPT
遍历PPT文件目录,处理每个文件
for file_name in os.listdir(ppt_dir):
if file_name.endswith(“.pptx”):
ppt_file_path = os.path.join(ppt_dir, file_name)
chart_data = chart_data_list.pop(0) if chart_data_list else None # 取出对应数据(如果没有数据则不插入)
process_ppt(ppt_file_path, chart_data=chart_data)
这个示例脚本定义了一个 `process_ppt()` 函数,它接受一个 PowerPoint 文件路径作为参数,并在该文件中执行替换文本、插入图表数据和应用样式的操作。主程序部分遍历指定目录下的所有 `.pptx` 文件,对每个文件调用 `process_ppt()` 函数。
注意,此示例假设每个 PPT 文件中都有一个图表且图表名称已知,同时数据列表中的数据顺序与 PPT 文件顺序对应。实际应用中,您可能需要根据具体文件结构和需求调整代码逻辑。
### 六、数据驱动生成示例代码

要结合数据源(如 CSV、数据库、API 等)动态生成包含分析结果、图表、汇总信息的幻灯片,您可以使用 Python 编写一个脚本,结合 `pandas` 进行数据分析,`matplotlib` 或 `plotly` 绘制图表,以及 `python-pptx` 创建和编辑 PowerPoint 幻灯片。以下是一个示例代码,演示如何从 CSV 文件读取数据,生成图表,并将分析结果和图表插入到 PowerPoint 中:
import pandas as pd
import matplotlib.pyplot as plt
import plotly.express as px
from pptx import Presentation
from pptx.util import Inches
1. 从数据源读取数据
data = pd.read_csv(“your_data.csv”)
2. 数据分析与处理(根据实际需求编写)
3. 生成图表
fig_bar = px.bar(data, x=“Category”, y=“Sales”, color=“Region”)
fig_line = px.line(data, x=“Date”, y=“GrowthRate”, title=“Growth Rate Over Time”)
保存图表为静态图片
fig_bar.write_image(“bar_chart.png”)
fig_line.write_image(“line_chart.png”)
4. 创建一个新的 PowerPoint 演示文稿
presentation = Presentation()
5. 添加新的幻灯片
slide1 = presentation.slides.add_slide(presentation.slide_layouts[6]) # 选择合适的布局
slide2 = presentation.slides.add_slide(presentation.slide_layouts[6])
6. 插入文本框并添加分析结果
title_shape = slide1.shapes.title
title_shape.text = “Data Analysis Report”
text_box = slide1.shapes.add_textbox(Inches(1), Inches(2), Inches(⅔), Inches(1))
tf = text_box.text_frame
tf.text = “Summary: \n\n…insert analysis summary here…\n\nDetailed Findings:\n\n…insert detailed findings here…”
7. 插入图表图片
left = top = Inches(1)
width = height = Inches(5)
slide1.shapes.add_picture(“bar_chart.png”, left, top, width=width, height=height)
slide2.shapes.add_picture(“line_chart.png”, left, top, width=width, height=height)
8. 保存 PowerPoint 演示文稿
presentation.save(“data_driven_presentation.pptx”)
在这个示例中:
* 我们首先使用 `pandas` 从 CSV 文件读取数据。
* 接着,使用 `plotly.express` 根据数据生成柱状图和折线图,并将它们保存为静态图片。
* 然后,创建一个新的 PowerPoint 演示文稿,添加两页幻灯片。
* 在幻灯片上添加标题、文本框,填充分析结果摘要和详细发现。
* 最后,将之前保存的图表图片插入到相应幻灯片上,并保存整个 PowerPoint 文件。
请注意,这只是一个基础示例。实际应用中,您可能需要根据具体的数据结构、分析需求、图表类型以及 PowerPoint 的布局要求进行相应的调整。另外,如果数据来自数据库或 API,只需替换相应的数据获取代码即可。例如,使用 `pd.read_sql()` 从数据库读取数据,或者使用 `requests` 库调用 API 获取数据。
### 七、合并与拆分示例代码

使用Python库来合并或拆分PPT文件,并保持原始设计和格式,您可以借助于`python-pptx`库。这是一个专门处理PowerPoint文件的Python库,可以读取、修改和创建PPTX文件。以下是使用`python-pptx`实现合并与拆分的示例代码:
1. **合并多个PPT文件成一个**
from pptx import Presentation
from os.path import join, isfile
def merge_ppt_files(input_files, output_file):
# 创建一个新的PPT作为合并目标
merged_ppt = Presentation()
for input_file in input_files:
    if not isfile(input_file):
        raise FileNotFoundError(f"File {input\_file} not found.")

    # 打开源PPT文件
    source_ppt = Presentation(input_file)

    # 将源PPT中的每一张幻灯片复制到合并PPT中
    for slide in source_ppt.slides:
        merged_ppt.slides.add_slide(slide)

# 保存合并后的PPT文件
merged_ppt.save(output_file)
使用示例
input_files = [‘path_to_ppt1.pptx’, ‘path_to_ppt2.pptx’, ‘path_to_ppt3.pptx’]
output_file = ‘merged_ppt.pptx’
merge_ppt_files(input_files, output_file)
2. **将一个PPT拆分为多个**
from pptx import Presentation
from os.path import exists, join
def split_ppt(input_file, output_template, slides_per_file):
if not exists(input_file):
raise FileNotFoundError(f"File {input_file} not found.")
source_ppt = Presentation(input_file)
total_slides = len(source_ppt.slides)

# 分组幻灯片
slide_groups = [source_ppt.slides[i:i+slides_per_file] for i in range(0, total_slides, slides_per_file)]

for index, group in enumerate(slide_groups, start=1):
    # 创建一个新的PPT作为目标文件
    target_ppt = Presentation()

    # 将当前分组的幻灯片添加到目标PPT中
    for slide in group:
        target_ppt.slides.add_slide(slide)

    # 根据模板生成输出文件名,并保存
    output_file = output_template.format(index)
    target_ppt.save(output_file)
使用示例
input_file = ‘source_ppt.pptx’
output_template = ‘split_ppt_{index}.pptx’ # 输出文件名模板,如:split_ppt_1.pptx, split_ppt_2.pptx等
slides_per_file = 10 # 每个输出文件包含的幻灯片数量
split_ppt(input_file, output_template, slides_per_file)
请注意,在使用上述代码前,请确保已通过`pip install python-pptx`安装了`python-pptx`库。这些示例代码会保持原始PPT文件的设计和格式不变,因为它们直接将源文件中的幻灯片复制到目标文件中。
### 八、母版和版式操作示例代码

在`python-pptx`库中,您可以对PowerPoint母版和版式进行自定义设计,以确保整个演示文稿风格一致。以下是如何使用该库进行母版和版式操作的示例:
1. **自定义母版设计**
from pptx import Presentation
from pptx.dml.color import RGBColor
from pptx.enum.dml import MSO_THEME_COLOR, MSO_FILL_TYPE
from pptx.util import Inches
def customize_master(presentation, background_color, font_name, font_size, font_color):
# 获取默认母版
default_master = presentation.slide_masters[0]
# 设置背景色
background_fill = default_master.background.fill
background_fill.type = MSO_FILL_TYPE.SOLID
background_fill.solid()
background_fill.fore_color.rgb = RGBColor(\*background_color)

# 设置字体样式(母版级)
for placeholder in default_master.placeholders:
    if placeholder.is_text_frame:
        tf = placeholder.text_frame
        tf.paragraphs[0].font.name = font_name
        tf.paragraphs[0].font.size = Pt(font_size)
        tf.paragraphs[0].font.color.rgb = RGBColor(\*font_color)

# 如果需要设置主题颜色方案,可以操作default\_master.theme,例如:
# theme\_colors = default\_master.theme.theme\_colors
# theme\_colors.get\_or\_add(MSO\_THEME\_COLOR.ACCENT\_1).rgb = RGBColor(\*accent\_1\_color)
使用示例
presentation = Presentation(‘template.pptx’) # 加载或新建一个PPT
customize_master(
presentation,
background_color=(245, 245, 245), # 背景颜色为浅灰色(RGB值)
font_name=‘Arial’, # 字体为Arial
font_size=14, # 字体大小为14磅
font_color=(0, 0, 0), # 字体颜色为黑色(RGB值)
)
presentation.save(‘customized_template.pptx’)
2. **应用或修改幻灯片版式**
from pptx import Presentation
from pptx.enum.shapes import PP_PLACEHOLDER
def apply_or_modify_layout(presentation, slide_index, layout_type, text=None, image_path=None):
slide = presentation.slides[slide_index]
# 如果需要更改现有幻灯片的版式
slide_layout = presentation.slide_layouts[layout_type]
slide.slide_layout = slide_layout

# 应用版式后,可以按需修改各个占位符的内容
if text:
    title_placeholder = slide.placeholders.get(title_shape_type=PP_PLACEHOLDER.TITLE)
    title_placeholder.text = text

if image_path:
    content_placeholder = slide.placeholders.get(title_shape_type=PP_PLACEHOLDER.CONTENT)
    left, top = content_placeholder.left, content_placeholder.top
    pic = slide.shapes.add_picture(image_path, left, top, height=Inches(5), width=Inches(7))
使用示例
presentation = Presentation(‘existing_presentation.pptx’)
apply_or_modify_layout(
presentation,
slide_index=0, # 第一张幻灯片
layout_type=1, # 应用第二种版式(从0开始计数)
text=“New Title”, # 更改标题文字
image_path=“image.jpg”, # 插入图片
)
presentation.save(‘modified_presentation.pptx’)
请确保已安装`python-pptx`库,并根据实际需求调整上述示例代码。通过这些操作,您可以实现对母版和版式的自定义设计,以及快速标准化幻灯片内容布局。
### 九、自动化流程集成示例代码
要将PPT自动化操作集成到更大的工作流或自动化脚本中,您可以利用Python的调度库(如`schedule`或`APScheduler`)来定时执行任务,或者结合事件驱动框架(如`Flask-socketio`或`Celery`)来响应特定事件触发的PPT更新。以下是一些示例:
1. **定时生成报告**
使用`schedule`库创建定时任务:
import schedule
import time
from your_ppt_script import generate_report_ppt # 假设您有一个名为generate_report_ppt的函数,用于生成报告PPT
def job():
generate_report_ppt() # 调用生成报告PPT的函数
print(“Report PPT generated at:”, time.ctime())
每天凌晨3点执行任务
schedule.every().day.at(“03:00”).do(job)
while True:
schedule.run_pending()
time.sleep(1) # 防止过于频繁地检查待执行任务
使用`APScheduler`库创建定时任务(更高级的功能,如持久化任务、多线程/进程等):
from apscheduler.schedulers.blocking import BlockingScheduler
from your_ppt_script import generate_report_ppt
def job():
generate_report_ppt()
scheduler = BlockingScheduler()
scheduler.add_job(job, ‘interval’, days=1, start_date=‘2023-09-6 03:00:00’) # 每天凌晨3点执行
scheduler.start()
2. **响应事件触发的PPT更新**


假设您有一个基于`Flask`的应用,并使用`Flask-SocketIO`处理实时事件:
from flask import Flask, request
from flask_socketio import SocketIO, emit
from your_ppt_script import update_ppt_on_event
app = Flask(name)
app.config[‘SECRET_KEY’] = ‘secret!’
socketio = SocketIO(app)
@socketio.on(‘update_request’)
def handle_update_event(data):
event_data = data[‘event_data’]
update_ppt_on_event(event_data) # 调用处理事件并更新PPT的函数
emit(‘ppt_updated’, {‘status’: ‘success’, ‘message’: ‘PPT updated successfully’})
if name == ‘__main__’:
socketio.run(app)
使用`Celery`作为任务队列,响应事件并异步更新PPT:
from celery import Celery
from your_ppt_script import update_ppt_on_event
app = Celery(‘tasks’, broker=‘pyamqp://guest@localhost//’) # 使用RabbitMQ作为消息代理
@app.task
def async_update_ppt(event_data):
update_ppt_on_event(event_data)
在事件处理器中调用异步任务
def handle_event(event_data):
async_update_ppt.delay(event_data)
以上示例展示了如何将PPT自动化操作集成到定时任务或响应事件的工作流中。根据实际应用场景选择合适的库和方法,确保PPT生成与更新能够无缝融入您的自动化脚本。
### 十、python-pptx基础操作示例代码

确实,`python-pptx` 是一个功能强大的Python库,专门用于创建、读取、修改Microsoft PowerPoint `.pptx` 文件。它通过提供详细的API接口,使得开发者可以高效且精确地控制PPT的各种元素和属性。以下是使用`python-pptx`库进行PPT自动化操作的一些关键步骤和示例:
1. **安装库**
首先确保已安装`python-pptx`库:
pip install python-pptx
2. **创建新演示文稿**
from pptx import Presentation
创建一个新的PPT文件
pres = Presentation()
添加一张新的幻灯片
slide_layout = pres.slide_layouts[6] # 选择一个预定义的布局(例如,标题和内容布局)
new_slide = pres.slides.add_slide(slide_layout)
3. **添加内容**


**插入文本**
title_shape = new_slide.shapes.title
title_shape.text = “Presentation Title”
或者添加在内容区
content_box = new_slide.placeholders[1]
tf = content_box.text_frame
p = tf.add_paragraph()
p.text = “Slide Content”
**插入图片**
from pptx.util import Inches
img_path = “path_to_your_image.jpg”
left = top = Inches(1.0) # 图片位置
pic = new_slide.shapes.add_picture(img_path, left, top, height=Inches(5.0))
**插入表格**
table = new_slide.shapes.add_table(rows=2, cols=3, left=Inches(2), top=Inches(2)).table
填充表格数据
for row in table.rows:
for cell in row.cells:
cell.text = “Cell Content”
**插入形状和图表**
shape = new_slide.shapes.add_shape(MSO_SHAPE.RECTANGLE, left=Inches(1), top=Inches(1), width=Inches(3), height=Inches(2))
chart_data = ChartData()
chart_data.categories = [‘Category1’, ‘Category2’]
chart_data.add_series(‘Series1’, (1, 2, 3, 4, 5))
chart = new_slide.shapes.add_chart(XL_CHART_TYPE.COLUMN_CLUSTERED, left, top, width=Inches(5), height=Inches(3), chart_data=chart_data).chart
4. **保存文件**
pres.save(‘output.pptx’)
综上所述,`python-pptx`库为Python开发者提供了全面、灵活的手段来自动化处理`.pptx`文件,无论是批量生成报告、自动化更新现有PPT,还是构建复杂的工作流集成,都能满足需求。结合上述示例代码和库文档,您可以根据具体应用场景编写相应的自动化脚本。
### 十一、python-pptx进阶应用示例代码

除了基础的创建和编辑操作外,`python-pptx`还支持更高级别的定制化功能,以满足更为复杂的需求。下面对这些进阶应用进行详细说明:
1. **样式设置**
`python-pptx`允许对文本、形状、表格、图表等元素的样式进行精细调整,包括但不限于以下方面:
* **字体**:设置字体类型、大小、颜色、加粗、斜体、下划线、删除线等属性。
font = p.font
font.name = ‘Arial’
font.size = Pt(12)
font.color.rgb = RGBColor(0x44, 0x66, 0xAA)
font.bold = True
font.italic = False
* **填充**:指定形状或文本框的填充颜色、渐变、图案或图片填充。
fill = shape.fill
fill.solid()
fill.fore_color.rgb = RGBColor(0xFF, 0xCC, 0x00) # 设置纯色填充
或者使用渐变填充
fill.gradient()
fill.gradient_stops.add(RGBColor(0x00, 0x00, 0xFF), position=0)
fill.gradient_stops.add(RGBColor(0xFF, 0xFF, 0xFF), position=1)
* **边框**:定义线条样式、颜色、宽度及边角效果。
line = shape.line
line.color.rgb = RGBColor(0x00, 0x88, 0x00)
line.width = Pt(1.5)
line.dash_style = MSO_LINE.DASH_DOT # 设置虚线样式
* **阴影与三维效果**:为形状添加阴影、更改其深度和方向,以及应用三维旋转和透视效果。
shadow = shape.shadow
shadow.visible = True
shadow.style = MSO_SHADOW.STYLE_OUTER
shadow.blur_radius = Pt(½)
shadow.color.rgb = RGBColor(0x99, 0x99, 0x99)
三维效果
shape.three_d_format.depth = Pt(10)
shape.three_d_format.bevel_top_depth = Pt(2)
shape.three_d_format.bevel_top_size = Pt(4)
2. **主题管理**


`python-pptx`支持应用、修改甚至创建自定义的主题(也称为“设计”),以保持演示文稿整体风格的一致性。


* **应用预定义主题**:从已有的主题库中选择并应用到整个演示文稿。
theme_path = ‘path/to/theme.xml’ # 主题文件路径
pres.slide_master.part.drop_theme(theme_path)
* **修改主题元素**:调整主题的颜色方案、字体集、效果样式等。
theme = pres.slide_master.theme
color_scheme = theme.color_scheme
color_scheme.colors[MSO_COLOR_INDEX.ACCENT_1].rgb = RGBColor(0xEE, 0xBB, 0xEE)
major_font = theme.major_font
major_font.typeface = ‘Calibri’
effect_scheme = theme.effect_scheme
effect_scheme.fill_format.fill_type = PP_FILL.SOLID # 更改默认填充类型
* **自定义主题**:通过创建新的主题XML文件或直接操作主题XML结构来实现完全自定义的主题设计。这通常涉及到对Open XML标准的深入理解。
3. **动画和过渡效果**
尽管`python-pptx`库本身并不直接支持创建或编辑动画和过渡效果,但因为`.pptx`文件实质上是一个遵循Open Packaging Conventions(OPC)标准的ZIP压缩包,内部包含一系列XML文件,因此可以通过以下方式间接实现:
* **使用第三方库**:某些库如`python-docx`可能提供了对动画和过渡效果的有限支持,或者可以寻找专门针对PPT动画的扩展库。
* **直接编辑XML**:解压`.pptx`文件,定位到包含动画和过渡信息的XML文件(如`ppt/slides/slide1.xml`中的`<p:timing>`和`<p:transition>`元素),使用Python的XML处理库(如`lxml`)进行手动编辑。这种方法要求对Open XML标准有深入了解,并且需要注意重新打包时保持文件结构的完整性。
综上所述,借助`python-pptx`库及其提供的进阶功能,Python开发者能够实现对`.pptx`文件的深度定制,包括样式设定、主题管理以及间接实现动画和过渡效果。这些能力使得在批量生成报告、自动化更新现有PPT,以及构建复杂工作流集成等场景下,能够充分满足各种特定需求。结合上述示例代码、库文档及可能的第三方工具,您可以根据实际项目要求编写相应的自动化脚本。
### 十二、win32com基础功能示例代码

以下是一段使用 `win32com` 库操作 Microsoft PowerPoint 的示例代码,展示了如何打开一个现有的 `.ppt` 文件,向其中添加一个新的幻灯片,插入文字、形状和图片,并设置一些基本的动画效果。最后,保存修改并关闭 PowerPoint 应用程序。
import os
import win32com.client as win32
初始化 PowerPoint 应用程序实例
powerpoint_app = win32.Dispatch(“PowerPoint.Application”)
设置是否显示 PowerPoint 界面(True为显示,False为隐藏)
powerpoint_app.Visible = True # 可根据需求调整
打开指定路径下的旧版 .ppt 文件
presentation_path = r"C:\path\to\your\presentation.ppt"
presentation = powerpoint_app.Presentations.Open(presentation_path)
向演示文稿末尾添加新的幻灯片
new_slide = presentation.Slides.Add(Index=presentation.Slides.Count + 1, Layout=ppLayoutTitleOnly)
在幻灯片标题处插入文字
title_shape = new_slide.Shapes.Title
title_shape.TextFrame.TextRange.Text = “New Slide Title”
在幻灯片正文区域插入一个矩形形状,并添加文字
left_margin = 100
top_margin = 200
width = 300
height = 100
rectangle_shape = new_slide.Shapes.AddShape(Type=1, Left=left_margin, Top=top_margin, Width=width, Height=height)
rectangle_text = rectangle_shape.TextFrame.TextRange
rectangle_text.Text = “Rectangle Text”
设置矩形形状填充颜色和边框样式
rectangle_shape.Fill.ForeColor.RGB = RGB(255, 128, 0) # 填充为橙色
rectangle_shape.Line.Weight = 2 # 边框粗细为2磅
rectangle_shape.Line.DashStyle = 3 # 边框样式为虚线
插入图片
image_path = r"C:\path\to\your\image.jpg"
with open(image_path, ‘rb’) as image_file:
image_data = image_file.read()
image_shape = new_slide.Shapes.AddPicture(ImageFile=image_data, LinkToFile=False, SaveWithDocument=True,
Left=left_margin + width + 50, Top=top_margin, Width=200, Height=150)
添加动画效果
title_shape.AnimationSettings.EntryEffect = ppEffectFade # 幻灯片标题淡入效果
rectangle_shape.AnimationSettings.EntryEffect = ppEffectZoom # 矩形形状缩放效果
rectangle_shape.AnimationSettings.AnimateText = False # 不对矩形内的文字应用动画
image_shape.AnimationSettings.EntryEffect = ppEffectAppear # 图片出现效果
设置动画顺序及持续时间
for shape in [title_shape, rectangle_shape, image_shape]:
shape.AnimationSettings.PlaySettings.PlayOnClick = True # 点击鼠标时播放动画
shape.AnimationSettings.PlaySettings.Speed = 2 # 动画速度为中速
保存更改并关闭 PowerPoint 应用程序
presentation.Save()
presentation.Close()
powerpoint_app.Quit()
释放资源
del powerpoint_app
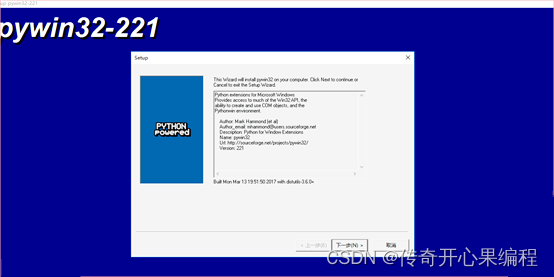
请注意,使用此代码前需要确保已安装 `pywin32` 库(即 `win32com`),且目标计算机上已安装兼容的 Microsoft PowerPoint 版本。同时,请替换示例中的文件路径 (`presentation_path` 和 `image_path`) 为实际文件所在的路径。
这段代码仅作为示例,展示了 `win32com` 库的部分功能。根据实际需求,您还可以进一步扩展代码,以利用 PowerPoint 的更多高级功能,如 VBA 宏、复杂动画、交互式元素、图表、数据绑定等。
### 十三、win32com高级功能示例代码

`win32com` 提供了丰富的接口来操作 PowerPoint 的各种高级功能。下面是一些具体的扩展示例,涵盖 VBA 宏、复杂动画、交互式元素以及图表数据绑定:
1. **使用 VBA 宏**
如果您已经有一个现成的 VBA 宏代码,想要在 Python 脚本中调用它,可以使用 `Run` 方法。假设您的 PowerPoint 演示文稿中有一个名为 `MyMacro` 的宏:
调用名为 “MyMacro” 的 VBA 宏
presentation.Run(“MyMacro”)
如果需要传递参数给宏,请查阅 VBA 宏的定义以了解参数类型和顺序,然后在 `Run` 方法中按照顺序传入相应的值。


2. **创建复杂动画**


除了基础的动画效果,`win32com` 还允许您创建更复杂的动画序列,如自定义路径动画、触发器动画等。以下是一个创建自定义路径动画的例子:
获取要添加路径动画的形状
shape_to_animate = new_slide.Shapes(“Rectangle 1”)
创建一个路径动画
path_animation = shape_to_animate.AddAnimation(
AnimationType=msoAnimTypePath,
Trigger=msoAnimTriggerOnPageClick, # 点击幻灯片时触发
)
设置路径动画的路径(此处为一个简单的“心形”路径)
path_points = [(100, 60), (90, ½0), (60, 90), (30, 90), (10, 60), (30, 30), (60, 10), (90, 30), (100, 60)]
path = presentation.Path(1, msoPathCurve, path_points)
path_animation.Path = path
设置动画的速度和重复次数
path_animation.Timing.Duration = 3 # 持续3秒
path_animation.Timing.RepeatCount = 1 # 重复一次
设置动画的开始方式(与其它动画同时开始)
path_animation.Timing.Start = msoAnimAfterPrevious # 在前一个动画结束后开始
3. **添加交互式元素**
PowerPoint 支持多种交互式元素,如超链接、动作按钮等。以下是如何添加一个点击后跳转至网页的动作按钮:
本人从事网路安全工作12年,曾在2个大厂工作过,安全服务、售后服务、售前、攻防比赛、安全讲师、销售经理等职位都做过,对这个行业了解比较全面。
最近遍览了各种网络安全类的文章,内容参差不齐,其中不伐有大佬倾力教学,也有各种不良机构浑水摸鱼,在收到几条私信,发现大家对一套完整的系统的网络安全从学习路线到学习资料,甚至是工具有着不小的需求。
最后,我将这部分内容融会贯通成了一套282G的网络安全资料包,所有类目条理清晰,知识点层层递进,需要的小伙伴可以点击下方小卡片领取哦!下面就开始进入正题,如何从一个萌新一步一步进入网络安全行业。
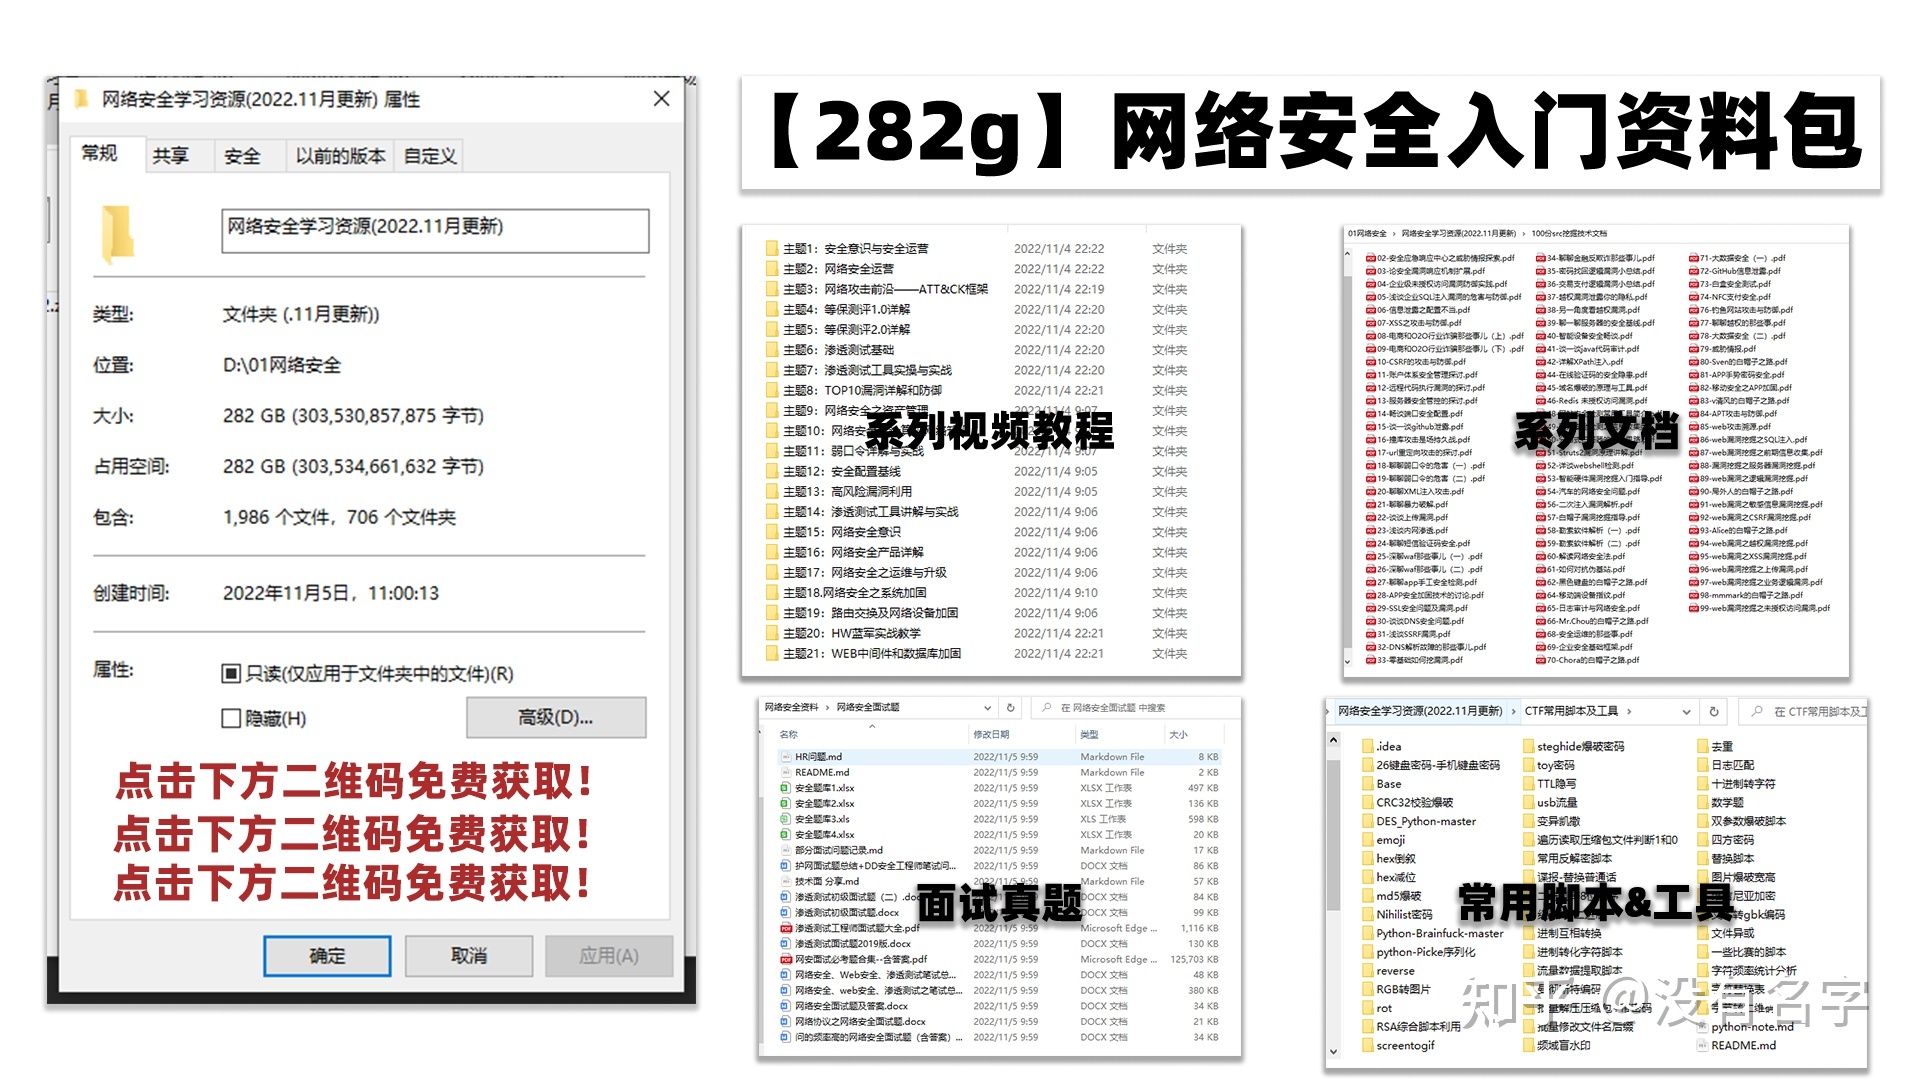
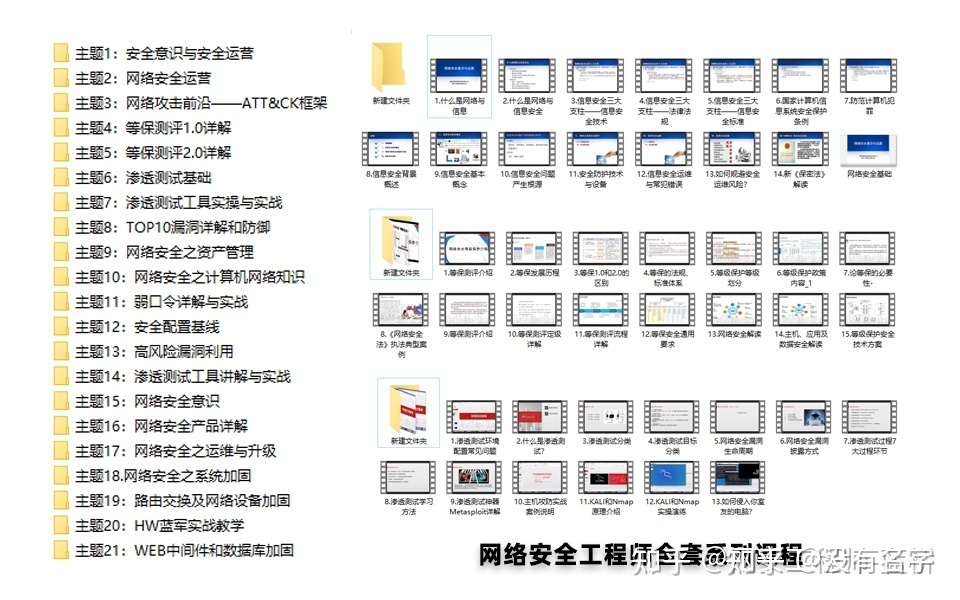
### 学习路线图
其中最为瞩目也是最为基础的就是网络安全学习路线图,这里我给大家分享一份打磨了3个月,已经更新到4.0版本的网络安全学习路线图。
相比起繁琐的文字,还是生动的视频教程更加适合零基础的同学们学习,这里也是整理了一份与上述学习路线一一对应的网络安全视频教程。
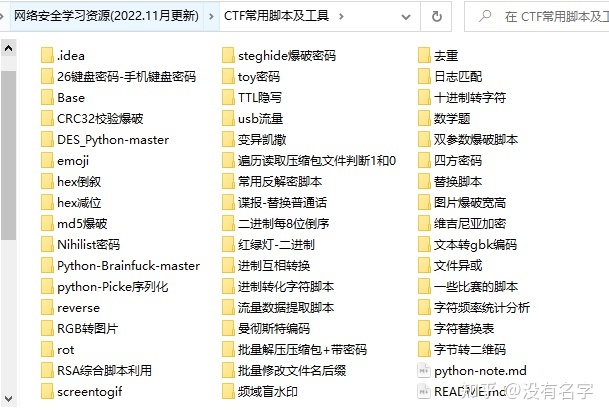
#### 网络安全工具箱
当然,当你入门之后,仅仅是视频教程已经不能满足你的需求了,你肯定需要学习各种工具的使用以及大量的实战项目,这里也分享一份**我自己整理的网络安全入门工具以及使用教程和实战。**
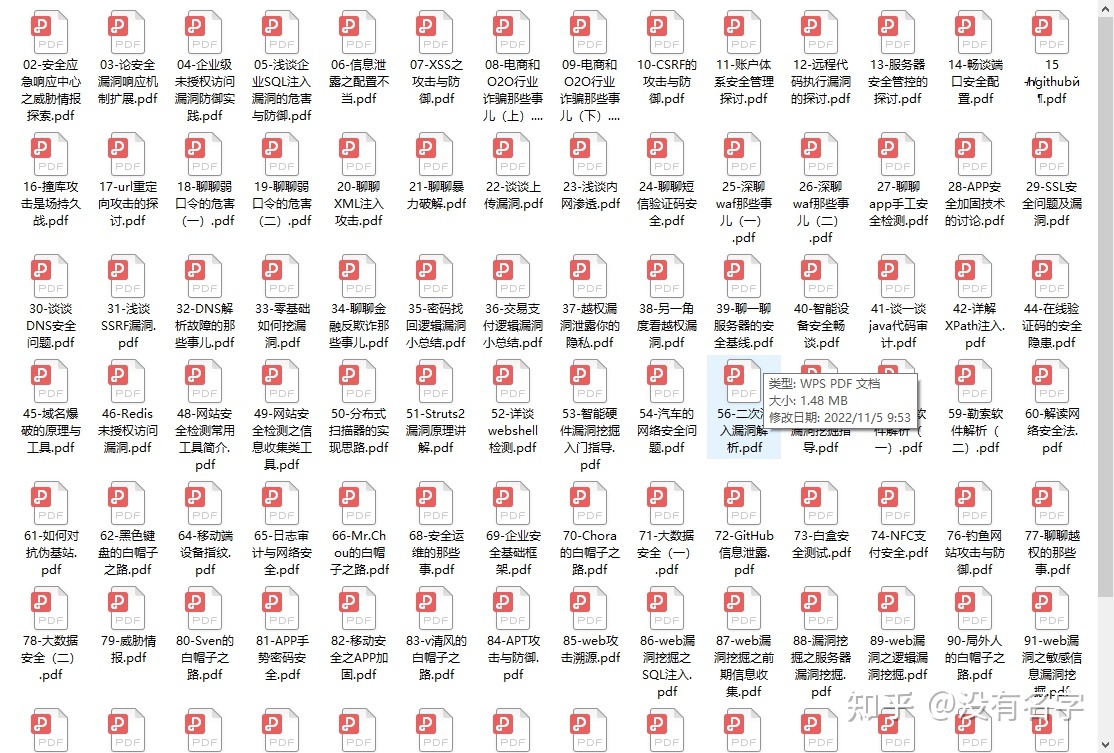
#### 项目实战
最后就是项目实战,这里带来的是**SRC资料&HW资料**,毕竟实战是检验真理的唯一标准嘛~
#### 面试题
归根结底,我们的最终目的都是为了就业,所以这份结合了多位朋友的亲身经验打磨的面试题合集你绝对不能错过!
**网上学习资料一大堆,但如果学到的知识不成体系,遇到问题时只是浅尝辄止,不再深入研究,那么很难做到真正的技术提升。**
**[需要这份系统化资料的朋友,可以点击这里获取](https://bbs.csdn.net/topics/618540462)**
**一个人可以走的很快,但一群人才能走的更远!不论你是正从事IT行业的老鸟或是对IT行业感兴趣的新人,都欢迎加入我们的的圈子(技术交流、学习资源、职场吐槽、大厂内推、面试辅导),让我们一起学习成长!**


 被折叠的 条评论
为什么被折叠?
被折叠的 条评论
为什么被折叠?
 到【灌水乐园】发言


