


文末
不管怎么样,不论是什么样的大小面试,要想不被面试官虐的不要不要的,只有刷爆面试题题做好全面的准备,当然除了这个还需要在平时把自己的基础打扎实,这样不论面试官怎么样一个知识点里往死里凿,你也能应付如流啊
小编将自己6年以来的面试经验和学习笔记都整理成了一个**937页的PDF,**以及我学习进阶过程中看过的一些优质视频教程。

其实看到身边很多朋友抱怨自己的工资很低,包括笔者也是一样的,其原因是在面试过程中没有给面试官一个很好的答案。所以笔者会持续更新面试过程中遇到的问题,也希望大家和笔者一起进步,一起学习。
网上学习资料一大堆,但如果学到的知识不成体系,遇到问题时只是浅尝辄止,不再深入研究,那么很难做到真正的技术提升。
一个人可以走的很快,但一群人才能走的更远!不论你是正从事IT行业的老鸟或是对IT行业感兴趣的新人,都欢迎加入我们的的圈子(技术交流、学习资源、职场吐槽、大厂内推、面试辅导),让我们一起学习成长!
{
holder.tv.setText(mDatas.get(position));
}
@Override
public int getItemCount()
{
return mDatas.size();
}
class MyViewHolder extends ViewHolder
{
TextView tv;
public MyViewHolder(View view)
{
super(view);
tv = (TextView) view.findViewById(R.id.id_num);
}
}
}
}
- Activity的布局文件
<RelativeLayout xmlns:android=“http://schemas.android.com/apk/res/android”
xmlns:tools=“http://schemas.android.com/tools”
android:layout_width=“match_parent”
android:layout_height=“match_parent” >
<android.support.v7.widget.RecyclerView
android:id=“@+id/id_recyclerview”
android:divider=“#ffff0000”
android:dividerHeight=“10dp”
android:layout_width=“match_parent”
android:layout_height=“match_parent” />
- Item的布局文件
<FrameLayout xmlns:android=“http://schemas.android.com/apk/res/android”
android:layout_width=“match_parent”
android:background=“#44ff0000”
android:layout_height=“wrap_content” >
<TextView
android:id=“@+id/id_num”
android:layout_width=“match_parent”
android:layout_height=“50dp”
android:gravity=“center”
android:text=“1” />
这么看起来用法与ListView的代码基本一致哈~~
看下效果图:
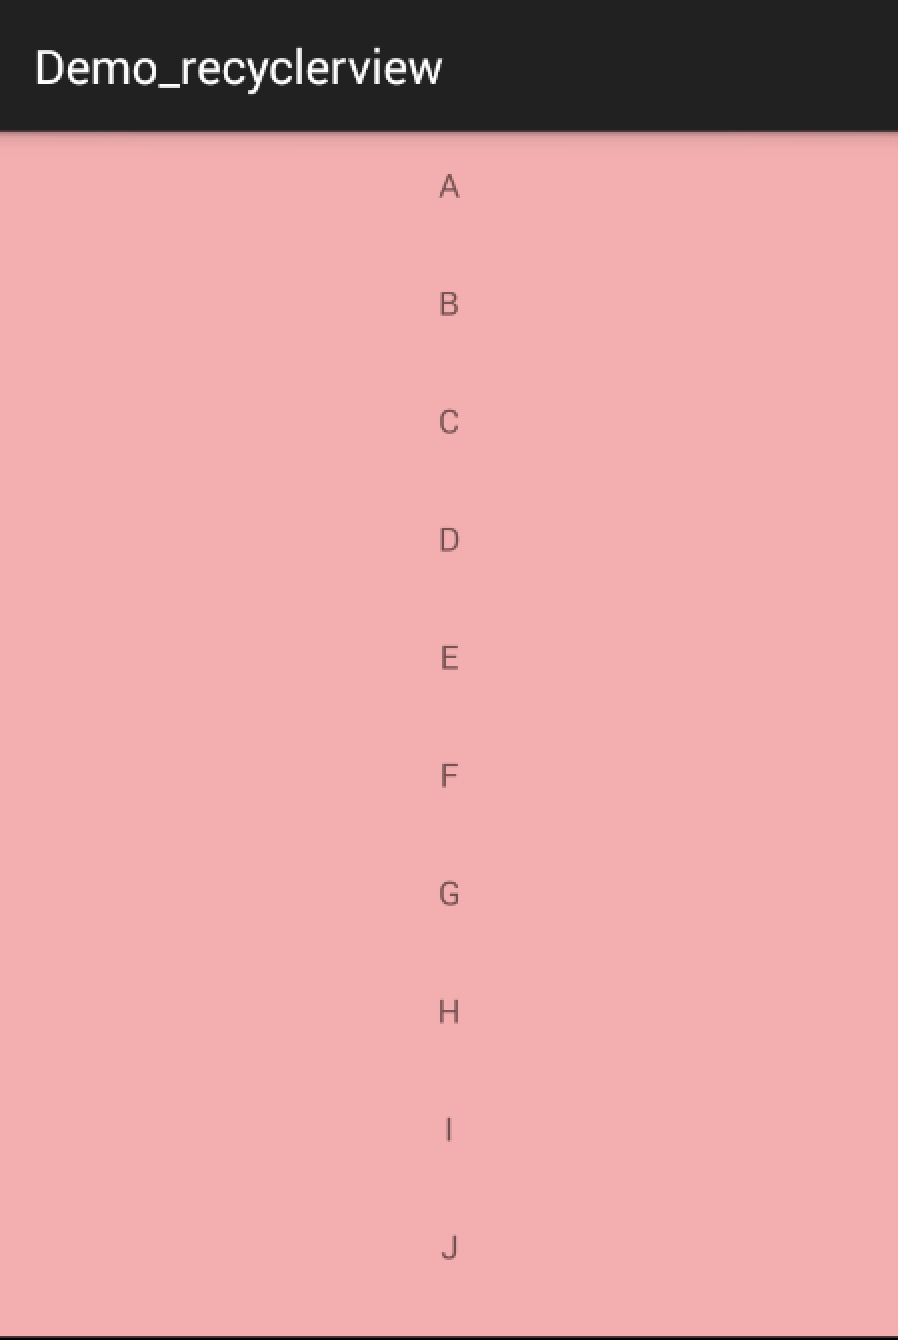
看起来好丑,Item间应该有个分割线,当你去找时,你会发现RecyclerView并没有支持divider这样的属性。那么怎么办,你可以给Item的布局去设置margin,当然了这种方式不够优雅,我们文章开始说了,我们可以自由的去定制它,当然我们的分割线也是可以定制的。
ItemDecoration
我们可以通过该方法添加分割线:
mRecyclerView.addItemDecoration()
该方法的参数为RecyclerView.ItemDecoration,该类为抽象类,官方目前并没有提供默认的实现类(我觉得最好能提供几个)。
该类的源码:
public static abstract class ItemDecoration {
public void onDraw(Canvas c, RecyclerView parent, State state) {
onDraw(c, parent);
}
public void onDrawOver(Canvas c, RecyclerView parent, State state) {
onDrawOver(c, parent);
}
public void getItemOffsets(Rect outRect, View view, RecyclerView parent, State state) {
getItemOffsets(outRect, ((LayoutParams) view.getLayoutParams()).getViewLayoutPosition(),
parent);
}
@Deprecated
public void getItemOffsets(Rect outRect, int itemPosition, RecyclerView parent) {
outRect.set(0, 0, 0, 0);
}
当我们调用mRecyclerView.addItemDecoration()方法添加decoration的时候,RecyclerView在绘制的时候,去会绘制decorator,即调用该类的onDraw和onDrawOver方法,
-
onDraw方法先于drawChildren
-
onDrawOver在drawChildren之后,一般我们选择复写其中一个即可。
-
getItemOffsets 可以通过outRect.set()为每个Item设置一定的偏移量,主要用于绘制Decorator。
接下来我们看一个RecyclerView.ItemDecoration的实现类,该类很好的实现了RecyclerView添加分割线(当使用LayoutManager为LinearLayoutManager时)。
该类参考自:DividerItemDecoration
package com.zhy.sample.demo_recyclerview;
/*
-
Copyright © 2014 The Android Open Source Project
-
Licensed under the Apache License, Version 2.0 (the “License”);
-
limitations under the License.
*/
import android.content.Context;
import android.content.res.TypedArray;
import android.graphics.Canvas;
import android.graphics.Rect;
import android.graphics.drawable.Drawable;
import android.support.v7.widget.LinearLayoutManager;
import android.support.v7.widget.RecyclerView;
import android.support.v7.widget.RecyclerView.State;
import android.util.Log;
import android.view.View;
/**
-
This class is from the v7 samples of the Android SDK. It’s not by me!
-
-
See the license above for details.
*/
public class DividerItemDecoration extends RecyclerView.ItemDecoration {
private static final int[] ATTRS = new int[]{
android.R.attr.listDivider
};
public static final int HORIZONTAL_LIST = LinearLayoutManager.HORIZONTAL;
public static final int VERTICAL_LIST = LinearLayoutManager.VERTICAL;
private Drawable mDivider;
private int mOrientation;
public DividerItemDecoration(Context context, int orientation) {
final TypedArray a = context.obtainStyledAttributes(ATTRS);
mDivider = a.getDrawable(0);
a.recycle();
setOrientation(orientation);
}
public void setOrientation(int orientation) {
if (orientation != HORIZONTAL_LIST && orientation != VERTICAL_LIST) {
throw new IllegalArgumentException(“invalid orientation”);
}
mOrientation = orientation;
}
@Override
public void onDraw(Canvas c, RecyclerView parent) {
Log.v(“recyclerview - itemdecoration”, “onDraw()”);
if (mOrientation == VERTICAL_LIST) {
drawVertical(c, parent);
} else {
drawHorizontal(c, parent);
}
}
public void drawVertical(Canvas c, RecyclerView parent) {
final int left = parent.getPaddingLeft();
final int right = parent.getWidth() - parent.getPaddingRight();
final int childCount = parent.getChildCount();
for (int i = 0; i < childCount; i++) {
final View child = parent.getChildAt(i);
android.support.v7.widget.RecyclerView v = new android.support.v7.widget.RecyclerView(parent.getContext());
final RecyclerView.LayoutParams params = (RecyclerView.LayoutParams) child
.getLayoutParams();
final int top = child.getBottom() + params.bottomMargin;
final int bottom = top + mDivider.getIntrinsicHeight();
mDivider.setBounds(left, top, right, bottom);
mDivider.draw©;
}
}
public void drawHorizontal(Canvas c, RecyclerView parent) {
final int top = parent.getPaddingTop();
final int bottom = parent.getHeight() - parent.getPaddingBottom();
final int childCount = parent.getChildCount();
for (int i = 0; i < childCount; i++) {
final View child = parent.getChildAt(i);
final RecyclerView.LayoutParams params = (RecyclerView.LayoutParams) child
.getLayoutParams();
final int left = child.getRight() + params.rightMargin;
final int right = left + mDivider.getIntrinsicHeight();
mDivider.setBounds(left, top, right, bottom);
mDivider.draw©;
}
}
@Override
public void getItemOffsets(Rect outRect, int itemPosition, RecyclerView parent) {
if (mOrientation == VERTICAL_LIST) {
outRect.set(0, 0, 0, mDivider.getIntrinsicHeight());
} else {
outRect.set(0, 0, mDivider.getIntrinsicWidth(), 0);
}
}
}
该实现类可以看到通过读取系统主题中的 android.R.attr.listDivider作为Item间的分割线,并且支持横向和纵向。如果你不清楚它是怎么做到的读取系统的属性用于自身,请参考我的另一篇博文:Android 深入理解Android中的自定义属性
获取到listDivider以后,该属性的值是个Drawable,在getItemOffsets中,outRect去设置了绘制的范围。onDraw中实现了真正的绘制。
我们在原来的代码中添加一句:
mRecyclerView.addItemDecoration(new DividerItemDecoration(this,
DividerItemDecoration.VERTICAL_LIST));
ok,现在再运行,就可以看到分割线的效果了。
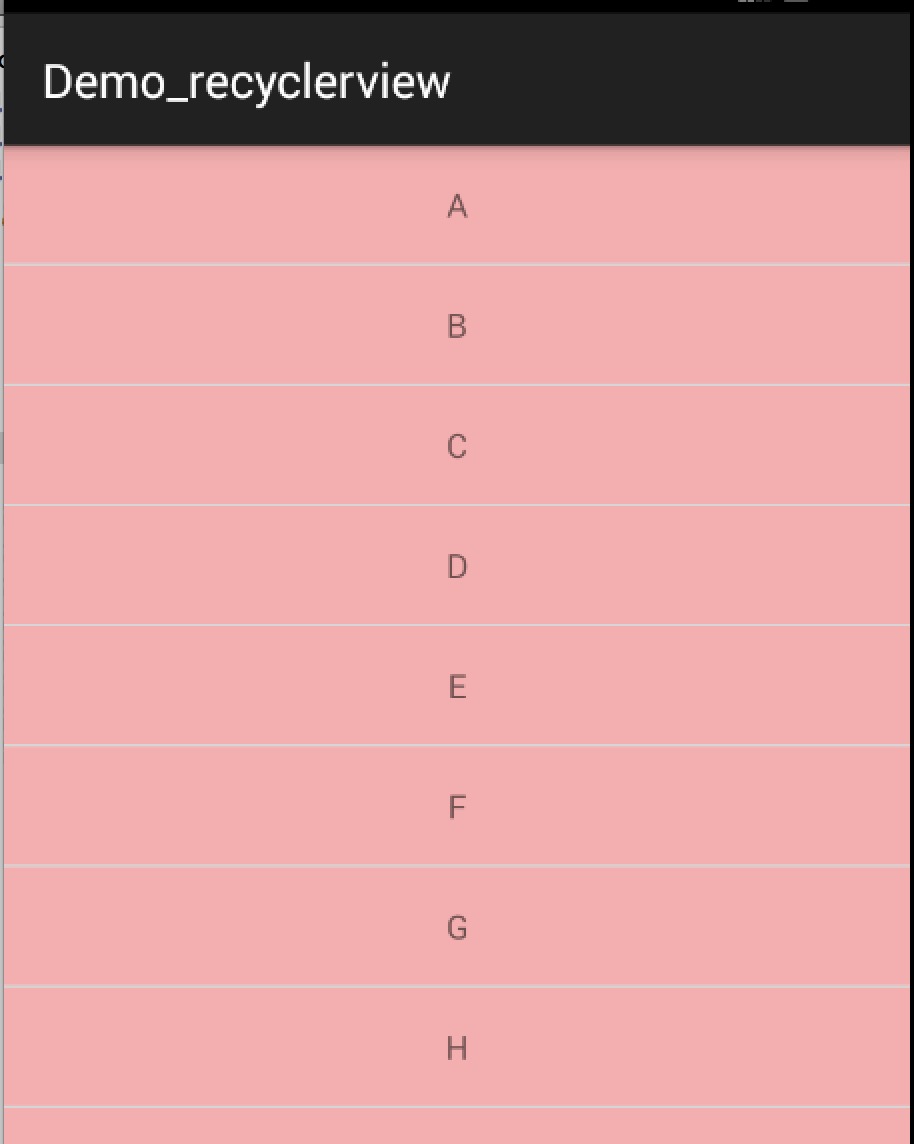
该分割线是系统默认的,你可以在theme.xml中找到该属性的使用情况。那么,使用系统的listDivider有什么好处呢?就是方便我们去随意的改变,该属性我们可以直接声明在:
然后自己写个drawable即可,下面我们换一种分隔符:
<?xml version="1.0" encoding="utf-8"?><shape xmlns:android=“http://schemas.android.com/apk/res/android”
android:shape=“rectangle” >
<gradient
android:centerColor=“#ff00ff00”
android:endColor=“#ff0000ff”
android:startColor=“#ffff0000”
android:type=“linear” />
现在的样子是:
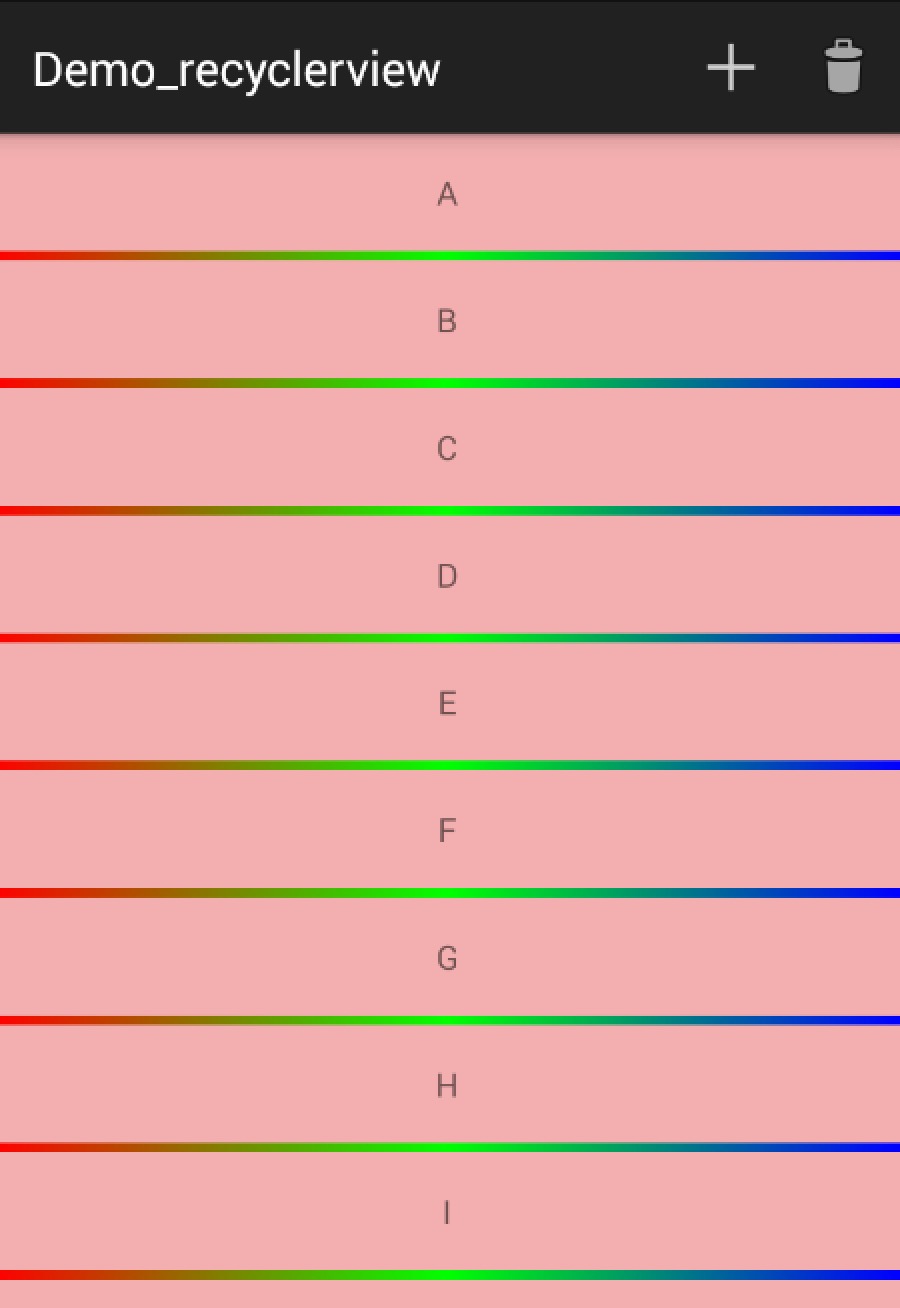
当然了,你可以根据自己的需求,去随意的绘制,反正是画出来的,随便玩~~
ok,看到这,你可能觉得,这玩意真尼玛麻烦,完全不能比拟的心爱的ListView。那么继续看。
LayoutManager
好了,上面实现了类似ListView样子的Demo,通过使用其默认的LinearLayoutManager。
RecyclerView.LayoutManager吧,这是一个抽象类,好在系统提供了3个实现类:
-
LinearLayoutManager 现行管理器,支持横向、纵向。
-
GridLayoutManager 网格布局管理器
-
StaggeredGridLayoutManager 瀑布就式布局管理器
上面我们已经初步体验了下LinearLayoutManager,接下来看GridLayoutManager。
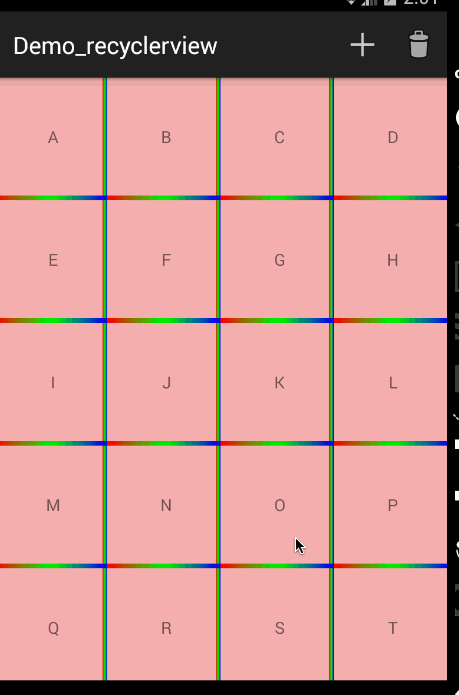
- GridLayoutManager
我们尝试去实现类似GridView,秒秒钟的事情:
//mRecyclerView.setLayoutManager(new LinearLayoutManager(this));
mRecyclerView.setLayoutManager(new GridLayoutManager(this,4));
只需要修改LayoutManager即可,还是很nice的。
当然了,改为GridLayoutManager以后,对于分割线,前面的DividerItemDecoration就不适用了,主要是因为它在绘制的时候,比如水平线,针对每个child的取值为:
final int left = parent.getPaddingLeft();
final int right = parent.getWidth() - parent.getPaddingRight();
因为每个Item一行,这样是没问题的。而GridLayoutManager时,一行有多个childItem,这样就多次绘制了,并且GridLayoutManager时,Item如果为最后一列(则右边无间隔线)或者为最后一行(底部无分割线)。
针对上述,我们编写了DividerGridItemDecoration。
package com.zhy.sample.demo_recyclerview;
import android.content.Context;
import android.content.res.TypedArray;
import android.graphics.Canvas;
import android.graphics.Rect;
import android.graphics.drawable.Drawable;
import android.support.v7.widget.GridLayoutManager;
import android.support.v7.widget.RecyclerView;
import android.support.v7.widget.RecyclerView.LayoutManager;
import android.support.v7.widget.RecyclerView.State;
import android.support.v7.widget.StaggeredGridLayoutManager;
import android.view.View;
/**
-
@author zhy
*/
public class DividerGridItemDecoration extends RecyclerView.ItemDecoration
{
private static final int[] ATTRS = new int[] { android.R.attr.listDivider };
private Drawable mDivider;
public DividerGridItemDecoration(Context context)
{
final TypedArray a = context.obtainStyledAttributes(ATTRS);
mDivider = a.getDrawable(0);
a.recycle();
}
@Override
public void onDraw(Canvas c, RecyclerView parent, State state)
{
drawHorizontal(c, parent);
drawVertical(c, parent);
}
private int getSpanCount(RecyclerView parent)
{
// 列数
int spanCount = -1;
LayoutManager layoutManager = parent.getLayoutManager();
if (layoutManager instanceof GridLayoutManager)
{
spanCount = ((GridLayoutManager) layoutManager).getSpanCount();
} else if (layoutManager instanceof StaggeredGridLayoutManager)
{
spanCount = ((StaggeredGridLayoutManager) layoutManager)
.getSpanCount();
}
return spanCount;
}
public void drawHorizontal(Canvas c, RecyclerView parent)
{
int childCount = parent.getChildCount();
for (int i = 0; i < childCount; i++)
{
final View child = parent.getChildAt(i);
final RecyclerView.LayoutParams params = (RecyclerView.LayoutParams) child
.getLayoutParams();
final int left = child.getLeft() - params.leftMargin;
final int right = child.getRight() + params.rightMargin
- mDivider.getIntrinsicWidth();
final int top = child.getBottom() + params.bottomMargin;
final int bottom = top + mDivider.getIntrinsicHeight();
mDivider.setBounds(left, top, right, bottom);
mDivider.draw©;
}
}
public void drawVertical(Canvas c, RecyclerView parent)
{
final int childCount = parent.getChildCount();
for (int i = 0; i < childCount; i++)
{
final View child = parent.getChildAt(i);
final RecyclerView.LayoutParams params = (RecyclerView.LayoutParams) child
.getLayoutParams();
final int top = child.getTop() - params.topMargin;
final int bottom = child.getBottom() + params.bottomMargin;
final int left = child.getRight() + params.rightMargin;
final int right = left + mDivider.getIntrinsicWidth();
mDivider.setBounds(left, top, right, bottom);
mDivider.draw©;
}
}
private boolean isLastColum(RecyclerView parent, int pos, int spanCount,
int childCount)
{
LayoutManager layoutManager = parent.getLayoutManager();
if (layoutManager instanceof GridLayoutManager)
{
if ((pos + 1) % spanCount == 0)// 如果是最后一列,则不需要绘制右边
{
return true;
}
} else if (layoutManager instanceof StaggeredGridLayoutManager)
{
int orientation = ((StaggeredGridLayoutManager) layoutManager)
.getOrientation();
if (orientation == StaggeredGridLayoutManager.VERTICAL)
{
if ((pos + 1) % spanCount == 0)// 如果是最后一列,则不需要绘制右边
{
return true;
}
} else
{
childCount = childCount - childCount % spanCount;
if (pos >= childCount)// 如果是最后一列,则不需要绘制右边
return true;
}
}
return false;
}
private boolean isLastRaw(RecyclerView parent, int pos, int spanCount,
int childCount)
{
LayoutManager layoutManager = parent.getLayoutManager();
if (layoutManager instanceof GridLayoutManager)
{
childCount = childCount - childCount % spanCount;
if (pos >= childCount)// 如果是最后一行,则不需要绘制底部
return true;
} else if (layoutManager instanceof StaggeredGridLayoutManager)
{
int orientation = ((StaggeredGridLayoutManager) layoutManager)
.getOrientation();
// StaggeredGridLayoutManager 且纵向滚动
if (orientation == StaggeredGridLayoutManager.VERTICAL)
{
childCount = childCount - childCount % spanCount;
// 如果是最后一行,则不需要绘制底部
if (pos >= childCount)
return true;
} else
// StaggeredGridLayoutManager 且横向滚动
{
// 如果是最后一行,则不需要绘制底部
if ((pos + 1) % spanCount == 0)
{
return true;
}
}
}
return false;
}
@Override
public void getItemOffsets(Rect outRect, int itemPosition,
RecyclerView parent)
{
int spanCount = getSpanCount(parent);
int childCount = parent.getAdapter().getItemCount();
if (isLastRaw(parent, itemPosition, spanCount, childCount))// 如果是最后一行,则不需要绘制底部
{
outRect.set(0, 0, mDivider.getIntrinsicWidth(), 0);
} else if (isLastColum(parent, itemPosition, spanCount, childCount))// 如果是最后一列,则不需要绘制右边
{
outRect.set(0, 0, 0, mDivider.getIntrinsicHeight());
} else
{
outRect.set(0, 0, mDivider.getIntrinsicWidth(),
mDivider.getIntrinsicHeight());
}
}
}
主要在getItemOffsets方法中,去判断如果是最后一行,则不需要绘制底部;如果是最后一列,则不需要绘制右边,整个判断也考虑到了StaggeredGridLayoutManager的横向和纵向,所以稍稍有些复杂。最重要还是去理解,如何绘制什么的不重要。一般如果仅仅是希望有空隙,还是去设置item的margin方便。
最后的效果是:
ok,看到这,你可能还觉得RecyclerView不够强大?
但是如果我们有这么个需求,纵屏的时候显示为ListView,横屏的时候显示两列的GridView,我们RecyclerView可以轻松搞定,而如果使用ListView去实现还是需要点功夫的~~~
当然了,这只是皮毛,下面让你心服口服。
- StaggeredGridLayoutManager
瀑布流式的布局,其实他可以实现GridLayoutManager一样的功能,仅仅按照下列代码:
// mRecyclerView.setLayoutManager(new GridLayoutManager(this,4));
最后
针对于上面的问题,我总结出了互联网公司Android程序员面试涉及到的绝大部分面试题及答案,并整理做成了文档,以及系统的进阶学习视频资料。
(包括Java在Android开发中应用、APP框架知识体系、高级UI、全方位性能调优,NDK开发,音视频技术,人工智能技术,跨平台技术等技术资料),希望能帮助到你面试前的复习,且找到一个好的工作,也节省大家在网上搜索资料的时间来学习。

网上学习资料一大堆,但如果学到的知识不成体系,遇到问题时只是浅尝辄止,不再深入研究,那么很难做到真正的技术提升。
一个人可以走的很快,但一群人才能走的更远!不论你是正从事IT行业的老鸟或是对IT行业感兴趣的新人,都欢迎加入我们的的圈子(技术交流、学习资源、职场吐槽、大厂内推、面试辅导),让我们一起学习成长!
要绘制底部;如果是最后一列,则不需要绘制右边,整个判断也考虑到了StaggeredGridLayoutManager的横向和纵向,所以稍稍有些复杂。最重要还是去理解,如何绘制什么的不重要。一般如果仅仅是希望有空隙,还是去设置item的margin方便。
最后的效果是:
ok,看到这,你可能还觉得RecyclerView不够强大?
但是如果我们有这么个需求,纵屏的时候显示为ListView,横屏的时候显示两列的GridView,我们RecyclerView可以轻松搞定,而如果使用ListView去实现还是需要点功夫的~~~
当然了,这只是皮毛,下面让你心服口服。
- StaggeredGridLayoutManager
瀑布流式的布局,其实他可以实现GridLayoutManager一样的功能,仅仅按照下列代码:
// mRecyclerView.setLayoutManager(new GridLayoutManager(this,4));
最后
针对于上面的问题,我总结出了互联网公司Android程序员面试涉及到的绝大部分面试题及答案,并整理做成了文档,以及系统的进阶学习视频资料。
(包括Java在Android开发中应用、APP框架知识体系、高级UI、全方位性能调优,NDK开发,音视频技术,人工智能技术,跨平台技术等技术资料),希望能帮助到你面试前的复习,且找到一个好的工作,也节省大家在网上搜索资料的时间来学习。
[外链图片转存中…(img-y1MArr4f-1715800020902)]
网上学习资料一大堆,但如果学到的知识不成体系,遇到问题时只是浅尝辄止,不再深入研究,那么很难做到真正的技术提升。
一个人可以走的很快,但一群人才能走的更远!不论你是正从事IT行业的老鸟或是对IT行业感兴趣的新人,都欢迎加入我们的的圈子(技术交流、学习资源、职场吐槽、大厂内推、面试辅导),让我们一起学习成长!


 2931
2931


 被折叠的 条评论
为什么被折叠?
被折叠的 条评论
为什么被折叠?
 到【灌水乐园】发言


