


+ 三、语言理解示例代码和扩展
+ 四、语音识别合成示例代码和扩展
+ 五、知识库示例代码和扩展
+ 六、自然语言生成示例代码和扩展
+ 七、人脸识别示例代码和扩展
+ 八、图像识别示例代码和扩展
+ 九、整合第三方服务示例代码和扩展
+ 十、归纳总结
系列博文目录
Python的文本和语音相互转换库技术点案例示例
博文目录
前言
 利用Microsoft Azure Cognitive Services开发聊天机器人是一种常见且具有广泛应用的方法。
一、一般步骤和常用的Azure Cognitive Services功能
 下面是一般步骤和一些常用的Azure Cognitive Services功能,可以帮助你开发一个智能的聊天机器人:
- 文本分析:利用文本分析功能可以帮助聊天机器人理解用户输入的文本。这包括情感分析(判断用户情绪)、实体识别(识别关键词)、关键短语提取等功能。
- 语言理解:使用语言理解功能可以帮助聊天机器人理解用户意图和上下文。可以使用LUIS(Language Understanding Intelligent Service)来构建自定义的语言模型,从而更好地理解用户的输入。
- 语音识别和合成:如果你的聊天机器人支持语音交互,可以使用Azure Cognitive Services中的语音识别和语音合成功能。这样用户可以通过语音与机器人进行交流。
- 知识库:利用知识库(QnA Maker)功能可以构建一个问答库,让聊天机器人能够回答用户的常见问题。
- 自然语言生成:通过自然语言生成功能,可以让聊天机器人以自然的方式回复用户的消息,使对话更加流畅。
- 人脸识别:如果你的聊天机器人需要识别用户身份或情绪,可以使用人脸识别功能。
- 图像识别:如果聊天机器人需要处理图片或识别图片中的内容,可以使用图像识别功能。
- 整合第三方服务:除了Azure Cognitive Services,还可以整合其他第三方服务,如地理位置服务、天气服务等,以提供更多功能。
通过结合以上功能,你可以开发一个功能丰富、智能化的聊天机器人,能够与用户进行自然的对话,并提供有用的信息和帮助。记得在开发过程中不断优化和训练模型,以提高聊天机器人的性能和用户体验。
二、文本分析示例代码和扩展
 以下是使用Microsoft Azure Cognitive Services中的文本分析功能进行情感分析、实体识别和关键短语提取的示例代码(使用Python):
import os
from azure.ai.textanalytics import TextAnalyticsClient
from azure.core.credentials import AzureKeyCredential

# Set your Azure Cognitive Services endpoint and key
endpoint = "YOUR\_ENDPOINT"
key = "YOUR\_KEY"

# Instantiate a Text Analytics client
text_analytics_client = TextAnalyticsClient(endpoint=endpoint, credential=AzureKeyCredential(key))

# Text for analysis
documents = [
    "I love the weather today! It makes me so happy.",
    "The movie was not good. I did not enjoy it at all.",
    "Microsoft is a technology company based in Redmond, Washington.",
    "The new product launch was a success. Customers are excited about it."
]

# Perform sentiment analysis
response = text_analytics_client.analyze_sentiment(documents=documents)[0]
for idx, doc in enumerate(response):
    print("Document: {}".format(documents[idx]))
    print("Sentiment: {}".format(doc.sentiment))
    print()

```python
# Perform entity recognition
response = text_analytics_client.recognize_entities(documents=documents)[0]
for idx, doc in enumerate(response):
    print("Document: {}".format(documents[idx]))
    print("Entities:")
    for entity in doc.entities:
        print("\tText: {}, Type: {}".format(entity.text, entity.category))
    print()
# Perform key phrase extraction
response = text_analytics_client.extract_key_phrases(documents=documents)[0]
for idx, doc in enumerate(response):
    print("Document: {}".format(documents[idx]))
    print("Key Phrases:")
    for phrase in doc.key_phrases:
        print("\t{}".format(phrase))
    print()
在这个示例代码中,我们使用Azure Cognitive Services中的Text Analytics客户端进行情感分析、实体识别和关键短语提取。你需要将YOUR_ENDPOINT和YOUR_KEY替换为你自己的Azure Cognitive Services终结点和密钥。
通过这段代码,你可以对提供的文本进行情感分析,识别文本中的实体(关键词),以及提取文本中的关键短语。这些功能可以帮助你的聊天机器人更好地理解用户输入的文本,并做出相应的响应。
 当扩展示例代码时,你可以考虑添加一些额外的功能,比如处理多语言文本、识别文本中的关键日期、识别人名等。以下是一个扩展示例代码,展示了如何处理多语言文本、识别日期和人名:
# Additional text for analysis including multiple languages, dates, and names
additional_documents = [
    "今天的天气真好!",
    "La película fue excelente. ¡Me encantó!",
    "The meeting is scheduled for February 28th.",
    "John Smith will be attending the conference next week."
]

# Perform sentiment analysis for additional documents
response = text_analytics_client.analyze_sentiment(documents=additional_documents, language="es")[0]
for idx, doc in enumerate(response):
    print("Document: {}".format(additional_documents[idx]))
    print("Sentiment: {}".format(doc.sentiment))
    print()

# Perform entity recognition for additional documents
response = text_analytics_client.recognize_entities(documents=additional_documents)[0]
for idx, doc in enumerate(response):
    print("Document: {}".format(additional_documents[idx]))
    print("Entities:")
    for entity in doc.entities:
        print("\tText: {}, Type: {}".format(entity.text, entity.category))
    print()

# Perform key phrase extraction for additional documents
response = text_analytics_client.extract_key_phrases(documents=additional_documents)[0]
for idx, doc in enumerate(response):
    print("Document: {}".format(additional_documents[idx]))
    print("Key Phrases:")
    for phrase in doc.key_phrases:
        print("\t{}".format(phrase))
    print()

# Perform date recognition for additional documents
response = text_analytics_client.recognize_pii_entities(documents=additional_documents)[0]
for idx, doc in enumerate(response):
    print("Document: {}".format(additional_documents[idx]))
    print("PII Entities:")
    for entity in doc.entities:
        if entity.category == "DateTime":
            print("\tDate: {}".format(entity.text))
    print()

# Perform name recognition for additional documents
response = text_analytics_client.recognize_pii_entities(documents=additional_documents)[0]
for idx, doc in enumerate(response):
    print("Document: {}".format(additional_documents[idx]))
    print("PII Entities:")
    for entity in doc.entities:
        if entity.category == "PersonName":
            print("\tName: {}".format(entity.text))
    print()
这段代码展示了如何处理包含多种语言、日期和人名的文本。你可以看到如何在不同语言的文本中进行情感分析、实体识别和关键短语提取,同时识别日期和人名。这些功能可以帮助你构建更智能的应用程序,处理多样化的文本输入。
三、语言理解示例代码和扩展
 以下是一个示例代码,演示如何使用Azure Cognitive Services中的LUIS(Language Understanding Intelligent Service)来构建自定义的语言模型,以帮助聊天机器人更好地理解用户的意图和上下文:
from azure.cognitiveservices.language.luis.authoring import LUISAuthoringClient
from azure.cognitiveservices.language.luis.authoring.models import ApplicationCreateObject
from msrest.authentication import CognitiveServicesCredentials

# Set up the LUIS authoring client
authoring_key = "YOUR\_LUIS\_AUTHORING\_KEY"
authoring_endpoint = "YOUR\_LUIS\_AUTHORING\_ENDPOINT"
authoring_client = LUISAuthoringClient(authoring_endpoint, CognitiveServicesCredentials(authoring_key))

# Define and create a new LUIS application
app_name = "MyChatbotApp"
app_description = "Custom language model for a chatbot"
app_version = "1.0"
culture = "en-us"

app_definition = ApplicationCreateObject(name=app_name, description=app_description, culture=culture, version=app_version)
created_app = authoring_client.apps.add(app_definition)

# Define intents, utterances, and entities
intents = ["Greeting", "Search", "Weather"]
utterances = [
    {"text": "Hello", "intent": "Greeting"},
    {"text": "What's the weather like today?", "intent": "Weather"},
    {"text": "Find a restaurant nearby", "intent": "Search"}
]
entities = []

# Add intents, utterances, and entities to the LUIS application
for intent in intents:
    authoring_client.model.add_intent(created_app, version_id=app_version, name=intent)

for utterance in utterances:
    authoring_client.examples.add(created_app, version_id=app_version, example_label=utterance["intent"], utterance_text=utterance["text"])

for entity in entities:
    authoring_client.model.add_entity(created_app, version_id=app_version, name=entity)

# Train and publish the LUIS application
authoring_client.train.train_version(created_app, app_version)
authoring_client.apps.publish(created_app, app_version, is_staging=False)

print("LUIS application published successfully!")
这段代码演示了如何使用LUIS Authoring API来创建自定义的语言模型。你可以定义意图(intents)、用户话语(utterances)和实体(entities),然后将它们添加到LUIS应用程序中。最后,训练并发布应用程序,以便聊天机器人可以使用该语言模型来更好地理解用户的输入。这种自定义语言模型可以大大提升聊天机器人的交互体验和理解能力。
 当扩展示例代码以包括LUIS语言理解功能时,你可以考虑添加以下部分来演示如何使用LUIS API 来解析用户输入并获取相应的意图和实体:
from azure.cognitiveservices.language.luis.runtime import LUISRuntimeClient
from msrest.authentication import CognitiveServicesCredentials

# Set up the LUIS runtime client
runtime_key = "YOUR\_LUIS\_RUNTIME\_KEY"
runtime_endpoint = "YOUR\_LUIS\_RUNTIME\_ENDPOINT"
runtime_client = LUISRuntimeClient(runtime_endpoint, CognitiveServicesCredentials(runtime_key))

# Define user input
user_input = "What's the weather like tomorrow in New York?"

# Call LUIS to predict user intent and entities
prediction_response = runtime_client.prediction.resolve(app_id=created_app.id, slot_name="production", prediction_request={"query": user_input})

# Extract intent and entities from the prediction response
top_intent = prediction_response.prediction.top_intent
entities = prediction_response.prediction.entities

print("Predicted Intent: {}".format(top_intent))
print("Entities:")
for entity in entities:
    print("\t- Type: {}, Value: {}".format(entity.entity, entity.value))
这部分代码展示了如何使用LUIS Runtime API 来解析用户输入并获取预测的意图和实体。通过调用runtime_client.prediction.resolve方法,你可以向LUIS发送用户输入并获取预测的结果。在这个示例中,我们打印出了预测的意图和实体,以便你可以进一步处理这些信息,根据用户意图执行相应的操作。
通过将这部分代码与前面的示例代码整合,你可以构建一个更完整的应用程序,其中包括了自定义的语言模型(通过LUIS Authoring API 创建)和使用该模型解析用户输入的功能(通过LUIS Runtime API)。这样的应用程序可以更智能地理解用户的意图和上下文,从而提供更加个性化和高效的交互体验。
四、语音识别合成示例代码和扩展
 以下是一个示例代码,演示如何使用Azure Cognitive Services中的语音识别和语音合成功能,以支持语音交互的聊天机器人:
import azure.cognitiveservices.speech as speechsdk

# Set up the speech config
speech_key = "YOUR\_SPEECH\_KEY"
service_region = "YOUR\_SERVICE\_REGION"
speech_config = speechsdk.SpeechConfig(subscription=speech_key, region=service_region)

# Set up the speech recognizer
speech_recognizer = speechsdk.SpeechRecognizer(speech_config)

print("Say something...")

# Start speech recognition
result = speech_recognizer.recognize_once()

# Get recognized text
if result.reason == speechsdk.ResultReason.RecognizedSpeech:
    print("Recognized: {}".format(result.text))
elif result.reason == speechsdk.ResultReason.NoMatch:
    print("No speech could be recognized")
elif result.reason == speechsdk.ResultReason.Canceled:
    cancellation_details = result.cancellation_details
    print("Speech recognition canceled: {}".format(cancellation_details.reason))

# Set up the speech synthesizer
speech_synthesizer = speechsdk.SpeechSynthesizer(speech_config)

# Synthesize text to speech
text_to_speak = "Hello! How can I help you today?"
result = speech_synthesizer.speak_text_async(text_to_speak).get()

if result.reason == speechsdk.ResultReason.SynthesizingAudioCompleted:
    print("Speech synthesized to audio.")
elif result.reason == speechsdk.ResultReason.Canceled:
    cancellation_details = result.cancellation_details
    print("Speech synthesis canceled: {}".format(cancellation_details.reason))
这段代码演示了如何使用Azure Cognitive Services中的语音识别和语音合成功能。首先,我们设置了语音配置(speech config),然后创建了一个语音识别器(speech recognizer),并启动语音识别来识别用户说的话语。接着,根据识别结果,我们打印出识别的文本。
接下来,我们设置了语音合成器(speech synthesizer),并使用它将指定的文本转换为语音。在这个示例中,我们将文本“Hello! How can I help you today?”转换为语音。最后,我们打印出语音合成的结果。
通过结合语音识别和语音合成功能,你可以为聊天机器人添加语音交互的能力,使用户可以通过语音与机器人进行交流。这种功能可以提升用户体验,特别是在需要使用语音进行交互的场景下。
 当扩展示例代码以包括语音识别和语音合成功能时,你可以考虑以下示例代码来展示如何结合这两个功能,以支持语音交互的聊天机器人:
import azure.cognitiveservices.speech as speechsdk

# Set up the speech config for speech recognition
speech_key = "YOUR\_SPEECH\_KEY"
service_region = "YOUR\_SERVICE\_REGION"
speech_config = speechsdk.SpeechConfig(subscription=speech_key, region=service_region)

# Set up the speech recognizer
speech_recognizer = speechsdk.SpeechRecognizer(speech_config)

print("Listening...")

# Start speech recognition
result = speech_recognizer.recognize_once()

# Get recognized text
if result.reason == speechsdk.ResultReason.RecognizedSpeech:
    user_input = result.text
    print("Recognized: {}".format(user_input))
elif result.reason == speechsdk.ResultReason.NoMatch:
    print("No speech could be recognized")
elif result.reason == speechsdk.ResultReason.Canceled:
    cancellation_details = result.cancellation_details
    print("Speech recognition canceled: {}".format(cancellation_details.reason))

# Set up the speech synthesizer for text-to-speech
speech_synthesizer = speechsdk.SpeechSynthesizer(speech_config)

# Define the response text
response_text = "You said: {}".format(user_input)

# Synthesize text to speech
result = speech_synthesizer.speak_text_async(response_text).get()

if result.reason == speechsdk.ResultReason.SynthesizingAudioCompleted:
    print("Speech synthesized to audio.")
elif result.reason == speechsdk.ResultReason.Canceled:
    cancellation_details = result.cancellation_details
    print("Speech synthesis canceled: {}".format(cancellation_details.reason))
在这段代码中,首先设置了语音配置(speech config)用于语音识别和语音合成功能。然后创建了一个语音识别器(speech recognizer),并启动语音识别以识别用户说的话语。识别到的文本被存储在user_input变量中。
接着,设置了语音合成器(speech synthesizer),并定义了一个回复文本response_text,其中包含了用户输入的内容。使用语音合成器将回复文本转换为语音,并输出结果。
通过结合语音识别和语音合成功能,你可以构建一个支持语音交互的聊天机器人。用户可以通过语音输入与机器人交流,机器人可以识别用户的语音输入并以语音形式回复,从而实现更加自然和便捷的交互体验。
五、知识库示例代码和扩展
 以下是一个示例代码,演示如何使用Azure Cognitive Services中的知识库(QnA Maker)功能构建一个问答库,以便聊天机器人能够回答用户的常见问题:
from azure.cognitiveservices.knowledge.qnamaker import QnAMakerClient
from azure.cognitiveservices.knowledge.qnamaker.models import QueryDTO

# Set up QnA Maker client
subscription_key = "YOUR\_SUBSCRIPTION\_KEY"
endpoint = "YOUR\_QNA\_MAKER\_ENDPOINT"
kb_id = "YOUR\_KNOWLEDGE\_BASE\_ID"
client = QnAMakerClient(endpoint, CognitiveServicesCredentials(subscription_key))

# Define a function to query the QnA Maker knowledge base
def query\_knowledge\_base(question):
    query = QueryDTO(question=question)
    response = client.runtime.generate_answer(kb_id, query)
    if response.answers:
        return response.answers[0].answer
    else:
        return "Sorry, I don't have an answer to that question."

# Example usage
question = "What is the capital of France?"
answer = query_knowledge_base(question)
print("Question: {}".format(question))
print("Answer: {}".format(answer))
在这段代码中,首先设置了QnA Maker客户端,包括订阅密钥(subscription key)、终结点(endpoint)和知识库ID(kb_id)。然后定义了一个query_knowledge_base函数,用于向知识库提出问题并获取答案。
在query_knowledge_base函数中,首先创建一个QueryDTO对象,包含用户提出的问题。然后使用QnA Maker客户端的generate_answer方法查询知识库,获取回答。如果知识库返回了答案,就返回第一个答案;否则返回一个默认的提示。
最后,通过调用query_knowledge_base函数并传入一个问题,可以获取知识库中对应问题的答案,并将问题和答案打印出来。
通过结合知识库(QnA Maker)功能,你可以构建一个问答库,使聊天机器人能够回答用户的常见问题,提升用户体验并提供更加智能化的交互。
 当扩展知识库(QnA Maker)示例代码以处理多语言文本时,你可以考虑以下示例代码,演示如何在问答库中添加多语言支持:
from azure.cognitiveservices.knowledge.qnamaker import QnAMakerClient
from azure.cognitiveservices.knowledge.qnamaker.models import QueryDTO
from msrest.authentication import CognitiveServicesCredentials

# Set up QnA Maker client
subscription_key = "YOUR\_SUBSCRIPTION\_KEY"
endpoint = "YOUR\_QNA\_MAKER\_ENDPOINT"
kb_id = "YOUR\_KNOWLEDGE\_BASE\_ID"
client = QnAMakerClient(endpoint, CognitiveServicesCredentials(subscription_key))

# Define a function to query the QnA Maker knowledge base with language support
def query\_knowledge\_base\_multilanguage(question, language="en"):
    query = QueryDTO(question=question, top=1, strict_filters=[], metadata_filter={"language": language})
    response = client.runtime.generate_answer(kb_id, query)
    if response.answers:
        return response.answers[0].answer
    else:
        return "Sorry, I don't have an answer to that question in the specified language."

# Example usage with multiple languages
question = "What is the weather like today?"
answer_en = query_knowledge_base_multilanguage(question, "en")
answer_es = query_knowledge_base_multilanguage(question, "es")

print("Question: {}".format(question))
print("Answer (English): {}".format(answer_en))
print("Answer (Spanish): {}".format(answer_es))
在这段代码中,我们在QueryDTO中添加了一个metadata_filter参数,用于指定问题的语言。这样可以确保查询知识库时根据指定的语言获取答案。在示例中,我们展示了如何查询英语和西班牙语版本的答案。
通过这种扩展,你可以为知识库添加多语言支持,使聊天机器人能够根据用户提出问题的语言提供相应的答案,从而提升用户体验并增强交互的智能性。
六、自然语言生成示例代码和扩展
 当使用Cognitive Services中的自然语言生成功能来让聊天机器人以自然的方式回复用户的消息时,你可以考虑以下示例代码,演示如何使用Azure Text Analytics中的Text Analytics API来生成自然语言回复:
import os
from azure.core.credentials import AzureKeyCredential
from azure.ai.textanalytics import TextAnalyticsClient
from azure.ai.textanalytics import TextAnalyticsApiVersion
from azure.ai.textanalytics.models import TextDocumentInput

# Set up Text Analytics client
key = os.environ["AZURE\_TEXT\_ANALYTICS\_KEY"]
endpoint = os.environ["AZURE\_TEXT\_ANALYTICS\_ENDPOINT"]
credential = AzureKeyCredential(key)
text_analytics_client = TextAnalyticsClient(endpoint, credential, api_version=TextAnalyticsApiVersion.V3_2)

# Define a function to generate natural language response
def generate\_response(input_text):
    documents = [TextDocumentInput(id="1", text=input_text)]
    response = text_analytics_client.begin_analyze_actions(documents, actions=["generate\_answer"])
    result = response.result()

    if result.answers:
        return result.answers[0].generated_answer.text
    else:
        return "I'm sorry, I couldn't generate a response for that input."

# Example usage
input_text = "What are the top tourist attractions in Paris?"
response = generate_response(input_text)
print("User Input: {}".format(input_text))
print("Bot Response: {}".format(response))
在这段代码中,我们使用Azure Text Analytics API来生成自然语言回复。首先,需要设置Azure Text Analytics服务的密钥和终结点,然后创建Text Analytics客户端。接着定义了一个generate_response函数,该函数接受用户输入的文本,并使用Text Analytics API生成自然语言回复。
在示例中,我们展示了如何使用该函数来生成对用户输入的问题的自然语言回复。这样,你可以让聊天机器人以更加自然和流畅的方式回应用户的消息,提升交互体验和用户满意度。
 当扩展自然语言生成示例代码时,你可以考虑添加更多功能,例如处理多语言文本、识别日期、人名等,以使聊天机器人的回复更加智能和个性化。以下是一个扩展的示例代码,演示如何结合自然语言处理工具(如Spacy)和Azure Cognitive Services来实现这些功能:
import spacy
import os
from azure.core.credentials import AzureKeyCredential
from azure.ai.textanalytics import TextAnalyticsClient
from azure.ai.textanalytics import TextAnalyticsApiVersion
from azure.ai.textanalytics.models import TextDocumentInput

# Load Spacy model for NLP tasks
nlp = spacy.load("en\_core\_web\_sm")

# Set up Text Analytics client
key = os.environ["AZURE\_TEXT\_ANALYTICS\_KEY"]
endpoint = os.environ["AZURE\_TEXT\_ANALYTICS\_ENDPOINT"]
credential = AzureKeyCredential(key)
text_analytics_client = TextAnalyticsClient(endpoint, credential, api_version=TextAnalyticsApiVersion.V3_2)

# Define a function to generate natural language response with enhanced features
def generate\_enhanced\_response(input_text):
    # Perform NLP tasks with Spacy
    doc = nlp(input_text)

    # Extract entities like dates and names
    dates = [ent.text for ent in doc.ents if ent.label_ == "DATE"]
    names = [ent.text for ent in doc.ents if ent.label_ == "PERSON"]

    # Prepare text for Text Analytics API
    documents = [TextDocumentInput(id="1", text=input_text)]

    # Use Text Analytics API to generate answer
    response = text_analytics_client.begin_analyze_actions(documents, actions=["generate\_answer"])
    result = response.result()

    if result.answers:
        generated_answer = result.answers[0].generated_answer.text
        # Incorporate extracted entities into the response
        response_with_entities = f"{generated\_answer}. Dates mentioned: {dates}. Names mentioned: {names}"
        return response_with_entities
    else:
        return "I'm sorry, I couldn't generate a response for that input."

# Example usage
input_text = "Who is the president of the United States and when was he born?"
response = generate_enhanced_response(input_text)
print("User Input: {}".format(input_text))
print("Bot Response: {}".format(response))
在这个扩展的示例代码中,我们首先使用Spacy进行自然语言处理任务,提取文本中的日期和人名等实体。然后,将提取的实体信息结合到Text Analytics API生成的自然语言回复中,以增强回复的内容和个性化程度。
 通过这种扩展,你可以让聊天机器人更好地理解用户输入,并以更加智能和个性化的方式回复,从而提升用户体验和交互的质量。
七、人脸识别示例代码和扩展
 要为聊天机器人添加人脸识别功能,可以使用Azure Cognitive Services中的人脸识别服务。以下是一个简单的示例代码,演示如何使用Azure Cognitive Services中的人脸识别功能来识别用户的情绪:
import os
### 最后
Python崛起并且风靡,因为优点多、应用领域广、被大牛们认可。学习 Python 门槛很低,但它的晋级路线很多,通过它你能进入机器学习、数据挖掘、大数据,CS等更加高级的领域。Python可以做网络应用,可以做科学计算,数据分析,可以做网络爬虫,可以做机器学习、自然语言处理、可以写游戏、可以做桌面应用…Python可以做的很多,你需要学好基础,再选择明确的方向。这里给大家分享一份全套的 Python 学习资料,给那些想学习 Python 的小伙伴们一点帮助!
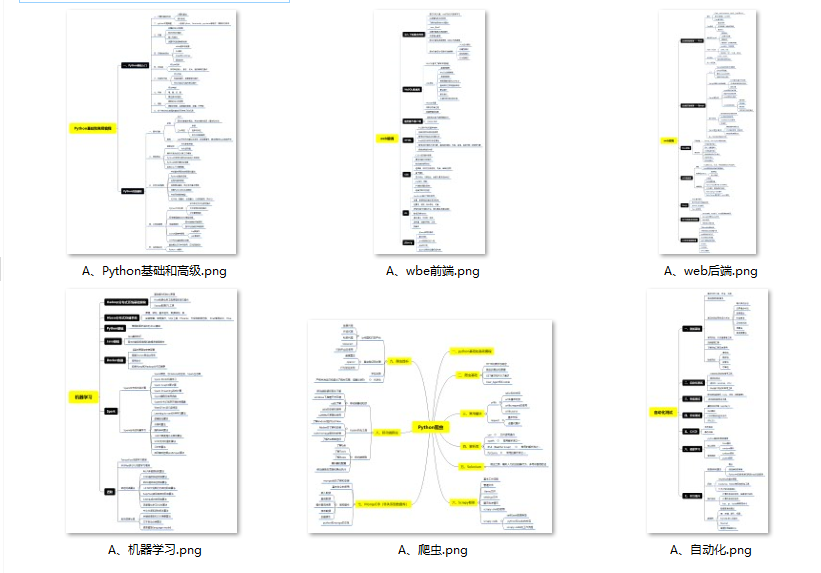
#### 👉Python所有方向的学习路线👈
Python所有方向的技术点做的整理,形成各个领域的知识点汇总,它的用处就在于,你可以按照上面的知识点去找对应的学习资源,保证自己学得较为全面。
#### 👉Python必备开发工具👈
工欲善其事必先利其器。学习Python常用的开发软件都在这里了,给大家节省了很多时间。
#### 👉Python全套学习视频👈
我们在看视频学习的时候,不能光动眼动脑不动手,比较科学的学习方法是在理解之后运用它们,这时候练手项目就很适合了。
#### 👉实战案例👈
学python就与学数学一样,是不能只看书不做题的,直接看步骤和答案会让人误以为自己全都掌握了,但是碰到生题的时候还是会一筹莫展。
因此在学习python的过程中一定要记得多动手写代码,教程只需要看一两遍即可。
#### 👉大厂面试真题👈
我们学习Python必然是为了找到高薪的工作,下面这些面试题是来自阿里、腾讯、字节等一线互联网大厂最新的面试资料,并且有阿里大佬给出了权威的解答,刷完这一套面试资料相信大家都能找到满意的工作。
**[需要这份系统化学习资料的朋友,可以戳这里无偿获取](https://bbs.csdn.net/topics/618317507)**
**一个人可以走的很快,但一群人才能走的更远!不论你是正从事IT行业的老鸟或是对IT行业感兴趣的新人,都欢迎加入我们的的圈子(技术交流、学习资源、职场吐槽、大厂内推、面试辅导),让我们一起学习成长!**


 663
663

 被折叠的 条评论
为什么被折叠?
被折叠的 条评论
为什么被折叠?
 到【灌水乐园】发言


