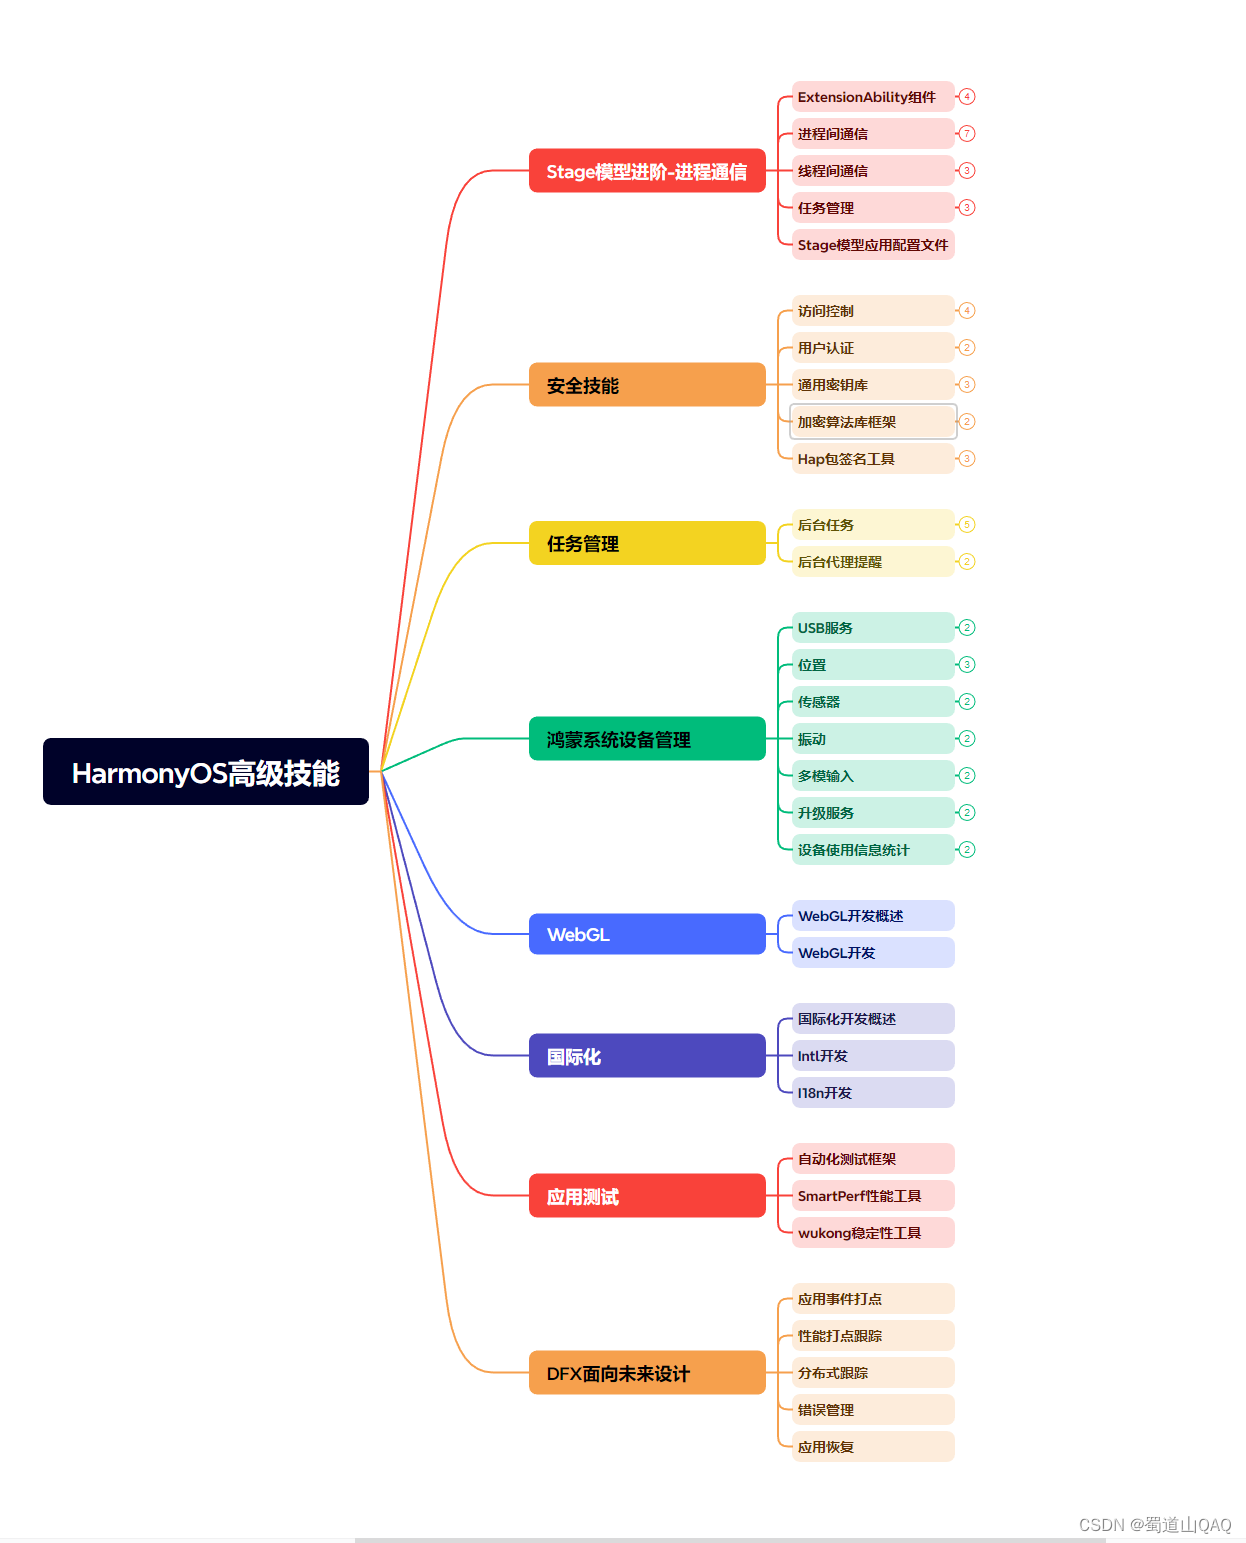
深知大多数程序员,想要提升技能,往往是自己摸索成长,但自己不成体系的自学效果低效又漫长,而且极易碰到天花板技术停滞不前!


既有适合小白学习的零基础资料,也有适合3年以上经验的小伙伴深入学习提升的进阶课程,涵盖了95%以上鸿蒙开发知识点,真正体系化!
由于文件比较多,这里只是将部分目录截图出来,全套包含大厂面经、学习笔记、源码讲义、实战项目、大纲路线、讲解视频,并且后续会持续更新
ohos:layout_alignment=“horizontal_center”
ohos:text=“My name is Jackie.”
ohos:text_size=“25vp”/>
也可以通过Java代码直接创建,点击事件都是如此的亲切
@Override
public void onStart(Intent intent) {
super.onStart(intent);
// 步骤1 声明布局
DirectionalLayout directionalLayout = new DirectionalLayout(context);
// 步骤2 设置布局大小
directionalLayout.setWidth(ComponentContainer.LayoutConfig.MATCH_PARENT);
directionalLayout.setHeight(ComponentContainer.LayoutConfig.MATCH_PARENT);
// 步骤3 设置布局属性及ID(ID视需要设置即可)
directionalLayout.setOrientation(Component.VERTICAL);
directionalLayout.setPadding(32, 32, 32, 32);
Text text = new Text(context);
text.setText(“My name is Text.”);
text.setTextSize(50);
text.setId(100);
// 步骤4.1 为组件添加对应布局的布局属性
DirectionalLayout.LayoutConfig layoutConfig = new DirectionalLayout.LayoutConfig(LayoutConfig.MATCH_CONTENT,
LayoutConfig.MATCH_CONTENT);
layoutConfig.alignment = LayoutAlignment.HORIZONTAL_CENTER;
text.setLayoutConfig(layoutConfig);
// 步骤4.2 将Text添加到布局中
directionalLayout.addComponent(text);
// 类似的添加一个Button
Button button = new Button(context);
layoutConfig.setMargins(0, 50, 0, 0);
button.setLayoutConfig(layoutConfig);
button.setText(“My name is Jackie.”);
button.setTextSize(50);
button.setId(100);
ShapeElement background = new ShapeElement();
background.setRgbColor(new RgbColor(0, 125, 255));
background.setCornerRadius(25);
button.setBackground(background);
button.setPadding(10, 10, 10, 10);
button.setClickedListener(new Component.ClickedListener() {
@Override
// 在组件中增加对点击事件的检测
public void onClick(Component Component) {
// 此处添加按钮被点击需要执行的操作
}
});
directionalLayout.addComponent(button);
// 步骤5 将布局作为根布局添加到视图树中
super.setUIContent(directionalLayout);
}
首页的布局如下,通过Java代码创建
@Override
public void onStart(Intent intent) {
super.onStart(intent);
System.out.println(“onStart”);
LayoutConfig config = new LayoutConfig(LayoutConfig.MATCH_PARENT, LayoutConfig.MATCH_PARENT);
myLayout.setLayoutConfig(config);
ShapeElement element = new ShapeElement();
element.setRgbColor(new RgbColor(255, 255, 255));
myLayout.setBackground(element);
Text text = new Text(this);
text.setLayoutConfig(config);
text.setText(“CT Jackie”);
text.setTextColor(new Color(0xFF000000));
text.setTextSize(50);
text.setTextAlignment(TextAlignment.CENTER);
myLayout.addComponent(text);
super.setUIContent(myLayout);
}
效果如下:

2.生命周期
下面再来看看主界面的生命周期,实现了ILifecycle接口,生命周期状态一共有七种
public static enum Event {
UNDEFINED,
ON_START,
ON_INACTIVE,
ON_ACTIVE,
ON_BACKGROUND,
ON_FOREGROUND,
ON_STOP;
private Event() {
}
}
界面启动时调用onStart()和onActive()
2020-09-13 21:42:10.266 25547-25547[表情] I/System.out: onStart
2020-09-13 21:42:10.284 25547-25547[表情] I/System.out: onActive
点击返回键时调用
2020-09-13 21:42:35.847 25547-25547/com.example.helloworld I/System.out: onInactive
2020-09-13 21:42:35.917 25547-25547/com.example.helloworld I/System.out: onBackground
2020-09-13 21:42:35.920 25547-25547/com.example.helloworld I/System.out: onStop
至于UNDEFINED和ON_FOREGROUND暂时还不了解。
3.Gradle任务(Task)
甚至连gradle的Task都非常类似,打包命令是assembleDebug/Release
Task :entry:preBuild
Task :entry:compileDebugNativeWithCmake
Task :entry:collectDebugDependencies
Task :entry:mergeDebugResources
Task :entry:mergeDebugProfile
Task :entry:compileDebugResources
Task :entry:compileDebugIdl
Task :entry:compileDebugRFile
Task :entry:processDebugJavaResource
Task :entry:compileDebugJavaWithJavac
Task :entry:mergeDebugJavaResource
Task :entry:generateDebugClassesJar
Task :entry:mergeDebugProjectDex
Task :entry:generateDebugShell
Task :entry:processDebugShellManifest
Task :entry:compileDebugShellResources
Task :entry:linkDebugShellResources
Task :entry:compileDebugShellJavaWithJavac
Task :entry:mergeDebugShellDex
Task :entry:packageDebugShell
Task :entry:packageDebugSimplifyShell
Task :entry:validateDebugSigning
Task :entry:signDebugShell
Task :entry:packageDebugHap
Task :entry:signDebugHap
Task :entry:assembleDebug
4.配置文件
配置文件是一个命名为config.json的文件,配置应用的一些信息
{
“app”: {
“bundleName”: “com.example.helloworld”,
“vendor”: “example”,
“version”: {
“code”: 1,
“name”: “1.0”
},
“apiVersion”: {
“compatible”: 3,
“target”: 3
}
},
“deviceConfig”: {
“default”: {
}
},
“module”: {
“package”: “com.example.helloworld”,
“name”: “.HelloWorld”,
“reqCapabilities”: [
“video_support”
],
“deviceType”: [
“wearable”
],
“distro”: {
“deliveryWithInstall”: true,
“moduleName”: “entry”,
“moduleType”: “entry”
},
“abilities”: [
{
“skills”: [
{
“entities”: [
“entity.system.home”
],
“actions”: [
“action.system.home”
]
}
],
“orientation”: “landscape”,
“formEnabled”: false,
“name”: “com.example.helloworld.MainAbility”,
“icon”: “
m
e
d
i
a
:
i
c
o
n
"
,
"
d
e
s
c
r
i
p
t
i
o
n
"
:
"
media:icon", "description": "
media:icon","description":"string:mainability_description”,
“label”: “HelloWorld”,
“type”: “page”,
“launchType”: “standard”
}
]
}
深知大多数程序员,想要提升技能,往往是自己摸索成长,但自己不成体系的自学效果低效又漫长,而且极易碰到天花板技术停滞不前!


既有适合小白学习的零基础资料,也有适合3年以上经验的小伙伴深入学习提升的进阶课程,涵盖了95%以上鸿蒙开发知识点,真正体系化!
由于文件比较多,这里只是将部分目录截图出来,全套包含大厂面经、学习笔记、源码讲义、实战项目、大纲路线、讲解视频,并且后续会持续更新
存中…(img-cjSIGkA1-1715890526615)]
既有适合小白学习的零基础资料,也有适合3年以上经验的小伙伴深入学习提升的进阶课程,涵盖了95%以上鸿蒙开发知识点,真正体系化!
由于文件比较多,这里只是将部分目录截图出来,全套包含大厂面经、学习笔记、源码讲义、实战项目、大纲路线、讲解视频,并且后续会持续更新


 52
52

 被折叠的 条评论
为什么被折叠?


