


href=“${pageContext.request.contextPath}/plugins/ionslider/ion.rangeSlider.skinNice.css”>
href=“${pageContext.request.contextPath}/plugins/bootstrap-slider/slider.css”>
href=“${pageContext.request.contextPath}/plugins/bootstrap-datetimepicker/bootstrap-datetimepicker.css”>
<jsp:include page=“header.jsp”></jsp:include>
<jsp:include page=“aside.jsp”></jsp:include>
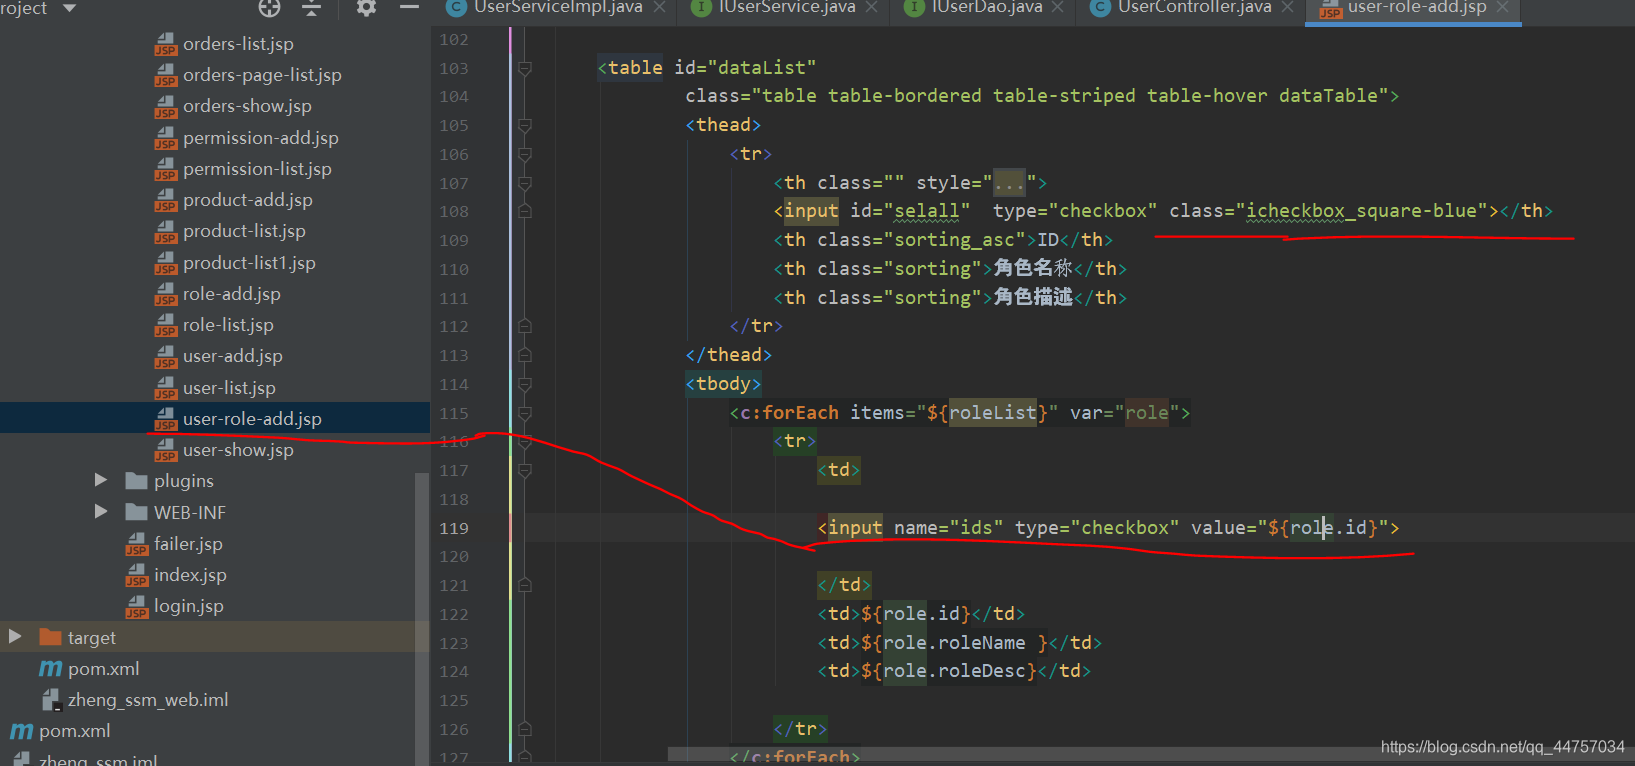
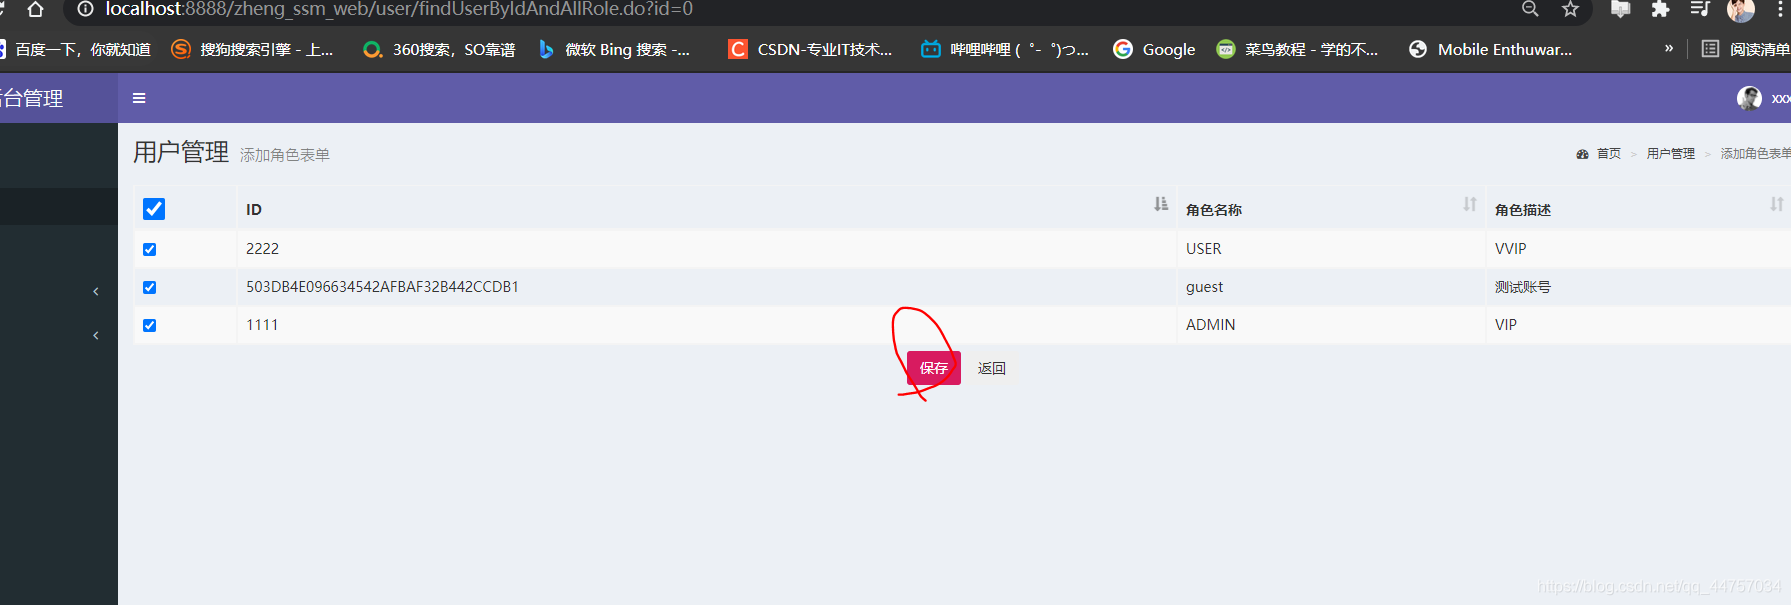
用户管理 添加角色表单
class=“fa fa-dashboard”> 首页
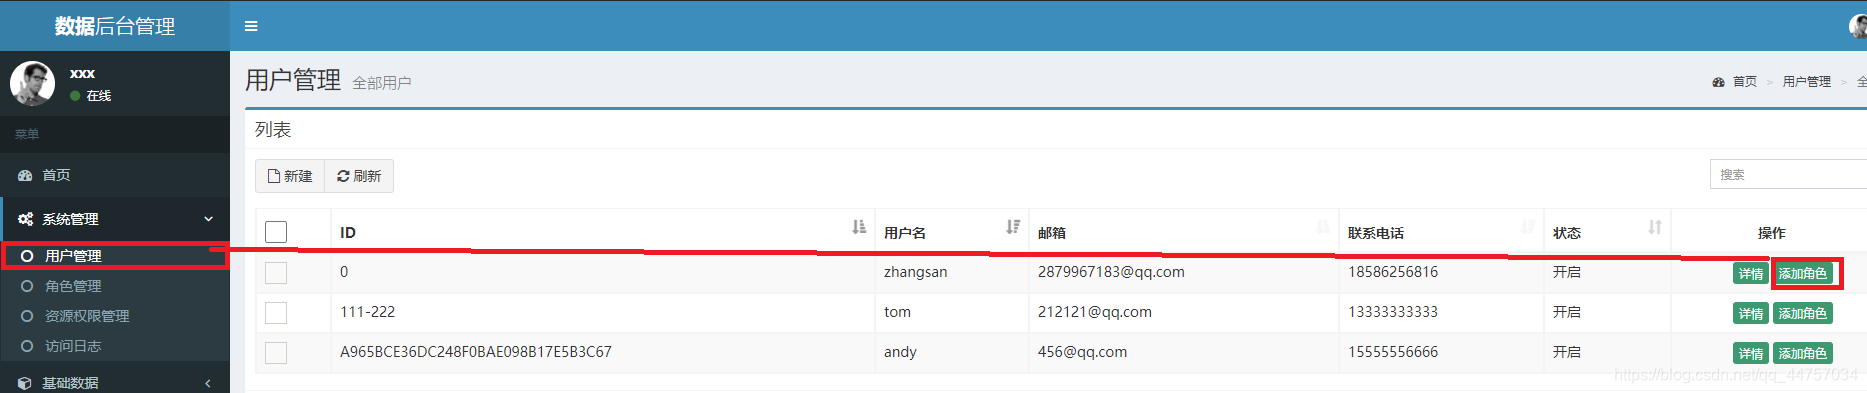
href=“${pageContext.request.contextPath}/user/findAll.do”>用户管理
- 添加角色表单
action=“${pageContext.request.contextPath}/user/addRoleToUser.do”
method=“post”>
class=“table table-bordered table-striped table-hover dataTable”>
<input id=“selall”
type=“checkbox” class=“icheckbox_square-blue”>
ID 角色名称 角色描述<c:forEach items=“${roleList}” var=“role”>
${role.id} ${role.roleName } ${role.roleDesc}</c:forEach>
保存
<button type=“button” class=“btn bg-default”
οnclick=“history.back(-1);”>返回
Version 1.0.8
Copyright © 2014-2017 <a
href=“http://www.itcast.cn”>研究院研发部.
All rights reserved.
5、勾选并保存
(1)在UserController当中创建对应addRoleToUser方法

//给用户添加角色
@RequestMapping(“/addRoleToUser”)
public void addRoleToUser(@RequestParam(name = “userId”, required = true) String userId,
@RequestParam(name = “ids”, required = true) String[] roleIds) {
userService.addRoleToUser(userId,roleIds);
}
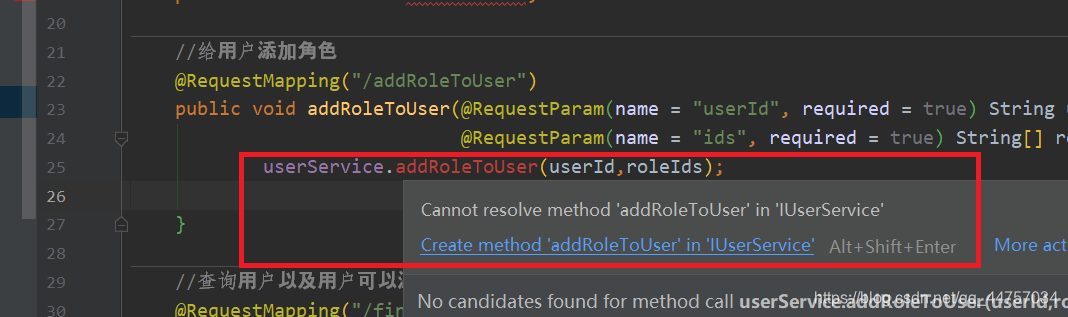
(2)在IUserService当中以及对应的实现类当中创建对应的方法

void addRoleToUser(String userId, String[] roleIds);
在UserServiceImpl当中
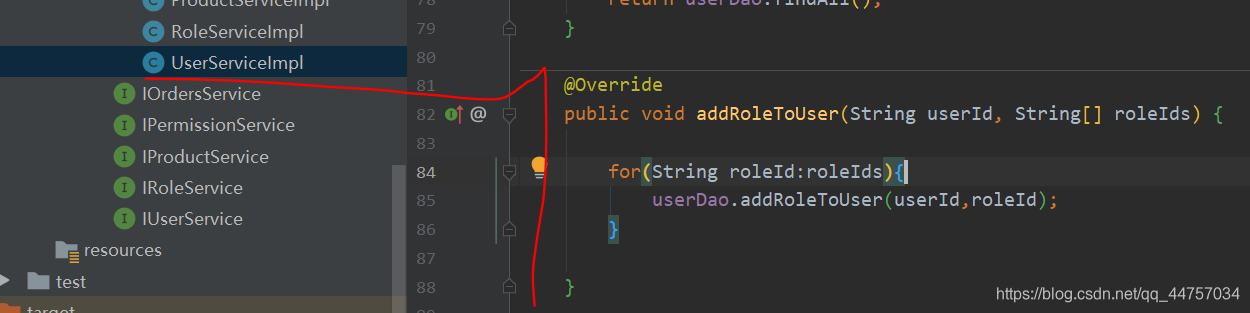
@Override
public void addRoleToUser(String userId, String[] roleIds) {
for(String roleId:roleIds){
userDao.addRoleToUser(userId,roleId);
}
}
(3)在IUserDao当中

@Insert(“insert into users_role(userId,roleId) values (#{userId},#{roleId})”)
void addRoleToUser(String userId, String roleId);
(4)在UserController当中addRoleToUser方法
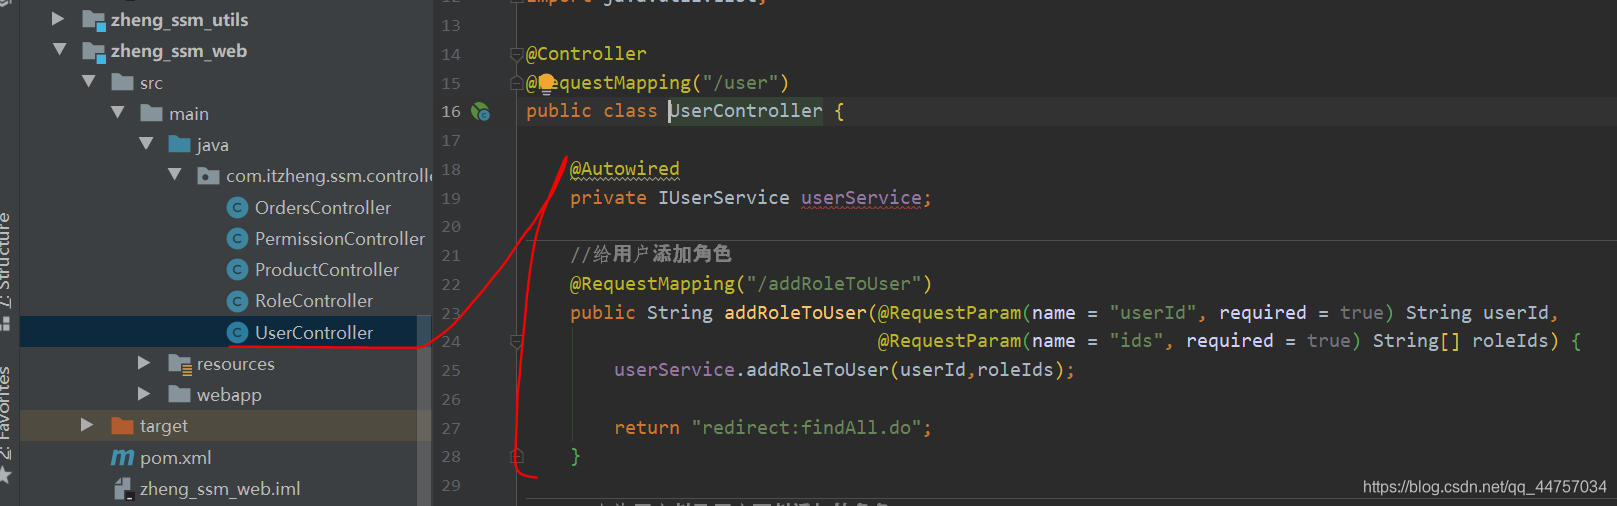
//给用户添加角色
@RequestMapping(“/addRoleToUser”)
public String addRoleToUser(@RequestParam(name = “userId”, required = true) String userId,
@RequestParam(name = “ids”, required = true) String[] roleIds) {
userService.addRoleToUser(userId,roleIds);
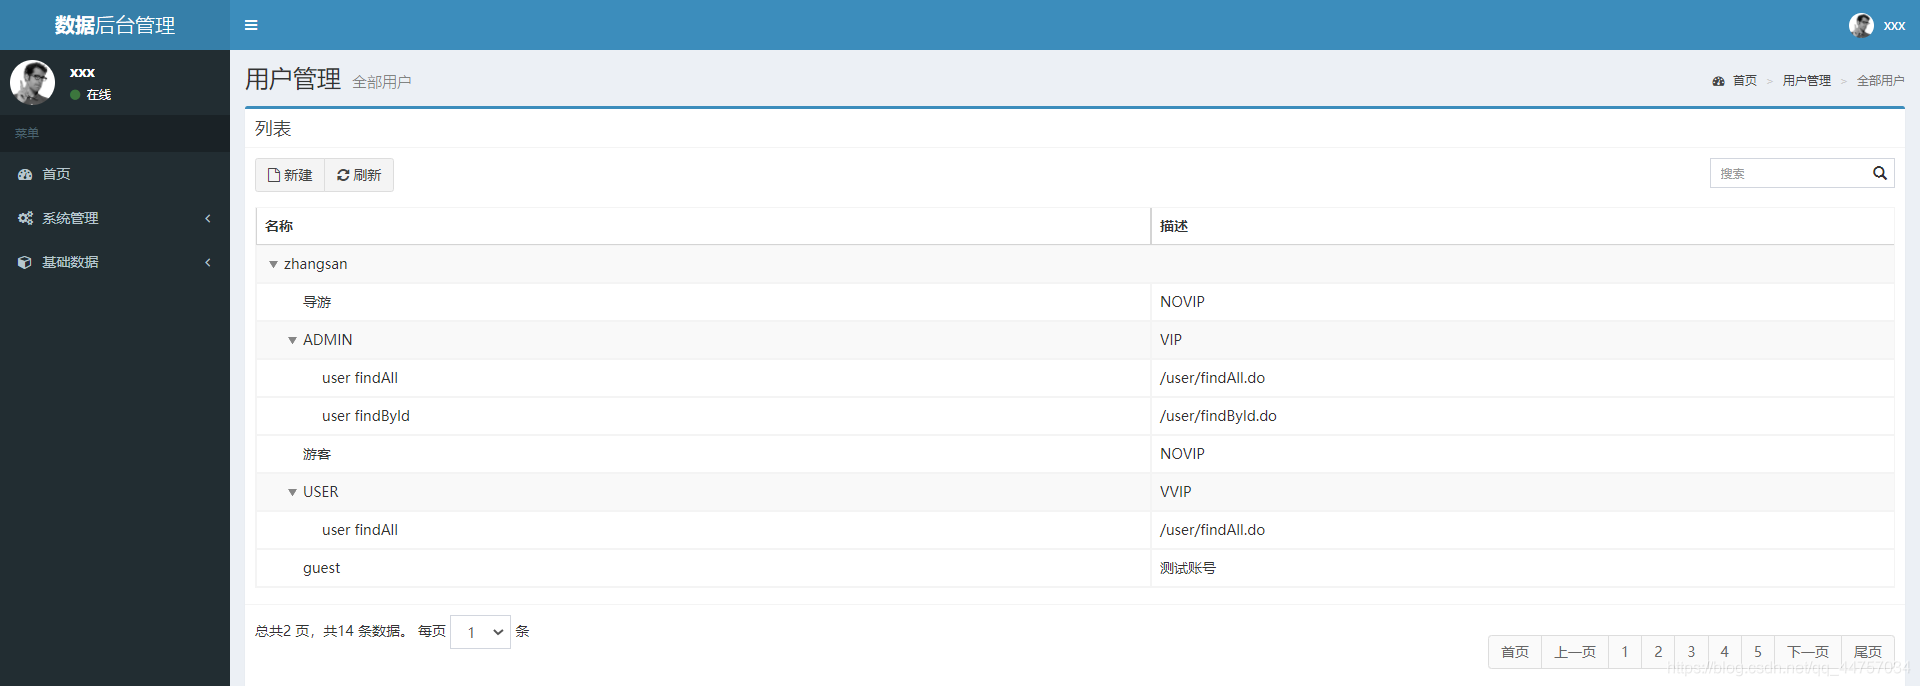
return “redirect:findAll.do”;
}
(5)运行测试
重新运行后访问:http://localhost:8888/zheng_ssm_web

发现报错证明dao出错了
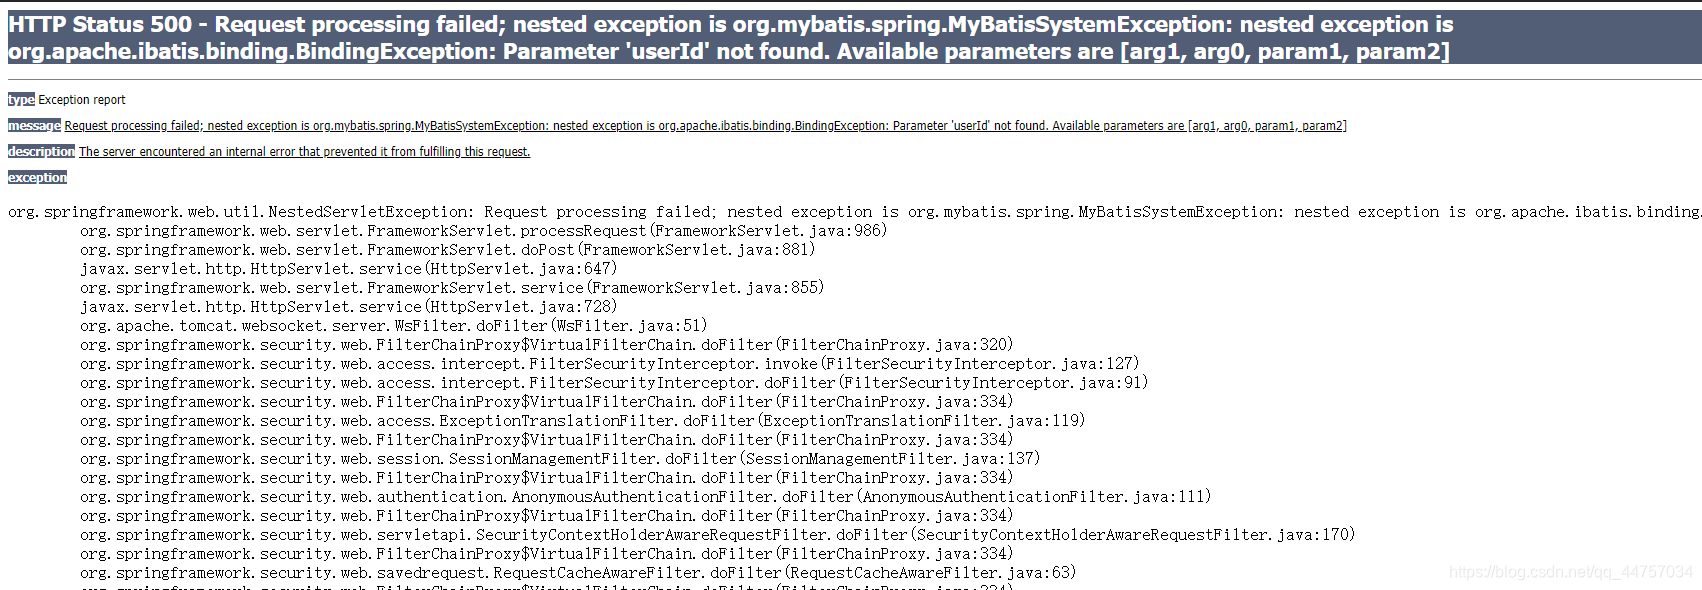
(6)修改IUserDao当中的addRoleToUser方法

@Insert(“insert into users_role(userId,roleId) values (#{userId},#{roleId})”)
void addRoleToUser(@Param(“userId”)String userId,@Param(“roleId”)String roleId);
(7)清理工程并重新运行

1、修改页面
(1)修改role-list.jsp

2、修改RoleController完善对应的方法以及其service和dao
(1)RoleController
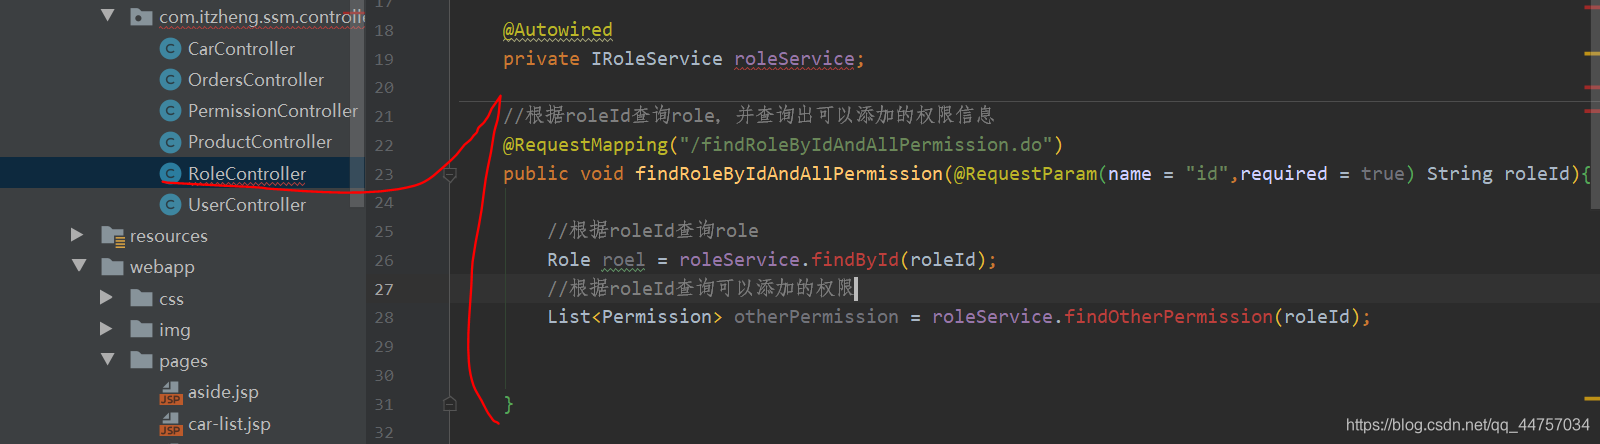
//根据roleId查询role,并查询出可以添加的权限信息
@RequestMapping(“/findRoleByIdAndAllPermission.do”)
public void findRoleByIdAndAllPermission(@RequestParam(name = “id”,required = true) String roleId) throws Exception {
//根据roleId查询role
Role roel = roleService.findById(roleId);
//根据roleId查询可以添加的权限
List otherPermission = roleService.findOtherPermission(roleId);
}
创建对应的方法在service当中

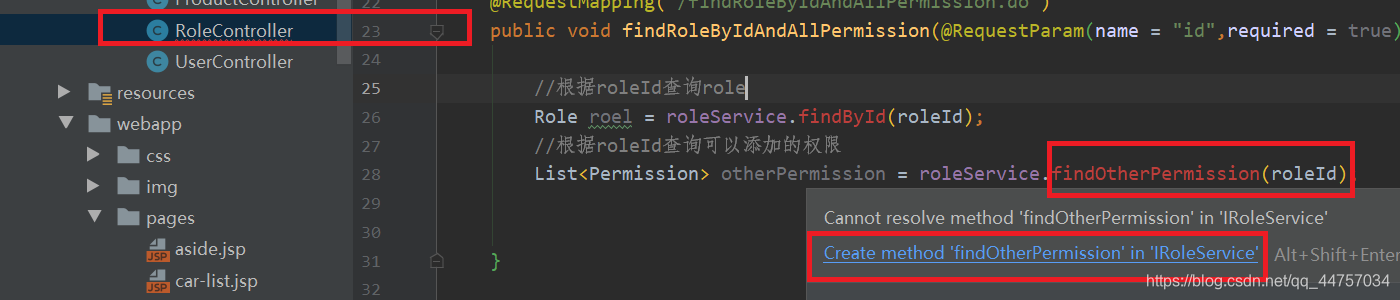
(2)RoleService
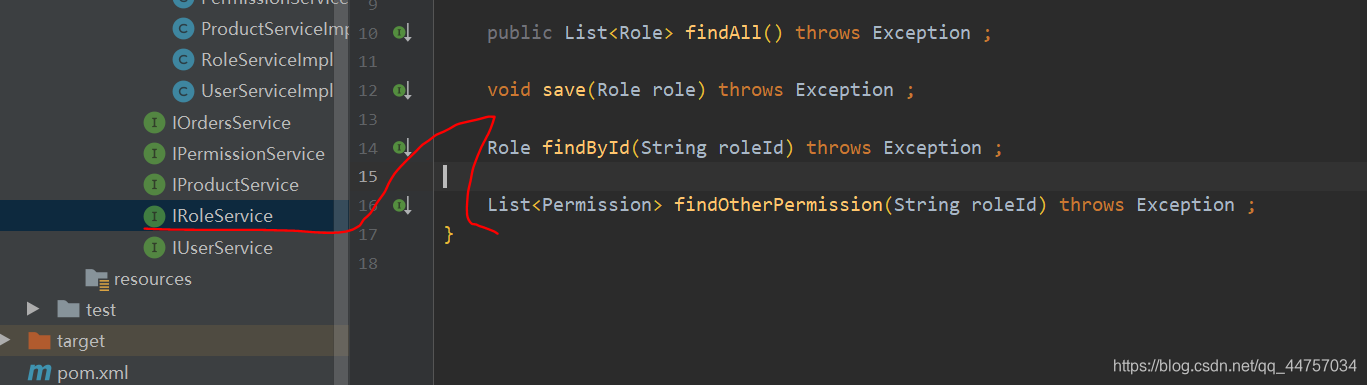
Role findById(String roleId) throws Exception ;
List findOtherPermission(String roleId) throws Exception ;
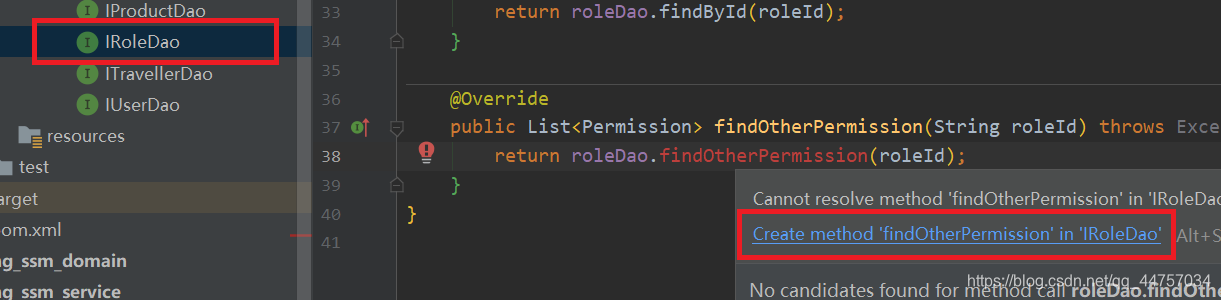
(3)RoleServiceImpl当中

@Override
public Role findById(String roleId) throws Exception {
return roleDao.findById(roleId);
}
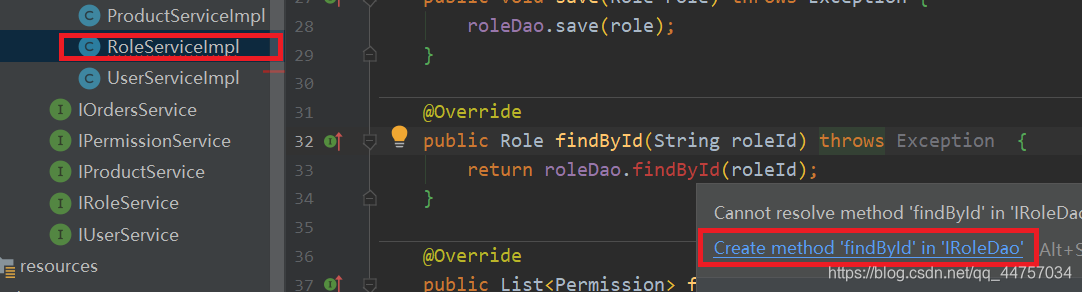
(4)对应的IRoleDao
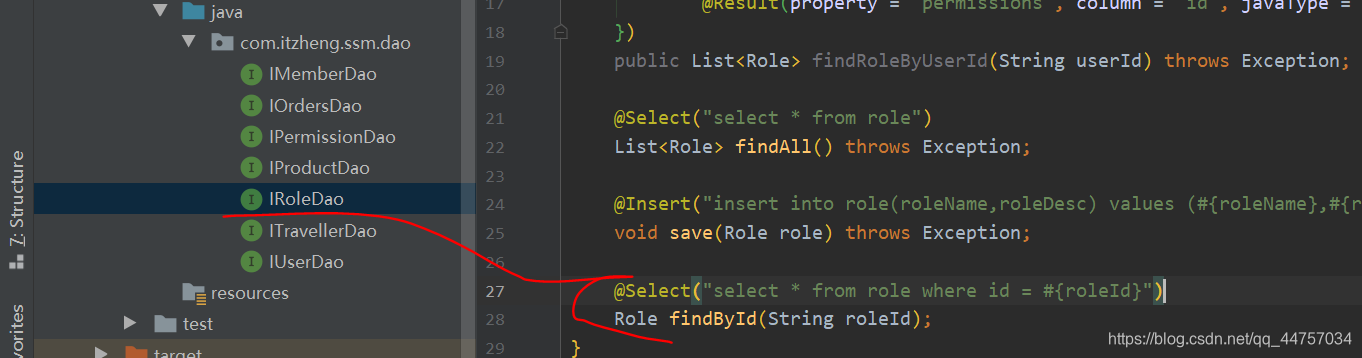
@Select(“select * from role where id = #{roleId}”)
Role findById(String roleId);

@Select(“select * from permission where id not in (select permissionId from role_permission where roleId = #{roleId})”)
List findOtherPermission(String roleId);
(5)完善RoleController当中的findRoleByIdAndAllPermission方法

//根据roleId查询role,并查询出可以添加的权限信息
@RequestMapping(“/findRoleByIdAndAllPermission.do”)
public ModelAndView findRoleByIdAndAllPermission(@RequestParam(name = “id”,required = true) String roleId) throws Exception {
ModelAndView mv = new ModelAndView();
//根据roleId查询role
Role role = roleService.findById(roleId);
//根据roleId查询可以添加的权限
List otherPermission = roleService.findOtherPermission(roleId);
mv.addObject(“role”,role);
mv.addObject(“permissionList”,otherPermission);
mv.setViewName(“role-permission-add”);
return mv;
}
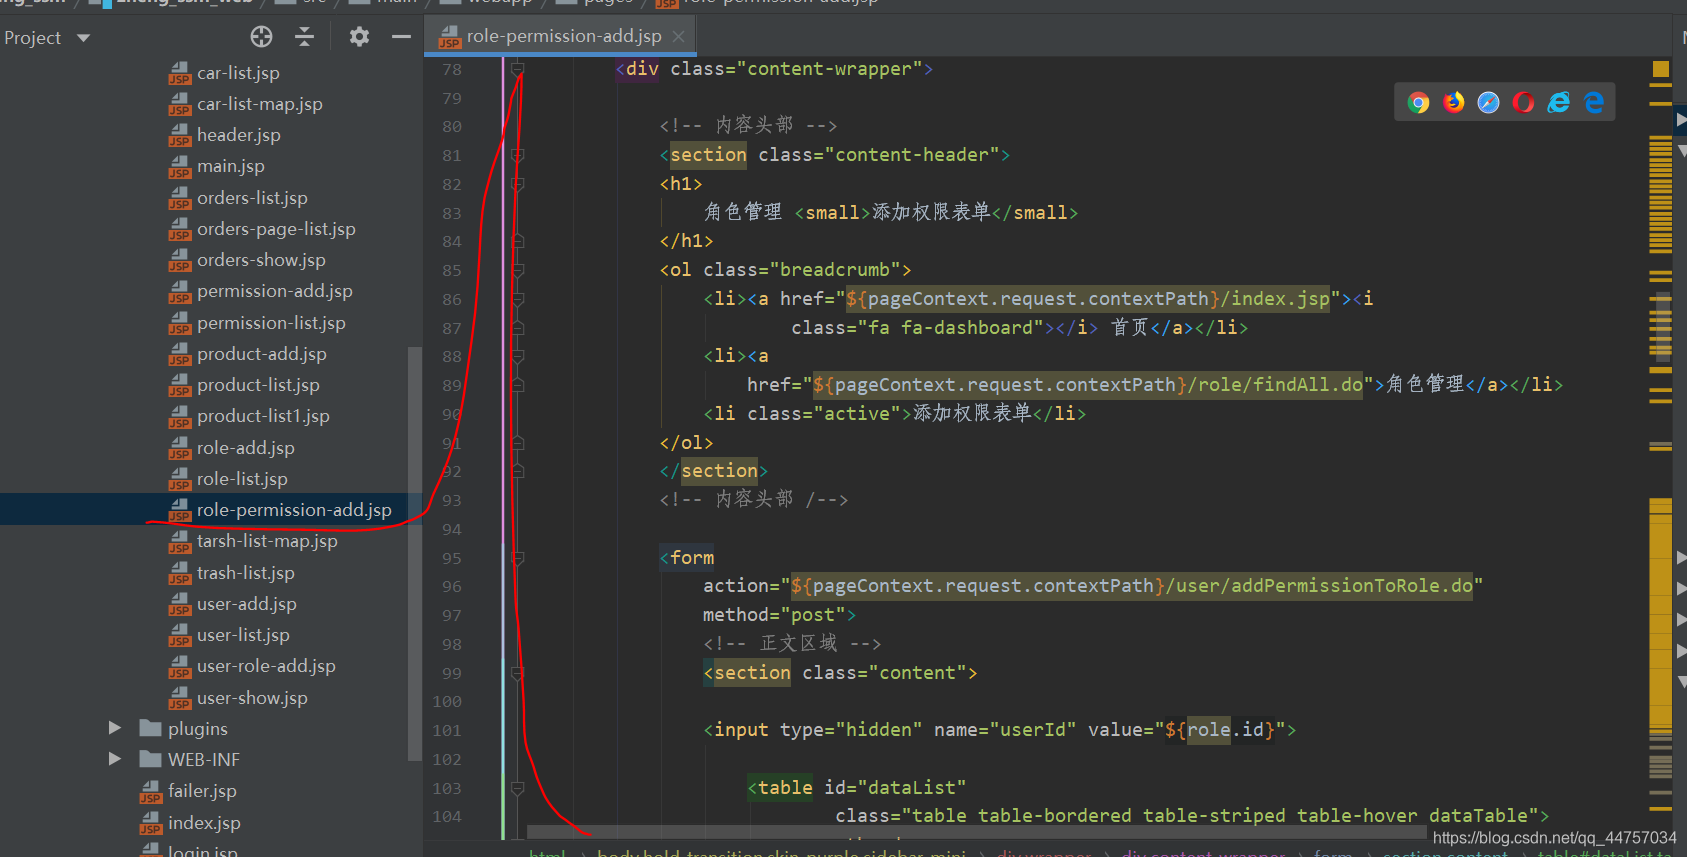
3、创建role-permission-add.jsp
<%@ page language=“java” contentType=“text/html; charset=UTF-8”
pageEncoding=“UTF-8”%>
<%@taglib prefix=“c” uri=“http://java.sun.com/jsp/jstl/core”%>
数据 - AdminLTE2定制版 <meta
content=“width=device-width,initial-scale=1,maximum-scale=1,user-scalable=no”
name=“viewport”>
href=“${pageContext.request.contextPath}/plugins/bootstrap/css/bootstrap.min.css”>
href=“${pageContext.request.contextPath}/plugins/font-awesome/css/font-awesome.min.css”>
href=“${pageContext.request.contextPath}/plugins/ionicons/css/ionicons.min.css”>
href=“${pageContext.request.contextPath}/plugins/iCheck/square/blue.css”>
href=“${pageContext.request.contextPath}/plugins/morris/morris.css”>
href=“${pageContext.request.contextPath}/plugins/jvectormap/jquery-jvectormap-1.2.2.css”>
href=“${pageContext.request.contextPath}/plugins/datepicker/datepicker3.css”>
href=“${pageContext.request.contextPath}/plugins/daterangepicker/daterangepicker.css”>
href=“${pageContext.request.contextPath}/plugins/bootstrap-wysihtml5/bootstrap3-wysihtml5.min.css”>
href=“${pageContext.request.contextPath}/plugins/datatables/dataTables.bootstrap.css”>
href=“${pageContext.request.contextPath}/plugins/treeTable/jquery.treetable.css”>
href=“${pageContext.request.contextPath}/plugins/treeTable/jquery.treetable.theme.default.css”>
href=“${pageContext.request.contextPath}/plugins/select2/select2.css”>
href=“${pageContext.request.contextPath}/plugins/colorpicker/bootstrap-colorpicker.min.css”>
href=“${pageContext.request.contextPath}/plugins/bootstrap-markdown/css/bootstrap-markdown.min.css”>
href=“${pageContext.request.contextPath}/plugins/adminLTE/css/AdminLTE.css”>
href=“${pageContext.request.contextPath}/plugins/adminLTE/css/skins/_all-skins.min.css”>
href=“${pageContext.request.contextPath}/css/style.css”>
href=“${pageContext.request.contextPath}/plugins/ionslider/ion.rangeSlider.css”>
href=“${pageContext.request.contextPath}/plugins/ionslider/ion.rangeSlider.skinNice.css”>
href=“${pageContext.request.contextPath}/plugins/bootstrap-slider/slider.css”>
href=“${pageContext.request.contextPath}/plugins/bootstrap-datetimepicker/bootstrap-datetimepicker.css”>
<jsp:include page=“header.jsp”></jsp:include>
<jsp:include page=“aside.jsp”></jsp:include>
角色管理 添加权限表单
class=“fa fa-dashboard”> 首页
href=“${pageContext.request.contextPath}/role/findAll.do”>角色管理
- 添加权限表单
action=“${pageContext.request.contextPath}/user/addPermissionToRole.do”
method=“post”>
class=“table table-bordered table-striped table-hover dataTable”>
ID 权限名称 权限URL<c:forEach items=“${permissionList}” var=“permission”>
${permission.id} ${permission.permissionName } ${permission.url}</c:forEach>
保存
<button type=“button” class=“btn bg-default”
οnclick=“history.back(-1);”>返回
Version 1.0.8
Copyright © 2014-2017 <a
href=“http://www.itcast.cn”>研究院研发部.
All rights reserved.


 369
369

 被折叠的 条评论
为什么被折叠?
被折叠的 条评论
为什么被折叠?
 到【灌水乐园】发言


