


通过训练建筑工地车辆挖掘机压路机数据集 建立基于YOLO11的建筑工地移动车辆目标检测识别系统智慧工地识别
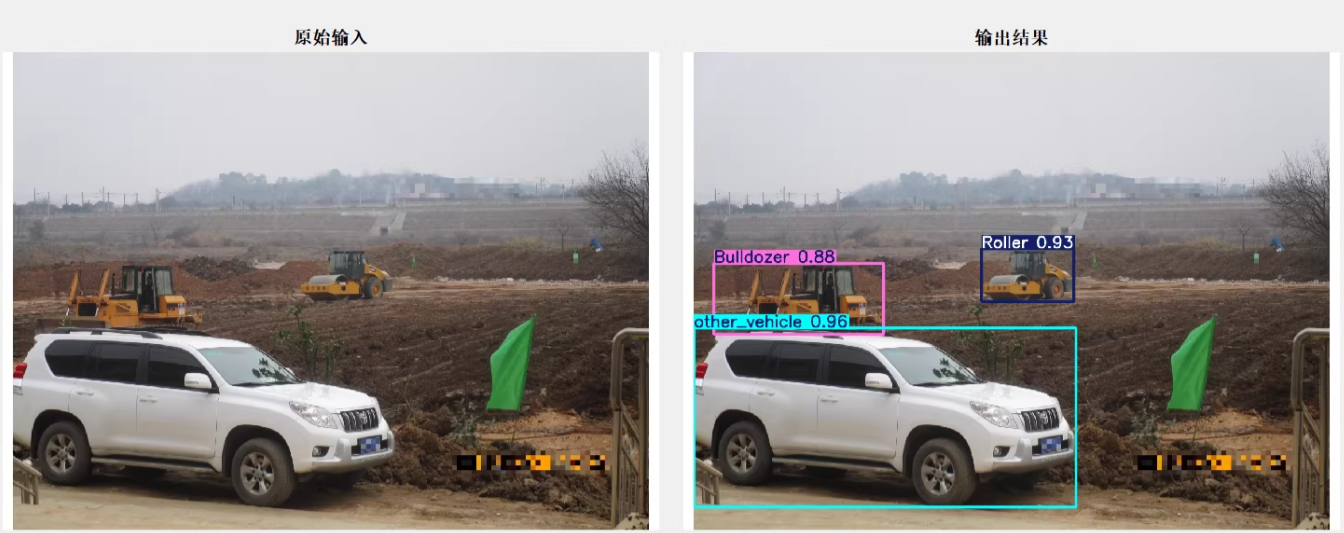
基于YOLO11的建筑工地移动目标检测实战系统 选择图片或视频检测,实时输出检测结果。包括 Bulldozer、Roller 等,是工地管理的好帮手。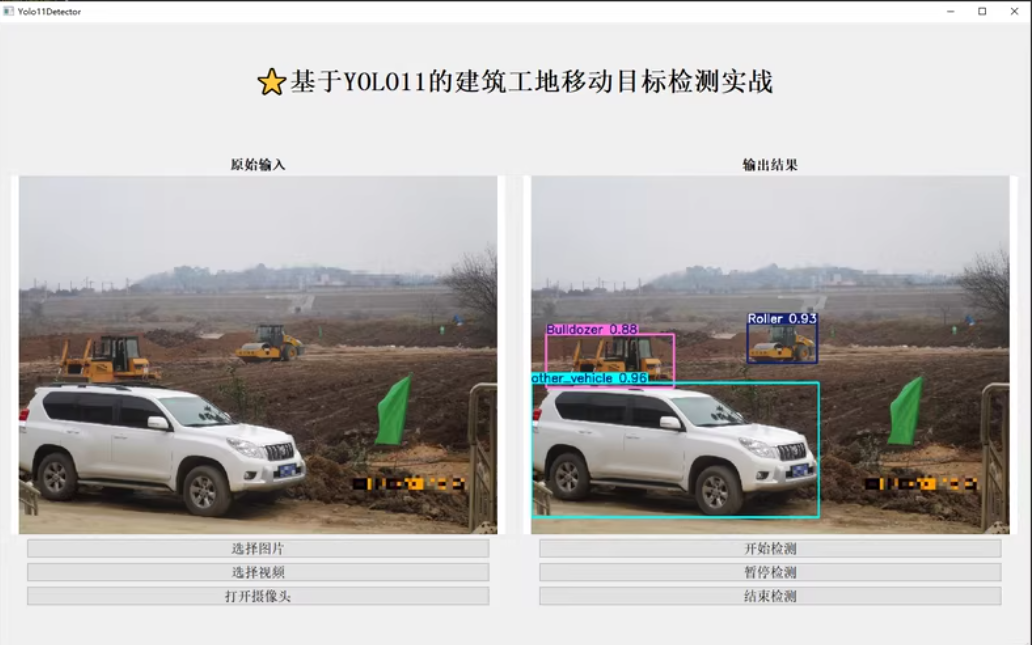
预实现功能呢
:开始检测、暂停检测、结束检测都有明确按钮指示。检测框以彩色显示,方便识别不同车辆和设备。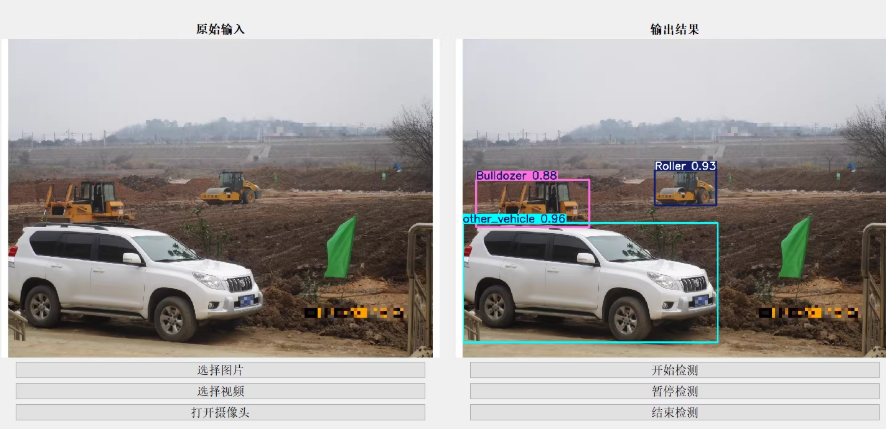
基于YOLOv11的建筑工地移动目标检测实战系统,包括选择图片或视频检测、实时输出检测结果,并且具有明确的操作按钮指示和彩色检测框显示,需要经过以下几个步骤:数据准备、环境搭建、模型训练、推理代码编写以及界面开发。代码示例,仅供参考。
数据准备
确保你的数据集已准备好,并按照以下结构组织:
construction_site_dataset/
├── images/
│   ├── train/
│   ├── val/
│   └── test/
└── labels/
    ├── train/
    ├── val/
    └── test/
images/train/,images/val/,images/test/分别存放训练、验证和测试图像。labels/train/,labels/val/,labels/test/存放对应图像的标签文件(YOLO格式)。
每个标签文件包含一行信息,格式如下:class_id center_x center_y width height,所有坐标值都是相对于图像尺寸归一化的。
数据配置
创建一个名为 data.yaml 的文件来描述数据集的路径和类别信息:
train: ./construction_site_dataset/images/train/
val: ./construction_site_dataset/images/val/
test: ./construction_site_dataset/images/test/

nc: 3 # 类别数量(Bulldozer, Roller, other_vehicle)
names: ['Bulldozer', 'Roller', 'other_vehicle'] # 类别名称
环境搭建
安装必要的库:
pip install ultralytics opencv-python numpy
模型训练
使用YOLOv8进行模型训练(假设YOLOv11尚未发布,这里使用YOLOv8作为替代):
yolo detect train model=yolov8n.pt data=data.yaml batch=16 epochs=100 imgsz=640 device=cuda
这里,epochs 设置为100,可以根据需要调整。device=cuda 表示使用GPU加速训练。
推理代码
训练完成后,可以编写Python脚本对新图像或视频进行推理:
from ultralytics import YOLO
import cv2
import numpy as np

# 加载训练好的模型
model = YOLO('runs/detect/train/weights/best.pt')

def infer_image(image_path):
    results = model.predict(source=image_path, imgsz=640)

    for r in results:
        boxes = r.boxes.xyxy.cpu().numpy()
        scores = r.boxes.conf.cpu().numpy()
        labels = r.boxes.cls.cpu().numpy()

        image = cv2.imread(image_path)
        for box, score, label in zip(boxes, scores, labels):
            x1, y1, x2, y2 = map(int, box)
            color = (0, 255, 0) if label == 0 else (0, 0, 255) if label == 1 else (255, 0, 0)
            cv2.rectangle(image, (x1, y1), (x2, y2), color, 2)
            cv2.putText(image, f"{r.names[int(label)]} {score:.4f}", (x1, y1 - 10), cv2.FONT_HERSHEY_SIMPLEX, 0.9, color, 2)

        cv2.imshow("Inference Result", image)
        cv2.waitKey(0)
        cv2.destroyAllWindows()

# 测试图像路径
infer_image('path/to/test/image.jpg')
视频推理
对于视频推理,可以修改上述脚本以处理视频流:
def infer_video(video_path):
    cap = cv2.VideoCapture(video_path)
    while cap.isOpened():
        ret, frame = cap.read()
        if not ret:
            break

        results = model.predict(source=frame, imgsz=640)

        for r in results:
            boxes = r.boxes.xyxy.cpu().numpy()
            scores = r.boxes.conf.cpu().numpy()
            labels = r.boxes.cls.cpu().numpy()

            for box, score, label in zip(boxes, scores, labels):
                x1, y1, x2, y2 = map(int, box)
                color = (0, 255, 0) if label == 0 else (0, 0, 255) if label == 1 else (255, 0, 0)
                cv2.rectangle(frame, (x1, y1), (x2, y2), color, 2)
                cv2.putText(frame, f"{r.names[int(label)]} {score:.4f}", (x1, y1 - 10), cv2.FONT_HERSHEY_SIMPLEX, 0.9, color, 2)

        cv2.imshow("Inference Result", frame)
        if cv2.waitKey(1) & 0xFF == ord('q'):
            break

    cap.release()
    cv2.destroyAllWindows()

# 测试视频路径
infer_video('path/to/test/video.mp4')
构建用户界面
我们可以使用tkinter库来构建一个简单的GUI,用于选择图像或视频进行检测:
import tkinter as tk
from tkinter import filedialog, messagebox
from PIL import Image, ImageTk
import cv2
from ultralytics import YOLO

class ConstructionSiteDetectorApp:
    def __init__(self, root):
        self.root = root
        self.root.title("建筑工地移动目标检测系统")

        self.image_label = tk.Label(root)
        self.image_label.pack()

        self.create_button("选择图片", self.select_image)
        self.create_button("选择视频", self.select_video)
        self.create_button("打开摄像头", self.open_camera)
        self.create_button("开始检测", self.start_detection)
        self.create_button("暂停检测", self.pause_detection)
        self.create_button("结束检测", self.stop_detection)

        self.model = YOLO('runs/detect/train/weights/best.pt')
        self.cap = None
        self.running = False

    def create_button(self, text, command):
        button = tk.Button(self.root, text=text, command=command)
        button.pack(pady=5)

    def select_image(self):
        file_path = filedialog.askopenfilename(filetypes=[("Image files", "*.jpg *.png")])
        if file_path:
            self.image_path = file_path
            self.show_image(file_path)

    def show_image(self, image_path):
        image = Image.open(image_path)
        image = image.resize((600, 400))
        photo = ImageTk.PhotoImage(image)
        self.image_label.config(image=photo)
        self.image_label.image = photo

    def select_video(self):
        file_path = filedialog.askopenfilename(filetypes=[("Video files", "*.mp4 *.avi")])
        if file_path:
            self.video_path = file_path

    def open_camera(self):
        self.cap = cv2.VideoCapture(0)

    def start_detection(self):
        if hasattr(self, 'image_path'):
            infer_image(self.image_path)
        elif hasattr(self, 'video_path'):
            infer_video(self.video_path)
        elif self.cap is not None:
            self.running = True
            self.detect_from_camera()

    def pause_detection(self):
        self.running = False

    def stop_detection(self):
        self.running = False
        if self.cap is not None:
            self.cap.release()
            self.cap = None

    def detect_from_camera(self):
        if self.running and self.cap is not None:
            ret, frame = self.cap.read()
            if ret:
                results = self.model.predict(source=frame, imgsz=640)

                for r in results:
                    boxes = r.boxes.xyxy.cpu().numpy()
                    scores = r.boxes.conf.cpu().numpy()
                    labels = r.boxes.cls.cpu().numpy()

                    for box, score, label in zip(boxes, scores, labels):
                        x1, y1, x2, y2 = map(int, box)
                        color = (0, 255, 0) if label == 0 else (0, 0, 255) if label == 1 else (255, 0, 0)
                        cv2.rectangle(frame, (x1, y1), (x2, y2), color, 2)
                        cv2.putText(frame, f"{r.names[int(label)]} {score:.4f}", (x1, y1 - 10), cv2.FONT_HERSHEY_SIMPLEX, 0.9, color, 2)

                cv2.imshow("Camera Detection", frame)
                if cv2.waitKey(1) & 0xFF == ord('q'):
                    self.stop_detection()

            self.root.after(10, self.detect_from_camera)

if __name__ == "__main__":
    root = tk.Tk()
    app = ConstructionSiteDetectorApp(root)
    root.mainloop()
构建一个基于YOLOv8的建筑工地移动目标检测实战系统了。


 被折叠的 条评论
为什么被折叠?
被折叠的 条评论
为什么被折叠?
 到【灌水乐园】发言


