


深度学习框架yolov5目标检测算法如何训练 电力设备缺陷电线缺陷数据集_电塔电线缺陷检测数据集 建立深度学习电力设备输电线缺陷检测
以下文字及代码仅供参考,
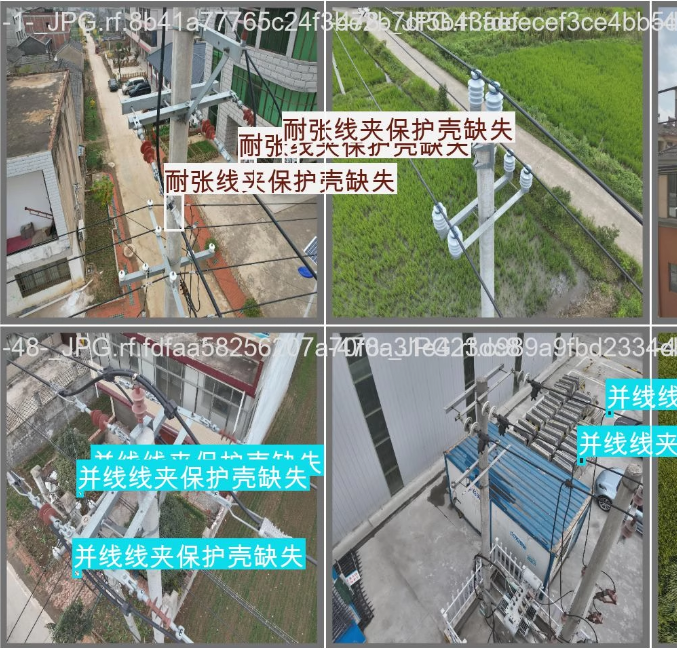
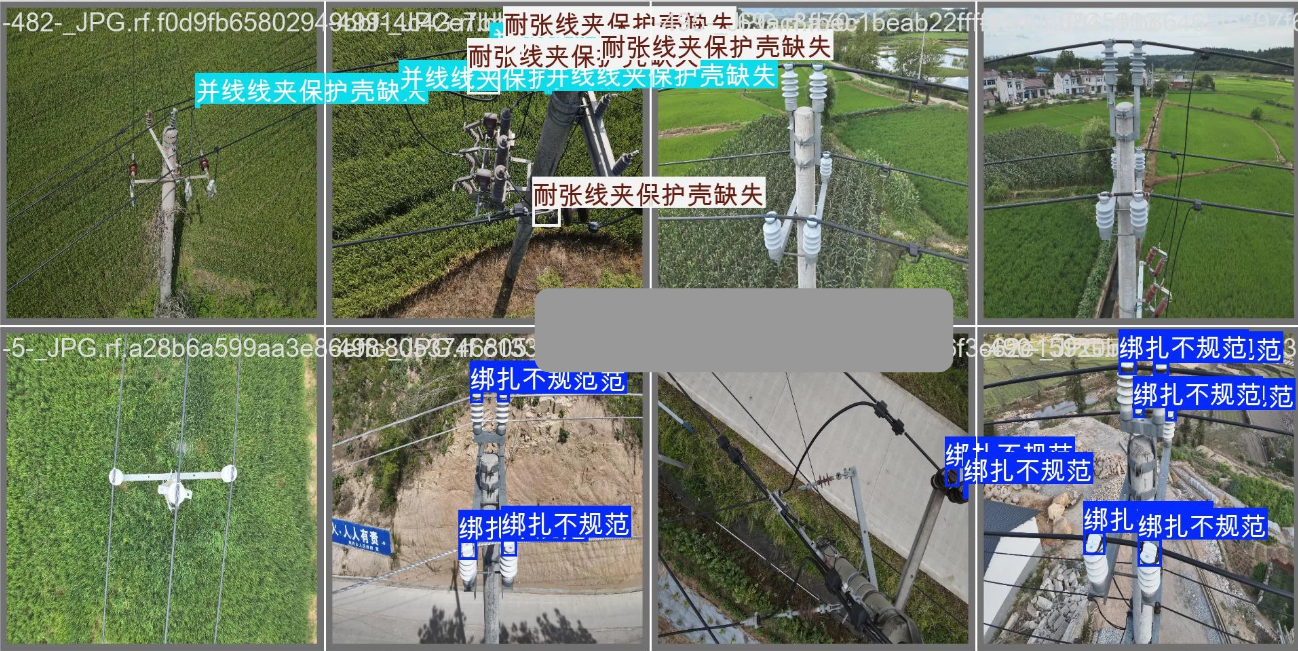
电塔电线缺陷检测数据集9838张 5类
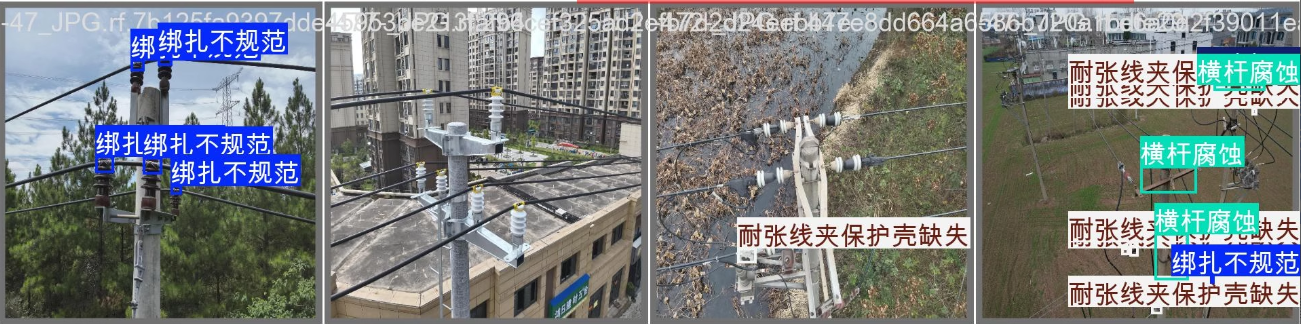
电塔电线缺陷检测数据集9838张,
8比2划分为训练集和验证集,
训练集7870张,验证集1968张,
分为5类,分类为:‘绑扎不规范’, ‘并线线夹保护壳缺失’, ‘耐张线夹保护壳缺失’, ‘横杆腐蚀’, ‘塔头损坏’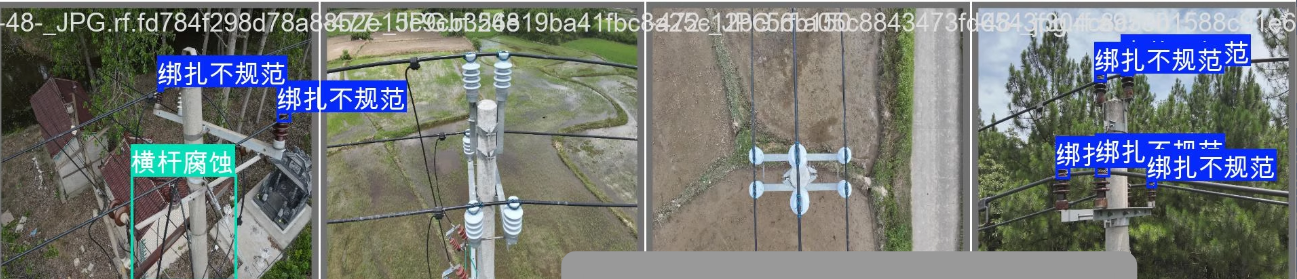
| 类别 | 图片数 | 标注框数 |
|---|---|---|
| 绑扎不规范 | 3717 | 14510 |
| 并线线夹保护壳缺失 | 3317 | 11285 |
| 耐张线夹保护壳缺失 | 3748 | 16148 |
| 横杆腐蚀 | 987 | 1556 |
| 塔头损坏 | 972 | 1021 |
1
为了使用YOLOv5训练电塔电线缺陷检测数据集,我们需要经过一系列步骤来准备数据、配置环境、训练模型并评估其性能。以下是详细的步骤和代码示例。
1. 环境搭建
首先,确保安装了必要的库:
pip install torch torchvision torchaudio
git clone https://github.com/ultralytics/yolov5  # 克隆YOLOv5仓库
cd yolov5
pip install -r requirements.txt
2. 数据准备
格式转换与数据划分
假设你的标注数据是Pascal VOC格式(XML文件),需要将其转换为YOLO所需的TXT格式(每行代表一个对象,格式为<class_index> <x_center> <y_center> <width> <height>,其中坐标值归一化)。
编写Python脚本进行转换和数据划分:
import os
import xml.etree.ElementTree as ET
from sklearn.model_selection import train_test_split

def convert_annotation(xml_file, classes):
    in_file = open(xml_file)
    tree = ET.parse(in_file)
    root = tree.getroot()
    size = root.find('size')
    w = int(size.find('width').text)
    h = int(size.find('height').text)

    lines = []
    for obj in root.iter('object'):
        difficult = obj.find('difficult').text
        cls = obj.find('name').text
        if cls not in classes or int(difficult) == 1:
            continue
        cls_id = classes.index(cls)
        xmlbox = obj.find('bndbox')
        b = (float(xmlbox.find('xmin').text), float(xmlbox.find('xmax').text),
             float(xmlbox.find('ymin').text), float(xmlbox.find('ymax').text))
        bb = convert((w, h), b)
        lines.append(f"{cls_id} {' '.join(map(str, bb))}\n")
    return lines

def convert(size, box):
    dw = 1./(size[0])
    dh = 1./(size[1])
    x = (box[0] + box[1])/2.0
    y = (box[2] + box[3])/2.0
    w = box[1] - box[0]
    h = box[3] - box[2]
    x = x*dw
    w = w*dw
    y = y*dh
    h = h*dh
    return (x,y,w,h)

# 假设你的图像和标注文件位于同一目录下
images = [f for f in os.listdir('path/to/images') if f.endswith('.jpg')]
train_images, val_images = train_test_split(images, test_size=0.2, random_state=42)

classes = ['绑扎不规范', '并线线夹保护壳缺失', '耐张线夹保护壳缺失', '横杆腐蚀', '塔头损坏']

for image_set in ['train', 'val']:
    list_file = open(f'{image_set}.txt', 'w')
    images_to_process = train_images if image_set == 'train' else val_images
    for img in images_to_process:
        txt_file = img.replace('.jpg', '.txt')
        with open(os.path.join('path/to/labels', txt_file), 'w') as out_file:
            xml_file = os.path.join('path/to/annotations', img.replace('.jpg', '.xml'))
            lines = convert_annotation(xml_file, classes)
            out_file.writelines(lines)
        list_file.write(f"path/to/images/{img}\n")
    list_file.close()
3. 数据配置
创建一个.yaml文件来定义你的数据集路径和类别信息:
train: ./data/train.txt
val: ./data/val.txt
nc: 5
names: ['绑扎不规范', '并线线夹保护壳缺失', '耐张线夹保护壳缺失', '横杆腐蚀', '塔头损坏']
4. 模型训练
使用YOLOv5的训练脚本来训练模型:
python train.py --img 640 --batch 16 --epochs 100 --data data.yaml --weights yolov5s.pt
--img:输入图像尺寸。--batch:批次大小。--epochs:训练周期数。--data:数据配置文件路径。--weights:预训练权重路径(可以使用YOLOv5的预训练模型作为起点)。
5. 配置超参数
根据实验结果调整学习率、批次大小、训练轮次等超参数以优化模型性能。
6. 模型推理
训练完成后,你可以使用如下命令进行推理:
python detect.py --source path/to/test/image.jpg --weights runs/train/exp/weights/best.pt --conf 0.25
7. 推理代码
为了批量处理图像并保存结果,可以修改detect.py脚本或编写新的Python脚本:
from pathlib import Path
from models.experimental import attempt_load
from utils.general import non_max_suppression, scale_coords
from utils.torch_utils import select_device
import cv2

device = select_device('')
model = attempt_load('runs/train/exp/weights/best.pt', map_location=device)

def process_image(image_path):
    img = cv2.imread(image_path)
    # 图像预处理...
    pred = model(img, augment=False)[0]
    pred = non_max_suppression(pred, 0.25, 0.45, classes=None, agnostic=False)
    # 后处理预测结果...
    return results

image_paths = list(Path('path/to/images').glob('*.jpg'))
for image_path in image_paths:
    results = process_image(str(image_path))
    # 保存或显示结果...
8. 性能评估
使用mAP(mean Average Precision)等指标评估模型性能。YOLOv5自带的val.py脚本可以帮助完成这项工作:
python val.py --data data.yaml --weights runs/train/exp/weights/best.pt --img 640


 被折叠的 条评论
为什么被折叠?
被折叠的 条评论
为什么被折叠?
 到【灌水乐园】发言


