


第一章 小程序简介
小程序特征
无需安装
触手可及
用完即走
无需卸载
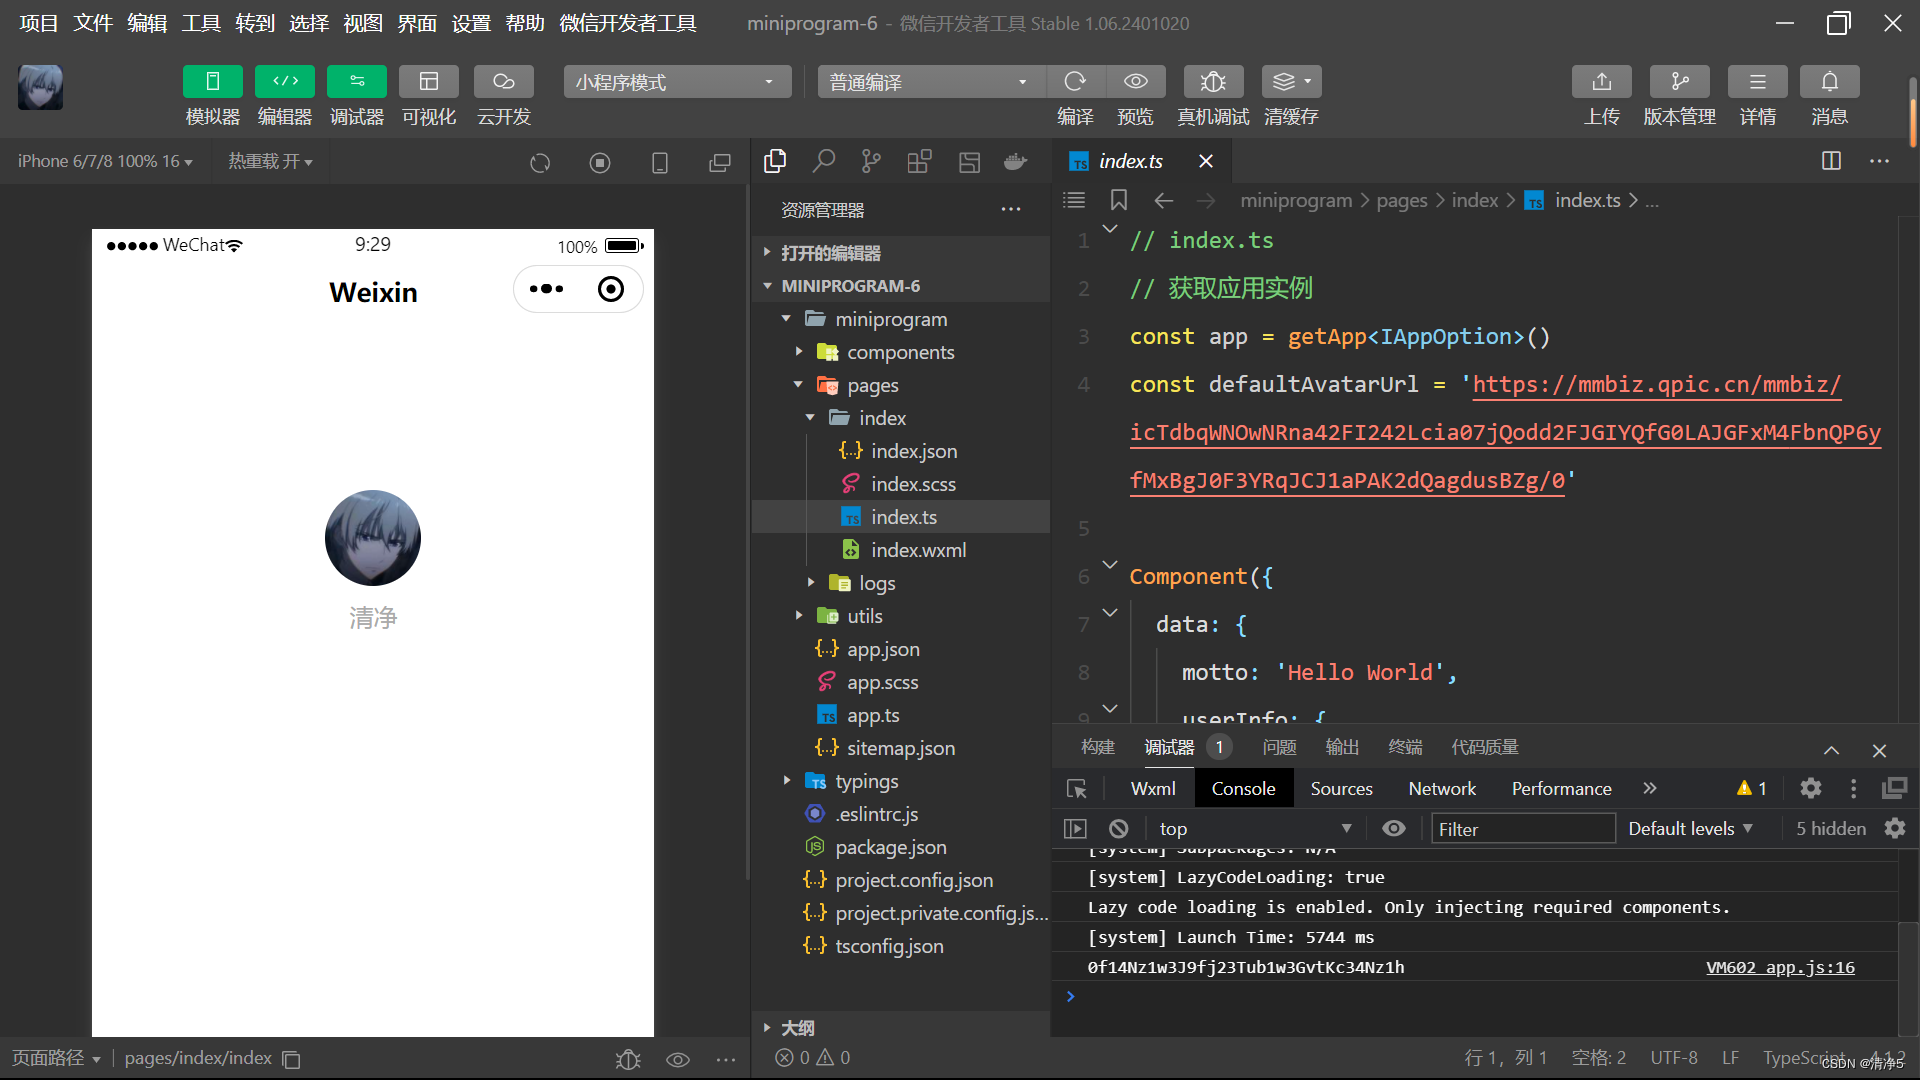
js:
// index.js
const defaultAvatarUrl = 'https://mmbiz.qpic.cn/mmbiz/icTdbqWNOwNRna42FI242Lcia07jQodd2FJGIYQfG0LAJGFxM4FbnQP6yfMxBgJ0F3YRqJCJ1aPAK2dQagdusBZg/0'

Page({
  data: {
    motto: 'Hello World',
    userInfo: {
      avatarUrl: defaultAvatarUrl,
      nickName: '',
    },
    hasUserInfo: false,
    canIUseGetUserProfile: wx.canIUse('getUserProfile'),
    canIUseNicknameComp: wx.canIUse('input.type.nickname'),
  },
  bindViewTap() {
    wx.navigateTo({
      url: '../logs/logs'
    })
  },
  onChooseAvatar(e) {
    const { avatarUrl } = e.detail
    const { nickName } = this.data.userInfo
    this.setData({
      "userInfo.avatarUrl": avatarUrl,
      hasUserInfo: nickName && avatarUrl && avatarUrl !== defaultAvatarUrl,
    })
  },
  onInputChange(e) {
    const nickName = e.detail.value
    const { avatarUrl } = this.data.userInfo
    this.setData({
      "userInfo.nickName": nickName,
      hasUserInfo: nickName && avatarUrl && avatarUrl !== defaultAvatarUrl,
    })
  },
  getUserProfile(e) {
    // 推荐使用wx.getUserProfile获取用户信息,开发者每次通过该接口获取用户个人信息均需用户确认,开发者妥善保管用户快速填写的头像昵称,避免重复弹窗
    wx.getUserProfile({
      desc: '展示用户信息', // 声明获取用户个人信息后的用途,后续会展示在弹窗中,请谨慎填写
      success: (res) => {
        console.log(res)
        this.setData({
          userInfo: res.userInfo,
          hasUserInfo: true
        })
      }
    })
  },
})
wxml:
//wxml
<!--index.wxml-->
<scroll-view class="scrollarea" scroll-y type="list">
  <view class="container">
    <view class="userinfo">
      <block wx:if="{{canIUseNicknameComp && !hasUserInfo}}">
        <button class="avatar-wrapper" open-type="chooseAvatar" bind:chooseavatar="onChooseAvatar">
          <image class="avatar" src="{{userInfo.avatarUrl}}"></image>
        </button>
        <view class="nickname-wrapper">
          <text class="nickname-label">昵称</text>
          <input type="nickname" class="nickname-input" placeholder="请输入昵称" bind:change="onInputChange" />
        </view>
      </block>
      <block wx:elif="{{!hasUserInfo}}">
        <button wx:if="{{canIUseGetUserProfile}}" bindtap="getUserProfile"> 获取头像昵称 </button>
        <view wx:else> 请使用2.10.4及以上版本基础库 </view>
      </block>
      <block wx:else>
        <image bindtap="bindViewTap" class="userinfo-avatar" src="{{userInfo.avatarUrl}}" mode="cover"></image>
        <text class="userinfo-nickname">{{userInfo.nickName}}</text>
      </block>
    </view>
    <view class="usermotto">
      <text class="user-motto">{{motto}}</text>
    </view>
  </view>
</scroll-view>
json:
//json
{
  "usingComponents": {
  }
}
wxss:
/**index.wxss**/
page {
  height: 100vh;
  display: flex;
  flex-direction: column;
}
.scrollarea {
  flex: 1;
  overflow-y: hidden;
}

.userinfo {
  display: flex;
  flex-direction: column;
  align-items: center;
  color: #aaa;
  width: 80%;
}

.userinfo-avatar {
  overflow: hidden;
  width: 128rpx;
  height: 128rpx;
  margin: 20rpx;
  border-radius: 50%;
}

.usermotto {
  margin-top: 200px;
}

.avatar-wrapper {
  padding: 0;
  width: 56px !important;
  border-radius: 8px;
  margin-top: 40px;
  margin-bottom: 40px;
}

.avatar {
  display: block;
  width: 56px;
  height: 56px;
}

.nickname-wrapper {
  display: flex;
  width: 100%;
  padding: 16px;
  box-sizing: border-box;
  border-top: .5px solid rgba(0, 0, 0, 0.1);
  border-bottom: .5px solid rgba(0, 0, 0, 0.1);
  color: black;
}

.nickname-label {
  width: 105px;
}

.nickname-input {
  flex: 1;
}
小程序应用场景及特点
简单的业务逻辑
低频的使用场景
微信小程序开发流程
注册小程序账号
开发环境准备
微信开发工具的下载及安装
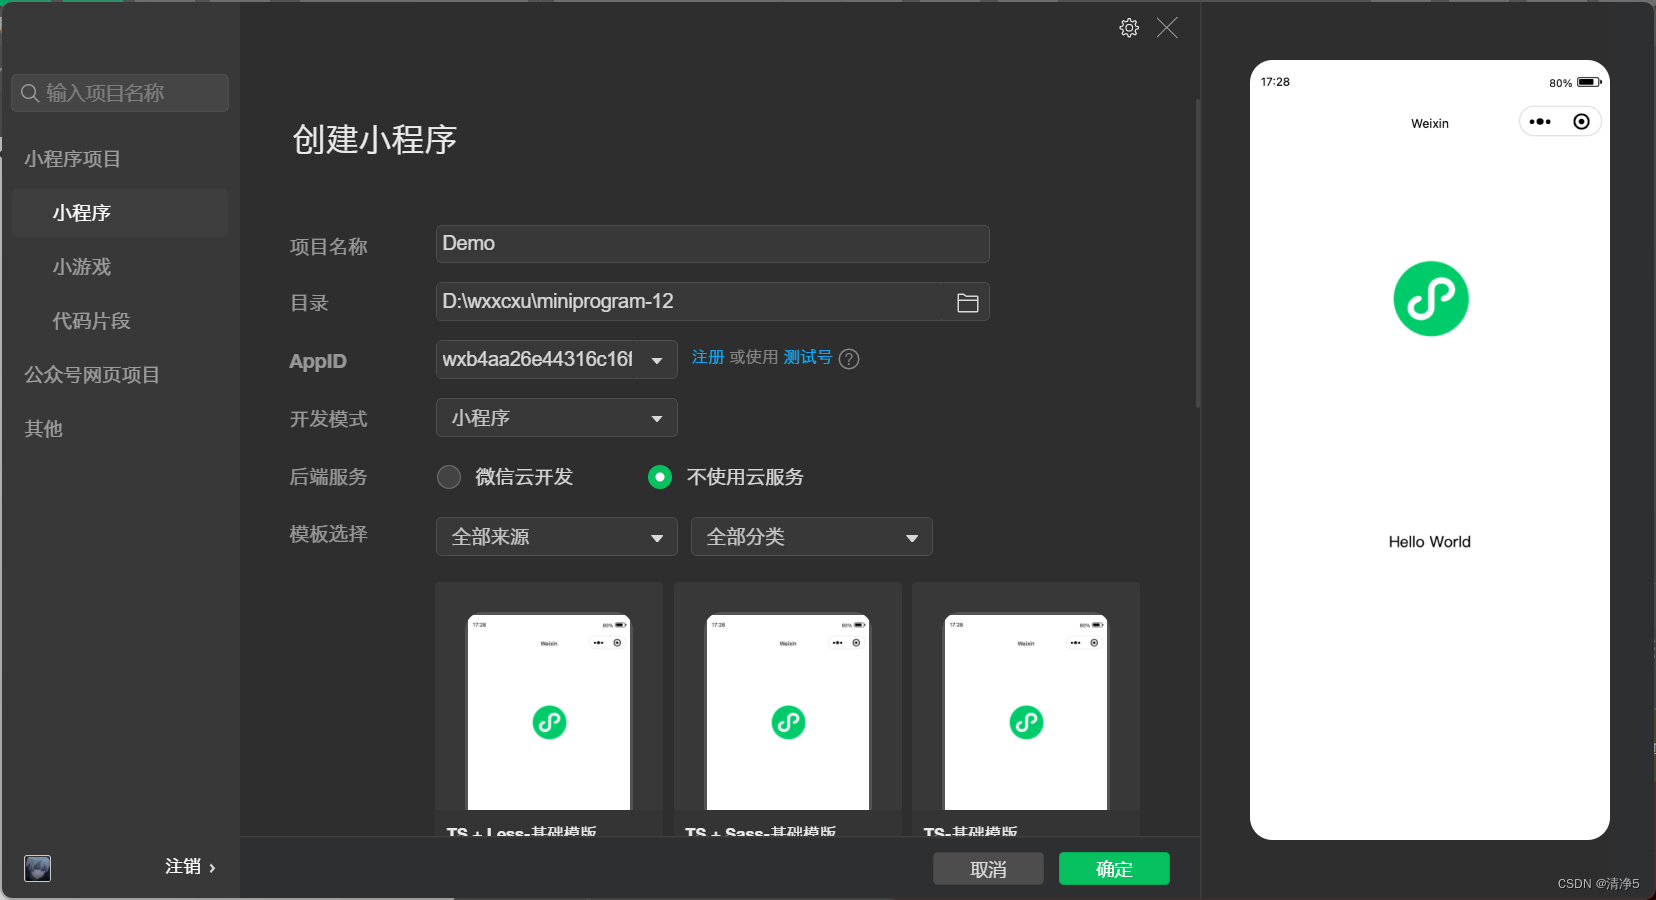
创建第一个小程序项目
运行及发布小程序
微信小程序开发者工具界面功能介绍
工具栏
模拟区
目录文件区
编辑区
调试区
Console面板
Sources面板
Network面板
Sexurity面板
Storage面板
AppData面板
Wxml面板
Sensor面板
Trace面板
开展菜单项
第二章 微信小程序开发基础
小程序的基本目录结构
主体文件
1.app.js
2.app.json
3.app.wxss
页面文件
1.js文件 页面逻辑文件
2 .wxml 页面结构文件
3 .wxss 页面样式文件
4 .json 页面配置文件
小程序的开发框架
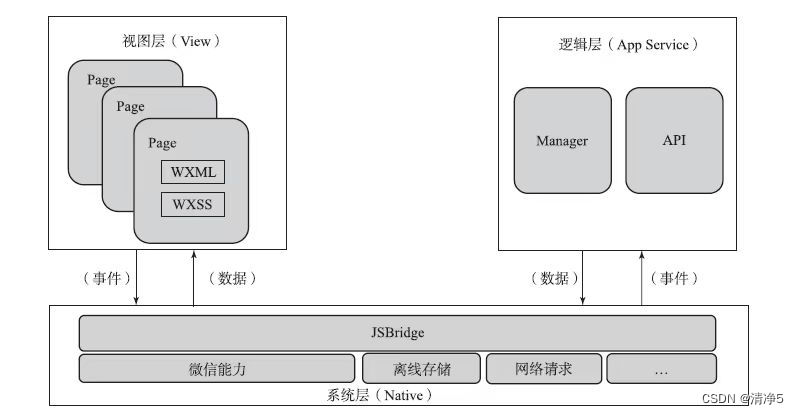
视图层
逻辑层
数据层
创建小程序页面
创建第一个页面文件
创建另一个页面文件
配置文件
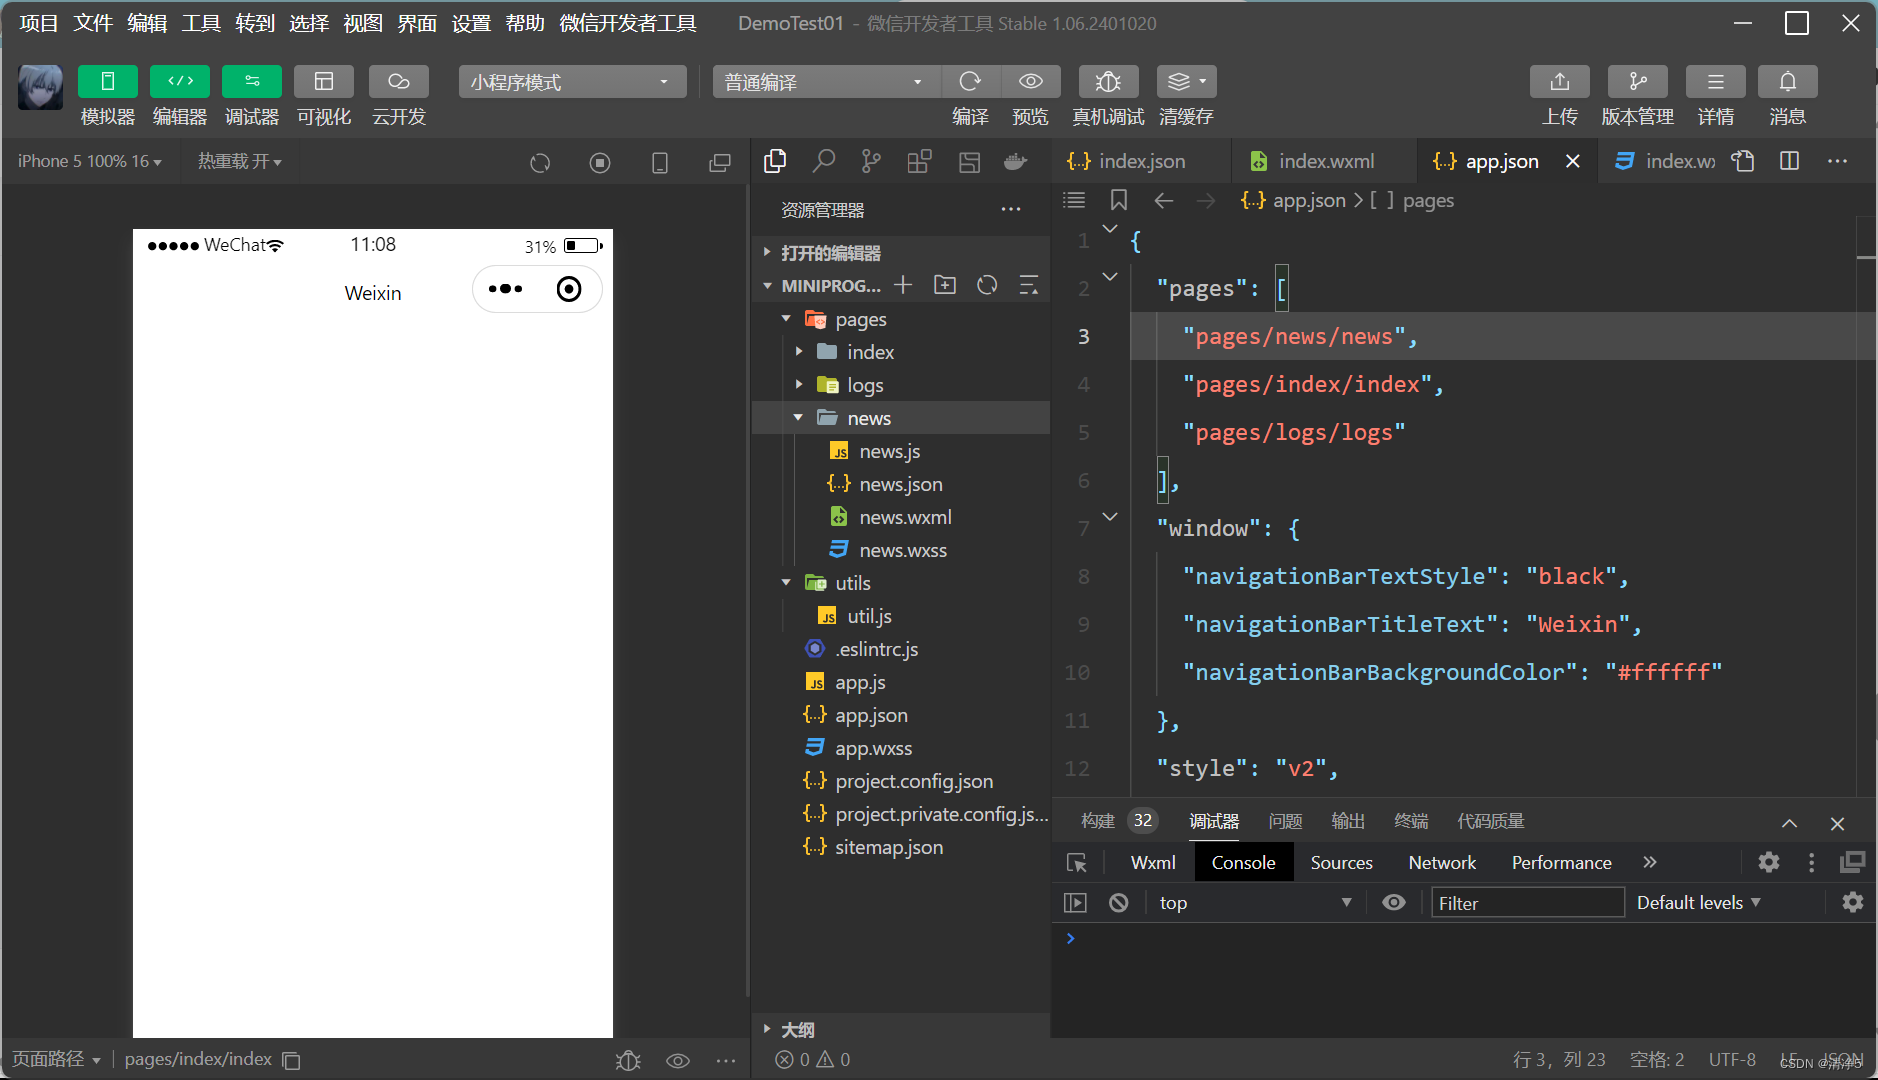
全局配置文件
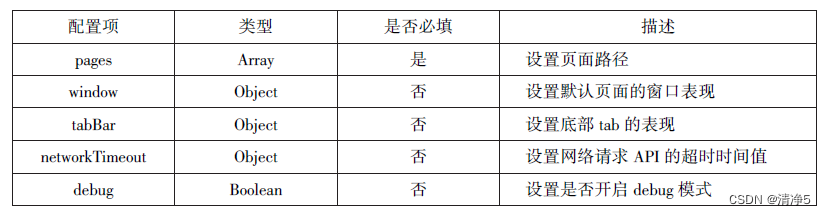
pages配置项
{
"pages":[
        "pages/news/news",
        "pages/index/index"
        ]
}
window配置项
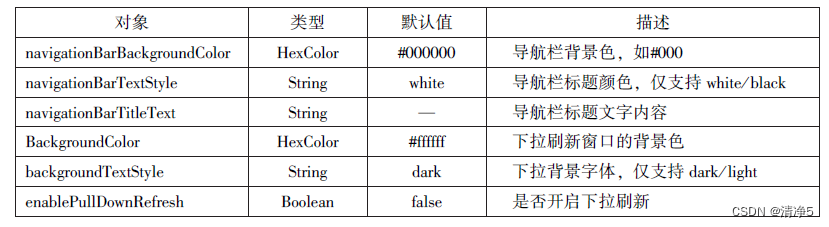
tabBar配置项
 tabBar中的list选项
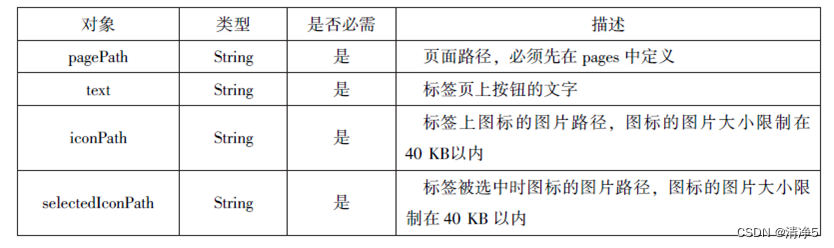
在app.json文件中设置tabBar配置
{
  "tabBar":{
    "color":"#666666",
    "selectedColor":"#ff0000",
    "borderStyle": "black",
    "backgroundColor": "#ffffff",
    "list":[
      {
        "pagePath":"pages/index/index",
        "iconpath":"images/index.png",
        "selectedIconPath":"images/logs.jpg",
        "text":"首页"
      },
      {
        "pagePath":"pages/logs/logs",
        "iconpath":"images/index.png",
        "selectedIconPath":"images/logs.jpg",
        "text":"新闻"
      }
    ]
  }
}
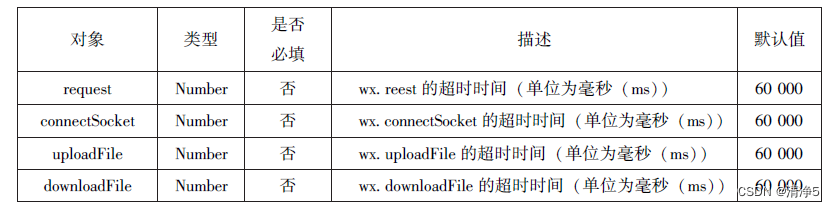
 networkTimeout配置项
逻辑层文件
项目逻辑文件

页面逻辑文件

页面结构文件
数据绑定
wxml:
<view>姓名:{{name}}</view>
<view>年龄:{{age}}</view>
<view>出生日期:
{{birthday[0].year}}年
{{birthday[1].month}}月
{{birthday[2].date}}日
</view>
<view>爱好:{{object.hobby}}</view>
<view>运算:{{age + num}}</view>
<view>逻辑运算:{{age==40}}</view>
<view>三元运算:{{age==40 ? 'happy' : 'nohappy'}}</view>
<view wx:if="{{x>0}}">1</view>
<view wx:elif="{{x==0}}">0</view>
<view wx:else>-1</view>
<template name="zyt">
<view wx:for="{{students}}">
<text>{{item.nickname}}</text>
<text>{{item.height}}</text>
<text>{{item.weight}}</text>
</view>
</template>
<template is="zyt" data="{{students}}"></template>
js:
Page({
  data:{
    name:'zyt',
    age:18,
    num:100,
    x:10,
    birthday:[{year:1988},{month:11},{datea:18}],
    object:{hobby:'computer'},
    students:[
      {nickname:'tom',height:180,weight:120},
      {nickname:'aom',height:180,weight:120},
    ]
  }
})
页面样式文件
页面样式文件(wxss) 是基于CSS拓展的样式语言,用于描述XWML的组件样式,决定WXML的组件如何显示。WXSS具有CSS具有CSS的大部分特性,小程序对WXSS做了一些扩充和修改。
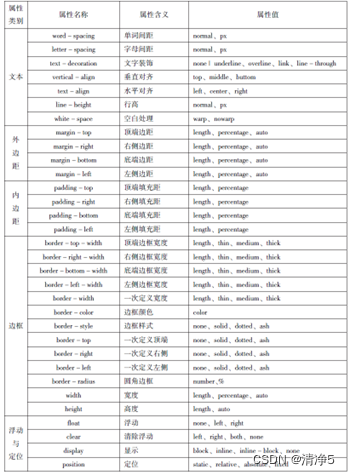
wxss常见属性
第三章 页面布局
盒子模型
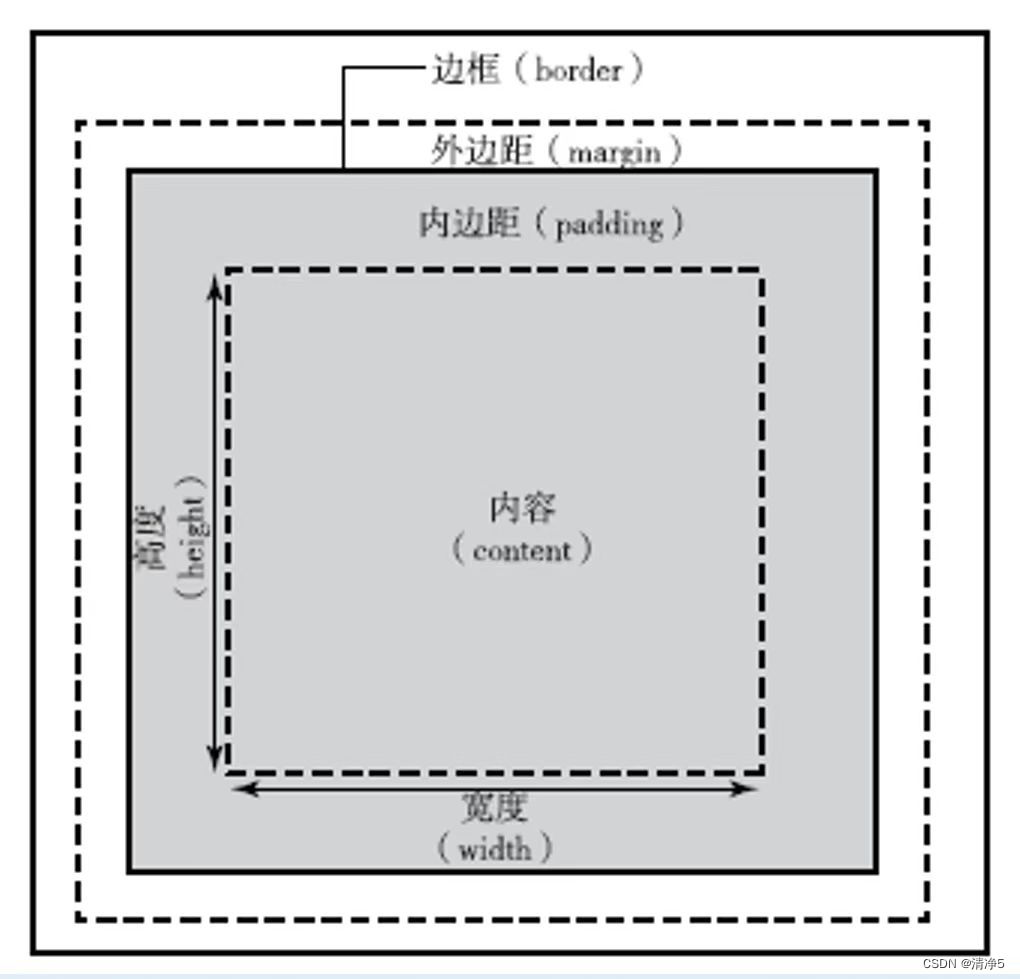
对padding、border、和margin可以进一步细化为上、下、左、右4个部分,在css在中可以分别进行设置:

块级元素与行内元素
块级元素
wxml:
<view style="border: 1px solid #f00">块1</view>
<view style="border: 1px solid #0f0;margin: 15px;padding: 20px;">块2</view>
<view style="border: 1px solid #00f;width: 200px;height: 80px;">块3</view>
<view style="border: 1px solid #ccc">
<view style="height: 60px;">块4</view>
</view>
<view style="border: 1px solid #f00;width: 100px;background-color: #ccc;">父级元素高度随内容决定,内容为文本</view>
行内元素
wxml:
<view style="padding: 20px">
<text style="border: 1px solid #f00;">文1</text>
<text style="border: 1px solid #0f0;margin: 10px; padding: 5px;">文2</text>
<view style="border: 1px solid #00f;display: inline;">块级设置为行内元素</view>一行显示不全,自动换行显示
</view>
行内块元素
wxml:
<view>
元素显示方式的<view style="display: inline-block;border: 1px solid #f00;margin: 10px; width: 200px;">块级元素、行内元素和行内块元素</view>三种类型
</view>
效果图:

浮动与定位
元素浮动与清除
css中如下{float:none|left|right}
none:默认
left:左浮动
right:右浮动
wxml:
<view>box1,box2,box3没浮动</view>
<view style="border:1px solid #f00; padding: 5px;">
<view style="border:1px solid #0f0">b1</view>
<view style="border:1px solid #0f0">b2</view>
<view style="border:1px solid #0f0">b3</view>
</view>
<view>b1左浮动</view>
<view style="border:1px solid #f00; padding: 5px;">
<view style="float: left; border: 1px solid #0f0">b1
</view>
<view style="border:1px solid #0f0">b2</view>
<view style="border:1px solid #0f0">b3</view>
</view>
<view>b1b2左浮动</view>
<view style="border:1px solid #f00; padding: 5px;">
<view style="float:left;border: 1px solid #0f0">b1</view>
<view style="float:left;border: 1px solid #0f0">b2</view>
<view style="border:1px solid #0f0">b3</view>
</view>
<view>b1b2b3左浮动</view>
<view style="border:1px solid #f00; padding: 5px;">
<view style="float:left;border: 1px solid #0f0">b1</view>
<view style="float:left;border: 1px solid #0f0">b2</view>
<view style="float:left;border: 1px solid #0f0">b3</view>
</view>
清除浮动
css中如下{clear : left | right | both | none}
left: 清除左浮动
right:清除右浮动
both: 清净左右浮动
none:不清除浮动
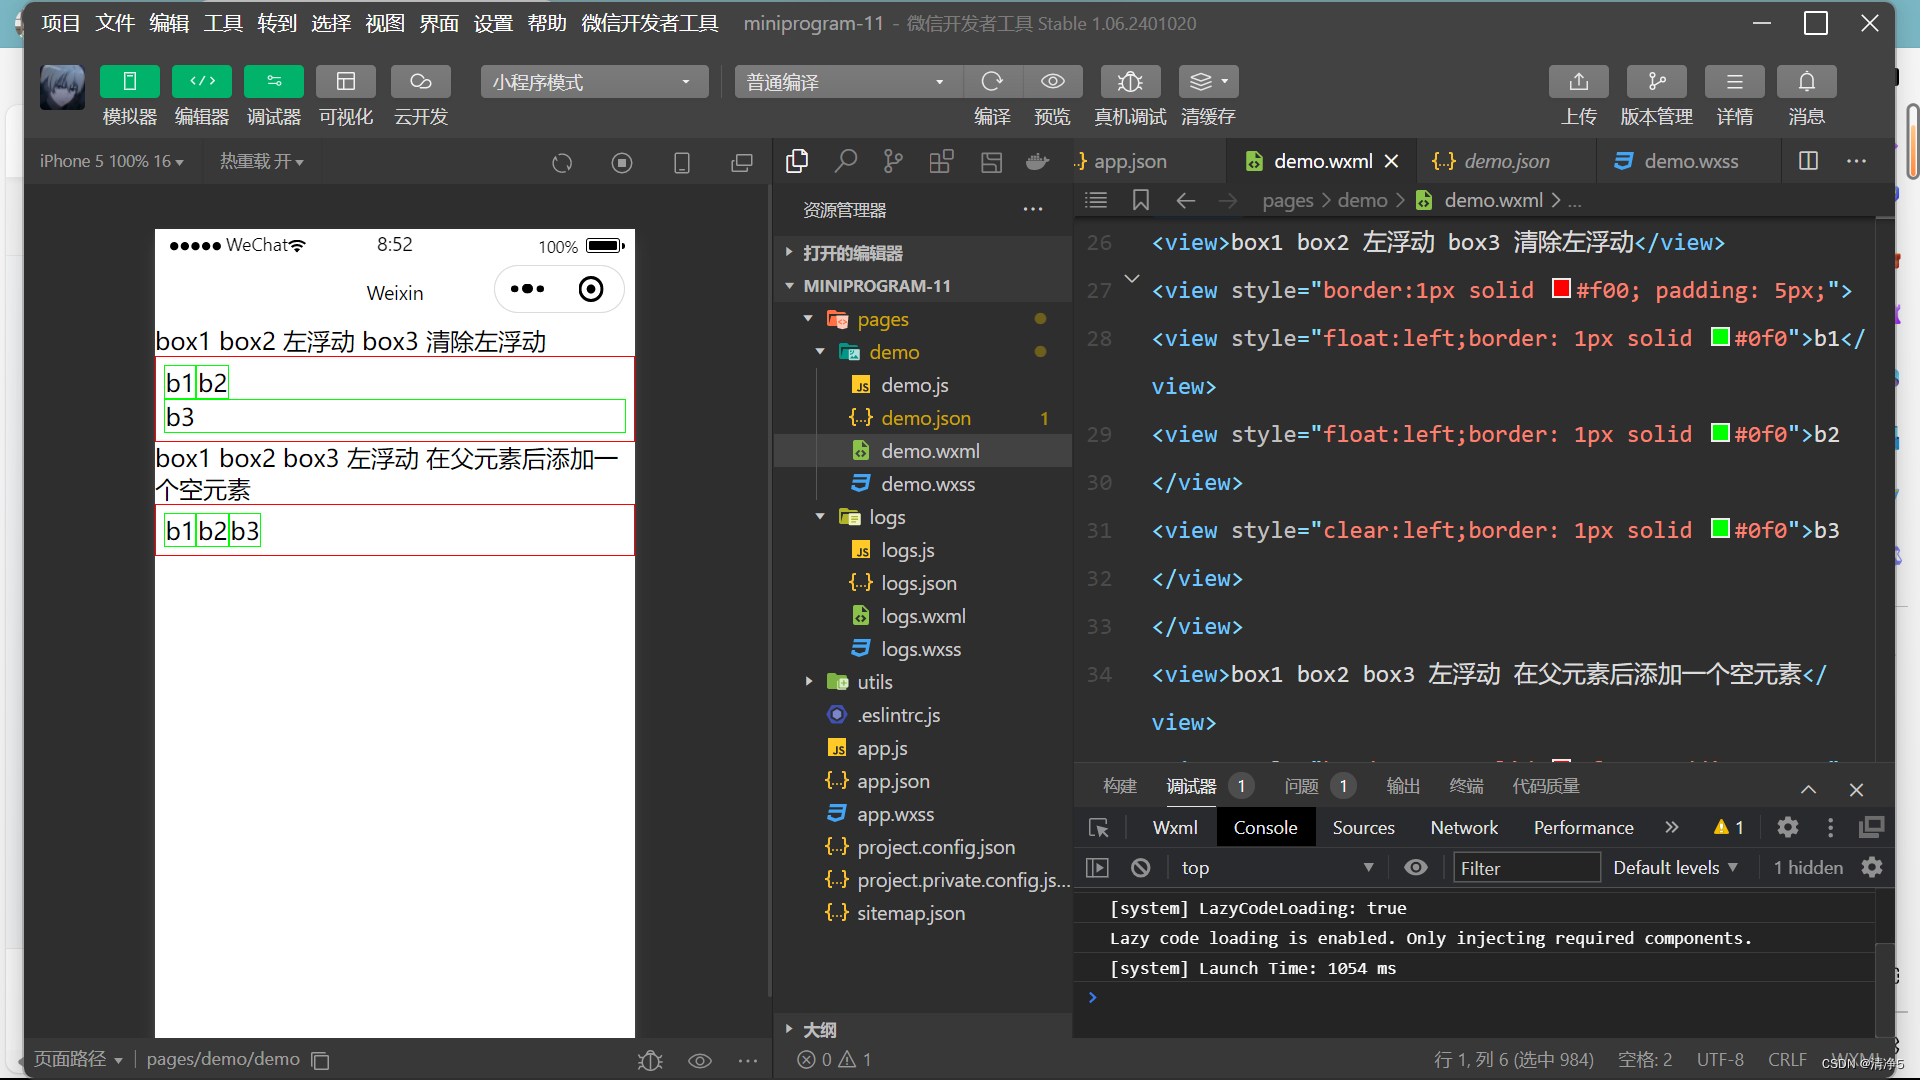
wxml:
<view>box1 box2 左浮动 box3 清除左浮动</view>
<view style="border:1px solid #f00; padding: 5px;">
<view style="float:left;border: 1px solid #0f0">b1</view>
<view style="float:left;border: 1px solid #0f0">b2
</view>
<view style="clear:left;border: 1px solid #0f0">b3
</view>
</view>
<view>box1 box2 box3 左浮动 在父元素后添加一个空元素</view>
<view style="border:1px solid #f00; padding: 5px;" class="clearfloat">
<view style="float:left;border:1px solid #0f0">b1</view>
<view style="float:left;border:1px solid #0f0">b2</view>
<view style="float:left;border:1px solid #0f0">b3</view>
</view>
//wxss
.clearfloat::after{
  display: block;
  clear: both;
  height: 0;
  content: "";
} 
元素定位
css中如下{position | stateic | relative | absolute | fixed}
static : 默认值
wxml:
<view style="border: 1px solid #0f0;width: 100px;height: 100px">box1</view>
<view style="border: 1px solid #0f0;width: 100px;height: 100px">box2</view>
<view style="border: 1px solid #0f0;width: 100px;height: 100px">box3</view>
absolute : 绝对定位
wxml:
<view style="border: 1px solid #0f0;width: 100px;height: 100px">box1</view>
<view style="border: 1px solid #0f0;width: 100px;height: 100px;position: absolute;left: 30px;top: 30px;">box2</view>
<view style="border: 1px solid #0f0;width: 100px;height: 100px">box3</view>
relative : 相对定位
wxml:
 <view style="border: 1px solid #0f0;width: 100px;height: 100px">box1</view>
<view style="border: 1px solid #0f0;width: 100px;height: 100px;position: relative;left: 30px;top: 30px;">box2</view>
<view style="border: 1px solid #0f0;width: 100px;height: 100px">box3</view> 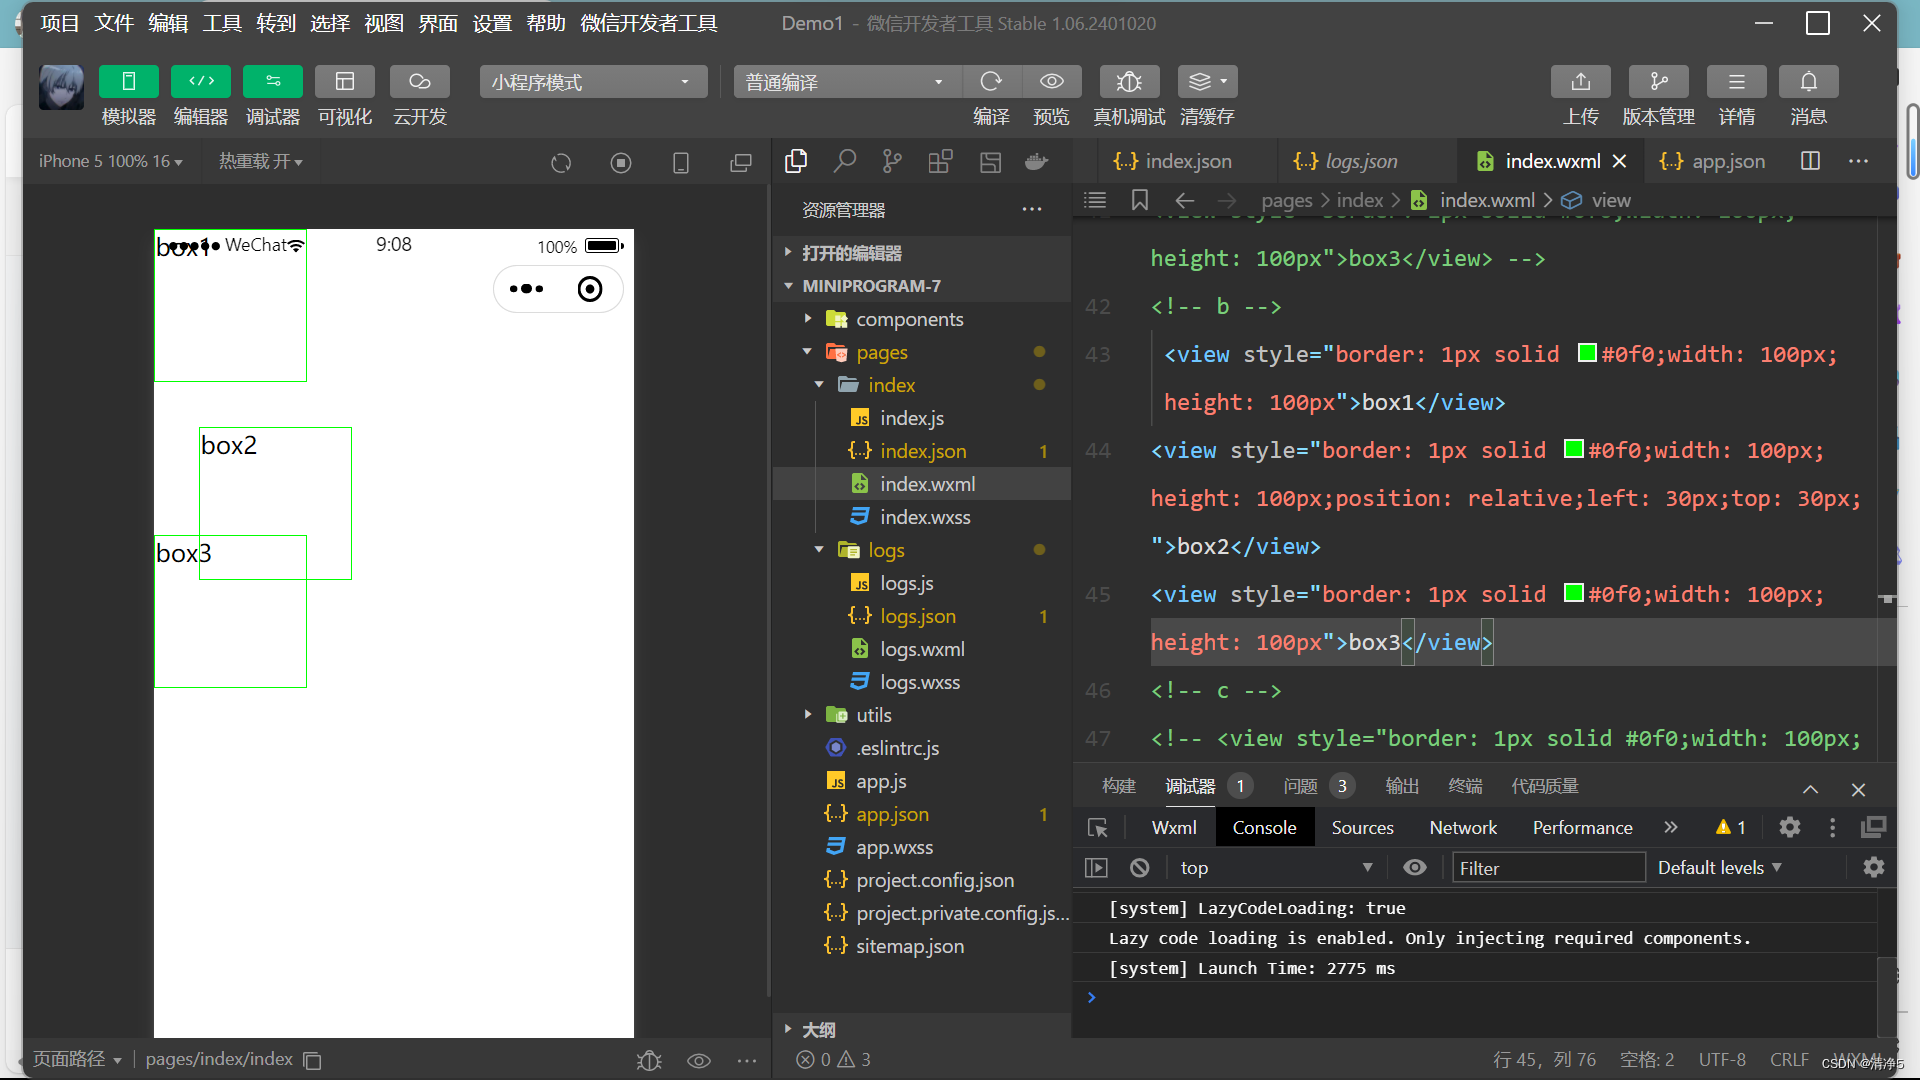
flxed : 固定定位
wxml:
<view style="border: 1px solid #0f0;width: 100px;height: 100px">box1</view>
<view style="border: 1px solid #0f0;width: 100px;height: 100px;position: fixed;left: 30px;top: 30px;">box2</view>
<view style="border: 1px solid #0f0;width: 100px;height: 100px">box3</view>
父元素采用相对定位,子元素分别采用绝对定位、固定定位
wxml:
<view style="position:relative;top:50px;left:50px;border: 1px solid #00f">
  <view style="border: 1px solid #0f0;width: 100px;height: 100px;">box1</view>
  <view style="border: 1px solid #0f0;width: 100px;height: 100px;position: absolute; left: 30px; top: 30px">box2</view>
  <view style="border: 1px solid #0f0;width: 100px;height: 100px">box3</view>
</view>
wxml:
<view style="position:relative;top:50px;left:50px;border: 1px solid #00f">
  <view style="border: 1px solid #0f0;width: 100px;height: 100px;">box1</view>
  <view style="border: 1px solid #0f0;width: 100px;height: 100px;position: fixed; left: 30px; top: 30px">box2</view>
  <view style="border: 1px solid #0f0;width: 100px;height: 100px">box3</view>
</view>
flex布局
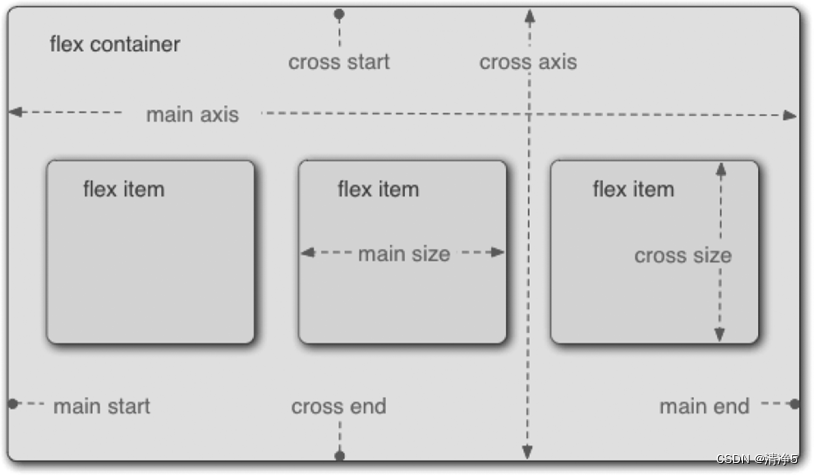
容器属性
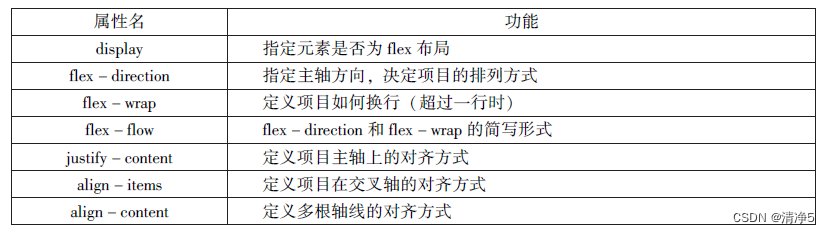
1.display
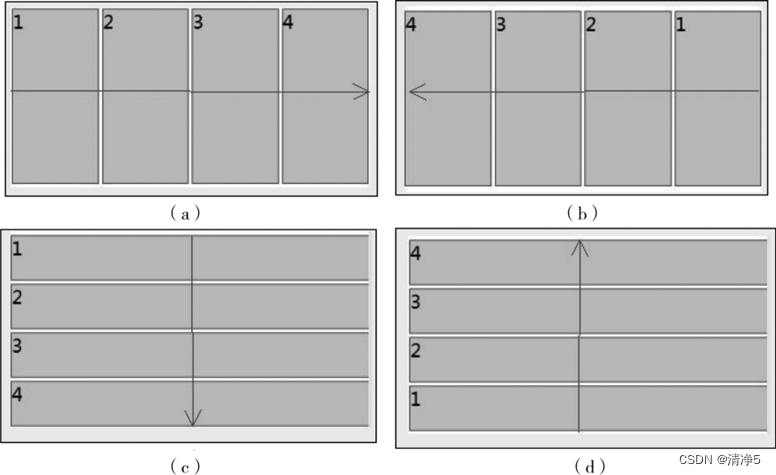
2.flex-direction
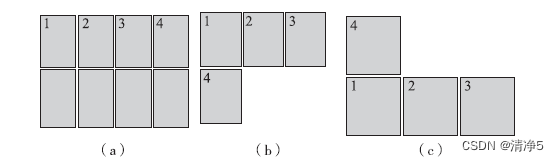
3.flex-wrap
4.flex-flow
5.justify-countent
6.align-items
wxml:
<view class="cont1">
<view class="item">1</view>
<view class="item2">2</view>
<view class="item3">3</view>
<view class="item4">4</view>
</view>
//wxss
.cont1{
  display: flex;
  flex-direction: row;
  align-items: baseline;
}
.item{
  background-color: #ccc;
  border: 1px solid #f00;
  height: 100px;
  width: 50px;
  margin: 2px;
}
.item2{
  height: 80px;
}
.item3{
  display: flex;
  height: 50px;
  align-items: flex-end;
}
.item4{
  height: 120px;
}
7.align-content
项目属性
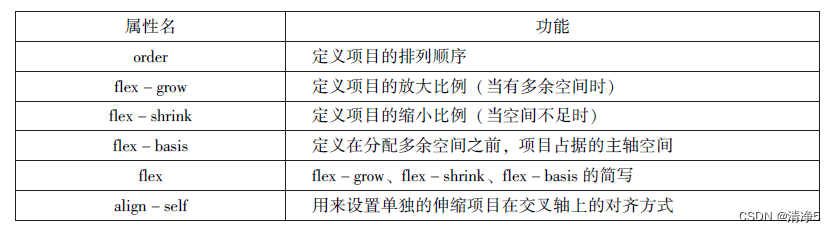
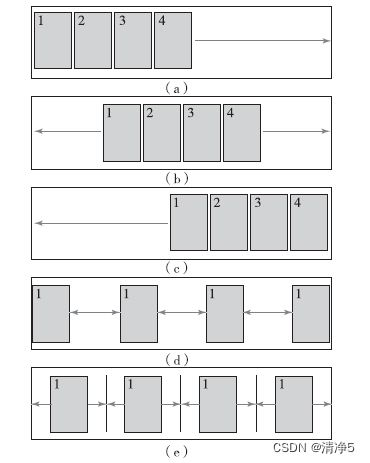
1.order
wxml:
<view class="cont1">
<view class="item">1</view>
<view class="item">2</view>
<view class="item">3</view>
<view class="item">4</view>
</view>
<view class="cont1">
<view class="item" style="order:1">1</view>
<view class="item" style="order:2">2</view>
<view class="item" style="order:3">3</view>
<view class="item">4</view>
</view>
2.flex-grow
wxml:
<view class="cont1">
<view class="item">1</view>
<view class="item">2</view>
<view class="item">3</view>
<view class="item">4</view>
</view>
<view class="cont1">
<view class="item" style="flex-grow: 1">1</view>
<view class="item" style="flex-grow: 2">2</view>
<view class="item" >3</view>
<view class="item">4</view>
</view>
3.flex-shrink
wxml:
<view class="cont1">
<view class="item">1</view>
<view class="item">2</view>
<view class="item">3</view>
<view class="item">4</view>
</view>
<view class="cont1">
  <view class="item">1</view>
<view class="item" style="flex-shrink: 2">2</view>
<view class="item" style="flex-shrink: 1">3</view>
<view class="item" style="flex-shrink: 4">4</view>
</view>
4.flex-basis
wxml:
<view class="cont1">
<view class="item">1</view>
<view class="item">2</view>
<view class="item">3</view>
<view class="item">4</view>
</view>
<view class="cont1">
  <view class="item">1</view>
<view class="item" style="flex-basis: 100px">2</view>
<view class="item" style="flex-basis: 200px">3</view>
<view class="item" >4</view>
</view>
5.flex
wxml:
.item{
  flex: auto;
}
.item{
  flex: none;
}
6.align-self
wxml:
.item{
align-self:auto|flex-start|flex-end|center|baseline|stretch;
}
第四章 页面组件
组件的定义及属性
id : 组件唯一表示
class : 组件的样式类
style : 组件的内联式
hidden : 组件是否显示
data - * : 自定属性
bind * catch * : 组件的事件
容器视图组件
view
 wxml:
wxml:
<view style="text-align: center">默认flex布局</view>
<view style="display: flex">
  <view style="border: 1px solid #f00; flex-grow: 1">1</view>
  <view style="border: 1px solid #f00; flex-grow: 1">2</view>
  <view style="border: 1px solid #f00; flex-grow: 1">3</view>
</view>
<view style="text-align: center">上下混合布局</view>
<view style="display: flex; flex-direction: column">
  <view style="border: 1px solid #f00">1</view>
  <view style="display: flex">
    <view style="border: 1px solid #f00; flex-grow: 1">2</view>
    <view style="border: 1px solid #f00; flex-grow: 1">3</view>
  </view>
</view>
<view style="text-align: center">左右混合布局</view>
<view style="display: flex">
  <view style="border: 1px solid #f00; flex-grow: 1">1</view>
  <view style="display: flex; flex-direction: column; flex-grow:1">
  <view style="border: 1px solid #f00; flex-grow: 1">2</view>
  <view style="border: 1px solid #f00; flex-grow: 2">3</view>
</view>
</view>
scroll-view
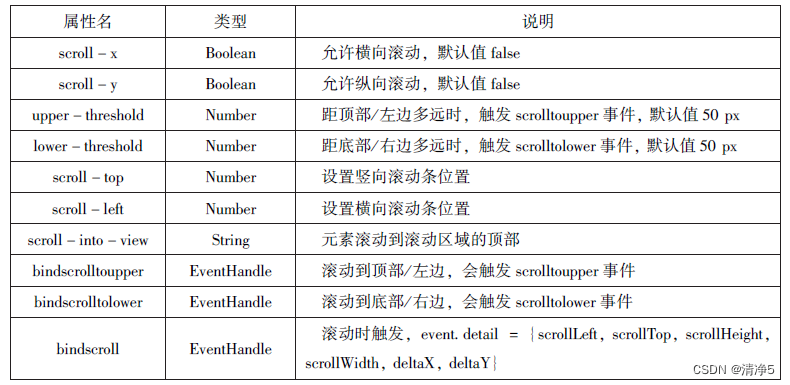
wxml:
<view class="container" style="padding: 0rpx;">
<scroll-view scroll-top="{{scrollTop}}"scroll-y = "true"
style="height: {{scollHeight}}px;" class="list" bind-scrolltolower = "bindDownLoad"
bindscrolltoupper="topLoad"bindscroll = "scroll">
<view class="item"wx:for = "{{list}}">
<image class="img" src="{{item.pic_url}}"></image>
<view class="text">
<text class="title">{{item.name}}</text>
<text class="description">{{item.short_de-scription}}</text>
</view>
</view>
</scroll-view>
<view class="body-view">
<loading hidden="{{hidden}}" bindchange = "loadingchange">
加载中
</loading>
</view>
</view>
js:
var url = "http://www.imooc.com/course/ajaxlist";
var page = 0;
var page_size = 5;
var sort = "list";
var is_easy = 0;
var lange_id = 0;
var pos_id = 0;
var unlearn = 0;
var loadMore = function(that){
  that.setData({
    hidden:false
  });
  wx.request({
    url: 'url',
    data:{
      page:page,
      page_size:page_size,
      sort:sort,
      is_easy:is_easy,
      pos_id:pos_id,
      unlearn:unlearn
    },
    success:function(res){
      //console.info(that.data.list);
      var lsit = that.data.list;
      for(var i = 0;i < res.data.list.lenght; i++){
        lsit.push(res.data.list[i]);
      }
      that.setData({
        list:list
      });
      page++;
      that.setData({
        hidden:true
      });
    }
  })
}
page({
  data:{
    hidden:true,
    list:[],
    scrollTop:0,
    scrollHeight:0
  },
  onLoad:function(){
    var that = this;
    wx.getSystemInfo({
      success:function(res){
        that.setData({
          scrollHeight:res.windowHeight

          });
        }
    });
    loadMore(that);
  },
  scroll:function(event){
    this.setData({
      scrollTop:event.detail.scrollTop
    });
  },
  topLoad:function(event){
    page = 0;
    this.setData({
      list:[],
      scrollTop:0,
    });
    loadMore(this);
    console.log("lower");
  }
})
wxss:
.userinfo{
  display: flex;
  flex-direction: column;
  align-items: center;
}
.userinfo-avatar{
  width: 128rpx;
  height: 128rpx;
  margin: 20rpx;
  border-radius: 50%;
}
.userinfo-nickname{
  color:#aaa;
}
.usermotto{
  margin-top: 200px;
}
scroll-view{
  width: 100%;
}
.item{
  width: 90%;
  height: 300rpx;
  margin: 20rpx auto;
  background: brown;
  overflow: hidden;
}
.item.img{
  width: 430rpx;
  margin-right: 20rpx;
  float: left;
}
.title{
  font-size: 30rpx;
  display: block;
  margin: 30rpx auto;
}
.description{
  font-size: 26rpx;
  line-height: 15rpx;
}
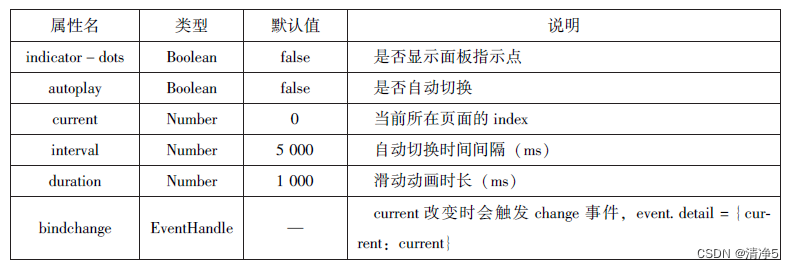
swiper

wxml:
<swiper indicator-dots="true"autoplay ="true "interval="5000" duration="1000">
<swiper-item>
<image src="../image/1.png" style="width: 100%"></image>
</swiper-item>
<swiper-item>
<image src="../image/1.png" style="width: 100%"></image>
</swiper-item>
<swiper-item>
<image src="../image/1.png" style="width: 100%"></image>
</swiper-item>
</swiper> 
基础内容组件
icon
icon组件属性
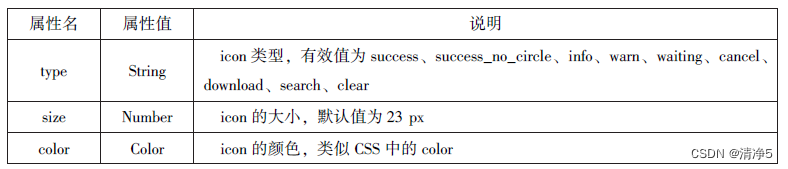
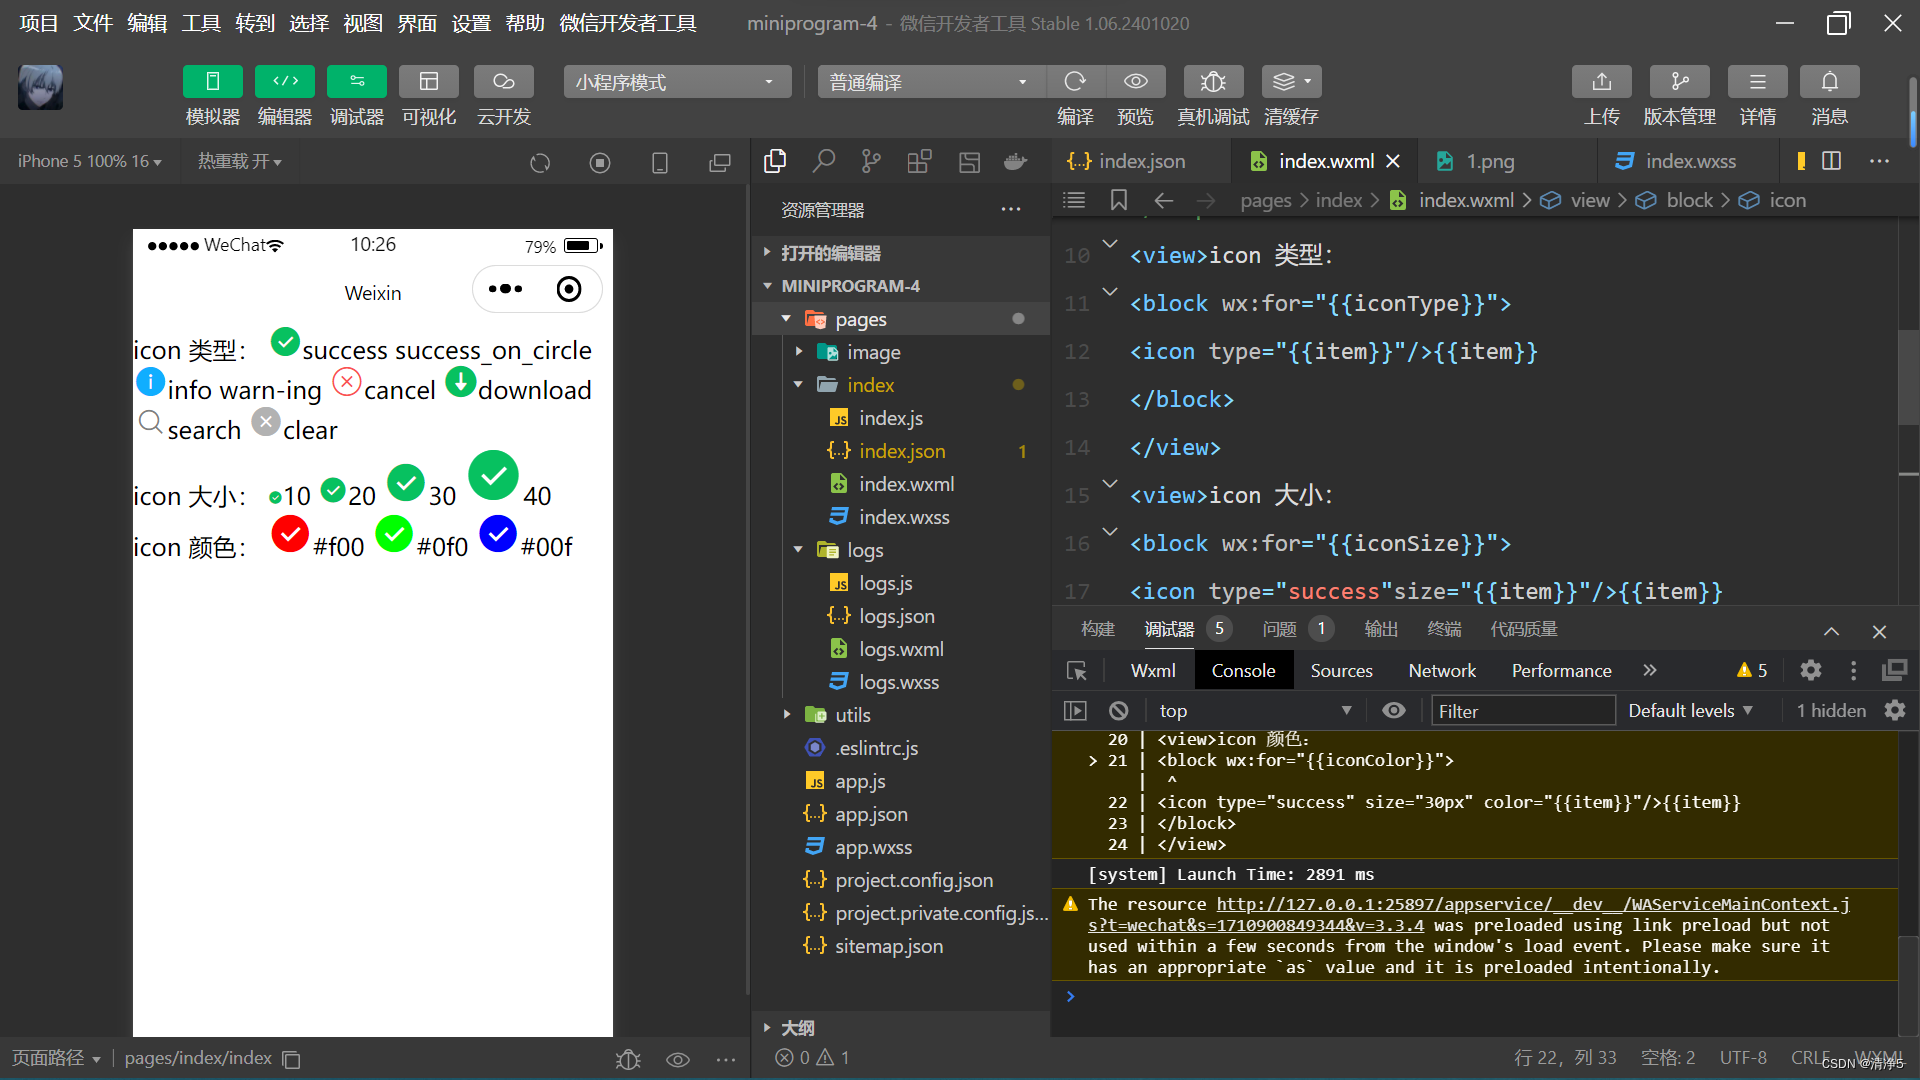
wxml:
<view>icon 类型:
<block wx:for="{{iconType}}">
<icon type="{{item}}"/>{{item}}
</block>
</view>
<view>icon 大小:
<block wx:for="{{iconSize}}">
<icon type="success"size="{{item}}"/>{{item}}
</block>
</view>
<view>icon 颜色:
<block wx:for="{{iconColor}}">
<icon type="success" size="30px" color="{{item}}"/>{{item}}
</block>
</view>
js:
page({
data:{
     iconType:["success","success_on_circle","info","warn-ing","cancel","download","search","clear"],
     iconSize:[10,20,30,40],
     iconColor:['#f00','#0f0','#00f']
}) 
text
 wxml:
wxml:
<block wx:for="{{x}}" wx:for-item="x">
<view>
<block wx:for="{{25-x}}" wx:for-item="x">
<text decode = "{{true}}" space = "{{true}}"> </text>
</block>
<block wx:for="{{y}}" wx:for-item="y">
<block wx:if="{{y<=2*x-1}}">
<text>*</text>
</block>
</block>
</view>
</block>
<block wx:for="{{x}}" wx:for-item="x">
<view>
<block wx:for="{{21+x}}" wx:for-item="x">
<text decode = "{{true}}" space="{{true}}"> </text>
</block>
<block wx:for="{{y}}" wx:for-item="y">
<block wx:if="{{y <= 9-2*x}}">
<text>*</text>
</block>
</block>
</view>
</block>js:
page({
  data:{
    x:[1,2,3,4,5],
    y:[1,2,3,4,5,6,7,8,9]
  }
})
progress
wxml:
<view>显示百分比</view>
<progress percent="88" show-info="88"></progress>
<view>改变宽度</view>
<progress percent="20" stroke-width="5"></progress>
<view>自动显示进度条</view>
<progress percent="80" active></progress> 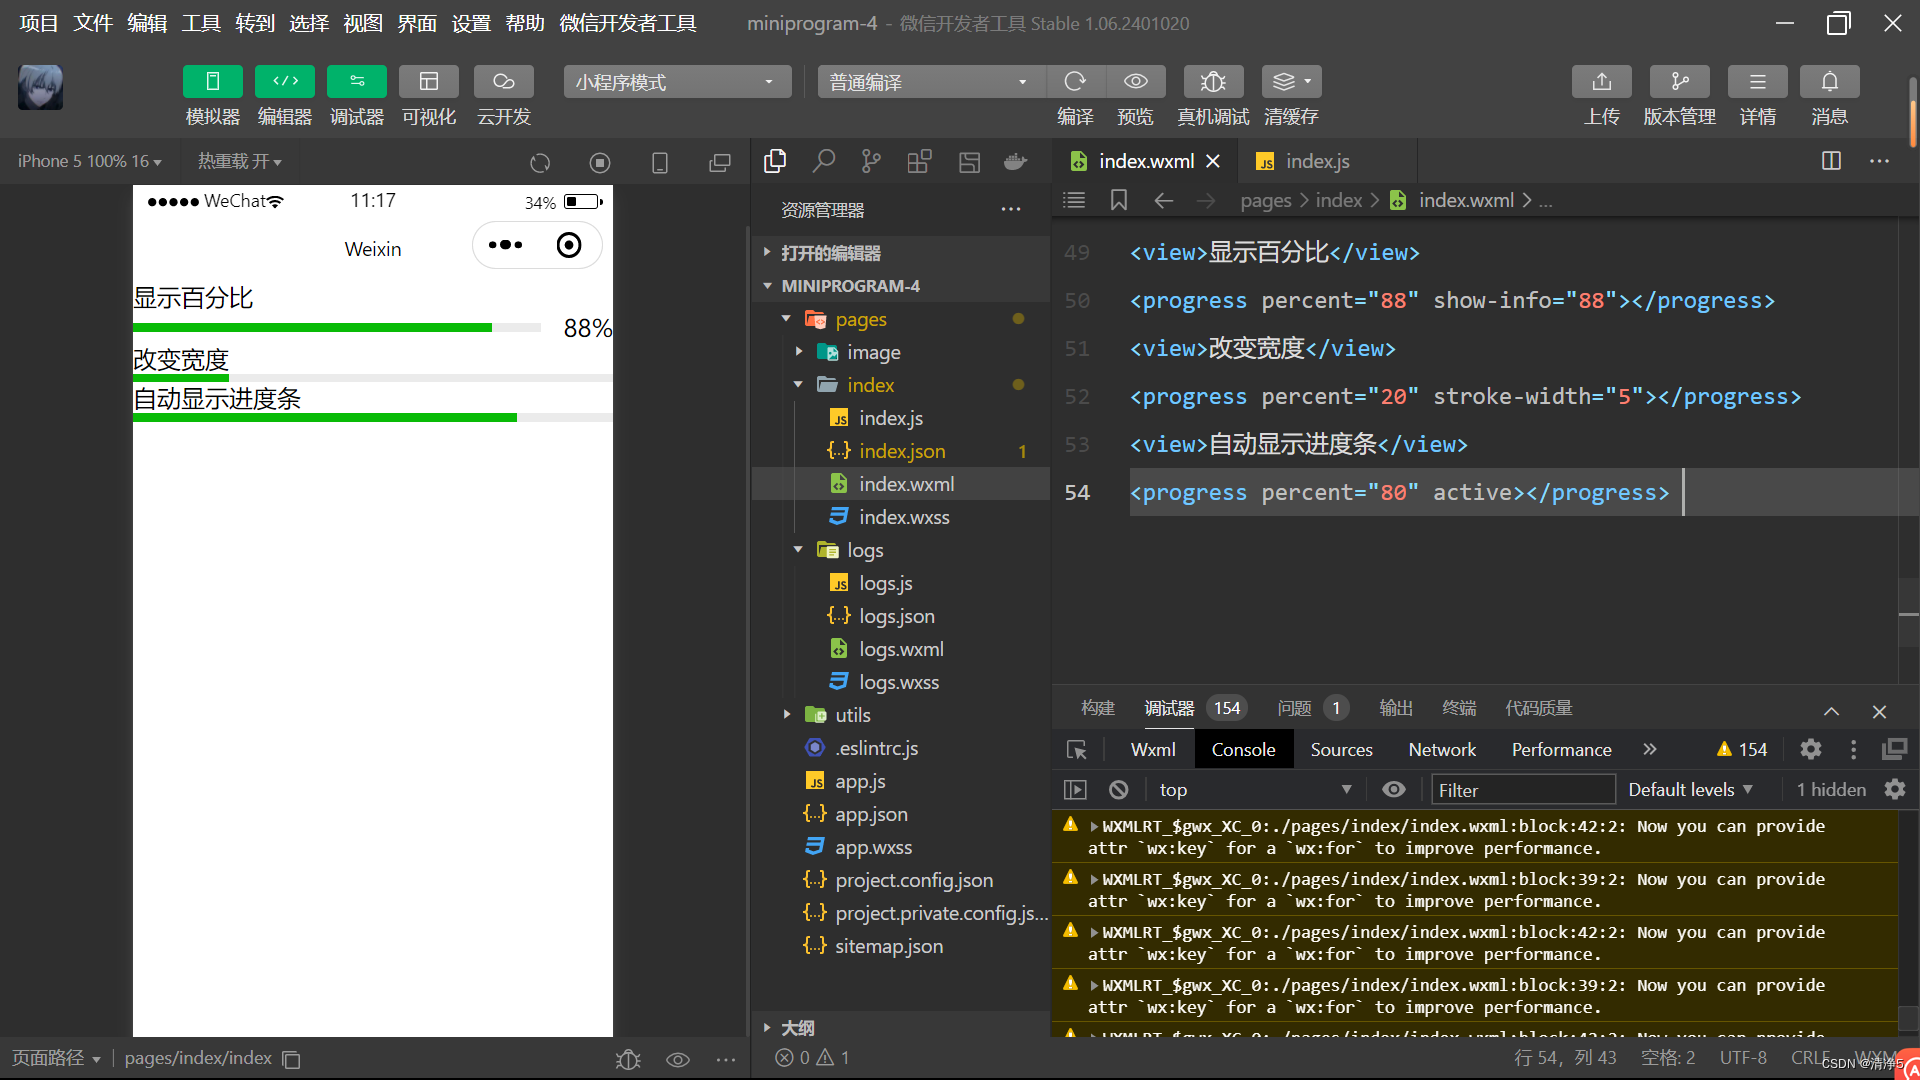
button
button组件属性

wxml:
<button type="default">type:default</button>
<button type="primary">type:primary</button>
<button type="warn">type:warn</button>
<button type="default" bindtap='buttonSize'size="{{size}}">改变size显示</button>
<button type="default" bindtap='buttonPlain'plain="{{plain}}">改变plain显示</button>
<button type="default" bindtap='buttonLoading'loading="{{loading}}">改变loading显示</button>
js:
page({
data:{
  size:'default',
  plain:'false',
  loading:'false'
},
buttonSize:function(){
  if(this.data.size="default")
  this.setData({size:'mini'})
  else
  this.setData({size:'default'})
},
buttonPlain:function(){
this.setData({plain:!this.data.plain})
},
buttonLoading:function(){
this.setData({loading:!this.data.loading})
}
})
radio
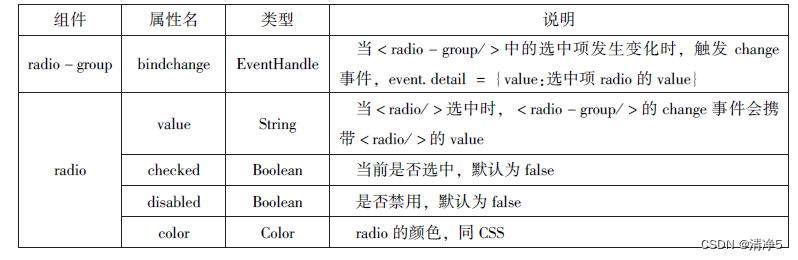
wxml:
<view>radio</view>
<view>城市</view>
<radio-group bindchange="citychange">
<radio value="丽江">丽江</radio>
<radio value="北京">北京</radio>
<radio value="大理">大理</radio>
<radio value="西藏">西藏</radio>
<radio value="西安">西安</radio>
</radio-group>
<view>选择:{{city}}</view>
<view>喜欢的计算机</view>
<radio-group class="radio-group"bindchange="radiochange">
<label class="radio" wx:for="{{radios}}">
<radio value="{{item.value}}" checked="{{item.checked}}"/>
{{item.name}}
</label>
</radio-group>
<view>你选择:{{lang}}</view>
js:
page({
data:{
  radios:[
    {name:'java',value:'JAVA'},
    {name:'python',value:'python',checked:'true'},
    {name:'php',value:'PHP'},
    {name:'swif',value:'SWIF'},
  ],
  city:"",
  lang:""
},
citychange:function(e){
  this.setData({city:e.detail.value});
},
radiochange:function(event){
  this.setData({lang:event.detail.value})
  console.log(event.detail.value)
}
})
checkbox

wxml:
<view>radio</view>
<view>城市</view>
<checkbox-group bindchange = "cityChange">
<label wx:for="{{citys}}">
<checkbox value="{{item.value}}" checked='{{item.checked}}'>{{item.value}}</checkbox>
</label>
</checkbox-group>
<view>你选择:{{city}}</view>
js:
page({
data:{
  citys:[
    {name:'km',value:"昆明"},
    {name:'sy',value:"三亚"},
    {name:'zh',value:"珠海",checked:'true'},
    {name:'dl',value:"大理"}]
},
cityChange:function(e){
  console.log(e.detail.value);
  var city = e.detail.value;
  this.setData({city:city})
}
})
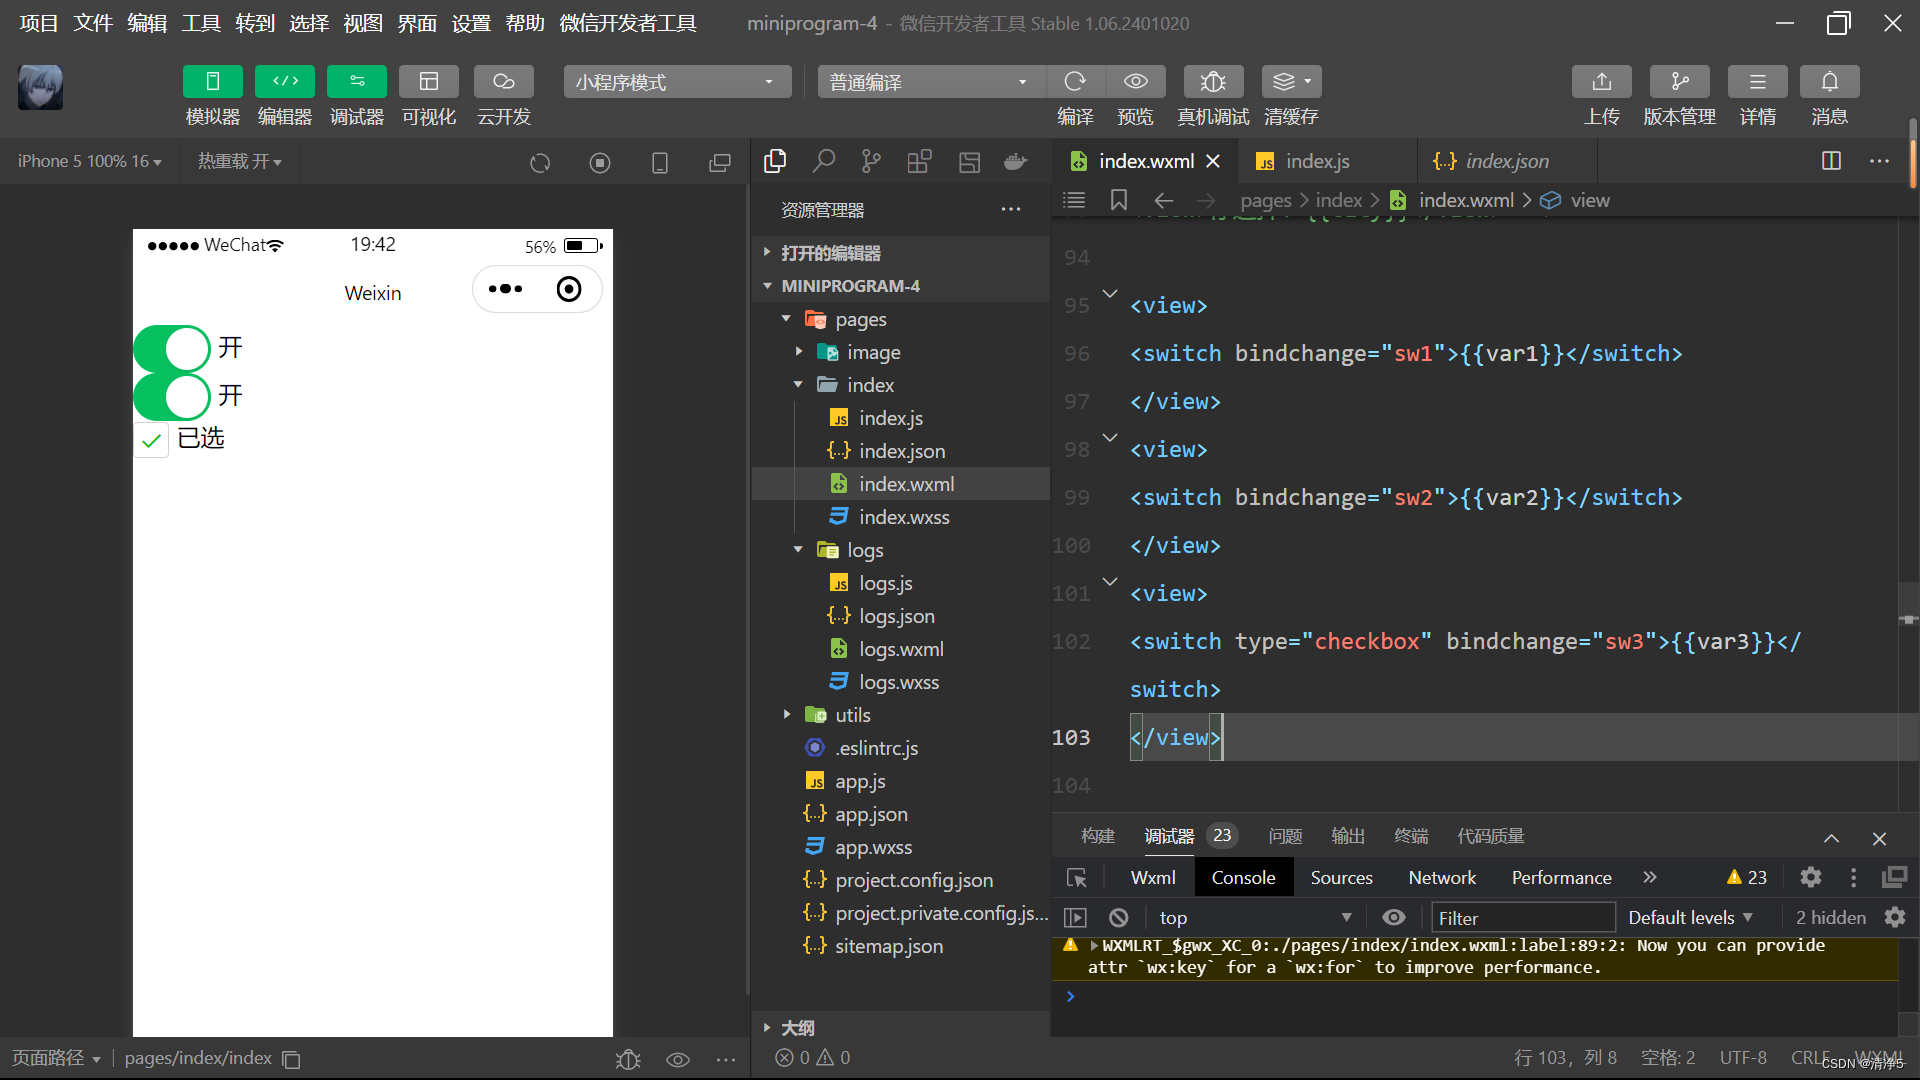
switch

wxml:
<view>
<switch bindchange="sw1">{{var1}}</switch>
</view>
<view>
<switch bindchange="sw2">{{var2}}</switch>
</view>
<view>
<switch type="checkbox" bindchange="sw3">{{var3}}</switch>
</view>
js:
page({
data:{
  var1:'关',
  var2:'开',
  var3:'未选',
},
sw1:function(e){
  this.setData({var1:e.detail.value?'开':'关'})
},
sw2:function(e){
  this.setData({var2:e.detail.value?'开':'关'})
},
sw3:function(e){
  this.setData({var3:e.detail.value?'已选':'未选'})
},
}) 
slider
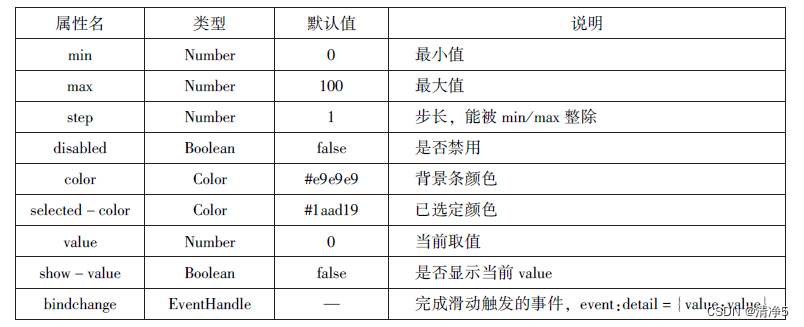
wxml:
 <view>默认 min=0 max=100 step=1</view>
<slider></slider>
<view>显示当前值</view>
<slider show-value></slider>
<view>设置 min=20 max=200 step=10</view>
<slider min='0' max='200' step='10' show-value></slider>
<view>滑动改变icon大小</view>
<slider show-value bindchange='sliderchange'></slider>
<icon type="success" size='{{size}}'></icon>
js:
data:{
  size:'20'
},
sliderchange:function(e){
  this.setData({size:e.setData.value})
}
picker
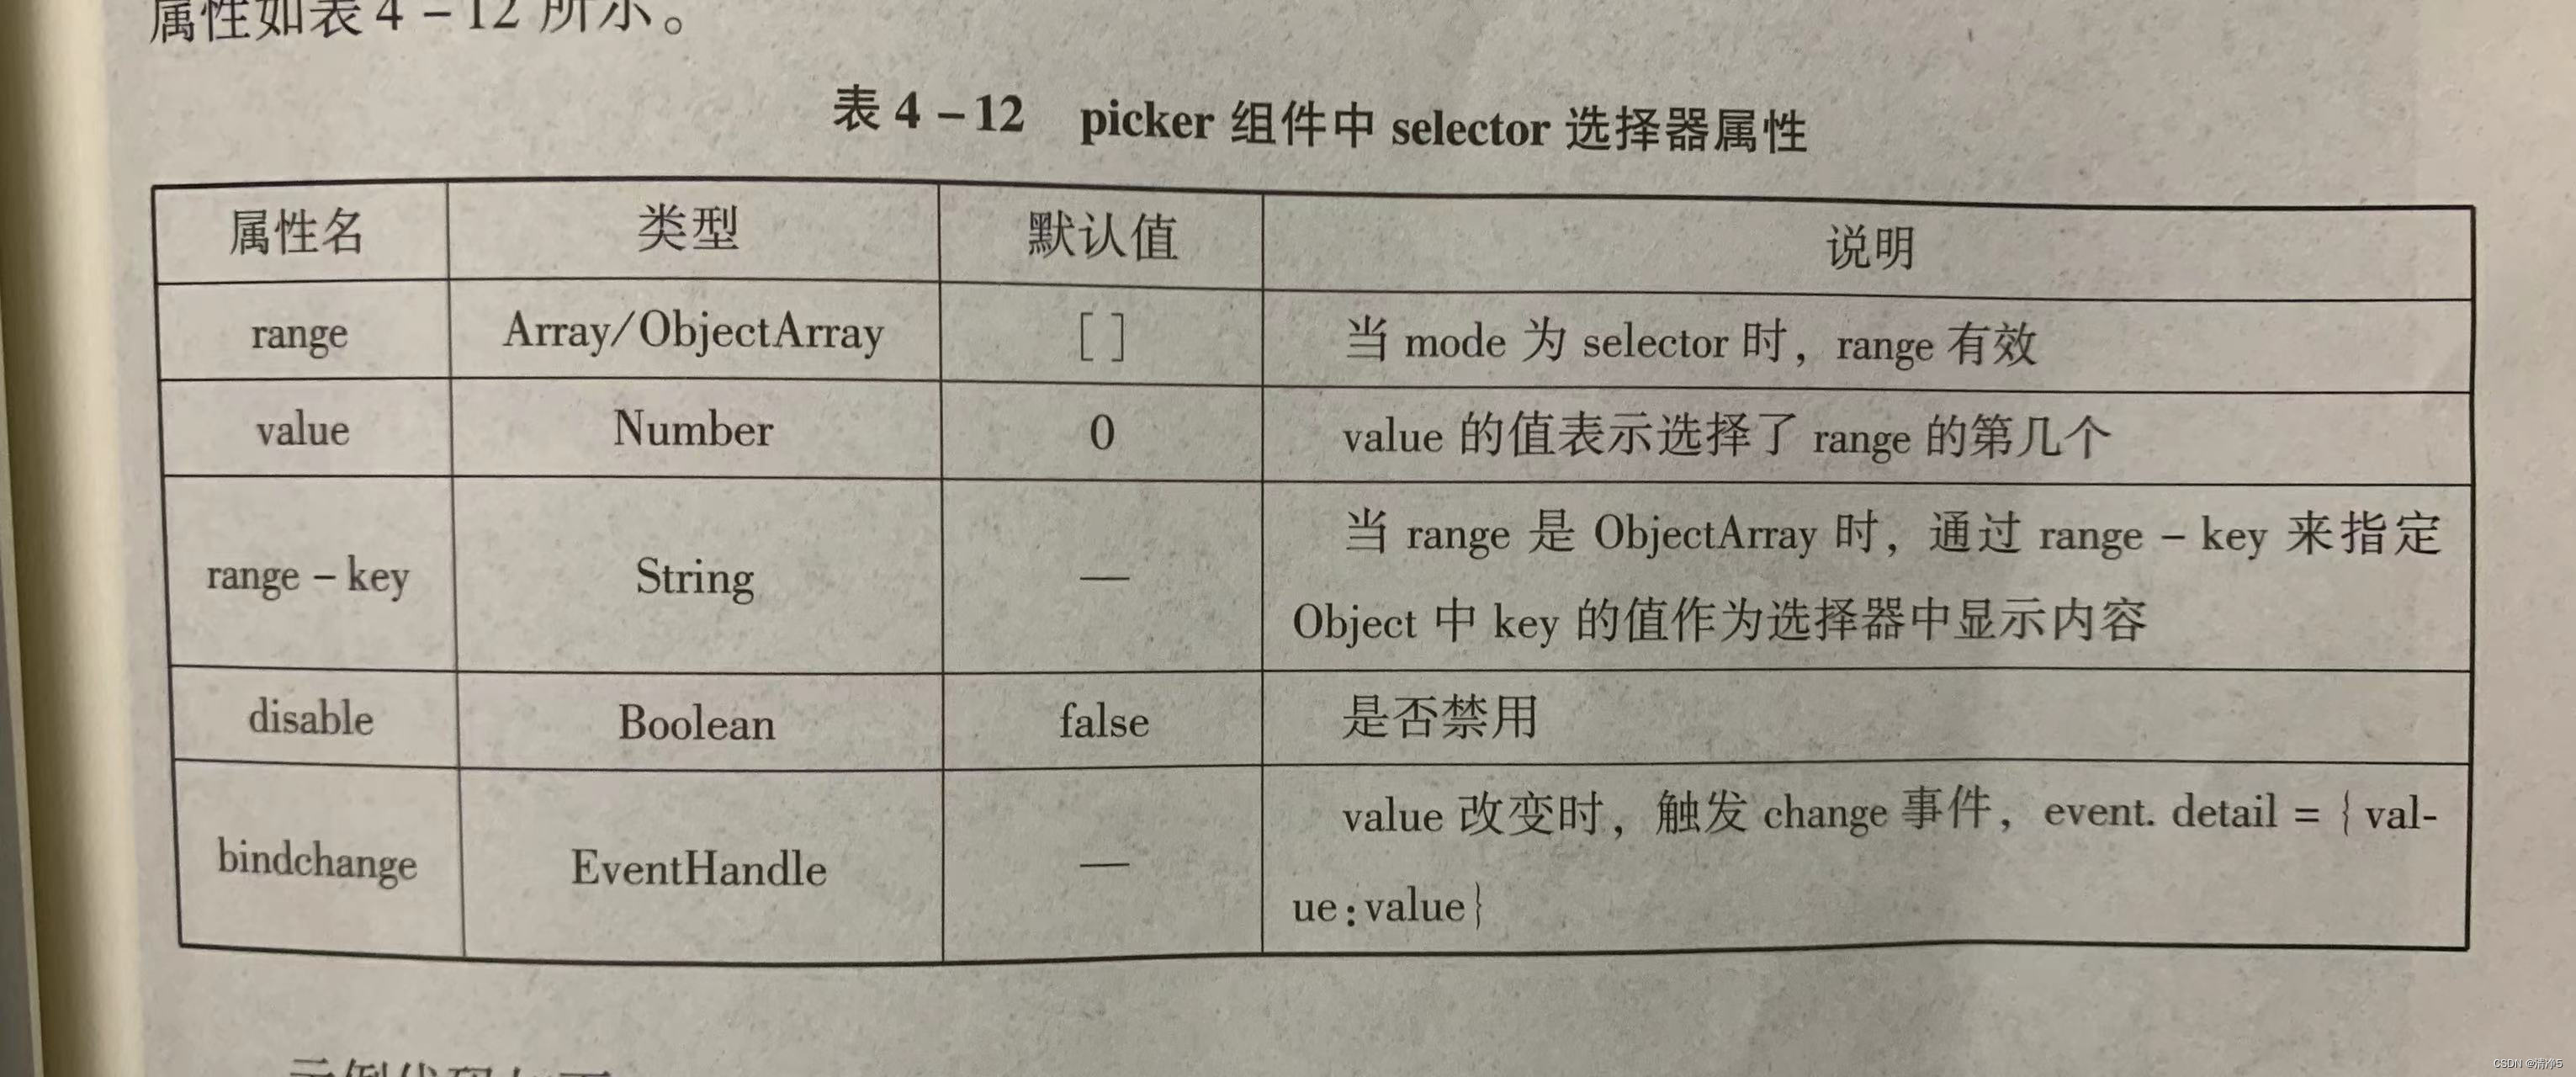
wxml:
<view>---range为数组---</view>
<picker range="{{array}}" value="{{index1}}" bindchange='arrayChange'>
当前选择:{{aray[index1]}}
</picker>
<view>---range为数组对象---</view>
<picker bindchange="objArrayChange" value="{{index2}}" range-key="name" range="{{objArray}}">
当前选择:{{objArray[index2].name}}
</picker>
js:
page({
data:{
  array:['Java','Python','C','C#'],
  objArray:[
    {id:0,name:'Java'},
    {id:1,name:'Python'},
    {id:2,name:'C'},
    {id:3,name:'C#'}
  ],
  index1:0,
  index2:0
},
arrayChange:function(e){
  console.log('picker值变为',e.detail.value)
  var index = 0;
  this.setData({
    index1:e.detail.value
  })
},
objArrayChange:function(e){
  console.log('picker值变为',e.detail.value)
  this.setData({
    index2:e.detail.value
  })
}
})
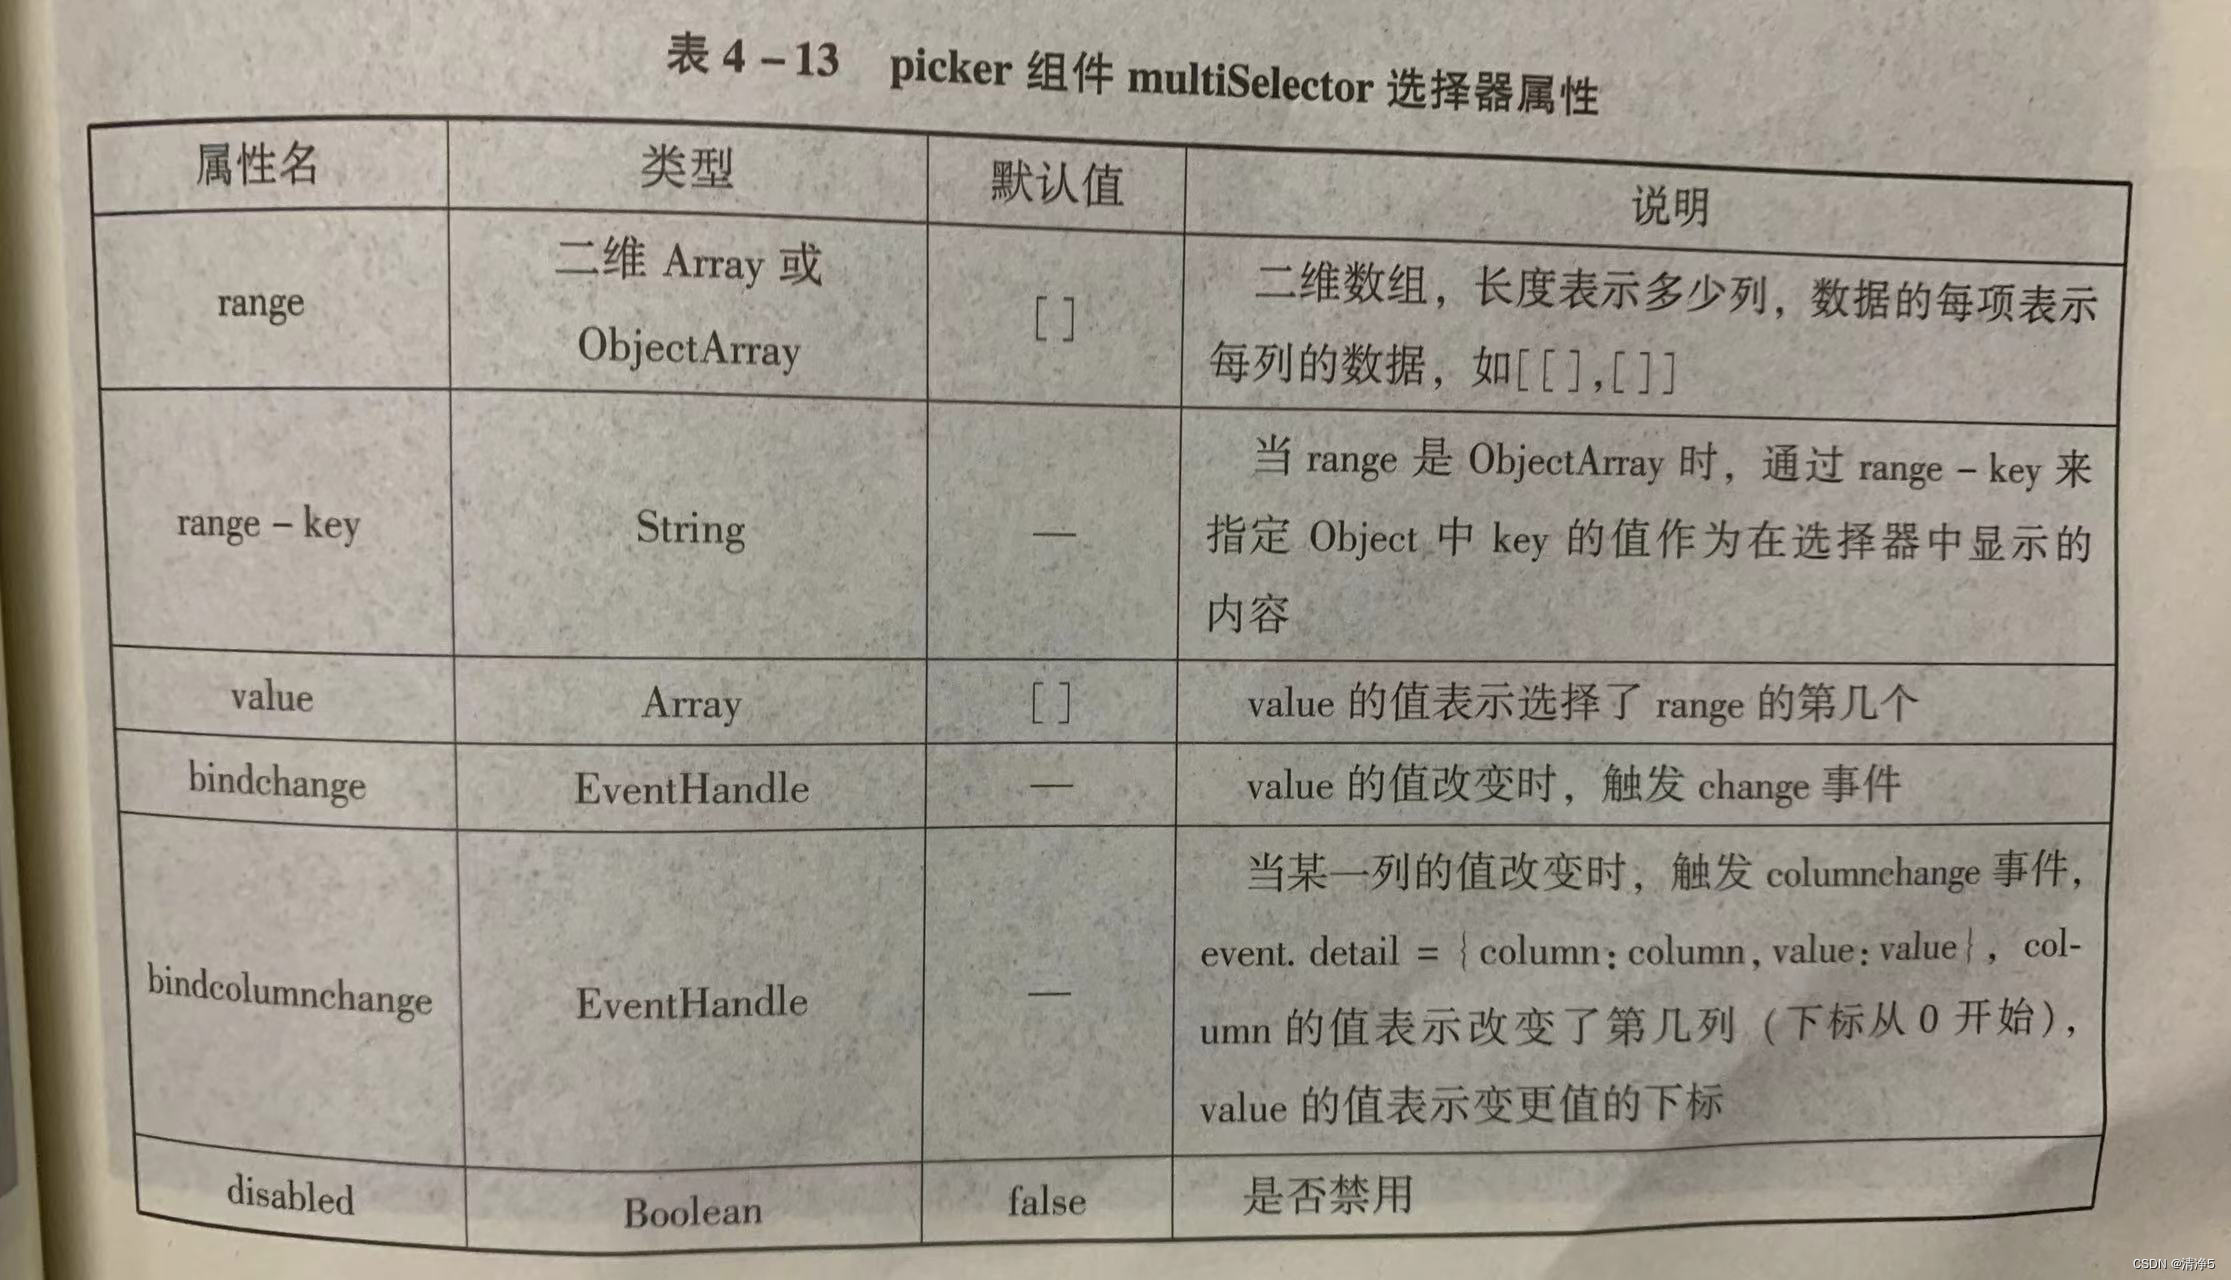
wxml:
<view>多列选择器</view>
<picker rmode = "multiSelector" bindchange="bindMultiPickerChange" bindcolumnchange="bindMultiPickerColumnChange"
value="{{multiIndex}}"
range="{{multiArray}}">
<view>
  当前选择:{{multiArray[0][multiIndex[0]]}},
  {{multiArray[1][multiIndex[1]]}},
  {{multiArray[2][multiIndex[2]]}}
</view>
</picker>
js:
page({
 data:{
    multiArray:[['陕西省','广东省',],['西安市','汉中市','延安市'],['雁塔区','长安区']],
    multiIndex:[0,0,0]
  },
  bindMultiPickerChange:function(e){
    console.log('Picker发送选择改变,携带值为',e.detail.value)
    this.setData({
      multiIndex:e.detail.value
    })
  },
  bindMultiPickerColumnChange:function(e){
    console.log('修改的列为',e.detail.column,',值为',e.detaila.value);
    var data={
      multiArray:this.data.multiArray,
      multiIndex:this.data.multiIndex
    };
    data.multiIndex[e.detail.column] =e.detail.value;
    switch(e.detail.column){
      case 0:
       switch(data.multiIndex[0]){
         case 0:
           data.multiArray[1]=['西安市','汉中市','延安市'];
           data.multiArray[2]=['雁塔区','长安区'];
           break;
         case 1:
           data.multiArray[1]=['深圳市','珠海市'];
           data.multiArray[2]=['南山区','长安区'];
           break;
       }
       data.multiIndex[1]= 0;
       data.multiIndex[2]= 0;
       break;
       case 1:
         switch(data.multiIndex[0]){
           case 0:
           switch(data.multiIndex[1]){
             case 0:
               data.multiArray[2] =['雁塔区','长安区'];
               break;
             case1:data.multiArray[2]=['汉台区','南郑区'];
               break;
             case 2:
               data.multiArray[2]=['宝塔区','子长县','延川县'];
               break;
           }
           break;
           case 1:
           switch(data.multiIndex[1]){
             case 0:
               data.multiArray[2]=['南山区','罗湖区'];
               break;
             case 1:

               data.multiArray[2]=['香洲区','斗门区'];
               break;
           }
           break;
         }
         data.multiIndex[2]=0;
         console.log(data.multiIndex);
         break;
    }
    this.setData(data);
  },
})
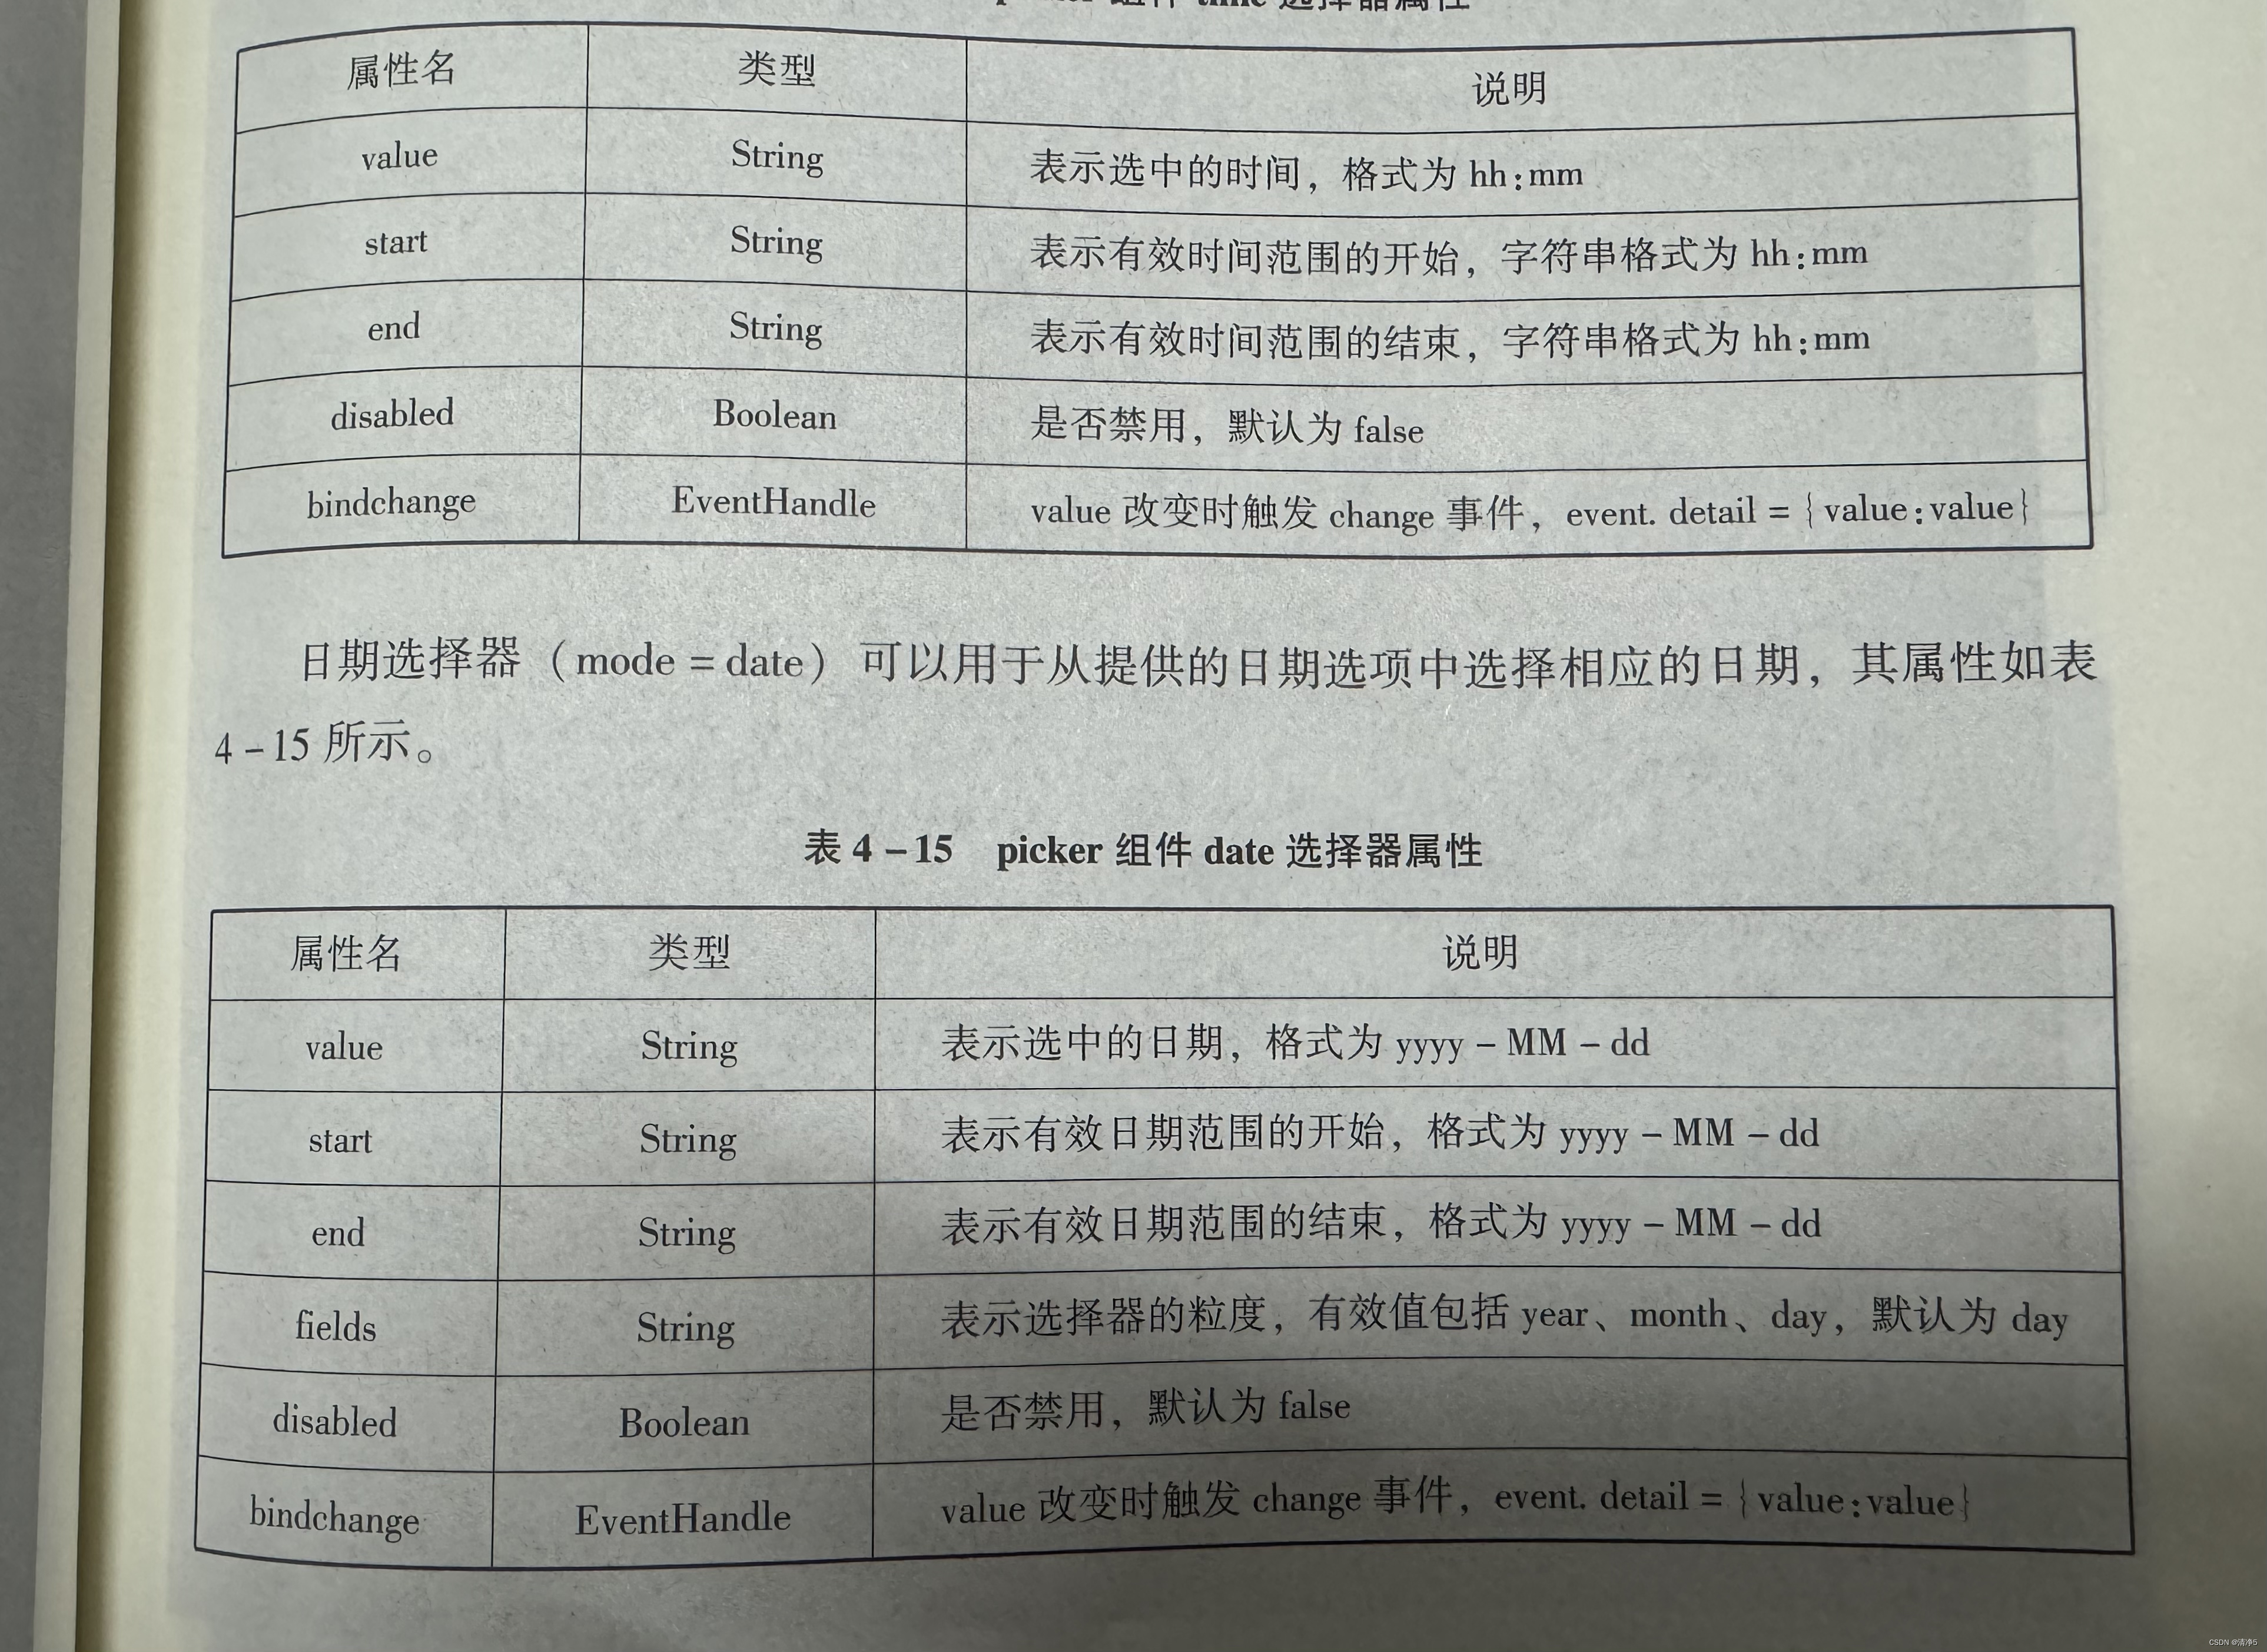
wxml:
<view>
  <picker mode = "date" start = "{{startdate}} " end = " {{enddate}}"
value = "{{date}}" bindchange = "changedate">
选择的日期:{{date}}
</picker >
</view>
<view>
  <picker mode ="time" start = "{{starttime}}"end = "{{endtime}}" bindchange ="changet ime">选择的时间:     {{time}}
</picker>
</view>
js:
<view>
  <picker mode = "date" start = "{{startdate}} " end = " {{enddate}}"
value = "{{date}}" bindchange = "changedate">
选择的日期:{{date}}
</picker >
</view>
<view>
  <picker mode ="time" start = "{{starttime}}"end = "{{endtime}}" bindchange ="changet ime">选择的时间:     {{time}}
</picker>
</view> 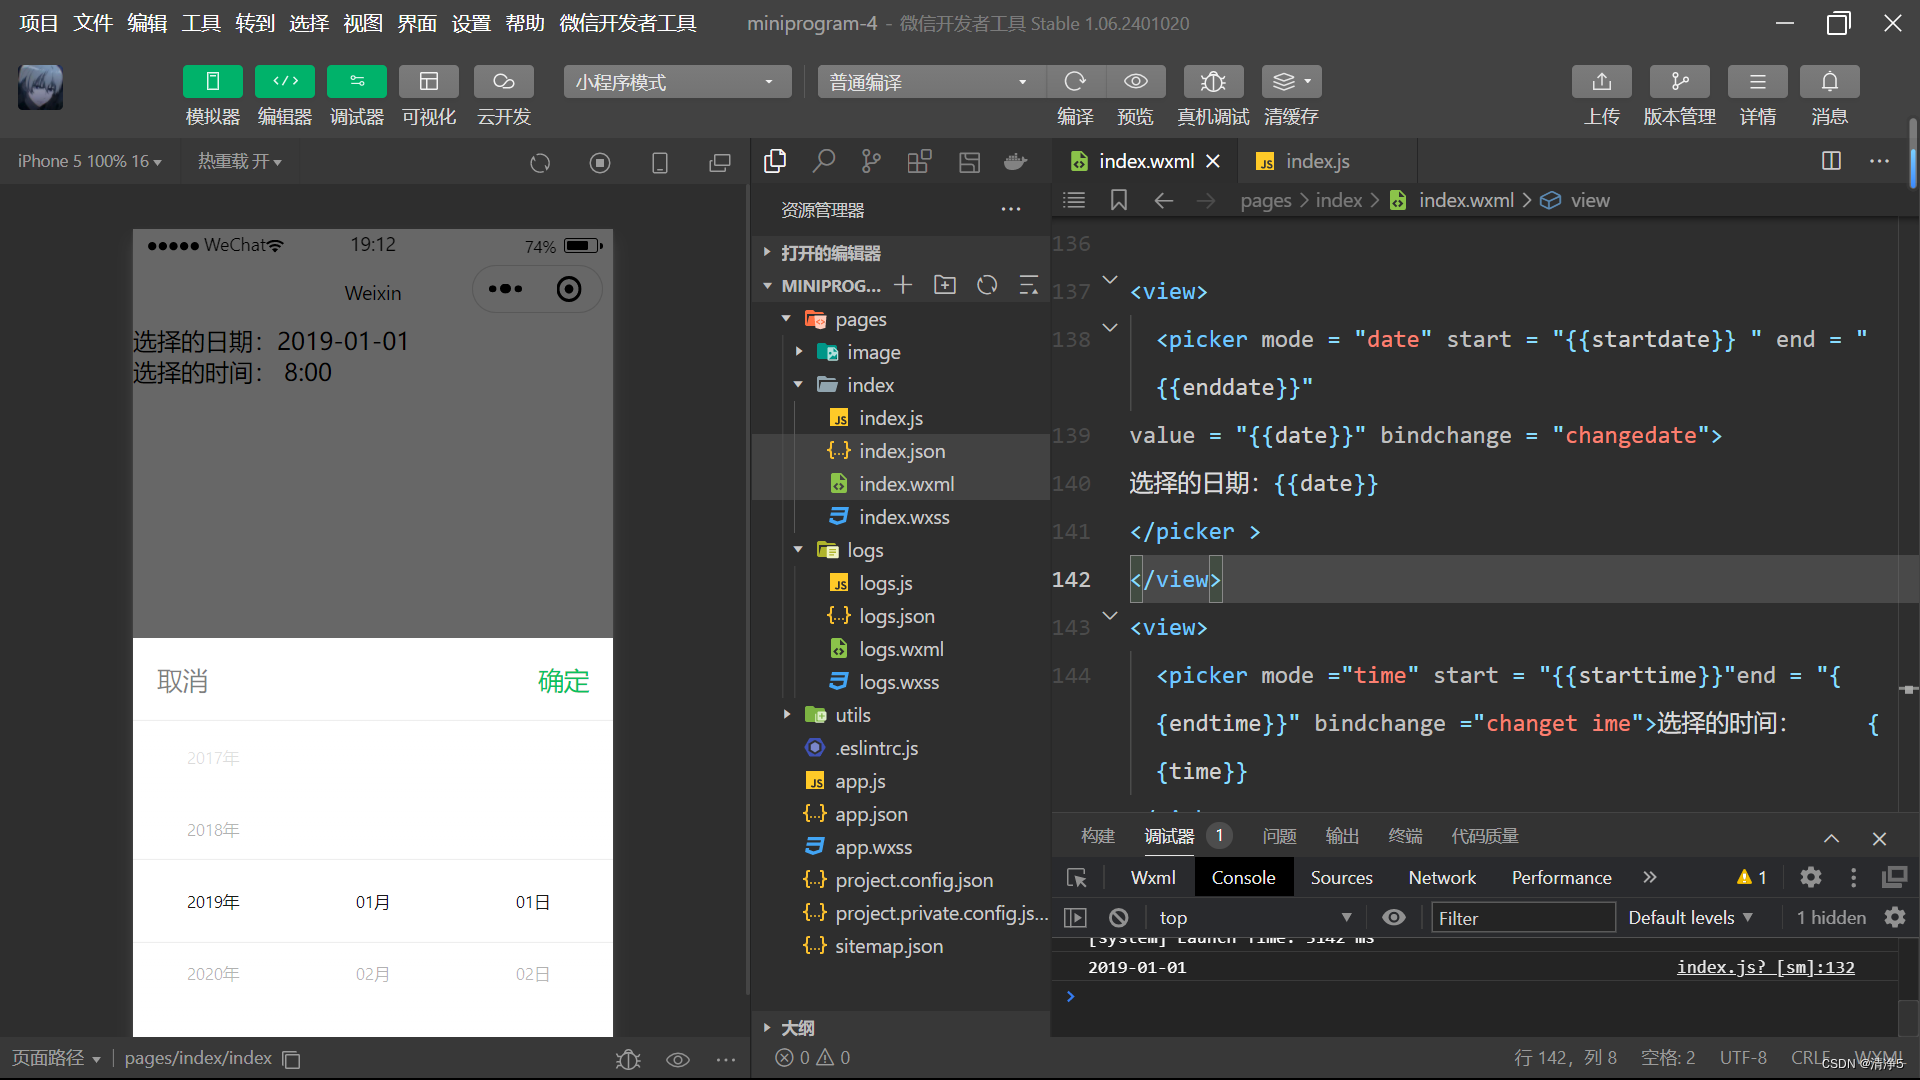
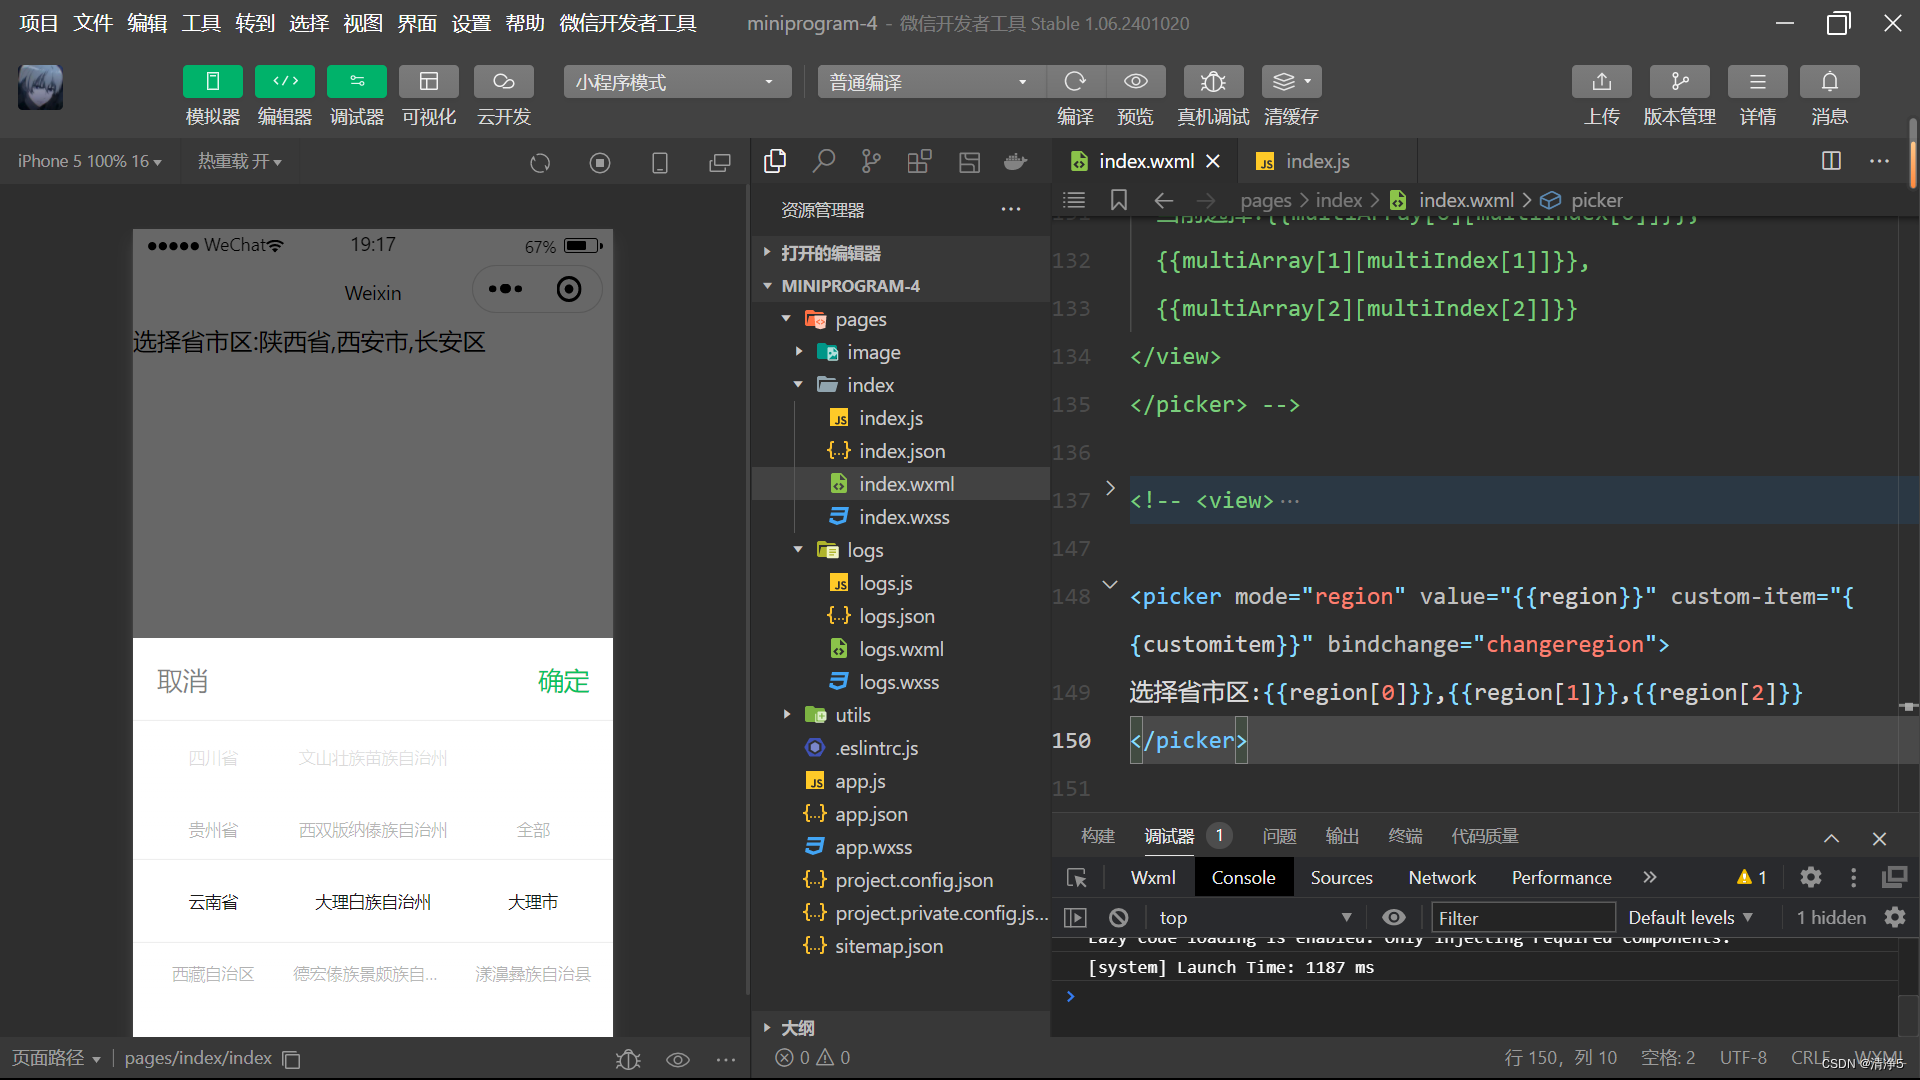
wxml:
<picker mode="region" value="{{region}}" custom-item="{{customitem}}" bindchange="changeregion">
选择省市区:{{region[0]}},{{region[1]}},{{region[2]}}
</picker>
js:
    data:{
      region:['陕西省','西安市','长安区'],
      customitem:'全部'
    },
    changeregion:function(e){
      console.log(e.detail.value)
      this.setData({
        region:e.detail.value
      })
} 
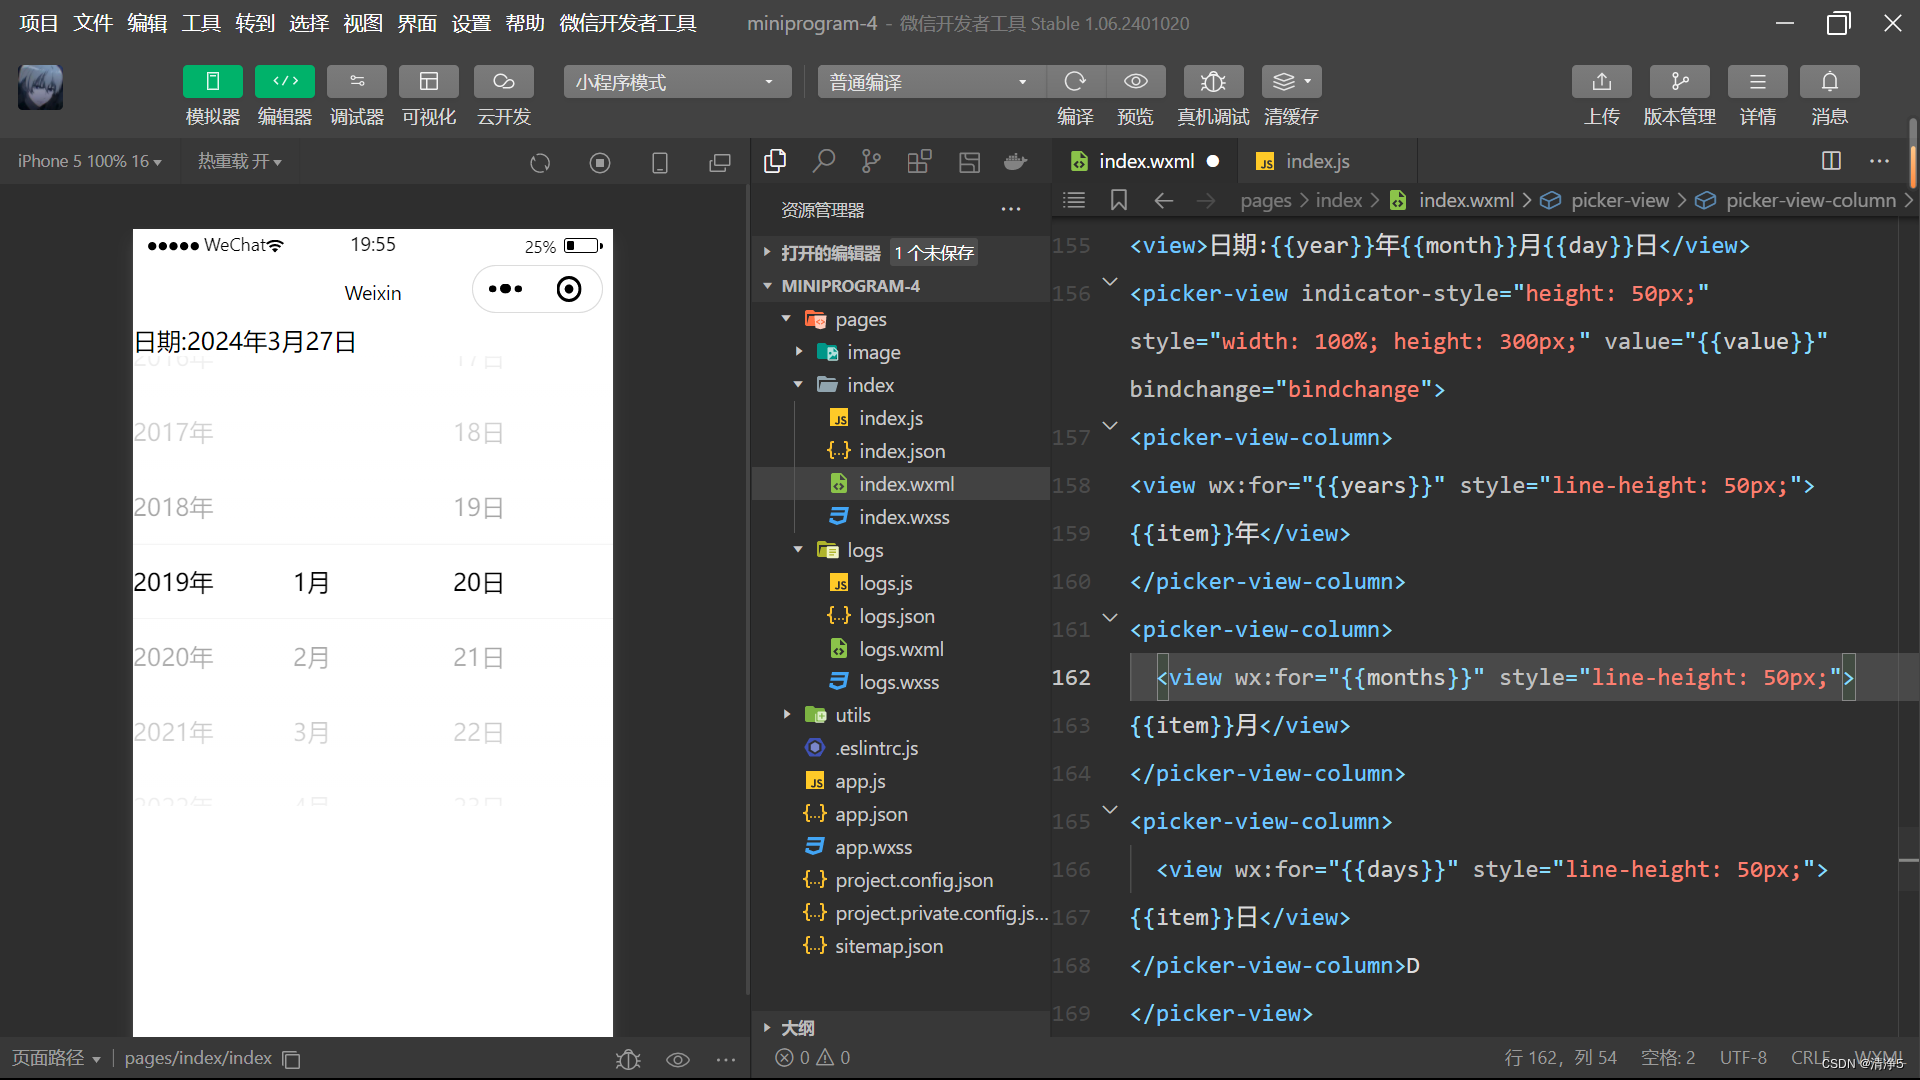
picker-view
wxml:
<view>日期:{{year}}年{{month}}月{{day}}日</view>
<picker-view indicator-style="height: 50px;" style="width: 100%; height: 300px;" value="{{value}}" bindchange="bindchange">
<picker-view-column>
<view wx:for="{{years}}" style="line-height: 50px;">
{{item}}年</view>
</picker-view-column>
<picker-view-column>
  <view wx:for="{{months}}" style="line-height: 50px;">
{{item}}月</view>
</picker-view-column>
<picker-view-column>
  <view wx:for="{{days}}" style="line-height: 50px;">
{{item}}日</view>
</picker-view-column>
</picker-view>
js:
const date = new Date()
const years =[]
const months = []
const days = []
for(let i = 1900;i<=2050;i++){
  years.push(i)
}
for(let i= 1;i<=12;i++){
  months.push(i)
}
for(let i=1;i<=31;i++){
  days.push(i)
}
Page({
 data:{
   years:years,
   months:months,
   days:days,
   year:date.getFullYear(),
   month:date.getMonth()+1,
   day:date.getDate(),
   value:[2018,0,0],
 },
 bindChange:function(e){
   const val = e.detail.value
   console.log(val);
   this.setData({
     year:this.data.years[val[0]],
     month:this.data.months[val[1]],
     day:this.data.days[val[2]]
   })
 }
}) 
input

 wxml:
wxml:
<input placeholder="这是一个可以自动聚焦的input" auto-focus />
<input placeholder="这个只有在按钮点击的时候才聚焦" focus="{{focus}}" />
<button bindtap="bindButtonTap">使得输入框获取焦点</button>
<input maxlength="10" placeholder="最大输入长度为10" />
<view class="section_title">你输入得是:{{inputValue}}
  <input bindinput="bindKeyInput" placeholder="输入同步到view中" />
  <input bindinput="bindReplaceInput" placeholder="连续的两个1会变成2" />
  <input password type="number" />
  <input password type="text" />
  <input type ="digit" placeholder="带小数点的数字键盘" />
  <input type ="idcard" placeholder="身份证输入键盘" />
  <input placeholder-style="color:red"placeholder="占位符字体是红色的" />
</view>
js:
Page({
  data:{
    focus:false,
    inputValue:""
  } ,
  bindButtonTap:function(){
    this.setData({
      focus:true
    })
  },
  bindKeyInput:function(e){
    this.setData({
      inputValue:e.detail.value
    })
  },
  bindReplaceInput:function(e){
    var value =e.detail.value
    var pos = e.detail.cursor
    if(pos!=-1){
      var left =e.detail.value.slice(0,pos)
      pos = left.replace(/11/g,'2').length
    }
    return{
      value: value.replace(/11/g,'2'),
      cursor:pos
    }
  }
}) 
textarea

wxml:
<textarea bindblur="bindTextAreaBlur" auto-height placeholder="自动变高" />
<textarea placeholder="placeholder 颜色是红色的" placeholder-style="color:red;" />
<textarea placeholder="这是一个可以自动聚焦的textarea" auto-focus />
<textarea placeholder="这个只有在按钮点击的时候才聚焦" focus="{{focus}}" />
<button bindtap="bindButtonTap">使得输入框获取焦点</button>
<form bindsubmit="bindFormSubmit">
  <textarea placeholder="form中的textarea" name="textarea" />
  <button form-type="submit">提交</button>
</form>
js:
page({
 data:{
    height:10,
    focus:false
  } ,
  bindButtonTap:function(){
    this.setData({
      focus:true
    })
  },
  bindTextAreaBlur:function(e){
    console.log(e.detail.value)
  },
  bindFormSubmit:function(e){
    console.log(e.detail.value.textarea)
  }
})
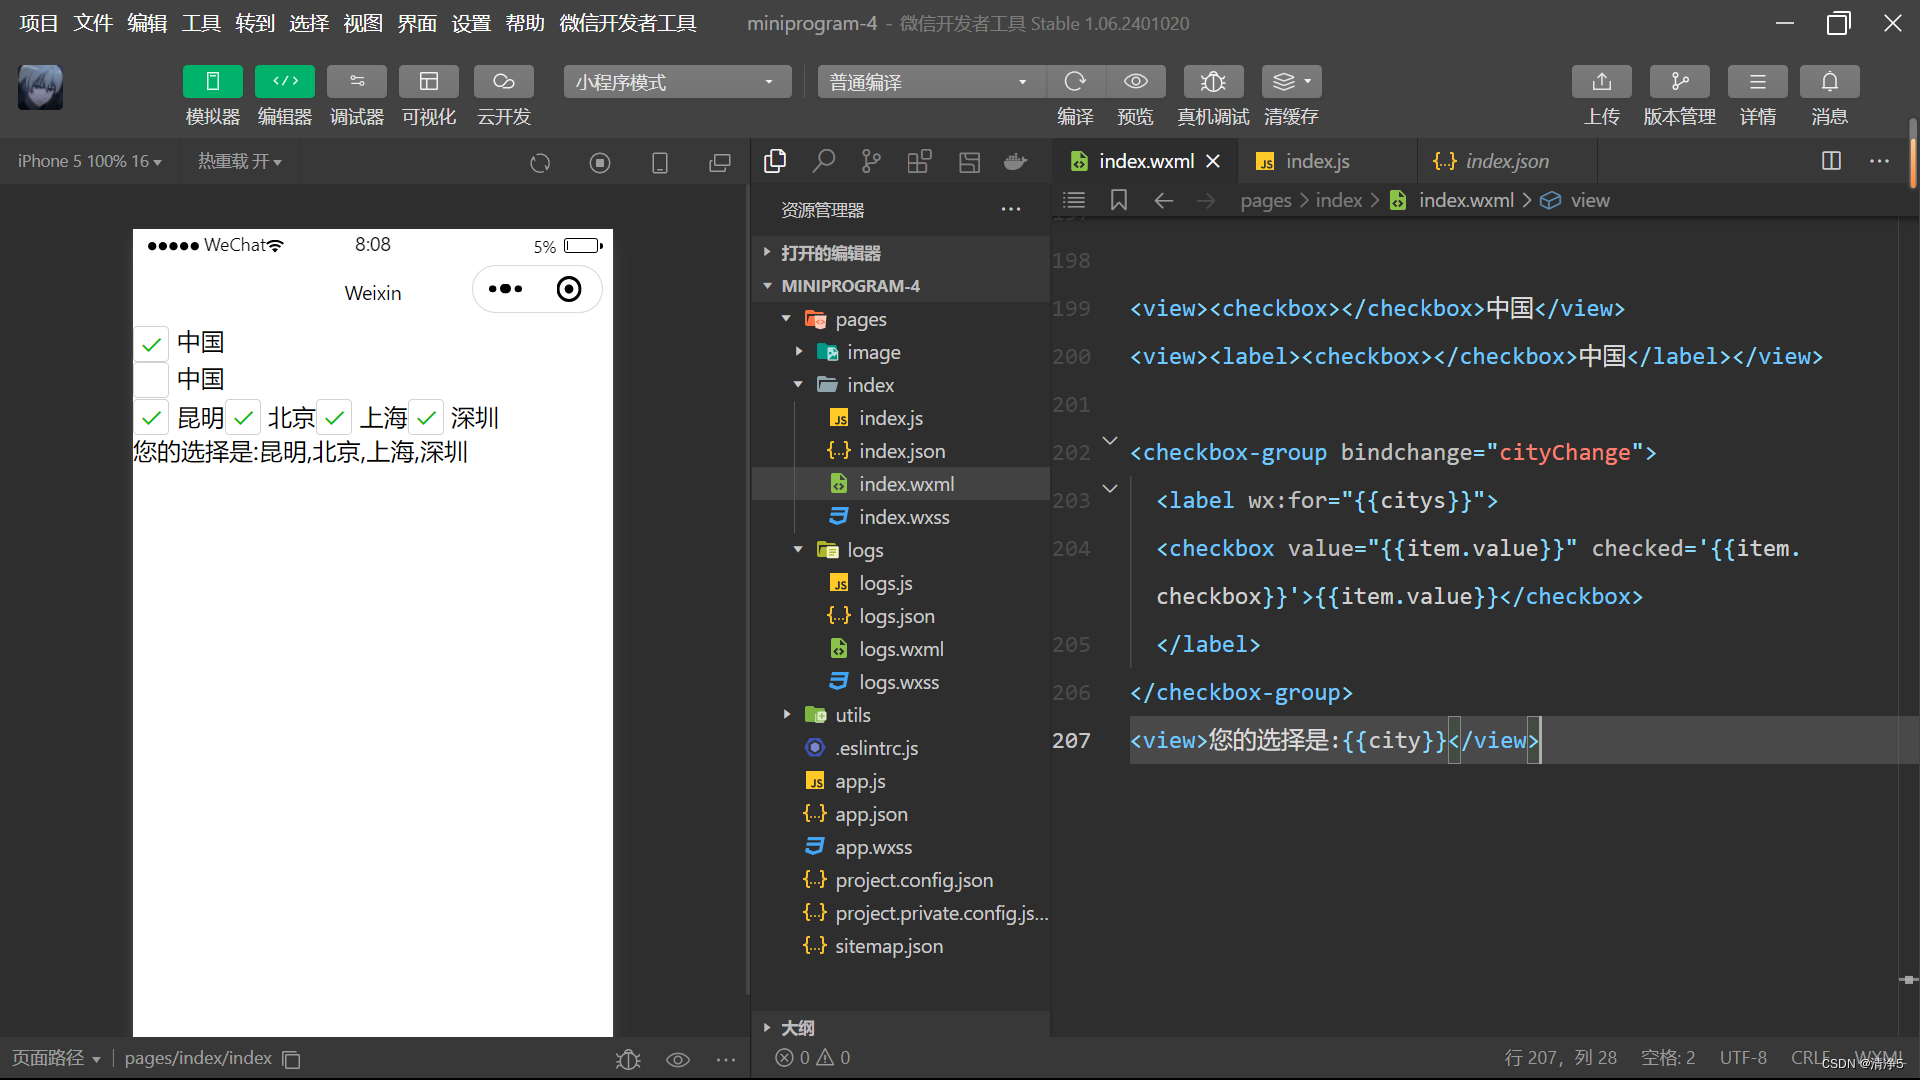
label
wxml:
<view><checkbox></checkbox>中国</view>
<view><label><checkbox></checkbox>中国</label></view>

<checkbox-group bindchange="cityChange">
  <label wx:for="{{citys}}">
  <checkbox value="{{item.value}}" checked='{{item.checkbox}}'>{{item.value}}</checkbox>
  </label>
</checkbox-group>
<view>您的选择是:{{city}}</view>
js:
 city:"",
      data:{
        citys:[
          {name:'km',value:'昆明'},
          {name:'bj',value:'北京'},
          {name:'sh',value:'上海',checked:'true'},
          {name:'sz',value:'深圳'}
        ]
      },
      cityChange:function(e){
        console.log(e.detail.value);
        var city = e.detail.value;
        this.setData({city:city})
      }
form

wxml:
<form bindsubmit="formSubmit" bindreset ="formReset">
<view>姓名:
  <input type="text" name="xm" />
</view>
<view>性别:
  <radio-group name ="xb">
    <label>
    <radio value="男" checked/>男</label>
    <label>
    <radio value="女" />女</label>
  </radio-group>
</view>
<view>爱好:
  <checkbox-group name="hobby">
  <label wx:for="{{hobbies}}">
    <checkbox value="{{item.value}}"
    checked='{{item.checkbox}}'>{{item.value}}</checkbox>
  </label>
  </checkbox-group>
</view>
<button formType='sumbit'>提交</button>
<button formType='reset'>重置</button>
</form>
js:
Page({
  hobby:"",
  data:{
    hobbies:[
      {name:'jsj',value:'计算机',checked:'true'},
      {name:'music',value:'听音乐'},
      {name:'game',value:'玩电竞'},
      {name:'swim',value:'游泳',checked:'true'}
    ]
    },
    formSubmit:function(e){
      console.log('form发生了sumbit事件,携带数据为:',e.detail.value)
    },
    formReset:function(){
      console.log('form发生了reset事件')
    }
})
多媒体组件
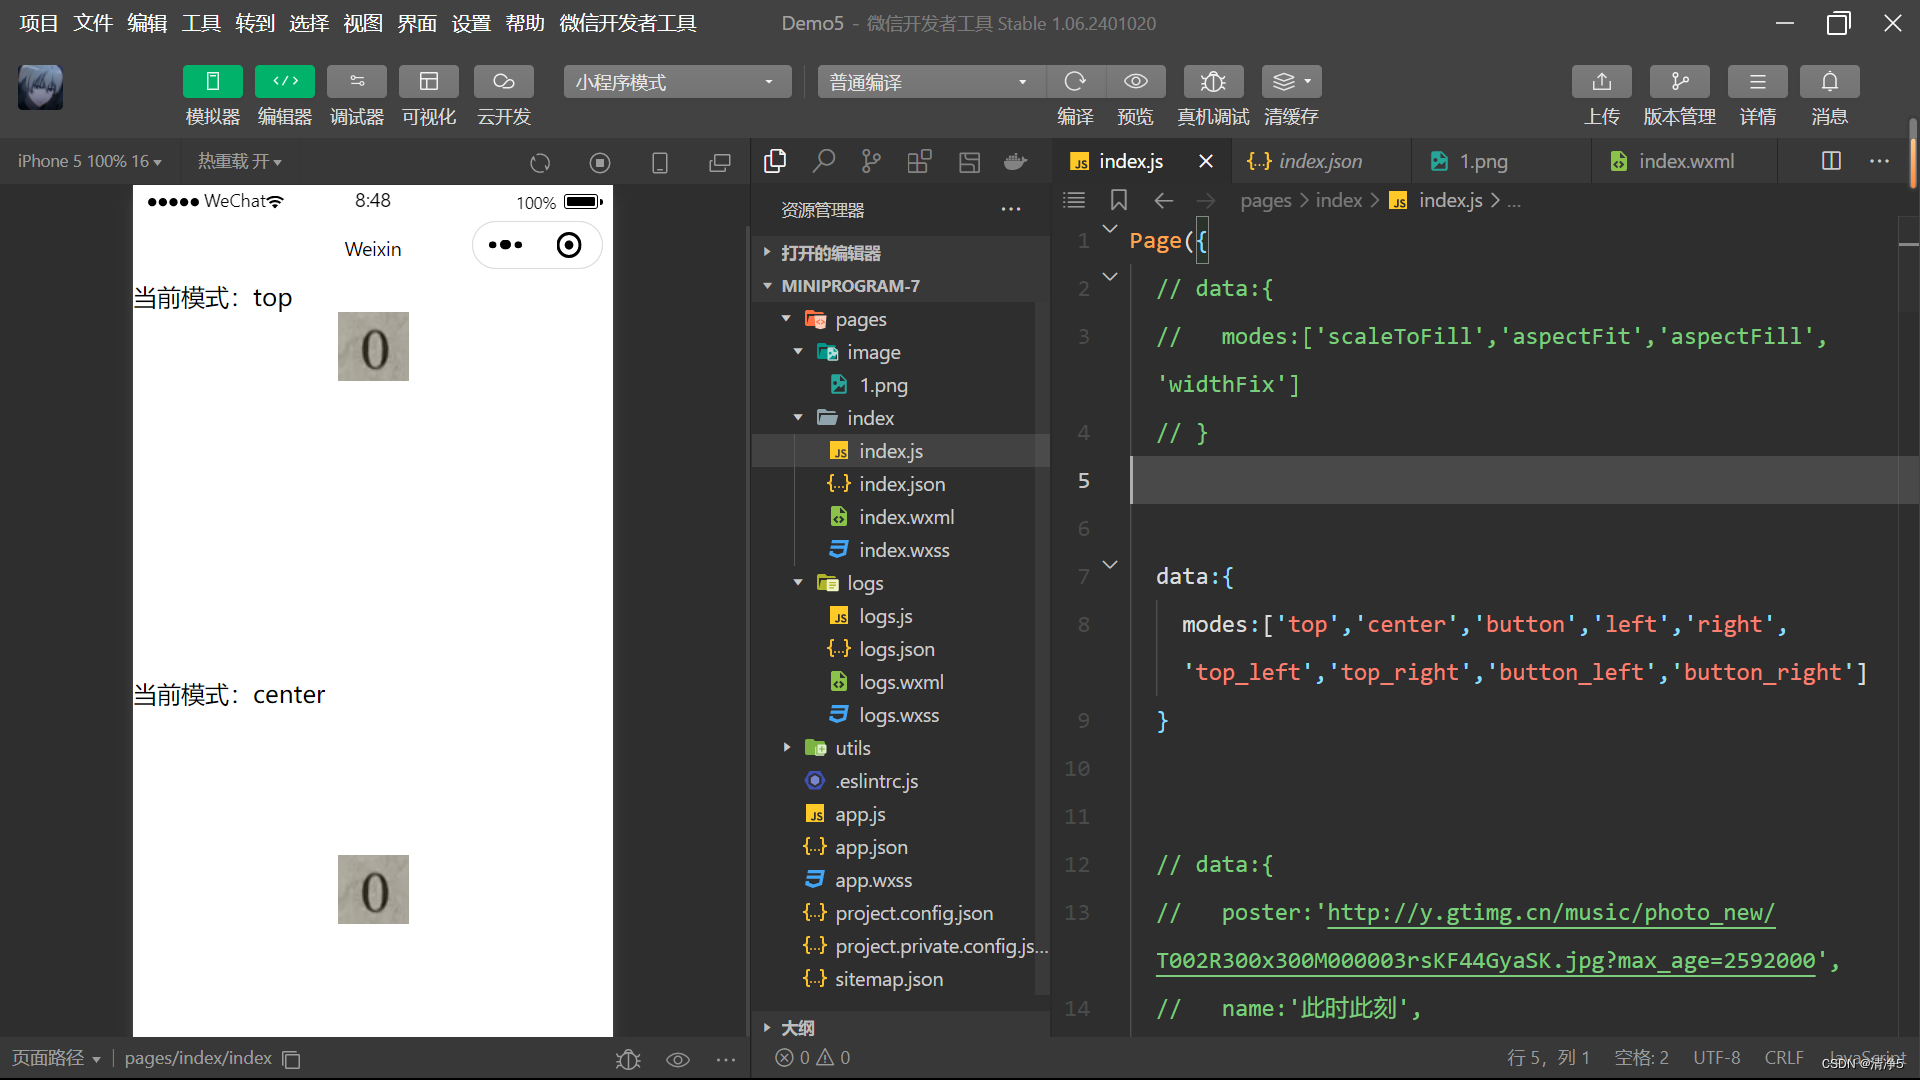
image
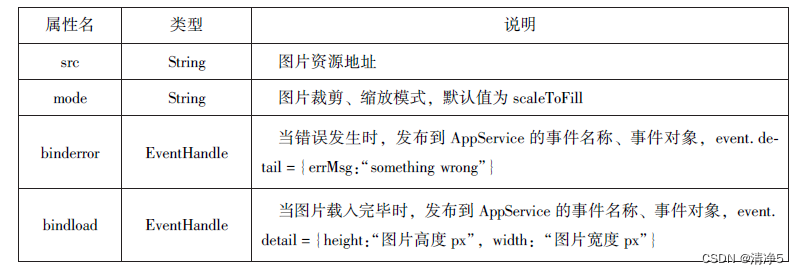
wxml:
<block wx:for="{{modes}}">
<view>当前模式:{{item}}</view>
<image mode="{{item}}" src="../image/1.png" style="width: 100%,height : 100%"/>
</block>
js:
Page({
  data:{
    modes:['scaleToFill','aspectFit','aspectFill','widthFix']
  }
})
wxml:
wxml:
<block wx:for="{{modes}}">
<view>当前模式:{{item}}</view>
<image mode="{{item}}" src="../image/1.png" style="width: 100%,height : 100%"/>
</block>
js:
page({
  data:{
    modes:['top','center','button','left','right','top_left','top_right','button_left','button_right']
  }
}) 
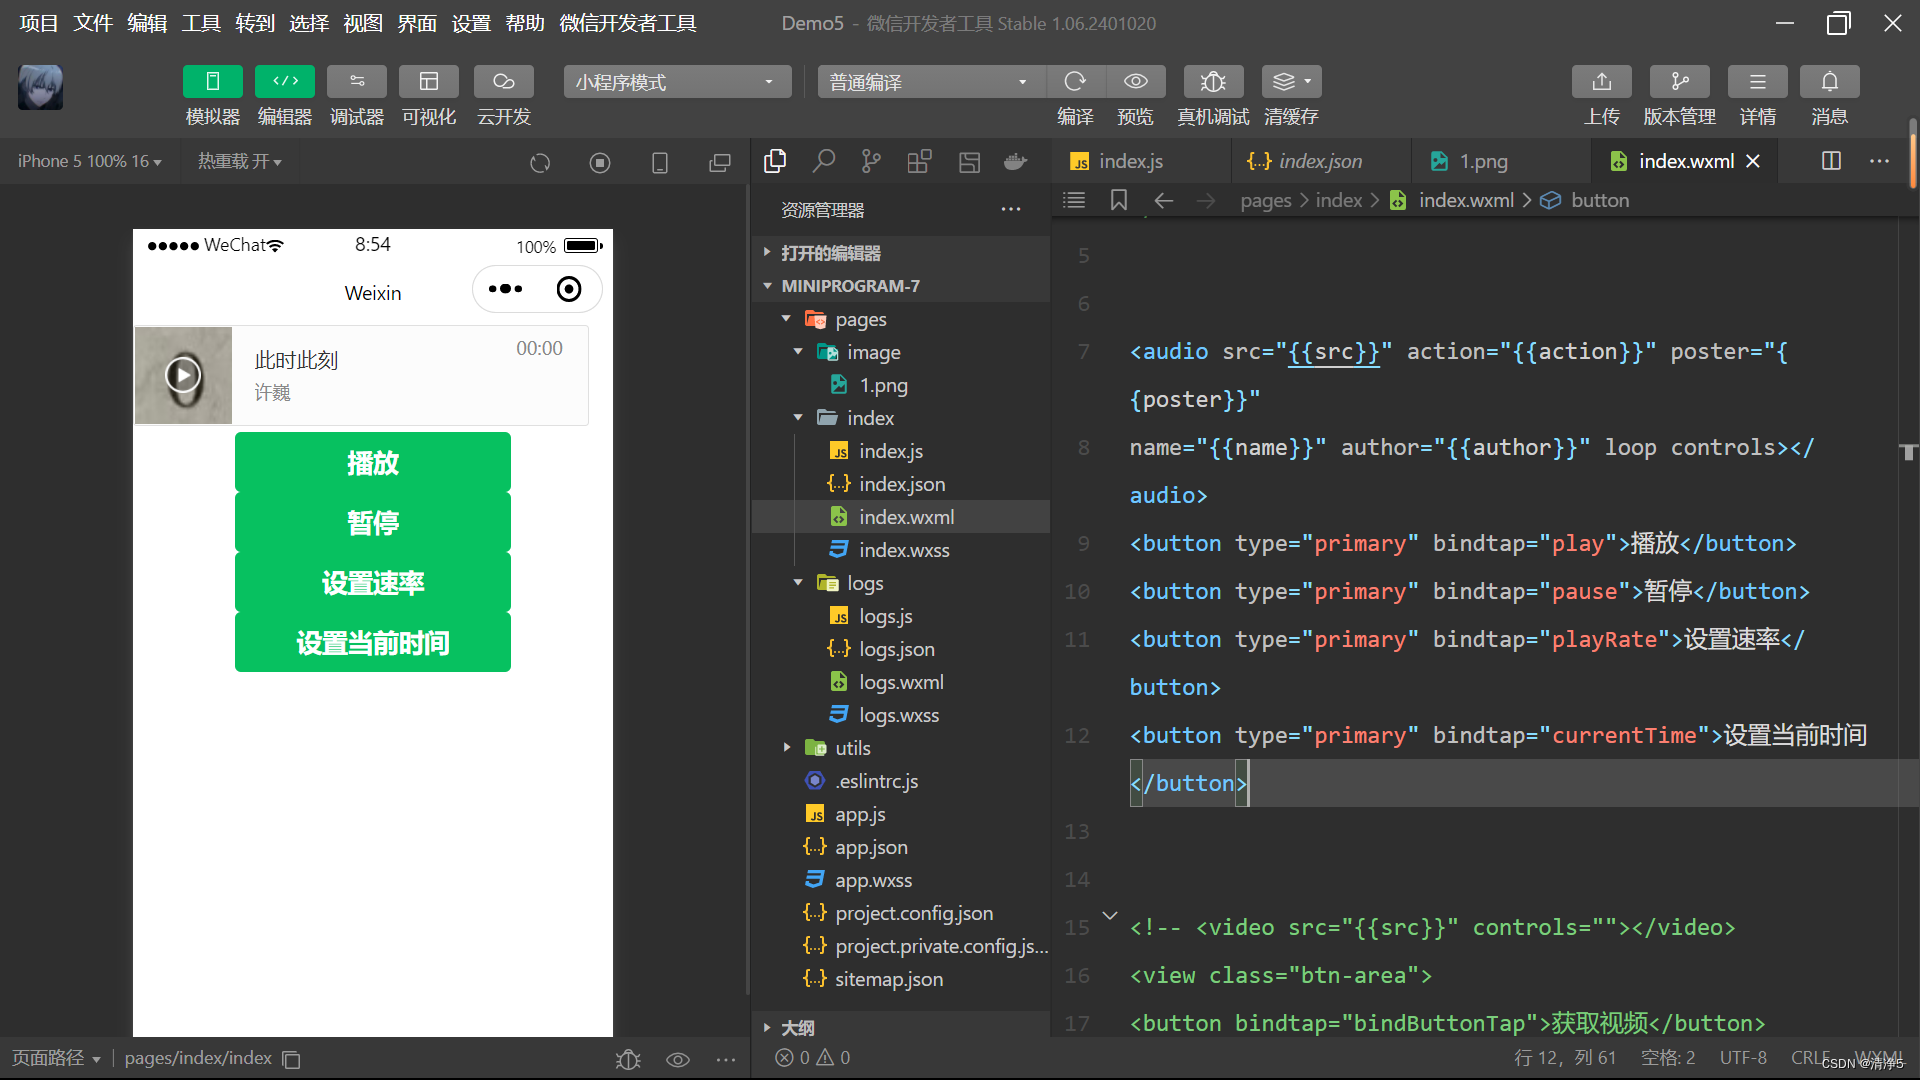
audio
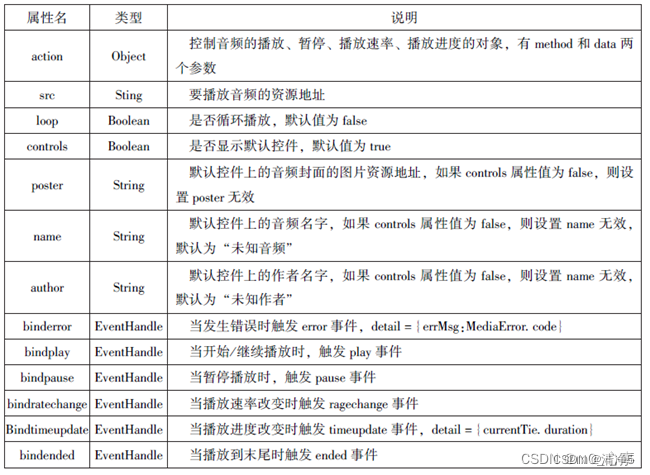
wxml:
<audio src="{{src}}" action="{{action}}" poster="{{poster}}"
name="{{name}}" author="{{author}}" loop controls></audio>
<button type="primary" bindtap="play">播放</button>
<button type="primary" bindtap="pause">暂停</button>
<button type="primary" bindtap="playRate">设置速率</button>
<button type="primary" bindtap="currentTime">设置当前时间</button>
js:
page({
 data:{
    poster:'../image/1.png',
    name:"此时此刻",
    author:'许巍',
    src:'http://ws.stream.qqmusic.qq.com/M500001VfvsJ21xFqb.mp3?guid=ffffffff82def4af4b12b3cd9337d5e7&uin=346897220&vkey=6292F51E1E384E06DCBDC9AB7C49FD713D632D313AC4858BACB8DDD29067D3C601481D36E62053BF8DFEAF74C0A5CCFADD6471160CAF3E6A&fromtag=46'
  },
  play:function(){
    this.setData({
      action:{
        method:'play'
      }
    })
  },
  pause:function(){
    this.setData({
      action:{
        method:'pause'
      }
    })
  },
  playRate:function(){
    this.setData({
      action:{
        method:'setplaybackRate',
        data:10
      }
    })
    console.log('当前:'+ this.data.action.data)
  },
  currentTime:function(){
    this.setData({
      action:{
        method:'setCurrentTime',
        data:120
      }
    })
  }
}) 
video
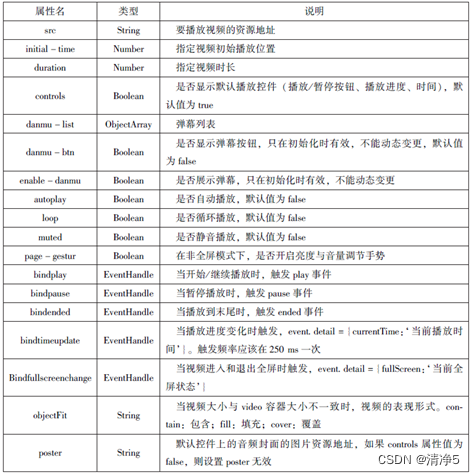
wxml:
<video src="{{src}}" controls=""></video>
<view class="btn-area">
<button bindtap="bindButtonTap">获取视频</button>
</view>
js:
page({
data:{
    src:"",
  },
  bindButtonTap:function(){
     var that = this
    wx.chooseVideo({
      sourceType:['album','camera'],
      maxDuration:60,
      camera:['front','back'],
       success:function(res){
        that.setData({
          src:res.tempFilePath
        })
      }
      })
  }
})
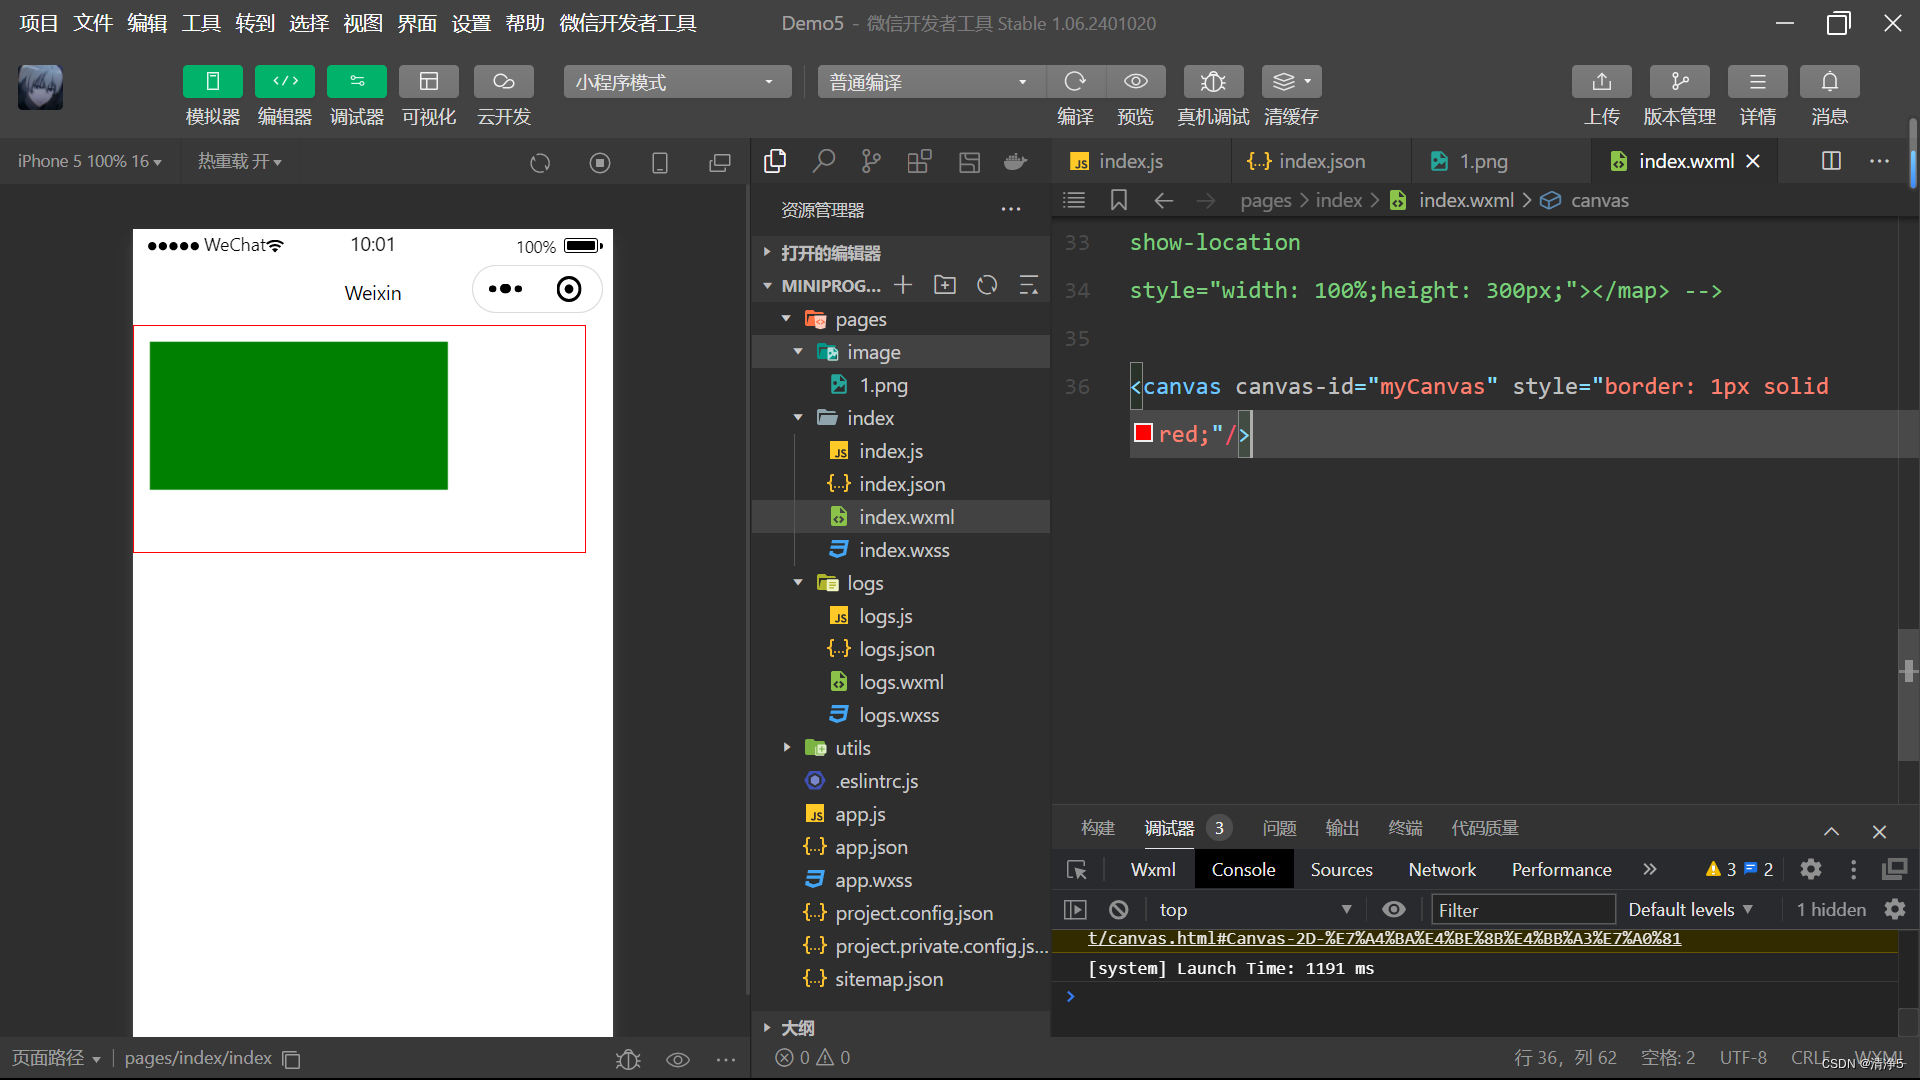
camera
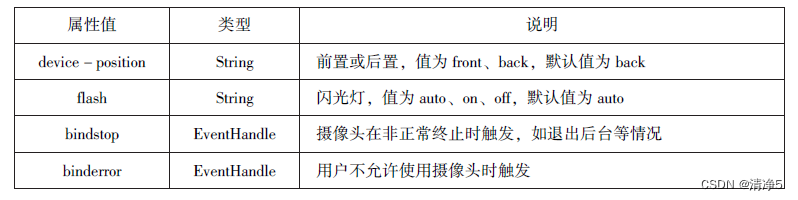
wxml:
<camera device-position="back" flash="off" binderror="error"
style="width: 100%; height: 350px;"></camera>
<button type="primary" bindtap="takePhoto">拍照</button>
<view>预览</view>
<image mode="widthFix" src="{{src}}"></image>
js:
page({
takePhoto(){
      const ctx = wx.createCameraContext()
      ctx.takePhoto({
        quality:'high',
        success:(res) => {
          this.setData({
            src:res.tempImagePath
          })
        }
      })
    },
    error(e){
      console.log(e.detail)
    }
})
其他组件
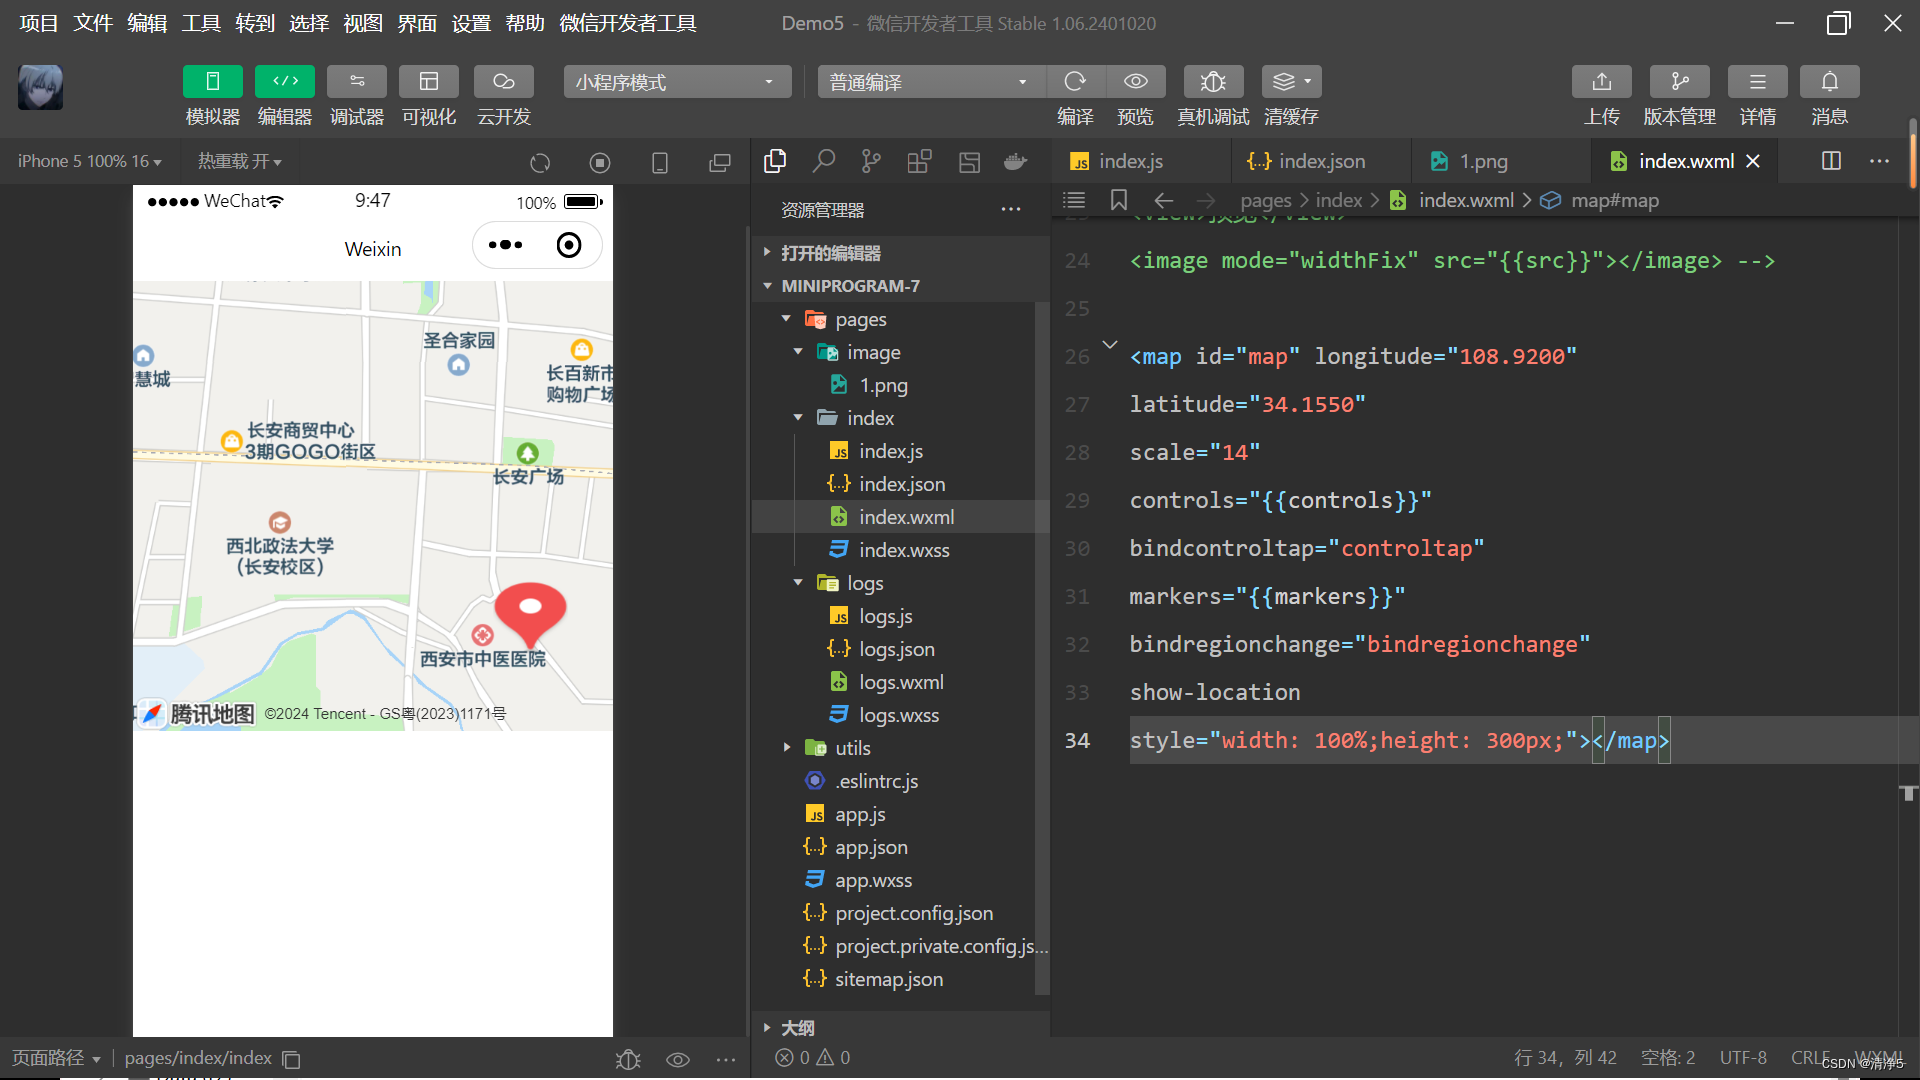
map


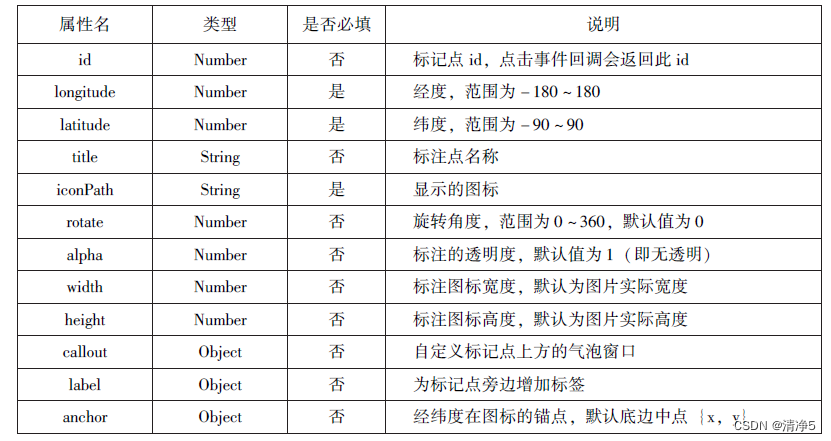
 wxml:
wxml:
<map id="map" longitude="108.9200"
latitude="34.1550"
scale="14"
controls="{{controls}}"
bindcontroltap="controltap"
markers="{{markers}}"
bindregionchange="bindregionchange"
show-location
style="width: 100%;height: 300px;"></map>
js:
page({
  data:{
    markers:[{
      iconPath:"",
      id:0,
      longitude:"108.9290",
      latitude:"34.1480",
      width:50,
      height:50
    }],
    polyline:[{
      points:[
        {
          longitude:"108.9200",
          latitude:"34.1400",
        },
        {
          longitude:"108.9200",
          latitude:"34.1500"
        },
        {
          longitude:"108.9200",
          latitude:"34.1700"
        }
      ],
      color:"#00ff00",
      width:2,
      dottedLine:true
    }],
    conteols:[{
      id:1,
      iconPath:'',
      position:{
        left:0,
        top:300,
        width:30,
        height:30
      },
      clickable:true
    }]
  },
  regionchange(e){
    console.log(e.type)
  },
  markertap(e){
    console.log(e.markerId)
  },
  conroltap(e){
    console.log(e.controlId)
  }

})
canvas
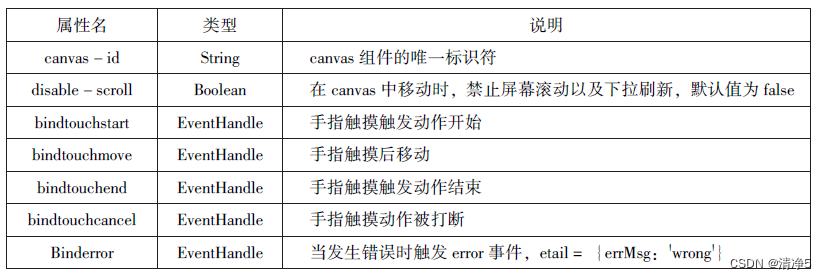
wxml:
<canvas canvas-id="myCanvas" style="border: 1px solid red;"/>js:
  onLoad:function(options){
    var ctx = wx.createCanvasContext("myCanvas")
    ctx.setFillStyle('green')
    ctx.fillRect(10,10,200,100)
    ctx.draw()
} 
第五章 即速应用
基础组件
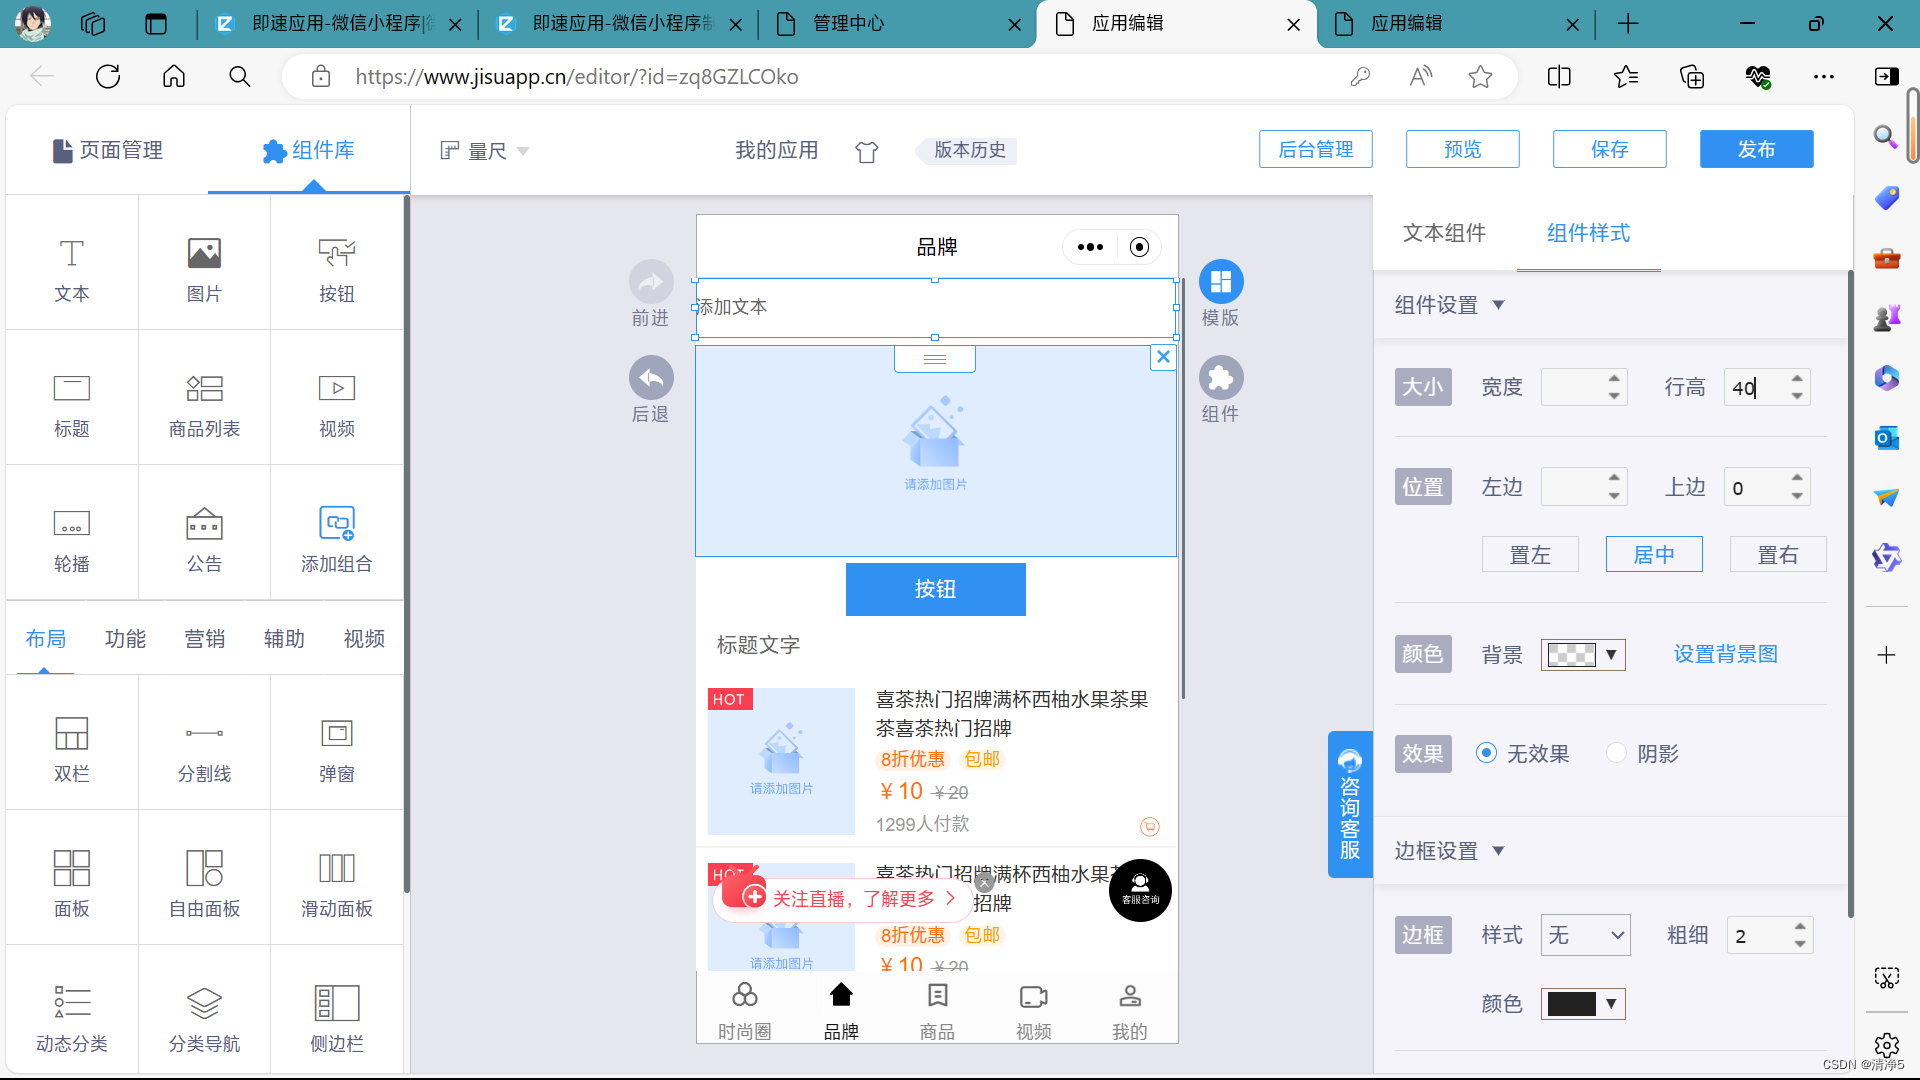
1.文本:
文本组件
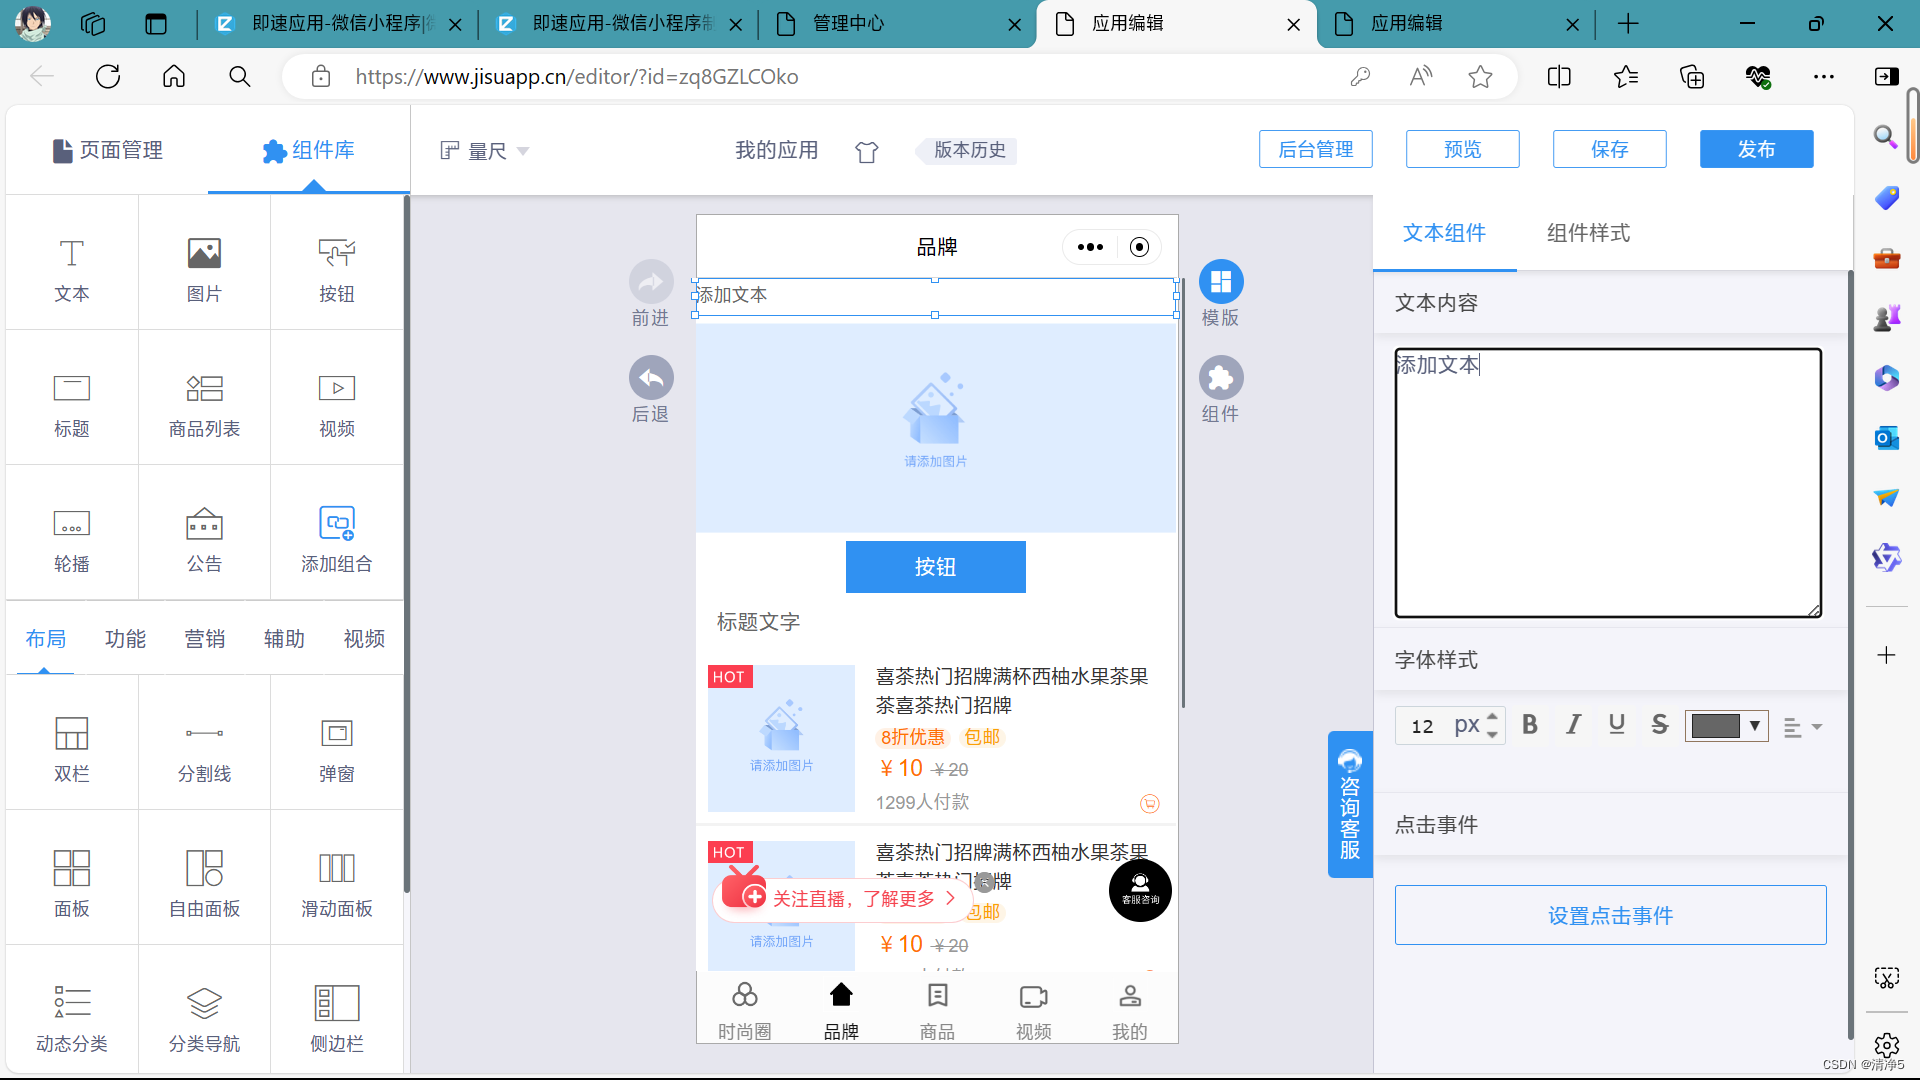
文本样式
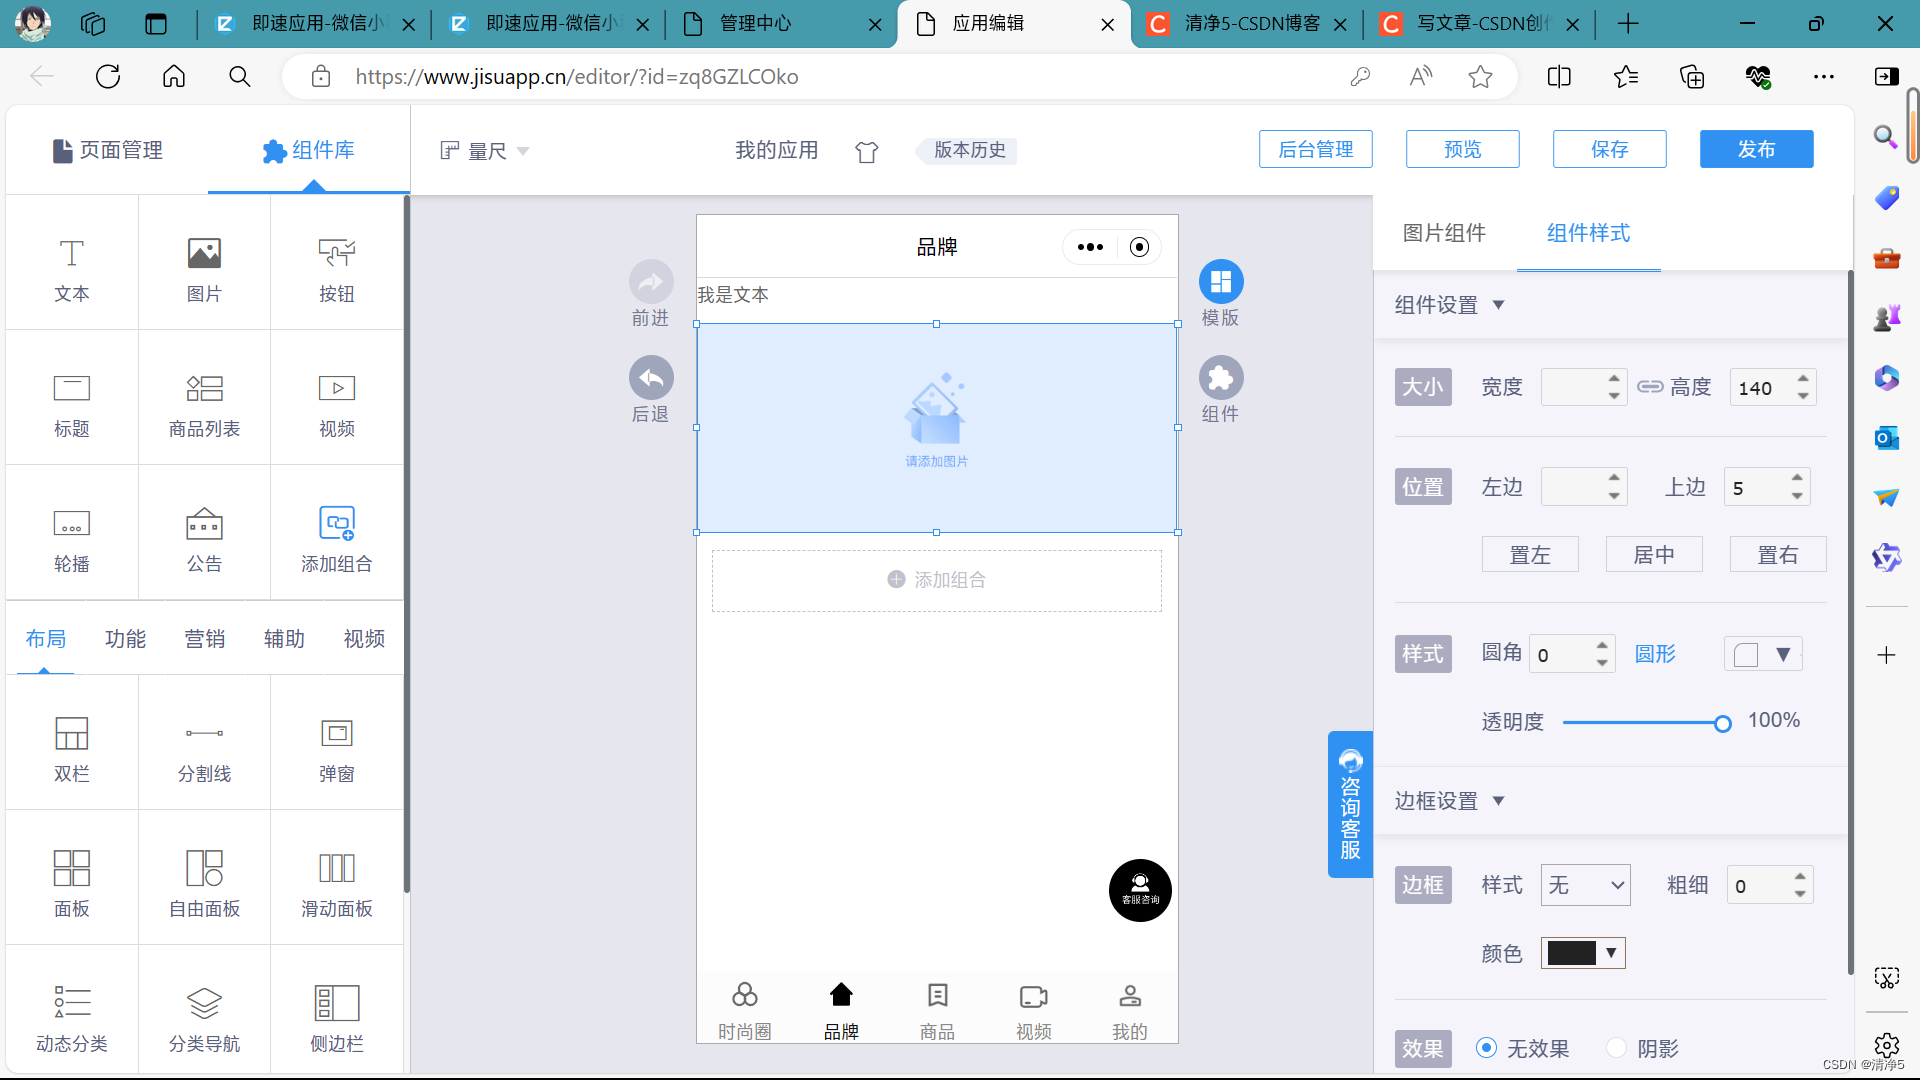
2.图片
图片组件
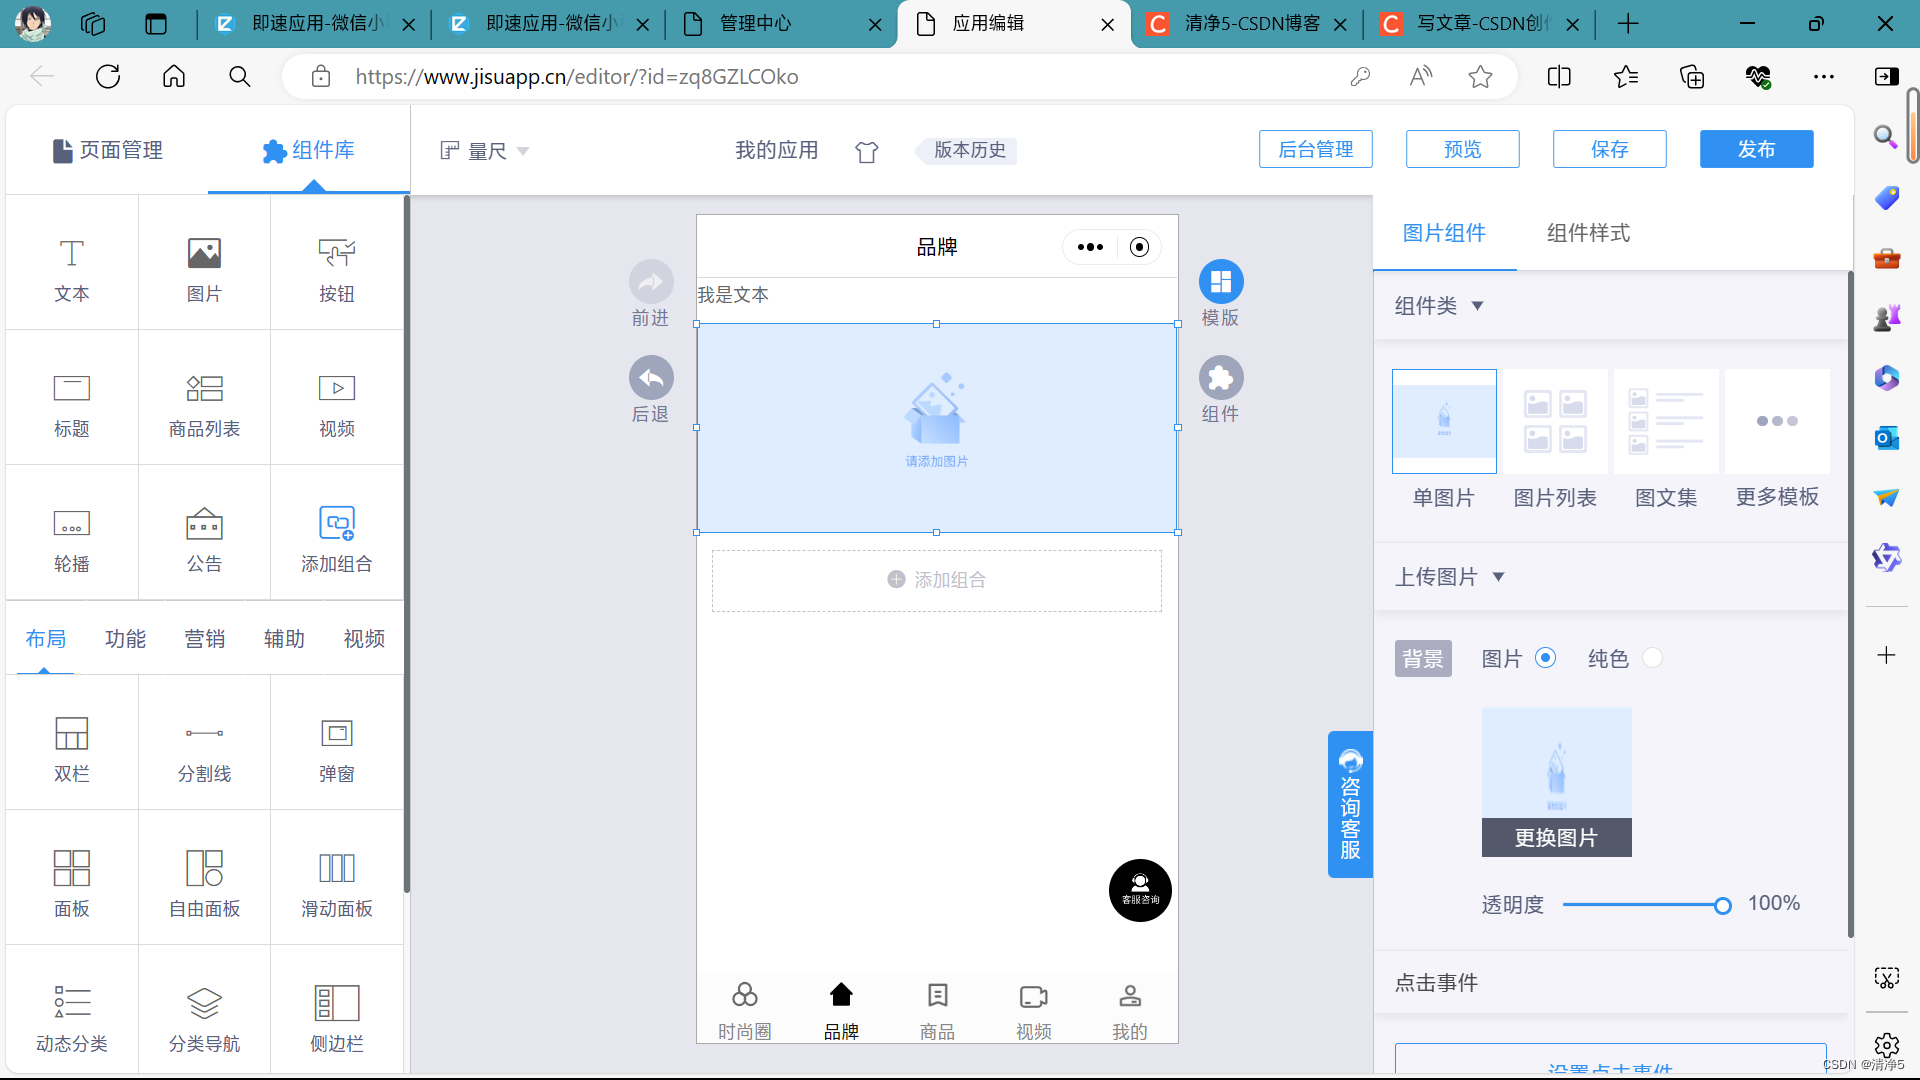
图片组件样式
3.按钮
按钮组件
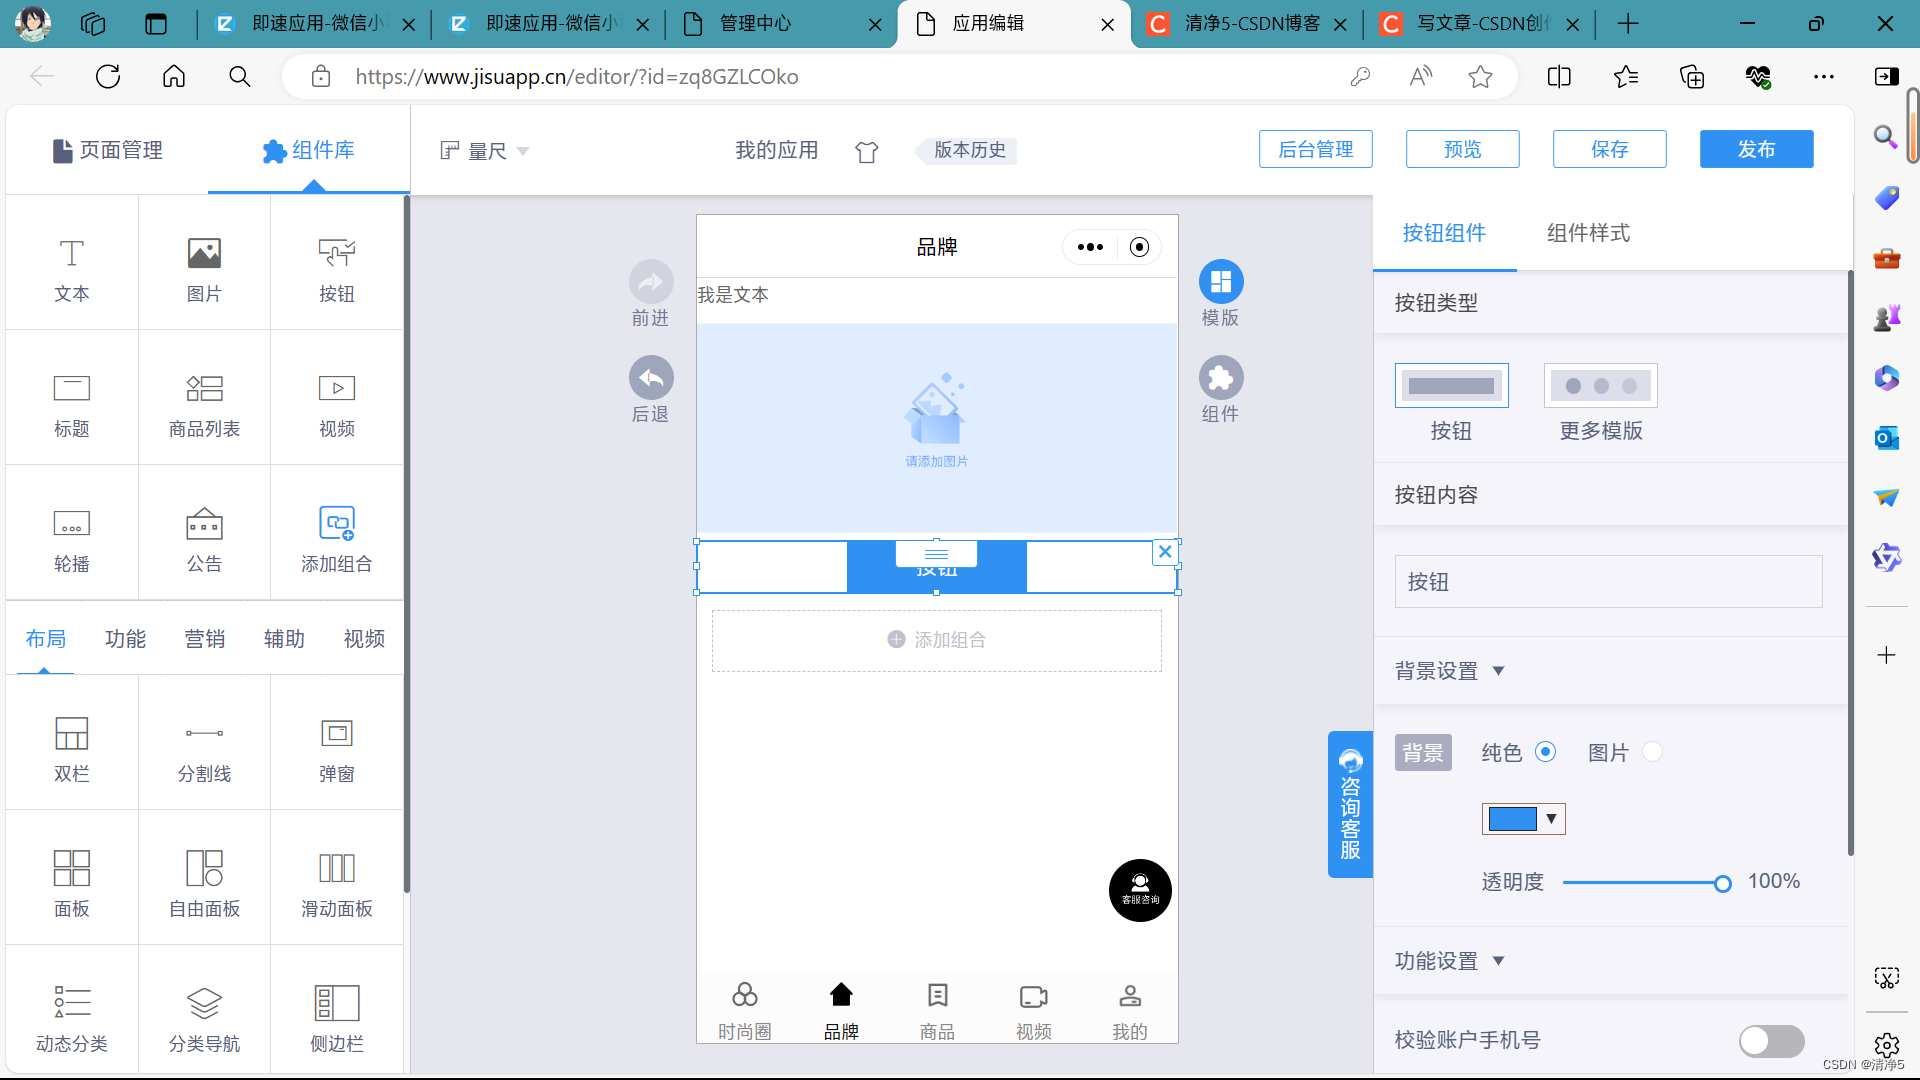
按钮样式

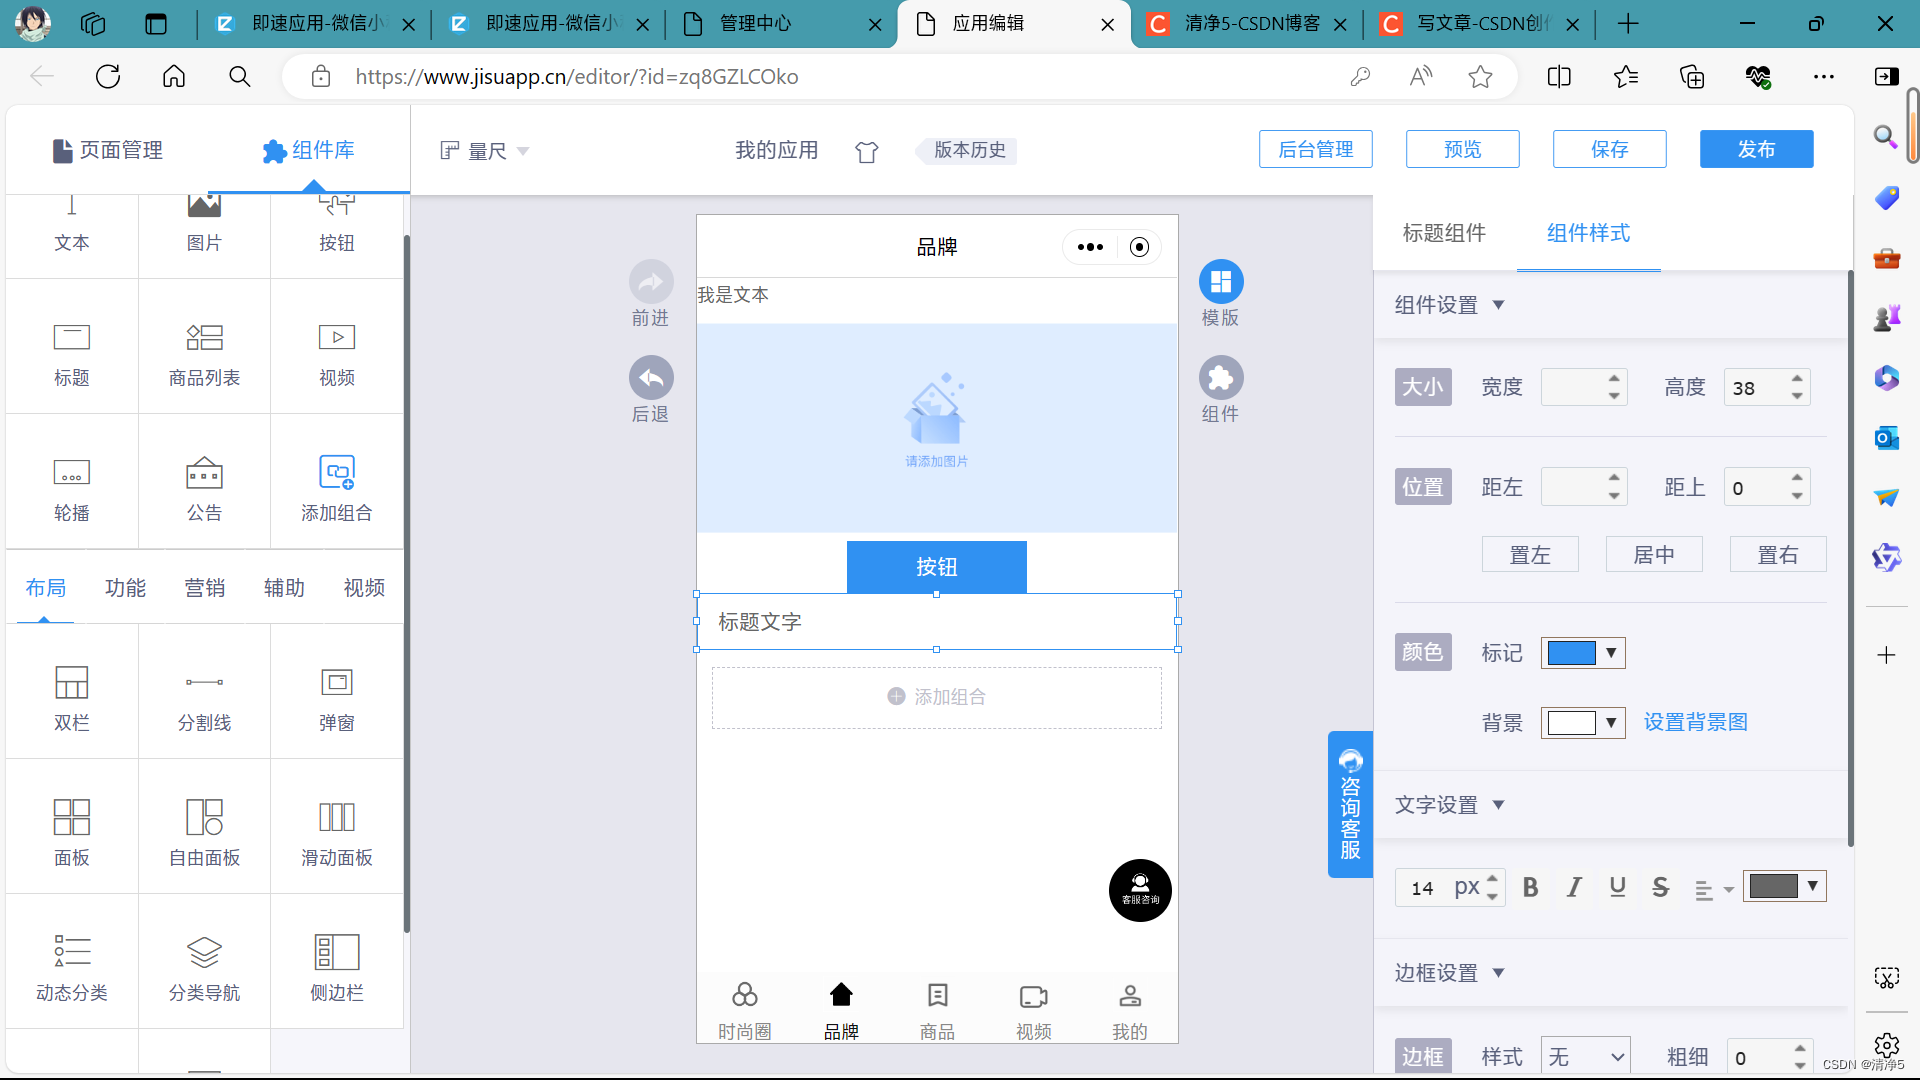
4.标题
标题组件
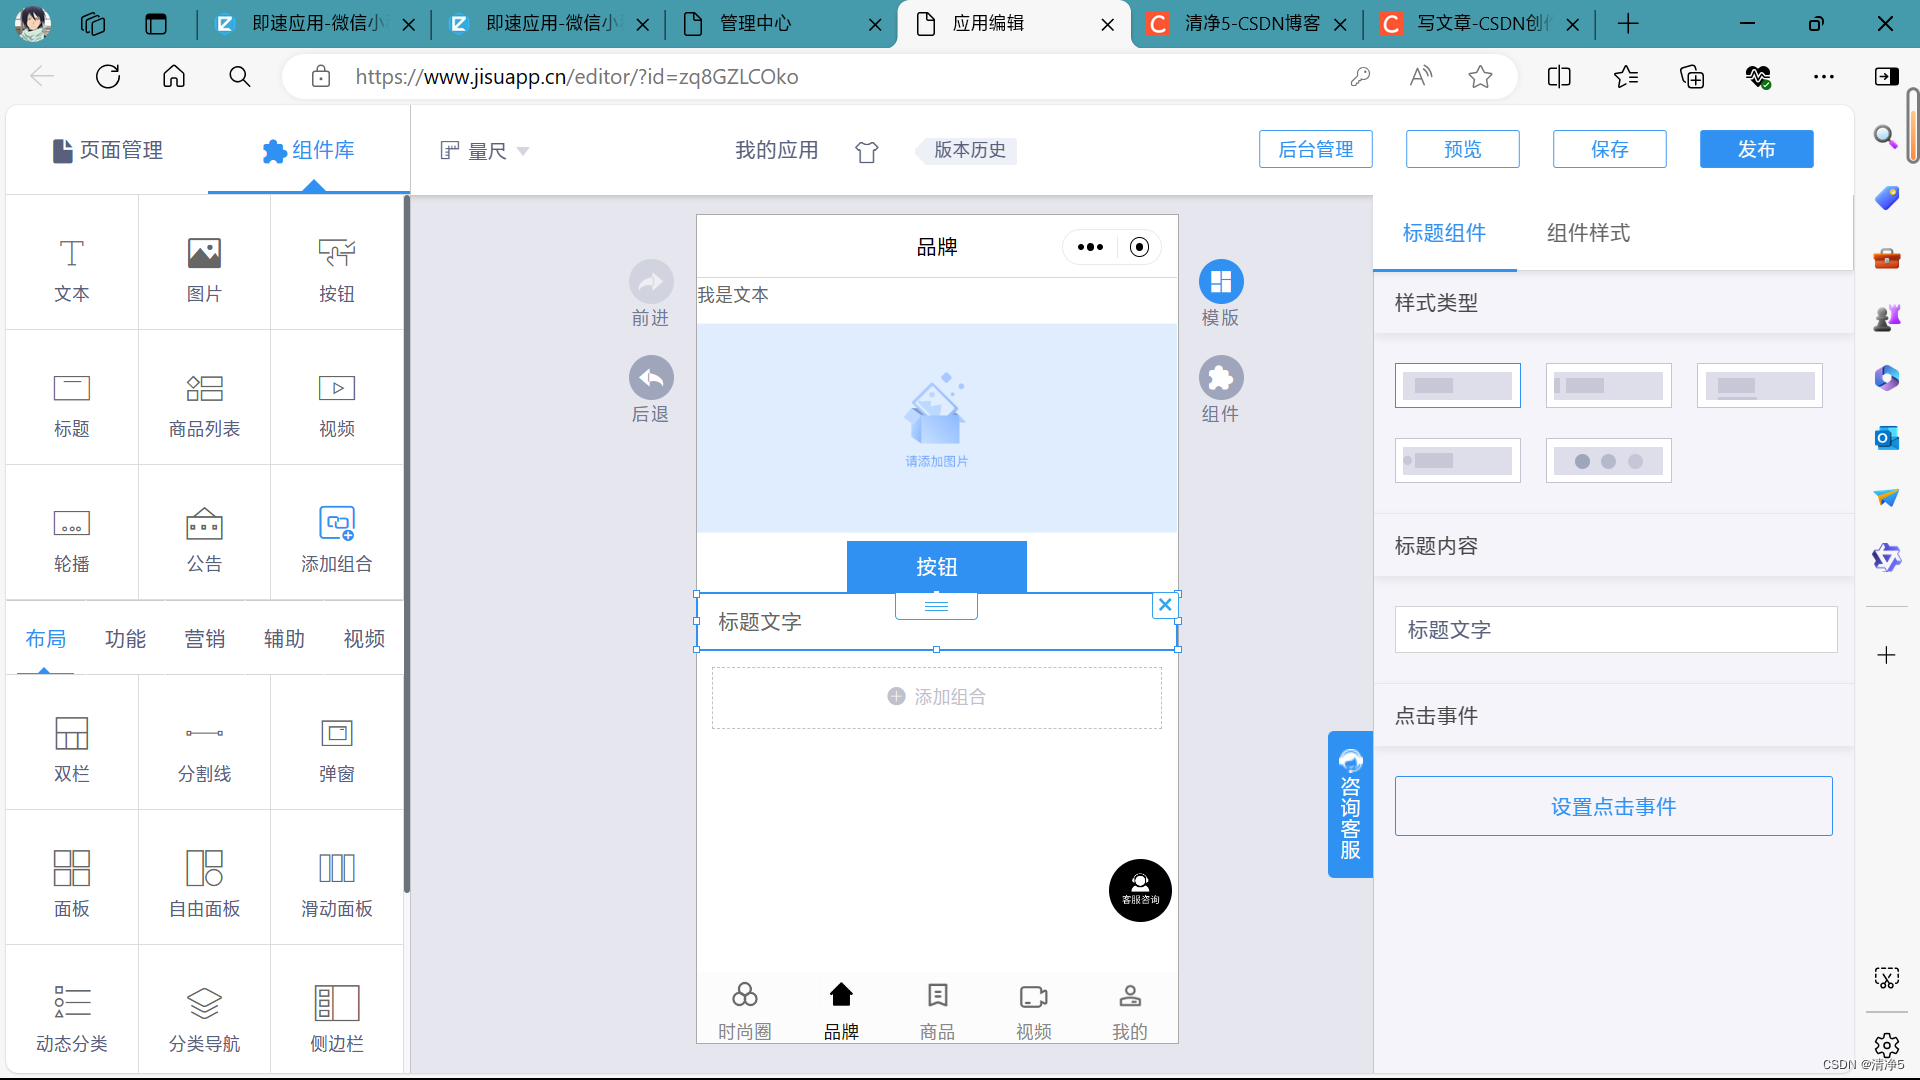
标题样式
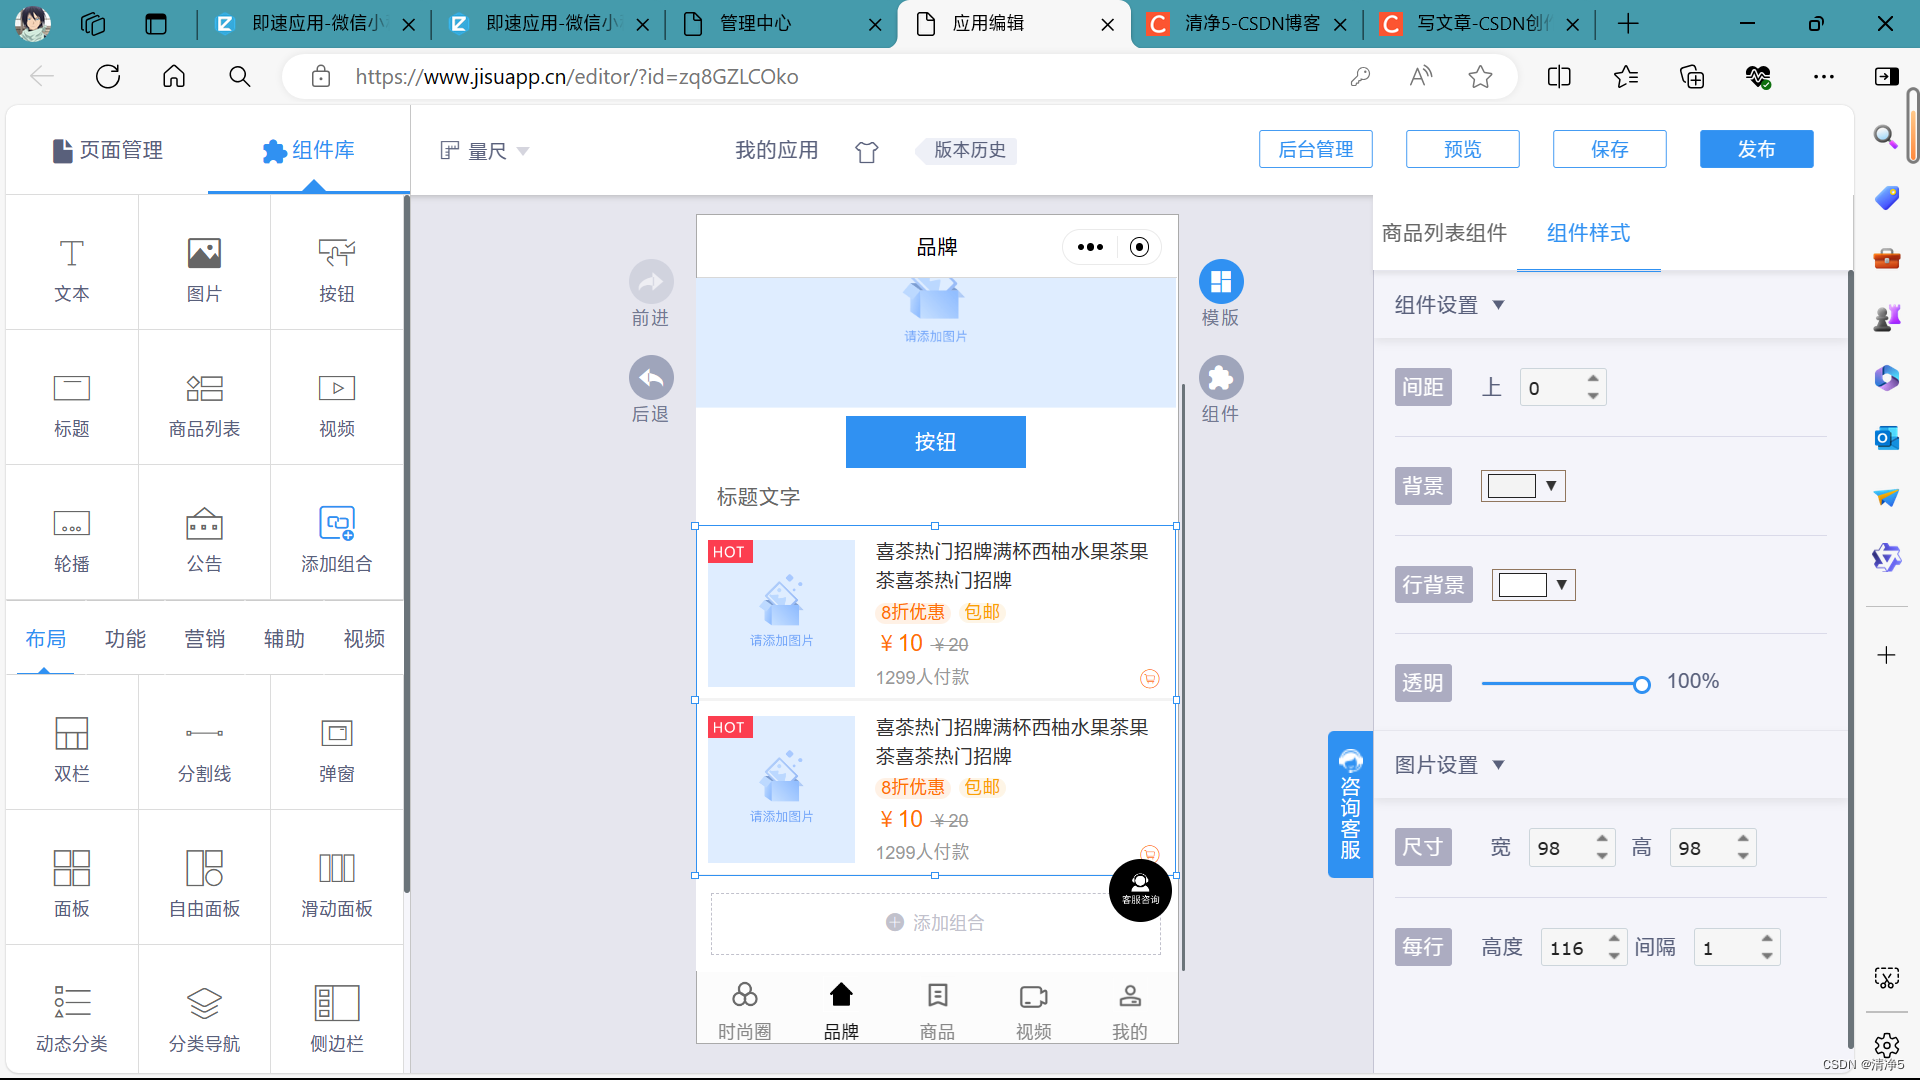
5.商品列表
商品列表组件
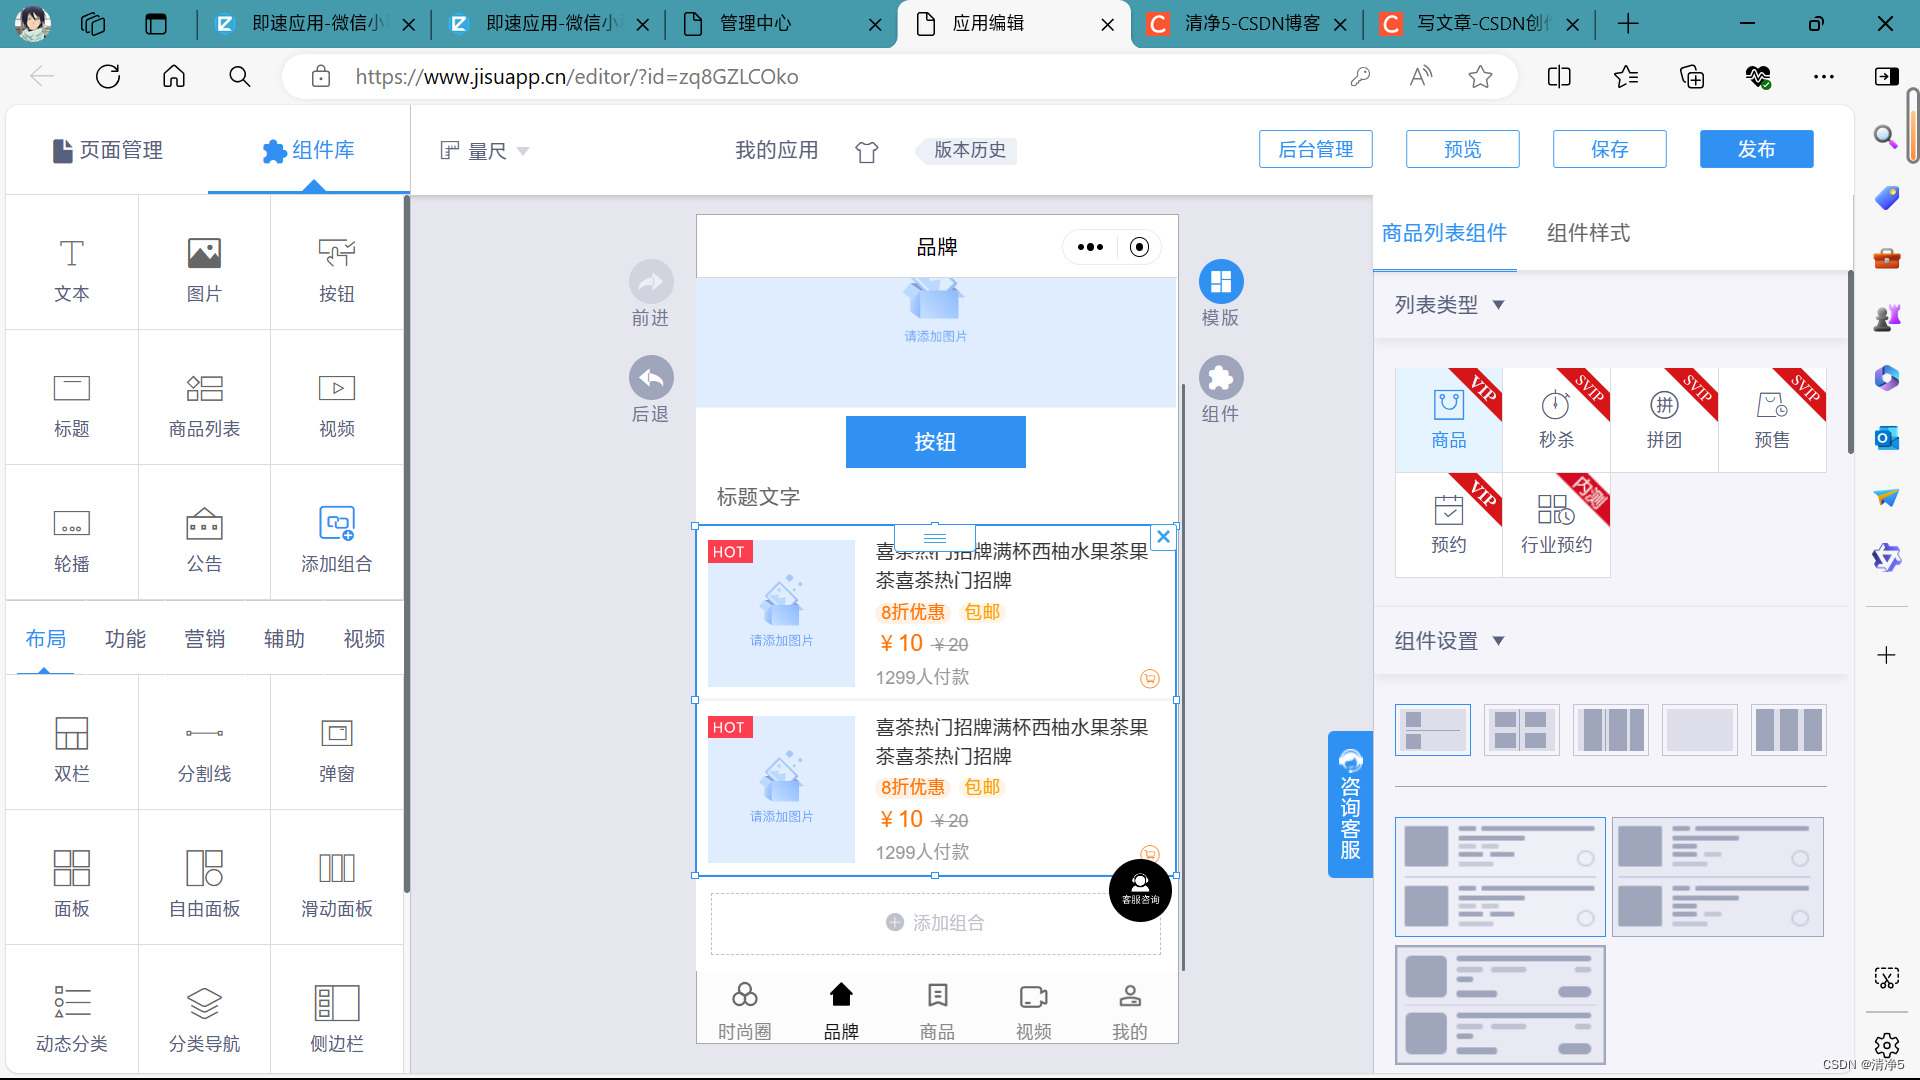
列表样式
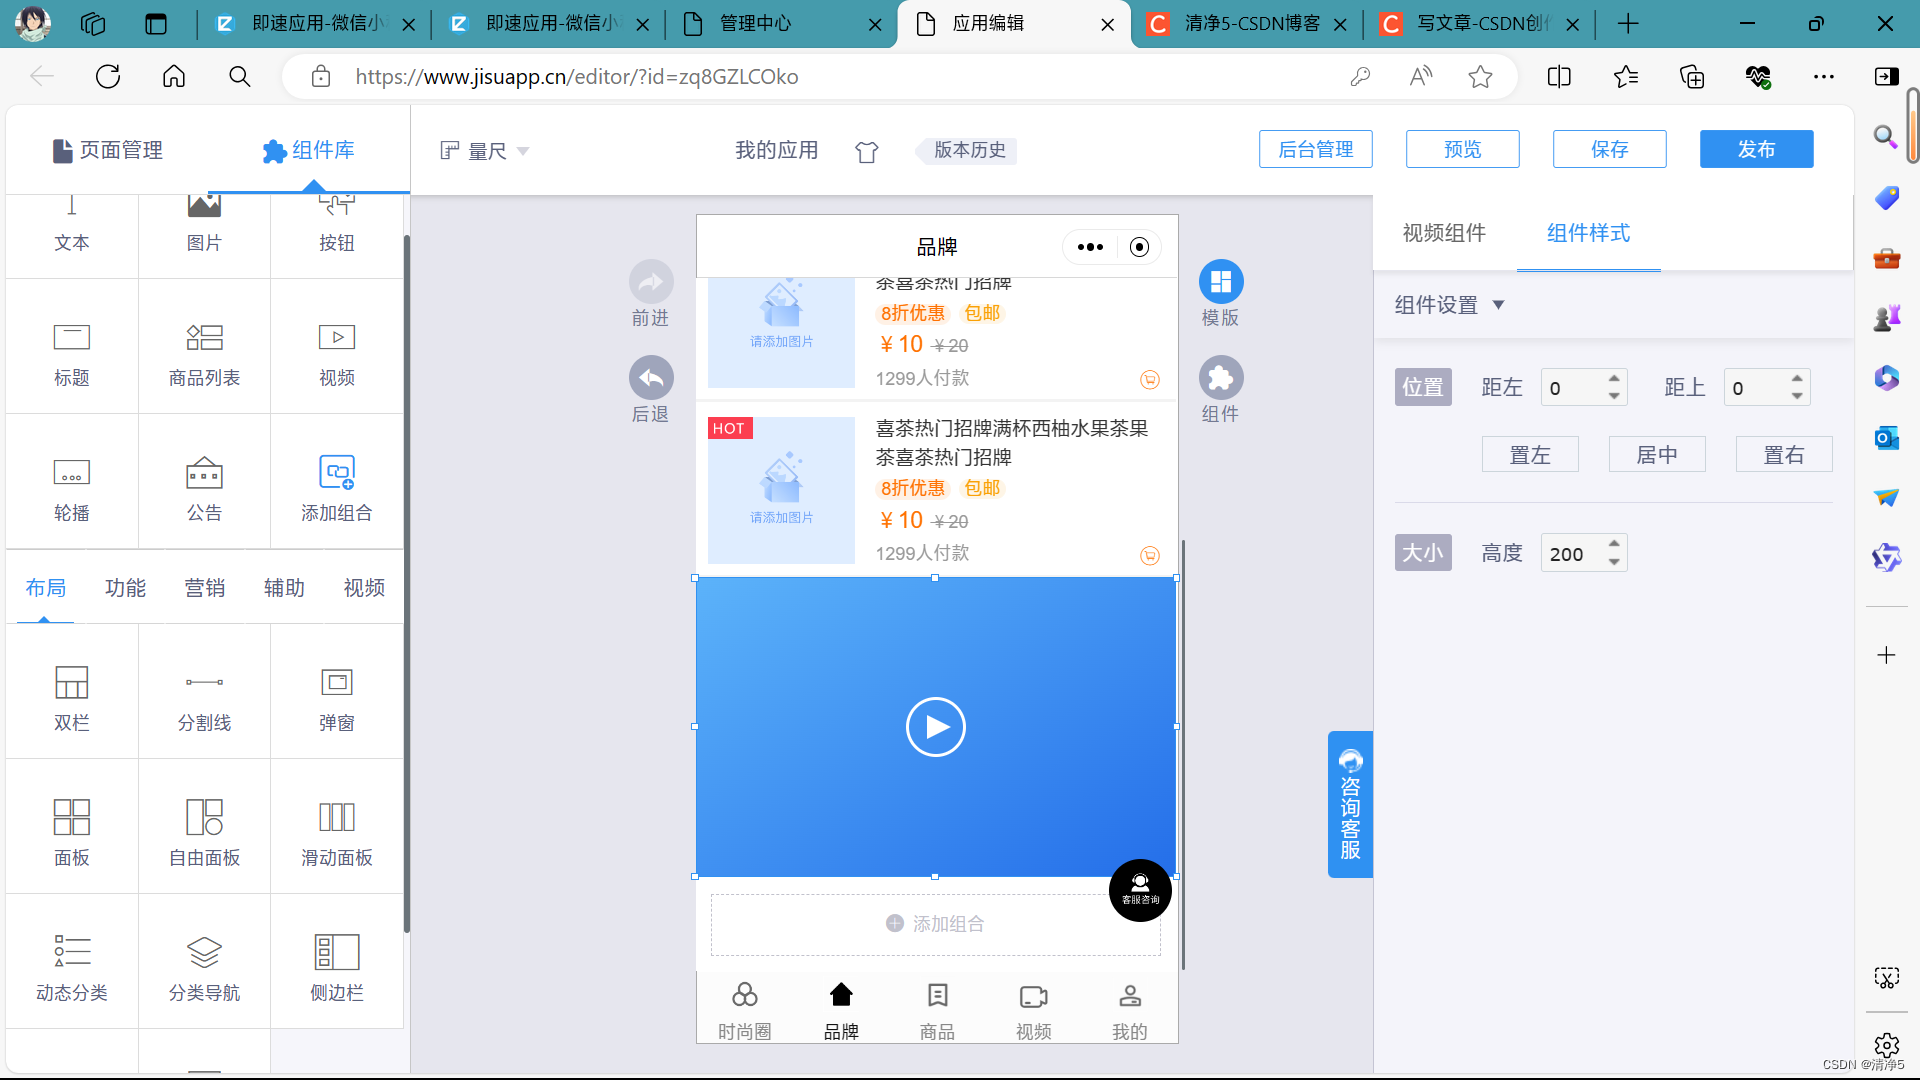
6.视频
视频组件
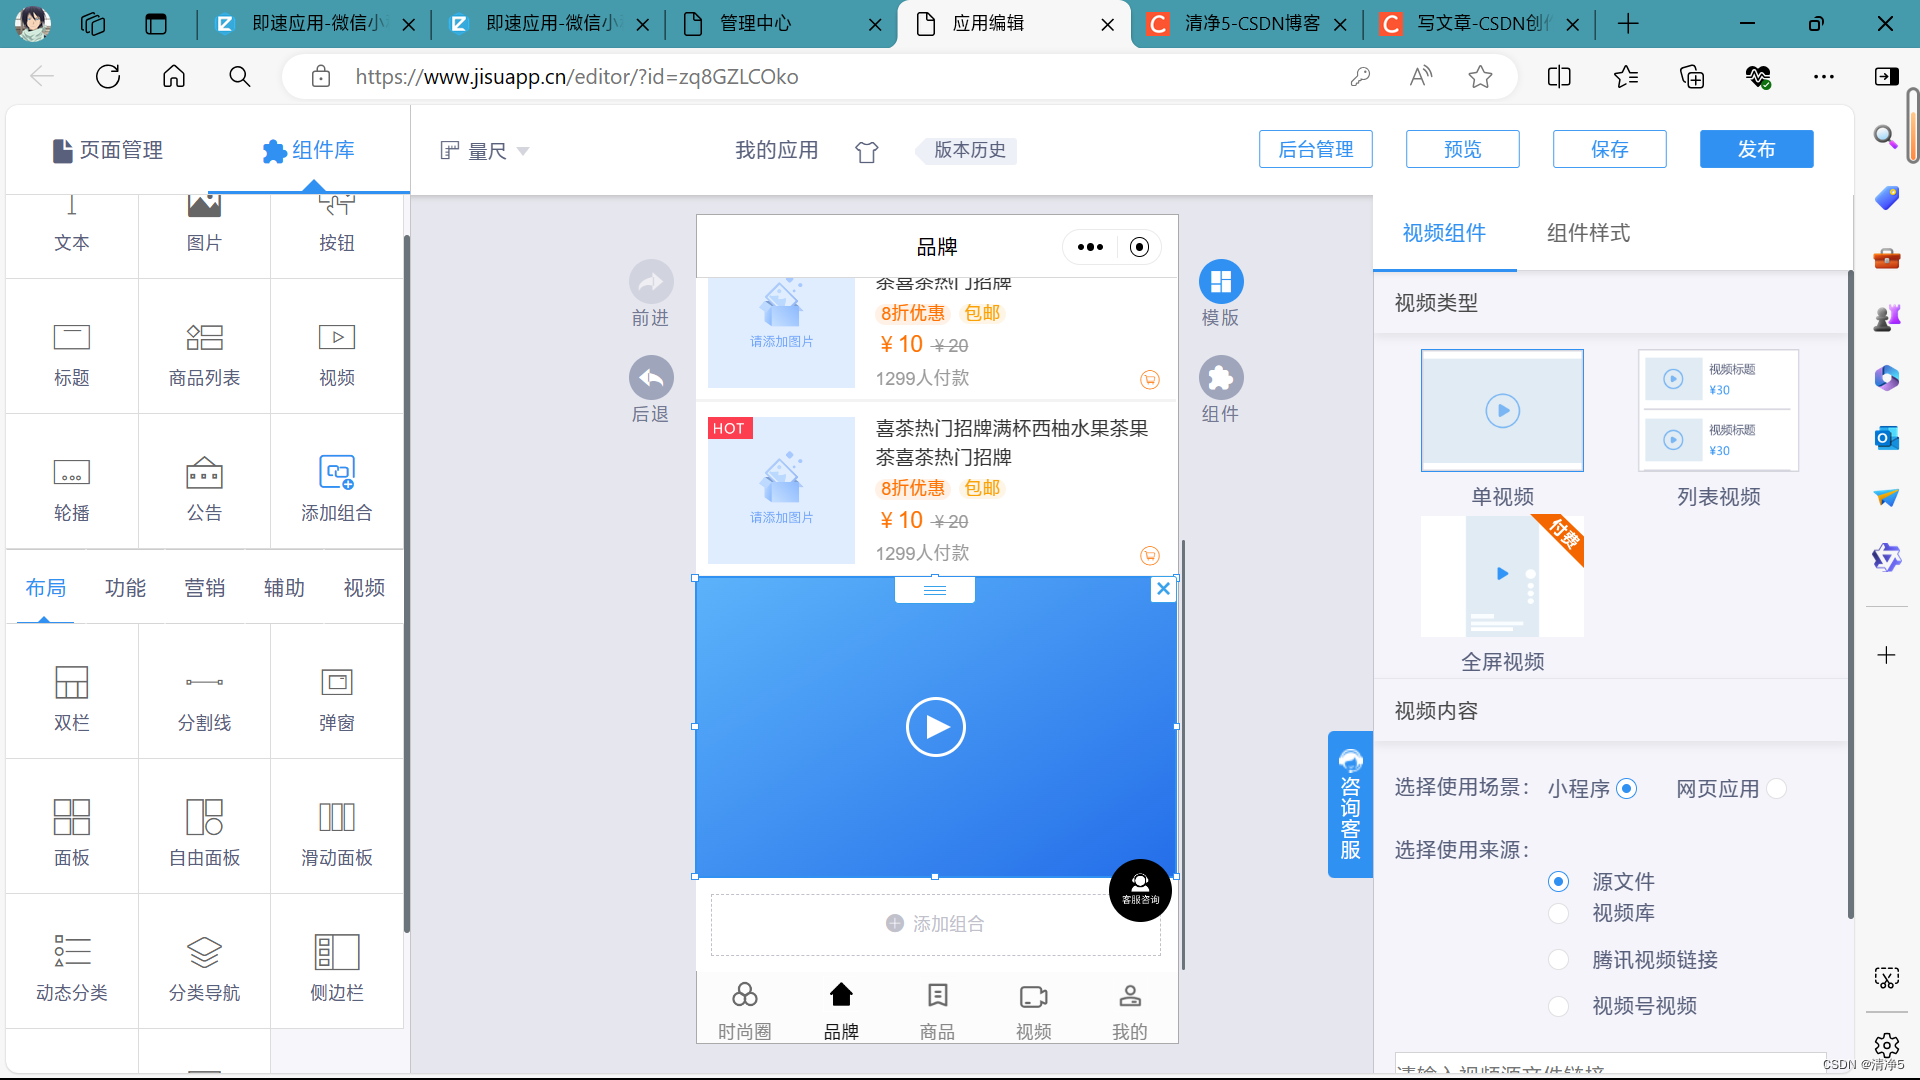
视频样式
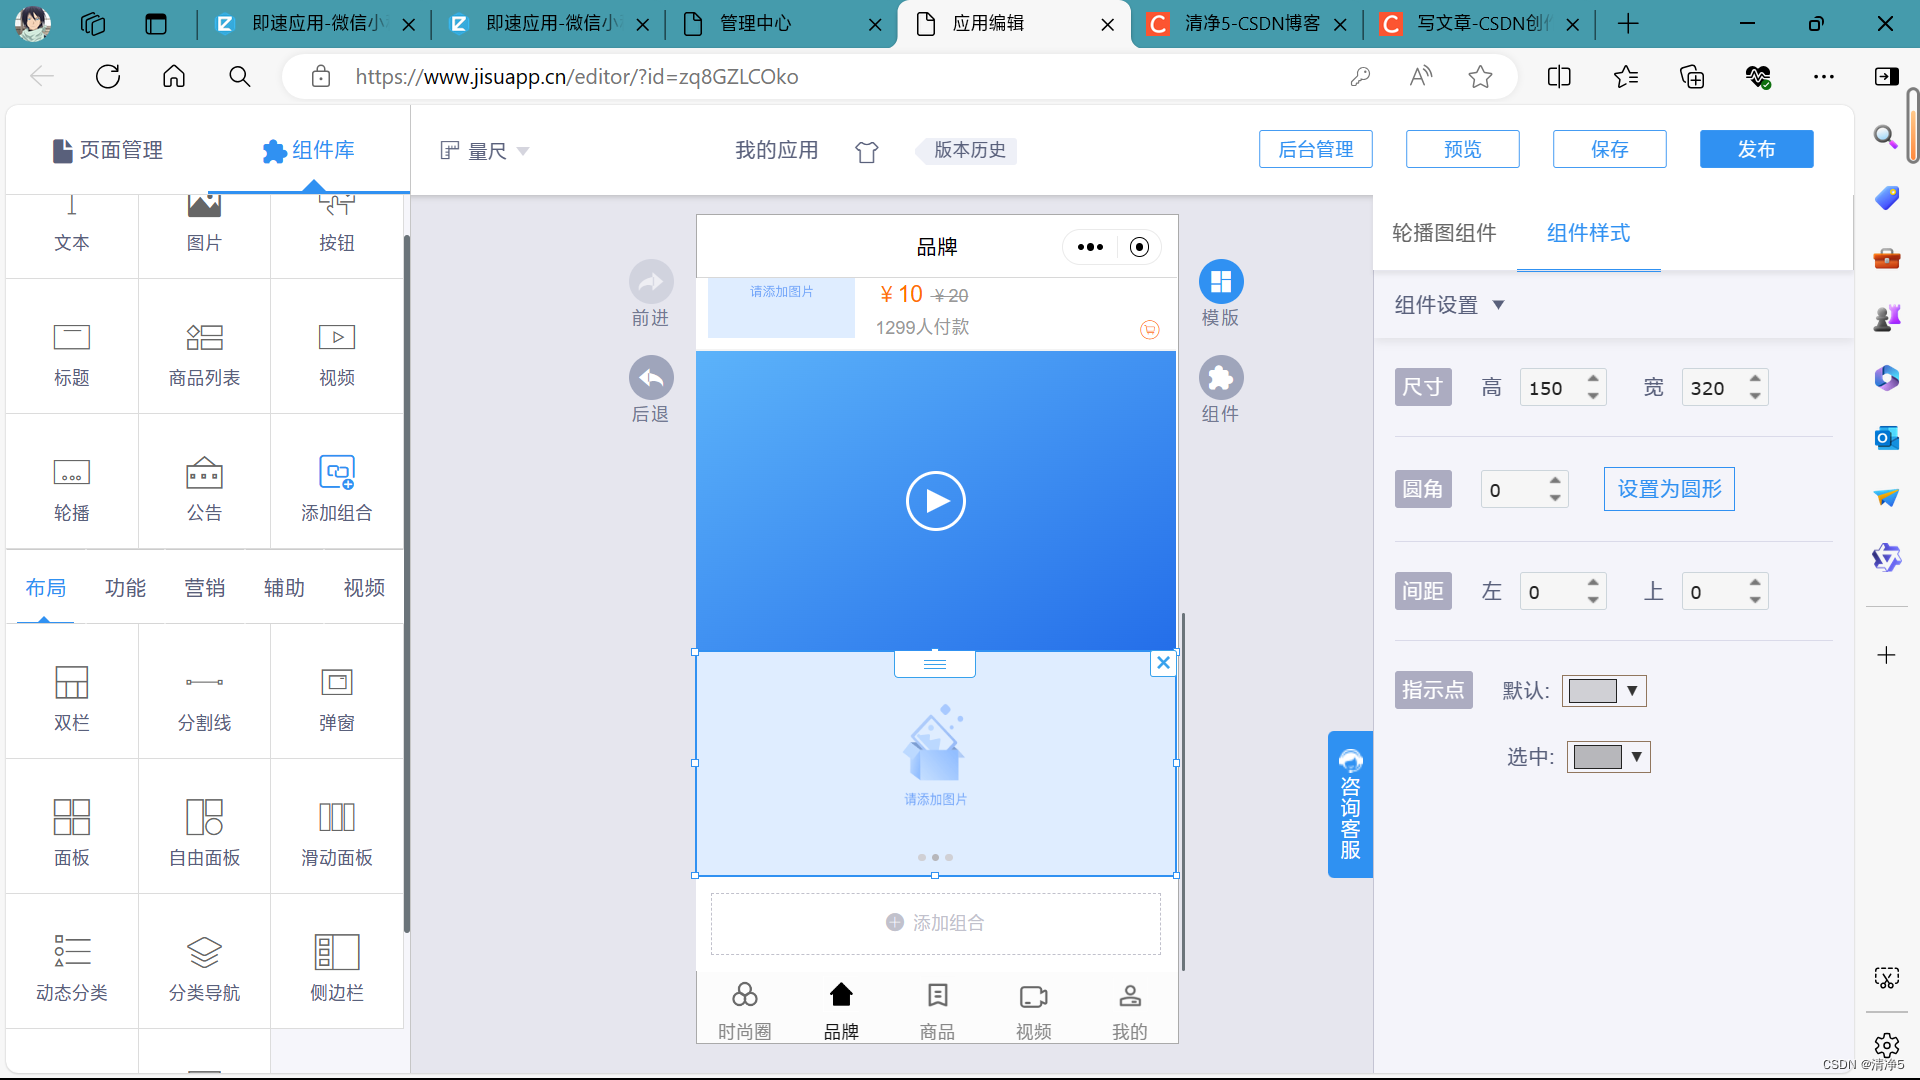
7.轮播
轮播组件
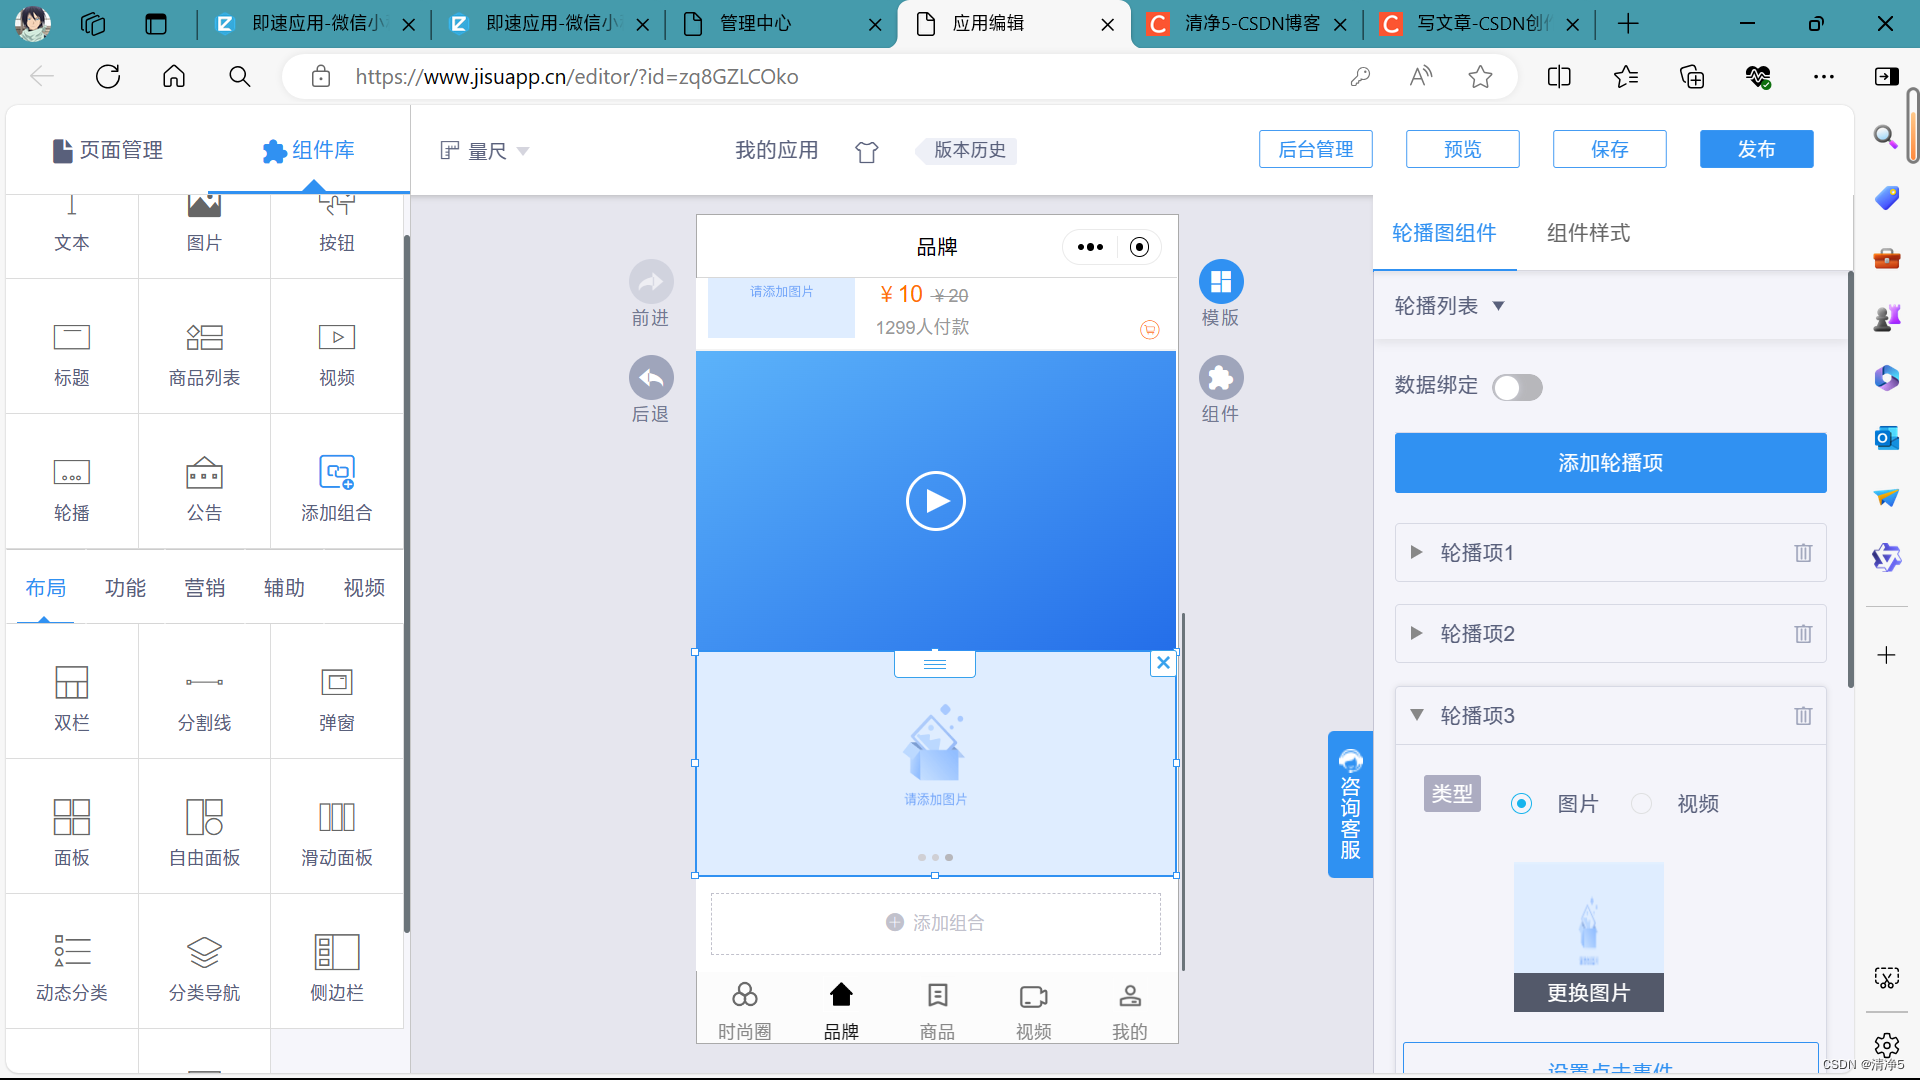
轮播样式
8.公告
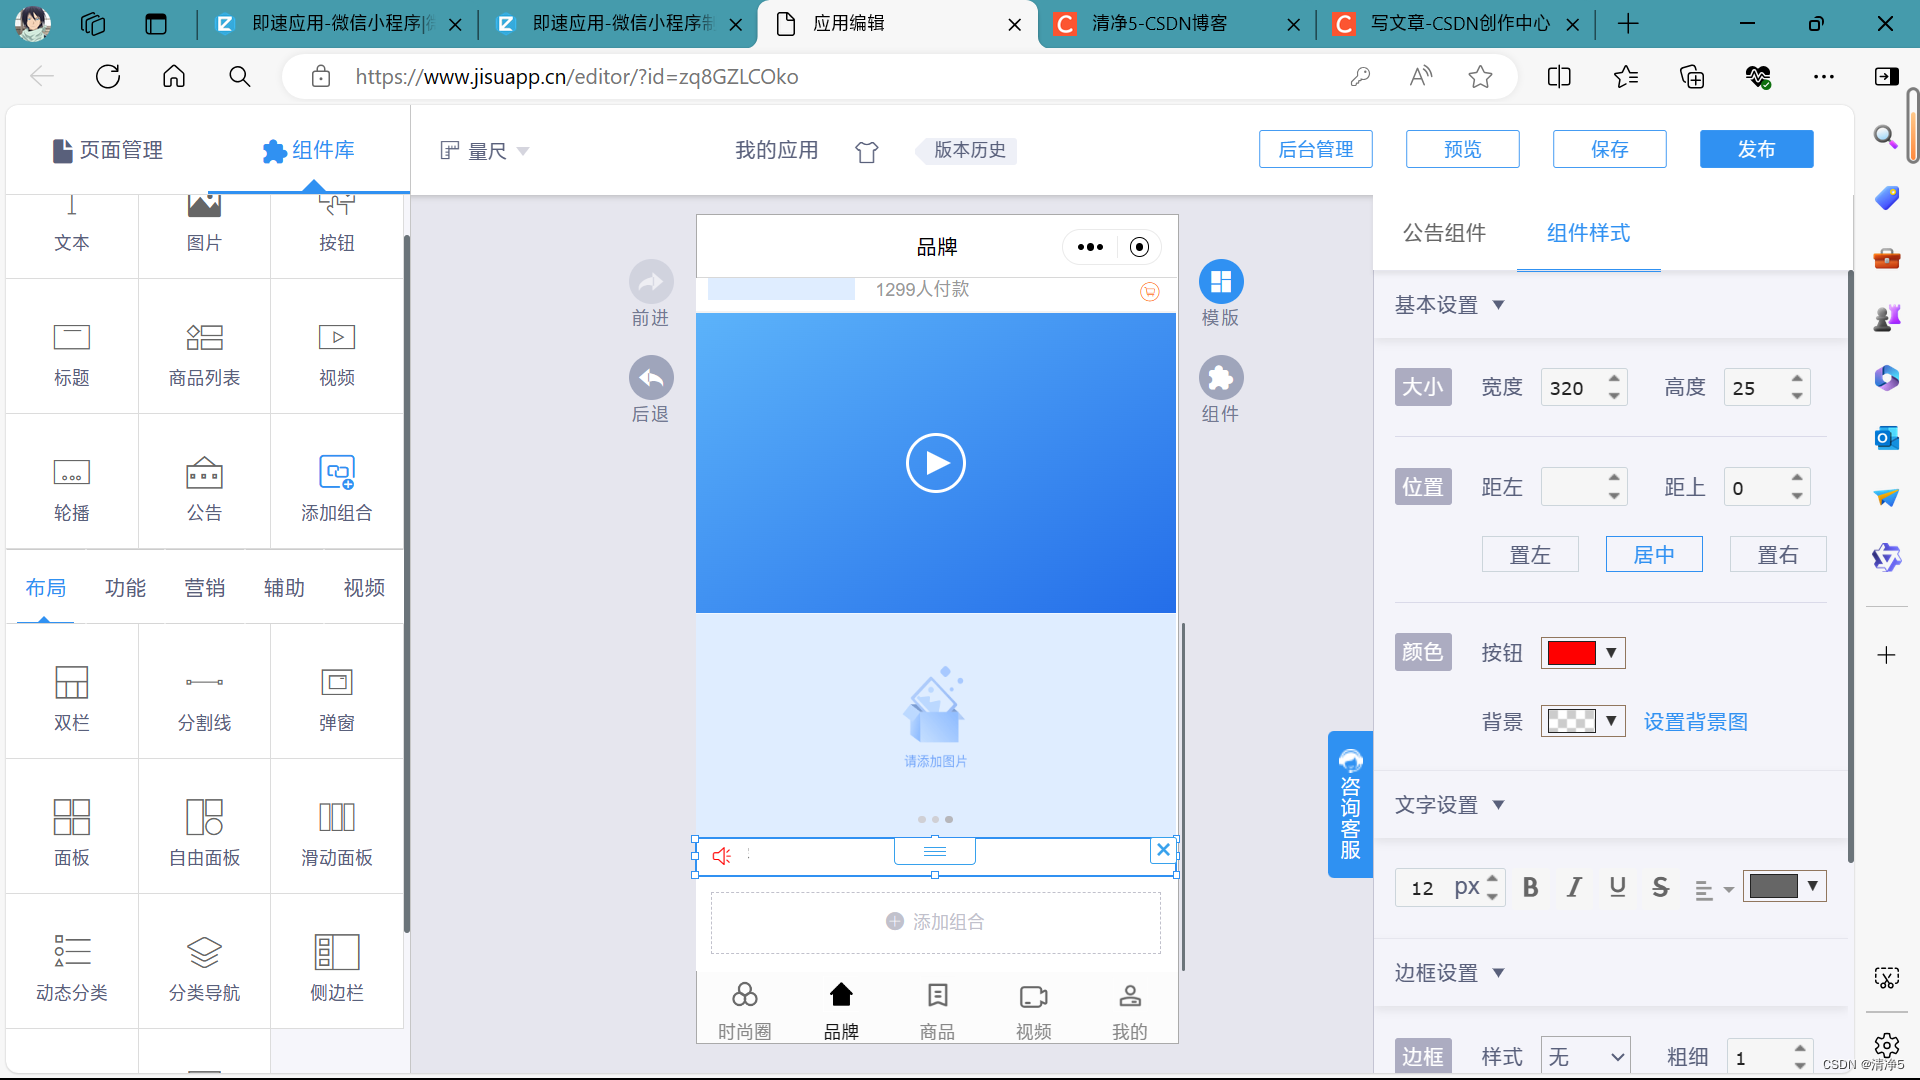
公告组件
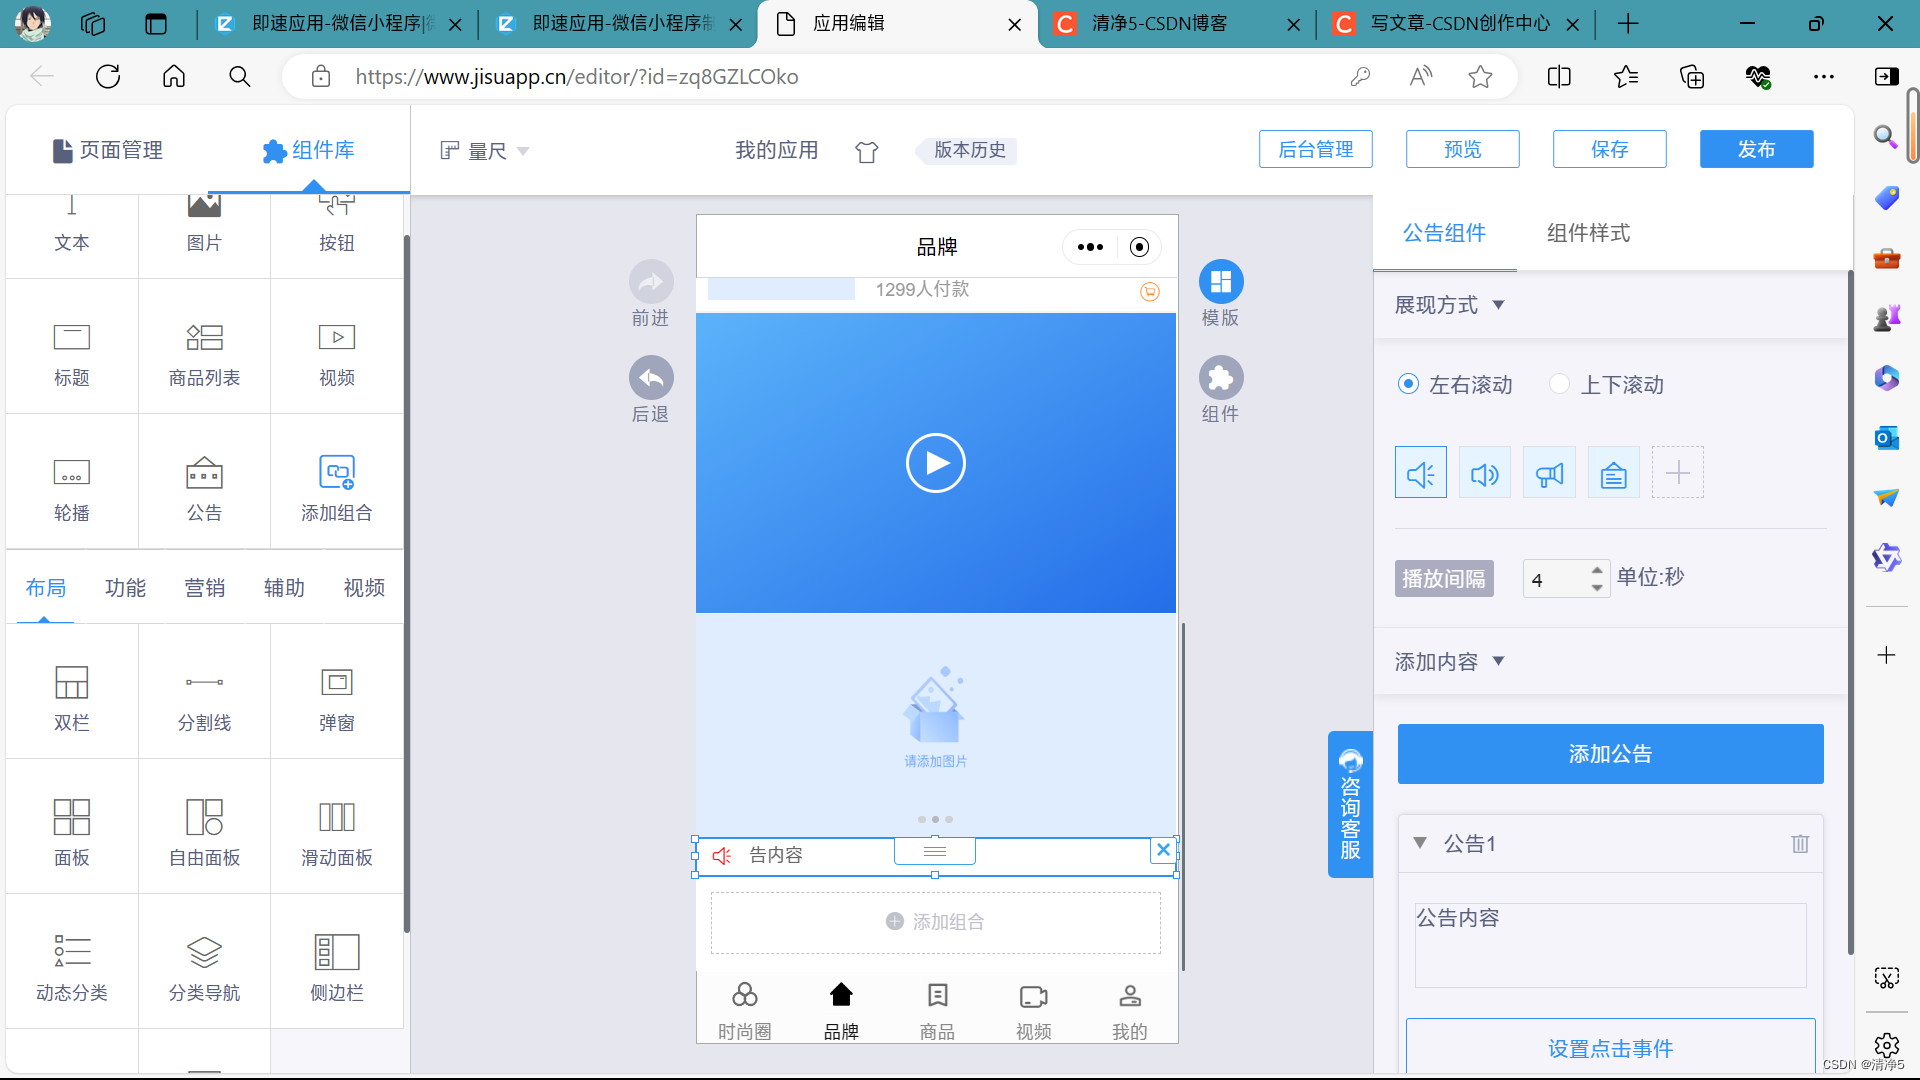
公告组件样式
布局
9.双栏
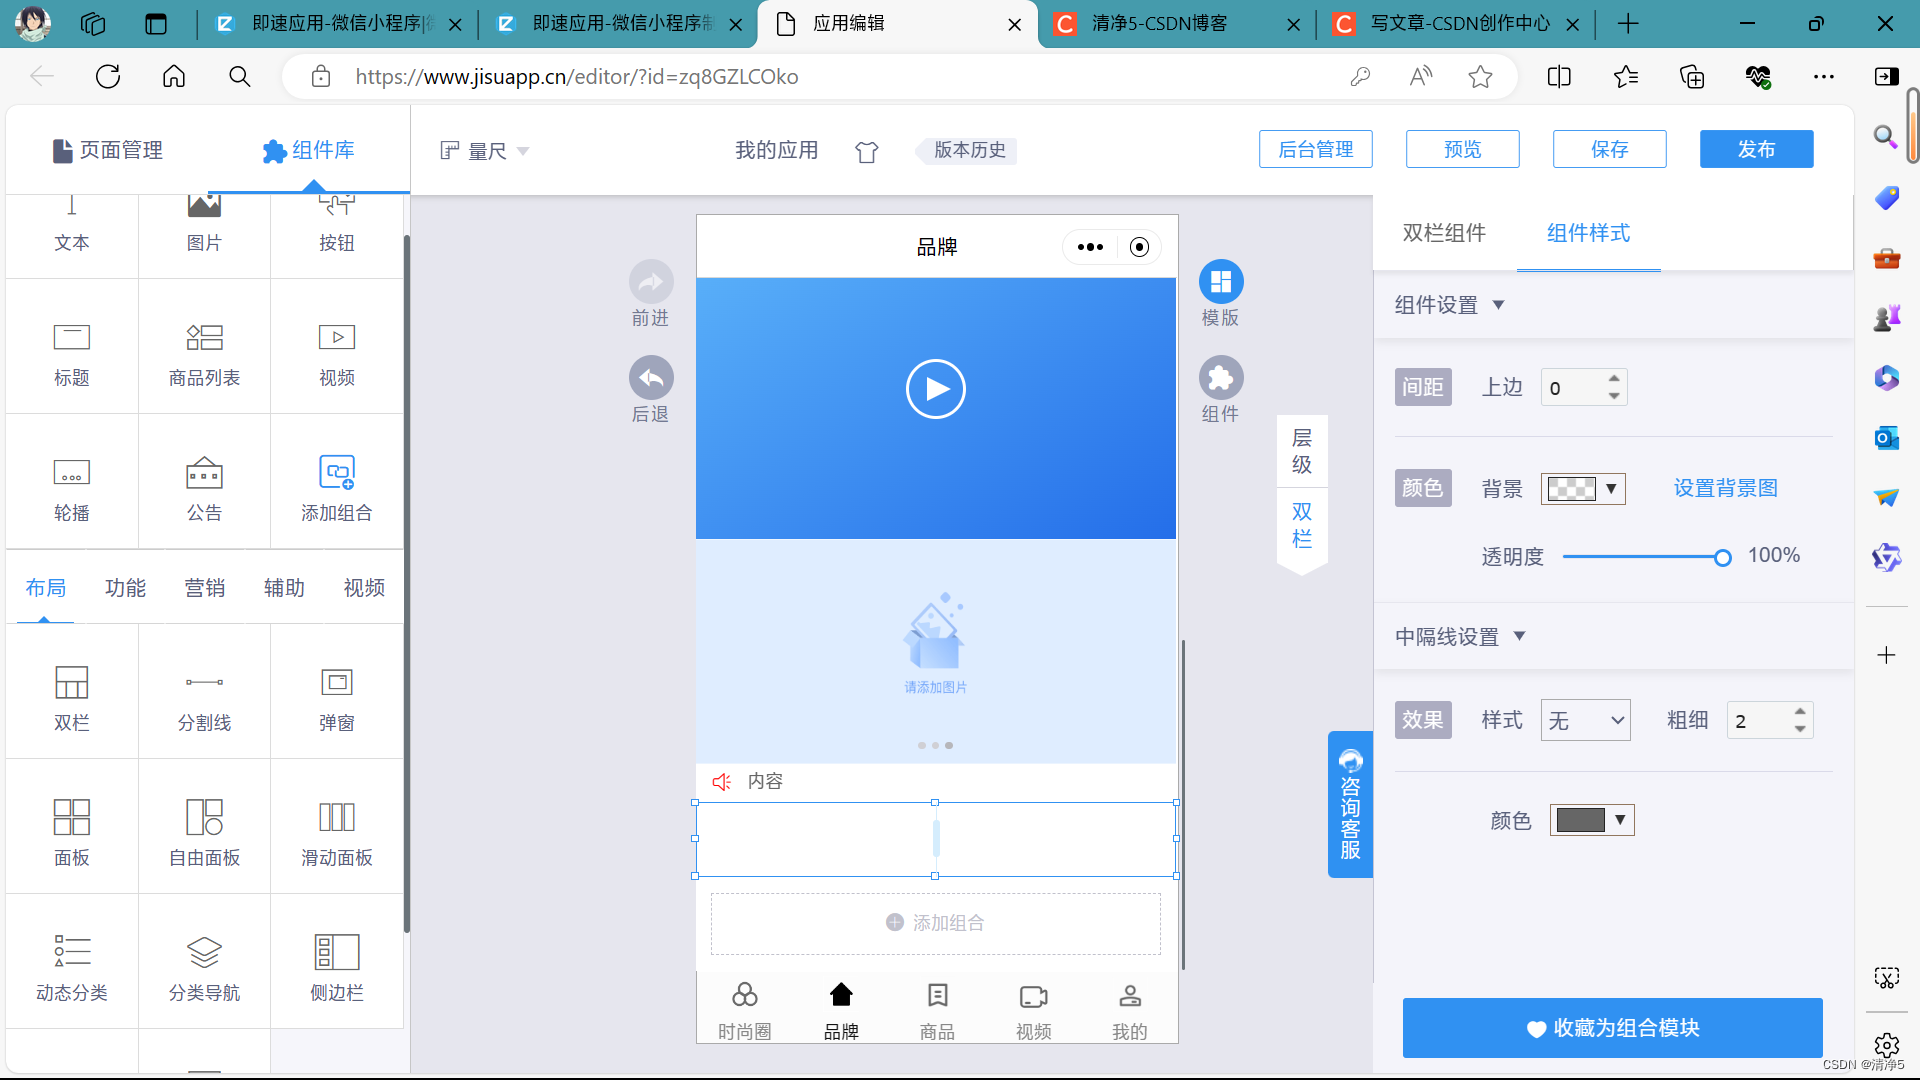
双栏组件
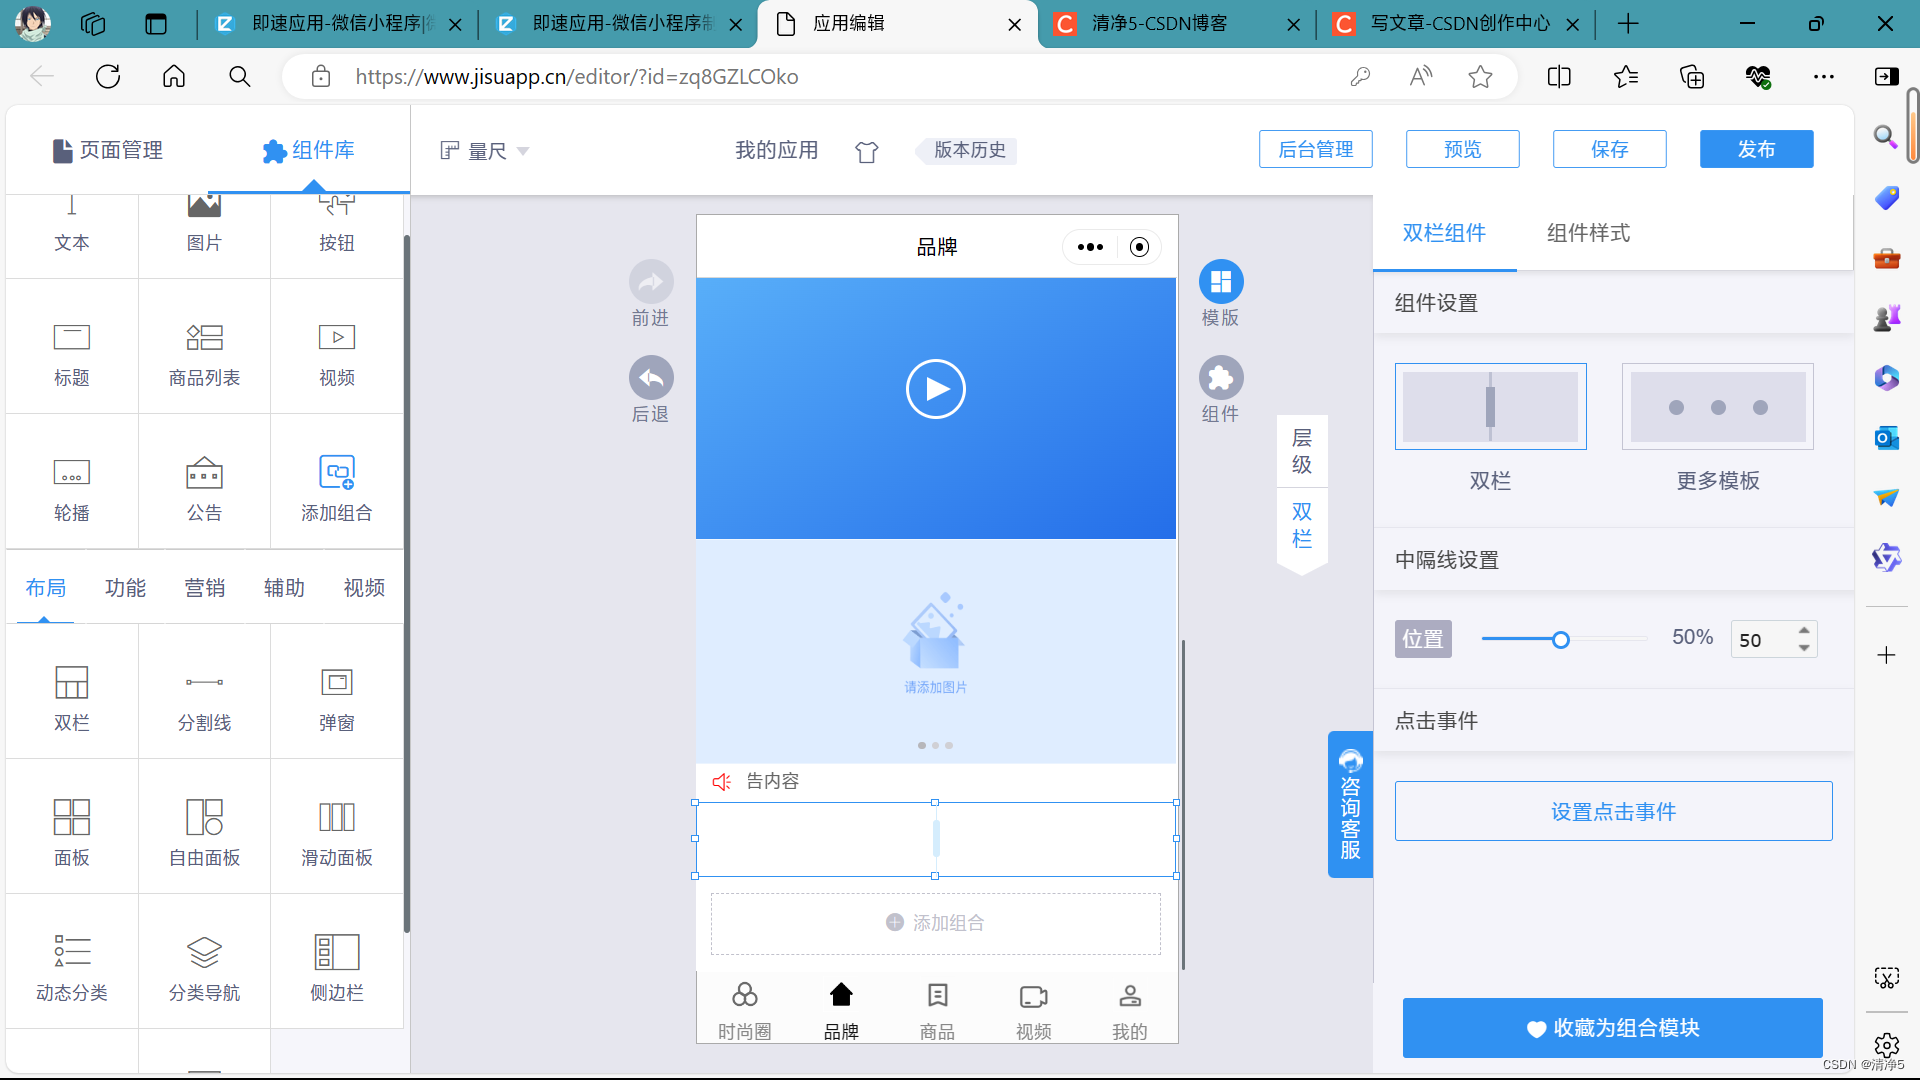
组件样式
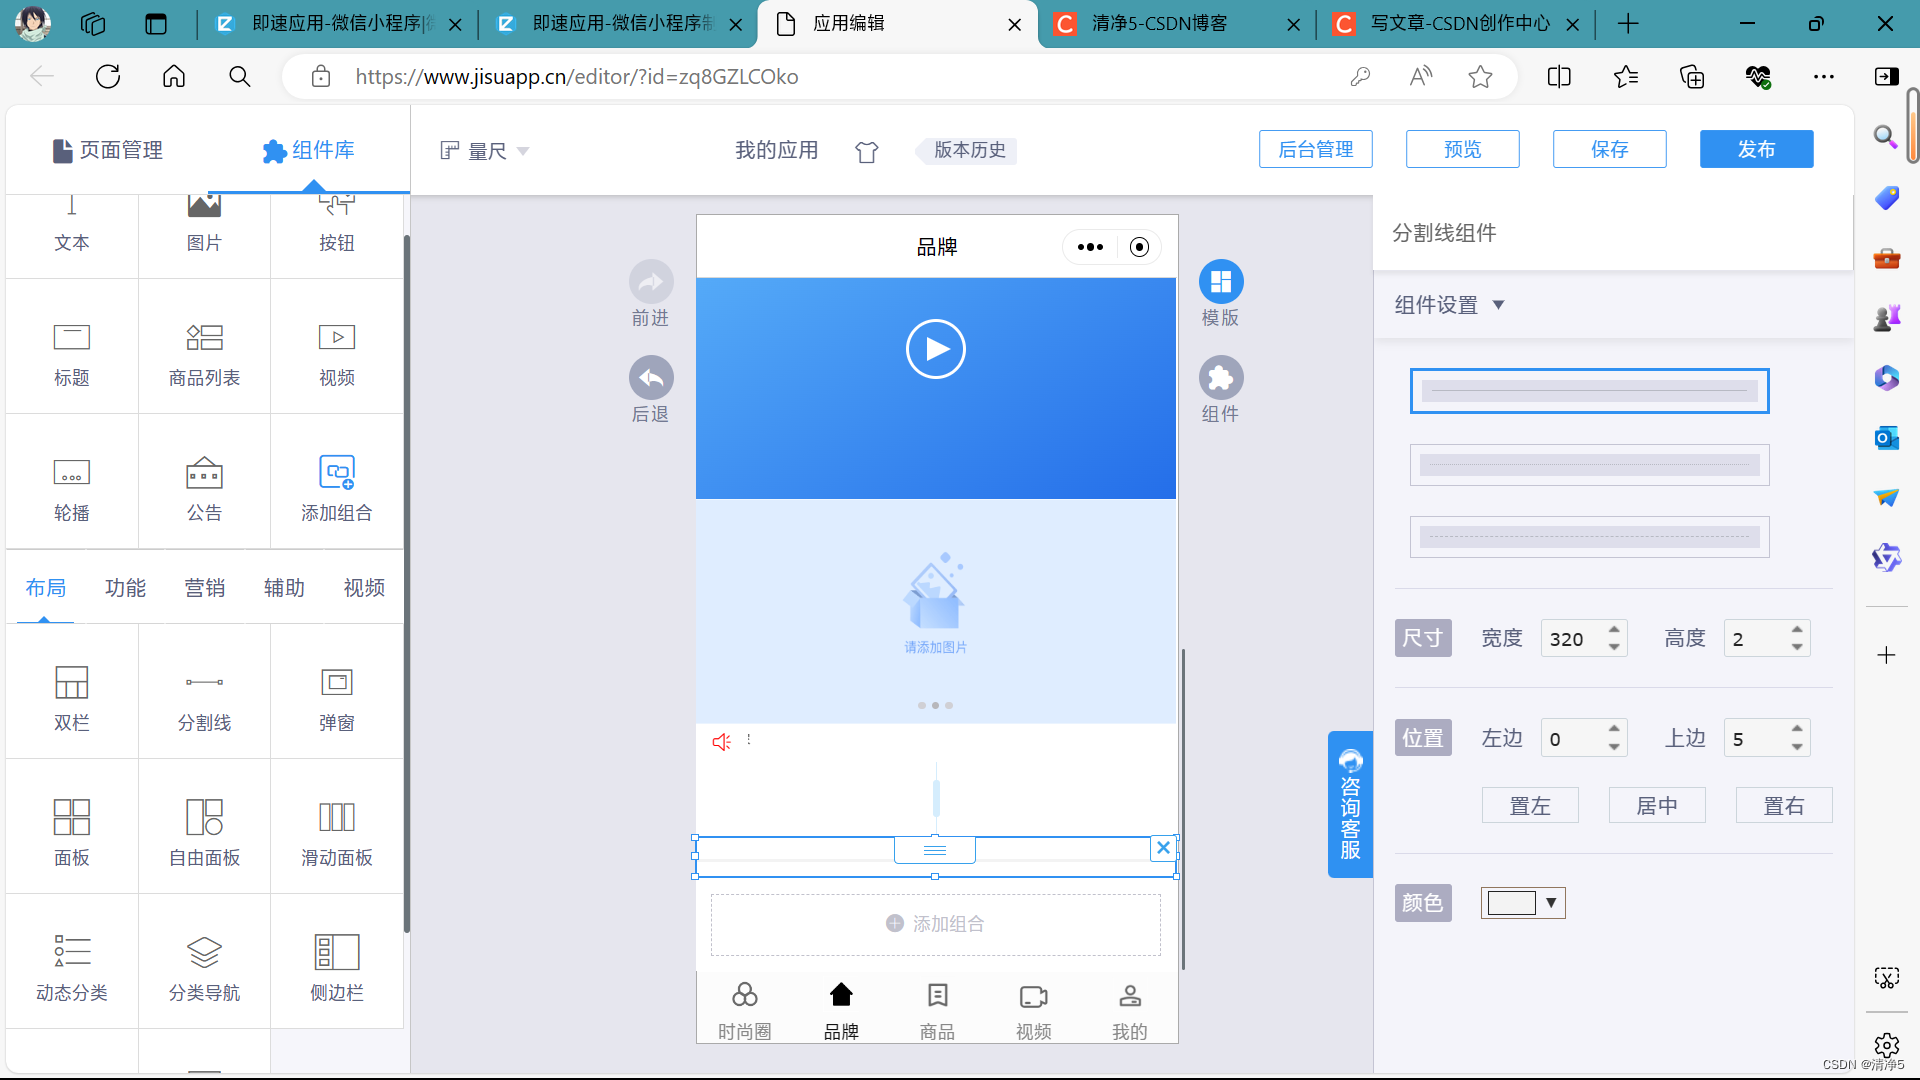
10.分割线
分割线组件
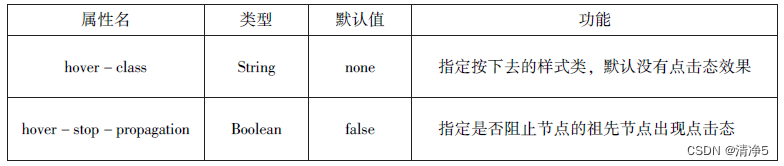
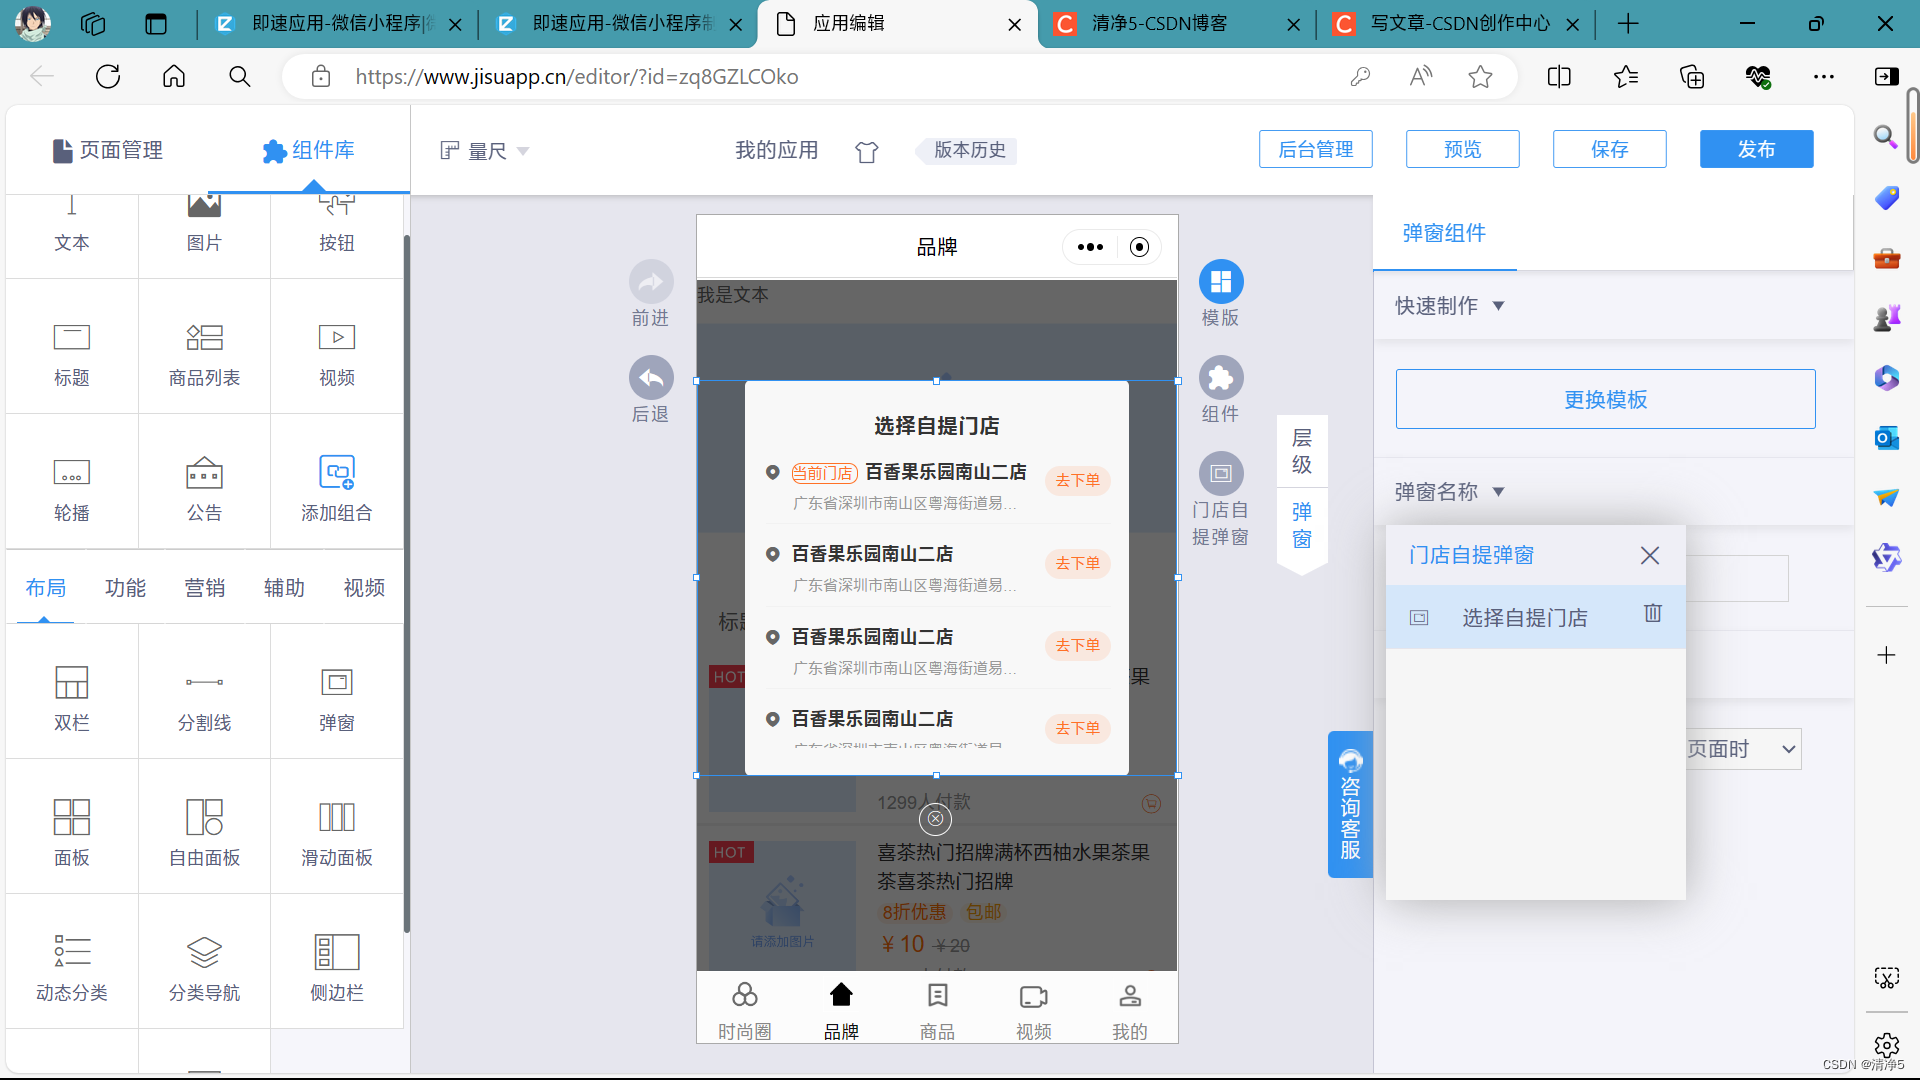
11.弹窗
弹窗组件
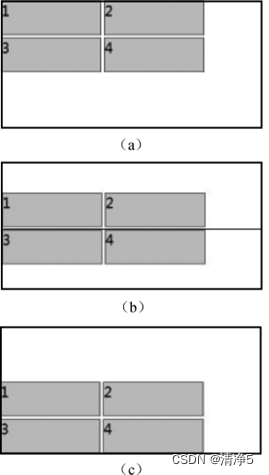
12.面板
面板组件
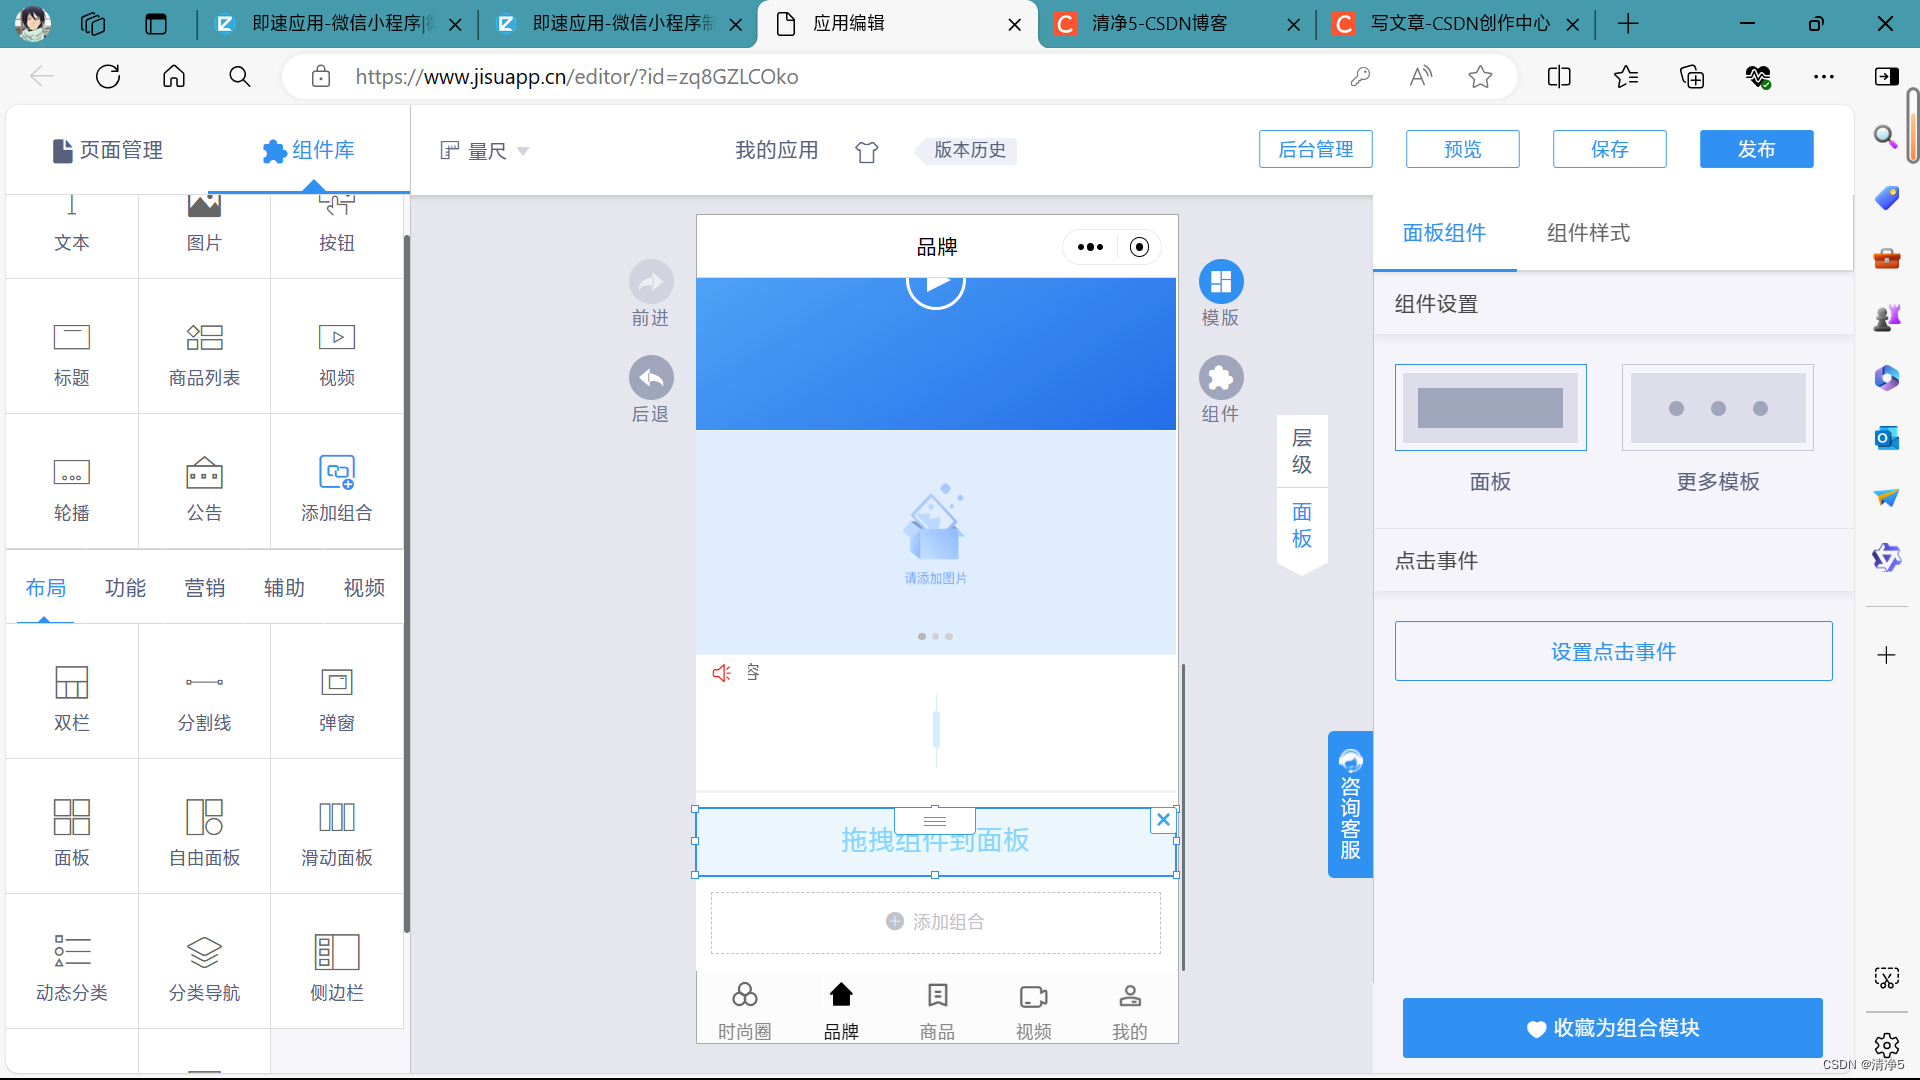
组件样式

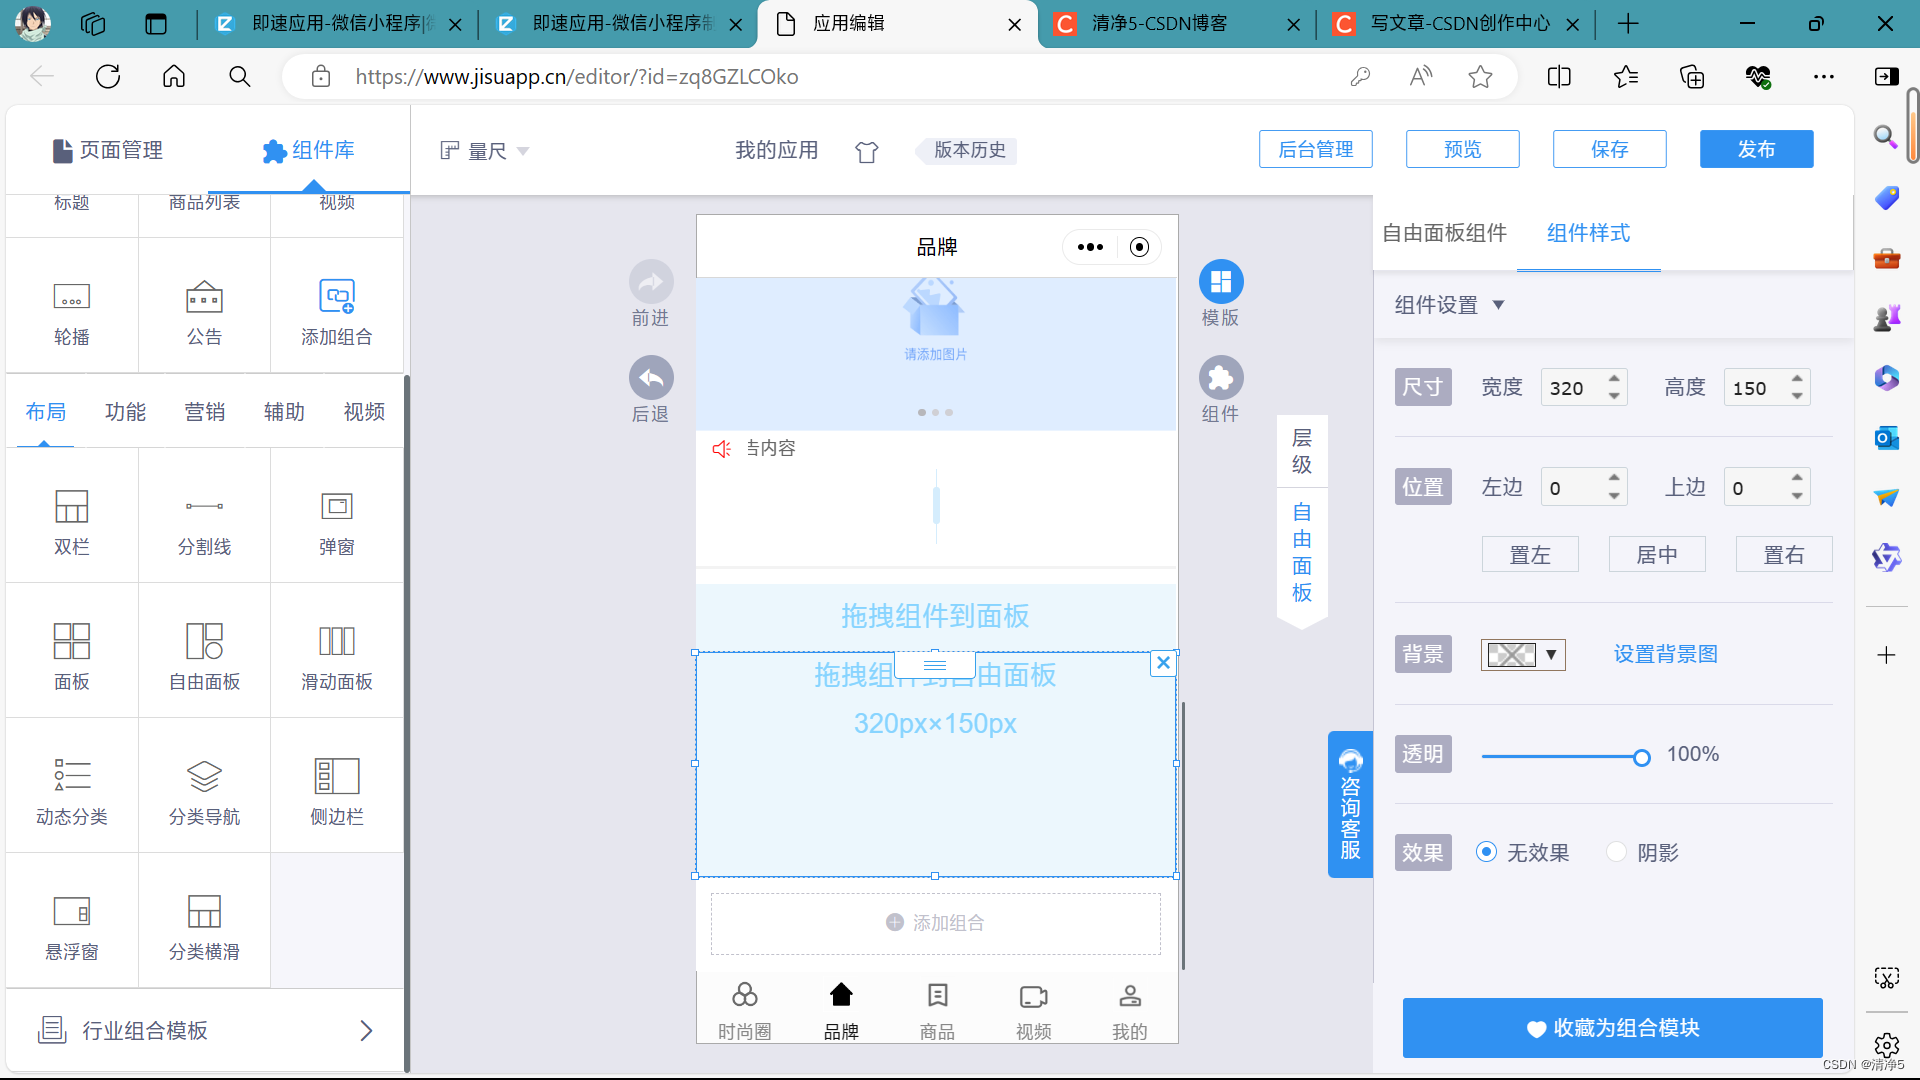
13.自由面板
自由面板组件

组件样式
14.滑动面板
滑动面板组件
15.动态导航
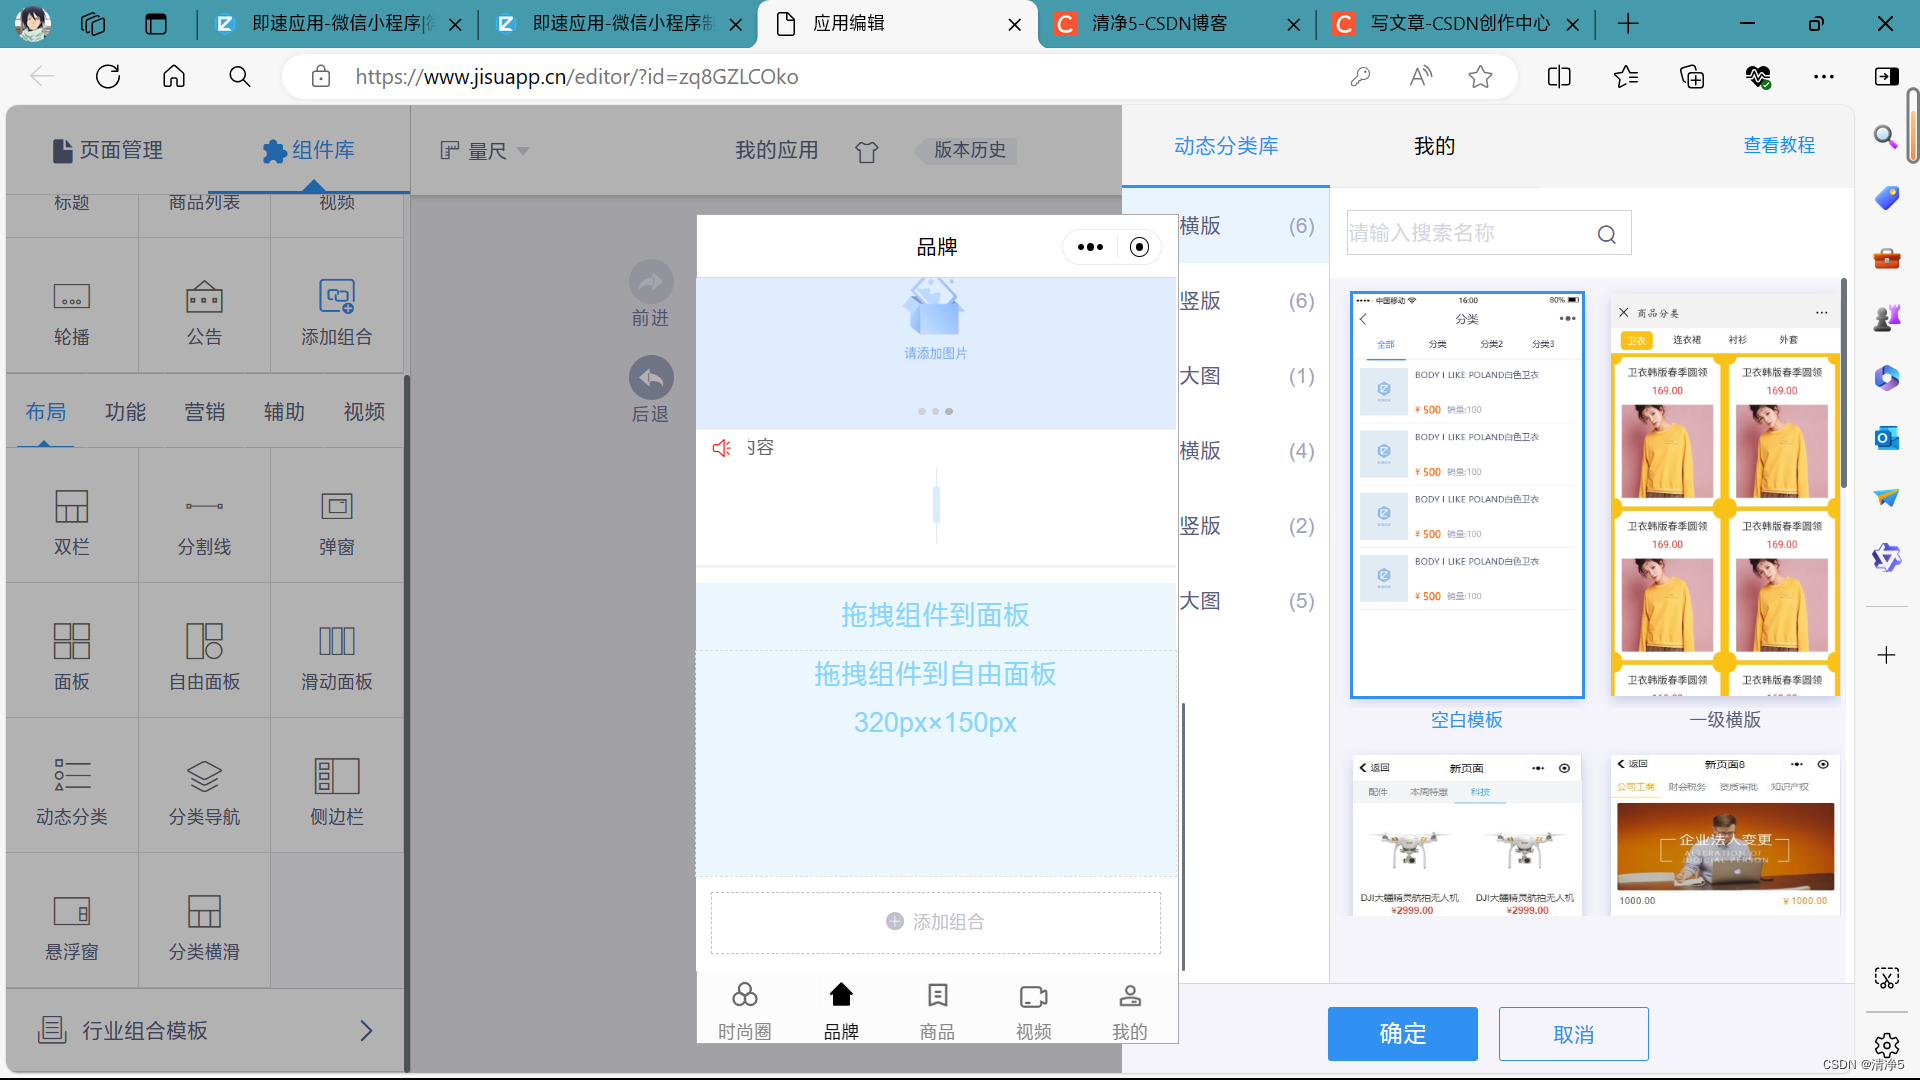
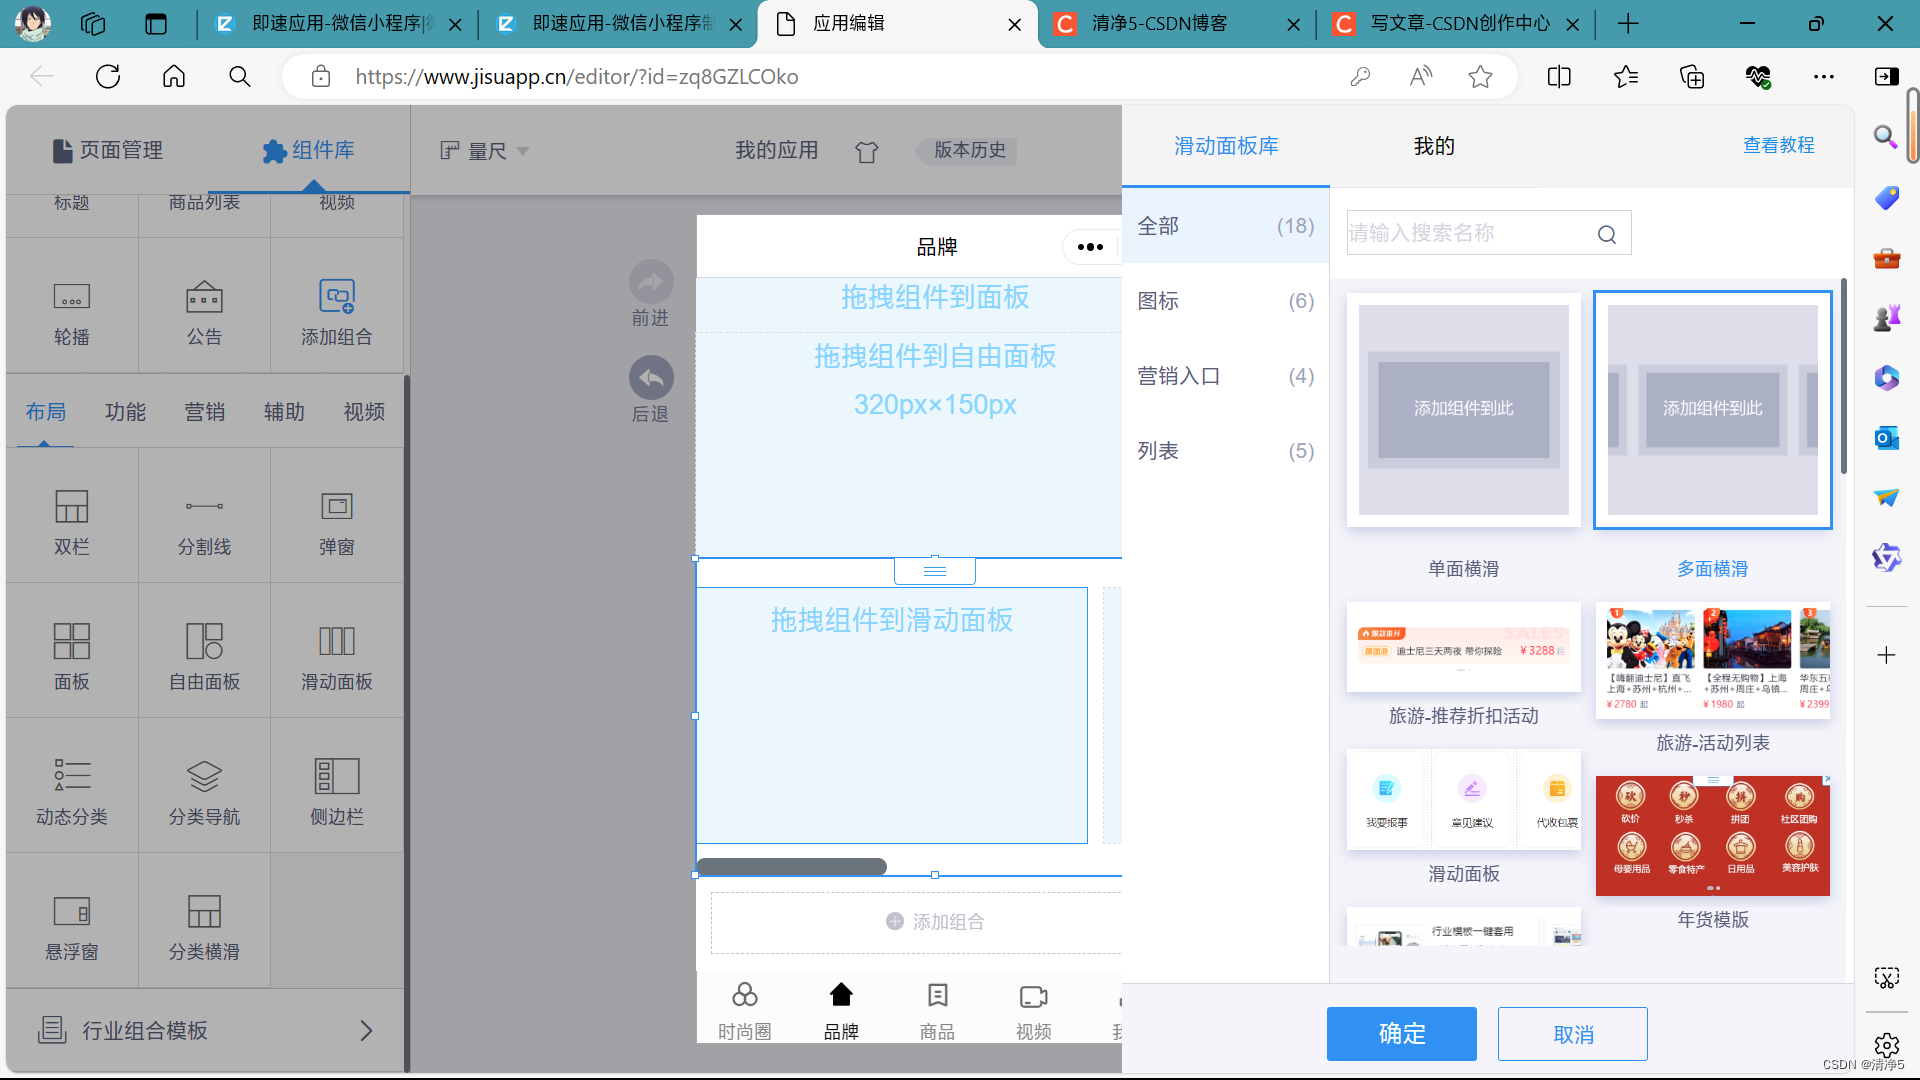
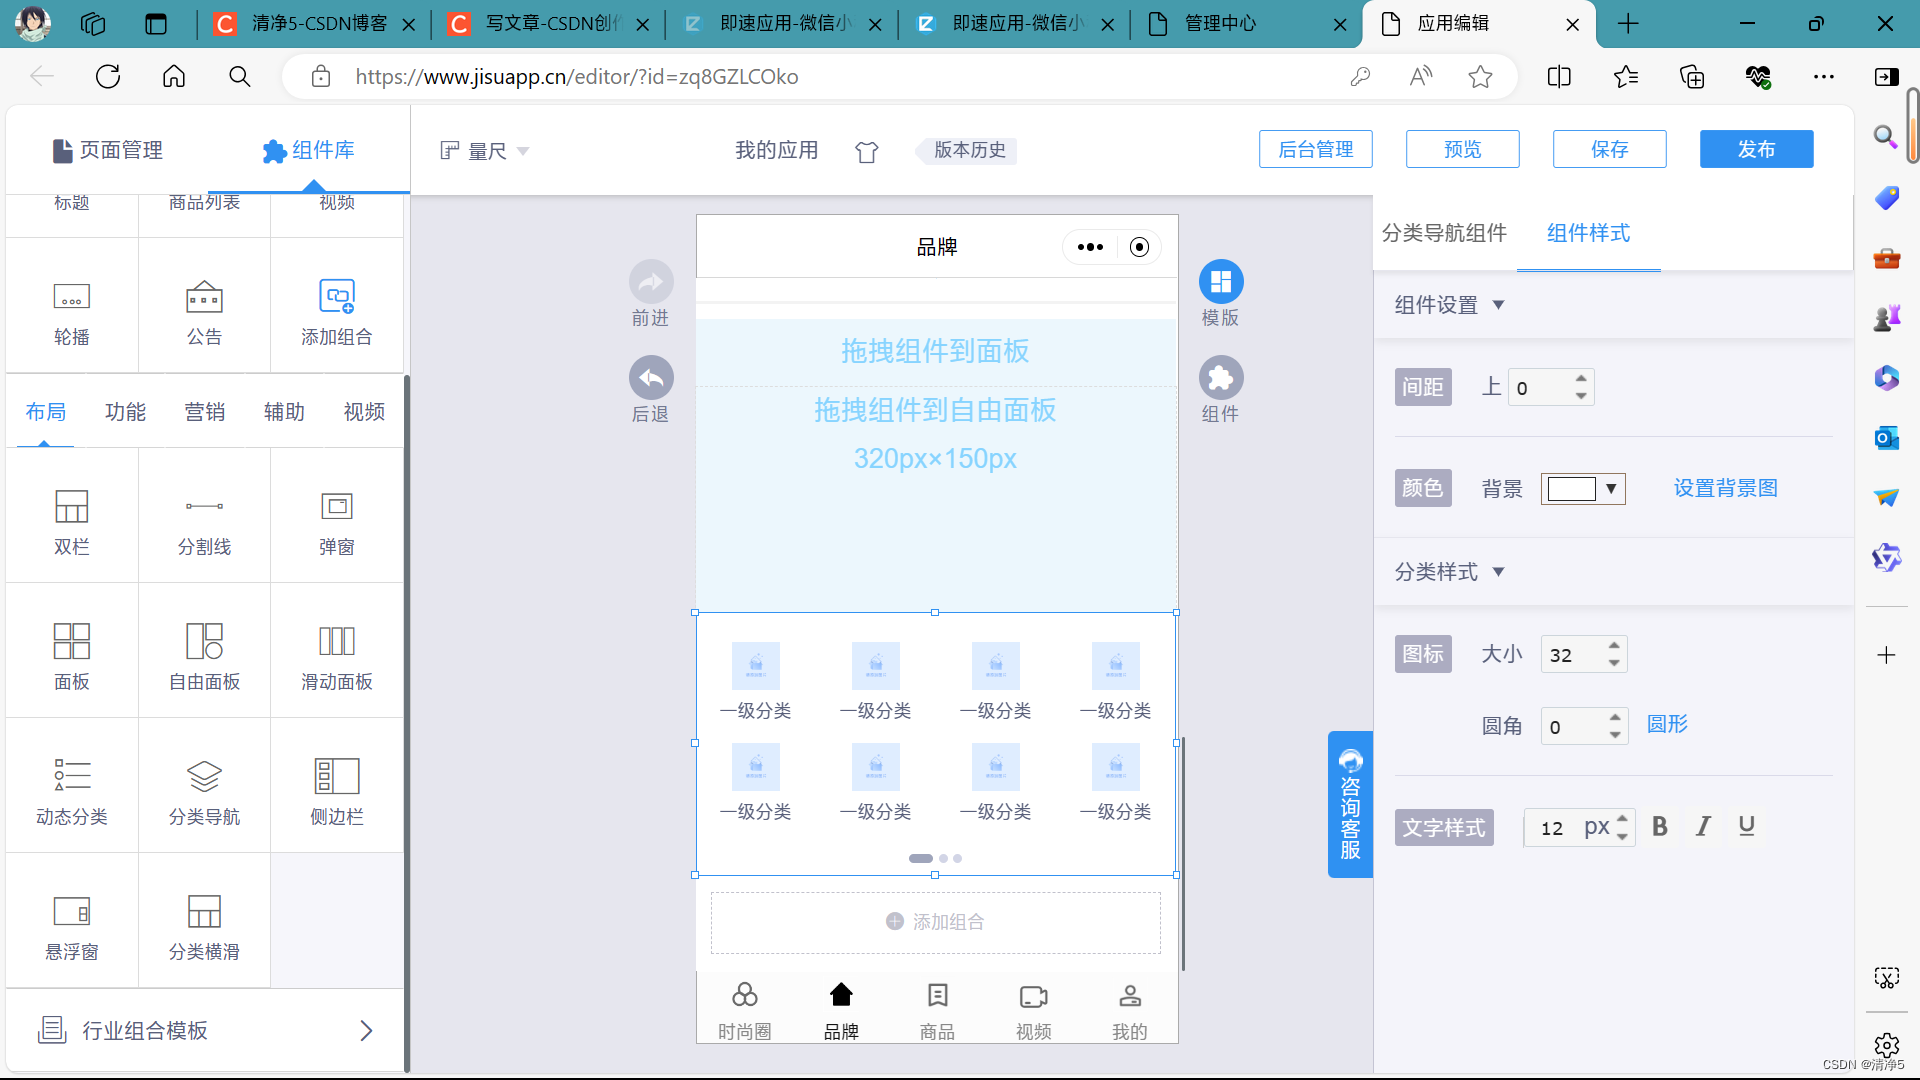
16.分类导航
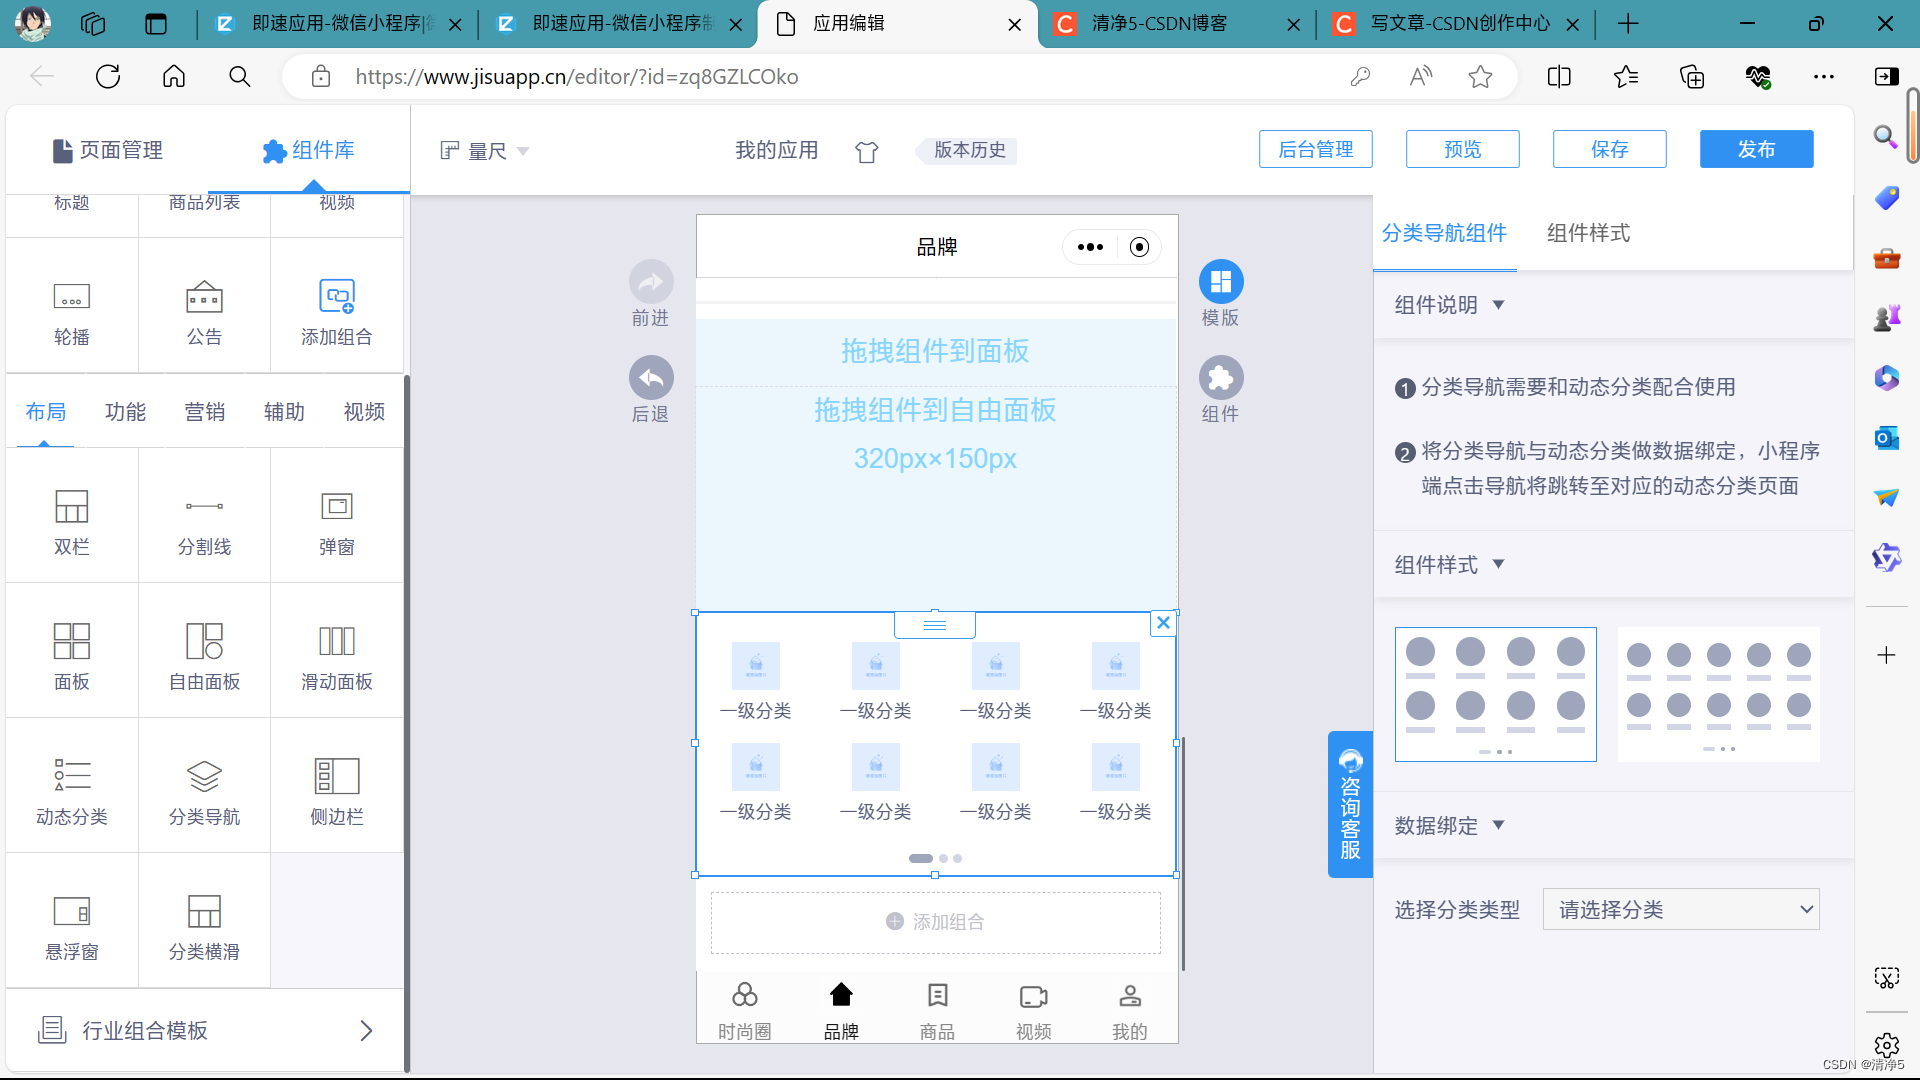
组件样式
17.侧边栏
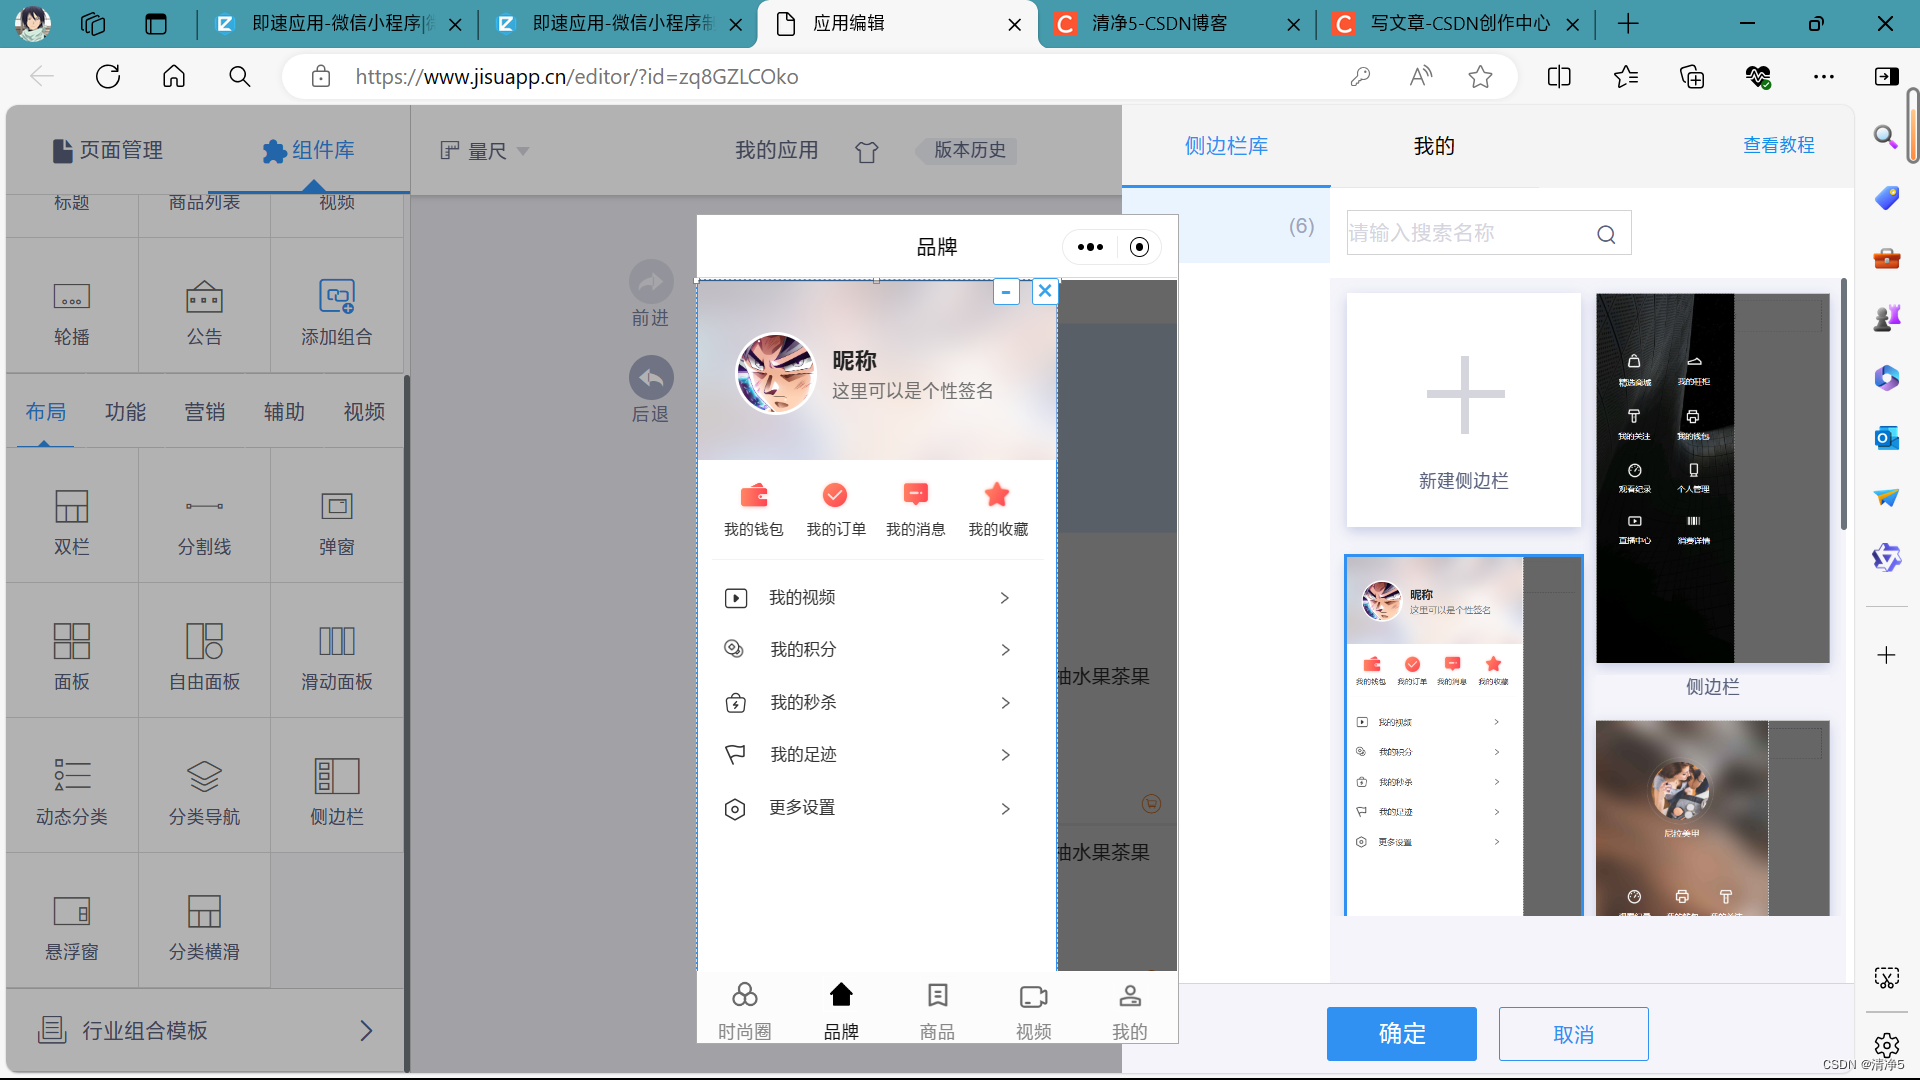
18.悬浮窗
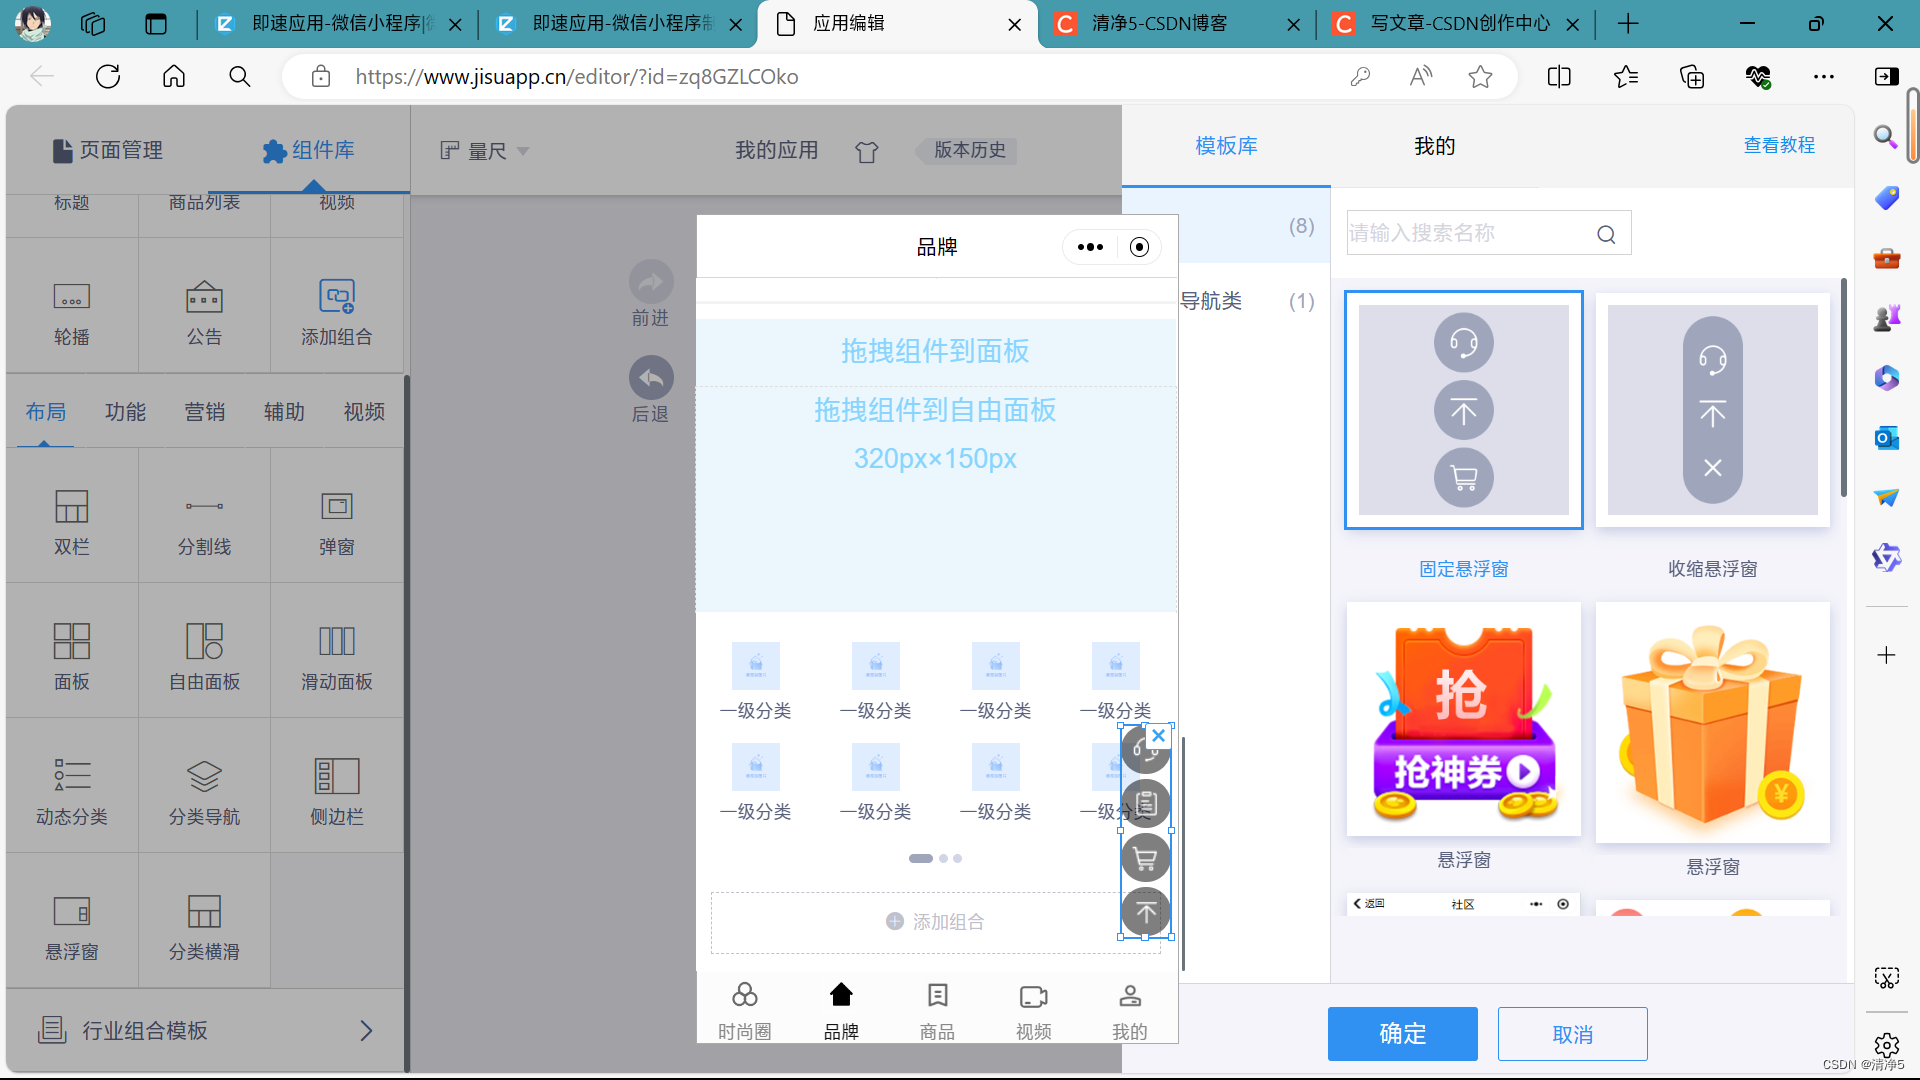
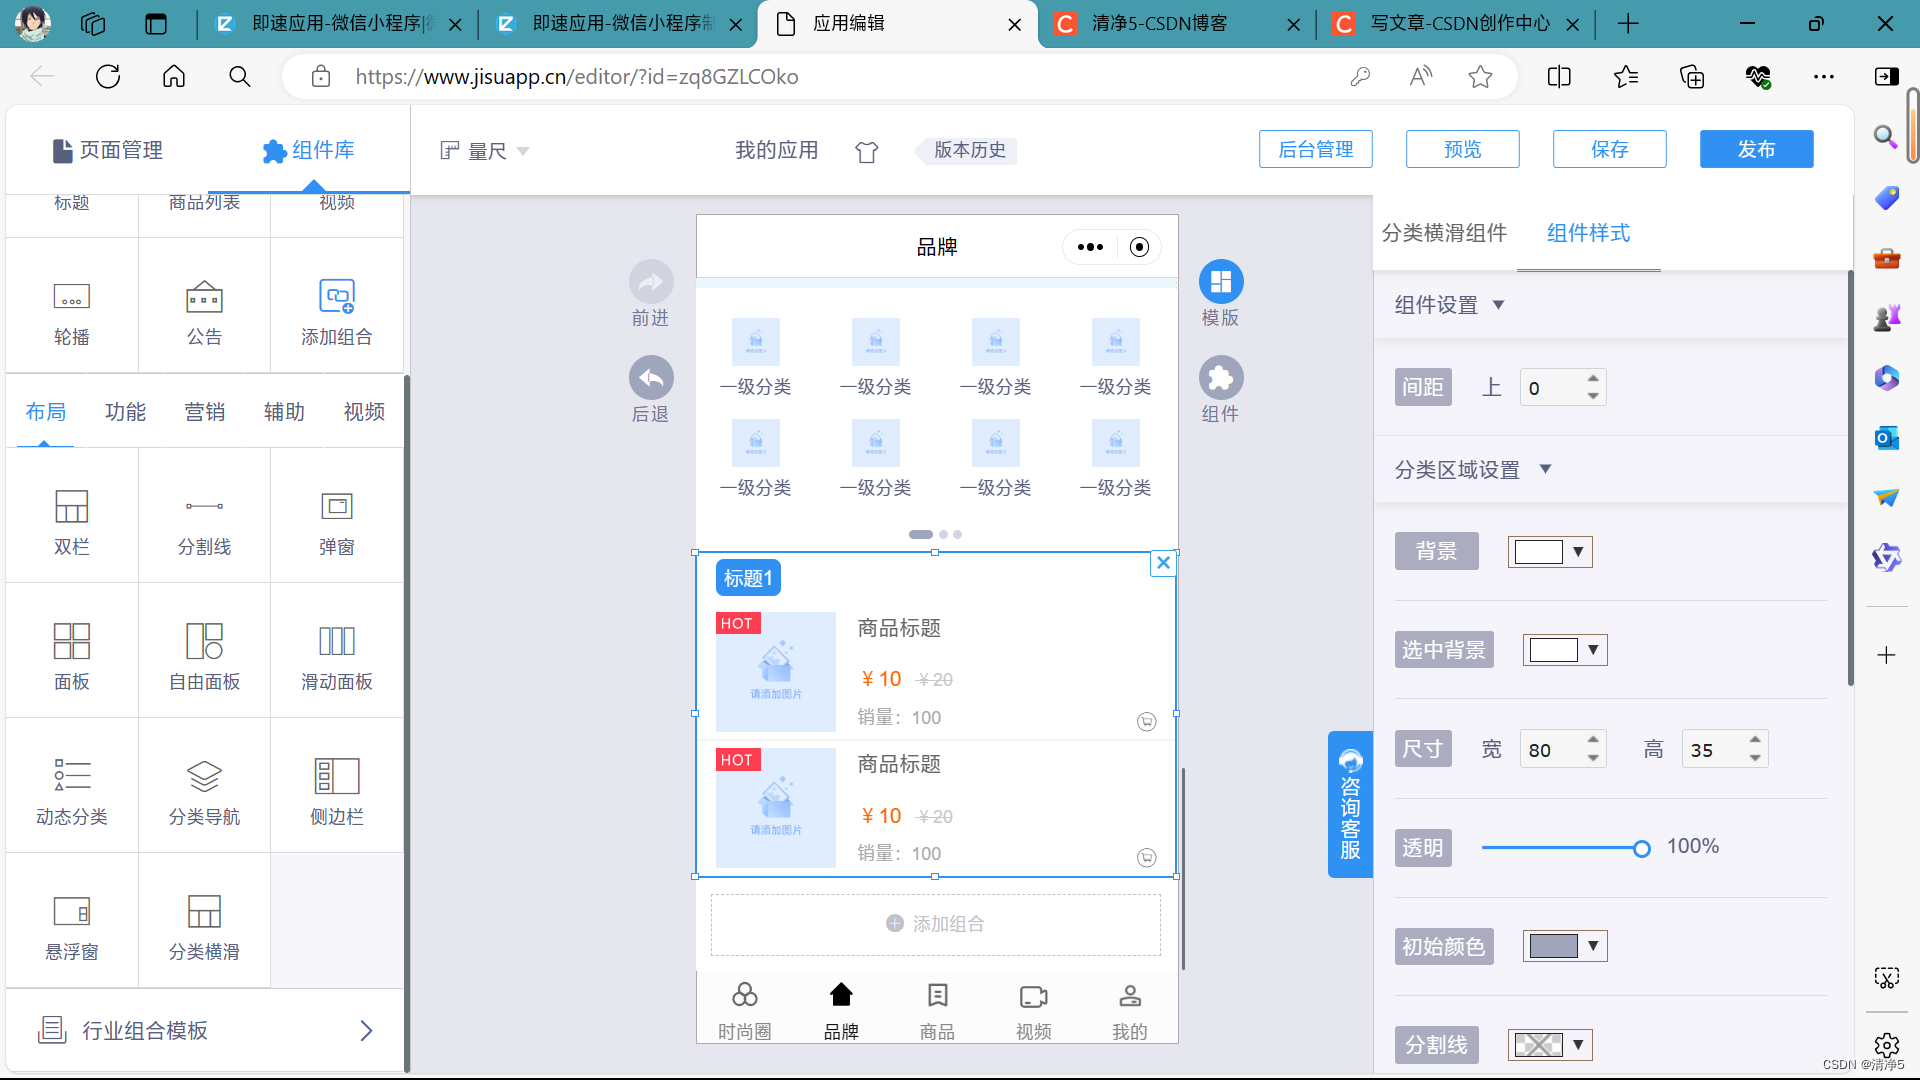
19.分类横滑
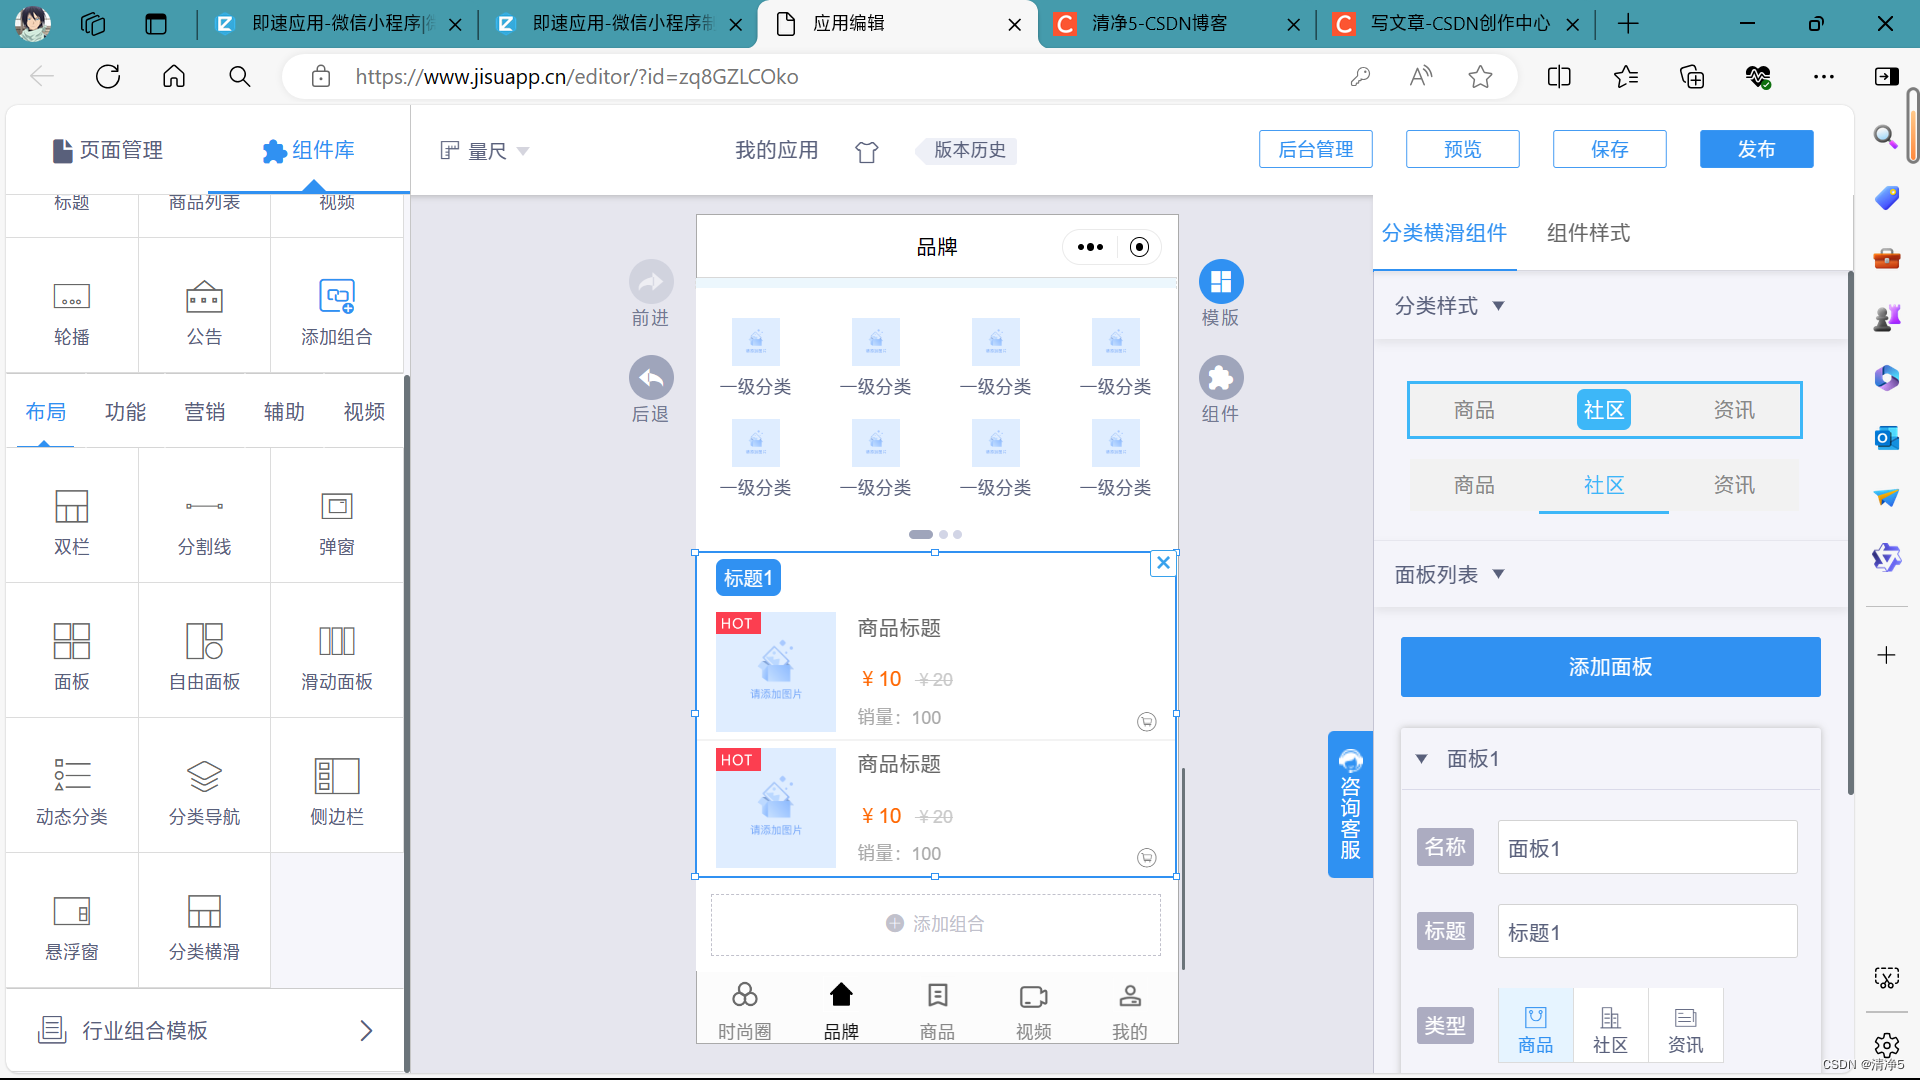
组件样式
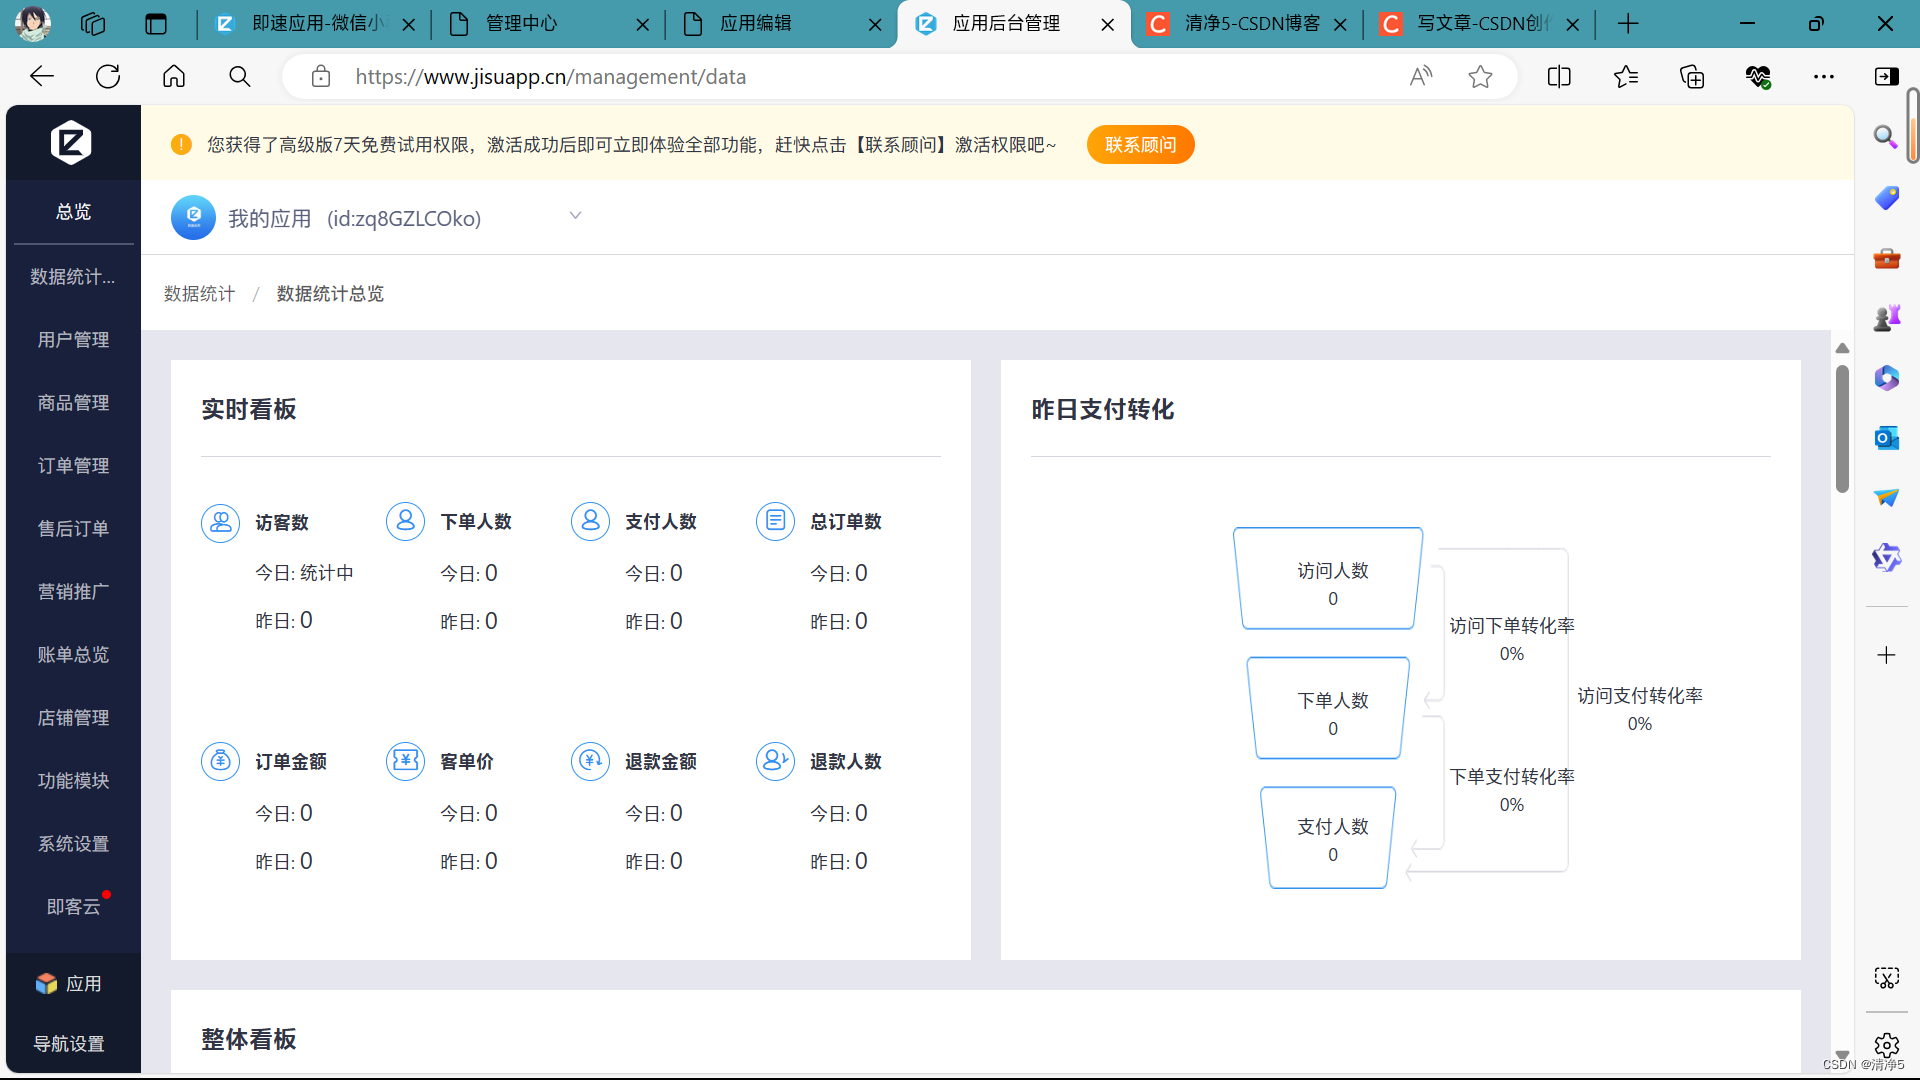
即速应用后台管理
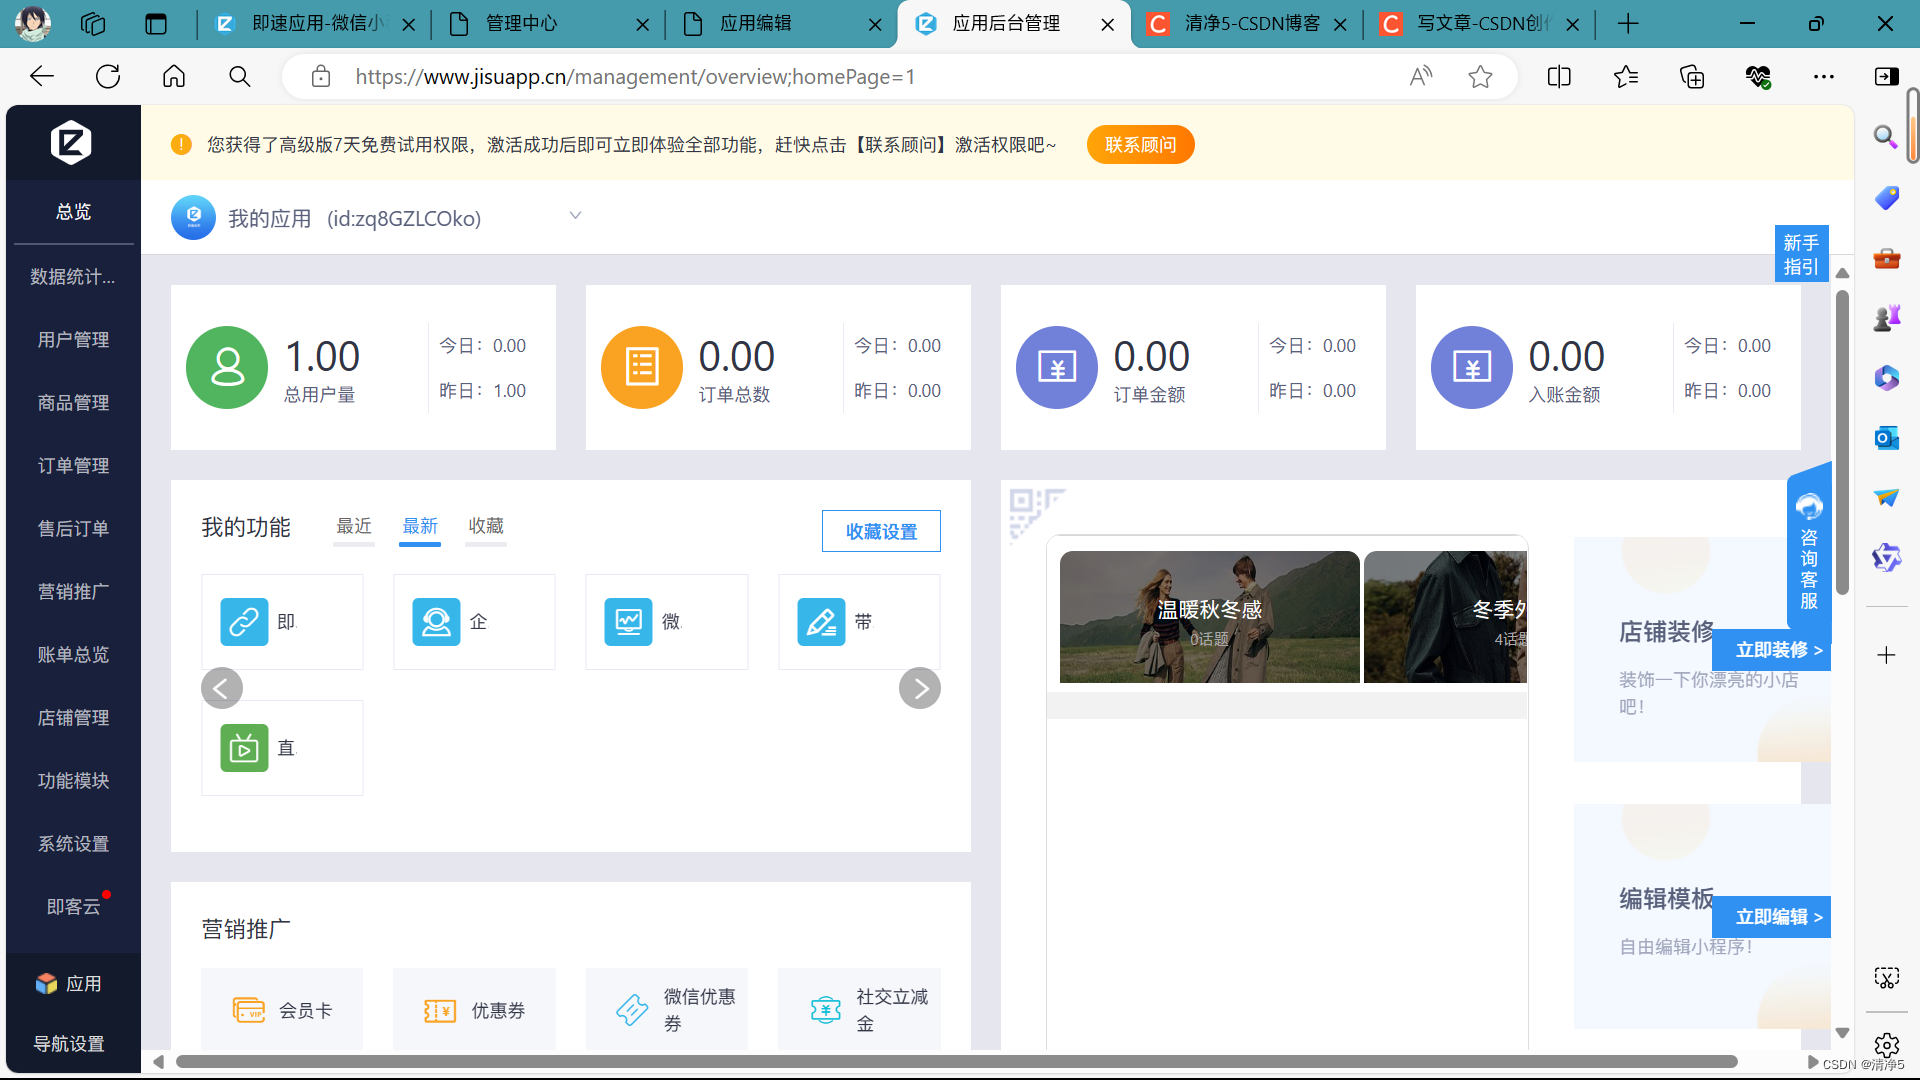
用户数据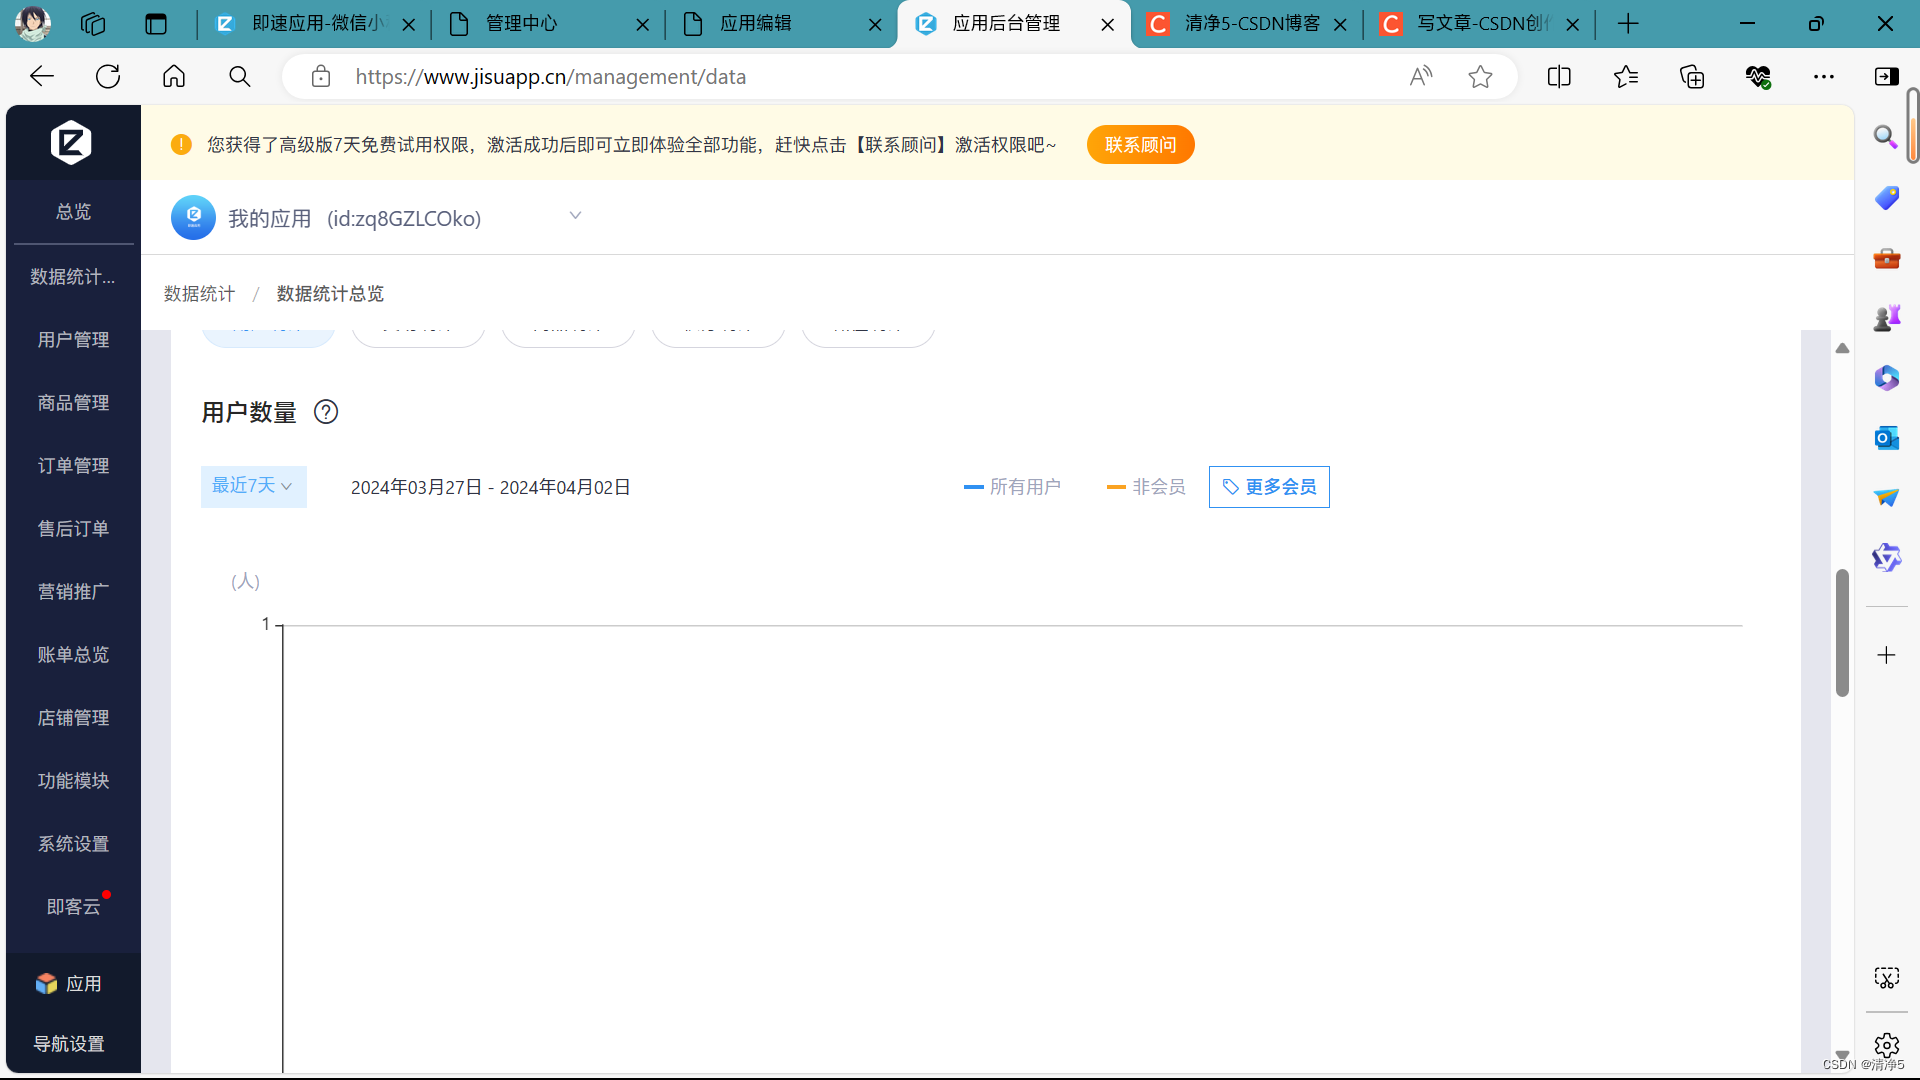
订单数量、金额、入账金额
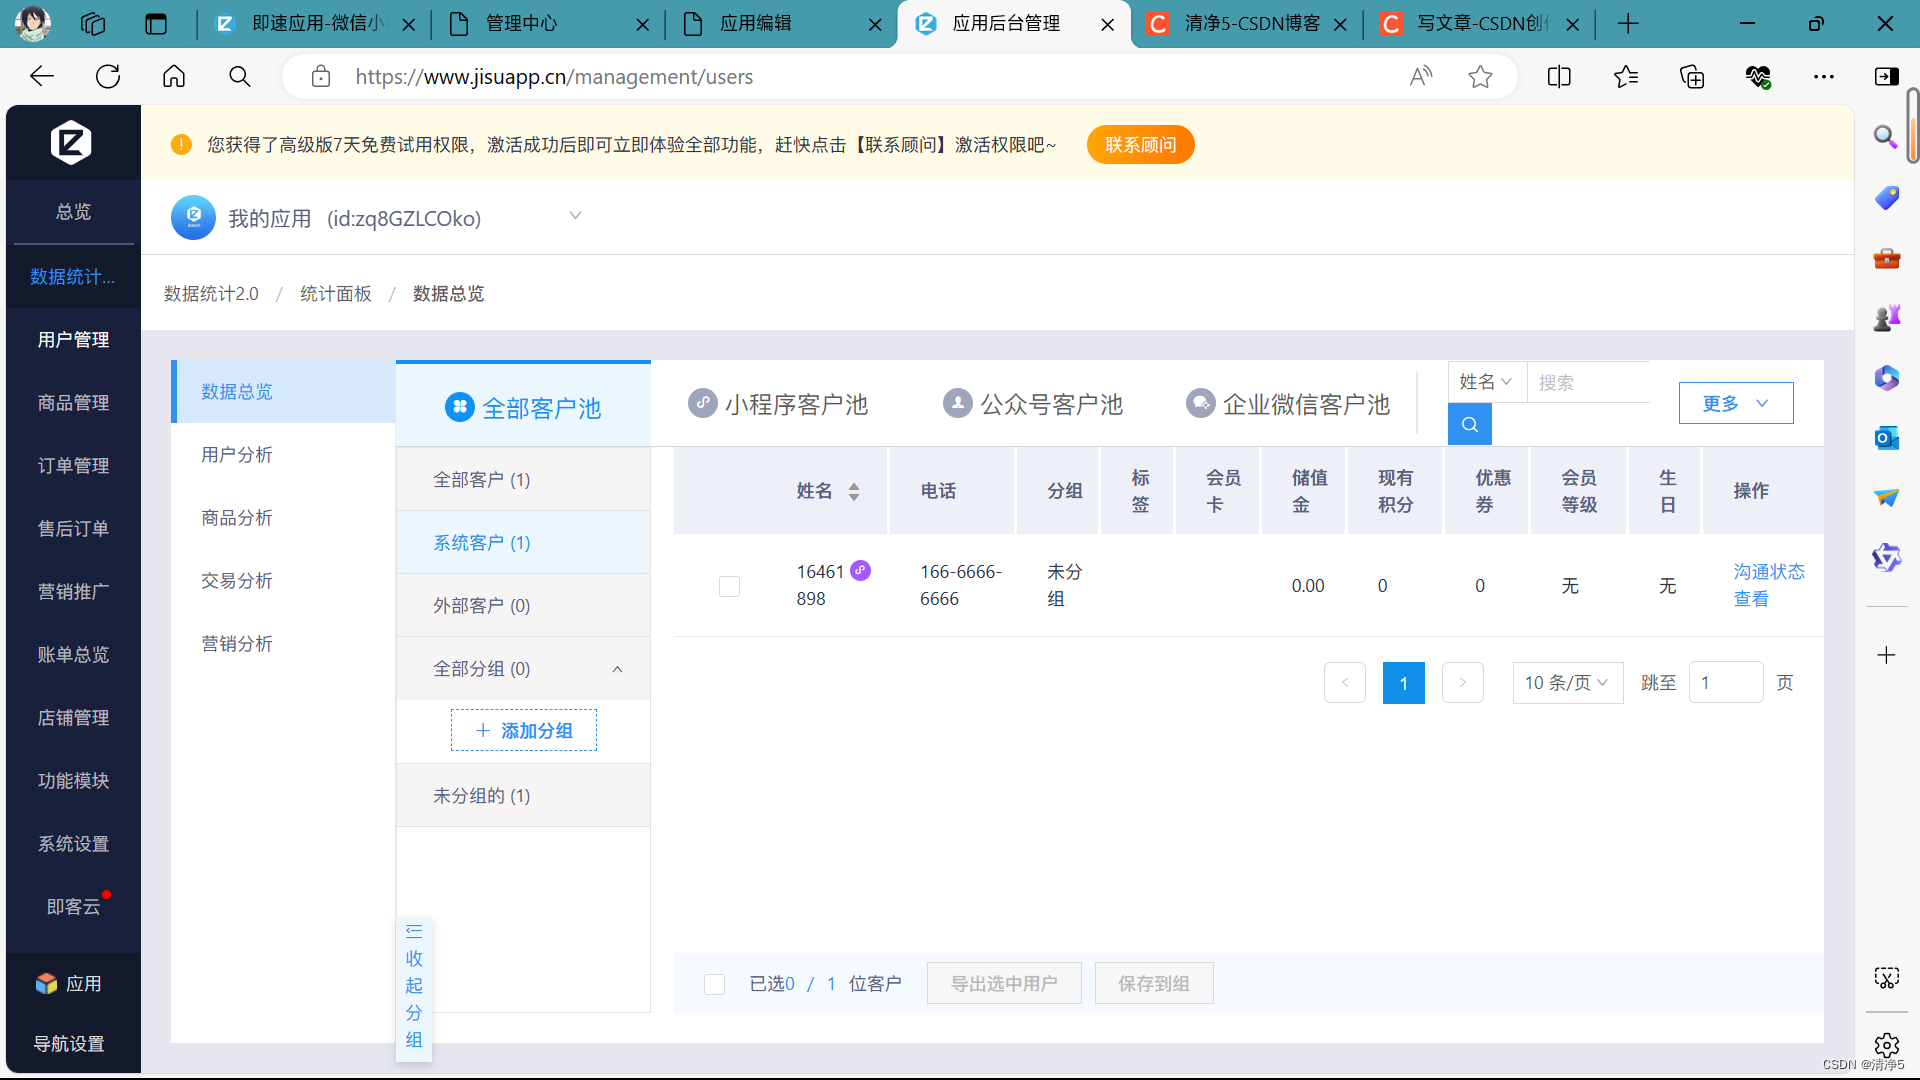
用户管理
商品管理

账单总览

————————————————
第六章 API应用
6.1 网络 API
6.1.1 发起网络请求
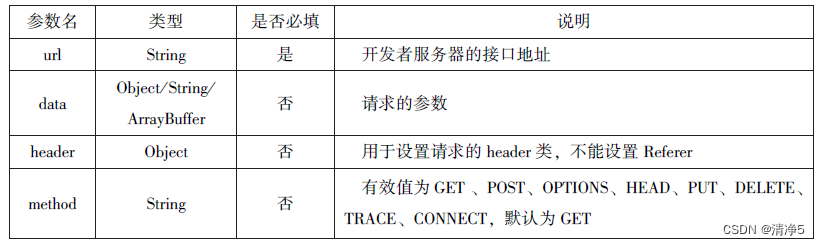

wxml:
<button type = "primary" bindtap="getbindutap">获取数据</button>
<textarea value='{{html}}'auto-auto-heightmaxlenght = '0'></textarea>
js:
Page({
data:{
  html:""
},
getbindtap:function(){
  var that = this;
  wx.request({
    url: 'https://www.baidu.com',
    data:{},
    header:{'Content-Type':'application/json'},
    success:function(res){
      console.log(res);
      that.setData({
        html:res.data
      })
    }
  })
}
})
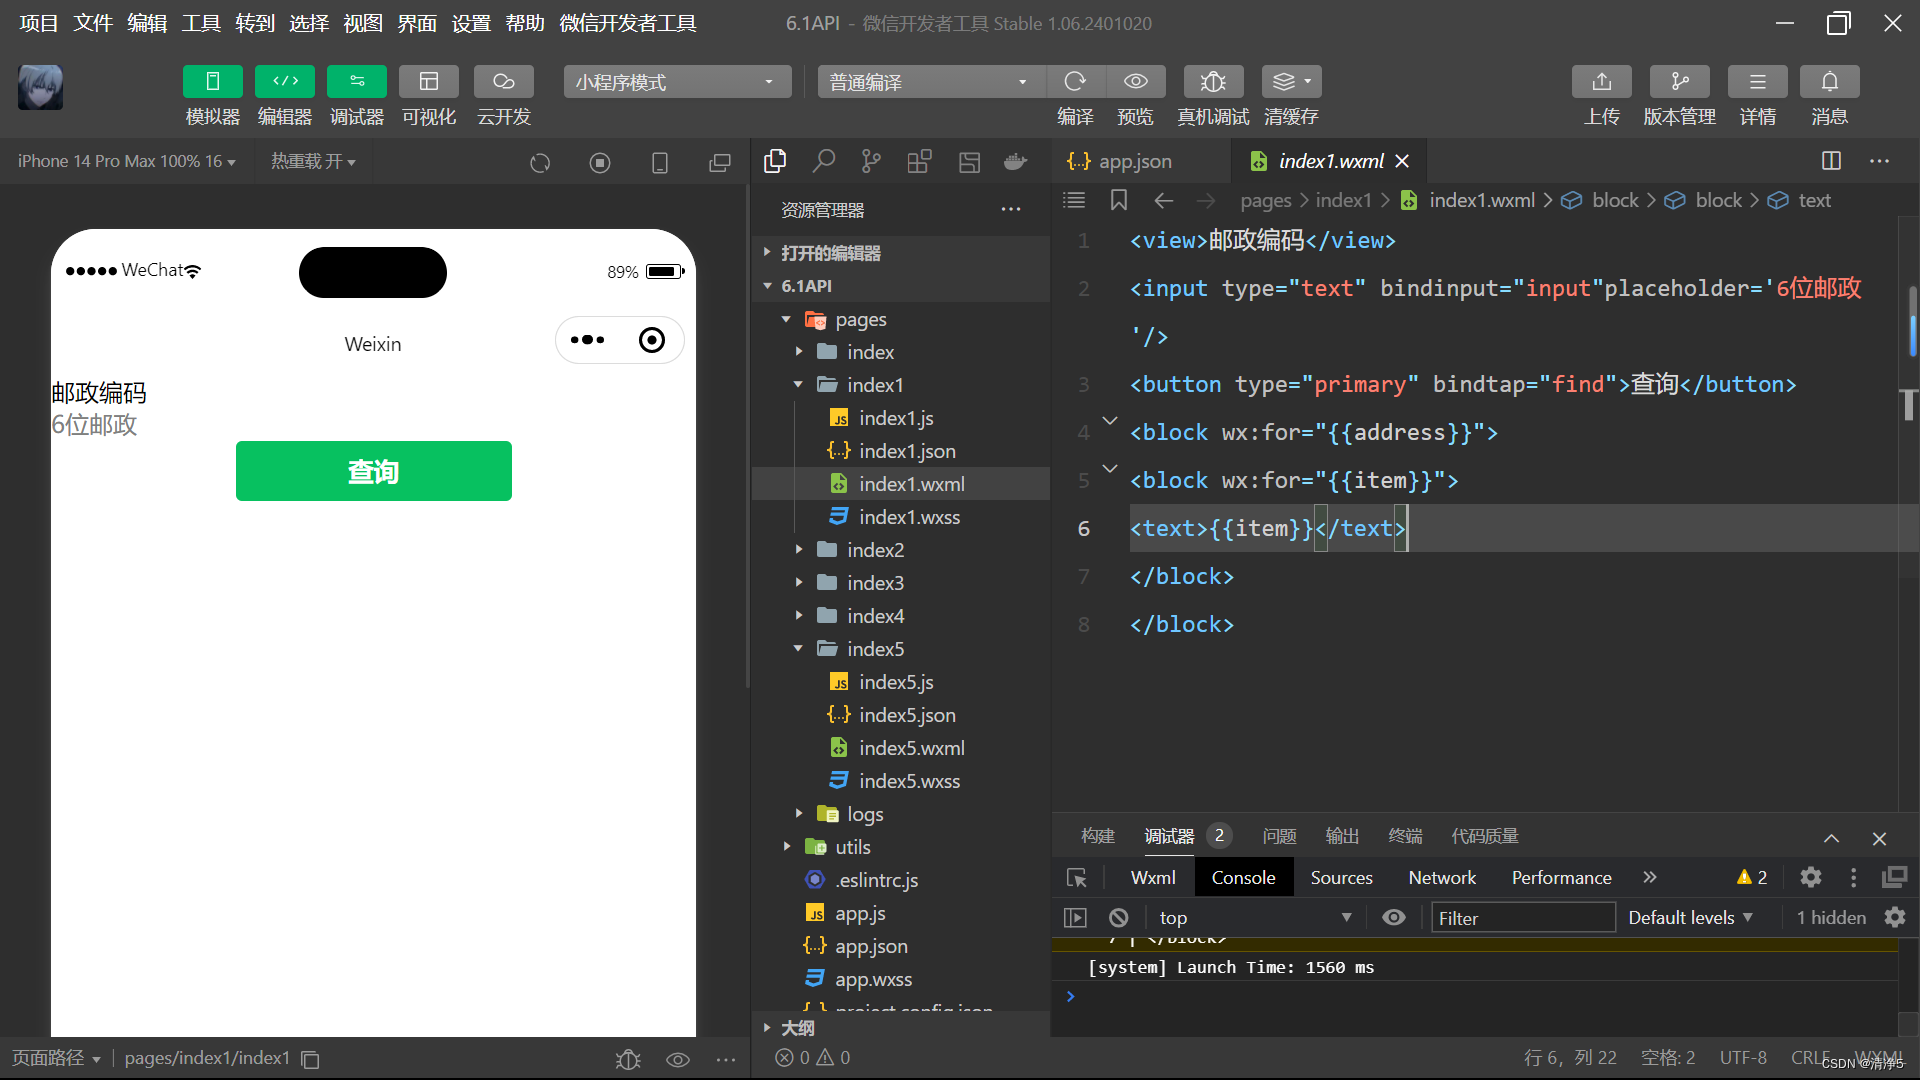
wxml:
<view>邮政编码</view>
<input type="text" bindinput="input"placeholder='6位邮政'/>
<button type="primary" bindtap="find">查询</button>
<block wx:for="{{address}}">
<block wx:for="{{item}}">
<text>{{item}}</text>
</block>
</block>
js:
Page({
data:{
  postcode:"",
  address:"",
  errMsg:"",
  error_code:"",
},
input:function(e){
  this.setData({
    postcode:e.detail.value,
  })
  console.log(e.detail.value)
},
find:function(){
  var postcode = this.data.postcode;
  if(postcode != null&&postcode != ""){
    var self = this;
    wx.showToast({
      title: '请等候',
      icon:'loading',
      duration:10000
    });
    wx.request({
      url: 'https://v.juhe.cn/postcode/query',
      data:{
        'postcode':postcode,
        'key':'off9bfccdf147476e067de994eb5496e'
      },
      header:{
        'Content-Type':'application/json',
      },
      method:'GET',
      success:function(res){
        wx.hideToast();
        if(res.data.error_code == 0){
          console.log(res);
          self.setData({
            errMsg:"",
            error_code:res.data.error_code,
            address:res.data.result.list
          })
        }
        else{
          self.setData({
            errMsg:res.data.reason || res.data.reason,

            error_code:res.data.error_code
          })
        }
      }
    })
  }
}
})
wxml:
<view>邮政编码</view>
<input type="text" bindinput="input"placeholder='6位邮政'/>
<button type="primary" bindtap="find">查询</button>
<block wx:for="{{address}}">
<block wx:for="{{item}}">
<text>{{item}}</text>
</block>
</block>
js:
Page({
  data:{
    postcode:"",
    address:"",
    errMsg:"",
    error_code:"",
  },
  input:function(e){
    this.setData({
      postcode:e.detail.value,
    })
    console.log(e.detail.value)
  },
  find:function(){
    var postcode = this.data.postcode;
    if(postcode != null&&postcode != ""){
      var self = this;
      wx.showToast({
        title: '请等候',
        icon:'loading',
        duration:10000
      });
      wx.request({
        url: 'https://v.juhe.cn/postcode/query',
        data:{
          'postcode':postcode,
          'key':'off9bfccdf147476e067de994eb5496e'
        },
        header:{
          'Content-Type':'application/X-WWW-from-urlencoded',
        },
        method:'Post',
        success:function(res){
          wx.hideToast();
          if(res.data.error_code == 0){
            console.log(res);
            self.setData({
              errMsg:"",
              error_code:res.data.error_code,
              address:res.data.result.list
            })
          }
          else{
            self.setData({
              errMsg:res.data.reason || res.data.reason,

              error_code:res.data.error_code
            })
          }
        }
      })
    }
  }
  })
6.1.2 上传文件
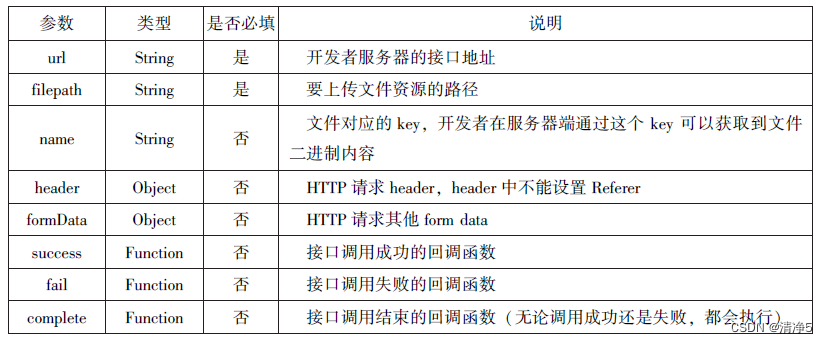
wxml:
<button type="primary" bindtap="uploadimage">上传</button>
<image src="{{img}}" mode="widthFix"/>
js:
Page({
data:{
  img:null,
},
uploadimage:function(){
  var that = this;
  wx.chooseImage({
    success:function(res){
      var tempFilePaths = res.tempFilePaths
      upload(that,tempFilePaths);
    }
  })
  function upload(page,path){
    wx.showToast({
      icon:'loading',
      title: '上传',
    }),
    wx.uploadFile({
      filePath: path[0],
      name: 'file',
      url: "http://localhost",
      success:function(res){
        console.lkog(res);
        if(res.statusCode != 200){
          wx.showToast({
            title: '提示',
            content:'上传失败',
            showCancel:false
          })
          return;
        }
        var data = res.data
        page.setData({
          img:path[0]
        })
      },
      fail:function(e){
        console.log(e);
        wx.showModal({
          title:'提示',
          content:'上传失败',
          showCancel:false
        })
      },
      complete:function(){
        wx.hideToast();
      }
    })
  }
}
})
6.1.3 下载文件

wxml:
<button type="primary" bindtap="uploadimage">上传</button>
<image src="{{img}}" mode="widthFix"/>
js:
Page({
data:{
  img:null,
},
uploadimage:function(){
  var that = this;
  wx.chooseImage({
    success:function(res){
      var tempFilePaths = res.tempFilePaths
      upload(that,tempFilePaths);
    }
  })
  function upload(page,path){
    wx.showToast({
      icon:'loading',
      title: '上传',
    }),
    wx.uploadFile({
      filePath: path[0],
      name: 'file',
      url: "http://localhost",
      success:function(res){
        console.lkog(res);
        if(res.statusCode != 200){
          wx.showToast({
            title: '提示',
            content:'上传失败',
            showCancel:false
          })
          return;
        }
        var data = res.data
        page.setData({
          img:path[0]
        })
      },
      fail:function(e){
        console.log(e);
        wx.showModal({
          title:'提示',
          content:'上传失败',
          showCancel:false
        })
      },
      complete:function(){
        wx.hideToast();
      }
    })
  }
}
})
6.2 多媒体API
6.2.1 图片API
1.选择图片或拍照
js:
  wx.chooseImage({
      count:2,
      sizeType:['original','compressed'],
      sourceType:['album','camera'],
      success:function(res){
        var tempFilePaths = res.tempFilePaths
        var tempFiles = res.tempFiles;
        console.log(tempFilePaths)
        console.log(tempFiles)
      }
    })
2.预览图片
js:
    wx.previewImage({
      current:"http://bmbo - cdn - 16488.b0.upaiyun.com/2018/02/05/1.png",
      urls: ["http://bmbo - cdn - 16488.b0.upaiyun.com/2018/02/05/2.png","http://bmbo - cdn - 16488.b0.upaiyun.com/2018/02/05/2.png","http://bmbo - cdn - 16488.b0.upaiyun.com/2018/02/05/3.png"],
    })
3.获取图片信息
js:
wx.chooseImage({
      success:function(res){
        wx.getImageInfo({
          src: res.tempFilePaths[0],
          success:function(e){
            console.log(e.width)
            console.log(e.height)
          }
        })
      },
    })
4.保存图片到系统相册
js:
 wx.chooseImage({
      success:function(res){
        wx.saveImageToPhotosAlbum({
          filePath: res.tempFilePaths[0],
          success:function(e){
            console.log(e)
          }
        })
      },
    })
6.2.2 录音API
1.开始录音
2.停止录音
js:
   wx.startRecord({
      success:function(res){
        var tempFilePaht = res.tempFilePath
      },
      fail:function(res){

      }
    })
    setTimeout(function () {
      wx.startRecord()
    },1000)
6.2.3 音频播放控制 API
1.立即播放
js:
wx.startRecord({
      success:function(res) {
        var tempFilePath = res.tempFilePath
        wx.playVoice({
          filePath: tempFilePath,
          complete:function () {
          }
        })
      }
    })
2.暂停播放
js:
wx.startRecord({
      success:function(res) {
        var tempFilePath = res.tempFilePath
        wx.playVoice({
          filePath: tempFilePath
        })
        setTimeout(function () {
          wx.playVoice()
          },5000)
      }
    })
3.结束播放
js:
wx.startRecord({
      success:function(res) {
        var tempFilePath = res.tempFilePath
        wx.playVoice({
          filePath: tempFilePath
        })
        setTimeout(function () {
          wx.playVoice()
          },5000)
      }
    })
6.2.4 音乐播放控制API
1.播放音乐
js:
wx.playBackgroundAudio({
      dataUrl:'http://bmob -cdn-16488.b0.upaiyun.com/2018 /0209/117e4a1b405195b18061299e2de89597.mp3',
      title:'有一天',
      coverImgUrl:'http://bmob-cdn-16488.b0.upaiyun.com/201802/09/604297140c9681880cc3d3e581f7724.jpg',
      success:function(res){
      console.log(res)//成功返回playBackgroundAudio:ok
      }
    })
2.获取音乐播放状态
js:
wx.getBackgroundAudioPlayerstate({
      success:function(res){
      var status = res.status
      var dataUrl = res.dataUrl
      var currentPosition =res.currentPosition
      var duration =res.duration
      var downloadPercent =res.downloadPercent
      console.log("播放状态:"+status)
      console.log("音乐文件地址:"+ dataUrl)
      console.log("音乐文件当前播放位置:"+currentPosition)
      console.log("音乐文件的长度:"+duration)
      console.log("音乐文件的下载进度:"+status)
      }
    })
3.控制音乐播放进度
js:
wx.seekBackgroundAudio({
position:30
})
4.暂停播放音乐
wx.playBackgroundAudio{
      dataUrl: '/music/a.mp3',
      title:'我的音乐!',
      coverImgUrl:'/images/poster.jpg',
      success:(function(){
        console.log('开始播放音乐了');
      }
    });
    setTimeout(function()
console.log('暂停播放');
wx.pauseBackgroundAudio();
},5000);
5.停止播放音乐
 wx.playBackgroundAudio{
dataUrl: '/music/a.mp3',
title:'我的音乐',
coverImgUrl:'/images/poster.jpg',
success:function(){
console.log('开始播放音乐了');
  }
});
setTimeout(function(){
console.1og('暂停播放');
wx.pauseBackgroundAudio();
},5000);
6.监听音乐播放
wx.playBackgroundAudio({
  dataUrl:this.data.musicData.dataUrl,title:this.data.musicData.title,
  coverImgUrl:this.data.musicData.coverImgUrl,success:function(){
  wx.onBackgroundAudioStop(function(){
  that.setData({
    isPlayingMusic:false
  })
})
}
})
wxml:
<view class="container">
<image class="bgaudio"src="{{changedImg? music.coverImg:'/image/background.png'}}"/>
<view class="control –view" >
<!--使用data-how定义一个0表示快退10秒 -->
<image src="/image/pre.png"bindtap="onPositionTap"data -how="0"/>
<image src="/image/{{isPlaying?'pause':'play'}}.png" bindtap="onAudioTap"/>
<image src="/image/stop.png"binatap="onStopTap"/>
<!--使用 data-how 定义一个1 表示快进10 秒 -->
<image src="/image/next.png"bindtap="onPositionTap"datahow="1"/></view>
</view>
js:
Page({
data:{
//记录播放状态
isPlaying:false,
//记录coverImg,仅当音乐初始时和播放停止时,使用默认的图片。播放中和暂停时都使用当前音乐的图片
coverImg,
changedImg: false,
//音乐内容
music:{
"url":
"http://bmob-can-16488.b0.upaiyun.com/2018/02/09/117e4a1b405195b18061299e2de89597.mp3",
"title":"盛晓玫-有一天",
"coverImg":
"http://bmob-can-16488.b0upaivun.com/2018/02/09/£6042971409681880cc3d3e581f7724.jpg" ,
},
},
onLoad: function(){
//页面加载时,注册监听事件
this.onAudioState();
},
//点击播放或者暂停按钮时触发
onAudioTap:function(event){
if(this.data.isplaying){
//如果在正常播放状态,就暂停,并修改播放的状
wx.pauseBackgroundAudio();
}
else{
//如果在暂停状态,就开始播放,并修改播放的
let music=this.data.music;
wx.playBackgroundAudio({
dataUrl:music.url,
title:music.title,
coverImgUrl:music.coverImg
})
}
},
//点击即可停止播放音乐
onStopTap:function(){
let that=this;
wx.stopBackgroundAudio({
success:function(){
//改变 coverImg 和播放状态
that.setData
({isPlaying:false,changedImg:false});
}
})
},
//点击“快进10秒”或者“快退10秒”时,触发
onPositionTap:function(event){
let how=event.target.dataset.how;
//获取音乐的播放状态
wx.getBackgroundAudioplayerState({
success:function(res){
//仅在音乐播放中,快进和快退才生效
//音乐的播放状态,1表示播放中
let status=res,status;
if(status===1){
//音乐的总时长
let duration=res.duration;
let currentPosition=res.currentPosition;
if(how ==="0"){
//注意:快退时,当前播放位置快退10秒小于0时,直接设置position为1;否则,成去10秒
//快退到达的位置
let position=currentposition-10;
if(position<0){
position =1;
}
//执行快退
wx.seekBackgroundAudio({
position: position
});
//给出一个友情提示,在实际应用中,请删除!!!
wx.showToast({title:"快退10s",duration:500});
}
(how==="1");{
//注意:快进时,当前播放位置快进10秒后大于总时长时,直接设置position为总时长减1
//快进到达的位置
let position=currentPosition +10;
if(position>duration){
position=duration -1;
}
//执行快进
wx.seekBackgroundAudio({
position: position
});
//给出一个友情提示,在实际应用中,请删除!!!
wx.showToast({title:"快进10s",duration:500});
}
}else{
//给出一个友情提示,在实际应用中,请删除!!!
wx.showToast({title:"音乐未播放",duration:800});
}
}
})
},
//音乐播放状态
onAudioState:function(){
let that=this;
wx.onBackgroundAudioPlay(function(){
//当wx.playBackgroundAudio()执行时触发
//改变coverImg 和播放状态
that.setData({isPlaying:true,changedImg:true});
console.log( "on play");
});
wx.onBackgroundAudioPause(function(){
//wx.pauseBackgroundAudio()执行时触发
//仅改变播放状态
that.setData({isPlaying:false});
console.log("on pause");
});
wx.onBackgroundAudioStop(function(){
//当音乐自行播放结束时触发
//改变 coverImg 和播放状态 都有二者
that.setData({lisPlaying:false,changedImg:false});
console.log("on stop");
});
}
})wxss:
.bgaudio{
height:350rpx;
width:350rpx;
margin-bottom:100rpx;
}
.control -view image{
height:64rpx;
width:64rpx;
margin:30rpx;
}
案例展示
6.3 文件API
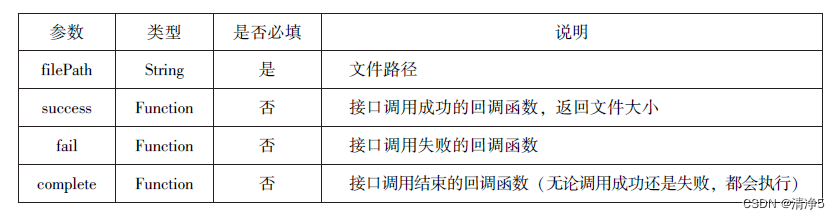
1.保存文件
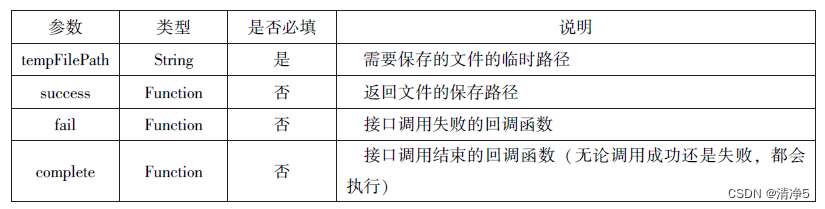
js:
saveImg:function(){
  wx.chooseImage({
  count:1,//默认值为9
  sizeType:['original','compressed'],//可以指定是原图还是压缩图,默认二者都有
  sourceType:['album', 'camera'],//可以指定来源是相册还是相机,默认二者都有
  success:function(res){
  var tempFilePaths = res.tempFilePaths[0]
  wx.saveFile({
  tempFilePath: tempFilePaths,
  success:function(res){
  var saveFilePath = res. savedFilePath;
  console. log(saveFilePath)
  }
  })
  }
  })
  }
2.获取本地文件列表

js:
wx.getSavedFileList({
success:function(res){
that. setData({
fileList:res.fileList
})
}
})
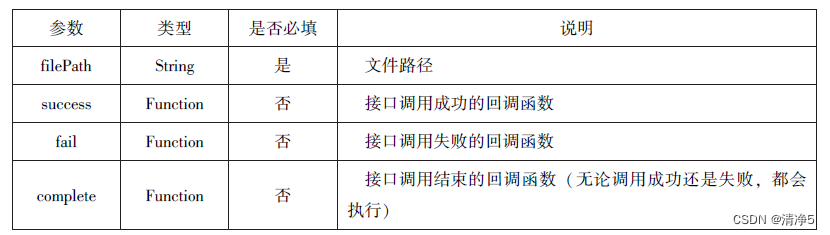
3.获取本地文件的文件信息
js:
 wx.chooseImage({
           count:1,
           sizeType:['original','compressed'],
           sourceType:['album','camera'],
           success:function(res){
           var tempFilePaths=res.tempFilePaths[0]
      wx.saveFile({
           tempFilePath:tempFilepaths,
           success:function (res) {
        var saveFilePath = res.saveFilePath;
          wx.getSavedFileInfo({
        filePath:saveFileOath,
        success:function(res){
        console.log(res.size)
    }
       })
    }
     })
    }
)}
4.删除本地文件
js:
wx.getSavedFileList({
success:function(res){
if(res,fileList.length>0){
wx.removeSavedFile({
filePath: res. fileList[0l. filePath,
complete:function(res){
console.log(res)
}
})
}
}
})
5.打开文档
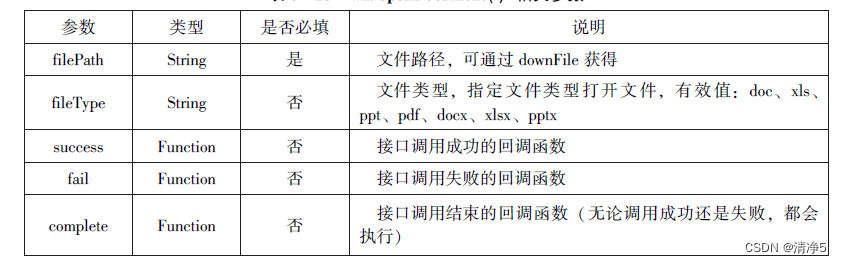
js:
wx.downloadFile({
url:"http://localhost/fm2.pdf",//在本地通过wxamp 搭建服务器
success:function(res){
var tempFilePath =res.tempFilePath;
wx.openDocument({
filePath: tempFilePath,
success:function(res){
console.log("打开成功")
}
})
}
})
6.4 本地数据及缓存 API
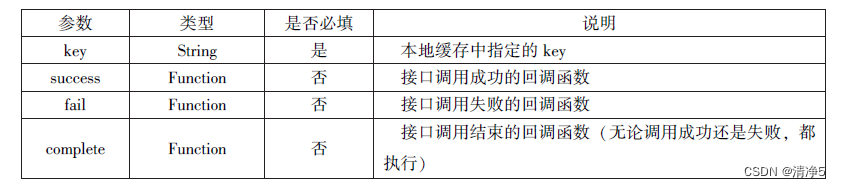
6.4.1 保存数据
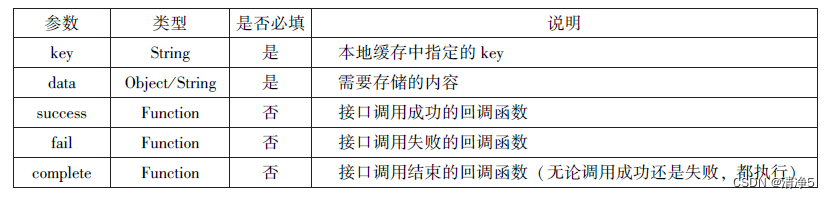
1.js
wx.setStorage({
  key:'name',
  data:'sdy',
  success:function (res) {
    console.log(res)
  }
})
2.js
wx.setStorageSync('age', 25)
6.4.2 获取数据

1.js
wx.getStorage()({
  key:'name',
  success:function (res) {
    console.log(res.data)
  },
})
2.js
try{
  var value = wx.getStorageInfoSync('age')
  if(value){
    console.log("获取成功" + value)
  }
}catch(e){
  console.log("获取失败")
}
6.4.3 删除数据
1.js
wx.removeStorage({
  key: 'key',
})(option)({
  key:'name',
  success:function (res) {
    console.log("删除成功")
  },
  fail:function () {
    console.log("删除失败")
  }
})
2.js
try{
  wx.removeStorageSync('name')
}catch(e){

}
6.4.4 清空数据
1.js
wx.getStorage({
  key:'name',
  success:function (res) {
    wx.clearStorage()
  },
})
2.js
try{
  wx.clearStorageSync()('name')
}catch(e){

}
6.5 位置信息 API
6.5.1 获取位置信息
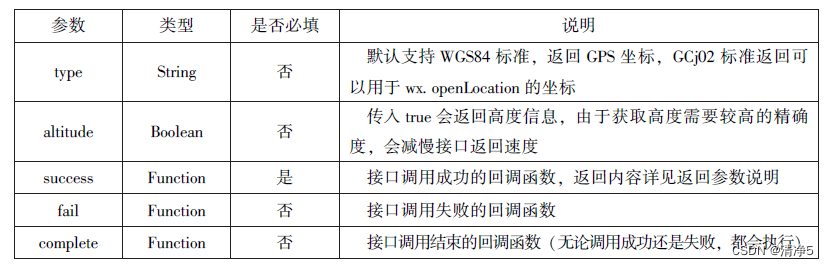

 js:

Page({
data:{
}
})
wx.getLocation({
  type:'wgs84',
  success:function (res) {
    console.log("经度:" + res.longitude);
    console.log("纬度:" + res.latitude);
    console.log("速度:" + res.longitude);
    console.log("位置的精准度:" + res.accuracy);
    console.log("水平精准度:" + res.horizontalAccuracy);
    console.log("垂直精准度:" + res.verticalAccuracy);
  },
})
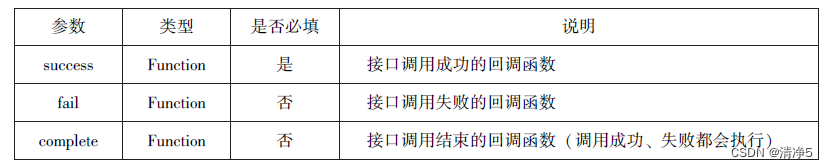
6.5.2 选择位置信息


js:

wx.chooseLocation()({
  success:function (res) {
    console.log("位置的名称:" + res.name);
    console.log("位置的地址:" + res.address);
    console.log("位置的经度:" + res.longitude);
    console.log("位置的纬度:" + res.latitude);
  },
})
6.5.3 显示位置信息
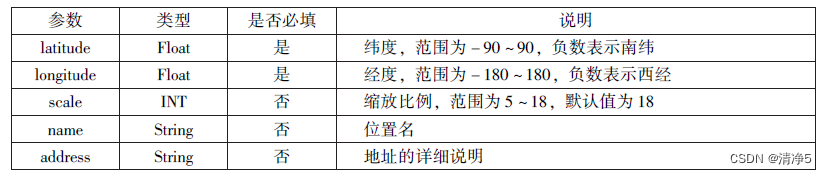

js:

wx.getLocation({
  type:'gcj02',
  success:function (res) {
    var latitude = res.latitude
    var longitude = red.longitude
    wx.openLocation({
      latitude: latitude,
      longitude: longitude,
      scale:10,
      name:'智慧国际酒店',
      address:'西安市长安区西长安区300号'
    })
  }
})
6.6 设备相关 API
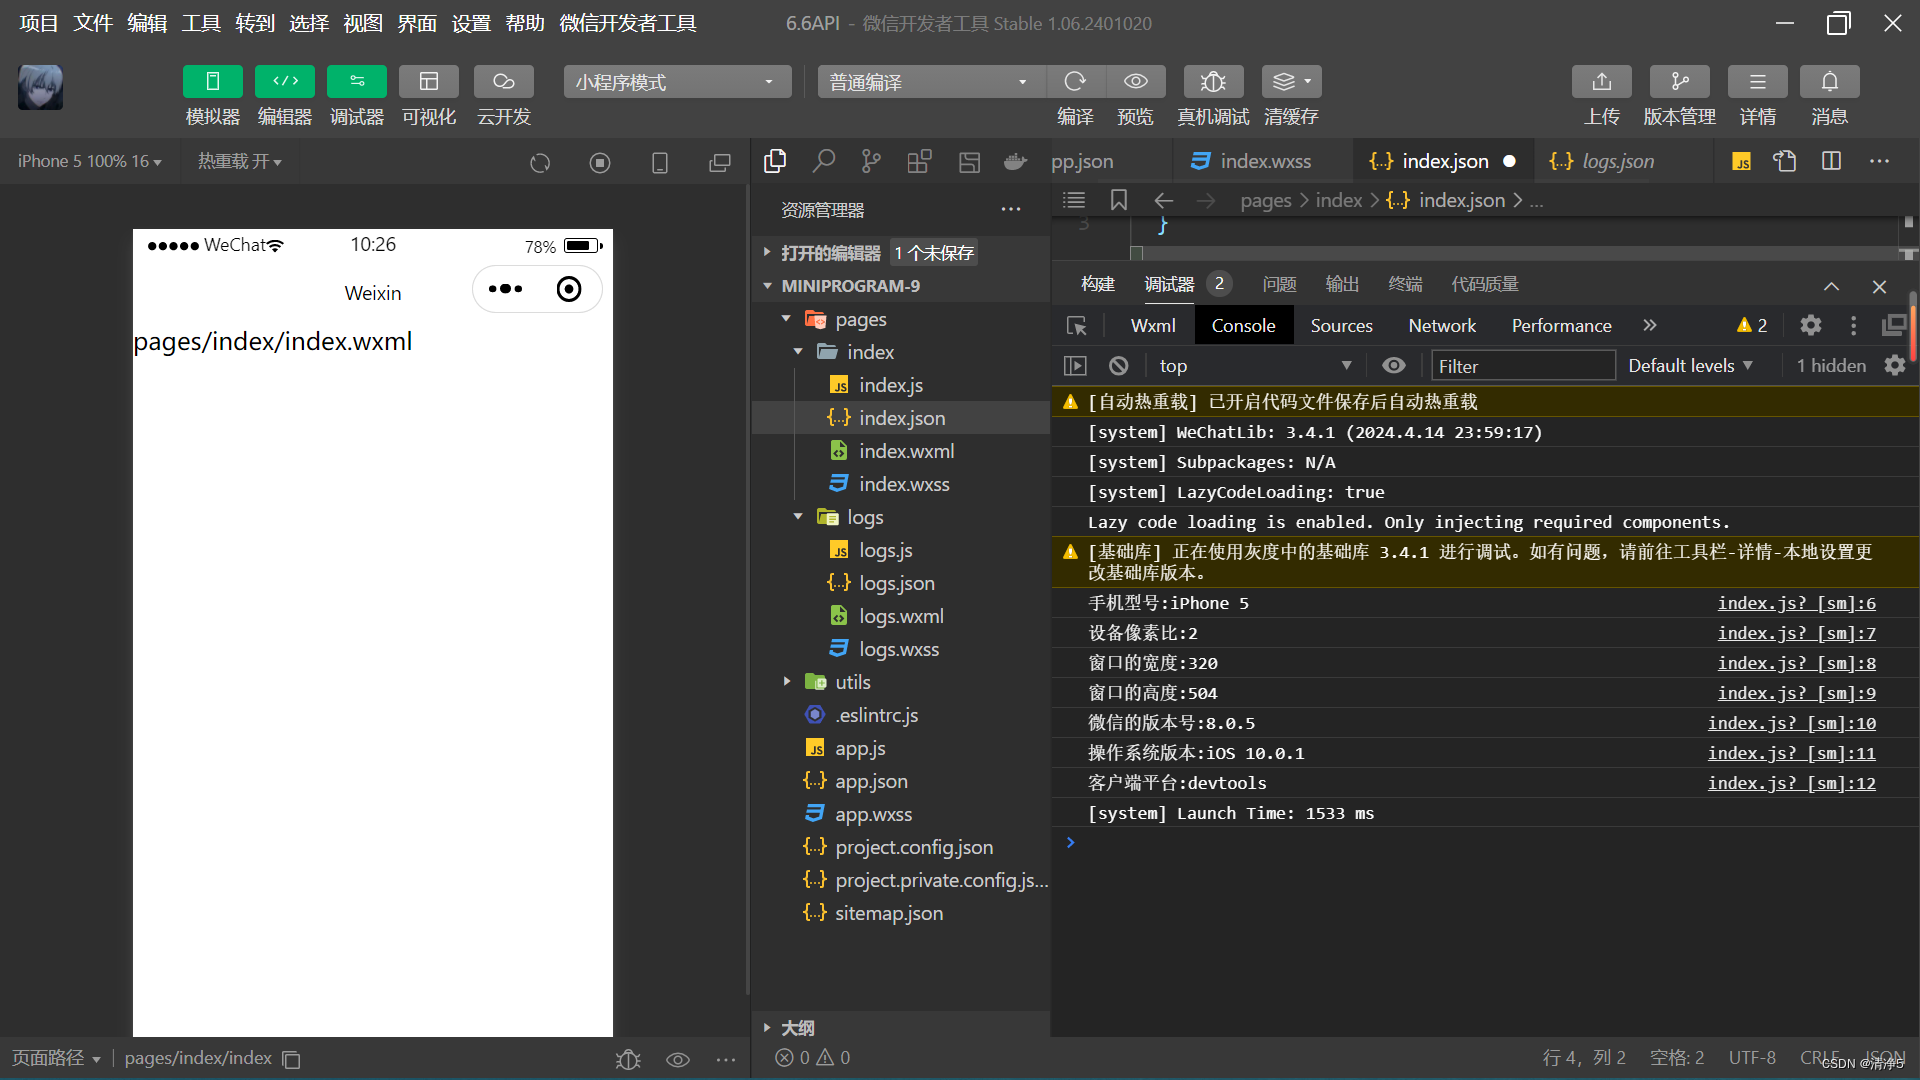
6.6.1 获取系统信息

 js:

wx.getSystemInfo({
  success:function (res) {
    console.log("手机型号:" + res.model);
    console.log("设备像素比:" + res.pixelRatio);
    console.log("窗口的宽度:" + res.windowWidth);
    console.log("窗口的高度:" + res.windowHeight);
    console.log("微信的版本号:" + res.version);
    console.log("操作系统版本:" + res.system);
    console.log("客户端平台:" + res.platform);
  },
})
6.6.2 网络状态

js:
获取网络状态
wx.getNetworkType({
  success:function (res) {
    console.log(res.networkType)
  },
})
监听网络状态变化
wx.onNetworkWeakChange(function(res) {
  console.log("网络是否连接::" + res.isConnected)
  console.log("变化后的网络类型:" + res.networkType)
})
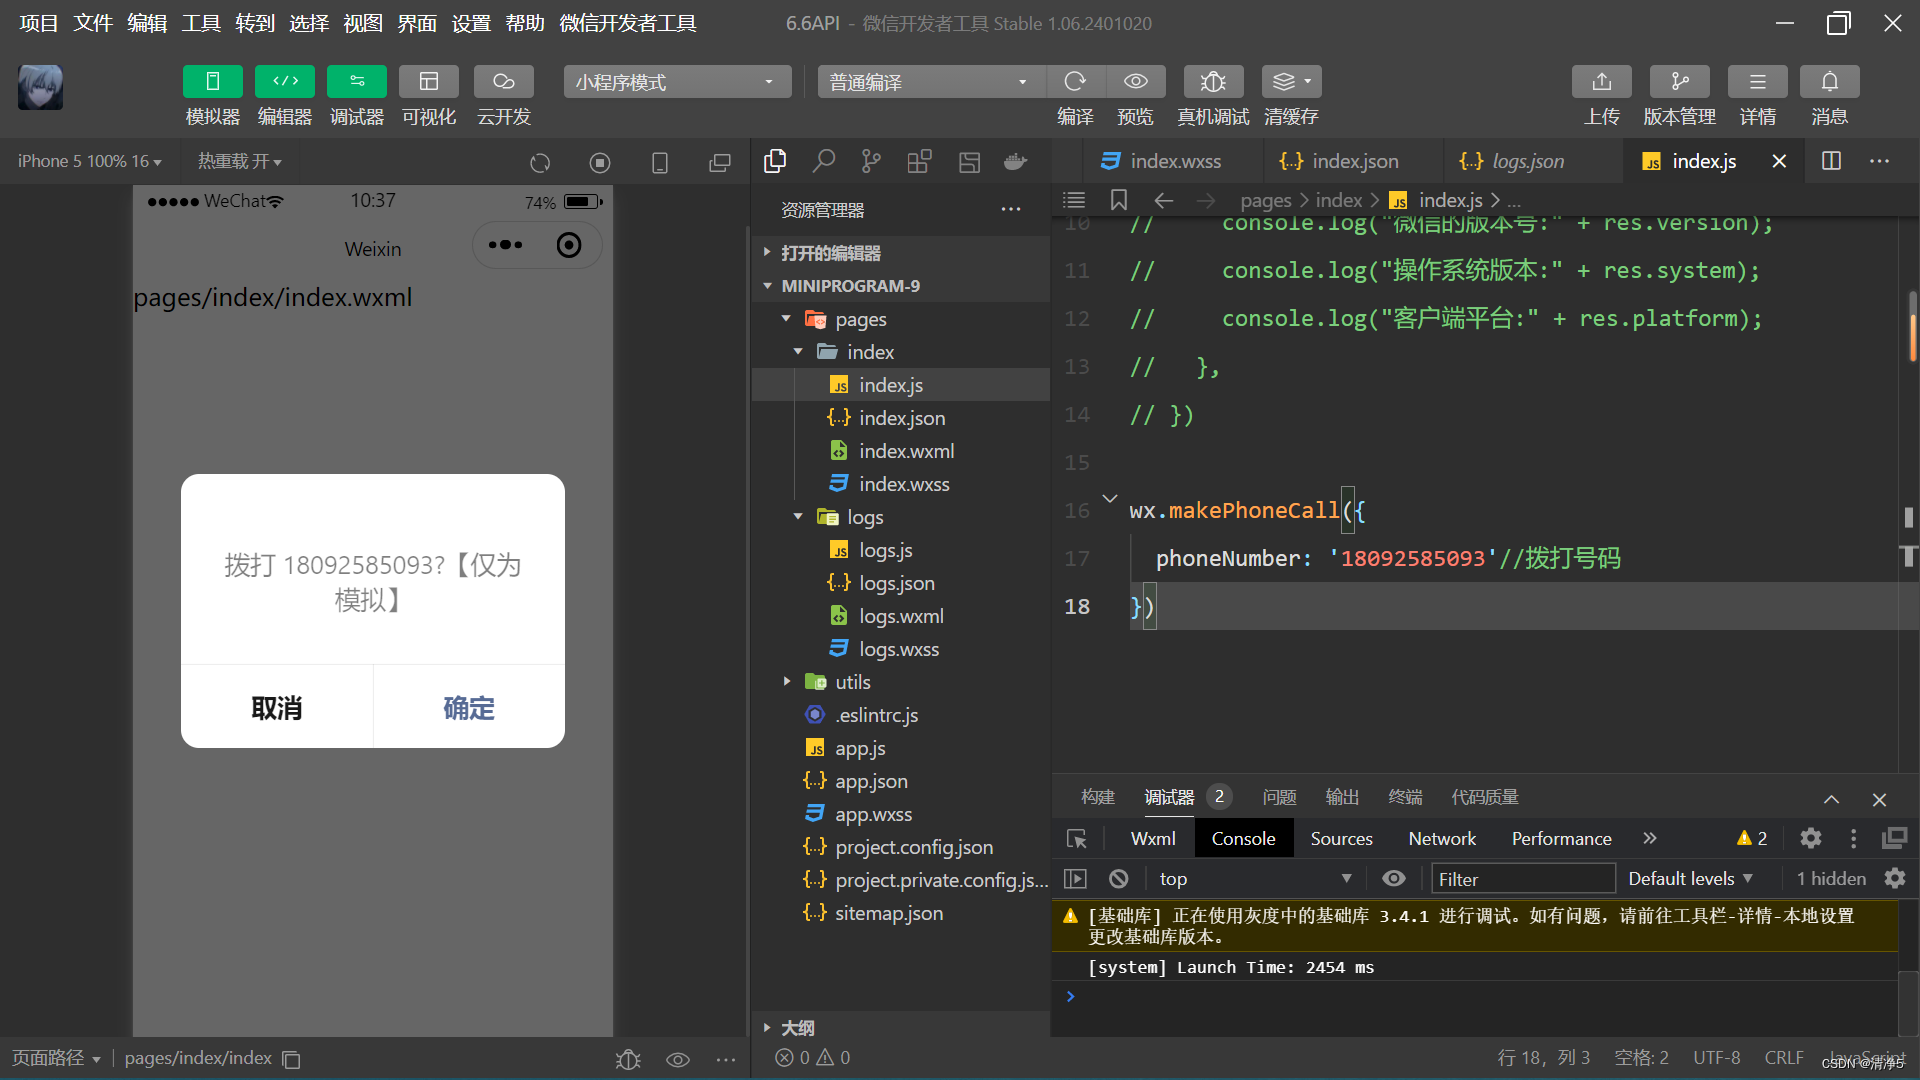
6.6.3 拨打电话
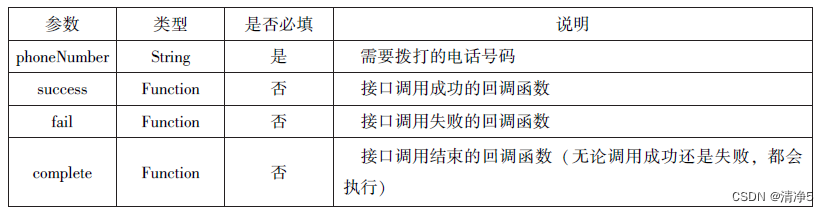
js:

wx.makePhoneCall({
  phoneNumber: '18092585093'//拨打号码
})
6.6.4 扫描二维码
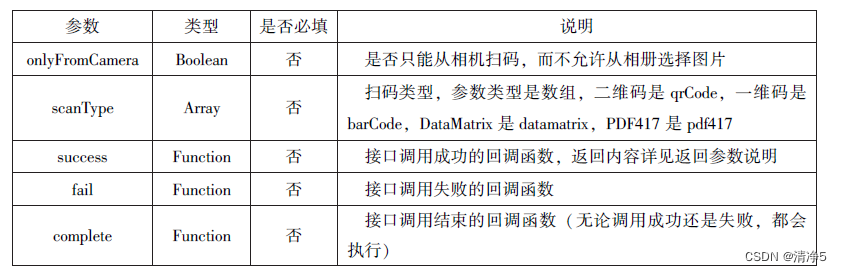

js:

wx.scanCode({
  success:(res) =>{
    console.log(res.result)
    console.log(res.scanType)
    console.log(res.charSet)
    console.log(res.path)
  }
})

wx.scanCode({
  onlyFromCamera:true,
  success:(res) =>{
    console.log(res)
  }
})


 1万+
1万+


 被折叠的 条评论
为什么被折叠?
被折叠的 条评论
为什么被折叠?
 到【灌水乐园】发言


