


配置ssh实现A,B主机互相免密登录
客户端
1.制作公私钥对
[root@shutiao ~]# ssh-keygen -t rsa
Generating public/private rsa key pair.
Enter file in which to save the key (/root/.ssh/id_rsa):
Enter passphrase (empty for no passphrase):
Enter same passphrase again:
Your identification has been saved in /root/.ssh/id_rsa
Your public key has been saved in /root/.ssh/id_rsa.pub
The key fingerprint is:
SHA256:qN0Q70WZKeyxtCAd4zZIaNSfyJfcftvImlppMbmRza4 root@shutiao
The key's randomart image is:
+---[RSA 3072]----+
| ..o. o          |
|  o..+ +   +     |
| . .o+B+= =      |
|    oo*O.@       |
|     .o.S +      |
|     o +.O.      |
|    . . Bo.+     |
|       o o+ .    |
|      ..E.       |
+----[SHA256]-----+
2.将公钥上传到服务器端
ssh-copy-id root@192.168.153.166
/usr/bin/ssh-copy-id: INFO: Source of key(s) to be installed: "/root/.ssh/id_rsa.pub"
The authenticity of host '192.168.153.166 (192.168.153.166)' can't be established.
ED25519 key fingerprint is SHA256:nUpp98jf5J/XswFlnvBfGMusDQ23L0R7Jf0GcQkgxBc.
This host key is known by the following other names/addresses:
    ~/.ssh/known_hosts:1: www.shutiao.com
    ~/.ssh/known_hosts:4: hehe.com
Are you sure you want to continue connecting (yes/no/[fingerprint])? yes
/usr/bin/ssh-copy-id: INFO: attempting to log in with the new key(s), to filter out any that are already installed
/usr/bin/ssh-copy-id: INFO: 1 key(s) remain to be installed -- if you are prompted now it is to install the new keys
root@192.168.153.166's password:

Number of key(s) added: 1

Now try logging into the machine, with:   "ssh 'root@192.168.153.166'"
and check to make sure that only the key(s) you wanted were added.

[root@shutiao ~]# ssh root@192.168.153.166
Activate the web console with: systemctl enable --now cockpit.socket

Register this system with Red Hat Insights: rhc connect

Example:
# rhc connect --activation-key <key> --organization <org>

The rhc client and Red Hat Insights will enable analytics and additional
management capabilities on your system.
View your connected systems at https://console.redhat.com/insights

You can learn more about how to register your system
using rhc at https://red.ht/registration
3.客户端测试
[root@shutiao ~]# ssh root@192.168.153.131

[root@server1 ~]#
服务端
1.制作公私钥对
[root@server1 ~]# ssh-keygen -t rsa
Generating public/private rsa key pair.
Enter file in which to save the key (/root/.ssh/id_rsa): ^[[A
Enter passphrase (empty for no passphrase):
Enter same passphrase again:      .pub
The key fingerprint is:n saved in  in
SHA256:XX78x2u8mQXICKTrU6HPC/J1tQJyzddOO/5e8wd4awo root@server1
The key's randomart image is:
+---[RSA 3072]----+
|        .        |
|       o         |
|      . o   .    |
|       o * = +   |
|      + S = *.*  |
|     . * . o.=o= |
|    . + + E ..=+*|
|     o + o o .o+@|
|      . .   .ooB*|
+----[SHA256]-----+
2.将公钥上传到服务器端
[root@server1 ~]# ssh-copy-id root@192.168.153.1313.服务端测试
[root@server1 ~]# ssh root@192.168.153.131
Activate the web console with: systemctl enable --now cockpit.socket

Register this system with Red Hat Insights: rhc connect

Example:
# rhc connect --activation-key <key> --organization <org>

The rhc client and Red Hat Insights will enable analytics and additional
management capabilities on your system.
View your connected systems at https://console.redhat.com/insights

You can learn more about how to register your system
using rhc at https://red.ht/registration
Last login: Mon May  5 14:16:24 2025 from 192.168.153.1
[root@shutiao ~]#
配置nginx服务,通过多ip区分多网站
1.准备工作
[root@server2 ~]# systemctl stop firewalld
[root@server2 ~]# setenforce 0
[root@server2 ~]# yum install nginx
2.配置不同IP
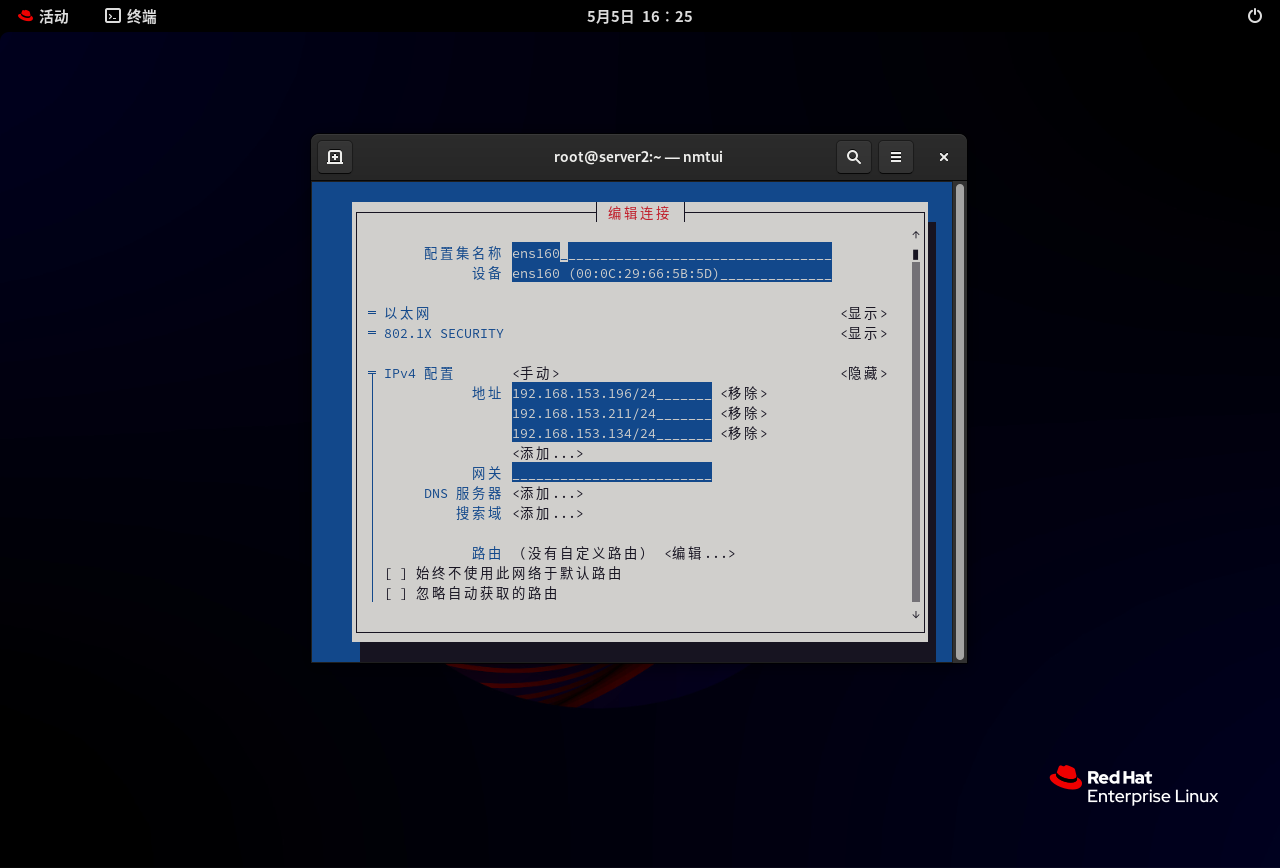
[root@server2 ~]# nmtui
3.配置文件
[root@server2 ~]# vim /etc/nginx/conf.d/ip.conf

server{
        listen 192.168.153.134;
        root /www/ip/134;
        }
server{
        listen 192.168.153.196;
        root /www/ip/196;
        }
[root@server2 ~]# mkdir /www/ip/{134,196} -pv
mkdir: created directory '/www/ip'
mkdir: created directory '/www/ip/134'
mkdir: created directory '/www/ip/196'
[root@server2 ~]# echo this is 134 > /www/ip/134/index.html
[root@server2 ~]# echo this is 196 > /www/ip/196/index.html
[root@server2 ~]# systemctl restart nginx
4.测试
[root@server2 ~]# curl 192.168.153.134
this is 134
[root@server2 ~]# curl 192.168.153.196
this is 196


 493
493

 被折叠的 条评论
为什么被折叠?
被折叠的 条评论
为什么被折叠?
 到【灌水乐园】发言


