


认识vue
vue是一个渐进式的框架。
vue功能
解耦视图和数据
可复用的组件
前端路由技术
状态管理
虚拟DOM
VUE的安装
1.cdn引入
分为开发环境和生产环境
2.下载和引入
vue.js文件的引入

3.npm安装
小练习
<!DOCTYPE html>
<html lang="en">
<head>
<meta charset="UTF-8">
<meta http-equiv="X-UA-Compatible" content="IE=edge">
<meta name="viewport" content="width=device-width, initial-scale=1.0">
<title>Document</title>
<script src="js/vue.js"></script>
</head>
<body>
<div id="app">
<!-- 声明式编程 -->
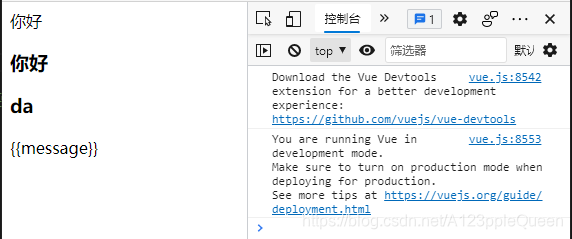
{{message}}
<h3>{{message}}</h3>
<h3>{{name}}</h3>
</div>
<div>{{message}}</div>
<script>
new Vue({
el:"#app", //用于挂载要管理的元素
data:{ //定义数据
message:'你好',
name:'da'
}
})
</script>
</body>
</html>vue的响应式
当数据发生改变时,页面也会自动响应发生更改
<!DOCTYPE html>
<html lang="en">
<head>
<meta charset="UTF-8">
<meta http-equiv="X-UA-Compatible" content="IE=edge">
<meta name="viewport" content="width=device-width, initial-scale=1.0">
<title>Document</title>
<script src="js/vue.js"></script>
</head>
<body>
<div id="app">
<!-- 声明式编程 -->
<h3>{{message}}</h3>
<h3>{{name}}</h3>
</div>
<script>
const app=new Vue({
el:"#app", //用于挂载要管理的元素
data:{ //定义数据
message:'你好',
name:'da'
}
})
</script>
</body>
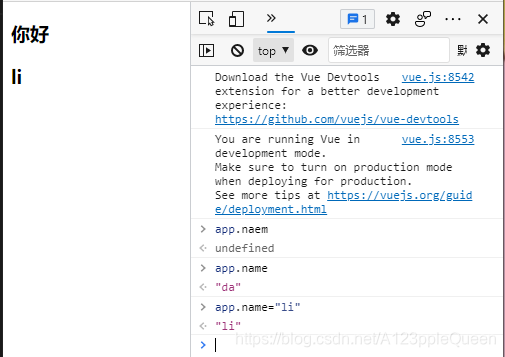
</html>解析:创建vue对象的1时候,传入了一些options:{}
{}中包含了el属性,该属性决定了这个vue对象挂载到了id为app的元素上
{}中包含了data属性,该属性通常会存储一些数据。这些数据可以是自己定义的,比如message,也有些可能来自网络,从服务器加载。
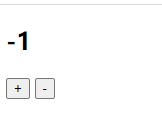
小练习----vue列表展示 计时器
直接用{{}}是无法的

用下标取出来

可以用循环直接弄出来

计时器
<!DOCTYPE html>
<html lang="en">
<head>
<meta charset="UTF-8">
<meta http-equiv="X-UA-Compatible" content="IE=edge">
<meta name="viewport" content="width=device-width, initial-scale=1.0">
<title>Document</title>
<script src="js/vue.js"></script>
</head>
<body>
<div id="app">
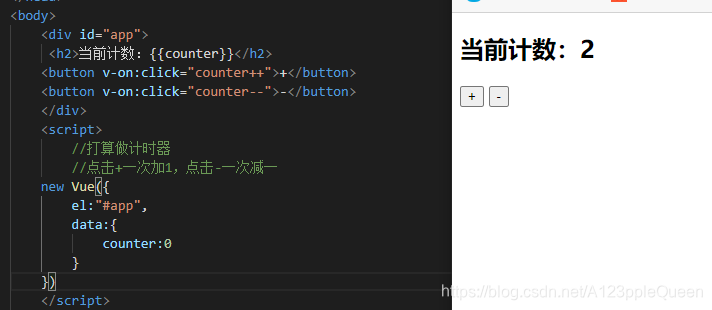
<h2>当前计数:{{counter}}</h2>
<button v-on:click="add">+</button>
<button v-on:click="sub">-</button>
</div>
<script>
//打算做计时器
//点击+一次加1,点击-一次减一
const app = new Vue({
el:"#app",
data:{
counter:0
},
methods:{
// 加
add: function(){
console.log('add被执行');
//this表示当前对象
this.counter++
},
// 减
sub: function(){
console.log('sub被执行');
this.counter--
}
}
})
</script>
</body>
</html>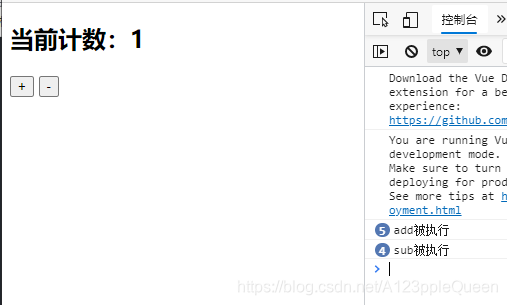

vue的MVVM
mvvm是model view viewmodel的缩写。
model数据与view视图的通信是通过viewmodel视图模型实现的。viewmodel有两个功能,其一它进行了data binding数据绑定,将数据的改变实时同步到视图中,其二,它实现了dom listener,dom监听,当dom发生了事件,如点击等,可以监听到,并改变对应的数据。
vue的options对象
名称 能用的数据类型 作用
el string /HTMLElement 决定它管理那个视图
data object / Function vue对应的数据对象
mehods key:string/Function 定义vue中的方法,可以在其他地方调用或在指令中用
生名周期函数
vue的生命周期
生命周期:事物从诞生到消亡的过程
生命周期也叫钩子函数
Vue的生命周期:
vue的声明周期函数:
beforeCreate/created 创建前 创建 beforeMount/mounted 挂载前/挂载 beforeUpdate/updated 更新前/更新 beforeDestory/destoryed 销毁前/销毁
vue指令
指令Directives是带有v_前缀的特殊attribute.指令的职责是,当表达式的值改变时将其产生的连带影响,响应式的作用到dom。
插值操作---Mustache{{}}
插值不仅可以写变量,还可以写表达式

v-once
该指令表示元素和组件只渲染一次,不会随着数据改变而改变
指令后不需要跟任何表达式,直接v-once就好

v-html
某些情况下,我们从服务器本身请求到的数据就是一个html代码
用{{}}方式输出,会将html代码一起输出,达不到想要的效果
使用v-html指令可以解决这个问题,它会将string的html解析出来并进行渲染
该指令后面会跟一个string类型,不是直接单独使用。eg: v-html=url

v-text
将数据显示在界面中,但是会覆盖数据
该指令后也会跟一个string类型,eg:v-text="message"

v-pre
跳过这个元素和它子元素的编译过程,用于显示原本的mustache插值语法。
该指令直接使用

v-cloak
在某些情况下,浏览器会显示出未编译的mustache插值标签,例如延迟加载
<!DOCTYPE html>
<html lang="en">
<head>
    <meta charset="UTF-8">
    <meta http-equiv="X-UA-Compatible" content="IE=edge">
    <meta name="viewport" content="width=device-width, initial-scale=1.0">
    <title>Document</title>
    <script src="js/vue.js"></script>
</head>
<body>
    <div id="app" >
  <!-- 这里加载的网页会有一个动态变化,刚开始加载出来,显示的{{message}},1秒后,变为你好-->
        <h2>{{message}}</h2>
    </div>
    <script>
        // 假设延迟了1秒钟
        setTimeout(function(){
            new Vue({
            el:"#app",
            data:{
                message:'你好'
            }
        })
        },1000
        )

    </script>
</body>
</html>
解决:
<!DOCTYPE html>
<html lang="en">
<head>
    <meta charset="UTF-8">
    <meta http-equiv="X-UA-Compatible" content="IE=edge">
    <meta name="viewport" content="width=device-width, initial-scale=1.0">
    <title>Document</title>
    <script src="js/vue.js"></script>
    <style>
         [v-cloak]{
            display:none;
        }
    </style>
</head>
<body>
    <div id="app" v-cloak>
        <!-- 加载的页面也是动态变化的,刚加载的页面是空白的,1秒后直接出现 你好 -->
        <h2>{{message}}</h2>
    </div>
    <script>
        //在vue解析之前,div中有一个属性v-cloak
        //在vue解析之后,div中没有了属性v-cloak
        // 假设延迟了1秒钟
        setTimeout(function(){
            new Vue({
            el:"#app",
            data:{
                message:'你好'
            }
        })
        },1000
        )

    </script>
</body>
</html>
v-if
v-if原理:后面的条件为false时,对应的元素以及子元素不会被渲染,也就是说不会有对应的标签查出现在dom中
通过v-if的值true/false控制是否显示

通过变量值控制显示

<!DOCTYPE html>
<html lang="en">
<head>
<meta charset="UTF-8">
<meta http-equiv="X-UA-Compatible" content="IE=edge">
<meta name="viewport" content="width=device-width, initial-scale=1.0">
<title>Document</title>
<script src="js/vue.js"></script>
</head>
<body>
<div id="app">
<!-- 通过=控制变量来决定是否展示 -->
<h2 v-if="isShow">{{message}}
<div>abc</div>
</h2>
</div>
<script>
const app= new Vue({
el:"#app",
data:{
message:"你好",
isShow:true
}
})
</script>
</body>
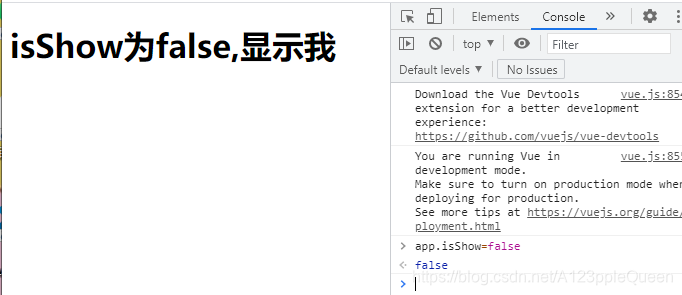
</html>v-if v-else结合使用
<!DOCTYPE html>
<html lang="en">
<head>
    <meta charset="UTF-8">
    <meta http-equiv="X-UA-Compatible" content="IE=edge">
    <meta name="viewport" content="width=device-width, initial-scale=1.0">
    <title>Document</title>
    <script src="js/vue.js"></script>
</head>
<body>
    <!--v-if v-else的结合使用  -->
    <div id="app">
        <h2 v-if="isShow">{{message}}
            <div>abc</div>
        </h2>
        <h1 v-else>isShow为false,显示我</h1>
    </div>
    <script>
       const app= new Vue({
            el:"#app",
            data:{
              message:"你好",
              isShow:true
            }
        })
    </script>
</body>
</html>
v-if与v-else-if结合使用
<!DOCTYPE html>
<html lang="en">
<head>
    <meta charset="UTF-8">
    <meta http-equiv="X-UA-Compatible" content="IE=edge">
    <meta name="viewport" content="width=device-width, initial-scale=1.0">
    <title>Document</title>
    <script src="js/vue.js"></script>
</head>
<body>
    <div id="app">
        <!-- 如果很麻烦建议使用computed来用 -->
    <!-- <p v-if="score>=90">优秀</p>
    <p v-else-if="score>=80">良好</p>
    <p v-else-if="score>=60">及格</p>
    <p v-else>不及格</p> -->
    <h2>{{result}}</h2>
    </div>
    <script>
     const app =  new Vue({
            el:"#app",
            data:{
            score:40
            },
            computed:{
             result(){
                 let showMessage=' ';
                 if(this.score>=90){
                     showMessage='优秀'
                 }else if(this.score>=80){
                     showMessage='良好'
                 }else if(this.score>=60){
                     showMessage="及格"
                 }else{
                     showMessage="不及格"
                 }
                 return showMessage
             }
            }
        })
    </script>
</body>
</html>
小案列 条件渲染案列
用户登录时,可以切换用户账号登录还是邮箱地址登录

<!DOCTYPE html>
<html lang="en">
<head>
    <meta charset="UTF-8">
    <meta http-equiv="X-UA-Compatible" content="IE=edge">
    <meta name="viewport" content="width=device-width, initial-scale=1.0">
    <title>Document</title>
    <script src="js/vue.js"></script>
</head>
<body>
    <div id="app">
     <span v-if="isUser">
      <label for="username">用户账号</label>
        <input type="text" id="username" placeholder="用户账号">
        </span>
     <span v-else>
         <label for="email">用户邮箱</label>
        <input type="text" id="username" placeholder="用户邮箱">
        </span>
     <button @click="isUser=!isUser">切换类型</button>
    </div>
    <script>
        new Vue({
            el:"#app",
            data:{
              isUser:true
            }
        })
    </script>
</body>
</html>
但是这样也还存在着问题,假设我在账号的情况下输入了数据,然后我发现需要使用的是邮箱,但是切换后之前所填的数据缺没有消失
出现这种情况的原因是因为vue在进行Dom渲染时,出于性能考虑,会尽可能的复用已经存在的元素,而不是重新创建新的元素。
也就是说这个案列中,vue内部会发现原来的input元素不在使用,直接作为else中的input来使用了。
解决问题方法:如果不想出现重复利用问题,可以给对应的input添加key,并且需要保证key的不同。key值相同也重复利用之前输入的值。
<!DOCTYPE html>
<html lang="en">
<head>
    <meta charset="UTF-8">
    <meta http-equiv="X-UA-Compatible" content="IE=edge">
    <meta name="viewport" content="width=device-width, initial-scale=1.0">
    <title>Document</title>
    <script src="js/vue.js"></script>
</head>
<body>
    <div id="app">
     <span v-if="isUser">
      <label for="username">用户账号</label>
      <!-- 添加key设置不同值解决 -->
        <input type="text" id="username" placeholder="用户账号" key="username">
        </span>
     <span v-else>
         <label for="email">用户邮箱</label>
        <input type="text" id="username" placeholder="用户邮箱" key="email">
        </span>
     <button @click="isUser=!isUser">切换类型</button>
    </div>
    <script>
        new Vue({
            el:"#app",
            data:{
              isUser:true
            }
        })
    </script>
</body>
</html>
v-show
v-show也用于决定一个元素是否渲染
v-if与v-show的区别
当v-if为false时,压根不会有对应元素在Dom中
当v-show为false时,仅仅是将元素的display属性设置为none
开发中的选择如下:
当需要在显示和隐藏之间切片很频繁时,用v-show
当只有一次切换时,使用v-if
<!DOCTYPE html>
<html lang="en">
<head>
<meta charset="UTF-8">
<meta http-equiv="X-UA-Compatible" content="IE=edge">
<meta name="viewport" content="width=device-width, initial-scale=1.0">
<title>Document</title>
<script src="js/vue.js"></script>
</head>
<body>
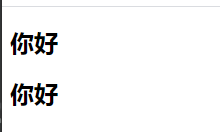
<div id="app">
<h2 v-show="isShow">{{message}}</h2>
<h2 v-if="isShow">{{message}}</h2>
</div>
<script>
new Vue({
el:"#app",
data:{
message:'你好',
isShow:true
}
})
</script>
</body>
</html>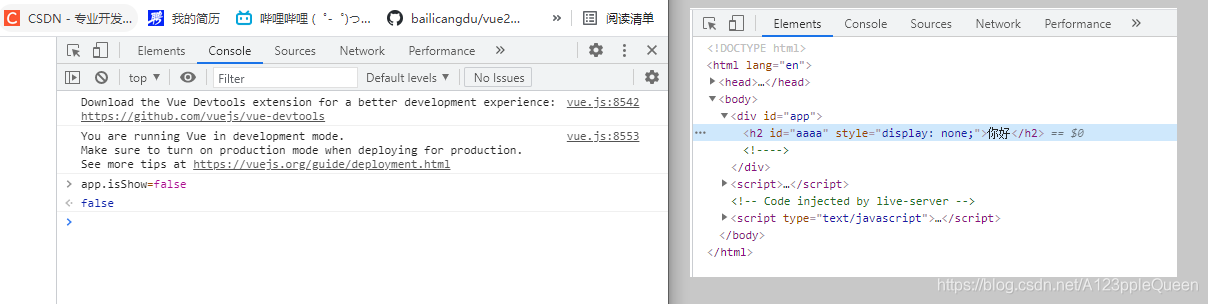
<!DOCTYPE html>
<html lang="en">
<head>
    <meta charset="UTF-8">
    <meta http-equiv="X-UA-Compatible" content="IE=edge">
    <meta name="viewport" content="width=device-width, initial-scale=1.0">
    <title>Document</title>
    <script src="js/vue.js"></script>
</head>
<body>
 <div id="app">
<h2 v-show="isShow" id="aaaa">{{message}}</h2>
<h2 v-if="isShow" id="ccccc">{{message}}</h2>
 </div>
 <script>
    const app= new Vue({
         el:"#app",
         data:{
             message:'你好',
             isShow:true
         }
     })
 </script>
</body>
</html>
v-on 事件监听
绑定事件监听器,调用在Vue实例中定义的方法
使用格式 v-on:click=" "
语法糖---缩写 @
这里所有的dom操作都有vue进行处理
在事件方法里写上需要关联的元素就好
当通过methods定义方法,以供@click调用是,需要注意参数问题
情况一:如果该方法不需要额外参数,那么方法后的()可以不添加 ----练习2
注意:如果方法本身中有一个参数,那么会默认将原生事件event参数传递进去
情况二:如果需要同时传入某个参数,同时需要event时,可以通过$event传入事件---练习3
v-on修饰符 ------练习4
在某些情况下,我们拿到event的母的可能是进行一些事件处理
Vue提供了修饰符来帮助我们处理一些事件:
.stop 调用event.stopProgation()
.prevent 调用event.preventDefault()
.{keyCode | keyAlias} 当事件是从特定键触发时才触发回调
.native 监听组件根元素的原生事件
.once 只触发一次回调

<!DOCTYPE html>
<html lang="en">
<head>
    <meta charset="UTF-8">
    <meta http-equiv="X-UA-Compatible" content="IE=edge">
    <meta name="viewport" content="width=device-width, initial-scale=1.0">
    <title>Document</title>
    <script src="js/vue.js"></script>
</head>
<body>
    <div id="app">
     <h2>{{message}}</h2>
     <button v-on:click="s">单击</button>
    </div>
    <script>
        new Vue({
            el:"#app",
            data:{
                message:[1,2,3,4]
            },
            methods:{
              s:function(){
                  this.message=this.message.reverse()
                  console.log("message");
              }

            }
        })
    </script>
</body>
</html>
练习2:
<!DOCTYPE html>
<html lang="en">
<head>
    <meta charset="UTF-8">
    <meta http-equiv="X-UA-Compatible" content="IE=edge">
    <meta name="viewport" content="width=device-width, initial-scale=1.0">
    <title>Document</title>
    <script src="js/vue.js"></script>
</head>
<body>
    <div id="app">
        <h2>{{counter}}</h2>
        <!-- 方法一 -->
        <!-- <button v-on:click="counter++">+</button>
        <button v-on:click="counter--">-</button> -->
        <!-- 方法二 -->
        <!-- <button v-on:click="increment">+</button>
        <button v-on:click="decrement">-</button>     -->
        <!-- 方法二 语法糖 缩写 -->
        <button @click="increment">+</button>
        <button @click="decrement">-</button>
        </div>
    <script>
        new Vue({
            el:"#app",
            data:{
               counter:0
            },
            methods:{
                // 对象字面量增加写法
                increment(){
                  this.counter++
                },
                decrement(){
                    this.counter--
                }
            }
        })
    </script>
</body>
</html>
练习3
<!DOCTYPE html>
<html lang="en">
<head>
    <meta charset="UTF-8">
    <meta http-equiv="X-UA-Compatible" content="IE=edge">
    <meta name="viewport" content="width=device-width, initial-scale=1.0">
    <title>Document</title>
    <script src="js/vue.js"></script>
</head>
<body>
    <div id="app">
        <!-- 一  事件使用的方法没有参数 -->
     <button @click="btnClick">按钮1</button>
     <!--  二·事件定义时,写函数时省略了小括号,但是方法本身需要一个参数的 -->
               <!--进行传参 -->
     <!-- <button @click="btn2Click(123)">按钮2</button> -->
                 <!-- 不传参 -->
     <!-- <button @click="btn2Click()">按钮2</button> -->
                 <!-- 括号不写,就是event出来了。-->
                 <!-- 在事件定义中,写函数时省略了小括号,但是方法本身是需要一个参数的,这个时候,$vue会默认将浏览器生成的event事件对象作为参数传入到方法  btn2Click(event){
                    console.log('------',event)  把abc换成event就可以得到event事件了
                }  -->
     <button @click="btn2Click">按钮2</button>
     <!-- 方法定义时,需要event对象,也需要其他参数 -->
           <!-- 注意:直接写event会找不到,把它当成变量,$event才可以获取到浏览器参数的event对象 -->
     <button @click="btn3Click(124,event)">按钮3</button>


    </div>
    <script>
        new Vue({
            el:"#app",
            data:{

            },
            methods:{
                btnClick(){
                    console.log("btnclick");
                },
                btn2Click(abc){
                    console.log('------',abc)
                },
                btn3Click(abc,event){
                    console.log('++++',abc,event);
                }
            }
        })
    </script>
</body>
</html>
练习4--修饰符

<!DOCTYPE html>
<html lang="en">
<head>
<meta charset="UTF-8">
<meta http-equiv="X-UA-Compatible" content="IE=edge">
<meta name="viewport" content="width=device-width, initial-scale=1.0">
<title>Document</title>
<script src="js/vue.js"></script>
</head>
<body>
<div id="app">
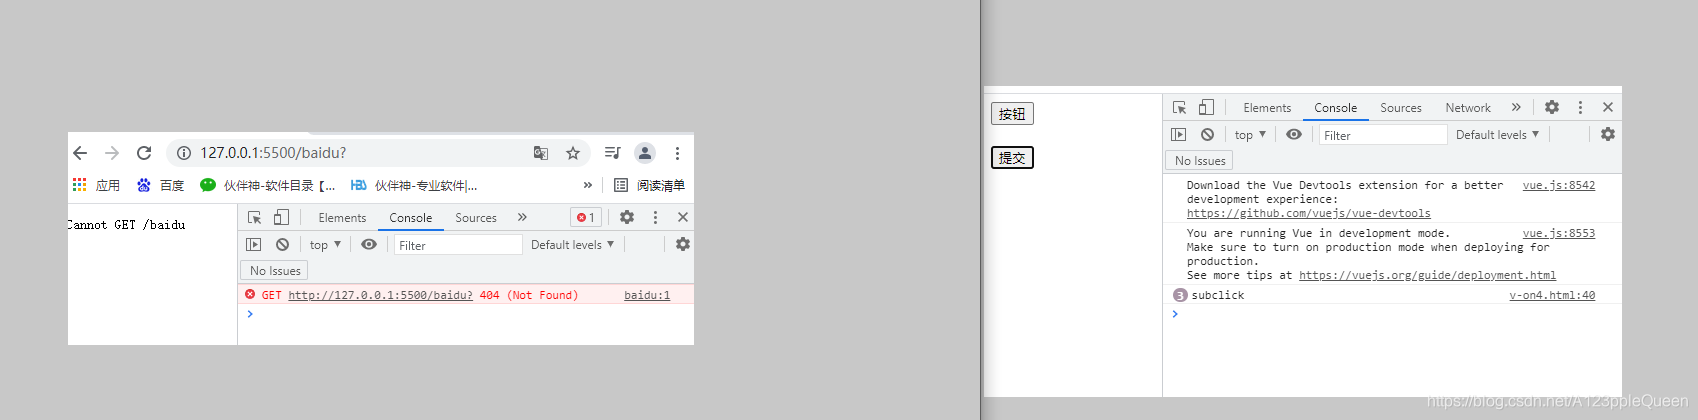
<!-- 注意:这里有事件冒泡的存在,点按钮,div也出来了 -->
<div @click="divClick">
<!-- 添加修饰符stop,阻止事件冒泡 -->
<!-- <button @click="btnClick">按钮</button> -->
<button @click.stop="btnClick">按钮</button>
</div>
<!-- .prevent的使用 阻止默认事件-->
<!-- 这个它会自动提交,但是我希望只打印不提交-->
<form action="baidu">
<br/>
<input type="submit" value="提交" @click.prevent="subClick">
</form>
<!-- 监听某个键盘的键帽 -->
<!-- 现在是只要用户按下键盘上的键就会打印一次keyup -->
<!-- <input type="text" @keyup="keyup"> -->
<!-- 加上修饰符.enter 只有敲下后按了回车才会打印keyup -->
<br/>
<input type="text" @keyup.enter="keyup">
<!-- native在组件才方便讲 -->
<!-- .once只触发一次 -->
<!-- 用户点击第一次才有效,之后点了没有效果-->
<br/>
<br/>
<button @click.once="btn2Click">按钮2</button>
</div>
<script>
new Vue({
el:"#app",
data:{
},
methods:{
btnClick(){
console.log("btnClick");
},
divClick(){
console.log("divClick");
},
subClick(){
console.log('subclick');
},
keyup(){
console.log("keyup");
},
btn2Click(){
console.log("btn2click");
}
}
})
</script>
</body>
</html>v-for 列表渲染
通常用于将一个数组/对象渲染成一个列表
遍历对象
用法: {{展示名 }}
下标值用法
用法: {{下标值}} {{展示名}}
列表小练习
数组列表展示

<!DOCTYPE html>
<html lang="en">
<head>
    <meta charset="UTF-8">
    <meta http-equiv="X-UA-Compatible" content="IE=edge">
    <meta name="viewport" content="width=device-width, initial-scale=1.0">
    <title>Document</title>
    <script src="js/vue.js"></script>
</head>
<body>
    <div id="app">
        <h2 v-for="me in message">{{me}}</h2>

    </div>
    <script>
        new Vue({
            el:"#app",
            data:{
                message:['夏目友人帐','花开伊吕波','干物妹!小埋']
            }
        })
    </script>
</body>
</html>
对象展示

<!DOCTYPE html>
<html lang="en">
<head>
    <meta charset="UTF-8">
    <meta http-equiv="X-UA-Compatible" content="IE=edge">
    <meta name="viewport" content="width=device-width, initial-scale=1.0">
    <title>Document</title>
    <script src="js/vue.js"></script>
</head>
<body>
    <div id="app">
        <h2 v-for="ku in people">{{ku}}</h2>
    </div>
    <script>
   new Vue({
       el:"#app",
       data:{
           people:{
               name:'li',
               age:'18',
               money:'90000'
           }
       }
   })
    </script>
</body>
</html>
下标值小练习
<!DOCTYPE html>
<html lang="en">
<head>
<meta charset="UTF-8">
<meta http-equiv="X-UA-Compatible" content="IE=edge">
<meta name="viewport" content="width=device-width, initial-scale=1.0">
<title>Document</title>
<script src="js/vue.js"></script>
</head>
<body>
<div id="app">
<ul>
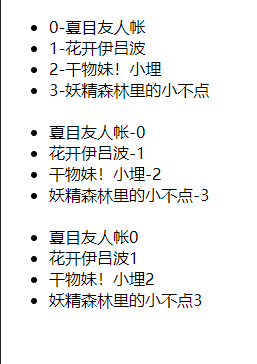
<li v-for="(item,x) in message">{{x}}-{{item}}</li><br/>
<li v-for="(item,x) in message">{{item}}-{{x}}</li><br/>
<li v-for="(item,x) in message">{{item}}{{x}}</li>
</ul>
</div>
<script>
new Vue({
el:"#app",
data:{
message:['夏目友人帐','花开伊吕波','干物妹!小埋','妖精森林里的小不点']
}
})
</script>
</body>
</html>
<!DOCTYPE html>
<html lang="en">
<head>
    <meta charset="UTF-8">
    <meta http-equiv="X-UA-Compatible" content="IE=edge">
    <meta name="viewport" content="width=device-width, initial-scale=1.0">
    <title>Document</title>
    <script src="js/vue.js"></script>
</head>
<body>
    <div id="app">
        <!-- value可以随便取名 -->
        <h2 v-for="(value,key) in people">{{key}}----{{value}}</h2>
    </div>
    <script>
   new Vue({
       el:"#app",
       data:{
           people:{
               name:'li',
               age:'18',
               money:'90000'
           }
       }
   })
    </script>
</body>
</html>
<!DOCTYPE html>
<html lang="en">
<head>
    <meta charset="UTF-8">
    <meta http-equiv="X-UA-Compatible" content="IE=edge">
    <meta name="viewport" content="width=device-width, initial-scale=1.0">
    <title>Document</title>
    <script src="js/vue.js"></script>
</head>
<body>
    <div id="app">
        <!-- value可以随便取名 index就是下标-->
        <h2 v-for="(value,key,index) in people">{{key}}----{{value}}----{{index}}</h2>
    </div>
    <script>
   new Vue({
       el:"#app",
       data:{
           people:{
               name:'li',
               age:'18',
               money:'90000'
           }
       }
   })
    </script>
</body>
</html>
v-for key属性
官方推荐使用v-for时,给对应的元素或组件添加上一个:key属性
key的作用是为了高效的更新虚拟Dom。
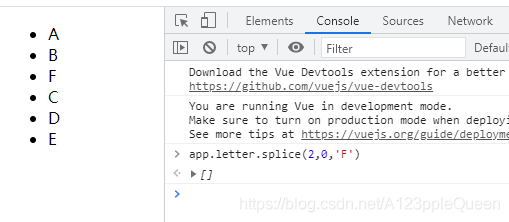
不加key时,假设,我需要在数组abcde中b之后插入f,那么,它会直接将c改查f,在家d改为c,e改为d,在写一个e.这样效率就较低
加key后,会首先一一对应,然后发现你创造了新元素,就直接插入进去。
当某一层有很多相同节点时,也就是列表节点,我们希望插入一个新的节点时,它执行diff算法,也就是一个个替换。但加入:key后,diff算法就可以正确的识别节点,并找到正确位置区插入新的节点。
<!DOCTYPE html>
<html lang="en">
<head>
    <meta charset="UTF-8">
    <meta http-equiv="X-UA-Compatible" content="IE=edge">
    <meta name="viewport" content="width=device-width, initial-scale=1.0">
    <title>Document</title>
    <script src="js/vue.js"></script>
</head>
<body>
    <div id="app">
    <ul>
        <li v-for="value in letter">{{value}}</li>
    </ul>
    </div>
    <script>
    const app=new Vue({
        el:"#app",
        data:{
            // 现在我需要插入一个元素在bc之间
            letter:['A','B','C','D','E']
        }
    })

 </script>
</body>
</html>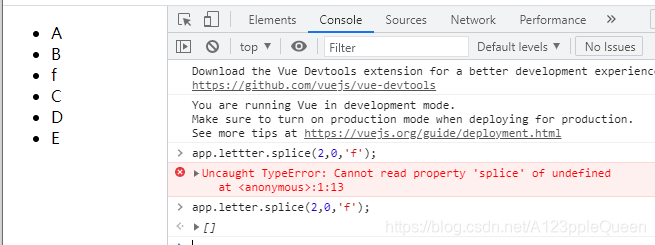
<!DOCTYPE html>
<html lang="en">
<head>
<meta charset="UTF-8">
<meta http-equiv="X-UA-Compatible" content="IE=edge">
<meta name="viewport" content="width=device-width, initial-scale=1.0">
<title>Document</title>
<script src="js/vue.js"></script>
</head>
<body>
<div id="app">
<ul>
<!-- 注意key值要与展示值的名相同 -->
<li v-for="value in letter" :key="value">{{value}}</li>
</ul>
</div>
<script>
const app=new Vue({
el:"#app",
data:{
// 现在我需要插入一个元素在bc之间
letter:['A','B','C','D','E']
}
})
</script>
</body>
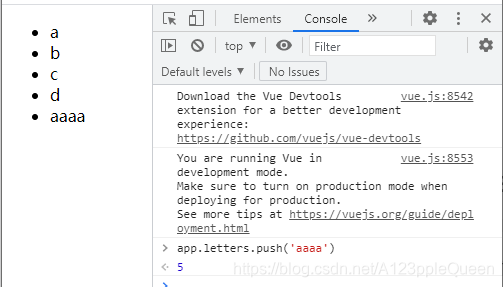
</html>数组中哪些是响应式的
push pop shift unshift splice sort() reverse()
<!DOCTYPE html>
<html lang="en">
<head>
    <meta charset="UTF-8">
    <meta http-equiv="X-UA-Compatible" content="IE=edge">
    <meta name="viewport" content="width=device-width, initial-scale=1.0">
    <title>Document</title>
    <script src="js/vue.js"></script>
</head>
<body>
    <div id="app">
     <ul>
         <li v-for="item in letters" :key="item">{{item}}</li>
     </ul>
    </div>
    <script>
      const app=  new Vue({
            el:"#app",
            data:{
                letters:['a','b','c','d']
            }
        })
    </script>
</body>
</html>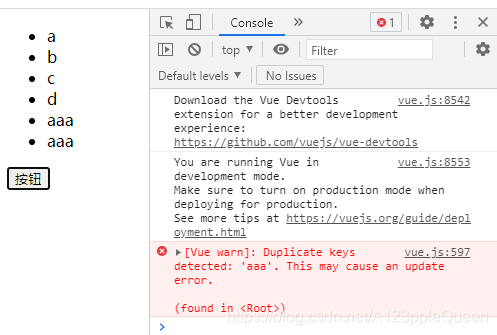
<!DOCTYPE html>
<html lang="en">
<head>
    <meta charset="UTF-8">
    <meta http-equiv="X-UA-Compatible" content="IE=edge">
    <meta name="viewport" content="width=device-width, initial-scale=1.0">
    <title>Document</title>
    <script src="js/vue.js"></script>
</head>
<body>
    <div id="app">
     <ul>
         <!-- <li v-for="item in letters" :key="item">{{item}}</li> -->
         <!-- 为了解决重复值的问题,去掉key就可以了 -->
         <li v-for="item in letters" >{{item}}</li>
     </ul>
     <button @click="btnClick">按钮</button>
    </div>
    <script>
      const app=  new Vue({
            el:"#app",
            data:{
                letters:['a','b','c','d']
            },
            methods:{
          btnClick(){
              //1.push方法
             this.letters.push('aaa')
          }
            }
        })
    </script>
</body>
</html>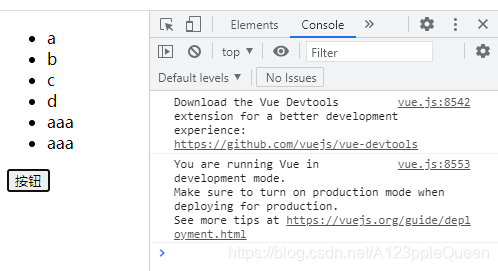
<!DOCTYPE html>
<html lang="en">
<head>
    <meta charset="UTF-8">
    <meta http-equiv="X-UA-Compatible" content="IE=edge">
    <meta name="viewport" content="width=device-width, initial-scale=1.0">
    <title>Document</title>
    <script src="js/vue.js"></script>
</head>
<body>
    <div id="app">
     <ul>
         <li v-for="item in letters">{{item}}</li>
     </ul>
     <button @click="btnClick">按钮</button>
    </div>
    <script>
      const app=  new Vue({
            el:"#app",
            data:{
                letters:['a','b','c','d']
            },
            methods:{
          btnClick(){
             this.letters.push('aaa')
          }
            }
        })
    </script>
</body>
</html>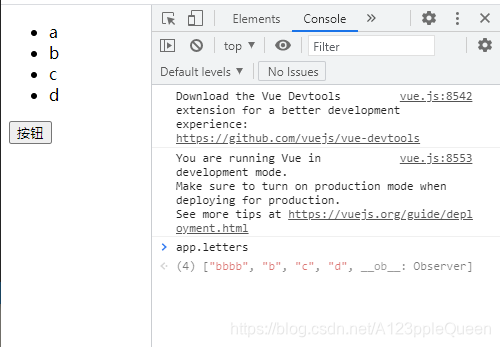
<!DOCTYPE html>
<html lang="en">
<head>
    <meta charset="UTF-8">
    <meta http-equiv="X-UA-Compatible" content="IE=edge">
    <meta name="viewport" content="width=device-width, initial-scale=1.0">
    <title>Document</title>
    <script src="js/vue.js"></script>
</head>
<body>
    <div id="app">
     <ul>
         <li v-for="item in letters">{{item}}</li>
     </ul>
     <button @click="btnClick">按钮</button>
    </div>
    <script>
      const app=  new Vue({
            el:"#app",
            data:{
                letters:['a','b','c','d']
            },
            methods:{
          btnClick(){
              //1.push方法
            //  this.letters.push('aaa')
             //2.通过索引值修改数组中的元素
	            // 这个体现了不是所有的方法都可以是响应式的
                this.letters[0]="bbbb";
          }
            }
        })
    </script>
</body>
</html>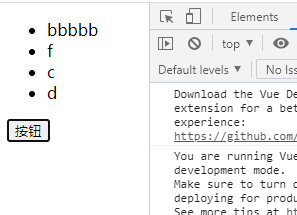
<!DOCTYPE html>
<html lang="en">
<head>
    <meta charset="UTF-8">
    <meta http-equiv="X-UA-Compatible" content="IE=edge">
    <meta name="viewport" content="width=device-width, initial-scale=1.0">
    <title>Document</title>
    <script src="js/vue.js"></script>
</head>
<body>
    <div id="app">
     <ul>
         <li v-for="item in letters">{{item}}</li>
     </ul>
     <button @click="btnClick">按钮</button>
    </div>
    <script>
      const app=  new Vue({
            el:"#app",
            data:{
                letters:['a','f','c','d']
            },
            methods:{
          btnClick(){
           //通过索引值修改数组中的元素
        //    这种做法不可取,页面不会进行刷新
           //this.letters[0]="bbbbbb"

           //可以通过splice实现
        //this.letters.splice(0,1,"bbbb")

        //或者通过set(要修改的对象,索引值,修改的值)
        // 修改letters的第1个位置的值为bbbb
        Vue.set(this.letters,0,'bbbbb')
          }
            }
        })
    </script>
</body>
</html>
<!DOCTYPE html>
<html lang="en">
<head>
    <meta charset="UTF-8">
    <meta http-equiv="X-UA-Compatible" content="IE=edge">
    <meta name="viewport" content="width=device-width, initial-scale=1.0">
    <title>Document</title>
    <script src="js/vue.js"></script>
</head>
<body>
    <div id="app">
     <ul>
         <li v-for="item in letters">{{item}}</li>
     </ul>
     <button @click="btnClick">按钮</button>
    </div>
    <script>
      const app=  new Vue({
            el:"#app",
            data:{
                letters:['a','b','c','d']
            },
            methods:{
          btnClick(){
            //   pop删除最后一个元素
             this.letters.pop()
          }
            }
        })
    </script>
</body>
</html>
<!DOCTYPE html>
<html lang="en">
<head>
    <meta charset="UTF-8">
    <meta http-equiv="X-UA-Compatible" content="IE=edge">
    <meta name="viewport" content="width=device-width, initial-scale=1.0">
    <title>Document</title>
    <script src="js/vue.js"></script>
</head>
<body>
    <div id="app">
     <ul>
         <li v-for="item in letters">{{item}}</li>
     </ul>
     <button @click="btnClick">按钮</button>
    </div>
    <script>
      const app=  new Vue({
            el:"#app",
            data:{
                letters:['a','b','c','d']
            },
            methods:{
          btnClick(){
            //shift删除数组第一个元素
             this.letters.shift()
          }
            }
        })
    </script>
</body>
</html>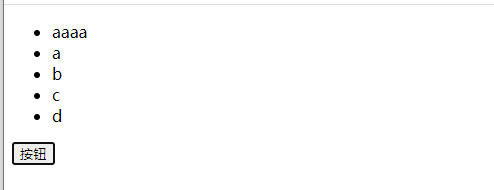
<!DOCTYPE html>
<html lang="en">
<head>
    <meta charset="UTF-8">
    <meta http-equiv="X-UA-Compatible" content="IE=edge">
    <meta name="viewport" content="width=device-width, initial-scale=1.0">
    <title>Document</title>
    <script src="js/vue.js"></script>
</head>
<body>
    <div id="app">
     <ul>
         <li v-for="item in letters">{{item}}</li>
     </ul>
     <button @click="btnClick">按钮</button>
    </div>
    <script>
      const app=  new Vue({
            el:"#app",
            data:{
                letters:['a','b','c','d']
            },
            methods:{
          btnClick(){
            //unshift数组最前面添加元素
             this.letters.unshift('aaaa')
          }
            }
        })
    </script>
</body>
</html>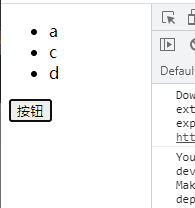
<!DOCTYPE html>
<html lang="en">
<head>
    <meta charset="UTF-8">
    <meta http-equiv="X-UA-Compatible" content="IE=edge">
    <meta name="viewport" content="width=device-width, initial-scale=1.0">
    <title>Document</title>
    <script src="js/vue.js"></script>
</head>
<body>
    <div id="app">
     <ul>
         <li v-for="item in letters">{{item}}</li>
     </ul>
     <button @click="btnClick">按钮</button>
    </div>
    <script>
      const app=  new Vue({
            el:"#app",
            data:{
                letters:['a','b','c','d']
            },
            methods:{
          btnClick(){
            //splice数组截取 删除 插入 替换
            // 删除演示 从第一个位置开始,删除一个元素
             this.letters.splice(1,1)
          }
            }
        })
    </script>
</body>
</html>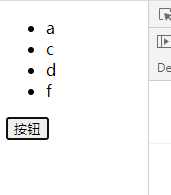
<!DOCTYPE html>
<html lang="en">
<head>
    <meta charset="UTF-8">
    <meta http-equiv="X-UA-Compatible" content="IE=edge">
    <meta name="viewport" content="width=device-width, initial-scale=1.0">
    <title>Document</title>
    <script src="js/vue.js"></script>
</head>
<body>
    <div id="app">
     <ul>
         <li v-for="item in letters">{{item}}</li>
     </ul>
     <button @click="btnClick">按钮</button>
    </div>
    <script>
      const app=  new Vue({
            el:"#app",
            data:{
                letters:['a','f','c','d']
            },
            methods:{
          btnClick(){
            //sort数组排序
             this.letters.sort()
          }
            }
        })
    </script>
</body>
</html>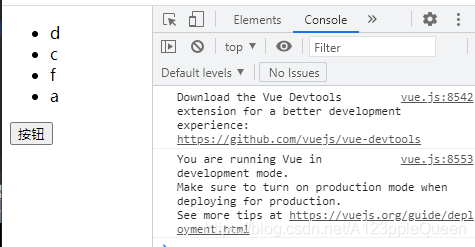
<!DOCTYPE html>
<html lang="en">
<head>
<meta charset="UTF-8">
<meta http-equiv="X-UA-Compatible" content="IE=edge">
<meta name="viewport" content="width=device-width, initial-scale=1.0">
<title>Document</title>
<script src="js/vue.js"></script>
</head>
<body>
<div id="app">
<ul>
<li v-for="item in letters">{{item}}</li>
</ul>
<button @click="btnClick">按钮</button>
</div>
<script>
const app= new Vue({
el:"#app",
data:{
letters:['a','f','c','d']
},
methods:{
btnClick(){
//sort数组反转
this.letters.reverse()
}
}
})
</script>
</body>
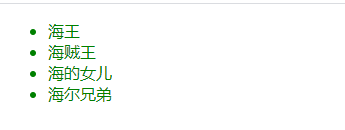
</html>v-for加css样式案例
目的:给单独的某一列加样式
<!DOCTYPE html>
<html lang="en">
<head>
    <meta charset="UTF-8">
    <meta http-equiv="X-UA-Compatible" content="IE=edge">
    <meta name="viewport" content="width=device-width, initial-scale=1.0">
    <title>Document</title>
    <script src="js/vue.js"> </script>
    <style>
        /* 现在我们想要给某个li加样式,但是直接加就全部都变成了 */
        .active{
            color:green;
        }
    </style>
</head>
<body>
    <div id="app">
        <ul>
            <li v-for="item in movies" class="active">{{item}}</li>
        </ul>
    </div>
    <script>
        const app=new Vue({
            el:"#app",
            data:{
                movies:['海王','海贼王','海的女儿','海尔兄弟']
            }
        })
    </script>
</body>
</html>
<!DOCTYPE html>
<html lang="en">
<head>
    <meta charset="UTF-8">
    <meta http-equiv="X-UA-Compatible" content="IE=edge">
    <meta name="viewport" content="width=device-width, initial-scale=1.0">
    <title>Document</title>
    <script src="js/vue.js"> </script>
    <style>
        /* 现在我们想要给某个li加样式,但是直接加就全部都变成了 */
        .active{
            color:green;
        }
    </style>
</head>
<body>
    <div id="app">
        <ul>
            <!-- 目的:给某些列加上样式 点谁谁变样式-->
            <!-- 但是,这种效果是所有的都加了效果 -->
            <!-- <li v-for="item in movies" class="active">{{item}}</li>   -->
            <!-- 所以为了解决这个问题,就要动态的加,把class改为:class,然后值也要相应的改变{ active:true},但是值是true还是false还有借助currentIndex来实现,currentIndex表示选中的到底是第几个 -->
            <!-- <li v-for="item in movies" :class="{active:currentIndex}">{{item}}</li> -->
            <!-- 当currentIndex==index时就为true -->
             <!-- <li v-for="(item,index) in movies" :class="{active:currentIndex === index}">{{index}}{{item}}</li>  -->

            <!-- 当currentIndex等于数值几,数值几就生效 -->
            <!-- <li :class="{active:0===currentIndex}"></li>
            <li :class="{active:1===currentIndex}"></li>
            <li :class="{active:2===currentIndex}"></li>
            <li :class="{active:3===currentIndex}"></li>   -->

            <!-- 可以用index取代其他索引值,就不用写多行 -->
            <!-- <li v-for="(item,index) in movies" :class="{active:currentIndex === index}">{{index}}---{{item}}</li>  -->

            <!-- 然后现在在实现点谁谁改变功能,通过监听 -->
            <li v-for="(item,index) in movies" :class="{active:currentIndex === index}" @click="liClick(index)">{{index}}---{{item}}</li>
        </ul>
    </div>
    <script>
        const app=new Vue({
            el:"#app",
            data:{
                movies:['海王','海贼王','海的女儿','海尔兄弟'],
                currentIndex:0
            },
            methods:{
                liClick(index){
                    // 点击谁就赋谁,所以需要参数index
                    this.currentIndex=index
                }
            }
        })
    </script>
</body>
</html>
补充可变参数
格式function 函数名(...参数名){
利用循环
}
函数名();
这时,函数可以调用的值就是无限的
<!DOCTYPE html>
<html>
	<head>
		<meta charset="utf-8">
		<title></title>
		<style>
    </style>
	</head>
	<body>
<script>
	function sum(...num){
		var result=0;
		for(var i of arguments){
			 result+=i
		}
		return result;
	}
	console.log(sum(10,30,20,70,80,90,100));
</script>
	</body>
</html>
v-bind 将值插入到属性中
这里之前的内容都是将值插入到模板的内容中。
从v-bind开始都是将值插入到属性中。eg:绑定a元素的href属性
v-bind绑定基础属性 v-bind:sr :href
v-bind动态绑定class 对象语法 数组语法
v-bind动态绑定style 对象语法 数组语法
v-bind动态绑定属性
图片建议在京东找,不会产生跨域问题。百度有跨域问题
给那个属性绑定值,就在哪个属性前加v-bind。eg:v-bind:src="imgURL"
<!DOCTYPE html>
<html lang="en">
<head>
    <meta charset="UTF-8">
    <meta http-equiv="X-UA-Compatible" content="IE=edge">
    <meta name="viewport" content="width=device-width, initial-scale=1.0">
    <title>Document</title>
    <script src="js/vue.js"></script>
</head>
<body>
    <div id="app">
        <!-- 动态绑定图片,把请求的地址放入到new vue里的数据里 -->
        <!-- 给那个属性绑定值,就在那个属性前加v-bind,这样就会变成变量了 -->
        <img v-bind:src="imgURL" alt="">
        <!-- 这种就是写死 -->
        <a href="http://www.baidu.com">百度一下</a>
        <!-- 动态绑定 -->
        <a v-bind:href="ahref">新闻联播</a>
    </div>
    <script>
        new Vue({
            el:"#app",
            data:{
           message:'你好',
        //  服务器请求的数据,在这里进行中转
           imgURL:"https://img10.360buyimg.com/seckillcms/s250x250_jfs/t1/187934/32/1952/266811/60961621Ebc882973/347faf6c9c61a295.png",
           ahref:"https://tv.cctv.com/lm/xwlb/"

        }
         })
    </script>
</body>
</html>
v-bind语法糖--就是简写

v-bind绑定class样式基础
<!DOCTYPE html>
<html lang="en">
<head>
    <meta charset="UTF-8">
    <meta http-equiv="X-UA-Compatible" content="IE=edge">
    <meta name="viewport" content="width=device-width, initial-scale=1.0">
    <title>Document</title>
    <script src="js/vue.js"></script>
    <style>
        .active{
            color:red;
        }
        .a{
            color: green;
        }
    </style>
</head>
<body>
    <div id="app">
        <!-- 传统方式绑定样 -->
       <h2 class="a">{{message}}</h2>
        <!-- 动态绑定样式 -->
        <h2 :class="active">{{message}}</h2>
    </div>
   <script>
       new Vue({
           el:"#app",
           data:{
               message:'你好',
               active:'active'
           }
       })
   </script>
</body>
</html>
v-bind动态绑定class样式--进阶版
通过对象和属性值控制元素颜色选择

<!DOCTYPE html>
<html lang="en">
<head>
    <meta charset="UTF-8">
    <meta http-equiv="X-UA-Compatible" content="IE=edge">
    <meta name="viewport" content="width=device-width, initial-scale=1.0">
    <title>Document</title>
    <script src="js/vue.js"></script>
    <style>
        .active{
            color:red;
        }
        .a{
            color: green;
        }
    </style>
</head>
<body>
    <div id="app">
        <!-- 利用对象方式和属性值为布尔值选颜色 -->
        <!--字体默认为红色,可以更改为绿色 -->
        <!-- 这个class身上是一条元素,因为为true才绑上了 -->
        <!-- 可以通过 f12 后,看h2身上的元素 class值的变化 -->
        <h2 v-bind:class="{active:isactive,a:isa}">{{message}}</h2>
    </div>
   <script>
    const app=  new Vue({
           el:"#app",
           data:{
               message:'你好',
               isactive:true,
               isa:false
           }
       })
   </script>
</body>
</html>
小练习
按钮中字变颜色


<!DOCTYPE html>
<html lang="en">
<head>
    <meta charset="UTF-8">
    <meta http-equiv="X-UA-Compatible" content="IE=edge">
    <meta name="viewport" content="width=device-width, initial-scale=1.0">
    <title>Document</title>
    <script src="js/vue.js"></script>
    <style>
        .active{
            color:red;
        }
        .a{
            color:orange;
        }
    </style>
</head>
<body>
    <div id="app">
        <button v-on:click="btnClick" v-bind:class="{active:isactive,a:isa}">你点我我就变颜色</button>
    </div>
   <script>
    const app=  new Vue({
           el:"#app",
           data:{
               message:'你好',
               isactive:true,
               isa:false
           },
           methods:{
               btnClick:function(){
                  this.isa=!this.isa;
               }
           }
       })
   </script>
</body>
</html>
小练习
点击按钮,字变颜色


<!DOCTYPE html>
<html lang="en">
<head>
    <meta charset="UTF-8">
    <meta http-equiv="X-UA-Compatible" content="IE=edge">
    <meta name="viewport" content="width=device-width, initial-scale=1.0">
    <title>Document</title>
    <script src="js/vue.js"></script>
    <style>
        .active{
            color:red;
        }
    </style>
</head>
<body>
    <div id="app">
        <h2 v-bind:class="{active:isactive,line:isline}">{{message}}</h2>
        <button  v-on:click="btnClick">按钮</button>
    </div>
   <script>
    const app=  new Vue({
           el:"#app",
           data:{
               message:'你好',
               isactive:true,
               isline:true
           },
           methods:{
               btnClick:function(){
                  this.isactive=!this.isactive;
               }
           }
       })
   </script>
</body>
</html>
v-bind绑定对象mthods方法实现
v-class:bind="方法调用"
methods:{
方法:
}
和上面效果一样
<!DOCTYPE html>
<html lang="en">
<head>
    <meta charset="UTF-8">
    <meta http-equiv="X-UA-Compatible" content="IE=edge">
    <meta name="viewport" content="width=device-width, initial-scale=1.0">
    <title>Document</title>
    <script src="js/vue.js"></script>
    <style>
        .active{
            color:red;
        }
    </style>
</head>
<body>
    <div id="app">
        <h2 v-bind:class="getClasses()">{{message}}</h2>
        <button  v-on:click="btnClick">按钮</button>
    </div>
    <script>
        const app=  new Vue({
               el:"#app",
               data:{
                   message:'你好',
                   isactive:true,
                   isline:true
               },
               methods:{
                   btnClick:function(){
                      this.isactive=!this.isactive;
                   },
                   getClasses:function(){
                       return {active:this.isactive,line:this.isline}
                   }
               }
           })
       </script>
</body>
</html>
v-bind 数组

v-bind样式属性值用法注意

<!DOCTYPE html>
<html lang="en">
<head>
    <meta charset="UTF-8">
    <meta http-equiv="X-UA-Compatible" content="IE=edge">
    <meta name="viewport" content="width=device-width, initial-scale=1.0">
    <title>Document</title>
    <script src="js/vue.js"></script>
</head>
<body>
    <div id="app">
        <!-- 注意:属性值需要加引号,不然会被误解为变量,报错 -->
        <!-- 当属性值不是变量时,需要加引号 -->
     <h2 :style="{color:'green'}">{{message}}</h2>
     <h2 :style="{fontsize:'50px'}">{{message}}</h2>
     <!-- 当属性值为变量时,不需要加引号 -->
     <h2 :style="{fontsize:finalsize+'px',color:finalcolor}">{{message}}</h2>
    </div>
    <script>
        new Vue({
            el:"#app",
            data:{
                message:"你好",
                finalSize:100,
                finalcolor:"orange"
            }
        })
    </script>
</body>
</html>
小技巧:css其他写法
效果一样

<!DOCTYPE html>
<html lang="en">
<head>
    <meta charset="UTF-8">
    <meta http-equiv="X-UA-Compatible" content="IE=edge">
    <meta name="viewport" content="width=device-width, initial-scale=1.0">
    <title>Document</title>
    <script src="js/vue.js"></script>
</head>
<body>
    <div id="app">
        <!-- 注意:属性值需要加引号,不然会被误解为变量,报错 -->
        <!-- 当属性值不是变量时,需要加引号 -->
     <h2 :style="{color:'green'}">{{message}}</h2>
     <h2 :style="{fontsize:'50px'}">{{message}}</h2>
     <!-- 当属性值为变量时,不需要加引号 -->
     <h2 :style="getStyle()">{{message}}</h2>
    </div>
    <script>
        new Vue({
            el:"#app",
            data:{
                message:"你好",
                finalSize:100,
                finalcolor:"orange"
            },
            methods:{
                getStyle:function(){
                    return {
                   fontsize:this.finalsize+'px',
                    color:this.finalcolor
                    }

                }
            }
        })
    </script>
</body>
</html>
v-bind 绑定数组

计算属性 computed
插值语法虽然可以显示data中的数据,但是某些情况,需要对数据进行转化后再显示,或者需要将多个数据结合起来进行使用
计算值

<!DOCTYPE html>
<html lang="en">
<head>
    <meta charset="UTF-8">
    <meta http-equiv="X-UA-Compatible" content="IE=edge">
    <meta name="viewport" content="width=device-width, initial-scale=1.0">
    <title>Document</title>
    <script src="js/vue.js"></script>
</head>
<body>
    <div id="app">
        <!-- 直接显示全名 -->
        <!-- 方法1 -->
     <h2>{{firstName}} {{lastName}}</h2>
     <!-- 方法2 -->
     <h2>{{firstName+' '+lastName}}</h2>
     <!-- 但是这里是方法看起来有点别扭 -->
     <!--方法 3  配合methods-->
     <h2>{{getfullName()}}</h2>
     <!-- 方法 4 配合computed使用-->
     <!-- 计算属性直接写 -->
     <h2>{{fullName}}</h2>
    </div>
    <script>
        new Vue({
            el:"#app",
            data:{
                firstName:'Lerbron',
                lastName:'James'
            },
            computed:{
            //   这里一般是名词
            fullName:function(){
                return this.firstName+' '+this.lastName
            }
            },
            methods:{
                getfullName(){
                    return this.firstName+' ' +this.lastName
                }
            }
        })
    </script>
</body>
</html>
<!DOCTYPE html>
<html lang="en">
<head>
    <meta charset="UTF-8">
    <meta http-equiv="X-UA-Compatible" content="IE=edge">
    <meta name="viewport" content="width=device-width, initial-scale=1.0">
    <title>Document</title>
    <script src="js/vue.js"></script>
</head>
<body>
    <div id="app">
    <h2>总价格:{{ totalPrice}}</h2>
    </div>
    <script>
      const app=  new Vue({
            el:"#app",
            data:{
                books:[
                    { id:110,name:'快速暴富的一百种方法',price:110 },
                    { id:120,name:'恋爱攻略',price:15 },
                    { id:130,name:'深入理解计算机原理',price:80 },
                    { id:140,name:'护肤基础知识',price:110 }
                ]
            },
            computed:{
                totalPrice:function(){
                    let result=0
                    for(let i=0;i<this.books.length;i++){
                        console.log("1111");
                        result +=this.books[i].price
                    }
                    return result
                }
            }
        })
    </script>
</body>
</html>
计算属性的setter 和getter
每个计算属性都包含一个getter和一个setter
get属性

<!DOCTYPE html>
<html lang="en">
<head>
    <meta charset="UTF-8">
    <meta http-equiv="X-UA-Compatible" content="IE=edge">
    <meta name="viewport" content="width=device-width, initial-scale=1.0">
    <title>Document</title>
    <script src="js/vue.js"></script>
</head>
<body>
    <div id="app">
    {{fullName}}
    </div>
    <script>
        new Vue({
            el:"#app",
            data:{
                firstName:'Kobe',
                lastName:'Bryant',
            },
            computed:{
                // 简写
                // fullName:function(){
                //     return this.firstName+' '+this.lastName
                // }
                // 全写
            fullName:{
                // 一般只用写get方法,可以不写set方法
                // set:function(){

                // },
                get:function(){
                    return this.firstName+' '+this.lastName
                }
            }
            }
        })
    </script>
</body>
</html>
set属性

<!DOCTYPE html>
<html lang="en">
<head>
    <meta charset="UTF-8">
    <meta http-equiv="X-UA-Compatible" content="IE=edge">
    <meta name="viewport" content="width=device-width, initial-scale=1.0">
    <title>Document</title>
    <script src="js/vue.js"></script>
</head>
<body>
    <div id="app">
    {{fullName}}
    </div>
    <script>
       const app= new Vue({
            el:"#app",
            data:{
                firstName:'Kobe',
                lastName:'Bryant',
            },
            computed:{
            fullName:{
                // newValue参数
                 set:function(newValue){
                   console.log('-----',newValue);
                },
                get:function(){
                    return this.firstName+' '+this.lastName
                }
            }
            }
        })
    </script>
</body>
</html>
<!DOCTYPE html>
<html lang="en">
<head>
<meta charset="UTF-8">
<meta http-equiv="X-UA-Compatible" content="IE=edge">
<meta name="viewport" content="width=device-width, initial-scale=1.0">
<title>Document</title>
<script src="js/vue.js"></script>
</head>
<body>
<div id="app">
{{fullName}}
</div>
<script>
const app= new Vue({
el:"#app",
data:{
firstName:'Kobe',
lastName:'Bryant',
},
computed:{
fullName:{
// newValue参数
set:function(newValue){
const names=newValue.split(' ');
this.firstName=names[0];
this.lastName=names[1];
},
get:function(){
return this.firstName+' '+this.lastName
}
}
}
})
</script>
</body>
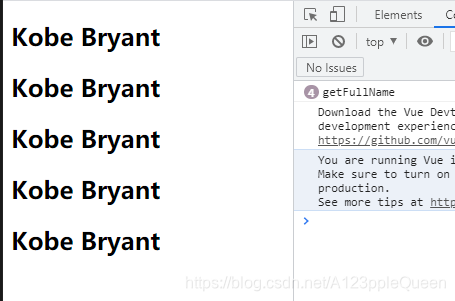
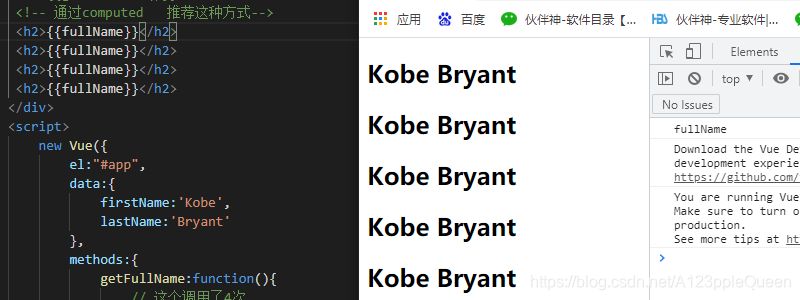
</html>计算属性和methods的对比
<!DOCTYPE html>
<html lang="en">
<head>
    <meta charset="UTF-8">
    <meta http-equiv="X-UA-Compatible" content="IE=edge">
    <meta name="viewport" content="width=device-width, initial-scale=1.0">
    <title>Document</title>
    <script src="js/vue.js"></script>
</head>
<body>
    <div id="app">
        <!-- 直接拼接 -->
     <h2>{{firstName}} {{lastName}}</h2>
     <!-- 通过methods 调用 -->
     <!-- <h2>{{getFullName()}}</h2>
     <h2>{{getFullName()}}</h2>
     <h2>{{getFullName()}}</h2>
     <h2>{{getFullName()}}</h2> -->
     <!-- 通过computed   推荐这种方式-->
     <h2>{{fullName}}</h2>
     <h2>{{fullName}}</h2>
     <h2>{{fullName}}</h2>
     <h2>{{fullName}}</h2>
    </div>
    <script>
        new Vue({
            el:"#app",
            data:{
                firstName:'Kobe',
                lastName:'Bryant'
            },
            methods:{
                getFullName:function(){
                    // 这个调用了4次
                    console.log('getFullName');
                    return this.firstName+' '+this.lastName
                }
            },
            computed:{
                fullName:function(){
                    // 这个调用了1次
                    // 当他发现返回结果没有变化时,会直接返回,不会重新计算
                    console.log('fullName');
                    return this.firstName+' '+this.lastName
                }
            }
        })
    </script>
</body>
</html>
v-model 双向绑定
双向绑定可以用于表单元素和数据的绑定
<!DOCTYPE html>
<html lang="en">
<head>
<meta charset="UTF-8">
<meta http-equiv="X-UA-Compatible" content="IE=edge">
<meta name="viewport" content="width=device-width, initial-scale=1.0">
<title>Document</title>
<script src="js/vue.js"></script>
</head>
<body>
<div id="app">
{{message}}
<input type="text" v-model="message">
</div>
<script>
const app= new Vue({
el:"#app",
data:{
message:"你好"
}
})
</script>
</body>
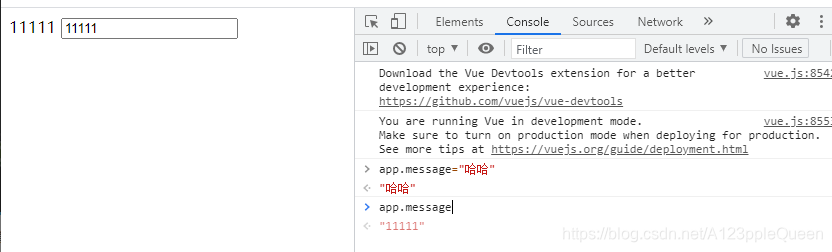
</html>v-model的原理
v-model是一个语法糖,它背后的本质操作有俩。
1.v-bind绑定了一个value属性。
2.v-on指令给当前元素绑定input事件
<!DOCTYPE html>
<html lang="en">
<head>
    <meta charset="UTF-8">
    <meta http-equiv="X-UA-Compatible" content="IE=edge">
    <meta name="viewport" content="width=device-width, initial-scale=1.0">
    <title>Document</title>
    <script src="js/vue.js"></script>
</head>
<body>
 <div id="app">
     <!-- : v-bind 控制台的值改变,页面内容改变-->
     <!--@ v-on 页面内容改变,控制台值改变 -->
    <!-- 第一种写法 -->
   <!-- <input type="text" :value="message" @input="valueChange"> -->
   <!-- 第二种写法 -->
   <input type="text" :value="message" @input="message=$event.target.value">
 </div>
 <script>
     const app=new Vue({
         el:"#app",
         data:{
             message:'你好'
         },
         methods: {
             valueChange(event){
            // 通过event获取值
        this.message=event.target.value;
             }
         },
     })
 </script>
</body>
</html>
当我们在输入框中输入内容时,因为input中的v-model绑定了message,所有会实时将输入的内容传递给message,message发生改变。
当message发生改变时,因为上面我们使用插值Mustache语法,将message的值插入到Dom中,所有dom会发送响应的改变。
所以,通过v-model实现了双向绑定。
v-model 与radio

<!DOCTYPE html>
<html lang="en">
<head>
    <meta charset="UTF-8">
    <meta http-equiv="X-UA-Compatible" content="IE=edge">
    <meta name="viewport" content="width=device-width, initial-scale=1.0">
    <title>Document</title>
    <script src="js/vue.js"></script>
</head>
<body>
    <div id="app">
        <label for="male">
            <!-- 当v-model绑定同一个变量时,可以不用同一个name=sex -->
            <input type="radio" id="male"  value="男" v-model="sex">男
        </label>
        <label for="female">
            <input type="radio" id="male" name="sex" value="女" v-model="sex">女
        </label>
        <h2>你选择的性别是:{{sex}}</h2>
    </div>
    <script>
        new Vue({
            el:"#app",
            data:{
            message:'你好',
            // sex的值就是默认值
            sex:'女'
            }
        })
    </script>
</body>
</html>
v-model与checkbox
复选框有两种,单个勾选框和多个勾选框
单选框例子

<!DOCTYPE html>
<html lang="en">
<head>
    <meta charset="UTF-8">
    <meta http-equiv="X-UA-Compatible" content="IE=edge">
    <meta name="viewport" content="width=device-width, initial-scale=1.0">
    <title>Document</title>
    <script src="js/vue.js"></script>
</head>
<body>
    <!-- checkbox 单选框-->
    <div id="app">
         <label for="agree">
             <input type="checkbox" id="agree" v-model="isAgree">同意协议
         </label>
         <h2>你的选择是:{{isAgree}}</h2>
         <!-- 同意下一步 -->
         <button :disabled="!isAgree"> 下一步</button>
    </div>
    <script>
        new Vue({
           el:"#app",
           data:{
               message:"你好",
               isAgree:false
           }
        })
    </script>
</body>
</html>
多选框例子

<!DOCTYPE html>
<html lang="en">
<head>
    <meta charset="UTF-8">
    <meta http-equiv="X-UA-Compatible" content="IE=edge">
    <meta name="viewport" content="width=device-width, initial-scale=1.0">
    <title>Document</title>
    <script src="js/vue.js"></script>
</head>
<body>
    <!-- checkbox 多选框-->
    <div id="app">
         <label for=" ">
             <input type="checkbox" value="米饭" v-model="hobbies">米饭
             <input type="checkbox" value="饼子" v-model="hobbies">饼子
             <input type="checkbox" value="面条" v-model="hobbies">面条
             <input type="checkbox" value="糕点" v-model="hobbies">糕点
         </label>
       <h2>你的爱好是:{{hobbies}}</h2>
    </div>
    <script>
        new Vue({
           el:"#app",
           data:{
               message:"你好",
               hobbies:[]
           }
        })
    </script>
</body>
</html>
v-model 与select
select也分单选和多选,v-model 绑定在select上
单选:只能选中一个值。
v-model绑定的是一个值
当我们选择option中的一个时,会将对应的value赋值到myselect中
多选:可以选中多个值
v_model绑定的是一个数组
当选中多个值时,就会将选中的option对应的value添加到数组myselect中
单选案例

<!DOCTYPE html>
<html lang="en">
<head>
    <meta charset="UTF-8">
    <meta http-equiv="X-UA-Compatible" content="IE=edge">
    <meta name="viewport" content="width=device-width, initial-scale=1.0">
    <title>Document</title>
    <script src="js/vue.js"></script>
</head>
<body>
    <!-- 单选select -->
    <div id="app">
        <select name="abc" id="" v-model="fruit">
            <option value="苹果" >苹果</option>
            <option value="西瓜">西瓜</option>
            <option value="哈蜜瓜">哈密瓜</option>
            <option value="桃子">桃子</option>
            <option value="芒果">芒果</option>
        </select>
    </div>
    <script>
        new Vue({
            el:"#app",
            data:{
             fruit:"西瓜"
            }
        })
    </script>
</body>
</html>
多选

<!DOCTYPE html>
<html lang="en">
<head>
    <meta charset="UTF-8">
    <meta http-equiv="X-UA-Compatible" content="IE=edge">
    <meta name="viewport" content="width=device-width, initial-scale=1.0">
    <title>Document</title>
    <script src="js/vue.js"></script>
</head>
<body>
    <!-- 多选select -->
    <div id="app">
        <select name="abc" id="" v-model="fruits" multiple>
            <option value="苹果" >苹果</option>
            <option value="西瓜">西瓜</option>
            <option value="哈蜜瓜">哈密瓜</option>
            <option value="桃子">桃子</option>
            <option value="芒果">芒果</option>
        </select>
        <!-- 页面选择的时候按住ctrl键就可以选择多个了 -->
        <h2>你选择的水果有:{{fruits}}</h2>
    </div>
    <script>
        new Vue({
            el:"#app",
            data:{
             fruits:[]
            }
        })
    </script>
</body>
</html>
v-model与值绑定
就是动态的给value动态赋值
可以通过提交按钮获取到值,点击提交按钮后,控制台输出值

<!DOCTYPE html>
<html lang="en">
<head>
    <meta charset="UTF-8">
    <meta http-equiv="X-UA-Compatible" content="IE=edge">
    <meta name="viewport" content="width=device-width, initial-scale=1.0">
    <title>Document</title>
    <script src="js/vue.js"></script>
</head>
<body>
    <div  id="app">
        <!-- v-model值相同绑定同一个  -->
   喜欢 <input type="radio" v-model="picked" value="A">
  不喜欢 <input type="radio" v-model="picked" value="b">
   <span>你的选择是:{{picked}}</span>
   <button type="button" @click="submit">提交</button>
    </div>
    <script >
       const app= new Vue({
            el:"#app",
            data:{
                //通过选择value的值进行开始默认值
             picked:'A',
            },
            methods:{
                submit:function(){
                    // 获取到vue的值
                    this.picked;
                    console.log(this.picked);
                }
            }
        })
    </script>
</body>
</html>
v-model与修饰符
lazy修饰符
默认情况下,v-model默认始终input事件中同步输入框的数据的,一旦有数据发生改变对应的data中的数据就会自动发生改变。
lazy修饰符可以让数据在失去焦点/回车时才更新。

<!DOCTYPE html>
<html lang="en">
<head>
<meta charset="UTF-8">
<meta http-equiv="X-UA-Compatible" content="IE=edge">
<meta name="viewport" content="width=device-width, initial-scale=1.0">
<title>Document</title>
<script src="js/vue.js"></script>
</head>
<body>
<div id="app">
<!-- 双向绑定是边输入边改变 -->
<!-- <input type="text" v-model="message"> -->
<!-- 现在是敲回车/失去焦点后才会改变 -->
<input type="text" v-model.lazy="message">
<h2>{{message}}</h2>
</div>
<script>
new Vue({
el:"#app",
data:{
message:"你好"
}
})
</script>
</body>
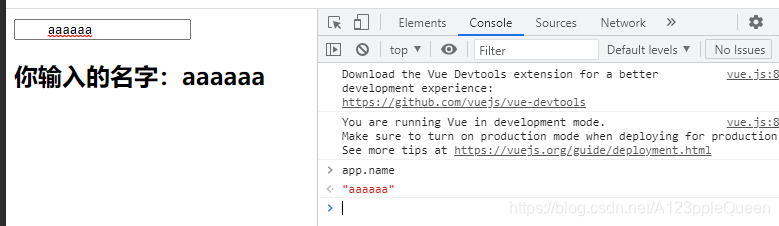
</html>trim修饰符
如果输入的内容首尾有很多空格,通过我们希望将其去除。
trim修饰符可以过滤内容左右两边的空格。
<!DOCTYPE html>
<html lang="en">
<head>
    <meta charset="UTF-8">
    <meta http-equiv="X-UA-Compatible" content="IE=edge">
    <meta name="viewport" content="width=device-width, initial-scale=1.0">
    <title>Document</title>
    <script src="js/vue.js"></script>
</head>
<body>
    <div id="app">
     <input type="text" v-model.trim="name">
     <h2>你输入的名字:{{name}}</h2>
    </div>
    <script>
     const app=  new Vue({
            el:"#app",
            data:{
                name:''
            }
        })
    </script>
</body>
</html>
number修饰符
默认情况下,在输入框中无论我们输入的是字母还是数字,都会被当做字符串类型进行处理。
但是如果我们希望处理的是数字类型,那么最好直接将内容当做数字处理.
number修饰符可以在输入框中将输入的内容自动转成数字类型


<!DOCTYPE html>
<html lang="en">
<head>
<meta charset="UTF-8">
<meta http-equiv="X-UA-Compatible" content="IE=edge">
<meta name="viewport" content="width=device-width, initial-scale=1.0">
<title>Document</title>
<script src="js/vue.js"></script>
</head>
<body>
<div id="app">
<input type="number" v-model.number="age">
<h2>{{age}}---{{typeof age}}</h2>
</div>
<script>
new Vue({
el:"#app",
data:{
age:0
}
})
</script>
</body>
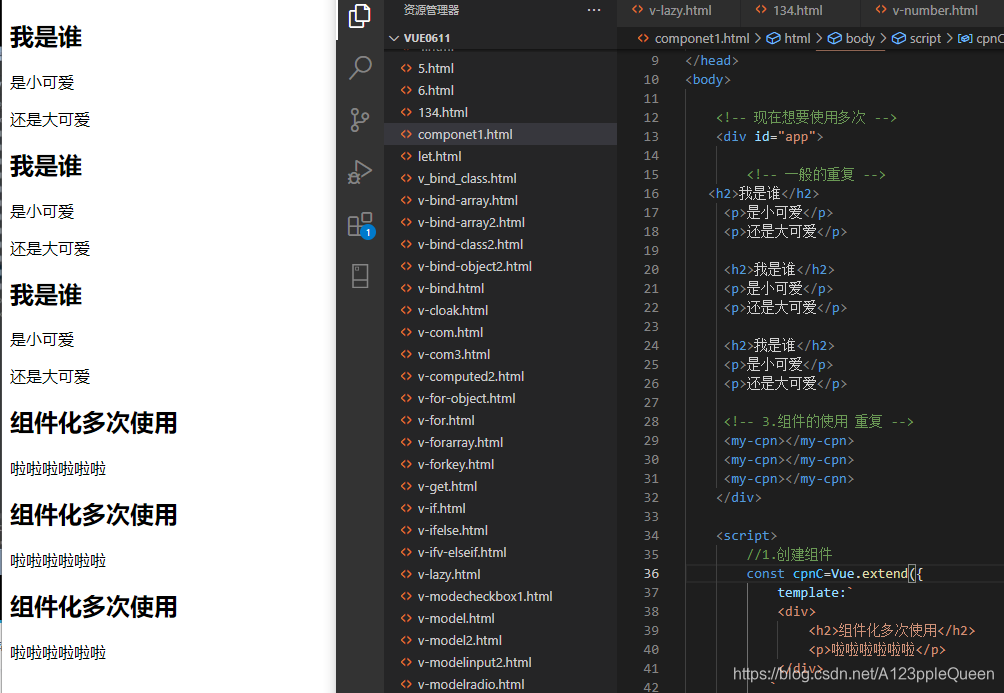
</html>组件化
组件化思想
如果我们将一个页面中所有的处理逻辑全部放在一起,处理起来就会变得非常复杂,而且不利于后续的管理以及扩展。
但如果,我们将一个页面拆分成一个个小小的功能块,每个功能块完成属于自己这部分独立的功能,那么整个页面的管理和维护就变得非常容易了。
我们可以将一个完整的页面分成很多个组件。
每个组件都用于实现页面的一个功能块。
而每一个组件又可以进行细分。
vue组件化思想
组件化是vue.js中的重要思想
它提供了一种抽象,让我们可以开发出一个个独立可复用的小组件来构造我们的应用。
任何的应用都会被抽象成一颗组件树。
组件的使用
组件的使用分为三个步骤:
创建组件构造器 -------- 调用Vue.extend()方法------定义要使用的模板----它有语法糖(就是简写)
注册组件----------调用Vue.component()方法----传递参数(使用时的组件名,创建组件时的变量名)
使用组件----------在Vue实例的作用范围内使用组件----必须挂载在某个vue实例上,某则不生效
<!DOCTYPE html>
<html lang="en">
<head>
    <meta charset="UTF-8">
    <meta http-equiv="X-UA-Compatible" content="IE=edge">
    <meta name="viewport" content="width=device-width, initial-scale=1.0">
    <title>Document</title>
    <script src="js/vue.js"></script>
</head>
<body>

    <!-- 现在想要使用多次 -->
    <div id="app">

        <!-- 一般的重复 -->
   <h2>我是谁</h2>
     <p>是小可爱</p>
     <p>还是大可爱</p>

     <h2>我是谁</h2>
     <p>是小可爱</p>
     <p>还是大可爱</p>

     <h2>我是谁</h2>
     <p>是小可爱</p>
     <p>还是大可爱</p>

     <!-- 3.组件的使用 重复 -->
     <my-cpn></my-cpn>
     <my-cpn></my-cpn>
     <my-cpn></my-cpn>
    </div>

    <script>
        //1.创建组件
        const cpnC=Vue.extend({
            template:`
            <div>
                <h2>组件化多次使用</h2>
                <p>啦啦啦啦啦啦</p>
            </div>
           `
        })
        //2.组册组件
        // 使用时的组件名,创建组件时的变量名
        Vue.component('my-cpn',cpnC)
        new Vue({
            el:"#app",
            data:{

            }
        })
    </script>
</body>
</html>
全局组件 局部组件
全局组件

<!DOCTYPE html>
<html lang="en">
<head>
    <meta charset="UTF-8">
    <meta http-equiv="X-UA-Compatible" content="IE=edge">
    <meta name="viewport" content="width=device-width, initial-scale=1.0">
    <title>Document</title>
    <script src="js/vue.js"></script>
</head>
<body>
    <div id="app">
    <!-- 使用组件 -->
    <money></money>
    </div>
    <div id="app2">
        <money></money>
        <money></money>
    </div>
    <script>
        //1.创建组件
        // V要大写
        const cpnC=Vue.extend({
            template:`
            <div>
                <h2>暴富暴富暴富</h2>
                <p>moneymoneymoney</p>
            </div>`

        })
        //.注册组件----全局组件
        Vue.component('money',cpnC);
        new Vue({
            el:"#app",
            data:{

            }
        })
        new Vue({
            el:"#app2",
             data:{

             }
            })
    </script>
</body>
</html>
局部组件

<!DOCTYPE html>
<html lang="en">
<head>
    <meta charset="UTF-8">
    <meta http-equiv="X-UA-Compatible" content="IE=edge">
    <meta name="viewport" content="width=device-width, initial-scale=1.0">
    <title>Document</title>
    <script src="js/vue.js"></script>
</head>
<body>
    <!-- 局部组件 -->


    <div id="app">
        <cpn></cpn>
        <cpn></cpn>
    </div>

    <script>
          //   1. 创建组件
    const cpnC=Vue.extend({
        template:`
        <div>
            <h2>局部组件呵呵呵呵呵呵</h2>
        </div>`
    })
       new Vue({
           el:"#app",
           data:{

           },
           //2.注册组件
           components:{
              cpn:cpnC
           }
       })

    </script>
</body>
</html>
组件的语法糖---全局组件 局部组件简写
<!DOCTYPE html>
<html lang="en">
<head>
    <meta charset="UTF-8">
    <meta http-equiv="X-UA-Compatible" content="IE=edge">
    <meta name="viewport" content="width=device-width, initial-scale=1.0">
    <title>Document</title>
    <script src="js/vue.js"></script>
</head>
<body>
    <div id="app">
     <cpn1></cpn1>
    </div>
    <script>
        // 全局组件语法糖
        // 第一步省略了
        //const cpn1=Vue.extend()
        Vue.component('cpn1',{
            template:`
            <div>
               <h2>我是标题</h2>
                <p>我是内容</p>
                </div>
            `
        })
    const app =  new Vue({
            el:"#app",
            data:{
                message:"你好"
            }
        })
    </script>
</body>
</html>
<!DOCTYPE html>
<html lang="en">
<head>
    <meta charset="UTF-8">
    <meta http-equiv="X-UA-Compatible" content="IE=edge">
    <meta name="viewport" content="width=device-width, initial-scale=1.0">
    <title>Document</title>
    <script src="js/vue.js"></script>
</head>
<body>
    <div id="app">
     <cpn2></cpn2>
    </div>
    <script>
        // 局部语法糖
    const app =  new Vue({
            el:"#app",
            data:{
                message:"你好"
            },
            components:{
                // 这里是引号
             'cpn2':{
                //  然后这里是反引号
                template:`
            <div>
               <h2>我是钱钱</h2>
                <p>我是荷包</p>
                </div>
            `
             }
            }
        })
    </script>
</body>
</html>
组件模板抽离-----组件语法糖2
虽然简化了Vue的注册过程,但是template模块的写法也是比较麻烦的。
所有如果能够把其中的html代码分离出来写,然后挂载到对应的组件上,结构会变得比较清晰
Vue有两种方式定义HTML模板内容
<script>标签
<template>标签
<!DOCTYPE html>
<html lang="en">
<head>
    <meta charset="UTF-8">
    <meta http-equiv="X-UA-Compatible" content="IE=edge">
    <meta name="viewport" content="width=device-width, initial-scale=1.0">
    <title>Document</title>
    <script src="js/vue.js"></script>
</head>
<body>
    <div id="app">
     <cpn></cpn>
    </div>
    <!-- 模板分离 -->
    <!-- 写法一  script通过id联系-->
    <script type="text/x-template" id="cpn">
        <div>
            <h2>我是标题</h2>
            <p>我是内容</p>
        </div>
    </script>


    <script>
        //注册一个全局组件
        Vue.component('cpn',{
            template:"#cpn"
        })
        new Vue({
            el:"#app",
            data:{
                message:"你好"
            }
        })
    </script>
</body>
</html>
<!DOCTYPE html>
<html lang="en">
<head>
    <meta charset="UTF-8">
    <meta http-equiv="X-UA-Compatible" content="IE=edge">
    <meta name="viewport" content="width=device-width, initial-scale=1.0">
    <title>Document</title>
    <script src="js/vue.js"></script>
</head>
<body>
    <div id="app">
     <cpn></cpn>
    </div>
    <!-- 模板分离 -->
    <!-- 写法二  template通过id联系-->
  <template id="cpn">
    <div>
        <h2>我会成为有钱人</h2>
        <p>我会有很多很多钱</p>
    </div>
  </template>


    <script>
        //注册一个全局组件
        Vue.component('cpn',{
            template:"#cpn"
        })
        new Vue({
            el:"#app",
            data:{
                message:"你好"
            }
        })
    </script>
</body>
</html>
<!DOCTYPE html>
<html lang="en">
<head>
  <meta charset="UTF-8">
  <meta http-equiv="X-UA-Compatible" content="IE=edge">
  <meta name="viewport" content="width=device-width, initial-scale=1.0">
  <title>Document</title>
  <script src="js/vue.js"></script>
</head>
<body>
  <div id="app">
   <cpn></cpn>
  </div>

  <template id="cpn">
      <p>学习哈哈哈哈</p>
  </template>


  <script>
   const cpn={
     template:"#cpn"
   }

    new Vue({
      el:"#app",
      data:{
      },
      components:{
         cpn
      }
    })
  </script>
</body>
</html>
组件数据 data
组件不可以访问Vue实例数据
组件是一个单独功能模块的封装;
这个模块有属于自己的html模板,也应该有属于自己的数据data
组件不能访问vue实例中的data,而且即使访问,如果将所有的数据都放在vue实例中,vue实例就会变得非常臃肿。
不能访问
<!DOCTYPE html>
<html lang="en">
<head>
    <meta charset="UTF-8">
    <meta http-equiv="X-UA-Compatible" content="IE=edge">
    <meta name="viewport" content="width=device-width, initial-scale=1.0">
    <title>Document</title>
    <script src="js/vue.js"></script>
</head>
<body>
    <div id="app">
     <cpn></cpn>
    </div>
    <!-- 模板分离 -->
    <!-- 写法二  通过id联系-->
  <template id="cpn">
    <div>
        <h2>{{title}}</h2>
        <p>我会有很多很多钱</p>
    </div>
  </template>


    <script>
        //注册一个全局组件
        Vue.component('cpn',{
            template:"#cpn"
        })
        new Vue({
            el:"#app",
            data:{
                message:"你好",
            // 这句话没有显示
                title:'你好,有钱人'
            }
        })
    </script>
</body>
</html>
组件数据data的存放
组件对象也有一个data属性
知识点:这个data属性必须是一个函数
而且这个函数返回一个对象,对象内部保存着数据

<!DOCTYPE html>
<html lang="en">
<head>
    <meta charset="UTF-8">
    <meta http-equiv="X-UA-Compatible" content="IE=edge">
    <meta name="viewport" content="width=device-width, initial-scale=1.0">
    <title>Document</title>
    <script src="js/vue.js"></script>
</head>
<body>
    <div id="app">
     <cpn></cpn>
    </div>
    <!-- 模板分离 -->
    <!-- 写法二  通过id联系-->
  <template id="cpn">
    <div>
        <h2>{{title}}</h2>
        <p>我会有很多很多钱</p>
    </div>
  </template>


    <script>
        //注册一个全局组件
        Vue.component('cpn',{
            template:"#cpn",
            // 组件的数据在这里
            // 这里的data不能是对象,写成对象会报错
            data(){
                return{
                    title:'钱包鼓鼓'
                }
            }
        })
        new Vue({
            el:"#app",
            data:{
                message:"你好",
            }
        })
    </script>
</body>
</html>
<!DOCTYPE html>
<html lang="en">
<head>
    <meta charset="UTF-8">
    <meta http-equiv="X-UA-Compatible" content="IE=edge">
    <meta name="viewport" content="width=device-width, initial-scale=1.0">
    <title>Document</title>
    <script src="js/vue.js"></script>
</head>
<body>
    <div id="app">
        <!-- 这些组件共用的不是一个data -->
    <cpn></cpn>
    <cpn></cpn>
    <cpn></cpn>
    </div>
    <template id="cpn">
        <div>
         <h2>当前计数:{{counter}}</h2>
         <button @click="increment">+</button>
         <button @click="decrement">-</button>
        </div>
    </template>
    <script>
        // 1.注册组件
        Vue.component('cpn',{
            template:'#cpn',
            data(){
                return{
                    counter:0
                }
            },
            // 组件也有方法
            methods:{
             increment(){
                 this.counter++
             },
             decrement(){
                 this.counter--
             }
                }
        })
        new Vue({
            el:"#app",
            data:{
                message:'你好'
            }
        })
    </script>
</body>
</html>
父组件和子组件
<!DOCTYPE html>
<html lang="en">
<head>
    <meta charset="UTF-8">
    <meta http-equiv="X-UA-Compatible" content="IE=edge">
    <meta name="viewport" content="width=device-width, initial-scale=1.0">
    <title>Document</title>
    <script src="js/vue.js"></script>
</head>
<body>
    <div id="app">
    <cpn1></cpn1>
    <cpn2></cpn2>
    </div>
    <script>
// 创建第一个组件构造器
const cpnC1=Vue.extend({
    template:`
    <div>
        <h2>我是标题1</h2>
        <p>我是内容,哈哈哈哈</p>
        </div>
    `
})

// 创建第一个组件构造器
const cpnC2=Vue.extend({
    template:`
    <div>
        <h2>我是标题2</h2>
        <p>我是内容,呵呵呵呵呵</p>
        </div>
    `
})

     const app =  new Vue({
            el:"#app",
            data:{
                message:'你好'
            },
            components:{
                cpn1:cpnC1,
                cpn2:cpnC2
            }
        })
    </script>
</body>
</html>
<!DOCTYPE html>
<html lang="en">
<head>
    <meta charset="UTF-8">
    <meta http-equiv="X-UA-Compatible" content="IE=edge">
    <meta name="viewport" content="width=device-width, initial-scale=1.0">
    <title>Document</title>
    <script src="js/vue.js"></script>
</head>
<body>
    <!-- 父子组件代码 -->
    <div id="app">
        <!-- 组件器2在app中进行了使用 -->
    <cpn2></cpn2>
    <!-- 那么这里可以使用<cpn1></cpn1>吗?不能 -->
    </div>
    <script>
// 创建第一个组件构造器(子组件)
const cpnC1=Vue.extend({
    template:`
    <div>
        <h2>我是标题1</h2>
        <p>我是内容,哈哈哈哈</p>
        </div>
    `
})

// 创建第二个组件构造器(父组件)
const cpnC2=Vue.extend({
    template:`
    <div>
        <h2>我是标题2</h2>
        <p>我是内容,呵呵呵呵呵</p>
        <cpn1></cpn1>
        </div>
    `,
    components:{
        // 组件器1在组件构造器2中进行了注册,并在模板中进行了使用
        // 注意这里注册了就只能在上面的模板里写,因为作用域的原因
        cpn1:cpnC1
    }
})

// root组件
     const app =  new Vue({
            el:"#app",
            data:{
                message:'你好'
            },
            components:{
                // 组件器2在vue实例中进行了注册
                cpn2:cpnC2
            }
        })
    </script>
</body>
</html>
父子组件的通信
子组件是不能引用父组件或者Vue实例的数据的,但是,在开发中,一些数据需要从上层传递到下层:比如,在一个页面中,从服务器请求到很多的数据。其中一部分数据,并非是我们整个页面的大组件来展示的,而是需要下面的子组件进行展示。这个时候,并不会让子组件再次发送一个网络请求,而是直接让大组件(父组件)将数据传递给小组件(子组件)
父子组件之间通信方法
通过props向子组件传递数据
通过自定义事件向父组件发送消息
在下面代码中,会直接将Vue实例当做父组件,并且其中包含子组件来简化代码
真实开发中,Vue实例和子组件的通信和父组件和子组件的通信过程是一样的。
父传子props
props基本用法
在组件中,使用选项props来声明需要从父级接受到的数据。
props的值有两种:
方式一:字符串数组,数组中的字符串就是传递时的名称
方式二:对象,对象可以设置传递时的类型,也可以设置默认值等
<!DOCTYPE html>
<html lang="en">
<head>
<meta charset="UTF-8">
<meta http-equiv="X-UA-Compatible" content="IE=edge">
<meta name="viewport" content="width=device-width, initial-scale=1.0">
<title>Document</title>
<script src="js/vue.js"></script>
</head>
<body>
<div id="app">
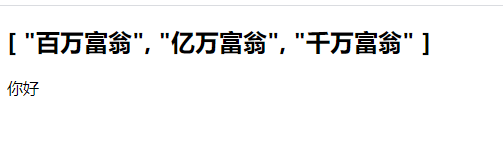
<cpn v-bind:cmovies="movies" :cmessage="message"></cpn>
<!-- 这里如果没有绑定,就是字符串了传了过去 movies message-->
<!-- <cpn cmovies="movies" cmessage="message"></cpn> -->
</div>
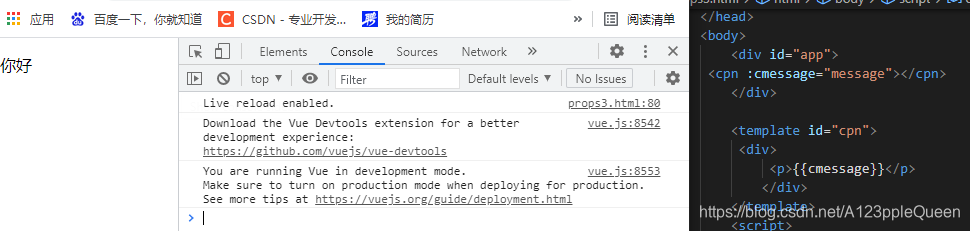
<template id="cpn">
<div>
<h2> {{cmovies}}</h2>
<p>{{cmessage}}</p>
</div>
</template>
<script>
// 子组件
// 父传子props
const cpn={
template:'#cpn',
props:['cmovies','cmessage'],
data(){
return{ }
},
methods: {
}
}
// 父组件
new Vue({
el:"#app",
data:{
message:"你好",
movies:['百万富翁','亿万富翁','千万富翁']
},
components:{
// 'cpn':cpn 简写成cpn
cpn
}
})
</script>
</body>
</html>props数据验证
在前面,我们的props选项是使用一个数组。
我们说过,除了数组之外,也可以使用对象,当需要对props进行类型验证时,就需要对象写法了。
验证都支持哪些数据类型呢?
string Number boolean array object date function symbol
当我们有自定义构造函数时,验证也支持自定义类型
<!DOCTYPE html>
<html lang="en">
<head>
    <meta charset="UTF-8">
    <meta http-equiv="X-UA-Compatible" content="IE=edge">
    <meta name="viewport" content="width=device-width, initial-scale=1.0">
    <title>Document</title>
    <script src="js/vue.js"></script>
</head>
<body>
    <div id="app">
        <!-- 现在即使这里没有cmessage=message,没有传入,也有message的默认值出现 -->
       <cpn v-bind:cmovies="movies" ></cpn>
    </div>

    <template id="cpn">
     <div>
         <p>{{cmessage}}</p>
        </div>
    </template>
    <script>
        // 子组件
        // 父传子props
        const cpn={
          template:'#cpn',
        props:{
        // 提供一些默认值
        cmessage:{
            type:String,
            default:`aaaaa`
        }
        },
          data(){
           return{ }
          },
          methods: {
          }
        }
        // 父组件
        new Vue({
            el:"#app",
            data:{
               message:"你好",
               movies:['百万富翁','亿万富翁','千万富翁']
                },
                components:{
                  // 'cpn':cpn  简写成cpn
                    cpn
                }
        })
    </script>
</body>
</html>
<!DOCTYPE html>
<html lang="en">
<head>
    <meta charset="UTF-8">
    <meta http-equiv="X-UA-Compatible" content="IE=edge">
    <meta name="viewport" content="width=device-width, initial-scale=1.0">
    <title>Document</title>
    <script src="js/vue.js"></script>
</head>
<body>
    <div id="app">
        <!-- 必须绑定否则报错 -->
 <cpn :cmessage="message"></cpn>
    </div>

    <template id="cpn">
     <div>
         <p>{{cmessage}}</p>
        </div>
    </template>
    <script>
        // 子组件
        // 父传子props
        const cpn={
          template:'#cpn',
        props:{
        cmessage:{
            type:String,
            default:`aaaaa`,
            // 当设置了required,别人用这个的时候,必须传message,不然就会报错
            required:true
        }
        },
          data(){
           return{ }
          },
          methods: {

          }
        }
        // 父组件
        new Vue({
            el:"#app",
            data:{
               message:"你好",
               movies:['百万富翁','亿万富翁','千万富翁']
                },
                components:{
                    cpn
                }
        })
    </script>
</body>
</html>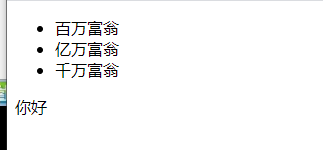
<!DOCTYPE html>
<html lang="en">
<head>
    <meta charset="UTF-8">
    <meta http-equiv="X-UA-Compatible" content="IE=edge">
    <meta name="viewport" content="width=device-width, initial-scale=1.0">
    <title>Document</title>
    <script src="js/vue.js"></script>
</head>
<body>
    <div id="app">
 <cpn :cmessage="message" :cmovies="movies"></cpn>
    </div>

    <template id="cpn">
     <div>
          <ul>
            <li v-for="item in cmovies">{{item}}</li>
        </ul>
         <p>{{cmessage}}</p>
        </div>
    </template>
    <script>
        // 子组件
        // 父传子props
        const cpn={
          template:'#cpn',
        props:{
        cmessage:{
            type:String,
            default:`aaaaa`,
            // 当设置了required,别人用这个的时候,必须传message,不然就会报错
            required:true
        },
        cmovies:{
            type:Array,
            // 类型为对象/数组时,默认值必须是一个函数
            dafault(){
                return[]
            }
        }
        },
          data(){
           return{ }
          },
          methods: {

          }
        }
        // 父组件
        new Vue({
            el:"#app",
            data:{
               message:"你好",
               movies:['百万富翁','亿万富翁','千万富翁']
                },
                components:{
                    cpn
                }
        })
    </script>
</body>
</html>
ES6知识补充
之后补

<!DOCTYPE html>
<html lang="en">
<head>
    <meta charset="UTF-8">
    <meta http-equiv="X-UA-Compatible" content="IE=edge">
    <meta name="viewport" content="width=device-width, initial-scale=1.0">
    <title>Document</title>
</head>
<body>
    <button>按钮1</button>
    <button>按钮2</button>
    <button>按钮3</button>
    <button>按钮4</button>
    <button>按钮5</button>
    <script>

        //3.没有块级作用域引起的问题:for的块级
        // var btns=dpcument.getElementsByTagName('button');
        // for(var i=0;i<btns.length;i++){
        //     btns[i].addEventListener('click',function(){
        //         // 这里是经典错误,点的明明是第1个按钮,显示的确实5,就是因为作用域问题
        //         // 需要的btns i 出现的却是循环完成的i
        //         console.log('第'+ i +'几个按钮被点')
        //     })
        // }

        // 解决方法1:闭包
        // 闭包能解决的原因是:函数是一个作用域
        // var btns=dpcument.getElementsByTagName('button');
        // for(var i=0;i<btns.length;i++){
        //     (function(inum){
        //         btns[i].addEventListener('click',function(){
        //             console.log('第'+ inum +'几个按钮被点')
        //         })
        //     })(i)
        // }

        //  解决方法2:因为let const有块级作用域
    const btns=document.getElementsByTagName('button');
    for(let i=0;i<btns.length;i++){
        btns[i].addEventListener('click',function(){
            console.log('第'+ i +'个按钮被点')
        })
    }

    </script>
</body>
</html>
案列:初级购物车

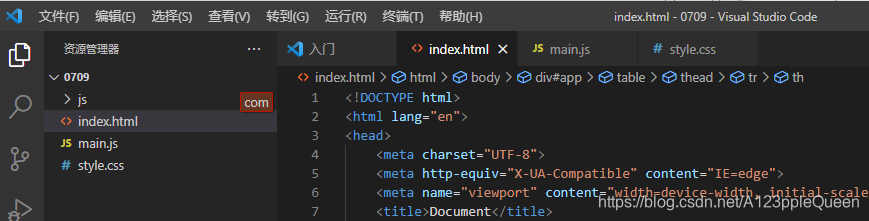
<!DOCTYPE html>
<html lang="en">
<head>
    <meta charset="UTF-8">
    <meta http-equiv="X-UA-Compatible" content="IE=edge">
    <meta name="viewport" content="width=device-width, initial-scale=1.0">
    <title>Document</title>
    <link rel="stylesheet" href="style.css">
</head>
<body>
    <!-- index.html -->
    <div id="app">
        <div v-if="books.length">
     <table>
         <thead>
             <tr>
                 <th></th>
                 <th>书籍名称</th>
                 <th>出版日期</th>
                 <th>价格</th>
                <th>购买数量</th>
                <th>操作</th>
             </tr>
         </thead>
         <!-- 注意:数据是从别处获取的不是固定的,所有需要动态绑定 -->
         <tbody>
             <!-- 这里传参是为了eleement ui考虑 -->
             <tr v-for="(item,index) in books">
             <td>{{item.id}}</td>
             <td>{{item.name}}</td>
             <td>{{item.data}}</td>
             <!-- 但是这样写不好,总价格也需要操作 -->
             <!-- <td>{{'¥' + item.price.toFixed(2)}}</td> -->
             <!-- 方法一 -->
             <!-- <td>{{getFinalPrice(item.price)}}</td> -->
             <!-- 方法二 过滤器 -->
              <td>{{item.price | showPrice}}</td>
             <td>
                 <!-- 监听来控制点击量  v-bind动态绑定数据为了监控减号 -->
                 <button @click="decrement(index)" v-bind:disabled="item.count <= 1">-</button>
                 {{item.count}}
                 <button @click="increment(index)">+</button>
             </td>
             <td><button @click="removeHandle">移除</button></td>
             </tr>
         </tbody>
     </table>
     <h2>总价格:{{totalPrice}}</h2>
    </div>
    <h2 v-else>购物车为空</h2>
    </div>
    <!-- 注意这个要写在下面,不然会找不到元素#app,不要写在head里 -->
    <script src="js/vue.js"></script>
    <script src="main.js"></script>
</body>
</html>
//main.js
const app=new Vue({
el:"#app",
data:{
// 因为没有做其他的,所有暂时是这样
books:[
{
id:1,
name:"《算法导论》",
data:'2006-9',
price:85.00,
count:1
},{
id:2,
name:"《inix编程艺术》",
data:'2006-2',
price:59.00,
count:1
},{
id:3,
name:"《编程珠玑》",
data:'2008-10',
price:39.00,
count:1
},{
id:4,
name:"《代码大全》",
data:'2006-3',
price:128.00,
count:1
}
]
// 正确代码如下,位置不要放错了
},
// 方法一 价格显示
// 注意函数那里也没有:
methods: {
getFinalPrice(price) {
return '¥' + price.toFixed(2)
},
increment(index){
// 价格index便于传参,有了index,点谁就能明确哪个按钮
console.log('inc',index);
this.books[index].count++
},
decrement(index){
// console.log('dec',index);
// 但是减号需要限制,最少有1
this.books[index].count--
},
removeHandle(index){
this.books.splice(index,1)
}
},
computed:{
totalPrice(){
// 1.普通for循环
// let totalPrice=0
// for(let i=0;i<this.books.length;i++){
// totalPrice += this.books[i].price*this.books[i].count
// }
// return totalPrice
// 2.用for in
// let totalPrice=0
// for(let i in this.books){
// totalPrice += this.books[i].price*this.books[i].count
// }
// return totalPrice
// }
//3.用for of 可以直接拿到每一项
// let totalPrice=0
// for(let item of this.books){
// totalPrice += item.price * item.count
// }
// return totalPrice
//4.reduce
return this.books.reduce(function(preValue,book){
return preValue + book.price*book.count
},0)
}
},
// 方法二 价格显示--过滤器
filters:{
showPrice(price){
return '¥' + price.toFixed(2)
}
}
})/* css */
table{
border:1px solid skyblue;
border-collapse: collapse;
border-spacing: 0;
}
th,td{
padding:8px 16px;
border:1px solid skyblue;
text-align: text;
}
th{
background-color: slategray;
color:snow;
font-weight: 600;
}父子组件通信--props驼峰标识----所以这个不用看了
这里现在好像刚好和老师讲的情况反了。


<!DOCTYPE html>
<html lang="en">
<head>
  <meta charset="UTF-8">
  <meta http-equiv="X-UA-Compatible" content="IE=edge">
  <meta name="viewport" content="width=device-width, initial-scale=1.0">
  <title>Document</title>
  <script src="js/vue.js"></script>
</head>
<body>
  <div id="app">
    <!-- 页面显示为空对象,因为它不支持驼峰-->
   <!-- <cpn :cinfo="info"></cpn> -->
   <!-- 所以这里必须转化一下 -->
   <cpn :c-info="info"></cpn>
  </div>
  <template id="cpn">
    <h2>{{cinfo}}</h2>
  </template>
  <script>
    const cpn={
     template:'#cpn',
     props:{
       cinfo:{
         type:Object,
         default(){
        return{}
         }
       }
     }
    }
   const app= new Vue({
      el:"#app",
      data:{
        info:{
          name:"why",
          age:18,
          height:180
        }
      },
      components:{
       cpn
      }
    })
  </script>
</body>
</html>
过滤器
在上面案例中用了
父子组件通信--子传父(自定义事件)
当子组件需要向父组件传递数据时,需要自定义事件
自定义事件流程
子组件中,通过$emit()触发事件
父组件中,通过v-on来监听子组件事件。
v-on 不仅可以监听Dom事件,还可以用于组件的自定义事件

<!DOCTYPE html>
<html lang="en">
<head>
  <meta charset="UTF-8">
  <meta http-equiv="X-UA-Compatible" content="IE=edge">
  <meta name="viewport" content="width=device-width, initial-scale=1.0">
  <title>Document</title>
  <script src="js/vue.js"></script>
</head>
<body>
  <!-- 父组件模板 -->
  <div id="app">
    <!-- 然后父组件里发生的监听,所以在父组件中定义 -->
   <cpn @item-click="cpnClick"></cpn>
  </div>

  <!-- 子组件模板 -->
  <template id="cpn">
   <div>
     <!-- item 就显示全部数据 包括 ida:xxxx  name:xxx -->
    <button v-for="item in  categories" @click="btnClick(item)">{{item.name}}</button>
   </div>
  </template>
  <script>
    // 子组件
  const cpn={
    template:'#cpn',
    data(){
      return{
        categories:[
          {id:'aaaa',name:"热门推荐"},
          {id:'bbbb',name:"手机数码"},
          {id:'cccc',name:"家用家电"},
          {id:'dddd',name:"电脑办公"},
        ]
      }
    },
    methods: {
      // 通过item传值,两边都要写
      btnClick(item){
        //看是否拿到了,是{__ob__:Observer}
      // console.log(item);
       //通过$emit(发送了谁 ,参数是谁)传到父组件
      //  在通过 v-on 在父组件中 来绑定子组件的事件
      // 自定义事件
       this.$emit('item-click',item)
      }
    },
  }
  // 父组件
    const app=new Vue({
      el:"#app",
      data:{
        message:"你好"
      },
      components:{
        cpn
      },
      methods: {
        // 能打印就把事件传过来了
        // 要把item写上才能接受
        cpnClick(item){
          // 这个就是打印出cpnclick
          //打印时也要写上item ,才能打出来
          // 注意:item 打出的是一个对象,点开才能打开值
          // item.xx  就是详细的值了
          console.log('cpnClick',item.name);
        }
      },
    })
  </script>
</body>
</html>
父子组件案列
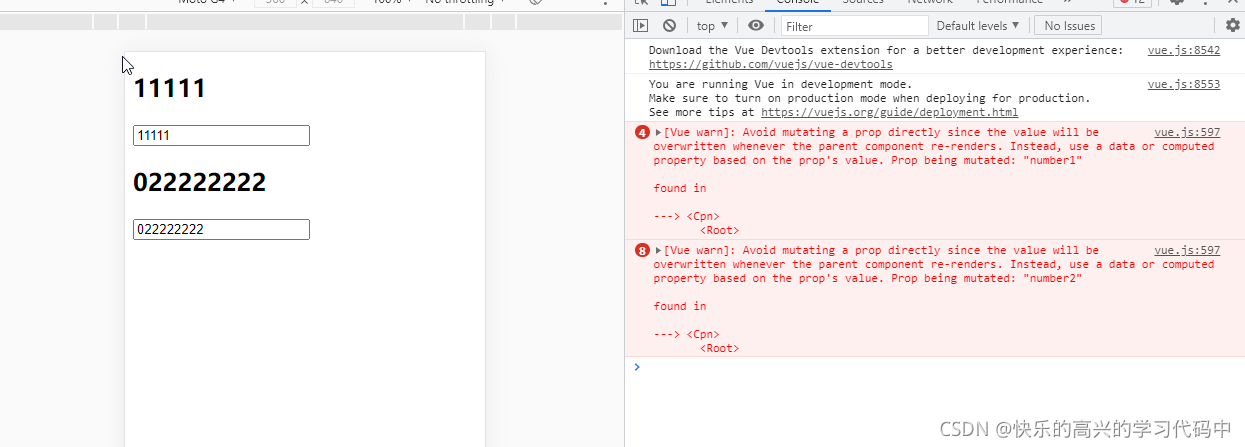
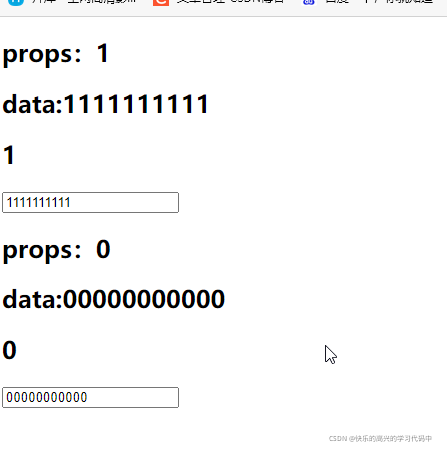
<!DOCTYPE html>
<html lang="en">
<head>
  <meta charset="UTF-8">
  <meta http-equiv="X-UA-Compatible" content="IE=edge">
  <meta name="viewport" content="width=device-width, initial-scale=1.0">
  <title>Document</title>
</head>
<body>
  <div id="app">
   <!-- <cpn :number1="num1"></cpn>
   <cpn :number2="num2"></cpn> -->
   <!-- 使用单标签也可以 -->
   <cpn :number1="num1" :number2="num2"></cpn>
  </div>
 <template id="cpn">
   <!-- 组件模板里必须要有根 -->
   <div>
   <!-- data和props值进行对比 -->
     <h2>props:{{number1}}</h2>
     <h2>data:{{dnumber1}}</h2>
     <h2>{{number1}}</h2>
     <!-- 以前绑定在date里,现在写在template中 -->
     <!-- <input type="text" v-model="number1"> -->
     <!-- v-model的值改为dnumber1是为了避免报错 -->
     <input type="text" v-model="dnumber1">
     <h2>props:{{number2}}</h2>
     <h2>data:{{dnumber2}}</h2>
     <h2>{{number2}}</h2>
     <!-- 有个很有趣的现象,当v-model的值一样时,输入一个框,两个值一起变 -->
     <!-- <input type="text" v-model="number2"> -->
     <input type="text" v-model="dnumber2">
   </div>
 </template>
  <script src="vue.js"></script>
  <script>
    const app=new Vue({
      el:"#app",
      data:{
        num1:1,
        num2:0
      },
      components:{
        cpn:{
          template:"#cpn",
          props:{
            number1:Number,
            number2:Number
          },
          // 写data和之后上面修改都是因为报错
          data(){
            return {
              dnumber1:this.number1,
              dnumber2:this.number2
            }
          }
        }
      }
    })
  </script>
</body>
</html>

<!DOCTYPE html>
<html lang="en">
<head>
  <meta charset="UTF-8">
  <meta http-equiv="X-UA-Compatible" content="IE=edge">
  <meta name="viewport" content="width=device-width, initial-scale=1.0">
  <title>Document</title>
</head>
<body>
  <div id="app">
   <!-- <cpn :number1="num1"></cpn>
   <cpn :number2="num2"></cpn> -->
   <!-- 使用单标签也可以 -->
   <!-- 加上@num1/2change -->
   <cpn :number1="num1" :number2="num2" @num1change="num1change" @num2change="num2change"></cpn>
  </div>
 <template id="cpn">
   <!-- 组件模板里必须要有根 -->
   <div>
   <!-- data和props值进行对比 -->
     <h2>props:{{number1}}</h2>
     <h2>data:{{dnumber1}}</h2>
     <h2>{{number1}}</h2>
     <!-- 以前绑定在date里,现在写在template中 -->
     <!-- <input type="text" v-model="number1"> -->
     <!-- v-model的值改为dnumber1是为了避免报错 -->
     <!-- <input type="text" v-model="dnumber1"> -->
     <!-- @input="dnumber1=$event.target.value" 等价于 methods 里的numInput-->
     <!-- <input type="text" :value="dnumber1" @input="dnumber1=$event.target.value"> -->
     <input type="text" :value="dnumber1" @input="num1Input">
     <h2>props:{{number2}}</h2>
     <h2>data:{{dnumber2}}</h2>
     <h2>{{number2}}</h2>
     <!-- 有个很有趣的现象,当v-model的值一样时,输入一个框,两个值一起变 -->
     <!-- <input type="text" v-model="number2"> -->
     <!-- <input type="text" v-model="dnumber2"> -->
     <input type="text" :value="dnumber2" @input="num2Input">
   </div>
 </template>
  <script src="vue.js"></script>
  <script>
    const app=new Vue({
      el:"#app",
      data:{
        num1:1,
        num2:0
      },
      methods: {
        num1change(value){
          // 看下value什么类型是否与设置符合 value--string
         // console.log(typepf value);
        //  不符合进行类型转换
        // this.num1=value
       // this.num1=value*1---- -这种可以
      this.num1=parseFloat(value)
        },
        num2change(value){
      this.num2=parseFloat(value)
        }
      },
      components:{
        cpn:{
          template:"#cpn",
          props:{
            number1:Number,
            number2:Number
          },
          // 写data和之后上面修改都是因为报错
          data(){
            return {
              dnumber1:this.number1,
              dnumber2:this.number2
            }
          },
          methods:{
            num1Input(event){
             this.dnumber1 = event.target.value;
            //  以事件的形式传出去
             this.$emit("num1change",this.dnumber1)
            },
            num2Input(event){
              this.dnumber2 = event.target.value;
              this.$emit("num2change",this.dnumber2)
            }
          }
        }
      }
    })
  </script>
</body>
</html>
下面的值是上面的100倍

<!DOCTYPE html>
<html lang="en">
<head>
  <meta charset="UTF-8">
  <meta http-equiv="X-UA-Compatible" content="IE=edge">
  <meta name="viewport" content="width=device-width, initial-scale=1.0">
  <title>Document</title>
</head>
<body>
  <div id="app">
   <!-- <cpn :number1="num1"></cpn>
   <cpn :number2="num2"></cpn> -->
   <!-- 使用单标签也可以 -->
   <!-- 加上@num1/2change -->
   <cpn :number1="num1" :number2="num2" @num1change="num1change" @num2change="num2change"></cpn>
  </div>
 <template id="cpn">
   <!-- 组件模板里必须要有根 -->
   <div>
   <!-- data和props值进行对比 -->
     <h2>props:{{number1}}</h2>
     <h2>data:{{dnumber1}}</h2>
     <h2>{{number1}}</h2>
     <!-- 以前绑定在date里,现在写在template中 -->
     <!-- <input type="text" v-model="number1"> -->
     <!-- v-model的值改为dnumber1是为了避免报错 -->
     <!-- <input type="text" v-model="dnumber1"> -->
     <!-- @input="dnumber1=$event.target.value" 等价于 methods 里的numInput-->
     <!-- <input type="text" :value="dnumber1" @input="dnumber1=$event.target.value"> -->
     <input type="text" :value="dnumber1" @input="num1Input">
     <h2>props:{{number2}}</h2>
     <h2>data:{{dnumber2}}</h2>
     <h2>{{number2}}</h2>
     <!-- 有个很有趣的现象,当v-model的值一样时,输入一个框,两个值一起变 -->
     <!-- <input type="text" v-model="number2"> -->
     <!-- <input type="text" v-model="dnumber2"> -->
     <input type="text" :value="dnumber2" @input="num2Input">
   </div>
 </template>
  <script src="vue.js"></script>
  <script>
    const app=new Vue({
      el:"#app",
      data:{
        num1:1,
        num2:0
      },
      methods: {
        num1change(value){
          // 看下value什么类型是否与设置符合 value--string
         // console.log(typepf value);
        //  不符合进行类型转换
        // this.num1=value
       // this.num1=value*1---- -这种可以
      this.num1=parseFloat(value)
        },
        num2change(value){
      this.num2=parseFloat(value)
        }
      },
      components:{
        cpn:{
          template:"#cpn",
          props:{
            number1:Number,
            number2:Number
          },
          // 写data和之后上面修改都是因为报错
          data(){
            return {
              dnumber1:this.number1,
              dnumber2:this.number2
            }
          },
          methods:{
            num1Input(event){
              // 将input中的value值赋值到dnumber中
             this.dnumber1 = event.target.value;
            //  为了让父组件可以修改值,发出一个事件
             this.$emit("num1change",this.dnumber1)
            //  可以同时修改dnumber2的值---但是只写这步props不会改
            this.dnumber2=this.dnumber1*100
            // 写了这步后,prop的值也会*100
            this.$emit('num2change',this.dnumber2);
            },
            num2Input(event){
              this.dnumber2 = event.target.value;
              this.$emit("num2change",this.dnumber2)


            this.dnumber1=this.dnumber2/100;
            this.$emit('num1change',this.dnumber1);
            }
          }
        }
      }
    })
  </script>
</body>
</html>
watch实现一样的效果
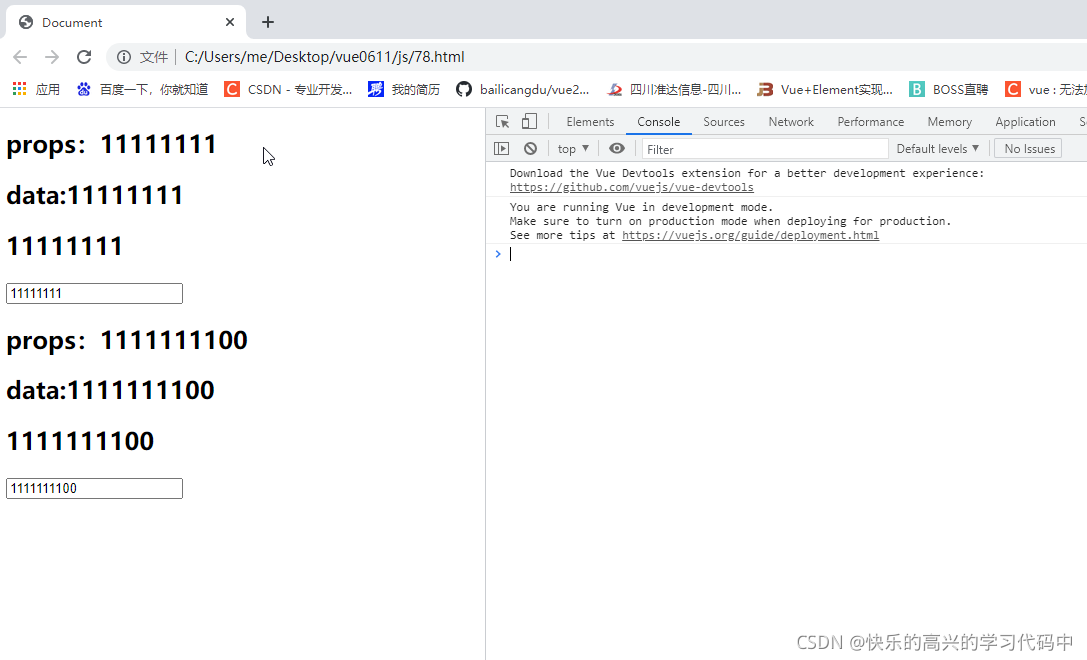
<!DOCTYPE html>
<html lang="en">
<head>
  <meta charset="UTF-8">
  <meta http-equiv="X-UA-Compatible" content="IE=edge">
  <meta name="viewport" content="width=device-width, initial-scale=1.0">
  <title>Document</title>
</head>
<body>
  <div id="app">
   <!-- <cpn :number1="num1"></cpn>
   <cpn :number2="num2"></cpn> -->
   <!-- 使用单标签也可以 -->
   <!-- 加上@num1/2change -->
   <cpn :number1="num1" :number2="num2" @num1change="num1change" @num2change="num2change"></cpn>
  </div>
 <template id="cpn">
   <!-- 组件模板里必须要有根 -->
   <div>
   <!-- data和props值进行对比 -->
     <h2>props:{{number1}}</h2>
     <h2>data:{{dnumber1}}</h2>
     <h2>{{number1}}</h2>
     <!-- 以前绑定在date里,现在写在template中 -->
     <!-- <input type="text" v-model="number1"> -->
     <!-- v-model的值改为dnumber1是为了避免报错 -->
     <!-- <input type="text" v-model="dnumber1"> -->
     <!-- @input="dnumber1=$event.target.value" 等价于 methods 里的numInput-->
     <!-- <input type="text" :value="dnumber1" @input="dnumber1=$event.target.value"> -->
     <input type="text" :value="dnumber1" @input="num1Input">
     <h2>props:{{number2}}</h2>
     <h2>data:{{dnumber2}}</h2>
     <h2>{{number2}}</h2>
     <!-- 有个很有趣的现象,当v-model的值一样时,输入一个框,两个值一起变 -->
     <!-- <input type="text" v-model="number2"> -->
     <!-- <input type="text" v-model="dnumber2"> -->
     <input type="text" :value="dnumber2" @input="num2Input">
   </div>
 </template>
  <script src="vue.js"></script>
  <script>
    const app=new Vue({
      el:"#app",
      data:{
        num1:1,
        num2:0
      },
      methods: {
        num1change(value){
          // 看下value什么类型是否与设置符合 value--string
         // console.log(typepf value);
        //  不符合进行类型转换
        // this.num1=value
       // this.num1=value*1---- -这种可以
      this.num1=parseFloat(value)
        },
        num2change(value){
      this.num2=parseFloat(value)
        }
      },
      components:{
        cpn:{
          template:"#cpn",
          props:{
            number1:Number,
            number2:Number
          },
          // 写data和之后上面修改都是因为报错
          data(){
            return {
              dnumber1:this.number1,
              dnumber2:this.number2
            }
          },
         watch:{
             dnumber1(newValue){
               this.dnumber2=newValue*100;
               this.$emit('num1change',newValue);
             },
             dnumber2(newValue){
               this.number1=newValue/100;
               this.$emit('num2change',newValue);
             }
         }
        }
      }
    })
  </script>
</body>
</html>
这里提了一下,也不是很懂
<!DOCTYPE html>
<html lang="en">
<head>
  <meta charset="UTF-8">
  <meta http-equiv="X-UA-Compatible" content="IE=edge">
  <meta name="viewport" content="width=device-width, initial-scale=1.0">
  <title>Document</title>
</head>
<body>
  <div id="app">
   <!-- <cpn :number1="num1"></cpn>
   <cpn :number2="num2"></cpn> -->
   <!-- 使用单标签也可以 -->
   <!-- 加上@num1/2change -->
   <cpn :number1="num1" :number2="num2" @num1change="num1change" @num2change="num2change"></cpn>
  </div>
 <template id="cpn">
   <!-- 组件模板里必须要有根 -->
   <div>
   <!-- data和props值进行对比 -->
     <h2>props:{{number1}}</h2>
     <h2>data:{{dnumber1}}</h2>
     <h2>{{number1}}</h2>
     <!-- 以前绑定在date里,现在写在template中 -->
     <!-- <input type="text" v-model="number1"> -->
     <!-- v-model的值改为dnumber1是为了避免报错 -->
     <!-- <input type="text" v-model="dnumber1"> -->
     <!-- @input="dnumber1=$event.target.value" 等价于 methods 里的numInput-->
     <!-- <input type="text" :value="dnumber1" @input="dnumber1=$event.target.value"> -->
     <input type="text" :value="dnumber1" @input="num1Input">
     <h2>props:{{number2}}</h2>
     <h2>data:{{dnumber2}}</h2>
     <h2>{{number2}}</h2>
     <!-- 有个很有趣的现象,当v-model的值一样时,输入一个框,两个值一起变 -->
     <!-- <input type="text" v-model="number2"> -->
     <!-- <input type="text" v-model="dnumber2"> -->
     <input type="text" :value="dnumber2" @input="num2Input">
   </div>
 </template>
  <script src="vue.js"></script>
  <script>
    const app=new Vue({
      el:"#app",
      data:{
        num1:1,
        num2:0
      },
      methods: {
        num1change(value){
          // 看下value什么类型是否与设置符合 value--string
         // console.log(typepf value);
        //  不符合进行类型转换
        // this.num1=value
       // this.num1=value*1---- -这种可以
      this.num1=parseFloat(value)
        },
        num2change(value){
      this.num2=parseFloat(value)
        }
      },
      components:{
        cpn:{
          template:"#cpn",
          props:{
            number1:Number,
            number2:Number,
            name:""
          },
          // 写data和之后上面修改都是因为报错
          data(){
            return {
              dnumber1:this.number1,
              dnumber2:this.number2
            }
          },
         watch:{
             dnumber1(newValue){
               this.dnumber2=newValue*100;
               this.$emit('num1change',newValue);
             },
             dnumber2(newValue){
               this.number1=newValue/100;
               this.$emit('num2change',newValue);
             },
            // 这两个值可以监听到newValue值的改变
            //  name(newValue,oldValue){
            //  }
         }
        }
      }
    })
  </script>
</body>
</html>
父子组件的访问方式
父组件访问子组件
$children $refs---reference(引用)
this.$children 是一个数组类型,它包含所有子组件对象
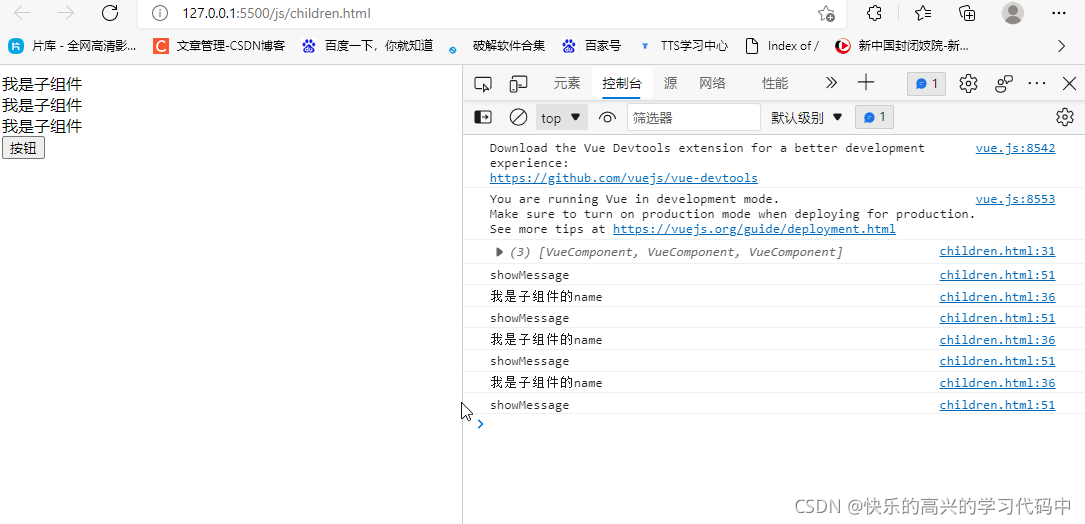
<!DOCTYPE html>
<html lang="en">
<head>
  <meta charset="UTF-8">
  <meta http-equiv="X-UA-Compatible" content="IE=edge">
  <meta name="viewport" content="width=device-width, initial-scale=1.0">
  <title>Document</title>
</head>
<body>

  <div id="app">
   <cpn></cpn>
   <cpn></cpn>
   <cpn></cpn>
   <button @click="btnClick">按钮</button>
  </div>


  <template id="cpn">
    <div>我是子组件</div>
  </template>
  <script src="vue.js"></script>
  <script>
    const app=new Vue({
      el:"#app",
      data:{
        message:"你好啊"
      },
      methods: {
        btnClick(){
       console.log(this.$children);
      //  这个可以获取到这个方法,cpn几个就会显示出来几个内容
       this.$children[0].showMessage();

       for(let c of this.$children){
         console.log(c.name);
         c.showMessage();
       }
        }
      },
      components:{
        cpn:{
          template:"#cpn",
          data(){
            return{
              name:"我是子组件的name"
            }
          },
          methods: {
            showMessage(){
              console.log("showMessage");
            }
          },
        }
      }
    })
  </script>
</body>
</html>
$refs---reference(引用)
就第一个老师打印出来-----{ }
第二个老师打印出来-----vueComponent{aaa}-----差不多长这样
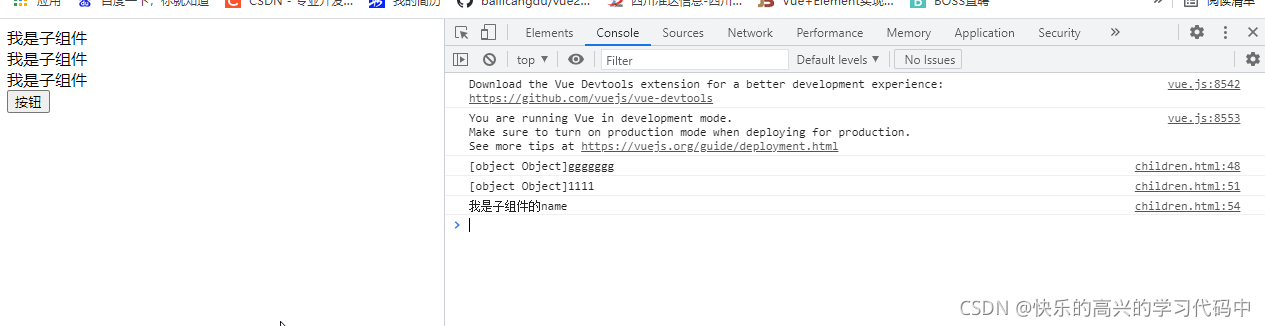
<!DOCTYPE html>
<html lang="en">
<head>
  <meta charset="UTF-8">
  <meta http-equiv="X-UA-Compatible" content="IE=edge">
  <meta name="viewport" content="width=device-width, initial-scale=1.0">
  <title>Document</title>
</head>
<body>

  <div id="app">
   <cpn></cpn>
   <cpn></cpn>
   <!-- 假设某一条插入了一个cpn 或者 my-cpn,用下标/数字去取会出错,不保险 -->
   <!-- 这就是children 的缺点-->
   <!-- <my-cpn></my-cpn> -->
   <!-- <cpn></cpn> -->
   <cpn ref="aaa"></cpn>
   <button @click="btnClick">按钮</button>
  </div>


  <template id="cpn">
    <div>我是子组件</div>
  </template>
  <script src="vue.js"></script>
  <script>
    const app=new Vue({
      el:"#app",
      data:{
        message:"你好啊"
      },
      methods: {
        btnClick(){
      //  console.log(this.$children);
      // //  这个可以获取到这个方法,cpn几个就会显示出来几个内容
      //  this.$children[0].showMessage();
      //  for(let c of this.$children){
      //    console.log(c.name);
      //    c.showMessage();
      //  }

      // 根据下标值获取上面的值--缺点,容易出错
      //console.log(this.$children[3].name);

      // $refs---就好多了
      // 直接拿{ } 空的对象
      console.log(this.$refs +"ggggggg");

     //在组件上加属性---ref=aaa 就可以指明了。--也可以避免误认的尴尬
     console.log(this.$refs.aaa +"1111");

    //加上name--更详细
    console.log(this.$refs.aaa.name);
      }
      },
      components:{
        cpn:{
          template:"#cpn",
          data(){
            return{
              name:"我是子组件的name"
            }
          },
          methods: {
            showMessage(){
              console.log("showMessage");
            }
          }
        }
      }
    })
  </script>
</body>
</html>
子组件访问父组件 ----今晚再看一遍
$parent

<!DOCTYPE html>
<html lang="en">
<head>
  <meta charset="UTF-8">
  <meta http-equiv="X-UA-Compatible" content="IE=edge">
  <meta name="viewport" content="width=device-width, initial-scale=1.0">
  <title>Document</title>

</head>
<body>
  <div id="app">
    <cpn></cpn>
  </div>

  <template id="cpn">
    <div>
    <h2>我是cpn组件</h2>
    <ccpn></ccpn>
    </div>
  </template>

<!-- 用ccpn来测试cpn是组件还是实例 -->
<template id="ccpn">
  <div>
    <h2>我是子组件</h2>
    <button @click="btnClick">按钮</button>
  </div>
</template>

<script src="js/vue.js"></script>
  <script>
    const app=new Vue({
      el:"#app",
      data:{
        message:"你好啊"
      },
      components:{
        cpn:{
          template:"#cpn",
          data(){
            return{
              name:"我是cpn的name"
            }
          },
          components:{
            ccpn:{
              template:"#ccpn",
              methods:{
                btnClick(){
                  //访问父组件
                  console.log(this.$parent);
                  console.log(this.$parent.name);
                }
              }
            }
          }
          }
        },

    })
  </script>
</body>
</html>
$root

<!DOCTYPE html>
<html lang="en">
<head>
  <meta charset="UTF-8">
  <meta http-equiv="X-UA-Compatible" content="IE=edge">
  <meta name="viewport" content="width=device-width, initial-scale=1.0">
  <title>Document</title>

</head>
<body>
  <div id="app">
    <cpn></cpn>
  </div>

  <template id="cpn">
    <div>
    <h2>我是cpn组件</h2>
    <ccpn></ccpn>
    </div>
  </template>

<!-- 用ccpn来测试cpn是组件还是实例 -->
<template id="ccpn">
  <div>
    <h2>我是子组件</h2>
    <button @click="btnClick">按钮</button>
  </div>
</template>

<script src="js/vue.js"></script>
  <script>
    const app=new Vue({
      el:"#app",
      data:{
        message:"你好啊"
      },
      components:{
        cpn:{
          template:"#cpn",
          data(){
            return{
              name:"我是cpn的name"
            }
          },
          components:{
            ccpn:{
              template:"#ccpn",
              methods:{
                btnClick(){
                  // 但是parent 不够独立--缺点
                  //访问父组件
                  //console.log(this.$parent);
                 // console.log(this.$parent.name);

                  //  vue--实例    vuecomponent---组件
                 //  访问根组件 $root
                 console.log(this.$root);
                 console.log(this.$root.message);
                }
              }
            }
          }
          }
        }
    })
  </script>
</body>
</html>
slot--插槽的基本使用
组件的插槽
组件的插槽是为了让封装的组件更加具有扩展性
让使用者可以决定组件内部的一些内容到底展示什么
eg:导航栏就可以利用slot进行内容区别展示
插槽利用方式一 抽取共性,保留不同
总结一下,就是利用插槽的预占空间,不需要就不用,需要就在具体的案列上进行改动

<!DOCTYPE html>
<html lang="en">
<head>
  <meta charset="UTF-8">
  <meta http-equiv="X-UA-Compatible" content="IE=edge">
  <meta name="viewport" content="width=device-width, initial-scale=1.0">
  <script src="js/vue.js"></script>
  <title>Document</title>
</head>
<body>
  <div id="app">
    <!-- 要求4个不同内容  利用插槽-->
    <!-- 最后一个只有h2 p 内容 -->
    <!-- 前三个h2 p内容相同,还有一个内容不同 -->
  <cpn><button>一年后我就是有钱人了</button></cpn>
  <cpn><span>身体健康天天开心</span></cpn>
  <cpn><i>喜欢学习有知识输出</i></cpn>
  <cpn></cpn>
  </div>

  <template id="cpn">
    <div>
      <h2>我是大可爱</h2>
      <p>我是大可爱,害羞害羞</p>
      <slot></slot>
    </div>
  </template>
  <script>
  const app=new Vue({
    el:"#app",
    data:{
      message:"你好啊"
    },
    components:{
      cpn:{
        template:"#cpn"
      }
    }
  })
  </script>
</body>
</html>
插槽利用方式二 利用插槽默认值,具体再改动
<!DOCTYPE html>
<html lang="en">
<head>
  <meta charset="UTF-8">
  <meta http-equiv="X-UA-Compatible" content="IE=edge">
  <meta name="viewport" content="width=device-width, initial-scale=1.0">
  <script src="js/vue.js"></script>
  <title>Document</title>
</head>
<body>
  <div id="app">
  <cpn></cpn>
  <cpn></cpn>
  <cpn></cpn>
  <cpn>
    <i>许愿成为百万富婆</i><br/>
    <i>时间在一年内</i><br/>
    <i>方式是....</i>
  </cpn>
  </div>

  <template id="cpn">
    <div>
      <!-- h2是大写的字,容易忽略掉它,以后再看这个案例,别又忘记了,还说为什么只有两个内容 -->
      <!-- slot里的内容被直接替换了,是对的,记住啊 -->
      <h2>我是可爱的人</h2>
      <p>我是大可爱,害羞害羞</p>
      <slot>我是富有的人,开心</slot>
    </div>
  </template>
  <script>
  const app=new Vue({
    el:"#app",
    data:{
      message:"你好啊"
    },
    components:{
      cpn:{
        template:"#cpn"
      }
    }
  })
  </script>
</body>
</html>
插槽利用方式三 具名插槽
给插槽起名,并其余插槽名字自由更改内容

<!DOCTYPE html>
<html lang="en">
<head>
  <meta charset="UTF-8">
  <meta http-equiv="X-UA-Compatible" content="IE=edge">
  <meta name="viewport" content="width=device-width, initial-scale=1.0">
  <script src="js/vue.js"></script>
  <title>Document</title>
</head>
<body>
  <div id="app">
    <!-- 要求,第一个左边内容改为 左三圈   第二个右边改为右三圈 第三个不变-->
  <cpn><span slot="left">左三圈</span></cpn>
  <cpn><i slot="right">右三圈</i></cpn>
  <cpn></cpn>
  </div>

  <template id="cpn">
    <div>
      <!-- 利用插槽名字想改什么内容就该什么内容 -->
     <slot name="left"><span>左边</span></slot>
     <slot name="center"><span>中间</span></slot>
     <slot name="right"><span>右边</span></slot>
    </div>
  </template>
  <script>
  const app=new Vue({
    el:"#app",
    data:{
      message:"你好啊"
    },
    components:{
      cpn:{
        template:"#cpn"
      }
    }
  })
  </script>
</body>
</html>
编译作用域---为作用域插槽打基础
父组件的所有内容会在父级作用域内编译,子组件的所有内容在子级作用域内编译
基础

<!DOCTYPE html>
<html lang="en">
<head>
  <meta charset="UTF-8">
  <meta http-equiv="X-UA-Compatible" content="IE=edge">
  <meta name="viewport" content="width=device-width, initial-scale=1.0">
  <title>Document</title>
<script src="js/vue.js"></script>
</head>
<body>
  <div id="app">
    <cpn></cpn>
  </div>

  <template id="cpn">
    <div>
      <h2>我是子组件</h2>
      <p>我是内容,哈哈哈</p>
    </div>
  </template>
  <script>
    const app=new Vue({
      el:"#app",
      data:{
        message:"你好啊"
      },
      components:{
        cpn:{
          template:"#cpn"
        }
      }
    })
  </script>
</body>
</html>
作用域部分
通过isShow来说明
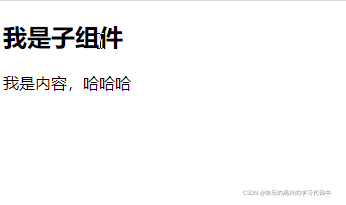
<!DOCTYPE html>
<html lang="en">
<head>
  <meta charset="UTF-8">
  <meta http-equiv="X-UA-Compatible" content="IE=edge">
  <meta name="viewport" content="width=device-width, initial-scale=1.0">
  <title>Document</title>
<script src="js/vue.js"></script>
</head>
<body>
  <div id="app">
    <cpn v-show="isShow"></cpn>
  </div>

  <template id="cpn">
    <div>
      <h2>我是子组件</h2>
      <p>我是内容,哈哈哈</p>
    </div>
  </template>
  <script>
    const app=new Vue({
      el:"#app",
      data:{
        message:"你好啊",
        // 这里的isShow是全局
        isShow:true
      },
      components:{
        cpn:{
          template:"#cpn",
          data(){
            return{
              isShow:false
            }
          }
        }
      }
    })
  </script>
</body>
</html>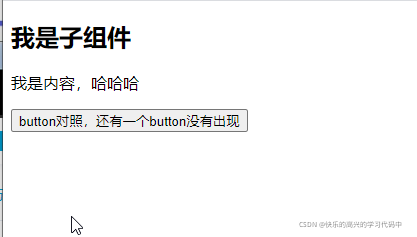
<!DOCTYPE html>
<html lang="en">
<head>
  <meta charset="UTF-8">
  <meta http-equiv="X-UA-Compatible" content="IE=edge">
  <meta name="viewport" content="width=device-width, initial-scale=1.0">
  <title>Document</title>
<script src="js/vue.js"></script>
</head>
<body>
  <div id="app">
    <cpn v-show="isShow"></cpn>
  </div>

  <template id="cpn">
    <div>
      <h2>我是子组件</h2>
      <p>我是内容,哈哈哈</p>
      <button v-show="isShow">isShow不会出现在页面中,因为值是false</button>
      <button>button对照,还有一个button没有出现</button>
    </div>
  </template>
  <script>
    const app=new Vue({
      el:"#app",
      data:{
        message:"你好啊",
        // 这里的isShow是全局
        isShow:true
      },
      components:{
        cpn:{
          template:"#cpn",
          data(){
            return{
              isShow:false
            }
          }
        }
      }
    })
  </script>
</body>
</html>
作用域插槽
父组件替换插槽的标签,但是内容是由子组件来提供
基础

<!DOCTYPE html>
<html lang="en">
<head>
  <meta charset="UTF-8">
  <meta http-equiv="X-UA-Compatible" content="IE=edge">
  <meta name="viewport" content="width=device-width, initial-scale=1.0">
  <title>Document</title>
  <script src="js/vue.js"></script>
</head>
<body>
  <div id="app">
   <cpn></cpn>
  </div>

  <template id="cpn">
    <div>
      <ul>
        <li v-for="item in Language">{{item}}</li>
      </ul>
    </div>
  </template>
  <script>
    const app=new Vue({
      el:"#app",
      data:{
        message:"你好"
      },
      components:{
        cpn:{
          template:"#cpn",
          data(){
            return{
              Language:["html","css","js","vue"]
            }
          }
        }
      }
    })
  </script>
</body>
</html>
现在想要样式有所改变

<!DOCTYPE html>
<html lang="en">
<head>
  <meta charset="UTF-8">
  <meta http-equiv="X-UA-Compatible" content="IE=edge">
  <meta name="viewport" content="width=device-width, initial-scale=1.0">
  <title>Document</title>
  <script src="js/vue.js"></script>
</head>
<body>
  <div id="app">
   <cpn></cpn>
   <!-- 第二个样式改变,因为加了slot -->
   <cpn>
     <!-- 获取子组件中的Language -->
     <!-- templat/div都可以 -->
     <!-- 通过slot来引入刚刚的插槽 -->
     <template slot-scope="slot">
       <!-- slot.data   slot引用插槽 data绑定了数据源Language-->
     <span v-for="item in slot.data">{{item}} --</span>
     </template>
   </cpn>

   <cpn>
    <template slot-scope="slot">
      <span v-for="item in slot.data">{{item}} ❀</span>
    </template>
   </cpn>
  </div>

  <template id="cpn">
    <div>
     <slot :data="Language">
      <ul>
        <li v-for="item in Language">{{item}}</li>
      </ul>
     </slot>
    </div>
  </template>
  <script>
    const app=new Vue({
      el:"#app",
      data:{
        message:"你好"
      },
      components:{
        cpn:{
          template:"#cpn",
          data(){
            return{
              Language:["html","css","js","vue"]
            }
          }
        }
      }
    })
  </script>
</body>
</html>
去掉多余的-/❀

<!DOCTYPE html>
<html lang="en">
<head>
  <meta charset="UTF-8">
  <meta http-equiv="X-UA-Compatible" content="IE=edge">
  <meta name="viewport" content="width=device-width, initial-scale=1.0">
  <title>Document</title>
  <script src="js/vue.js"></script>
</head>
<body>
  <div id="app">
   <cpn></cpn>
   <!-- 第二个样式改变,因为加了slot -->
   <cpn>
     <!-- 获取子组件中的Language -->
     <!-- templat/div都可以 -->
     <!-- 通过slot来引入刚刚的插槽 -->
     <template slot-scope="slot">
       <!-- slot.data   slot引用插槽 data绑定了数据源Language-->
     <!-- <span v-for="item in slot.data">{{item}} --</span> -->
     <span>{{slot.data.join('-')}}</span>
     </template>
   </cpn>

   <cpn>
    <template slot-scope="slot">
      <!-- <span v-for="item in slot.data">{{item}} ❀</span> -->
      <span>{{slot.data.join('❀')}}</span>
    </template>
   </cpn>
  </div>

  <template id="cpn">
    <div>
     <slot :data="Language">
      <ul>
        <li v-for="item in Language">{{item}}</li>
      </ul>
     </slot>
    </div>
  </template>
  <script>
    const app=new Vue({
      el:"#app",
      data:{
        message:"你好"
      },
      components:{
        cpn:{
          template:"#cpn",
          data(){
            return{
              Language:["html","css","js","vue"]
            }
          },
          // 去掉多余的- ❀
          created(){
             this.Language.join('-')
          }
        }
      }
    })
  </script>
</body>
</html>
CLI脚手架
路由 vue-router
认识路由
vue-router基本使用
vue-router嵌套路由
vue-router 参数传递
vue-router 导航守卫
keep-alive
路由就是通过互联的网络把信息从源地址传输到目的地址的活动。
单页面富应用阶段
spa主要特点就是在前后端分离的基础上加了一层前端路由
也就是前端维护一套路由规则
前端路由的核心
改变url,但是页面不进行整体的刷新
urL的hash
url的hash就是锚点,本质上是改变window.location的href属性
可以通过location.hash来改变href,但是页面不发生刷新
url的history
pushState 与replaceState
history go
vue-router
vue-router是vue.js官方的路由插件
vue-router用于设定访问路径,将路径和组件映射起来
在vue-router的单页面应用中,页面路径的改变就是组件的切换
安装路由
前提----安装好脚手架
vs打开界面,输入命令
vue create 项目名字,然后会有一个版本选择2/3,我选择的是2,然后cd vue-router
$ npm run serve 敲出现的这两句话,然后没报错,出现网址就对了
安装路由
命令行黑色界面
npm install vue-router@3.5.4 --save
安装好后,新建文件夹router,再在文件夹里新建文件index.js,写入代码
// 配置路由相关的信息
import VueRouter from 'vue-router'
import Vue from 'vue'

// 1.通过vue.use安装插件
Vue.use(VueRouter);

// 2.创建vueRouter对象
const routes = [

]
const router = new VueRouter({
  routes
})

// 3.将router对象传入到vue实例
export default router
在main.js文件里引入router
import Vue from 'vue'
import App from './App.vue'
import router from './router'

Vue.config.productionTip = false

new Vue({
  render: h => h(App),
  router,
}).$mount('#app')
配置路由映射关系
先把没用的删除了,components文件夹下的helloword.vue删掉,app.vue里面清除成下面这样
<template>
  <div id="app">

  </div>
</template>

<script>
export default {
  name: 'App',
}
</script>

<style>

</style>
在components下面新建两个文件About.vue和Home.vue,并写一点内容
<template>
  <div>
     <h2>我是首页</h2>
    <p>我是首页内容,哈哈哈哈</p>
  </div>
</template>

<script>
  export default {
    name:'Home'
}
</script>

<style scoped>

</style>
<template>
<div>
<h2>我是关于</h2>
<p>关于,呵呵呵呵</p>
</div>
</template>
<script>
export default {
name:"About"
}
</script>
<style scoped>
</style>
在index.js文件中配置路径
// 配置路由相关的信息
import VueRouter from 'vue-router'
import Vue from 'vue'

import Home from '../components/Home'
import About from '../components/About'

// 1.通过vue.use安装插件
Vue.use(VueRouter);

// 2.创建vueRouter对象
const routes = [
  {
    path:'/home',
    compoent:Home
  },
  {
    path:'/about',
    compoent:About
  }
]
const router = new VueRouter({
  routes
})

// 3.将router对象传入到vue实例
export default router
在app.vue中显示页面
<template>
  <div id="app">
   <router-link to="/home">首页</router-link>
   <router-link to="/about">关于</router-link>
      <!-- 页面内容 -->
   <router-view></router-view>
  </div>
</template>

<script>
export default {
  name: 'App',
}
</script>

<style>

</style>
最终效果图

路由自动跳转到首页-路由的默认值
自动指向首页,router-view自动渲染首页
path配置的是根路径/
redirect重定向
mode:history/hash(#)----index.js里修改
index.js文件自动指向首页
// 配置路由相关的信息
import VueRouter from 'vue-router'
import Vue from 'vue'

import Home from '../components/Home'
import About from '../components/About'

// 1.通过vue.use安装插件
Vue.use(VueRouter);

// 2.创建vueRouter对象
const routes = [
  {
    // 一打开就跳转到这个页面
    path:'',
    redirect:'/home',
  },
  {
    path:'/home',
    component:Home
  },
  {
    path:'/about',
    component:About
  }
]
const router = new VueRouter({
  routes,
  // 切换hash/history模式
  mode:'history'

})

// 3.将router对象传入到vue实例
export default router
在main.js修改路由hash/history模式
import Vue from 'vue'
import App from './App.vue'
import router from './router'

Vue.config.productionTip = false

new Vue({
  render: h => h(App),
  router,
  // 切换hash/history模式
  mode:'history'
}).$mount('#app')
router-link属性
router-link一般会被渲染成a标签
to----跳转到写的路径
tag------tag="xx" 等于什么就是什么属性
replace----页面不能后退
active-class:-------改变页面样式简写active-class="active",再在style里写上active的样式就行
修改多个样式,在routerde1inex.js中添加属性router-link-active:"active"就行(这个值可以自己随意取),上一个页面保留active的style样式
eg:app.js修改router-link代码
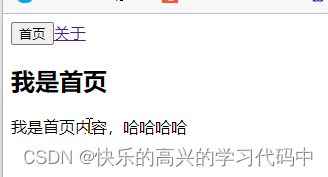
<template>
  <div id="app">
   <router-link to="/home" tag="button">首页</router-link>
   <router-link to="/about">关于</router-link>
   <!-- 页面内容 -->
   <router-view></router-view>
  </div>
</template>

<script>
export default {
  name: 'App',
}
</script>

<style>

</style>
eg:页面点击后退符号<-没有用
<template>
  <div id="app">
   <router-link to="/home" tag="button" replace>首页</router-link>
   <router-link to="/about">关于</router-link>
   <!-- 页面内容 -->
   <router-view></router-view>
  </div>
</template>

<script>
export default {
  name: 'App',
}
</script>

<style>

</style>
eg:router-link的active-class修改一个
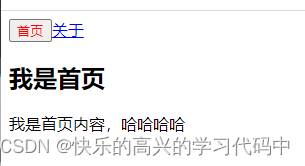
<template>
  <div id="app">
   <router-link to="/home" tag="button" replace active-class="cool">首页</router-link>
   <router-link to="/about">关于</router-link>
   <!-- 页面内容 -->
   <router-view></router-view>
  </div>
</template>

<script>
export default {
  name: 'App',
}
</script>

<style>
.cool{
  color:red;
}
</style>
eg:router-link的active-class修改多个,在router下的index.js文件中添加属性linkActiveClass,app页面保留.active样式
// 配置路由相关的信息
import VueRouter from 'vue-router'
import Vue from 'vue'

import Home from '../components/Home'
import About from '../components/About'

// 1.通过vue.use安装插件
Vue.use(VueRouter);

// 2.创建vueRouter对象
const routes = [
  {
    // 一打开就跳转到这个页面
    path:'',
    redirect:'/home',
  },
  {
    path:'/home',
    component:Home
  },
  {
    path:'/about',
    component:About
  }
]
const router = new VueRouter({
  routes,
  linkActiveClass:'active'
})

// 3.将router对象传入到vue实例
export default router
<template>
<div id="app">
<router-link to="/home" tag="button" replace >首页</router-link>
<router-link to="/about">关于</router-link>
<!-- 页面内容 -->
<router-view></router-view>
</div>
</template>
<script>
export default {
name: 'App',
}
</script>
<style>
.active{
color:red;
}
</style>通过代码跳转路由$router
this.$router.push =====push----pushState 可以前进后退
this.$router.replace======push---replaceState 不可以前进后退

<template>
  <div id="app">
   <!-- <router-link to="/home" tag="button" replace >首页</router-link>
   <router-link to="/about">关于</router-link> -->
   <button @click="homeClick">首页</button>
   <button @click="aboutClick">关于</button>
   <!-- 页面内容 -->
   <router-view></router-view>
  </div>
</template>

<script>
export default {
  name: 'App',
  methods:{
    homeClick(){
      this.$router.push('/home');
      console.log('home');
    },
    aboutClick(){
      this.$router.push('/about');
      console.log('about');
    }
  }
}
</script>

<style>
.active{
  color:red;
}
</style>
动态路由
path和component的匹配关系,称为动态路由(由路由传递数据的一种方式)
就是下面这种情况,各种结合使用
{
path:‘/user/:id’,
component:User
}
<div>
<h2>{{$route.params.id}}</h2>
</div>
<router-link to="/user/123">用户<router-link>
eg:在components文件夹下新建文件User.vue,在index.js里配置引入路径,在app页面写上它。
user页面代码
<template>
  <div>
    <h2>我是用户</h2>
    <p>我暴富了,申请平台兑款</p>
    <h2>{{userId}}</h2>
  </div>
</template>

<script>
  export default {
    name:"User",
    computed:{
      userId(){
        // $route.params 获取到活跃状态的信息
        return this.$route.params.userId
      }
    }
}
</script>

<style scoped>

</style>
index.js代码
// 配置路由相关的信息
import VueRouter from 'vue-router'
import Vue from 'vue'

import Home from '../components/Home'
import About from '../components/About'
import User from '../components/User'

// 1.通过vue.use安装插件
Vue.use(VueRouter);

// 2.创建vueRouter对象
const routes = [
  {
    // 一打开就跳转到这个页面
    path:'',
    redirect:'/home',
  },
  {
    path:'/home',
    component:Home
  },
  {
    path:'/about',
    component:About
  },{
    // 动态路由:
    path:'/user/:userId',
    component:User
  }
]
const router = new VueRouter({
  routes,
  // linkActiveClass:'active'
  // 切换hash/history模式
  mode:'history'

})

// 3.将router对象传入到vue实例
export default router
app.js上
<template>
  <div id="app">
   <router-link to="/home" tag="button" replace >首页</router-link>
   <router-link to="/about">关于</router-link>
   <!-- 用v-bind绑定数据 -->
   <router-link :to="'/user/'+userId">用户</router-link>
   <!-- <button @click="homeClick">首页</button>
   <button @click="aboutClick">关于</button> -->
   <!-- 页面内容 -->
   <router-view></router-view>
  </div>
</template>

<script>
export default {
  name: 'App',
  // 模拟获取的动态数据
  data(){
   return{
    userId:'Kevin'
   }
  }

}
</script>

<style>
.active{
  color:red;
}
</style>
vue-router打包文件的解析
dist打包下js里的三个文件 app.xx 我们写的 vendor.xx第三方插件比如vue/vue-router等、manifest.xx
路由懒加载
打包构建应用时,js包会变得非常大,影响页面加载,但如果把对应的组件分割成不同的代码块,当路由被访问的时候加载对应的组件就会更高效
路由会定义很多不同的页面,一般情况下,会放在一个js文件中,所以请求会很慢,为了解决这种状况,可使用路由懒加载
作用:
将路由对应的组件打包成一个个的js代码块
在这个路由被访问到的时候,才加载对应的组件
路由打包 npm run build
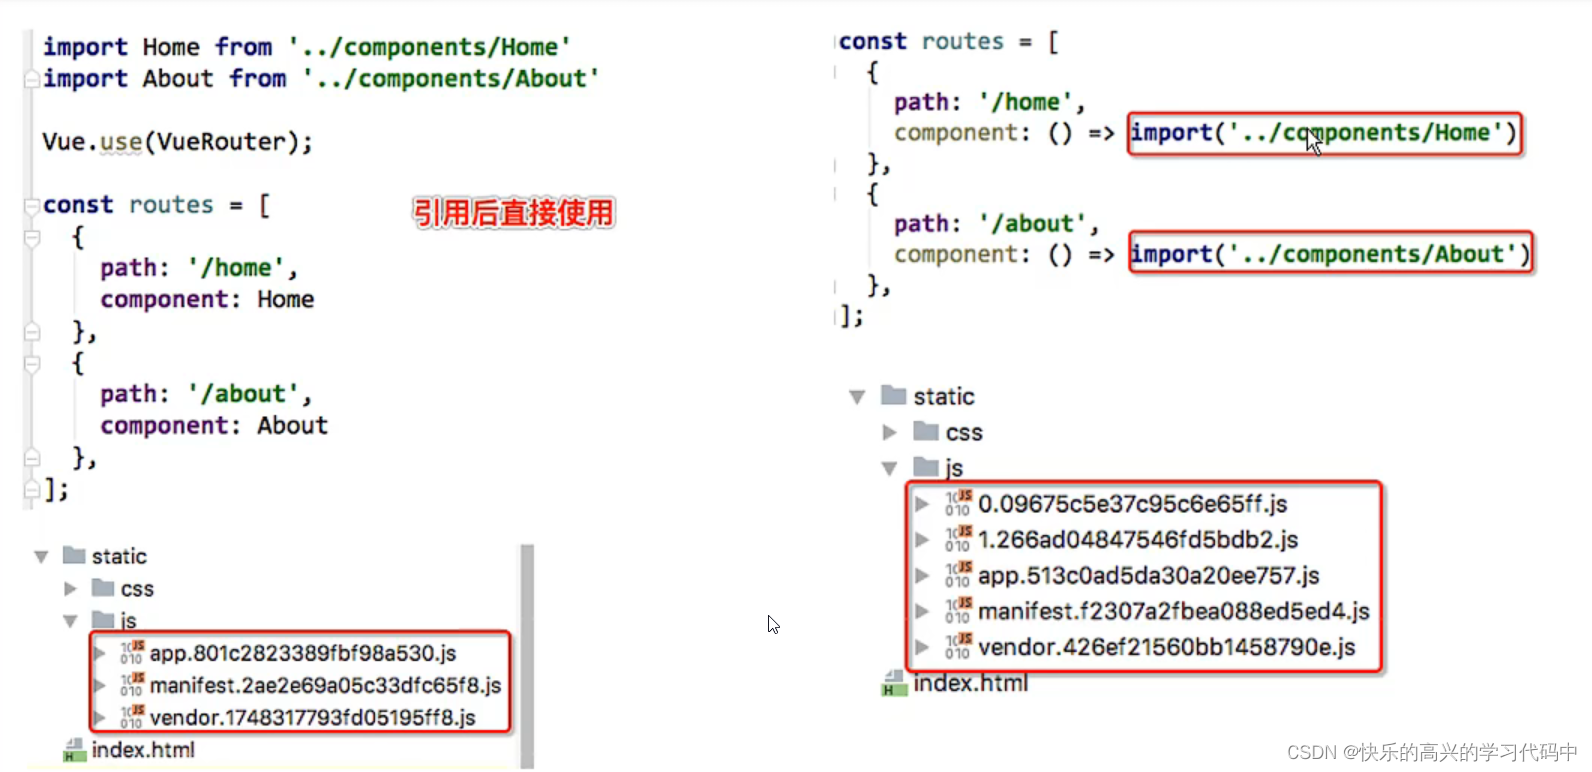
写懒加载方式
vue异步组件+webpack
const Home = resolve => {require.ensure(['../components/Home.vue'],()=>{resolve(require('../components/Home.vue'))})};
Amd
const About = resolve => require(['../components/About.vue'],resolve);
es6,现在使用的方式
const Home = () =>import('../components/Home.vue')
案列:懒加载 index.js修改代码
// 配置路由相关的信息
import VueRouter from 'vue-router'
import Vue from 'vue'

// 一般路由写法
// import Home from '../components/Home'
// import About from '../components/About'
// import User from '../components/User'

// 路由懒加载写法一 推荐写法
const Home = () => import('../components/Home')
const About = () => import('../components/About')
const User = () => import('../components/User')

// 1.通过vue.use安装插件
Vue.use(VueRouter);

// 2.创建vueRouter对象
const routes = [
  {
    // 一打开就跳转到这个页面
    path:'',
    redirect:'/home',
  },
  {
    path:'/home',
    component:Home
    // 路由懒加载写法二
    // component:()=>  import('../components/Home')
  },
  {
    path:'/about',
    component:About
  },{
    // 动态路由:
    path:'/user/:userId',
    component:User
  }
]
const router = new VueRouter({
  routes,
  // linkActiveClass:'active'
  // 切换hash/history模式
  mode:'history'

})

// 3.将router对象传入到vue实例
export default router
路由的嵌套
一个路径映射一个组件,访问这两个路径也会分别渲染两个组件,就是使用children
比如home 下有两个news /message 就是 /home/news /home/message就可以先使用路由嵌套
先创建对应的子组件页面Homenews、homeMessage和在index.js中使用chidren写上嵌套的路由homeMessage、homeNews,在home页面使用router-link跳转使用router-view组件


Home Message.vue页面代码
<template>
  <div>
    <ul>
      <li>message1</li>
      <li>message2</li>
      <li>message3</li>
      <li>message4</li>
    </ul>
  </div>
</template>

<script>
  export default {
    name:'HomeMessage'
}
</script>

<style scoped>

</style>
HomeNews.vue页面代码
<template>
  <div>
    <ul>
      <li>news1</li>
      <li>news2</li>
      <li>news3</li>
      <li>news4</li>
    </ul>
  </div>
</template>

<script>
  export default {
    name:'HomeNews'
}
</script>

<style scoped>

</style>
index.js代码
// 配置路由相关的信息
import VueRouter from 'vue-router'
import Vue from 'vue'

// 一般路由写法
// import Home from '../components/Home'
// import About from '../components/About'
// import User from '../components/User'

// 路由懒加载写法一 推荐写法
const Home = () => import('../components/Home')
const HomeNews = () => import('../components/HomeNews')
const HomeMessage = () => import('../components/HomeMessage')

const About = () => import('../components/About')
const User = () => import('../components/User')

// 1.通过vue.use安装插件
Vue.use(VueRouter);

// 2.创建vueRouter对象
const routes = [
  {
    // 一打开就跳转到这个页面
    path:'',
    redirect:'/home',
  },
  {
    path:'/home',
    component:Home,
    // 路由嵌套
    children:[
      {
      path:'',
      redirect:'message'
      },
      {
        path:'message',
        component:HomeMessage
      },
      {
        path:'news',
        component:HomeNews
      }
    ]
  },
  {
    path:'/about',
    component:About
  },{
    // 动态路由:
    path:'/user/:userId',
    component:User
  }
]
const router = new VueRouter({
  routes,
  // linkActiveClass:'active'
  // 切换hash/history模式
  mode:'history'

})

// 3.将router对象传入到vue实例
export default router
Home.vue页面代码
<template>
  <div>
     <h2>我是首页</h2>
    <p>我是首页内容,哈哈哈哈</p>
    <!-- 首页加router-view 占位子路由 -->
    <router-link to="/home/message">消息</router-link>
    <router-link to="/home/news">新闻</router-link>
    <router-view></router-view>
  </div>
</template>

<script>
  export default {
    name:'Home'
}
</script>

<style scoped>

</style>
Vue-router路由参数传递
传递参数有两种类型 params和query
params的类型
配置路由格式:/router/:id
传递的方式:在path后面跟上对应的值
传递后形成的路径 :/router/123,/router/abc
query的类型
配置路由格式:/router,也就是普通配置
传递的方式:对象中使用queryd的key作为传递方式
传递后形成的路径:/router?id=123,/router?id=abc
params前面做过
query案列

新建组件Profile.vue
Profile.vue代码
<template>
  <div>
    <h2>我是Profile</h2>
    <!-- 获取到地址里的所有值 -->
    <h3>{{$route.query}}</h3>
    <!-- 获取地址里的某个值 -->
    <h3>{{$route.query.name}}</h3>
    <h3>{{$route.query.age}}</h3>
  </div>
</template>

<script>
  export default {
    name:'Profile'
}
</script>

<style scoped>

</style>
index.js里引入组件profile
// 配置路由相关的信息
import VueRouter from 'vue-router'
import Vue from 'vue'

// 一般路由写法
// import Home from '../components/Home'
// import About from '../components/About'
// import User from '../components/User'

// 路由懒加载写法一 推荐写法
const Home = () => import('../components/Home')
const HomeNews = () => import('../components/HomeNews')
const HomeMessage = () => import('../components/HomeMessage')

const About = () => import('../components/About')
const User = () => import('../components/User')
const Profile = () =>import('../components/Profile')

// 1.通过vue.use安装插件
Vue.use(VueRouter);

// 2.创建vueRouter对象
const routes = [
  {
    // 一打开就跳转到这个页面
    path:'',
    redirect:'/home',
  },
  {
    path:'/home',
    component:Home,
    // 路由嵌套
    children:[
      {
      path:'',
      redirect:'message'
      },
      {
        path:'message',
        component:HomeMessage
      },
      {
        path:'news',
        component:HomeNews
      }
    ]
  },
  {
    path:'/about',
    component:About
  },{
    // 动态路由:
    path:'/user/:userId',
    component:User
  },{
    path:'/profile',
    component:Profile
  }
]
const router = new VueRouter({
  routes,
  // linkActiveClass:'active'
  // 切换hash/history模式
  mode:'history'

})

// 3.将router对象传入到vue实例
export default router
app.vue里面传入想要的数据和位置
<template>
  <div id="app">
   <router-link to="/home" tag="button" replace >首页</router-link>
   <router-link to="/about">关于</router-link>
   <!-- 用v-bind绑定数据 -->
   <router-link :to="'/user/'+userId">用户</router-link>
   <!-- 要想{}生效,必须使用v-bind -->
  <router-link :to="{path:'/profile',query:{name:'Kevin',age:18,height:1.88}}">档案</router-link>
   <router-view></router-view>
  </div>
</template>

<script>
export default {
  name: 'App',
  // 模拟获取的动态数据
  data(){
   return{
    userId:'Kevin'
   }
  }
}

</script>

<style>
.active{
  color:red;
}
</style>
案列:当把router-link改为button时
只需要把query案列,就是上面那个例子里面的app.vue里的代码改变一下就行

<template>
  <div id="app">
   <router-link to="/home" tag="button" replace >首页</router-link>
   <router-link to="/about">关于</router-link>
   <button @click="userClick">用户</button>
   <button @click="profileClick">档案</button>
   <router-view></router-view>
  </div>
</template>

<script>
export default {
  name: 'App',
  // 模拟获取的动态数据
  data(){
   return{
    userId:'Kevin'
   }
  },
  methods:{
   userClick(){
    this.$router.push('/user/' + this.userId)
   },
   profileClick(){
    this.$router.push({
      path:'/profile',
      query:{
        name:'Kevin',
        age:19,
        height:1.98
      }
    })
  }
}
}
</script>

<style>
.active{
  color:red;
}
</style>
router和route
router所有的路由信息,可以获取到name/path/query/params
route在用的具体路由信息,如果需要导航到不同的url可以使用$router.push

如何打印
在user.vue中添加一个按钮,在方法中打印,点击按钮出现。在main.js中打印router,页面一打开就出现
user.vue代码
<template>
  <div>
    <h2>我是用户</h2>
    <p>我暴富了,申请平台兑款</p>
    <!-- <h2>{{userId}}</h2> -->
    <button @click="btnClick">按钮</button>
  </div>
</template>

<script>
  export default {
    name:"User",
    // computed:{
    //   userId(){
    //     // $route.params 获取到活跃状态的信息
    //     return this.$route.params.userId
    //   }
    // },
    methods:{
      btnClick(){
        // 所有的组件都继承自vue类的原型
        console.log(this.$router,"router");
        console.log(this.$route,"route");
      }
    }
}
</script>

<style scoped>

</style>
main.js代码
import Vue from 'vue'
import App from './App.vue'
import router from './router'

Vue.config.productionTip = false

new Vue({
  render: h => h(App),
  router,
}).$mount('#app')

console.log(router);
全局导航路由
全局守卫
beforeEach 他有三个 to from next 一定需要使用next()
afterEach 不需要主动调用next
路由独享守卫------就是写在index.js里的路由,{}写在里面,前面是path等
组件守卫-----就是写在组件里的啊
老师的意思是自己去官网看有哪些,没详细讲
改变网页标题名字

可以在created()里写上 document.title="xxx"
或者在index.js中使用router.beforeach----推荐使用
// 配置路由相关的信息
import VueRouter from 'vue-router'
import Vue from 'vue'

// 一般路由写法
// import Home from '../components/Home'
// import About from '../components/About'
// import User from '../components/User'

// 路由懒加载写法一 推荐写法
const Home = () => import('../components/Home')
const HomeNews = () => import('../components/HomeNews')
const HomeMessage = () => import('../components/HomeMessage')

const About = () => import('../components/About')
const User = () => import('../components/User')
const Profile = () =>import('../components/Profile')

// 1.通过vue.use安装插件
Vue.use(VueRouter);

// 2.创建vueRouter对象
const routes = [
  {
    // 一打开就跳转到这个页面
    path:'',
    redirect:'/home',
  },
  {
    path:'/home',
    component:Home,
    meta:{
      title:'首页'
    },
    // 路由嵌套
    children:[
      {
      path:'',
      redirect:'message'
      },
      {
        path:'message',
        component:HomeMessage
      },
      {
        path:'news',
        component:HomeNews
      }
    ]
  },
  {
    path:'/about',
    component:About,
    meta:{
      title:'关于'
    },
  },{
    // 动态路由:
    path:'/user/:userId',
    component:User,
    meta:{
      title:'用户'
    },
  },{
    path:'/profile',
    component:Profile,
    meta:{
      title:'档案'
    },
  }
]
const router = new VueRouter({
  routes,
  // linkActiveClass:'active'
  // 切换hash/history模式
  mode:'history'
})

router.beforeEach((to,from,next)=>{
  // 从form跳转到to
  // 修改网页标题,在路由中能加入meta title属性
  // document.title=to.meta.title  //这样写第一个为undefined
  document.title=to.matched[0].meta.title
  next()
})

// 3.将router对象传入到vue实例
export default router
keep-alive
让被包含的组件保留状态,或避免重新渲染
include---字符串或者正则表达式,只有匹配的组件会被缓存
exclude-字符串或正则表达式,任何匹配的组件都不会被缓存
案列:keep-alive

在app.vue加上keep-alive,home页面加上actiivated,beforeRouterLeave代码
app.vue页面代码
<template>
  <div id="app">
   <router-link to="/home" tag="button" replace >首页</router-link>
   <router-link to="/about">关于</router-link>
   <!-- 用v-bind绑定数据 -->
   <router-link :to="'/user/'+userId">用户</router-link>
   <!-- 要想{}生效,必须使用v-bind -->
   <router-link :to="{path:'/profile',query:{name:'Kevin',age:18,height:1.88}}">档案</router-link>
   <!-- profile/user页面不会被缓存 加了空格就没用了,注意 -->
   <keep-alive exclude="Profile,User">
    <router-view></router-view>
    </keep-alive>
  </div>
</template>

<script>
export default {
  name: 'App',
  // 模拟获取的动态数据
  data(){
   return{
    userId:'Kevin'
   }
  }
}
</script>

<style>
.active{
  color:red;
}
</style>
home.vue页面代码
<template>
  <div>
     <h2>我是首页</h2>
    <p>我是首页内容,哈哈哈哈</p>
    <!-- 首页加router-view 占位子路由 -->
    <router-link to="/home/message">消息</router-link>
    <router-link to="/home/news">新闻</router-link>
    <router-view></router-view>
  </div>
</template>

<script>
  export default {
    name:'Home',
    activated(){
     this.$router.push(this.path).catch(err => err);
    },
    beforeRouteLeave(to,from,next){
      this.path = this.$route.path
      next()
    }
}
</script>

<style scoped>

</style>
Vuex
vuex是一个专为vue.js应用程序开发的状态管理模式
它采用集中是存储管理应用的所有组件状态
简单的说就是把多个组件共享的变量全部存储在一个对象中
vuex也集成到Vue的官方调试工具devtools extension
一般什么情况使用vuex
在多个界面需要共享的数据
比如用户的登录状态、用户名称、头像、地理位置信息
比如商品的收藏、购物车中的物品等
案列:传值对比----多页面管理
单页面值

<template>
 <!-- App页面代码 -->
  <div id="app">
    <h3>{{counter}}</h3>
    <button @click="counter++">+</button>
    <button @click="counter--">-</button>
  </div>
</template>

<script>
export default {
    name: "App",
    data() {
        return {
          counter: 0,
        };
    },
}
</script>

<style>

</style>
多页面值 prop传递--父子组件
安装好脚手架后
新建HelloWord.vue页面
用app页面的counter在HelloWord页面进行加减

<template>
  <div id="app">
    <!-- App页面 -->
    <button @click="counter++">+</button>
    <button @click="counter--">-</button>
    <!-- 有冒号是变量,没有冒号是字符串会报错  -->
   <hello-world :counter="counter"></hello-world>
  </div>
</template>

<script>
 import HelloWorld from './components/HelloWorld.vue'
export default {
    name: "App",
    components:{
      HelloWorld
    },
    data() {
        return {
          counter: 0,
        };
    },
}
</script>

<style>

</style>
<template>
<!-- HelloWorld页面 -->
<div class="hello">
<h2>{{counter}}----HelloWorld页面</h2>
</div>
</template>
<script>
export default {
name: 'HelloWorld',
props:{
counter:Number,
},
data(){
return{
}
}
}
</script>
<style scoped>
</style>
vuex传值
请看下面的变量值修改 ----推荐方式
vuex安装
注意:
--save 以后项目运行还有用
--save --dev
vue2脚手架使用vuex3,vue3脚手架使用vuex4,不然获取不到store
Property or method "$store" is not defined on the instance but referenced during render.
先安装脚手架
黑色命令行,输入下面内容

npm install vuex@3 --save
在src文件夹下创建文件夹store,在store下创建文件index.js,然后在main.js页面引入
// index.js页面
import Vue from 'vue'
import Vuex from 'vuex'

// 1.安装插件
Vue.use(Vuex);

// 2.创建对象
const store = new Vuex.Store({
  state:{

  },
  mutations:{

  },
  actions:{

  },
  getters:{

  },
  modules:{

  }
})

// 3.导出store独享
export default store
// main.js页面
import Vue from 'vue'
import App from './App.vue'
import store from './store'
Vue.config.productionTip = false
new Vue({
render: h => h(App),
store
}).$mount('#app')state
state变量的存放
store文件夹下的index.js文件中的state可以用来存放变量
在其他页面通过$store.state.变量名 显示变量值

// index.js页面
import Vue from 'vue'
import Vuex from 'vuex'

// 1.安装插件
Vue.use(Vuex);

// 2.创建对象
const store = new Vuex.Store({
  state(){
    return{
      count:1000
    }

  },
  mutations:{

  },
  actions:{

  },
  getters:{

  },
  modules:{

  }
})

// 3.导出store独享
export default store
<template>
<div id="app">
<!-- App页面 -->
<h3>{{$store.state.count}}</h3>
</div>
</template>
<script>
export default {
name: "App",
data() {
return {
};
},
}
</script>
<style>
</style>
变量值的修改
在mutations里修改变量方法,然后在对应的页面通过this.$store.commit()提交方法
下面这种不推荐,有问题,因为devtools插件无法准确跟踪状态更改

// index.js页面
import Vue from 'vue'
import Vuex from 'vuex'

// 1.安装插件
Vue.use(Vuex);

// 2.创建对象
const store = new Vuex.Store({
  state(){
    return{
      count:1000
    }

  },
  mutations:{

  },
  actions:{

  },
  getters:{

  },
  modules:{

  }
})

// 3.导出store独享
export default store
<template>
<div id="app">
<!-- App页面 -->
<h3>{{$store.state.count}}</h3>
<button @click="$store.state.count++">+</button>
<button @click="$store.state.count--">-</button>
</div>
</template>
<script>
export default {
name: "App",
data() {
return {
};
},
}
</script>
<style>
</style>下面这种方式推荐,而且devtools插件很好跟踪变量状态
在mutations里修改变量方法,然后在对应的页面通过this.$store.commit()提交方法

// index.js页面
import Vue from 'vue'
import Vuex from 'vuex'

// 1.安装插件
Vue.use(Vuex);

// 2.创建对象
const store = new Vuex.Store({
  state(){
    return{
      count:1000
    }
  },
  mutations:{
    // 方法里修改变量
    // 默认参数state,就是上面那个state
    // 方法名自己取
    increment(state) {
        state.count++
    },
    decrement(state){
      state.count--
    }
  },
  actions:{

  },
  getters:{

  },
  modules:{

  }
})

// 3.导出store独享
export default store
<template>
<div id="app">
<!-- App页面 -->
<h3>{{$store.state.count}}</h3>
<!-- 自己取点击方法名 -->
<button @click="addition">+</button>
<button @click="subtar">-</button>
</div>
</template>
<script>
// import HelloWorld from './components/HelloWorld.vue'
export default {
name: "App",
components:{
// HelloWorld
},
data() {
return {
};
},
methods:{
//click 点击对应的方法
addition(){
this.$store.commit("increment");
},
subtar(){
this.$store.commit("decrement");
}
}
}
</script>
<style>
</style>Getters
类似于组件里的计算属性,当我们需要获取变量变异后的值时,就可以使用getters
getters方法中自己命名方法名
$store.getters.方法名显示值
getters参数处理state ,还有一个getters
还可以通过返回一个函数 传参 ,看案列3
案列:count值为1000,页面显示为1000000

// index.js页面
import Vue from 'vue'
import Vuex from 'vuex'

// 1.安装插件
Vue.use(Vuex);

// 2.创建对象
const store = new Vuex.Store({
  state(){
    return{
      count:1000
    }
  },
  mutations:{

  },
  actions:{

  },
  getters:{
    //  自己取方法名
    powerCount(state){
      return state.count * state.count
    }
  },
  modules:{

  }
})

// 3.导出store独享
export default store
<template>
  <div id="app">
    <!-- App页面 -->
   <h3>初始值:{{$store.state.count}}</h3>

     <!-- 取到了count修改后的值 -->
   <h2>修改后的值:{{$store.getters.powerCount}}</h2>
  </div>
</template>

<script>
export default {
    name: "App",
    data() {
        return {

        };
    },
    methods:{
    }
}
</script>

<style>

</style>
案列2:取出大于20的对象

// index.js页面
import Vue from 'vue'
import Vuex from 'vuex'

// 1.安装插件
Vue.use(Vuex);

// 2.创建对象
const store = new Vuex.Store({
  state(){
    return{
      students:[
        {id:110,name:'why',age:18},
        {id:111,name:'kobe',age:24},
        {id:112,name:'james',age:30},
        {id:113,name:'curry',age:10},
      ]
    }
  },
  mutations:{

  },
  actions:{

  },
  getters:{
     // 方法名自己定义
    // state自带
    more20stu(state) {
      return state.students.filter(s=>s.age >= 20)
    }
  },
  modules:{

  }
})

// 3.导出store独享
export default store
<template>
<div id="app">
<!-- App页面 -->
<!-- getters大于20岁的人 -->
<h2>getters方法:{{$store.getters.more20stu}}</h2>
</div>
</template>
<script>
export default {
name: "App",
data() {
return {
};
},
methods:{
}
}
</script>
<style>
</style>computed方法做的

// index.js页面
import Vue from 'vue'
import Vuex from 'vuex'

// 1.安装插件
Vue.use(Vuex);

// 2.创建对象
const store = new Vuex.Store({
  state(){
    return{
      students:[
        {id:110,name:'why',age:18},
        {id:111,name:'kobe',age:24},
        {id:112,name:'james',age:30},
        {id:113,name:'curry',age:10},
      ]
    }
  },
  mutations:{

  },
  actions:{

  },
  getters:{
  },
  modules:{

  }
})

// 3.导出store独享
export default store
<template>
<div id="app">
<!-- App页面 -->
<!-- computed大于20岁的人 -->
<h2>{{more20stu}}</h2>
</div>
</template>
<script>
export default {
name: "App",
data() {
return {
};
},
computed:{
more20stu(){
return this.$store.state.students.filter(s=>s.age >= 20)
}
},
methods:{
}
}
</script>
<style>
</style>案列3:取出个数 传参

// index.js页面
import Vue from 'vue'
import Vuex from 'vuex'

// 1.安装插件
Vue.use(Vuex);

// 2.创建对象
const store = new Vuex.Store({
  state(){
    return{
      students:[
        {id:110,name:'why',age:18},
        {id:111,name:'kobe',age:24},
        {id:112,name:'james',age:30},
        {id:113,name:'curry',age:10},
      ]
    }
  },
  mutations:{

  },
  actions:{

  },
  getters:{
    // 方法名自己定义
    // state自带
    more20stu(state) {
      return state.students.filter(s=>s.age >= 20)
    },
    // 获取大于20对象的个数
    more20stuLength(state,getters) {
      return getters.more20stu.length
    },
    moreAgeStu(state){
      // 通过返回函数来传参
      return function (age) {
       return state.students.filter(s=>s.age>age)
      }
      // 箭头函数写法
      // return age => {
      //   return state.students.filter(s=>s.age>age)
      // }
    }
  },
  modules:{

  }
})

// 3.导出store独享
export default store
<template>
<div id="app">
<!-- App页面 -->
<!-- getters大于20岁的人 -->
<h2>getters方法:{{$store.getters.more20stu}}</h2>
<!--获取大于20人的个数 -->
<h2>{{$store.getters.more20stuLength}}</h2>
<!-- 这里的参数就可以根据自己的情况自定义 -->
<!-- 大于12岁 -->
<h2>{{$store.getters.moreAgeStu(12)}}</h2>
<!-- 大于20 -->
<h2>{{$store.getters.moreAgeStu(20)}}</h2>
</div>
</template>
<script>
export default {
name: "App",
data() {
return {
};
},
methods:{
}
}
</script>Mutation
只有mutation可以直接更改state里变量的值
mutation传递一个参数就直接在它的方法参数里加参数名,传递那个页面也加上这个参数名,还有commit提交时,也加上这个参数名
传递多个数据也还是差不多,不过是对象形式
mutation有时会携带一些额外的参数,把这个称为Payload(负载)
当使用的是对象时,包含了type属性,使用官方给的playload起的参数名,而不能自己随意起名,不然会报错
添加新属性
方式一:使用Vue.set(state.对象名,"属性名",“属性值”)
方式二:用新对象给旧对象重新赋值
不用Vue.set,新属性无法显示在页面上,虽然有data数据,但界面上没有它
删除属性
Vue.delete(state.对象名,‘属性名’);
mutation 常量
把变量名变为常量,防止出错,这歌略好了
Mutations中的方法必须是同步方法,这样devtools好帮助捕捉,如果用异步,用action处理
案列一:传递一个参数

// index.js页面
import Vue from 'vue'
import Vuex from 'vuex'

// 1.安装插件
Vue.use(Vuex);

// 2.创建对象
const store = new Vuex.Store({
  state(){
    return{
      count:1000,
    }
  },
  mutations:{
  // 添加了参数count
  increment(state,count){
    state.count += count;
  }
  },
  actions:{

  },
  getters:{

  },
  modules:{

  },
})

// 3.导出store独享
export default store
<template>
<div id="app">
<!-- App页面 -->
<h2>{{$store.state.count}}</h2>
<button @click="addCount(5)">+5</button>
<button @click="addCount(10)">+10</button>
</div>
</template>
<script>
export default {
name: "App",
data() {
return {
};
},
methods:{
// 添加了参数count
addCount(count){
this.$store.commit("increment",count);
}
}
}
</script>
<style>
</style>案列2:传递多个参数

// index.js页面
import Vue from 'vue'
import Vuex from 'vuex'

// 1.安装插件
Vue.use(Vuex);

// 2.创建对象
const store = new Vuex.Store({
  state(){
    return{
      students:[
        {id:110,name:'why',age:18},
        {id:111,name:'kobe',age:24},
        {id:112,name:'james',age:30},
        {id:113,name:'curry',age:10},
      ]
    }
  },
  mutations:{
  // 这里两边方法名起了一样
  addStudent(state,stu){
    state.students.push(stu)
  }
  },
  actions:{

  },
  getters:{
    // 方法名自己定义
    // state自带
    more20stu(state) {
      return state.students.filter(s=>s.age >= 20)
    },
    //}
  },
  modules:{

  },
})

// 3.导出store独享
export default store
<template>
  <div id="app">
    <!-- App页面 -->

 <!-- getters大于20岁的人 -->
   <h2>大于20岁的人{{$store.getters.more20stu}}</h2>
   <h2>全员{{$store.state.students}}</h2>
   <button @click="addStudent">添加学生</button>
  </div>
</template>

<script>
export default {
    name: "App",
    data() {
        return {

        };
    },
    methods:{
      addStudent(){
        const stu = {id:114,name:'Alan',age:35}
        this.$store.commit("addStudent",stu)
      }
    }
}
</script>

<style>

</style>
案列3:传递参数包含type时,使用官方参数名playload

// index.js页面
import Vue from 'vue'
import Vuex from 'vuex'

// 1.安装插件
Vue.use(Vuex);

// 2.创建对象
const store = new Vuex.Store({
  state(){
    return{
      count:1000,
    }
  },
  mutations:{
  // increment(state,count){
    // 当使用的是对象时,包含了type属性,使用官方给的playload
    increment(state,playload){
    // 添加了参数count
    state.count += playload.count;
  },
  },
  actions:{

  },
  getters:{

  },
  modules:{

  },
})

// 3.导出store独享
export default store
<template>
<div id="app">
<!-- App页面 -->
<h2>{{$store.state.count}}</h2>
<button @click="addCount(5)">+5</button>
<button @click="addCount(10)">+10</button>
</div>
</template>
<script>
export default {
name: "App",
components:{
},
data() {
return {
};
},
methods:{
// 添加了参数count
// 普通的提交风格
addCount(count){
// 特殊的提交封装,有了type
this.$store.commit({
type:'increment',
// count:count ,可以写成下面的简写
count
})
},
}
}
</script>
<style>
</style>案列四添加新属性,删除属性
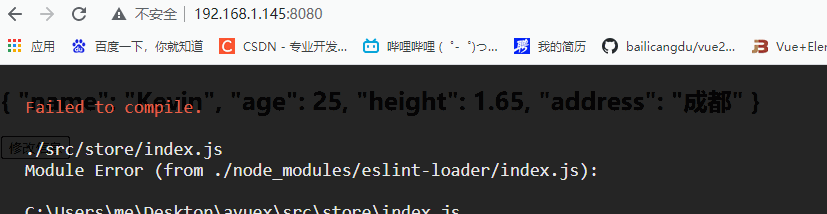
// index.js页面
import Vue from 'vue'
import Vuex from 'vuex'

// 1.安装插件
Vue.use(Vuex);

// 2.创建对象
const store = new Vuex.Store({
  state(){
    return{
      info:{
        name:"Kevin",
        age:25,
        height:1.65
      }
    }
  },
  mutations:{
  updateInfo(state){
    // 添加新属性address
    // 下面这种是错误的添加方式
    // state.info['address']="成都"
    // 下面这种是正确的添加方式
  Vue.set(state.info,"address","成都")
  // 方式二 下面这句应该不完整,以后如果研究了回来补
  // state.info = {...state.info,"height":playload.height}

  // 删除属性
  Vue.delete(state.info,"age");
  }
  },
  actions:{

  },
  getters:{

  },
  modules:{

  },
})

// 3.导出store独享
export default store
<template>
<div id="app">
<!-- App页面 -->
<h2>{{$store.state.info}}</h2>
<button @click="updateInfo">修改信息</button>
</div>
</template>
<script>
export default {
name: "App",
data() {
return {
};
},
methods:{
// 添加了参数count
// 普通的提交风格
addCount(count){
// 特殊的提交封装,有了type
this.$store.commit({
type:'increment',
// count:count ,可以写成下面的简写
count
})
},
updateInfo(){
this.$store.commit("updateInfo");
}
}
}
</script>
<style>
</style>Action
action类似于mutation用action来代替操作mutation,当有异步操作时
context.commit()
this.$store.dispatch
案列一:一秒后修改信息

// index.js页面
import Vue from 'vue'
import Vuex from 'vuex'

// 1.安装插件
Vue.use(Vuex);

// 2.创建对象
const store = new Vuex.Store({
  state(){
    return{
      info:{
        name:"Kevin",
        age:25,
        height:1.65
      }
    }
  },
  mutations:{
  //修改信息,但需要1秒后修改,1秒后涉及异步,需要使用到action
  updateInfo(state){
  state.info.name = "Alan"
  }
  },
  actions:{
    // actions 处理异步代码
    // context自带的参数
     aUpdateInfo(context){
      setTimeout(()=>{
        context.commit('updateInfo');
      },1000)
     }
  },
  getters:{

  },
  modules:{

  },
})

// 3.导出store独享
export default store
<template>
<div id="app">
<!-- App页面 -->
<h2>{{$store.state.info}}</h2>
<button @click="updateInfo">修改信息</button>
</div>
</template>
<script>
export default {
name: "App",
components:{
},
data() {
return {
};
},
methods:{
updateInfo(){
// action提交 所有是dispatch
this.$store.dispatch('aUpdateInfo');
}
}
}
</script>
<style>
</style>案列二:payload参数
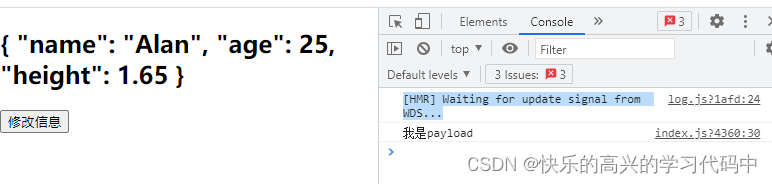
// index.js页面
import Vue from 'vue'
import Vuex from 'vuex'

// 1.安装插件
Vue.use(Vuex);

// 2.创建对象
const store = new Vuex.Store({
  state(){
    return{
      info:{
        name:"Kevin",
        age:25,
        height:1.65
      }
    }
  },
  mutations:{
  updateInfo(state){
  state.info.name = "Alan"
  }
  },
  actions:{
    // actions 处理异步代码
    // context自带的参数
     aUpdateInfo(context,payload){
      setTimeout(()=>{
        context.commit('updateInfo');
        console.log(payload);
      },1000)
     }
  },
  getters:{

  },
  modules:{

  },
})

// 3.导出store独享
export default store
<template>
<div id="app">
<!-- App页面 -->
<h2>{{$store.state.info}}</h2>
<button @click="updateInfo">修改信息</button>
</div>
</template>
<script>
export default {
name: "App",
components:{
},
data() {
return {
};
},
methods:{
updateInfo(){
// action提交 所有是dispatch
this.$store.dispatch('aUpdateInfo',"我是payload");
}
}
}
</script>
<style>
</style>案列三:

// index.js页面
import Vue from 'vue'
import Vuex from 'vuex'

// 1.安装插件
Vue.use(Vuex);

// 2.创建对象
const store = new Vuex.Store({
  state(){
    return{
      info:{
        name:"Kevin",
        age:25,
        height:1.65
      }
    }
  },
  mutations:{
  updateInfo(state){
  state.info.name = "Alan"
  }
  },
  actions:{
    // actions 处理异步代码
    // context自带的参数
     aUpdateInfo(context,payload){
      setTimeout(()=>{
        context.commit('updateInfo');
        console.log(payload.message);
        payload.success();
      },1000)
     }
  },
  getters:{

  },
  modules:{

  },
})

// 3.导出store独享
export default store
<template>
  <div id="app">
    <!-- App页面 -->
   <h2>{{$store.state.info}}</h2>
   <button @click="updateInfo">修改信息</button>
  </div>
</template>

<script>
export default {
    name: "App",
    components:{
    },
    data() {
        return {

        };
    },
    methods:{
      updateInfo(){
      //  action提交 所有是dispatch
        this.$store.dispatch('aUpdateInfo',{
          message:"我是携带的信息",
          success:()=>{
            console.log("里面已经完成了");
          }
        });
      }
    }
}
</script>

<style>

</style>
案例四 用promise实现效果,同案列三一个效果

// index.js页面
import Vue from 'vue'
import Vuex from 'vuex'

// 1.安装插件
Vue.use(Vuex);

// 2.创建对象
const store = new Vuex.Store({
  state(){
    return{
      info:{
        name:"Kevin",
        age:25,
        height:1.65
      }
    }
  },
  mutations:{
  updateInfo(state){
  state.info.name = "Alan"
  }
  },
  actions:{
    // actions 处理异步代码
    // context自带的参数
     aUpdateInfo(context,payload){
      return new Promise((resolve)=>{
        setTimeout(()=>{
          context.commit('updateInfo');
          console.log(payload);

          resolve('11111')
        },1000)
      })
     }
  },
  getters:{

  },
  modules:{

  },
})

// 3.导出store独享
export default store
<template>
  <div id="app">
    <!-- App页面 -->
   <h2>{{$store.state.info}}</h2>
   <button @click="updateInfo">修改信息</button>
  </div>
</template>

<script>
export default {
    name: "App",
    components:{
    },
    data() {
        return {

        };
    },
    methods:{
      updateInfo(){
      //  action提交 所有是dispatch
        this.$store.dispatch('aUpdateInfo',"我是携带的信息").then(res=>{
          console.log("里面完成了提交");
          console.log(res);
        })
      }
    }
}
</script>

<style>

</style>
Module
module模块
vuex使用单一状态树,意味着很多状态都会交给Vuex来管理,当应用变得复杂的时候,store对象就会变得相当臃肿,为了解决这个问题,vuex允许我们将store分割为模块,而每个模块拥有自己的state/mutation/action/getters等

// index.js页面
import Vue from 'vue'
import Vuex from 'vuex'

// 1.安装插件
Vue.use(Vuex);


// 2.创建对象
// 模块划分
const moduleA = {
  state:{
    name:"jule"
  },
  mutations:{
    updateName(state,payload){
      state.name = payload
    }
  },
  actions:{},
  getters:{
    fullname(state){
      return state.name+"111"
    },
    fullname2(state,getters){
      return getters.fullname+'2222'
    },
    fullname3(state,getters,rootState){
      return getters.fullname2+rootState.counter
    }
  }
}
const store = new Vuex.Store({
  state(){
    return{
      counter:1000,
    }
  },
  mutations:{
  },
  actions:{
  },
  getters:{

  },
  modules:{
    a:moduleA,
  },
})

// 3.导出store独享
export default store
<template>
  <div id="app">
    <!-- App页面 -->
   <h2>{{$store.state.a.name}}</h2>
   <button @click="updateName"> 修改名字</button>
   <h2>{{$store.getters.fullname}}</h2>
   <h2>{{$store.getters.fullname2}}</h2>
   <h2>{{$store.getters.fullname3}}</h2>
  </div>
</template>

<script>
export default {
    name: "App",
    components:{
    },
    data() {
        return {

        };
    },
    methods:{
      updateName(){
        this.$store.commit('updateName','lisa');
      }
    }
}
</script>

<style>

</style>
vuex核心概念
State Getters Mutation Action Module
Vuex单一状态树,提倡只使用一个store


 946
946

 被折叠的 条评论
为什么被折叠?
被折叠的 条评论
为什么被折叠?
 到【灌水乐园】发言


