


准备工作:
一个树莓派,我使用的是B+,装上最新的Raspbian镜像,RASPBIAN JESSIE WITH PIXEL 4.4
https://www.raspberrypi.org/downloads/raspbian/
Ubuntu操作系统,虚拟机也可以,我使用的是最新的Ubuntu 16.04 LTS http://cn.ubuntu.com/download/
都配置好可以连接互联网之后,我们就可以开始环境搭建了。请参考以下文章:
官方原文:
http://wiki.qt.io/RaspberryPi2EGLFS#A_modern_guide_for_cross-compiling_Qt_5.6_for_HW_accelerated_OpenGL_with_eglfs_on_Raspbian_Jessie_and_setting_up_Qt_Creator
依照步骤便可以搭建好环境,我简单的说一下搭建的过程以及我改良的一些步骤。
Step by step
1. Get the latest image from https://downloads.raspberrypi.org/raspbian_latest
2. Unzip and write it to a memory card. Replace ... with the SD card device (check with lsblk or dmesg eg. mmcblk0).
sudo dd if=2015-09-24-raspbian-jessie.img of=... bs=4M
3. Boot it up, run raspi-config, change it to boot to the console instead of X, change the GPU memory to 256 MB, install a bunch of development files (for simplicity we use build-dep, not everything is really needed, but it is easier this way), and prepare our target directory:
sudo raspi-config
sudo nano /etc/apt/sources.list
以上是安装raspbian镜像,以及更改raspi-config树莓派的配置为“启动到命令行界面”和“GPU内存为256MB”,然后更改使用更快的更新源(可不管)。
下面这些是在树莓派上完成的!
sudo apt-get update
sudo apt-get build-dep qt4-x11
sudo apt-get build-dep libqt5gui5
sudo apt-get install libudev-dev libinput-dev libts-dev libxcb-xinerama0-dev

sudo mkdir /usr/local/qt5pi
sudo chown pi:pi /usr/local/qt5pi
安装一些必须的文件。
下面的步骤就是在Ubuntu环境下完成了,但也请确保你的Ubuntu是可以访问树莓派的。
4. Back on the host PC, create our working directory and get a toolchain:
mkdir ~/raspi
cd ~/raspi
git clone https://github.com/raspberrypi/tools
把树莓派上的/lib,/usr/include,/usr/lib,/opt/vc里的文件同步到Ubuntu里来。命令里的IP替换成你那里树莓派的IP地址。
5. Create a sysroot. Using rsync we can properly keep things synchronized in the future as well. Replace IP with the address of the Pi.
mkdir sysroot sysroot/usr sysroot/opt
rsync -avz pi@<IP>:/lib sysroot				例如我的是:rsync -avz pi@192.168.31.205:/lib sysroot
rsync -avz pi@<IP>:/usr/include sysroot/usr
rsync -avz pi@<IP>:/usr/lib sysroot/usr
rsync -avz pi@<IP>:/opt/vc sysroot/opt
***调整替换掉旧的fixQualifiedLibraryPaths***
6. Adjust symlinks to be relative. Instead of the old fixQualifiedLibraryPaths get a script that works:
wget https://raw.githubusercontent.com/riscv/riscv-poky/master/scripts/sysroot-relativelinks.py
chmod +x sysroot-relativelinks.py
./sysroot-relativelinks.py sysroot
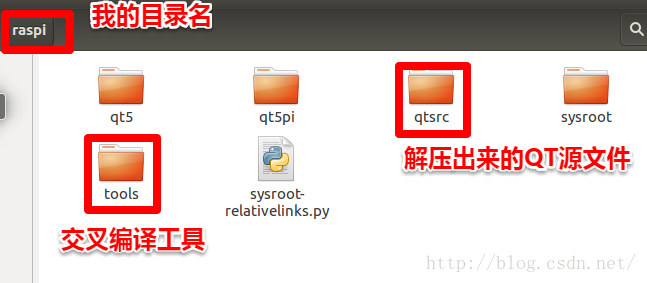
到了这步我不推荐用这里的方法,GIT太慢,而且这条命令只下载了qt基本组件,这么做的话不利于后续模块的安装(模块间的依赖关系会把人搞疯的)。所以,直接去下载个完全版。
http://download.qt.io/official_releases/qt/5.6/5.6.1/single/
我下载的qt-everywhere-opensource-src-5.6.1.tar.gz
下好了解压到目录里面。
7. Get qtbase 5.6 and configure Qt. The target directory is /usr/local/qt5pi on the Pi, the host tools like qmake will go to ~/raspi/qt5, while make install will target ~/raspi/qt5pi (this is what we will sync to the device). If using the old Pi instead of the Pi 2, change -device to linux-rasp-pi-g++. Don't forget to adjust the path to your ~/raspi directory if you changed that. For some reason the ~/ in the paths may not work, if this the case just use full paths.
git clone git://code.qt.io/qt/qtbase.git -b 5.6
cd qtbase						<------我的这里就改成cd qtsrc
./configure -release -opengl es2 -device linux-rasp-pi2-g++ \
-device-option CROSS_COMPILE=~/raspi/tools/arm-bcm2708/gcc-linaro-arm-linux-gnueabihf-raspbian/bin/arm-linux-gnueabihf- \
-sysroot ~/raspi/sysroot -opensource -confirm-license -make libs \
-prefix /usr/local/qt5pi -extprefix ~/raspi/qt5pi -hostprefix ~/raspi/qt5 -v

make
make install
经过漫长的等待之后,如果没有报错的话,恭喜你,你的环境已经搭建好了。
然后把支持文件同步回树莓派里。
8. Deploy to the device. We simply sync everything from ~/raspi/qt5pi to the prefix we configured above.
rsync -avz qt5pi pi@IP:/usr/local
这里是编译一个范例的方法。重点划线的三条命令我们以后会经常用。
9. Build an example:
cd qtbase/examples/opengl/qopenglwidget
~/raspi/qt5/bin/qmake
make
scp qopenglwidget pi@IP:/home/pi
下面回到树莓派上(或者SSH过去)
写一些配置,链接
10. On the device, let the linker find the Qt libs:
echo /usr/local/qt5pi/lib | sudo tee /etc/ld.so.conf.d/qt5pi.conf
sudo ldconfig
11. Still on the device, fix the EGL/GLES library nonsense:
The device may have the Mesa version of libEGL and libGLESv2 in /usr/lib/arm-linux-gnueabihf, resulting Qt apps picking these instead of the real thing from /opt/vc/lib. This may be fine for X11 desktop apps not caring about OpenGL performance but is totally useless for windowing system-less, fullscreen embedded apps.
sudo rm /usr/lib/arm-linux-gnueabihf/libEGL.so.1.0.0 /usr/lib/arm-linux-gnueabihf/libGLESv2.so.2.0.0
sudo ln -s /opt/vc/lib/libEGL.so /usr/lib/arm-linux-gnueabihf/libEGL.so.1.0.0
sudo ln -s /opt/vc/lib/libGLESv2.so /usr/lib/arm-linux-gnueabihf/libGLESv2.so.2.0.0
In case you are using qtwebengine please make sure to add missing symbolic links.
sudo ln -s /opt/vc/lib/libEGL.so /opt/vc/lib/libEGL.so.1
sudo ln -s /opt/vc/lib/libGLESv2.so /opt/vc/lib/libGLESv2.so.2
You may want to save the originals somewhere, just in case.
12. Run qopenglwidget we deployed to /home/pi. At this point it should just work at fullscreen with 60 FPS and mouse, keyboard, and possibly touch support.
结束环境搭建。
下面是安装其他模块的办法,如果你按照我的方法下载的完全包编译完的话,这里的内容可以无视。
13. Build other Qt modules as desired, the steps are the same always:
~/raspi/qt5/bin/qmake -r
make
make install
rsync -avz qt5pi pi@IP:/usr/local
小结:
其实环境的搭建还是很简单的,容易出错的地方可能就只有配置MAKEFILE文件那里,细细检查细细思考,就没有什么问题。
./configure -release -opengl es2 -device linux-rasp-pi2-g++ \
-device-option CROSS_COMPILE=~/raspi/tools/arm-bcm2708/gcc-linaro-arm-linux-gnueabihf-raspbian/bin/arm-linux-gnueabihf- \
-sysroot ~/raspi/sysroot -opensource -confirm-license -make libs \
-prefix /usr/local/qt5pi -extprefix ~/raspi/qt5pi -hostprefix ~/raspi/qt5 -v
这里的路径容易错,实在不行换成你的绝对路径。


 被折叠的 条评论
为什么被折叠?
被折叠的 条评论
为什么被折叠?
 到【灌水乐园】发言


