


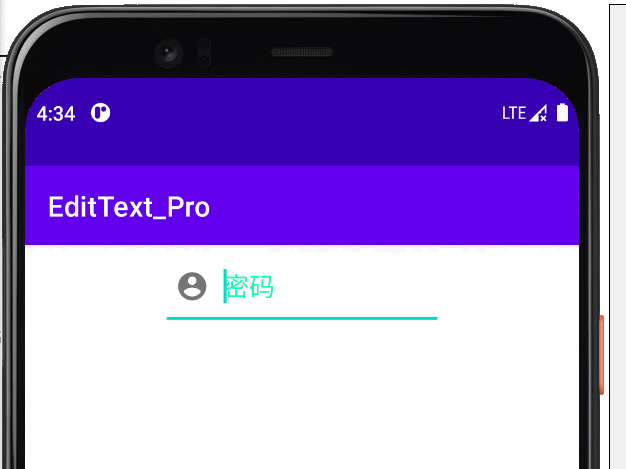
一、EditText
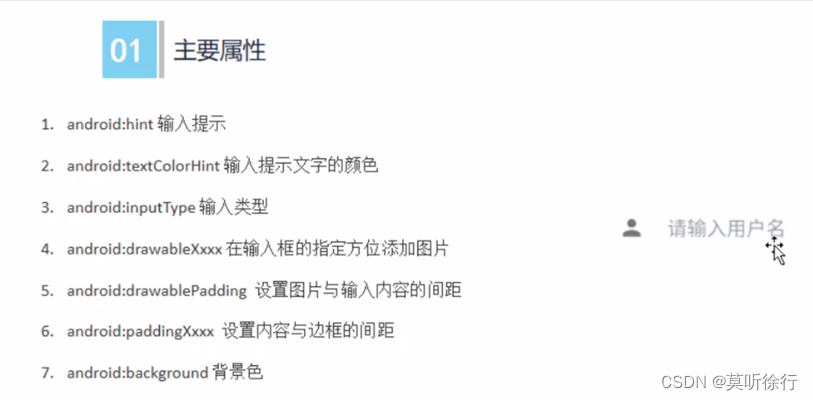
    android:layout_width="200dp"
        android:layout_height="60dp"
        android:hint="密码"
        android:drawableLeft="@drawable/ic_baseline_account_circle_24"
        android:inputType="textPassword"
        android:drawablePadding="10dp"
        android:textColorHint="#11ffaa"
        android:paddingLeft="10dp"

        app:layout_constraintLeft_toLeftOf="parent"
        app:layout_constraintRight_toRightOf="parent"
        app:layout_constraintTop_toTopOf="parent"/>
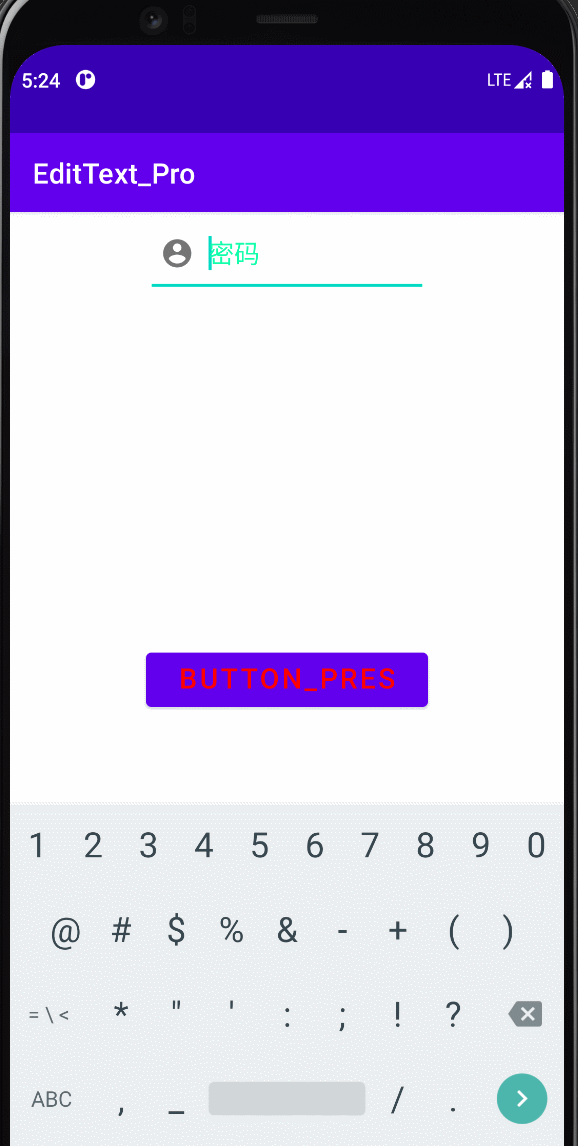
获取edittext中的值:
 btn.setOnClickListener(new View.OnClickListener() {
            @Override
            public void onClick(View view) {
                String value = editText.getText().toString();
                Toast.makeText(MainActivity.this, value, Toast.LENGTH_SHORT).show();
            }
        });
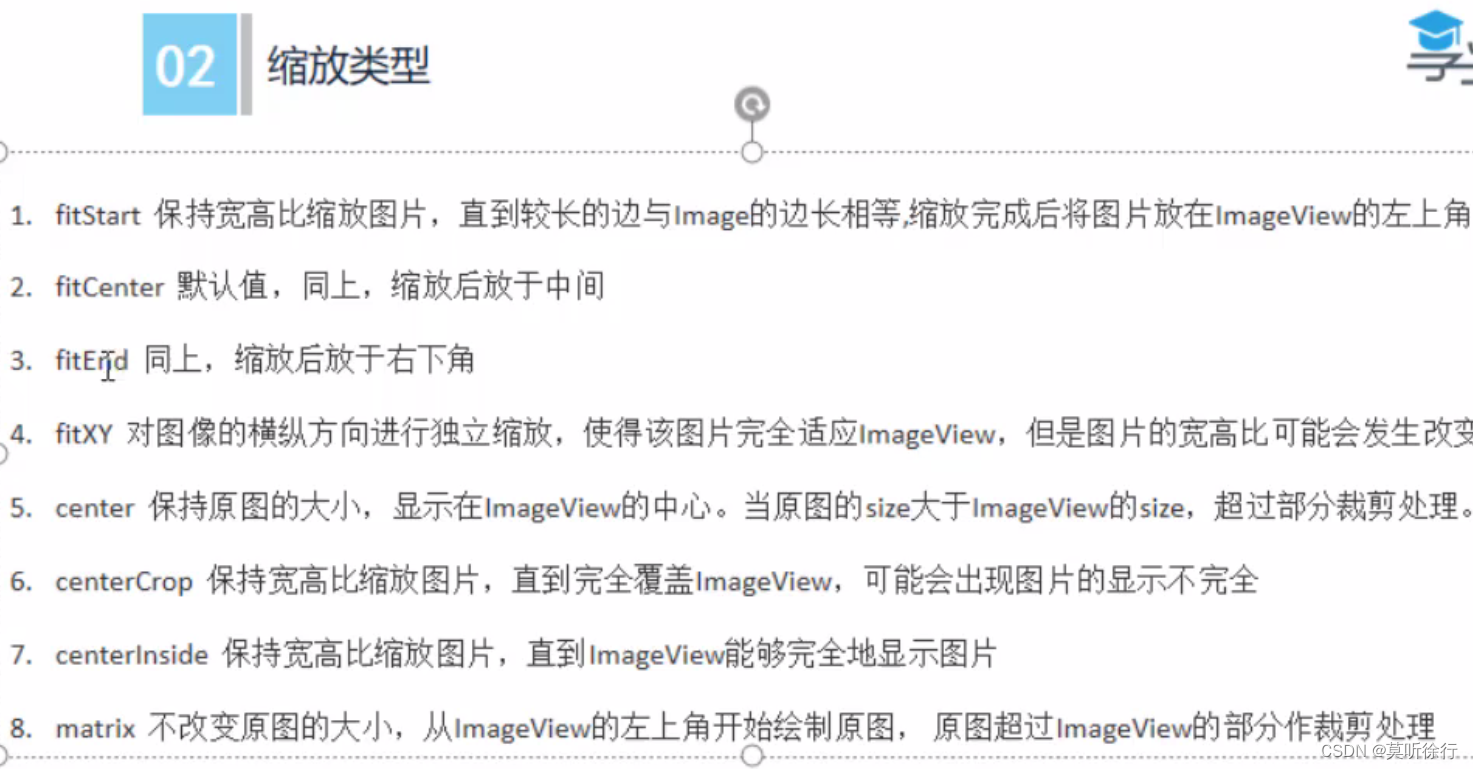
二、ImageView
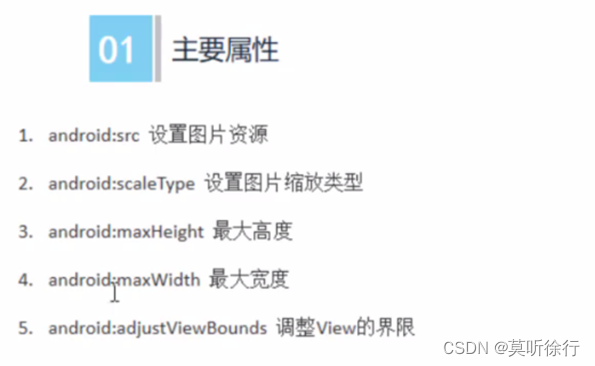
其中缩放类型的值有以下几种:
这三个属性一起使用是为了保证图片以最大边进行缩放,当有一条边达到最大值后,另一条边将等比例进行缩放。
<ImageView
        android:maxHeight="300dp"
        android:maxWidth="300dp"
        android:adjustViewBounds="true"
data = pd.read_csv(
    'https://labfile.oss.aliyuncs.com/courses/1283/adult.data.csv')
print(data.head())
三、progressBar
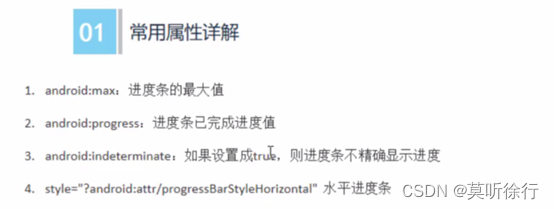
默认是圆形的,只有加了style属性之后才是水平的。
<ProgressBar
        android:layout_width="300dp"
        android:layout_height="wrap_content"
        style="?android:attr/progressBarStyleHorizontal"
        android:id="@+id/pb2"
        android:max="100"
        android:indeterminate="true"
Notification
消息通知需要有两个类进行操作:
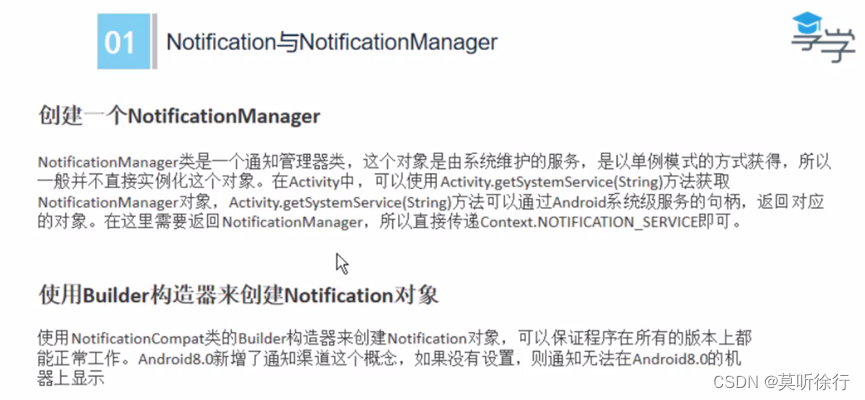
1、NotificationManager:
创建此类对象的代码:
private NotificationManager notificationManager;
notificationManager = (NotificationManager) getSystemService(NOTIFICATION_SERVICE);
2、Notification:
使用Notificationcompat类的Bulder构造器来创建Notification对象。只有这种方式可以在任何版本的android系统中运行,这是为了保障项目的健壮性。
notification = new NotificationCompat.Builder(this,"1")
                .setContentTitle("通知")
                .setContentText("正式内容,非常重要")
                .setSmallIcon(R.drawable.ic_baseline_account_circle_24)
                .setLargeIcon(BitmapFactory.decodeResource(getResources(),R.drawable.meinv1))
                .setColor(Color.parseColor("#ff00ff"))
                .setContentIntent(pendingIntent)
                .setAutoCancel(true)
                .build();
而在使用此方法创建notification时,Builder中第二个参数需要填入一个Channelid,因此要提前创建好 NotificationChannel对象。
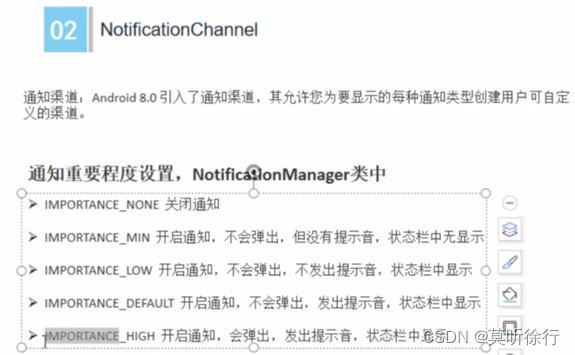
因为是比较的Android8.0,对应的sdk是26。
源码中可以看出VERSION_CODES.O是26。
public static final int O = 26;
//为下一步创建notification做准备。
        if(Build.VERSION.SDK_INT>=Build.VERSION_CODES.O){
            NotificationChannel channel = new NotificationChannel("1","消息",
                    NotificationManager.IMPORTANCE_HIGH);
            notificationManager.createNotificationChannel(channel);
        }
注意这里的id和创建notification对象中的id要保持一致,否则会报错。

注意在设置小图标时,图片不能有颜色。
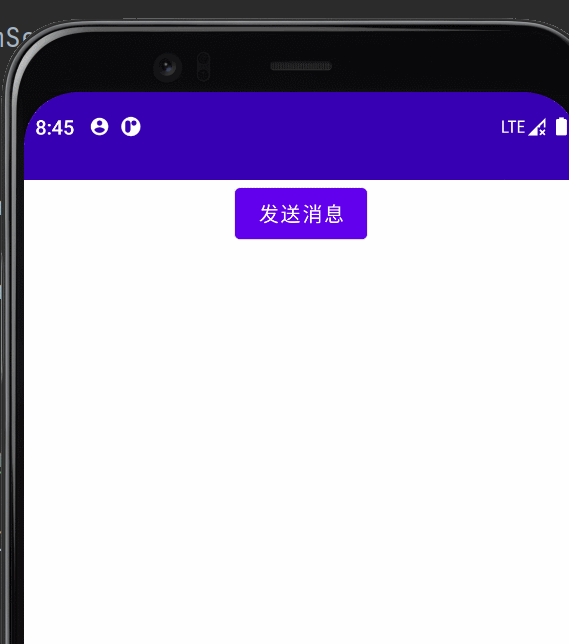
public void sendMessage(View view){
        notificationManager.notify(1,notification);
    }
4、toolbar
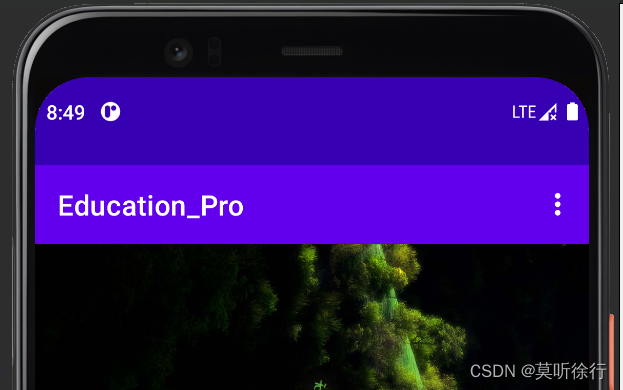
toolbar是指上面这一行Education_pro,一般是在values文件夹下中的themes.xml文件中会有默认的。这里我们学习自定义的toolbar。

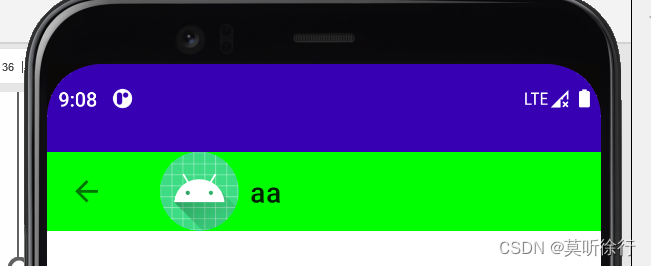
<androidx.appcompat.widget.Toolbar

        android:layout_width="match_parent"
        android:layout_height="?attr/actionBarSize"

        app:navigationIcon="@drawable/ic_baseline_arrow_back_24"
        app:logo="@mipmap/ic_launcher"
        app:titleMarginEnd="50dp"
        app:title="aa"


        android:background="#00ff00"
        android:gravity="center"
        tools:ignore="MissingConstraints" />
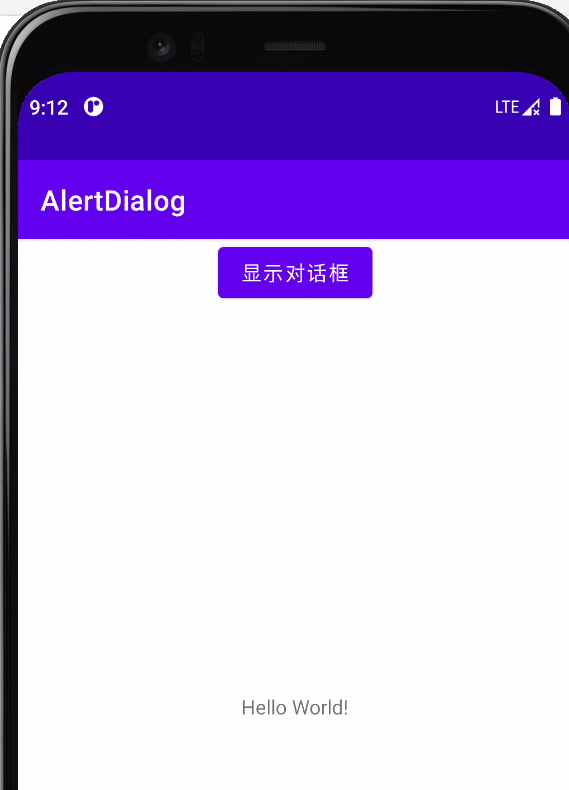
五、alertdialog

public void showDialog(View view){
        AlertDialog.Builder alertDialog = new AlertDialog.Builder(this);
        alertDialog.setIcon(R.drawable.ic_launcher_background)
                .setTitle("对话框")
                .setMessage("这是一条消息")
                .setPositiveButton("确定", new DialogInterface.OnClickListener() {
                    @Override
                    public void onClick(DialogInterface dialogInterface, int i) {

                    }
                })
                .setNegativeButton("取消", new DialogInterface.OnClickListener() {
                    @Override
                    public void onClick(DialogInterface dialogInterface, int i) {

                    }
                })
                .setNeutralButton("中间",new DialogInterface.OnClickListener(){


                    @Override
                    public void onClick(DialogInterface dialogInterface, int i) {

                    }
                })
                .create()
                .show();
    }
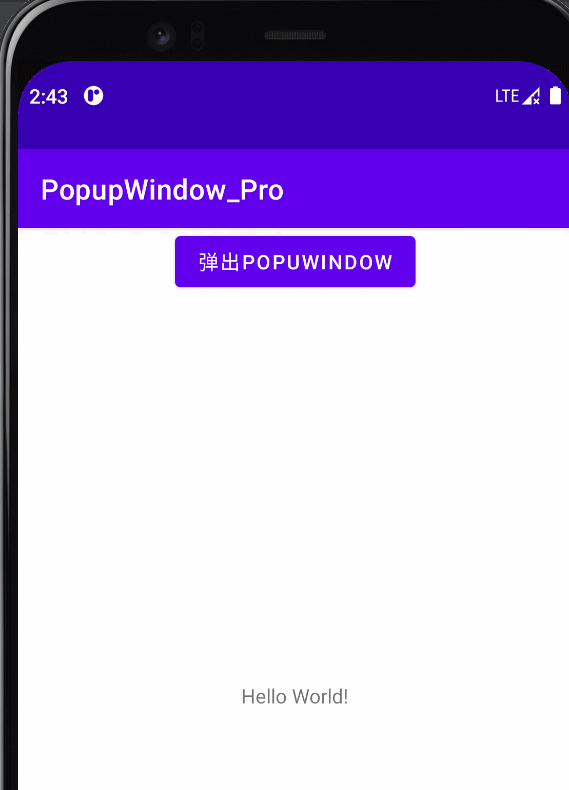
六、Popuwindow
将popview这个布局xml文件加载到popupwindow,popupwindow给定三个参数时,打开后无法关闭
public void popclick(View view) {
        View popview = getLayoutInflater().inflate(R.layout.popupwindow,null);
        PopupWindow popupWindow = new PopupWindow(popview,
                ViewGroup.LayoutParams.WRAP_CONTENT,
                ViewGroup.LayoutParams.WRAP_CONTENT
                );

        popupWindow.showAsDropDown(view);
    }
为解决该问题,只要添加一个参数即可
 public void popclick(View view) {
        View popview = getLayoutInflater().inflate(R.layout.popupwindow,null);
        PopupWindow popupWindow = new PopupWindow(popview,
                ViewGroup.LayoutParams.WRAP_CONTENT,
                ViewGroup.LayoutParams.WRAP_CONTENT,true
                );

        popupWindow.showAsDropDown(view);
    }
dismiss()关闭窗口的效果。
public void popclick(View view) {
        View popview = getLayoutInflater().inflate(R.layout.popupwindow,null);
        View btn1 = popview.findViewById(R.id.btn_beijing);
        View btn2 = popview.findViewById(R.id.btn_shanghai);

        PopupWindow popupWindow = new PopupWindow(popview,
                ViewGroup.LayoutParams.WRAP_CONTENT,
                ViewGroup.LayoutParams.WRAP_CONTENT,true
                );

        popupWindow.showAsDropDown(view);

        btn1.setOnClickListener(new View.OnClickListener() {
            @Override
            public void onClick(View view) {
                popupWindow.dismiss();
            }
        });

        btn2.setOnClickListener(new View.OnClickListener() {
            @Override
            public void onClick(View view) {
                popupWindow.dismiss();
            }
        });
    }


 7380
7380


 被折叠的 条评论
为什么被折叠?
被折叠的 条评论
为什么被折叠?
 到【灌水乐园】发言


