


倒车监控
没错,其实就是正点原子的Qt开发指南的摄像头Camera项目,建议直接官方网站看资料。有拍照功能,拍完的图片会固定右上角。摄像头开启无法退出界面,需关闭摄像头才可以退出界面。注意:顶部选择好对应的摄像头类型,本人使用USB摄像头,所以选择video2。
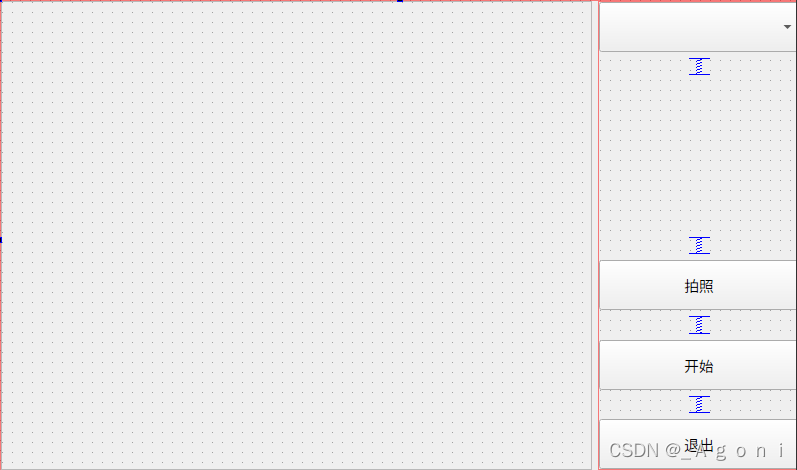
一、ui界面部分
二、代码实现部分功能
(1)camera.h
#ifndef CAMERA_H
#define CAMERA_H

#include <QImage>
#include <QTimer>
//使用命名空间 cv 下的 VideoCapture 与 Mat 类
namespace cv {
class VideoCapture;
class Mat;
}

class Camera : public QObject
{
    Q_OBJECT
public:
    explicit Camera(QObject *parent = nullptr);
    ~Camera();

signals:
    // 声明信号,用于传递有图片信号时显示图像
    void readyImage(const QImage&);

public slots:
    // 用于开启定时器
    bool cameraProcess(bool);

    // 选择摄像头
    void selectCameraDevice(int);

private slots:
    // 定时器时间到处理函数,发送图像数据信号
    void timerTimeOut();

private:
    // 声明 OpenCV 的 cv 命名空间下的 VideoCapture 对象
    cv::VideoCapture *capture;

    // 定时器
    QTimer *timer;

    // 图像转换处理函数
    QImage matToQImage(const cv::Mat&);

};


#endif // CAMERA_H
(2)camera_show.h
#ifndef CAMERA_SHOW_H
#define CAMERA_SHOW_H

#include <QMainWindow>
#include <QWidget>
#include <QMainWindow>
#include <QVBoxLayout>
#include <QHBoxLayout>
#include <QComboBox>
#include <QPushButton>
#include <QVBoxLayout>
#include <QLabel>
#include <QScrollArea>
#include <QDebug>

QT_BEGIN_NAMESPACE
namespace Ui { class camera_show; }
QT_END_NAMESPACE

class Camera;

class camera_show : public QWidget
{
    Q_OBJECT

public:
    camera_show(QWidget *parent = nullptr);
    ~camera_show();

private:
    Ui::camera_show *ui;
    // 拍照保存的图片
    QImage saveImage;

    //摄像头设备
    Camera *camera;

    //扫描是否存在摄像头
    void scanCameraDevice();

 private slots:
    //显示图像
    void showImage(const QImage&);

    // 保存图片到本地
    void on_pushButton_clicked();

    void on_pushButton_2_clicked(bool checked);

    void on_pushButton_3_clicked();

signals:
    void camera_show_main();
};

#endif // CAMERA_SHOW_H
(3)camera.cpp
#include "camera.h"
#include "opencv2/core/core.hpp"
#include "opencv2/highgui/highgui.hpp"
#include <QImage>
#include <QDebug>

// 构造函数
Camera::Camera(QObject *parent):QObject(parent)
{
    // 实例化
    capture = new cv::VideoCapture();  //图像捕获
    timer = new QTimer(this);

    // 信号槽连接,定时器时间一到就转到处理函数,定时获取像素帧,并发送图片
    connect(timer,SIGNAL(timeout()),this,SLOT(timerTimeOut()));

}

//析构函数
Camera::~Camera()
{
    delete capture;
    capture = NULL;
}

//选择摄像头设备并开启
void Camera::selectCameraDevice(int index)
{
    //如果有摄像头打开了,先释放
    if(capture->isOpened())
        capture->release();

    // 打开摄像头
    capture->open(index);
}
// 摄像头采集数据的处理
bool Camera::cameraProcess(bool bl)
{
    if(bl)
        timer->start(33); // 1000\33约等于33帧,一秒最多显示33帧
    else
        timer->stop();
    // 返回摄像头状态,打开还是关闭
    return capture->isOpened();
}

// 定时器设置,定时发送图片
void Camera::timerTimeOut()
{
    // 如果摄像头没有打开,定时器关闭
    if(!capture->isOpened())
    {
        timer->stop();
        return;
    }
    static cv::Mat frame;   //定义一个像素帧
    *capture >>frame;       //从摄像头获取一个像素帧
    if(frame.cols)         //如果像素帧存在
        emit readyImage(matToQImage(frame)); // 处理像素帧为图片,emit发送图片信号进行读取
}

// 图像处理函数,转图片
QImage Camera::matToQImage(const cv::Mat &img)
{
    // USB摄像头是RGB三通道,不考虑单\四通道摄像头
    //如果创建存储灰度图片的Mat对象,这个图像为宽100,高100,这张灰度图片有10000个像素点,每一个像素点在内存空间占8bite,8位--所以它对应的就是CV_8。
    //图像类型设置:U--代表--unsigned int--无符号整形
    //channels = 3:RGB彩色图像---------是--3通道图像
    if(img.type() == CV_8UC3)
    {
        //获取图像首地址
        const uchar *pimg = (const uchar*)img.data;

        // 以img构造RGB888图片
        QImage qImage(pimg,img.cols,img.rows,img.step,QImage::Format_RGB888);

        // 在不改变实际图像数据的条件下,交换红蓝通道,一般是opencv中图像显色为BGR
        // 将BGR格式转换为RGB格式
        return qImage.rgbSwapped();
    }
    return QImage();
}
(4)camera_show.cpp
#include "camera_show.h"
#include "ui_camera_show.h"

#include <QGuiApplication>
#include <QScreen>
#include <QFile>
#include <QPixmap>
#include <QBuffer>
#include "camera.h"

camera_show::camera_show(QWidget *parent)
    : QWidget(parent)
    , ui(new Ui::camera_show)
{
    ui->setupUi(this);


    ui->label->setScaledContents(true); //让显示图片页面随窗口大小调整。
    ui->label_2->setScaledContents(true);

    /* 摄像头 */
    camera = new Camera(this);

    //扫描摄像头设备
    scanCameraDevice();

    //信号槽连接,当发送图片信息后,一读取到图像信号,就转到槽函数显示图像
    connect(camera,SIGNAL(readyImage(QImage)),this,SLOT(showImage(QImage)));
    // 开启or关闭摄像头,开启定时器并返回图像状态。
    connect(ui->pushButton_2,SIGNAL(clicked(bool)),camera,SLOT(cameraProcess(bool)));
}

camera_show::~camera_show()
{
    delete ui;
}

// 扫描摄像头
void camera_show::scanCameraDevice()
{
    //如果是windows系统,一般是摄像头0
#if win32
    ui->comboBox->addItem("windows 摄像头0");
    connect(ui->comboBox,SIGNAL(currentIndexChanged(int)),camera,SLOT(selectCameraDevice(int)));
#else
    // QFile文件指向/dev/video0
    QFile file("/dev/video0");
    // 如果文件存在
    if(file.exists())
        ui->comboBox->addItem("video0");
    else
    {
        ui->label->setText("无摄像头设备");
        return;
    }

    // 重新设置设备名,并判断设备是否存在
    file.setFileName("/dev/video1");
    if(file.exists())
    {
        ui->comboBox->addItem("video1");
        // 设置当前设备号为1
        ui->comboBox->setCurrentIndex(1);
    }

    // 开发板 USB 摄像头设备是 2
    file.setFileName("/dev/video2");
    if(file.exists())
    {
        ui->comboBox->addItem("video2");
//        ui->comboBox->setCurrentIndex(2);
    }

#if !__arm__
    // ubuntu的USB摄像头一般0
    ui->comboBox->setCurrentIndex(0);
#endif
    connect(ui->comboBox,SIGNAL(currentIndexChanged(int)),camera,SLOT(selectCameraDevice(int)));

#endif
}

//显示图像
void camera_show::showImage(const QImage &image)
{
    // 显示视频图像
    ui->label_2->setPixmap(QPixmap::fromImage(image));
    saveImage = image;

    // 判断图像是否为空,空则设置拍照按钮不可用
    if(!saveImage.isNull())
        ui->pushButton->setEnabled(true);  //可用
    else
        ui->pushButton->setEnabled(false); //不可用
}

// 打开、关闭摄像头的文本设置
void camera_show::on_pushButton_2_clicked(bool checked)
{
    if(checked)
    {
        //设置摄像头设备
        camera->selectCameraDevice(ui->comboBox->currentIndex());
        ui->pushButton_2->setText("关闭");
        ui->pushButton_3->setEnabled(false);
    }
    else
    {
        //关闭了摄像头,则禁用拍照按钮
        ui->pushButton->setEnabled(false);
        ui->pushButton_3->setEnabled(true);
        ui->pushButton_2->setText("开始");
        ui->label_2->clear();
        ui->label->clear();
    }
}

// 拍照保存到本地
void camera_show::on_pushButton_clicked()
{
    //判断图片是否为空
    if(!saveImage.isNull())
    {
        QString fileName = QCoreApplication::applicationDirPath()+"/test.png";
        qDebug()<< "正在保存"<< fileName<< "图片,请稍后..." << endl;


        /* save(arg1,arg2,arg3)重载函数,arg1 代表路径文件名,
         * arg2 保存的类型,arg3 代表保存的质量等级 */
        saveImage.save(fileName,"PNG",-1);

        // 设置拍照的图片为显示在 ui->label 上
        ui->label->setPixmap(QPixmap::fromImage(QImage(fileName)));

        qDebug()<<"保存完成"<<endl;
    }
}

void camera_show::on_pushButton_3_clicked()
{
    this->hide();
    emit camera_show_main();
}
三、最终界面


 211
211

 被折叠的 条评论
为什么被折叠?
被折叠的 条评论
为什么被折叠?
 到【灌水乐园】发言


