


网络聊天室
JAVA的学习也进入到了网络这一块,下面手撸一个网络聊天室
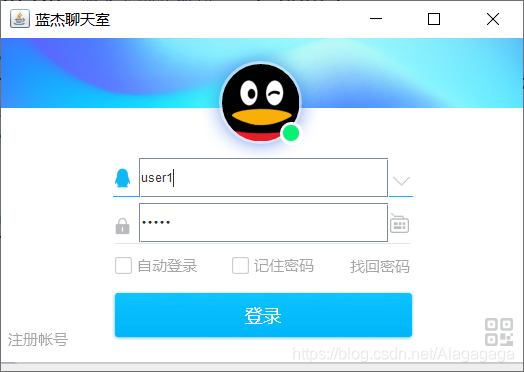
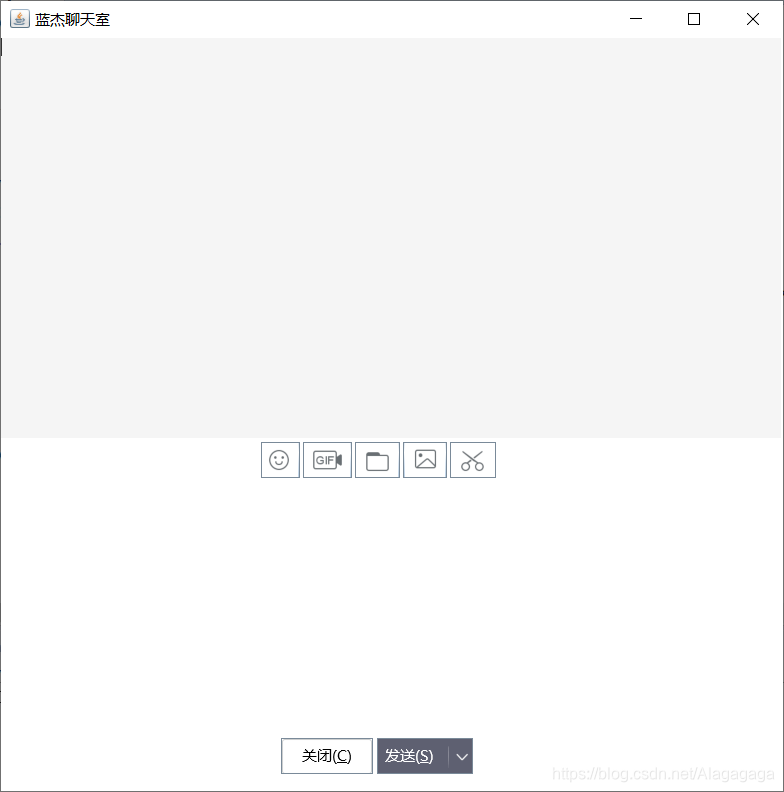
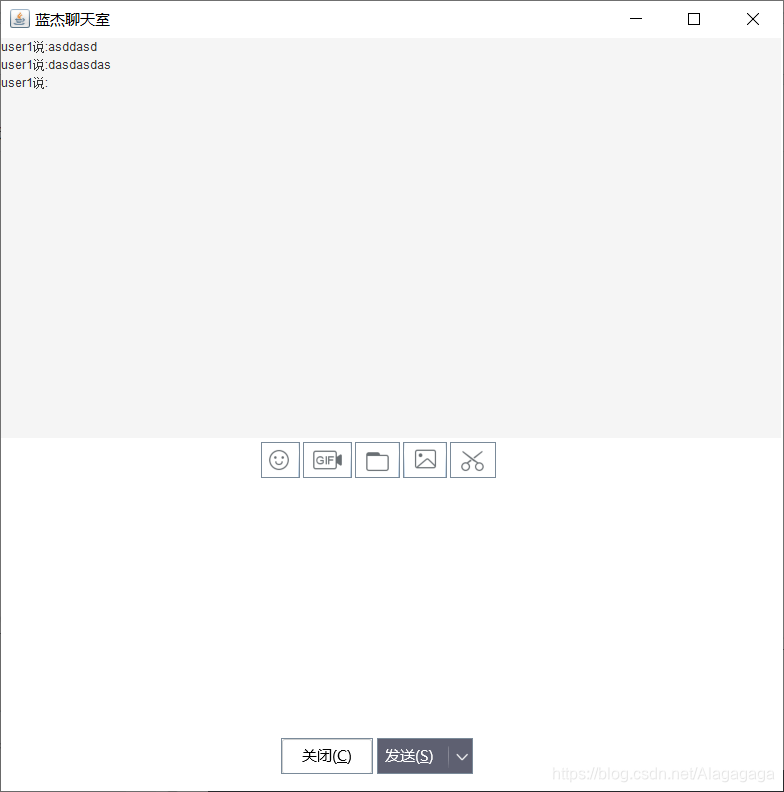
先放效果图吸引一下大家

ChatServer类
这里我们用ServerSocket创建服务器,输入我们的端口,建议端口大于2000,2000以内都被大多数软件占用,8888 6666 9090这些数字我都挺喜欢用的,然后用Socket创建一个客户端,这里为了我们达到聊天室的效果,所以我们把每一个客户端都当作一个线程来处理,这样就可以防止阻塞
//启动服务器,主程序
public class ChatServer {
	// 主函数
	public static void main(String[] args) {
		ChatServer cs = new ChatServer();
		cs.setupServer(9090);
	}

	// 在指定的端口上启动服务器
	public void setupServer(int port) {
		try {
			ServerSocket sc = new ServerSocket(port);
			System.out.println("服务器创建成功:" + port);
			while (true) {
				java.net.Socket client = sc.accept();// 等待连接进入
				System.out.println("进入了一个客户机连接: " + client.getRemoteSocketAddress().toString());
				// 启动一个处理线程,去处理这个连接对象
				ServerThread ct = new ServerThread(client);
				ct.start();
			}
		} catch (Exception ef) {
			ef.printStackTrace();
		}

	}
}
ServerThread类
这里就是我们的线程客户端类,我们把客户端的方法在这个线程类里封装好,然后在前面的服务器里创建对象,丢进线程里启动就完事了。
public class ServerThread extends Thread {

	private Socket client;// 线程中处理的客户对象
	private OutputStream ous;// 输出流对象
	private InputStream ins;
	private UserInfo user; // 这个线程处理对像代表的用户的信息
	// 构造器,创建时必须传入一个Socket对象,
	public ServerThread(Socket client) {
		this.client = client;
	}

	// 取得这个线程对象代表的用户对象;
	public UserInfo getOwerUser() {
		return this.user;
	}

	public void run() {// 线程中执行的方法
		processSocket();
	}

	// 封装方法,将一条消息发送给这个线程对象所代表的客户机, 传入前,不需要加上\r\n,
	public void sendMsg2Me(String msg) {
		try {
			msg += "\r\n";
			ous.write(msg.getBytes());
			ous.flush();
		} catch (Exception ef) {
		}
	}

	// 封装方法,读取客户机发来的消息
	private void processSocket() {
		try {
			ins = client.getInputStream();
			ous = client.getOutputStream();
			// 将输入流ins封装为可以读取一行字符串,也就是以\r\n结尾的字符串
			BufferedReader brd = new BufferedReader(new InputStreamReader(ins));
			sendMsg2Me("欢迎你来聊天!请输入你的用户名:");
			String userName = brd.readLine();
			sendMsg2Me(userName + ",请输入你的密码:");
			String pwd = brd.readLine();
			user = new UserInfo();
			user.setName(userName);
			user.setPwd(pwd);
			// 调用数据库模块,验证用户是否存在
			boolean loginState = DaoTools.checkLogin(user);
			if (!loginState) {// 不存在这个用户账号则关闭
				this.closeMe();
				return;
			}
			ChatTools.addClient(this); // 认证成功:将这个对象加入服务器队列
			String input = brd.readLine();// 一行一行的读取客户机发来的消息
			while (!"bye".equals(input)) {// 一直读取
				System.out.println("服务器收到的是: " + input);
				// 读到一条消息后,就发送给其他的客户机去...
				ChatTools.castMsg(this.user, input);
				input = brd.readLine();// 读取下一条
			}
		} catch (Exception ef) {
			ef.printStackTrace();
		}
		ChatTools.castMsg(this.user, "我下线了,再见!");
		this.closeMe();
		// 调用服务器管理方法,通知这人下线了
		// ChatTools.removeClient(this.user);//暂未实现
	}

	// 关闭这个线程处理对象
	public void closeMe() {
		try {
			client.close();
		} catch (Exception ef) {
			ef.printStackTrace();
		}
	}
}
NetClient类
解释一下这个类的用法,可能有人会问为什么有了上面的ServerThread类为什么还要再创建这个类,我们知道,我们的聊天过程实际上是客户机把消息转化成字节,然后用输出流发送给服务器,服务器用输入流接收,然后服务器再把消息转化成字节,通过输出输入流发给其他客户机。ServerThread类做的是创建客户机线程,以及把消息发送给服务器。而NetClient类则是服务器把消息转发出去的工作,当然你可能会问为什么不把两个功能放在一起,解释起来就是分开来清楚好看,我喜欢,想放在一起我也不拦你!
/**
 * 简单命令行客户端实现: 登录服务器,从命令行读取用户输入发送给服务器
 *
 * @author 帝国
 */
public class NetClient extends Thread {
	private String serverIp;// 服务器IP
	private int port;// 服务器端口
	private OutputStream ous;// 到服务器的输出流对象
	private BufferedReader brd;// 到服务器的输入流对象
	private Socket client;
	// 显示接收到的消息组件,要从界面上传过来
	private JTextArea jta_recive;
	private boolean flag = true;// 提供标识位
	Graphics g;
	// 构造器,创建客户机对象时,传入服务器IP和端口和显示组件
	public NetClient(String serverIp, int port, JTextArea jta_recive) {
		this.serverIp = serverIp;
		this.port = port;
		this.jta_recive = jta_recive;
	}

	// 1、连接上服务器,是否连接成功
	public boolean conn2Server() {
		try {
			// 创建一个到服务器端的Socket对象
			client = new Socket(this.serverIp, this.port);
			InputStream ins = client.getInputStream();// 得到输入输出流对象
			// 可以读取一行字符串,也就是以\r\n结尾的字符串
			brd = new BufferedReader(new InputStreamReader(ins));
			ous = client.getOutputStream();
			return true;
		} catch (Exception ef) {
			ef.printStackTrace();
		}
		return false;
	}

	/**
	 * 2.登录服务器
	 *
	 * @param name:用户名
	 * @param pwd:密码
	 * @return: 是否登录成功
	 */
	public boolean loginServer(String name, String pwd) {
		try {
			// 1.读取服务器发来的一条消息
			String input = brd.readLine();
			System.out.println("服务器说: " + input);
			// 2.按照服务器流程,发送用户名和密码
			name += "\r\n";// 发送时字符串后面必须跟上\r\n !!!
			ous.write(name.getBytes());
			ous.flush();
			System.out.println("客户机已将用户名发送,等服务器回应");

			input = brd.readLine();
			System.out.println("服务器说: " + input);
			pwd += "\r\n";
			ous.write(pwd.getBytes());
			ous.flush();
			return true;
		} catch (Exception ef) {
			ef.printStackTrace();
		}
		return false;
	}

	public boolean isFlag() {
		return flag;
	}

	public void setFlag(boolean flag) {
		this.flag = flag;
	}

	// 3、线程中读取服务器发来的消息
	public void run() {
		while (flag) {
			readFromServer();
		}
	}

	// 4、从服务器读取消息,这个方法会阻塞,必须在独立线程中
	public void readFromServer() {
		try {
			String input = brd.readLine();
			System.out.println(input);
			jta_recive.append(input + "\r\n");// 将收到的消息显示到界面上
		} catch (Exception ef) {
			ef.printStackTrace();
		}
	}

	/** 发送一条消息到服务器的方法 */
	public void sendMsg(String msg) {
		try {
			msg += "\r\n";
			this.ous.write(msg.getBytes());
			this.ous.flush();
		} catch (Exception ef) {
			ef.printStackTrace();
		}
	}

}
这里我们注意到上面用到了三个类,分别是ChatTools、DaoTools和UserInfo,解释一下,这里是我的两个工具类,一个用来保存我线程队列对象,一个用来保存账号密码
ChatTools类
   /**
 * @author ZBZ
 *这个类是服务器用的,保存了每一个客户机的线程对象,
 *并且把它们发来的消息转发出去,发到公屏上,前面只需要再加上每个客户机的id即可,
 *这才是网络聊天室的真相。
 */
public class ChatTools {
	// 保存处理线程的队列对象
	private static ArrayList<ServerThread> stList = new ArrayList();

	// 不需要在外部创建此类的对象,所以构造器访问限定符写为private
	private ChatTools() {
	}
	public static void addClient(ServerThread ct) {
		// 通知己在线用户,有人上线了:
		castMsg(ct.getOwerUser(), "我上线啦!目前人数" + stList.size());
		stList.add(ct);// 将这个处理线程对象加入到队列中
	}

    //解释一下这个方法,因为我们每个客户机发送消息是发送给服务器的,其他的客户机是看不到的,我们看到的,是从服务器接收后再转发出来的消息
	public static void castMsg(UserInfo sender, String msg) {
		msg = sender.getName() + "说:" + msg;
		for (int i = 0; i < stList.size(); i++) {
			ServerThread st = stList.get(i);
			// ServerThread类中定义有一个将消息发送出去的方法
			st.sendMsg2Me(msg);// 发消息给每一个客户机
		}
	}
}
DaoTools类
/**
 * @author ZBZ
 *创建用户名和密码以及认证
 */
public class DaoTools {
	public static boolean checkLogin(UserInfo user) {
		// 在此只验证用户名是否存在
		if (userDB.containsKey(user.getName())) {
			return true;
		}
		System.out.println("认证失败!: " + user.getName());
		return false;
	}

	// 内存用户信息数据库
	private static Map<String, UserInfo> userDB = new HashMap();
	// 静态块:模拟生成内存中的用户数据,用户名为user1~10
	// 当程序启动时,这段代码(静态块中的)会自动执行,向userDB中存放数据
	static {
		for (int i = 0; i < 10; i++) {
			UserInfo user = new UserInfo();
			user.setName("user" + i);
			user.setPwd("pwd" + i);
			userDB.put(user.getName(), user);
		}
	}
}
UserInfo类
名副其实工具类,全是set get 方法,也是为了完整的封装性。
public class UserInfo {
	private String name;// 用户名
	private String pwd;// 密码
	private String loginTime;// 上线时间
	private String addres;// 客户端地址

	public String getAddres() {
		return addres;
	}

	public void setAddres(String addres) {
		this.addres = addres;
	}

	public String getLoginTime() {
		return loginTime;
	}

	public void setLoginTime(String loginTime) {
		this.loginTime = loginTime;
	}

	public String getPwd() {
		return pwd;
	}

	public void setPwd(String pwd) {
		this.pwd = pwd;
	}

	public String getName() {
		return name;
	}

	public void setName(String name) {
		this.name = name;
	}
}
有了以上,我们的网络聊天室的基础就完成了,接下来就是我们的界面了
MainNetUI类
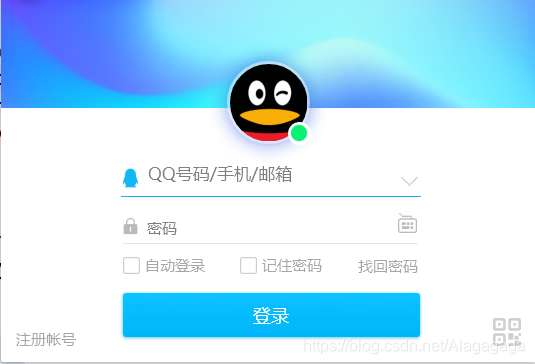
可能会有人说,哎你的界面怎么做的,其实很简单,打开QQ截图就完事了,然后把图片加载到按钮上,调一下位置大小就完事了,下面我也会放图,仅供学习使用,tx爸爸不要抓我!如有侵权,联系我立即删!十分抱歉!
public class MainNetUI extends JFrame {
	private JFrame jf;// 聊天主界面
	private JTextField userName; // 登录界面上的用户名,密码输入框
	private JPasswordField psd;
	private JTextArea input = new JTextArea(); // 显示接收到的消息组件
	private NetClient conn; // 界面所要使用到的连接对象
	Image LOGINPICTURE = new ImageIcon("UI1.png").getImage();
	ImageIcon login = new ImageIcon("login.png");
	// 主函数

	public static void main(String[] args) {
		MainNetUI qu = new MainNetUI();
		qu.showLoginUI();
	}


	// 显示登录界面:
	public void showLoginUI() {
		// 设置窗体
		setSize(540, 380);
		setTitle("蓝杰聊天室");
		setDefaultCloseOperation(JFrame.EXIT_ON_CLOSE);
		setLocationRelativeTo(null);

		// 设置账号框
		userName = new JTextField(12);
		userName.setBounds(138, 120, 250, 40);
		add(userName);

		// 设置密码框
		psd = new JPasswordField(12);
		psd.setBounds(138, 165, 250, 40);
		psd.setText("请输入密码");
		add(psd);

		// 设置按钮
		JButton btn = new JButton("登陆", login);
		btn.setBounds(118, 254, 284, 46);
		this.add(btn);

		// 创建监听器
		btn.addActionListener(new ActionListener() {

			public void actionPerformed(ActionEvent e) {
				loginAction();
			}
		});
		setLayout(null);
		// 设置窗体可见
		setVisible(true);

	}

	public void paint(Graphics g) {
		super.paint(g);
		g.drawImage(LOGINPICTURE, 0, 0, null);
	}

	// 登录事件处理
	private void loginAction() {
	//这个方法是打开文件选择器的,用于实现文件传输功能,容易做到,但是我懒得做了,有兴趣的同学可以做。
//		JFileChooser jfileChooser = new JFileChooser();
//		jfileChooser.showOpenDialog(null);
//		File file = jfileChooser.getSelectedFile();
//		if(file == null) {
//			return;
//		}
		String name = userName.getText();
		String word = psd.getText();
		// 1.创建连接对象
		conn = new NetClient("localhost", 9090, input);
		// 2.连接上服务器
		if (conn.conn2Server()) {// 如果能连接上服务器
			// 3.登录
			if (conn.loginServer(name, word)) {
				// 4.显示聊天主界面 //登录成功了,要关掉登录界面
				showMainUI();
				// 5.启动接收线程
				dispose();// 关闭登录界面
				conn.start();
			}
		} else {
			JOptionPane.showMessageDialog(null, "登陆失败",

					"登陆失败", JOptionPane.INFORMATION_MESSAGE);

			System.out.println("登录失败!");
		}
	}

	// 显示聊天界面
	public void showMainUI() {
		jf = new JFrame("聊天客户端v0.1");
		jf.setSize(new Dimension(800, 800));
		jf.setLocationRelativeTo(null);
		jf.setDefaultCloseOperation(JFrame.EXIT_ON_CLOSE);
		jf.setLayout(null);
		jf.setTitle("蓝杰聊天室");
		jf.getContentPane().setBackground(Color.WHITE);
		Graphics g =this.getGraphics();

		// 发送消息输入区
		final JTextArea output = new JTextArea();
		// 发送按钮
		// javax.swing.JButton bu_send = new javax.swing.JButton("send");

		// 聊天室内容
		output.setBackground(Color.WHITE);
		output.setBounds(0, 444, 780, 200);
		input.setBackground(new Color(245, 245, 245));
		input.setBounds(0, 0, 780, 400);

		// 添加按钮图片
		ImageIcon emoji = new ImageIcon("emoji.png");
		ImageIcon gif = new ImageIcon("gif.png");
		ImageIcon file = new ImageIcon("file.png");
		ImageIcon image = new ImageIcon("image.png");
		ImageIcon screen = new ImageIcon("screen.png");
		ImageIcon close = new ImageIcon("close.png");
		ImageIcon send = new ImageIcon("send.png");

		JButton bu_emoji = new JButton(emoji);
		JButton bu_gif = new JButton(gif);
		JButton bu_file = new JButton(file);
		JButton bu_image = new JButton(image);
		JButton bu_screen = new JButton(screen);
		JButton bu_close = new JButton(close);
		JButton bu_send = new JButton(send);

		bu_emoji.setBounds(260, 404, 39, 36);
		bu_gif.setBounds(302, 404, 49, 36);
		bu_file.setBounds(354, 404, 45, 36);
		bu_image.setBounds(402, 404, 44, 36);
		bu_screen.setBounds(449, 404, 46, 36);
		bu_close.setBounds(280, 700, 92, 36);
		bu_send.setBounds(376, 700, 96, 36);

		// 添加监听器
        ActionListener listener = new ActionListener() {

			@Override
			public void actionPerformed(ActionEvent e) {
				if(e.getSource()==bu_send) {
					String msg = output.getText();
					conn.sendMsg(msg);
					output.setText(null);
				}
				else if(e.getSource()==bu_gif) {
					System.out.println("sss");
					new Thread(new videoSet("localhost", 9090)).start();

				}
				else if(e.getSource()==bu_close) {
					jf.dispose();
					conn.setFlag(false);
					System.out.println(conn.isFlag());
				}

			}
		};
		bu_send.addActionListener(listener);
		bu_close.addActionListener(listener);
		bu_gif.addActionListener(listener);

		jf.add(input);
		jf.add(bu_emoji);
		jf.add(bu_gif);
		jf.add(bu_file);
		jf.add(bu_image);
		jf.add(bu_screen);
		jf.add(output);
		jf.add(bu_close);
		jf.add(bu_send);
		jf.setVisible(true);
	}
}


以上就是我们的聊天室大部分功能了,还有视频功能,代码我也会贴,不过要额外导入包,java本身自带的包是不行的,额外导入包的方法我在上一篇Quartz里有介绍过,这里就不赘述,说一下视频的实现,通过那个包调用摄像头,摄像头拍到的画面就是一张图片,然后用输入输出流发送出去即可,把这些封装成一个方法,然后通过一个按钮调用就行
因为要实现一边视频一边聊天,所以视频方法也用线程跑,这样就不会在视频的时候卡住。
用到的包是webcam,这个百度一下就有得下载,然后导入即可,实在不会也可以看看其他博主的使用介绍,我就懒得出教程了,蛮简单的。(干脆还是出一下吧,几分钟的事,那就看我的下篇文章)

public class videoSet implements Runnable {
	Graphics g;
	private Socket client;
	private String serverIp;// 服务器IP
	private int port;// 服务器端口

	@Override
	public void run() {
		try {
			video();
		} catch (IOException e) {
			// TODO Auto-generated catch block
			e.printStackTrace();
		}

	}

	public videoSet(String serverIp, int port) {
		super();
		this.serverIp = serverIp;
		this.port = port;
	}

	public void video() throws IOException {
		JFrame jf = new JFrame();
		jf.setTitle("视频");
		jf.setSize(800, 800);
		jf.setLocationRelativeTo(null);
		jf.setVisible(true);
		g = jf.getGraphics();
		Webcam web = Webcam.getDefault();
		web.setViewSize(WebcamResolution.VGA.getSize());
		web.open();
		System.out.println("连接成功");
		client = new Socket(serverIp, port);
		while (true) {
			BufferedImage img = web.getImage();
			g.drawImage(img, 0, 0, null);
			ByteArrayOutputStream baos = new ByteArrayOutputStream();
			try {
				OutputStream ous = client.getOutputStream();
				DataOutputStream dous = new DataOutputStream(ous);
				dous.writeInt(baos.size());
				baos.writeTo(ous);
			} catch (IOException e) {
				// TODO Auto-generated catch block
				e.printStackTrace();
			}
		}
	}

	// 接收对方的视频图像
	public void DrawCapture(byte[] buffer) {
		ByteArrayInputStream bais = new ByteArrayInputStream(buffer);
		try {
			BufferedImage show = ImageIO.read(bais);
			g.drawImage(show, 100, 100, null);
		} catch (Exception ef) {
			ef.printStackTrace();
		}
	}

}
然后我们的网络聊天室就这样完成了!很简单,其实还有很多想实现的功能,比如发送表情,比如私聊,比如截屏,等等,但是这些功能说难也不难,都只是之前知识的应用而已,我就不想花过多精力了,我已经马不停蹄地奔向下一个知识了,时间不等人!望大家也加油!
over~


 996
996


 被折叠的 条评论
为什么被折叠?
被折叠的 条评论
为什么被折叠?
 到【灌水乐园】发言


