


发现一位博主写的特别棒 强烈推荐参考他的:大牛的网址
由于Spring Boot能够快速开发、便捷部署等特性,相信有很大一部分Spring Boot的用户会用来构建RESTful API。而我们构建RESTful API的目的通常都是由于多终端的原因,这些终端会共用很多底层业务逻辑,因此我们会抽象出这样一层来同时服务于多个移动端或者Web前端。
这样一来,我们的RESTful API就有可能要面对多个开发人员或多个开发团队:IOS开发、Android开发或是Web开发等。为了减少与其他团队平时开发期间的频繁沟通成本,传统做法我们会创建一份RESTful API文档来记录所有接口细节,然而这样的做法有以下几个问题:
由于接口众多,并且细节复杂(需要考虑不同的HTTP请求类型、HTTP头部信息、HTTP请求内容等),高质量地创建这份文档本身就是件非常吃力的事,下游的抱怨声不绝于耳。
随着时间推移,不断修改接口实现的时候都必须同步修改接口文档,而文档与代码又处于两个不同的媒介,除非有严格的管理机制,不然很容易导致不一致现象。
为了解决上面这样的问题,本文将介绍RESTful API的重磅好伙伴Swagger2,它可以轻松的整合到Spring Boot中,并与Spring MVC程序配合组织出强大RESTful API文档。它既可以减少我们创建文档的工作量,同时说明内容又整合入实现代码中,让维护文档和修改代码整合为一体,可以让我们在修改代码逻辑的同时方便的修改文档说明。另外Swagger2也提供了强大的页面测试功能来调试每个RESTful API。
springfox是通过注解的形式自动生成API文档的,利用它,可以很方便的学些restful API;swagger主要用户展示springfox生成的API文档,而且还提供测试界面,自动显示json格式的响应,大大方便了后台开发人员和前端的沟通与联调成本。
swagger
swagger是一个规范的完整的框架,用户生成、描述、调用和可视化RESTful风格的Web服务。总体的目标是使客户端和文件系统作为服务器以同样的速度来更新。文件的方法,参数和模型紧密继承到服务器端的diamante,允许API来始终保持同步。Swagger让部署管理和使用功能强大的API从未如此简单
springfox-swagger
swagger的功能非常强大,spring这个大神就开始试图想把swagger继承到自己的项目中,就有了后来的spring-swagger,再后来又演变成了springfox。虽然是通过plug的方式把swagger集成进来,但是它本身对api的生成,主要还是依靠swagger实现的。
SpringFox的大致原理
springfox的大致原理就是,在项目启动的过程中,spring上下文的初始化的过程,框架自动根据配置家在一些swagger相关的bean到当前的上下文,并且自动扫描系统中可能需要生成的api文档的那些类,并生成响应的信息缓存起来。一般的都会扫描控制层Controller类,根据这些Controller类中的功能方法自动生成API接口文档。
使用步骤:(使用的软件:IDEA,语言:kotlin)
1.在pom.xml中添加maven依赖
        <dependency>
            <groupId>io.springfox</groupId>
            <artifactId>springfox-swagger2</artifactId>
            <version>2.6.1</version>
        </dependency>
        <dependency>
            <groupId>io.springfox</groupId>
            <artifactId>springfox-swagger-ui</artifactId>
            <version>2.6.1</version>
        </dependency>
        <dependency>
            <groupId>org.springframework.restdocs</groupId>
            <artifactId>spring-restdocs-mockmvc</artifactId>
            <version>1.1.2.RELEASE</version>
            <scope>test</scope>
        </dependency>
        <dependency>
            <groupId>io.springfox</groupId>
            <artifactId>springfox-staticdocs</artifactId>
            <version>2.6.1</version>
        </dependency>
2.添加Swagger2的配置文件:configuration
需要特别注意的是swagger scan base package,这是扫描注解的配置,即你的接口位置。
    import org.springframework.context.annotation.Bean
    import org.springframework.context.annotation.Configuration
    import org.springframework.http.ResponseEntity
    import springfox.documentation.builders.ApiInfoBuilder
    import springfox.documentation.builders.PathSelectors
    import springfox.documentation.builders.RequestHandlerSelectors
    import springfox.documentation.service.ApiInfo
    import springfox.documentation.service.Contact
    import springfox.documentation.spi.DocumentationType
    import springfox.documentation.spring.web.plugins.Docket
    import springfox.documentation.swagger.web.UiConfiguration
    import springfox.documentation.swagger2.annotations.EnableSwagger2

    @Configuration
    @EnableSwagger2
    class Swagger2Config {

    @Bean
    fun restfulApi(): Docket {
        return Docket(DocumentationType.SWAGGER_2)
                .genericModelSubstitutes(ResponseEntity::class.java)
                .useDefaultResponseMessages(true)
                .forCodeGeneration(true)
                .select()
                .apis(RequestHandlerSelectors.basePackage("com.company.service.web"))
                .paths(PathSelectors.any())
                .build()
                .pathMapping("/")
                .apiInfo(apiInfo())
    }

    private fun apiInfo(): ApiInfo {
        return ApiInfoBuilder()
                .title("API文档")
                .description(this.description)
                .termsOfServiceUrl("http://路径.com")
                .contact(Contact("name", "http://name.com", "name@name.com"))
                .version("1.0.0")
                .build()
    }

    private val description = "Api 文档规范."
}
这里的@Configuration注解,让spring加载配置,@EnableSwagger2启用Swagger2
再通过createRestApi函数创建Docket的Bean之后,apiInfo()用来创建该Api的基本信息(这些基本信息会展现在文档页面中)。select()函数返回一个ApiSelectorBuilder实例用来控制哪些接口暴露给Swagger来展现,本例采用指定扫描的包路径来定义,Swagger会扫描该包下所有Controller定义的API,并产生文档内容(除了被@ApiIgnore指定的请求)。
3.在API上做一些声明:在Controller类中添加相关的swagger注解。但是有一个要求,这个Controller类一定要让上一步配置类的@ComponentScan扫描到;
@RestController
@Api(value = "User", description = "the chapter of user")
@RequestMapping("/users", produces = arrayOf(MediaType.APPLICATION_JSON_UTF8_VALUE))
class UserController {
@Resource private lateinit var userService: IUserService
@Resource private lateinit var orgResponse: OrgResponse
@Resource private lateinit var iDGenerator: IDGenerator
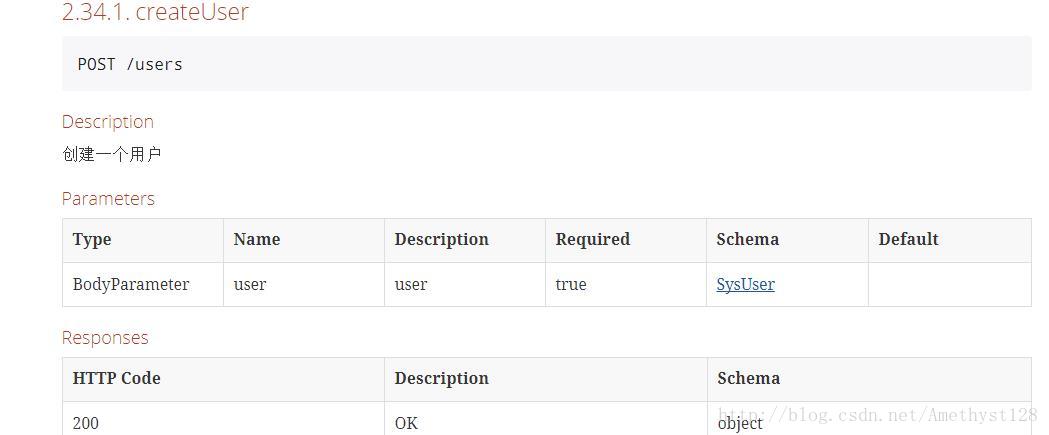
@ApiOperation(value = "createUser", notes = "创建一个用户")
@ApiImplicitParam(name = "zy", value = "用户名", paramType = "path", required = true, dataType = "String")
@PostMapping(consumes = arrayOf(MediaType.APPLICATION_JSON_UTF8_VALUE))
fun create(@Valid @RequestBody user: SysUser,@PathVariable userName:String): ResponseEntity<Any> {
return null
}
}使用Spring Rest Docs 可以通过测试生成响应的Asciidoc片段,mockmvc类是属于dosc的。
@RunWith(SpringJUnit4ClassRunner::class)
@SpringBootTest
class UserControllerTest {

    @Resource private lateinit var context: WebApplicationContext
    private lateinit var mockMvc: MockMvc

    @Rule @JvmField var restDocumentation = JUnitRestDocumentation("target/asciidoc/snippets")

    @Before
    fun setUp() {
        this.mockMvc = MockMvcBuilders.webAppContextSetup(context)
                .apply<DefaultMockMvcBuilder>(documentationConfiguration(this.restDocumentation))
                .build()
    }

    @After
    fun tearDown() {
    }

    @Test
    fun create() {
        val json = """
                {
                    "userName": "zy",
                    "email": "example@example.com",
                    "password": "zy2017"
                }
             """
        val request = post("/users")
                .contentType(MediaType.APPLICATION_JSON_UTF8)
                .content(json)
                .accept(MediaType.APPLICATION_JSON_UTF8)

        this.mockMvc.perform(request)
                .andExpect(status().isCreated)
                .andDo(print())
                //spring Rest Docs生成Asciidoc片段
                .andDo(document("createUser", preprocessResponse(prettyPrint())))

    }
生成html和pdf
1.首先在index中引入整个asciidoc的三行代码:
include::{generated}/overview.adoc[]
include::{generated}/paths.adoc[]
include::{generated}/definitions.adoc[]
2.在pom.xml文件中添加asciidoctor的插件
            <!--asciidoc-->
            <plugin>
                <groupId>org.apache.maven.plugins</groupId>
                <artifactId>maven-surefire-plugin</artifactId>
                <configuration>
                    <includes>
                        <include>**/*Documentation.java</include>
                    </includes>
                </configuration>
            </plugin>
            <!-- Run the generated asciidoc through Asciidoctor to generate
                 other documentation types, such as PDFs or HTML5 -->
            <plugin>
                <groupId>org.asciidoctor</groupId>
                <artifactId>asciidoctor-maven-plugin</artifactId>
                <version>1.5.3</version>
                <!-- Include Asciidoctor PDF for pdf generation -->
                <dependencies>
                    <dependency>
                        <groupId>org.asciidoctor</groupId>
                        <artifactId>asciidoctorj-pdf</artifactId>
                        <version>1.5.0-alpha.11</version>
                    </dependency>
                    <dependency>
                        <groupId>org.jruby</groupId>
                        <artifactId>jruby-complete</artifactId>
                        <version>1.7.21</version>
                    </dependency>
                </dependencies>
                <!-- Configure generic document generation settings -->
                <configuration>
                    <sourceDirectory>${asciidoctor.input.directory}</sourceDirectory>
                    <sourceDocumentName>index.adoc</sourceDocumentName>
                    <attributes>
                        <doctype>book</doctype>
                        <toc>left</toc>
                        <toclevels>3</toclevels>
                        <numbered/>
                        <hardbreaks/>
                        <sectlinks/>
                        <sectanchors/>
                        <generated>${generated.asciidoc.directory}</generated>
                    </attributes>
                </configuration>
                <!-- Since each execution can only handle one backend, run
                     separate executions for each desired output type -->
                <executions>
                    <execution>
                        <id>output-html</id>
                        <phase>test</phase>
                        <goals>
                            <goal>process-asciidoc</goal>
                        </goals>
                        <configuration>
                            <backend>html5</backend>
                            <outputDirectory>${asciidoctor.html.output.directory}</outputDirectory>
                        </configuration>
                    </execution>

                    <execution>
                        <id>output-pdf</id>
                        <phase>test</phase>
                        <goals>
                            <goal>process-asciidoc</goal>
                        </goals>
                        <configuration>
                            <backend>pdf</backend>
                            <outputDirectory>${asciidoctor.pdf.output.directory}</outputDirectory>
                        </configuration>
                    </execution>

                </executions>
            </plugin>
3.现在运行SwaggerTest,整合片段成html文件
import io.github.robwin.markup.builder.MarkupLanguage
import io.github.robwin.swagger2markup.GroupBy
import io.github.robwin.swagger2markup.Swagger2MarkupConverter
import org.junit.Before
import org.junit.Test
import org.junit.runner.RunWith
import org.springframework.boot.test.context.SpringBootTest
import org.springframework.http.MediaType
import org.springframework.test.context.junit4.SpringJUnit4ClassRunner
import org.springframework.test.web.servlet.MockMvc
import org.springframework.test.web.servlet.request.MockMvcRequestBuilders.get
import org.springframework.test.web.servlet.result.MockMvcResultMatchers.status
import org.springframework.test.web.servlet.setup.MockMvcBuilders
import org.springframework.web.context.WebApplicationContext
import springfox.documentation.staticdocs.Swagger2MarkupResultHandler.outputDirectory
import springfox.documentation.staticdocs.SwaggerResultHandler
import javax.annotation.Resource


/**
 * Description
 * @date 2017-04-17
 */
@RunWith(SpringJUnit4ClassRunner::class)
@SpringBootTest
//@AutoConfigureRestDocs(outputDir = "target/asciidoc/snippets")
class Swagger2MarkupTest {

    @Resource private val context: WebApplicationContext? = null
    private lateinit var mockMvc: MockMvc

    @Before
    fun setUp() {
        this.mockMvc = MockMvcBuilders.webAppContextSetup(this.context!!).build()
    }

    private val snippetDir = "target/asciidoc/snippets"
    private val outputDir = "target/asciidoc/generated"

    @Test
    @Throws(Exception::class)
    fun convertToAsciiDoc() {

        // 得到swagger.json,写入outputDir目录中
        this.mockMvc.perform(get("/v2/api-docs")
                .accept(MediaType.APPLICATION_JSON))
                .andDo(SwaggerResultHandler.outputDirectory(outputDir).build())
                .andExpect(status().isOk)
                .andReturn()

        // 读取上一步生成的swagger.json转成asciiDoc,写入到outputDir
        // 这个outputDir必须和插件里面<generated></generated>标签配置一致
        Swagger2MarkupConverter.from(outputDir + "/swagger.json")
                .withPathsGroupedBy(GroupBy.TAGS)// 按tag排序
                .withMarkupLanguage(MarkupLanguage.ASCIIDOC)// 格式
                .withExamples(snippetDir) //插入测试生成的片段
                .build()
                .intoFolder(outputDir) // 输出
    }

    @Test
    @Throws(Exception::class)
    fun convert2AsciiDoc() {
        this.mockMvc.perform(get("/v2/api-docs")
                .accept(MediaType.APPLICATION_JSON))
                .andDo(outputDirectory(outputDir)
                        .withPathsGroupedBy(GroupBy.TAGS)
                        .withExamples(snippetDir)
                        .build())
                .andExpect(status().isOk)
    }

}
运行测试和maven之后得到下面这样的:
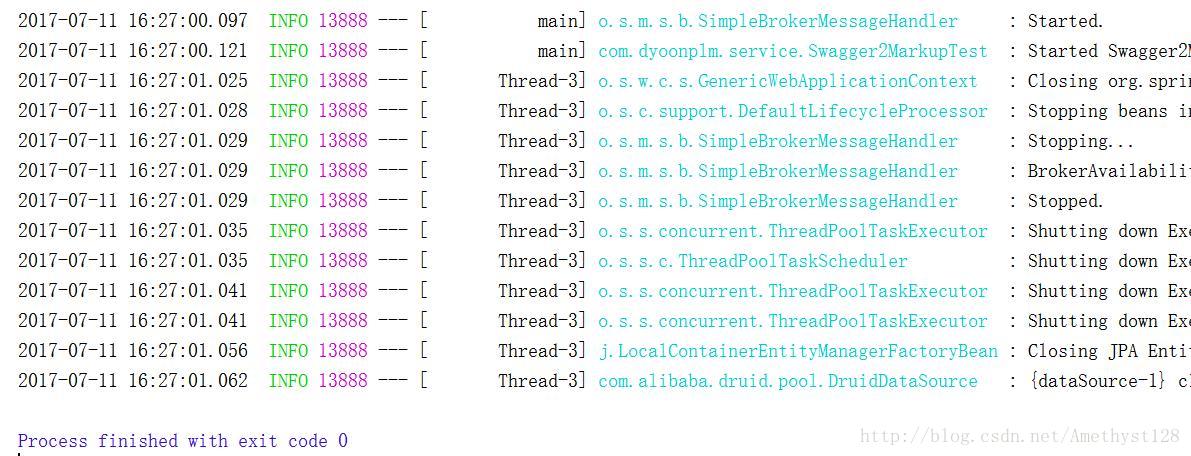
生成的api.xml将是这样的:
常用的注解:
* @Api:将Controller标记为Swagger文档资源。
* @ApiOperation:描述一个类的一个方法,或者说一个接口
* @ApiImplicitParams :多个参数描述
* @ApiImplicitParam:单个参数描述
* @ApiModel:用对象来接收参数
* @ApiModelProperty:用对象接收参数时,描述对象的一个字段
其它
* @ApiResponse:HTTP响应其中1个描述
* @ApiResponses:HTTP响应整体描述
详细的参数说明:
*@Api(value = “api的name”,notes = “描述”)
*@ApiOperation(value = “操作的名称”, notes = “对操作的描述”)
*@ ApiResponse(code = 返回的数字码, message = “对应的消息内容”, response = 返回值类)
*@ApiImplicitParam(name = “参数名称”, value = “参数的描述,或者值”, paramType = “参数位置”, required = true(boolean值,是否必须提供), dataType = “参数的数据类型”)
(((其中,位置参数类型paramType分为以下几种,是根据它被什么注解而对应的类型,这里的类型一定要和方法中的参数注解要相同,要不然获取不到值。下面是简介:
@RequestHeader—–paramType = “header”
@RequestParam—–paramType = “query”
@PathVariable—–paramType = “path”
@RequestBody—–paramType = “body”
4.设定访问API doc的路由
在配置文件application.yml中声明:
springfox.docmentation.swagger.v2.path:/api-docs
这个path就是json的访问request mapping,可以自定义,防止与自身代码冲突。
API doc的显示路由是:http://localhost:8080/swagger-ui.html
启动SpringBoot程序,访问上面的网址,就能够看到前文所展示的restful API的界面了。
我们可以在这里输入参数信息进行测试:
插入图片
参考信息:
* Swagger-UI官方网站 :http://swagger.io/swagger-ui/
* Spring boot 2.0 – swagger2 整合 swagger-ui.html 打不开问题 :http://www.jianshu.com/p/cbb6d89b88d8
* github:swagger-ui : https://github.com/swagger-api/swagger-ui/
* http://blog.csdn.net/daisy_xiu/article/details/52368920


 9985
9985

 被折叠的 条评论
为什么被折叠?
被折叠的 条评论
为什么被折叠?
 到【灌水乐园】发言


