


实验七 Spring Boot安全管理
一、 实验目的
1、熟悉Spring Security快速入门
2、熟悉MVC Security安全配置
3、掌握内存、JDBC、UserDetailsService身份认证。
4、掌握自定义用户访问控制、自定义用户登录、自定义用户退出。
5、掌握登录用户信息获取、记住我功能、CSRF防护功能。
二、实验内容
1.MVC Security安全配置介绍
2.内存身份认证
3.JDBC身份认证
4.UserDetailsService身份认证
5.自定义用户访问控制
6.自定义用户登录
7.自定义用户退出
8.登录用户信息获取
9.记住我功能
10、CSRF防护功能
11、Security管理前端页面
三、实验步骤
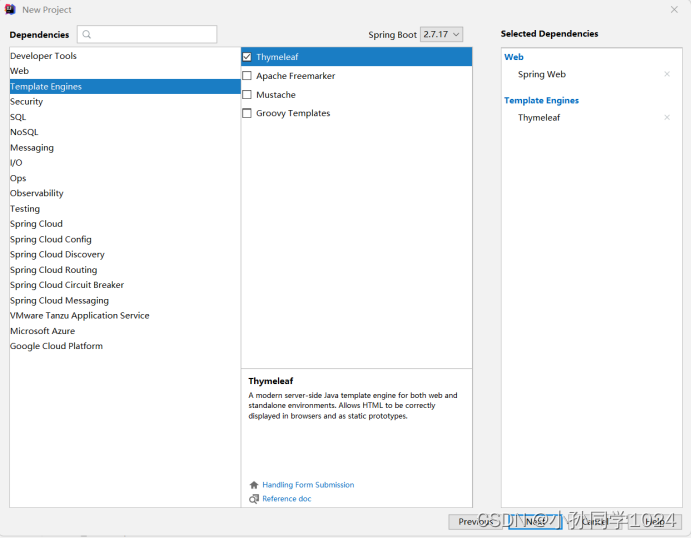
1、创建项目,引入Web和Thymeleaf的依赖启动器
2、引入页面Html资源文件
在项目的resources下templates目录中,创建detail文件夹并在其中创建common文件夹和vip文件夹
① 在templates目录中创建index.html文件
<!DOCTYPE html>
<html xmlns="http://www.w3.org/1999/xhtml" xmlns:th="http://www.thymeleaf.org" xmlns:sec="http://www.thymeleaf.org/thymeleaf-extras-springsecurity5">
<head>
<meta http-equiv="Content-Type" content="text/html; charset=UTF-8">
<title>影视直播厅</title>
</head>
<body>
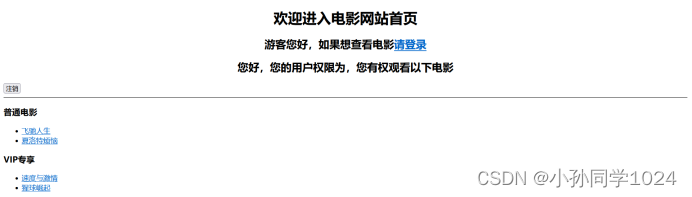
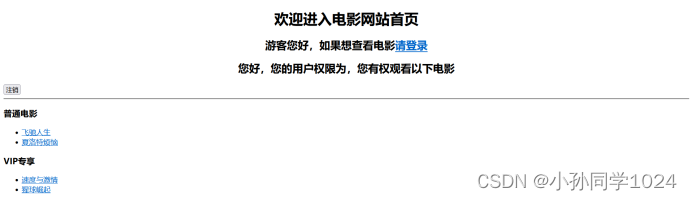
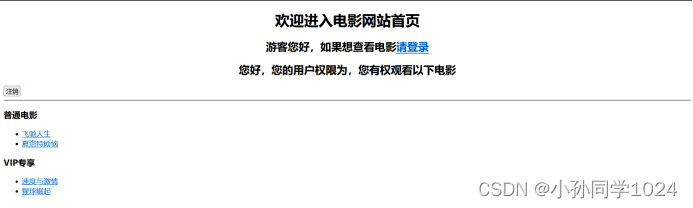
<h1 align="center">欢迎进入电影网站首页</h1>
<div sec:authorize="isAnonymous()">
<h2 align="center">游客您好,如果想查看电影<a th:href="@{/userLogin}">请登录</a></h2>
</div>
<div sec:authorize="isAuthenticated()">
<h2 align="center"><span sec:authentication="name" style="color: #007bff"></span>您好,您的用户权限为<span sec:authentication="principal.authorities" style="color:darkkhaki"></span>,您有权观看以下电影</h2>
<form th:action="@{/mylogout}" method="post">
<input th:type="submit" th:value="注销" />
</form>
</div>
<hr>
<div sec:authorize="hasRole('common')">
<h3>普通电影</h3>
<ul>
<li><a th:href="@{/detail/common/1}">飞驰人生</a></li>
<li><a th:href="@{/detail/common/2}">夏洛特烦恼</a></li>
</ul>
</div>
<div sec:authorize="hasAuthority('ROLE_vip')">
<h3>VIP专享</h3>
<ul>
<li><a th:href="@{/detail/vip/1}">速度与激情</a></li>
<li><a th:href="@{/detail/vip/2}">猩球崛起</a></li>
</ul>
</div>
</body>
</html>② 在templates\detail\common下创建1.html
<!DOCTYPE html>
<html xmlns="http://www.w3.org/1999/xhtml" xmlns:th="http://www.thymeleaf.org">
<head>
<meta http-equiv="Content-Type" content="text/html; charset=UTF-8">
<title>影片详情</title>
</head>
<body>
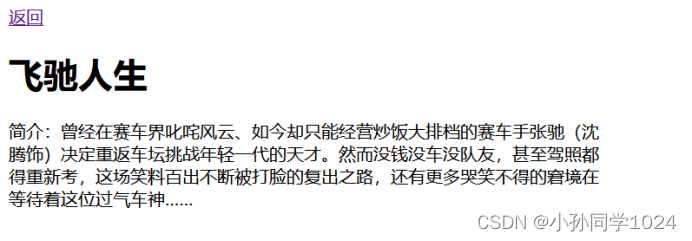
<a th:href="@{/}">返回</a>
<h1>飞驰人生</h1>
<p style="width: 550px">简介:曾经在赛车界叱咤风云、如今却只能经营炒饭大排档的赛车手张驰(沈腾饰)决定重返车坛挑战年轻一代的天才。
然而没钱没车没队友,甚至驾照都得重新考,这场笑料百出不断被打脸的复出之路,还有更多哭笑不得的窘境在等待着这位过气车神……
</p>
</body>
</html>③ 在templates\detail\common下创建2.html
<!DOCTYPE html>
<html xmlns="http://www.w3.org/1999/xhtml" xmlns:th="http://www.thymeleaf.org">
<head>
<meta http-equiv="Content-Type" content="text/html; charset=UTF-8">
<title>影片详情</title>
</head>
<body>
   <a th:href="@{/}">返回</a>
   <h1>夏洛特烦恼</h1>
   <p style="width: 550px">简介:《夏洛特烦恼》是开心麻花2012年首度推出的话剧,由闫非和彭大魔联合编剧、执导。
      2013、2014、2015年仍在上演。该作讲述了一个普通人在穿越重回到高中校园并实现了种种梦想的不可思议的经历……</p>
</body>
</html>
④ 在templates\detail\vip下创建1.html
<!DOCTYPE html>
<html xmlns="http://www.w3.org/1999/xhtml" xmlns:th="http://www.thymeleaf.org">
<head>
<meta http-equiv="Content-Type" content="text/html; charset=UTF-8">
<title>影片详情</title>
</head>
<body>
   <a th:href="@{/}">返回</a>
   <h1>速度与激情</h1>
   <p style="width: 550px">简介:《速度与激情》是罗伯·科恩等执导,于2001年至2017年范·迪塞尔、保罗·沃克(已故)、
      乔丹娜·布鲁斯特、米歇尔·罗德里格兹等主演的赛车题材的动作犯罪类电影,截至2018年,一共拍了八部。之后两部续集正式定档,
      《速度与激情9》和《速度与激情10》分别于2020年4月10日和2021年4月2日上映……</p>
</body>
</html>
⑤ 在templates\detail\vip下创建2.html
<!DOCTYPE html>
<html xmlns="http://www.w3.org/1999/xhtml" xmlns:th="http://www.thymeleaf.org">
<head>
<meta http-equiv="Content-Type" content="text/html; charset=UTF-8">
<title>影片详情</title>
</head>
<body>
   <a th:href="@{/}">返回</a>
   <h1>猩球崛起</h1>
   <p style="width: 550px">简介:《猩球崛起》是科幻片《人猿星球》的前传,由鲁伯特·瓦耶特执导,詹姆斯·弗兰科,汤姆·费尔顿,
      芙蕾达·平托,布莱恩·考克斯等主演。剧情主要讲述人猿进化为高级智慧生物、进而攻占地球之前的种种际遇,主题是带有警世性质的——人类疯狂的野心所产生的恶果。
      影片获得了第39届安妮奖最佳真人电影角色动画奖等奖项,同时获得了奥斯卡最佳特效奖提名,但很遗憾,并没有获奖……</p>
</body>
</html>
3、编写控制层
在com.lg.ch07中创建controller文件夹并在其中创建FileController.java
import org.springframework.stereotype.Controller;
import org.springframework.web.bind.annotation.GetMapping;
import org.springframework.web.bind.annotation.PathVariable;

@Controller
public class FileController {
    //  影片详情页
    @GetMapping("/detail/{type}/{path}")
    public String toDetail(@PathVariable("type") String type, @PathVariable("path") String path) {
        return "detail/" + type + "/" + path;
    }
}
4.添加启动器
在pom.xml文件中添加启动器
<dependency>
    <groupId>org.springframework.boot</groupId>
    <artifactId>spring-boot-starter-security</artifactId>
</dependency>
5.内存身份认证
① 自定义配置类并使用内存进行身份认证
在cim.lg.ch07中创建config包并在其中创建SecurityConfig配置类
import org.springframework.security.config.annotation.authentication.builders.AuthenticationManagerBuilder;
import org.springframework.security.config.annotation.web.configuration.EnableWebSecurity;
import org.springframework.security.config.annotation.web.configuration.WebSecurityConfigurerAdapter;
import org.springframework.security.crypto.bcrypt.BCryptPasswordEncoder;

@EnableWebSecurity
public class SecurityConfig extends WebSecurityConfigurerAdapter {
    @Override
    protected void configure(AuthenticationManagerBuilder auth) throws Exception {
        //  密码需要设置编码器
        BCryptPasswordEncoder encoder = new BCryptPasswordEncoder();
        // 1、使用内存用户信息,作为测试使用
        auth.inMemoryAuthentication().passwordEncoder(encoder)
                .withUser("shitou").password(encoder.encode("123456")).roles("common")
                .and()
                .withUser("李四").password(encoder.encode("123456")).roles("vip");
    }
}
② 效果测试
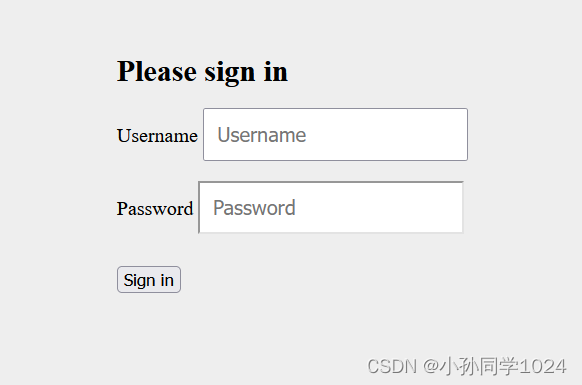
启动程序在浏览器输入http://127.0.0.1:8080
输入后自动跳转到http://127.0.0.1:8080/login
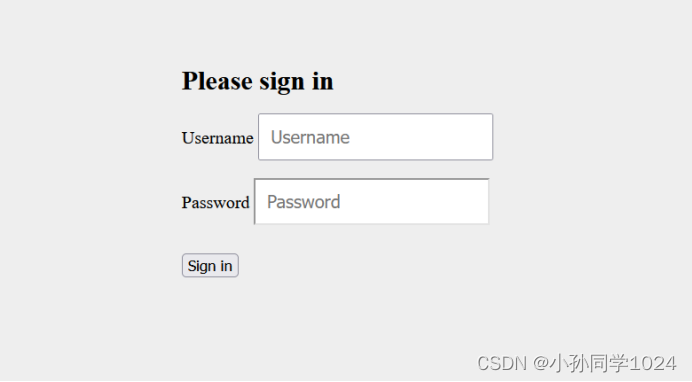
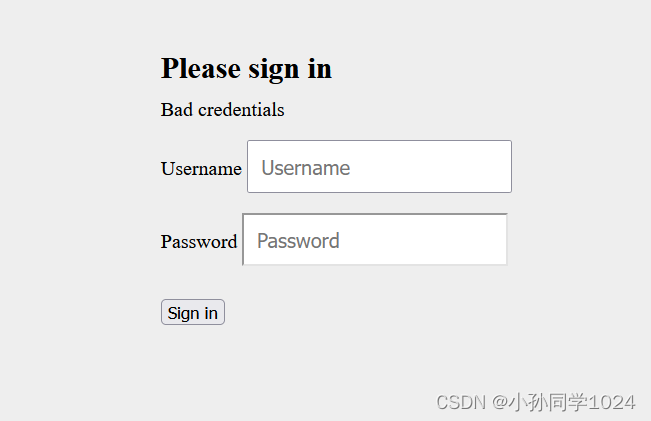
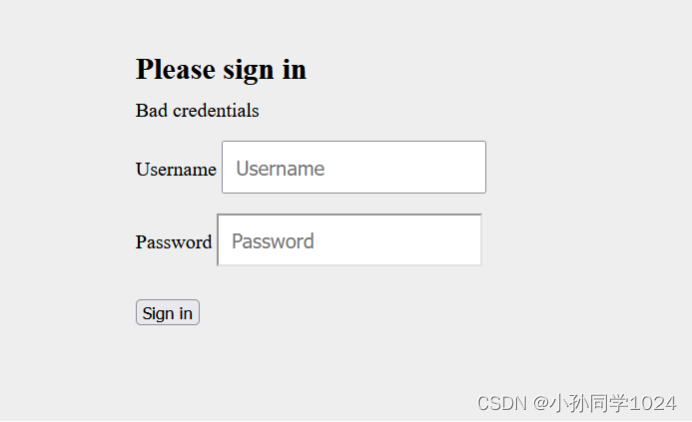
输入错误的账号和密码
输入正确的账号和密码
6.JDBC身份认证
① 数据准备
使用之前的springbootdata数据库创建t_customer、t_authority和t_customer_authority三个表并存入数据。
#使用数据库
USE springbootdata
#创建表t_customer
CREATE TABLE t_customer (
 `id` int(20) NOT NULL AUTO_INCREMENT,
 `username` VARCHAR(200) DEFAULT NULL,
 `password` VARCHAR(200) DEFAULT NULL,
 `valid` tinyint(1) NOT NULL DEFAULT '1',
 PRIMARY KEY (`id`)
) ENGINE=InnoDB AUTO_INCREMENT=4 DEFAULT CHARSET=utf8;
INSERT INTO `t_customer` VALUES (
'1','shitou',
'$2a$04$PNsSumK7WW4XqJ3MJIKRAusyUtdIs5sgsMF3H2uhvZxyXnVyzqEGi',
'1');
INSERT INTO `t_customer` VALUES (
'2','李四',
'$2a$04$PNsSumK7WW4XqJ3MJIKRAusyUtdIs5sgsMF3H2uhvZxyXnVyzqEGi',
'1');
#创建表t_authority
CREATE TABLE t_authority (
 `id` int(20) NOT NULL AUTO_INCREMENT,
 `authority` VARCHAR(20) DEFAULT NULL,
 PRIMARY KEY (`id`)
) ENGINE=InnoDB AUTO_INCREMENT=4 DEFAULT CHARSET=utf8;
INSERT INTO `t_authority` VALUES ('1','ROLE_common');
INSERT INTO `t_authority` VALUES ('2','ROLE_vip');
#创建表t_customer_authority
CREATE TABLE t_customer_authority (
 `id` int(20) NOT NULL AUTO_INCREMENT,
 `customer_id` int(20) DEFAULT NULL,
 `authority_id` VARCHAR(20) DEFAULT NULL,
 PRIMARY KEY (`id`)
) ENGINE=InnoDB AUTO_INCREMENT=5 DEFAULT CHARSET=utf8;
INSERT INTO `t_customer_authority` VALUES ('1','1','1');
INSERT INTO `t_customer_authority` VALUES ('2','2','2');
② 添加JDBC连接数据库的依赖启动器
在pom.xml文件中添加
<dependency>
    <groupId>org.springframework.boot</groupId>
    <artifactId>spring-boot-starter-jdbc</artifactId>
</dependency>
<dependency>
    <groupId>mysql</groupId>
    <artifactId>mysql-connector-j</artifactId>
    <scope>runtime</scope>
</dependency>
③ 进行数据库连接配置
在application.properties中添加
# MySQL数据库连接配置
spring.datasource.url=jdbc:mysql://localhost:3306/springbootdata?serverTimezone=UTC
spring.datasource.username=root
spring.datasource.password=1234
④ 使用JDBC进行身份认证
在config文件夹下的SecurityConfig.java中注释原有的内存身份认证代码,并添加
@Autowired
private DataSource dataSource;
@Override
protected void configure(AuthenticationManagerBuilder auth) throws Exception {
BCryptPasswordEncoder encoder = new BCryptPasswordEncoder();
String userSQL ="select username,password,valid from t_customer " +
        "where username = ?";
String authoritySQL="select c.username,a.authority from t_customer c,t_authority a,"+
        "t_customer_authority ca where ca.customer_id=c.id " +
        "and ca.authority_id=a.id and c.username =?";
auth.jdbcAuthentication().passwordEncoder(encoder)
        .dataSource(dataSource)
        .usersByUsernameQuery(userSQL)
        .authoritiesByUsernameQuery(authoritySQL);
}
⑤ 效果测试
启动程序在浏览器输入http://127.0.0.1:8080
输入后自动跳转到http://127.0.0.1:8080/login
输入错误的账号和密码
输入正确的账号和密码

7.UserDetailsService身份认证
① 在com.lg.ch07下创建domain文件夹并在其中创建Customer.java
import javax.persistence.*;

@Entity(name = "t_customer")
public class Customer {
    @Id
    @GeneratedValue(strategy = GenerationType.IDENTITY)
    private Integer id;
    private String username;
    private String password;
    public Integer getId() {
        return id;
    }

    public void setId(Integer id) {
        this.id = id;
    }

    public String getUsername() {
        return username;
    }

    public void setUsername(String username) {
        this.username = username;
    }

    public String getPassword() {
        return password;
    }

    public void setPassword(String password) {
        this.password = password;
    }

    @Override
    public String toString() {
        return "Customer{" +
                "id=" + id +
                ", username='" + username + '\'' +
                ", password=" + password +
                '}';
    }
}
② 在domain中创建Authority.java文件
import javax.persistence.*;

@Entity(name = "t_authority ")
public class Authority {
    @Id
    @GeneratedValue(strategy = GenerationType.IDENTITY)
    private Integer id;
    private String authority ;

    public Integer getId() {
        return id;
    }

    public void setId(Integer id) {
        this.id = id;
    }

    public String getAuthority() {
        return authority;
    }

    public void setAuthority(String authority) {
        this.authority = authority;
    }

    @Override
    public String toString() {
        return "Authority{" +
                "id=" + id +
                ", authority='" + authority + '\'' +
                '}';
    }
}
③ 在com.lg.ch07中创建repository文件夹并创建CustomerRepository.java
import com.lg.ch07.domian.Customer;
import org.springframework.data.jpa.repository.JpaRepository;

public interface CustomerRepository extends JpaRepository<Customer,Integer> {
    Customer findByUsername(String username);
}
④ 在repository中创建AuthorityRepository.java
import com.lg.ch07.domian.Authority;
import org.springframework.data.jpa.repository.JpaRepository;
import org.springframework.data.jpa.repository.Query;
import java.util.List;
public interface AuthorityRepository extends JpaRepository<Authority,Integer> {
    @Query(value = "select a.* from t_customer c,t_authority a,t_customer_authority ca where ca.customer_id=c.id and ca.authority_id=a.id and c.username =?1",nativeQuery = true)
    public List<Authority> findAuthoritiesByUsername(String username);
}
⑤ 定义查询用户及角色信息的服务接口
在com.lg.ch07下创建service文件夹并创建CustomerService.java
import com.lg.ch07.domian.Authority;
import com.lg.ch07.domian.Customer;
import com.lg.ch07.repository.AuthorityRepository;
import com.lg.ch07.repository.CustomerRepository;
import org.springframework.beans.factory.annotation.Autowired;
import org.springframework.data.redis.core.RedisTemplate;
import org.springframework.stereotype.Service;

import java.util.List;

@Service
public class CustomerService {
    @Autowired
    private CustomerRepository customerRepository;
    @Autowired
    private AuthorityRepository authorityRepository;
    @Autowired
    private RedisTemplate redisTemplate;
    public Customer getCustomer(String username){
        Customer customer=null;
        Object o = redisTemplate.opsForValue().get("customer_"+username);
        if(o!=null){
            customer=(Customer)o;
        }else {
            customer = customerRepository.findByUsername(username);
            if(customer!=null){
                redisTemplate.opsForValue().set("customer_"+username,customer);
            }
        }
        return customer;
    }
    public List<Authority> getCustomerAuthority(String username){
        List<Authority> authorities=null;
        Object o = redisTemplate.opsForValue().get("authorities_"+username);
        if(o!=null){
            authorities=(List<Authority>)o;
        }else {
            authorities=authorityRepository.findAuthoritiesByUsername(username);
            if(authorities.size()>0){
                redisTemplate.opsForValue().set("authorities_"+username,authorities);
            }
        }
        return authorities;
    }
}
⑥ 定义用于封装认证用户信息 UserDetailsServiceImpl.java
在service中创建UserDetailsServiceImpl.java
import com.lg.ch07.domian.Authority;
import com.lg.ch07.domian.Customer;
import org.springframework.beans.factory.annotation.Autowired;
import org.springframework.security.core.authority.SimpleGrantedAuthority;
import org.springframework.security.core.userdetails.*;
import org.springframework.stereotype.Service;
import java.util.List;
import java.util.stream.Collectors;

@Service
public class UserDetailsServiceImpl implements UserDetailsService {
    @Autowired
    private CustomerService customerService;
    @Override
    public UserDetails loadUserByUsername(String s) throws UsernameNotFoundException {
        Customer customer = customerService.getCustomer(s);
        List<Authority> authorities = customerService.getCustomerAuthority(s);
        List<SimpleGrantedAuthority> list = authorities.stream().map(authority -> new SimpleGrantedAuthority(authority.getAuthority())).collect(Collectors.toList());
        if(customer!=null){
            UserDetails userDetails= new User(customer.getUsername(),customer.getPassword(),list);
            return userDetails;
        } else {
            // 如果查询的用户不存在(用户名不存在),必须抛出此异常
            throw new UsernameNotFoundException("当前用户不存在!");
        }
    }
}
⑦ 在config文件夹下的SecurityConfig.java中注释原有的内存身份认证代码,并添加
@Autowired
private UserDetailsServiceImpl userDetailsService;
@Override
protected void configure(AuthenticationManagerBuilder auth) throws Exception {
    //  密码需要设置编码器
    BCryptPasswordEncoder encoder = new BCryptPasswordEncoder();
   auth.userDetailsService(userDetailsService).passwordEncoder(encoder);
}
⑧ 效果测试
启动程序在浏览器输入http://127.0.0.1:8080
输入后自动跳转到http://127.0.0.1:8080/login

输入错误的账号和密码

输入正确的账号和密码
8.自定义用户访问控制
① 自定义用户访问控制
重写SecurityConfig.java中的configure方法
@Override
protected void configure(HttpSecurity http) throws Exception {
    // 自定义用户授权管理
    http.authorizeRequests()
            .antMatchers("/").permitAll()
            // 需要对static文件夹下静态资源进行统一放行
            .antMatchers("/login/**").permitAll()
            .antMatchers("/detail/common/**").hasRole("common")
            .antMatchers("/detail/vip/**").hasRole("vip")
            .anyRequest().authenticated()
            .and()
            .formLogin();
}
② 效果测试
启动程序在浏览器输入http://127.0.0.1:8080
点击首页普通电影访问影片详情

输入普通用户的账号和密码
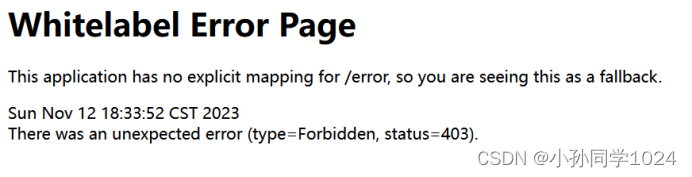
点击返回,返回后点击vip内容
9.自定义用户登录
① 定义用户登录页面
在resources/templates目录下创建名为login的文件夹并在其中创建login.html
<!DOCTYPE html>
<html xmlns="http://www.w3.org/1999/xhtml" xmlns:th="http://www.thymeleaf.org">
<head>
<meta http-equiv="Content-Type" content="text/html; charset=UTF-8">
<title>用户登录界面</title>
<link th:href="@{/login/css/bootstrap.min.css}" rel="stylesheet">
<link th:href="@{/login/css/signin.css}" rel="stylesheet">
</head>
<body class="text-center">
<form class="form-signin" th:action="@{/userLogin}" th:method="post" >
<img class="mb-4" th:src="@{/login/img/login.jpg}" width="72px" height="72px">
<h1 class="h3 mb-3 font-weight-normal">请登录</h1>
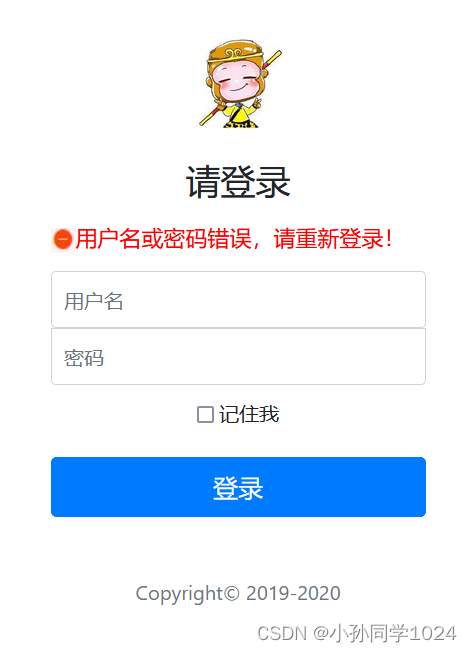
<!-- 用户登录错误信息提示框 -->
<div th:if="${param.error}" style="color: red;height: 40px;text-align: left;font-size: 1.1em">
<img th:src="@{/login/img/loginError.jpg}" width="20px">用户名或密码错误,请重新登录!
</div>
<input type="text" name="name" class="form-control" placeholder="用户名" required="" autofocus="">
<input type="password" name="pwd" class="form-control" placeholder="密码" required="">
<button class="btn btn-lg btn-primary btn-block" type="submit" >登录</button>
<p class="mt-5 mb-3 text-muted">Copyright© 2019-2020</p>
</form>
</body>
</html>② 引入静态资源文件
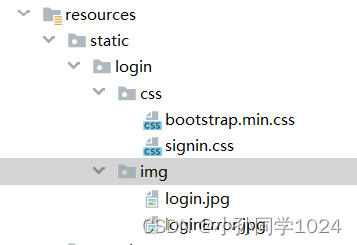
③ 自定义用户登录跳转
在FileController.java中添加一个跳转到登录页面的方法
@GetMapping("/userLogin")
public String toLoginPage() {
    return "login/login";
}
④ 自定义用户登录控制
打开SecurityConfig类重写configure方法
@Override
protected void configure(HttpSecurity http) throws Exception {
    // 自定义用户授权管理
    http.authorizeRequests()
            .antMatchers("/").permitAll()
            // 需要对static文件夹下静态资源进行统一放行
            .antMatchers("/login/**").permitAll()
            .antMatchers("/detail/common/**").hasRole("common")
            .antMatchers("/detail/vip/**").hasRole("vip")
            .anyRequest().authenticated();

    // 自定义用户登录控制
    http.formLogin()
            .loginPage("/userLogin").permitAll()
            .usernameParameter("name").passwordParameter("pwd")
            .defaultSuccessUrl("/")
            .failureUrl("/userLogin?error");
}
⑤ 效果测试
启动程序在浏览器输入http://127.0.0.1:8080
点击查看电影详情

输入错误的账号和密码
10.自定义用户退出
① 添加自定义用户退出链接
在index.html中添加
<form th:action="@{/mylogout}" method="post">
   <input th:type="submit" th:value="注销" />
</form>
② 自定义用户退出控制
重写SecurityConfig.java中的configure方法
// 自定义用户授权管理
http.authorizeRequests()
        .antMatchers("/").permitAll()
        // 需要对static文件夹下静态资源进行统一放行
        .antMatchers("/login/**").permitAll()
        .antMatchers("/detail/common/**").hasRole("common")
        .antMatchers("/detail/vip/**").hasRole("vip")
        .anyRequest().authenticated();

// 自定义用户登录控制
http.formLogin()
        .loginPage("/userLogin").permitAll()
        .usernameParameter("name").passwordParameter("pwd")
        .defaultSuccessUrl("/")
        .failureUrl("/userLogin?error");

// 自定义用户退出控制
http.logout()
        .logoutUrl("/mylogout")
        .logoutSuccessUrl("/");
③ 效果测试
启动程序在浏览器输入http://127.0.0.1:8080
进入普通电影详情页面

11.登录用户信息获取
① 使用HttpSession获取用户信息
在FileController.java中添加获取用户信息的方法
@GetMapping("/getuserBySession")
@ResponseBody
public void getUser(HttpSession session) {
    // 从当前HttpSession获取绑定到此会话的所有对象的名称
    Enumeration<String> names = session.getAttributeNames();
    while (names.hasMoreElements()){
        // 获取HttpSession中会话名称
        String element = names.nextElement();
        // 获取HttpSession中的应用上下文
        SecurityContextImpl attribute = (SecurityContextImpl) session.getAttribute(element);
        System.out.println("element: "+element);
        System.out.println("attribute: "+attribute);
        // 获取用户相关信息
        Authentication authentication = attribute.getAuthentication();
        UserDetails principal = (UserDetails)authentication.getPrincipal();
        System.out.println(principal);
        System.out.println("username: "+principal.getUsername());
    }
}
② 使用SecurityContextHolder获取用户信息
在FileController.java中添加获取用户信息的方法
@GetMapping("/getuserByContext")
@ResponseBody
public void getUser2() {
    // 获取应用上下文
    SecurityContext context = SecurityContextHolder.getContext();
    System.out.println("userDetails: "+context);
    // 获取用户相关信息
    Authentication authentication = context.getAuthentication();
    UserDetails principal = (UserDetails)authentication.getPrincipal();
    System.out.println(principal);
    System.out.println("username: "+principal.getUsername());
}
③ 效果测试
启动程序在浏览器输入http://127.0.0.1:8080/getuserBySession后登录,查看控制台

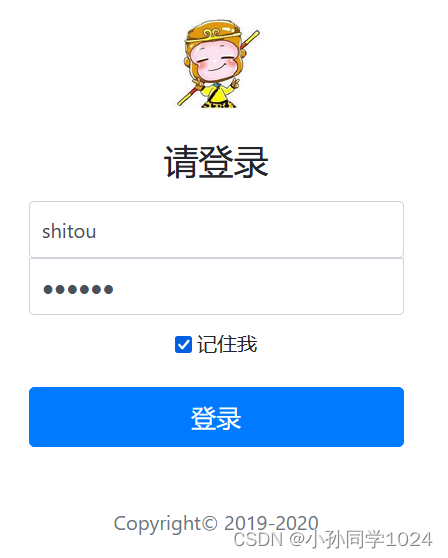
12.记住我功能
① 在login.html中添加
<div class="checkbox mb-3">
    <label>
        <input type="checkbox" name="rememberme"> 记住我
    </label>
</div>
② 添加方法
在SecurityConfig类中,添加方法
http.rememberMe()
        .rememberMeParameter("rememberme")
        .tokenValiditySeconds(200)
        // 对cookie信息进行持久化管理
        .tokenRepository(tokenRepository());
@Bean
public JdbcTokenRepositoryImpl tokenRepository(){
    JdbcTokenRepositoryImpl jr=new JdbcTokenRepositoryImpl();
    jr.setDataSource(dataSource);
    return jr;
}
③ 效果测试
启动程序在浏览器输入http://127.0.0.1:8080/
13.CSRF防护功能
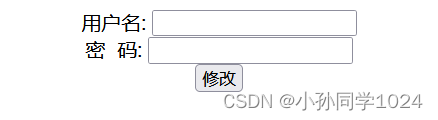
① 创建数据修改页面
在resources/templates目录下创建csrf文件夹并创建csrfTest.html
<!DOCTYPE html>
<html xmlns="http://www.w3.org/1999/xhtml" xmlns:th="http://www.thymeleaf.org">
<head>
<meta charset="UTF-8">
<title>用户修改</title>
</head>
<body>
<div align="center">
<form method="post" th:action="@{/updateUser}">
<!-- <input type="hidden" th:name="${_csrf.parameterName}" th:value="${_csrf.token}"/>-->
用户名: <input type="text" name="username" /><br />
密 码: <input type="password" name="password" /><br />
<button type="submit">修改</button>
</form>
</div>
</body>
</html>② 编写后台控制层方法
在controller中创建CSRFController.java
import org.springframework.stereotype.Controller;
import org.springframework.web.bind.annotation.*;

import javax.servlet.http.HttpServletRequest;

@Controller
public class CSRFController {
    // 向用户修改页跳转
    @GetMapping("/toUpdate")
    public String toUpdate() {
        return "csrf/csrfTest";
    }
    // 用户修改提交处理
    @ResponseBody
    @PostMapping(value = "/updateUser")
    public String updateUser(@RequestParam String username, @RequestParam String password,
                             HttpServletRequest request) {
        System.out.println(username);
        System.out.println(password);
        String csrf_token = request.getParameter("_csrf");
        System.out.println(csrf_token);
        return "ok";
    }
}
③ 效果测试
启动程序在浏览器输入http://127.0.0.1:8080/toUpdate
14.Security管理前端页面
① 添加依赖启动器
在pom.xml中添加依赖启动器
<dependency>
    <groupId>org.thymeleaf.extras</groupId>
    <artifactId>thymeleaf-extras-springsecurity5</artifactId>
</dependency>
② 修改前端页面
<!DOCTYPE html>
<html xmlns="http://www.w3.org/1999/xhtml" xmlns:th="http://www.thymeleaf.org" xmlns:sec="http://www.thymeleaf.org/thymeleaf-extras-springsecurity5">
<head>
   <meta http-equiv="Content-Type" content="text/html; charset=UTF-8">
   <title>影视直播厅</title>
</head>
<body>
<h1 align="center">欢迎进入电影网站首页</h1>
<div sec:authorize="isAnonymous()">
   <h2 align="center">游客您好,如果想查看电影<a th:href="@{/userLogin}">请登录</a></h2>
</div>
<div sec:authorize="isAuthenticated()">
   <h2 align="center"><span sec:authentication="name" style="color: #007bff"></span>您好,您的用户权限为<span sec:authentication="principal.authorities" style="color:darkkhaki"></span>,您有权观看以下电影</h2>
   <form th:action="@{/mylogout}" method="post">
      <input th:type="submit" th:value="注销" />
   </form>
</div>
<hr>
<div sec:authorize="hasRole('common')">
   <h3>普通电影</h3>
   <ul>
      <li><a th:href="@{/detail/common/1}">飞驰人生</a></li>
      <li><a th:href="@{/detail/common/2}">夏洛特烦恼</a></li>
   </ul>
</div>
<div sec:authorize="hasAuthority('ROLE_vip')">
   <h3>VIP专享</h3>
   <ul>
      <li><a th:href="@{/detail/vip/1}">速度与激情</a></li>
      <li><a th:href="@{/detail/vip/2}">猩球崛起</a></li>
   </ul>
</div>
</body>
</html>
③ 效果测试
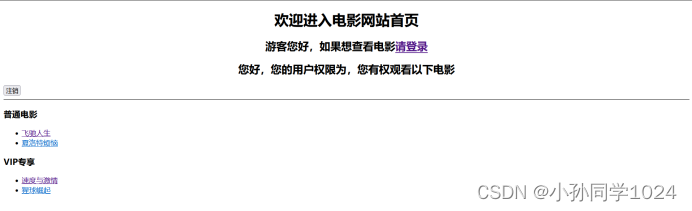
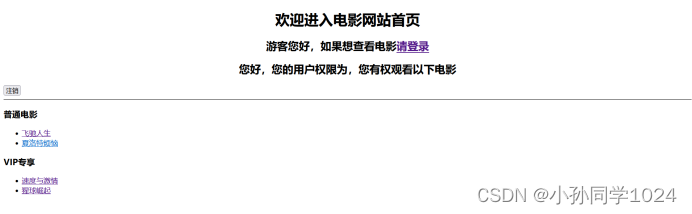
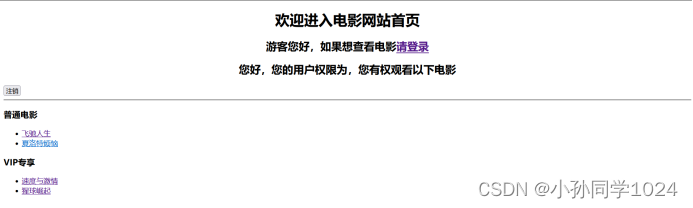
启动程序在浏览器输入http://127.0.0.1:8080/

登录普通用户

登录vip用户


 998
998


 被折叠的 条评论
为什么被折叠?
被折叠的 条评论
为什么被折叠?
 到【灌水乐园】发言


