


文章目录
一、Vue Router - 路由插件
通过前面的文章,已经可以明白前端路由的作用,以及知道自己实现一个产品级的路由是有很多东西要考虑的,
如果不是为了做开源插件,完全没有必要花费时间和精力去自己实现,我们可以使用一个专门为 Vue 提供前端
路由功能的成品插件 Vue Router
这篇文章将会记录 Vue Router 插件的常规使用方式,最后还会介绍 Vue 整合插件的原理,当然除了本文之外,
还建议通过 Vue Router 官网 学习其更多知识
1. 安装 Vue Router
1) 下载 Vue Router 模块
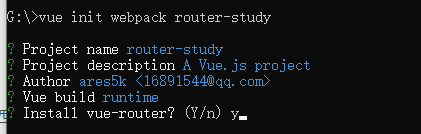
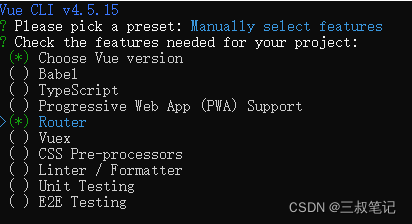
可以在使用 Vue-CLI 脚手架创建项目时,选择安装 Vue Router 插件,然后让脚手架自动帮我们安装 Vue Router 模
块,如下面两张图,
① Vue-CLI 老版本 ( Vue-CLI 2.x ) 中选择安装 Vue Router 插件:
② Vue-CLI 新版本 ( Vue-CLI 4.x ) 中选择安装 Vue Router 插件:
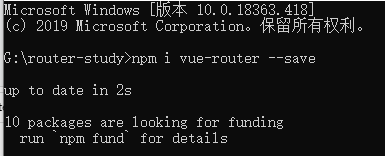
也可以在已有项目的目录中,打开 CMD 窗口,运行 npm i vue-router --save 下载 Vue Router 模块:
2) 安装 Vue Router 插件
通过 Vue-CLI 脚手架创建项目时,选择了安装 Vue Router,那么就可以跳过这一步,Vue-CLI 会自动帮我们做
好安装工作并创建标准的路由目录结构,但本例是手动通过 npm 命令下载的 Vue Router 模块包,所以需要手动
安装 Vue Router 到 Vue 中
我们要在创建 Vue 对象之前,完成 Vue 对 Vue Router 的安装,既在 new Vue({options}) 之前完成安装
① 以 Vue-CLI 的标准目录结构为基础, 我们先创建专门管理 Vue Router 的目录和文件
创建目录和文件 src/router/index.js,所有 Vue Router 相关配置都写在这里同一管理:
// 导入 Vue 模块
import Vue from 'vue'
// 导入 Vue Router 模块
import VueRouter from 'vue-router'

// 将 Vue Router 插件安装到 Vue 中
Vue.use(VueRouter)

// 创建路由配置对象
const router = new VueRouter({

})
// 导出路由配置对象
export default router
② 修改入口文件,将路由配置对象添加到 Vue 对象中
修改 src/main.js 的内容,重点在第 4、12 行 :
import Vue from 'vue' // 导入 Vue 模块
import App from './App' // 导入项目的入口组件
// 导入我们创建的路由配置对象,也可以写成 ./router/, 其默认会找 ./router 目录下的 index.js
import Router from './router/index.js'

Vue.config.productionTip = false

// 创建 Vue 对象,
// 在创建该对象前,我们已经在 ./router/index.js 中使用 Vue.use 完成了插件 Vue Router 的安装
new Vue({
  el: '#app', // 被 Vue 管理的元素的 ID
  router: Router,  // 将路由配信信息设置到 Vue 中,
  render: h => h(App) // 渲染函数,通过入口组件开始渲染
})
到这里我们 Vue Router 基本目录结构的搭建和安装工作就已经完成了,后面学习 Vue Router 插件的各种使用
2. Vue Router 路由的基本使用
1) 我们先创建几个组件,用来做画面切换
① 创建首页 scr->views->Home->Home.vue:
<template>
    <h2>这是首页</h2>
</template>
② 创建产品页 scr->views->Product->Product.vue:
<template>
  <h2>这是产品页</h2>
</template>
2) 修改入口组件
修改 src-> App.vue, 目的是向首页和产品页跳转,第 4、5 行 <router-link> 是 Vue Router 提供的路由链接,点击后会
根据路径到路由表中找到对应组件,第 8 行 <router-view>,是路由后,组件的渲染区域:
<template>
  <div id="app">
    <!-- Vue Router 提供的跳转链接,点击后会根据路径到路由表中找到对应组件 -->
    <router-link to="/home">首页</router-link>
    <router-link to="/product">产品页</router-link>

    <!-- 路由后的页面渲染在 router-view 的位置-->
    <router-view></router-view>
  </div>
</template>
3) 配置路由表
修改路由的配置文件 scr->router->index.js,配置路由表中路径和组件的对应关系,重点代码在 18 ~ 30 行:
// 导入 Vue 模块
import Vue from 'vue'
// 导入 Vue Router 模块
import VueRouter from 'vue-router'
// 导入首页组件
import Home from '@/views/Home/Home'
// 导入产品页组件
import Product from '@/views/Product/Product'

// 将 Vue Router 插件安装到 Vue 中
Vue.use(VueRouter)

// 创建路由配置对象
const router = new VueRouter({
  // 配置 URL 的修改方式,默认是 hash 模式, 因为不喜欢路径中的 # 号,所以改成 history 模式
  mode: 'history',

  // 配置路由表
  routes: [
    // /home 路径 对应的组件
    {
      path: '/home',
      component: Home
    },
    // /product 路径 对应的组件
    {
      path: '/product',
      component: Product
    }
  ]
})
// 导出路由配置对象
export default router
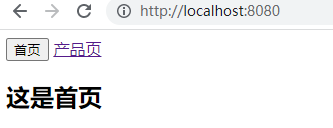
4) 运行项目查看效果:

5) 默认路由:
前面运行的效果中,页面打开后,只显示两个路由链接,如果想默认显示首页组件,我们可以配个默认路由,修改
src->router-index.js,重点在第 21 ~ 26 行代码:
// 导入 Vue 模块
import Vue from 'vue'
// 导入 Vue Router 模块
import VueRouter from 'vue-router'
// 导入首页组件
import Home from '@/views/Home/Home'
// 导入产品页组件
import Product from '@/views/Product/Product'

// 将 Vue Router 插件安装到 Vue 中
Vue.use(VueRouter)

// 创建路由配置对象
const router = new VueRouter({

  // 配置 URL 的修改方式,默认是 hash 模式, 因为不喜欢路径中的 # 号,所以改成 history 模式
  mode: 'history',

  // 配置路由表
  routes: [
    // 默认路径对应的组件
    {
      path: '/',
      // component: Home 用这种方式也可以实现默认路由, 但不建议使用,因为这种方式可能会让 router-link-active 无效
      redirect: '/home',
    },
    // /home 路径 对应的组件
    {
      path: '/home',
      component: Home
    },
    // /product 路径 对应的组件
    {
      path: '/product',
      component: Product
    }
  ]
})
// 导出路由配置对象
export default router
添加默认路由的运行效果,页面打开后会直接显示首页:

3. 设置 router-link
1) 修改 router-link 的显示形式
修改 src->App.vue 文件, 让 <router-link> 显示成按钮,,重点在第 4 行代码,<router-link> 默认是以超链接的形式将内
容显示在画面中,通过属性 tag = "button" 能将其修改为按钮,但在 Vue Router 的新版本中不建议修改
<template>
  <div id="app">
    <!-- Vue Router 提供的跳转链接,点击后会根据路径到路由表中找到对应组件 -->
    <router-link to="/home" tag="button">首页</router-link>
    <router-link to="/product">产品页</router-link>

    <!-- 路由后的页面渲染在 router-view 的位置-->
    <router-view></router-view>
  </div>
</template>
运行效果:
2) 修改 router-link 的跳转方式
<router-link> 默认是使用 history.pushState 的方式修改 URL,其每次跳转都会以压栈的方式保存访问记录,当点击浏
览器的回退按钮,会以出栈的方式将前一个画面显示

可以为 <router-link> 添加 replace 属性,让其使用 history.replaceState 的方式修改 URL
修改 src->App.vue,让跳转不保存记录,重点在第 4 行代码:
<template>
  <div id="app">
    <!-- Vue Router 提供的跳转链接,点击后会根据路径到路由表中找到对应组件 -->
    <router-link to="/home" replace>首页</router-link>
    <router-link to="/product" replace>产品页</router-link>

    <!-- 路由后的页面渲染在 router-view 的位置-->
    <router-view></router-view>
  </div>
</template>
运行效果:

3) 修改 router-link 对应的画面处于活跃时的样式
① 样式覆盖
当 <router-link> 所对应的组件处于活跃时( 既正在显示时 ),<router-link> 会默认添加名字为 .router-link-active 的样
式,我们可以通过覆盖这个样式来达到自己想要的效果
修改 src->App.vue,让 <router-link> 所对应的组件处于活跃时,<router-link> 的内容为红色,
重点在第 12 ~ 15 行代码:
<template>
  <div id="app">
    <!-- Vue Router 提供的跳转链接,点击后会根据路径到路由表中找到对应组件 -->
    <router-link to="/home" replace>首页</router-link>
    <router-link to="/product" replace>产品页</router-link>

    <!-- 路由后的页面渲染在 router-view 的位置-->
    <router-view></router-view>
  </div>
</template>

<style scoped>
.router-link-active {
  color: red;
}
</style>
运行效果:

② 指定样式
除了覆盖名字为 .router-link-active 的样式,也可以通过 <router-link> 的 active-class 属性自己指定一个样式名,
当 <router-link> 所对应的组件处于活跃时,就不会添加默认样式名,而是添加我们定义的样式名
修改 src->App.vue,自己指定样式名称,重点在第 4、5、12 ~ 15 行代码:
<template>
  <div id="app">
    <!-- Vue Router 提供的跳转链接,点击后会根据路径到路由表中找到对应组件 -->
    <router-link to="/home" active-class="my-style">首页</router-link>
    <router-link to="/product" active-class="my-style">产品页</router-link>

    <!-- 路由后的页面渲染在 router-view 的位置-->
    <router-view></router-view>
  </div>
</template>

<style scoped>
.my-style {
  color: red;
}
</style>
当所有 <router-link> 都要使用相同的自定义样式名时,依次修改太麻烦,我们也可以全局指定自定义样式名
修改 src->router->index.js,全局指定 <router-link> 活跃时的自定义样式名,重点在第 17 行代码:
// 导入 Vue 模块
import Vue from 'vue'
// 导入 Vue Router 模块
import VueRouter from 'vue-router'
// 导入首页组件
import Home from '@/views/Home/Home'
// 导入产品页组件
import Product from '@/views/Product/Product'

// 将 Vue Router 插件安装到 Vue 中
Vue.use(VueRouter)

// 创建路由配置对象
const router = new VueRouter({

  // 全局指定 router-link 活跃时的样式名
  linkActiveClass: 'my-style',

  // 配置 URL 的修改方式,默认是 hash 模式, 因为不喜欢路径中的 # 号,所以改成 history 模式
  mode: 'history',

  // 配置路由表
  routes: [
    // 默认路径对应的组件
    {
      path: '/',
      // component: Home 用这种方式也可以实现默认路由, 但不建议使用,因为这种方式可能会让 router-link-active 无效
      redirect: '/home',
    },
    // /home 路径 对应的组件
    {
      path: '/home',
      component: Home
    },
    // /product 路径 对应的组件
    {
      path: '/product',
      component: Product
    }
  ]
})
// 导出路由配置对象
export default router
4. 编程式路由
不单能使用 <router-link> 进行路由跳转,Vue Router 还提供了 Api ,让程序以编程的方式进行路由后渲染,通过
使用 $router 就可以实现,$router 是 Vue Router 添加到 Vue 中的全局对象属性,其路由 API 如下:
| API 名 | 描述 |
|---|---|
| this.$router.push ( 跳转路径, 跳转成功的回调,跳转失败的回调 ) | 与 history.pushState 效果相同 |
| this.$router.repalce ( 跳转路径, 跳转成功的回调,跳转失败的回调 ) | 与 history.replaceState 效果相同 |
现在将前例中的两个 <router-link> 路由链接删掉,换成两个普通按钮,然后通过 click 事件,使用路由 API 进行渲染
修改 src->App.vue,重点在第 4、5、16 行代码:
<template>

  <div id="app">
    <button @click="btnClick('/home')">首页</button>
    <button @click="btnClick('/product')">产品页面</button>

    <!-- 路由后的页面渲染在 router-view 的位置-->
    <router-view></router-view>
  </div>
</template>

<script>
export default{
  methods:{
    btnClick(path){
      this.$router.push(path)
    }
  }
}
</script>

<style scoped>
.my-style {
  color: red;
}
</style>
运行效果:
从上图运行效果中可以看出,画面间切换是没有问题的,但是当重复进入已活跃的画面时,控制台就会有错误提
示,这是因为 Vue Router 3.x + 版本不允许使用 push 重复进入画面的原因,我们有两种方式来关闭这个错误提示,
1) 调用 this.$router.push 时,传入第三个参数(错误回调),这样发生错误后,就会进入我们的处理,而不是默认的控
制台输出,将 App.vue 的第 16 行代码改成: this.$router.push(path, undefined, () => {}) 即可
2) 第二种方式就是覆盖 Vue Router 的 push 方法,修改 src->router-index.js, 详见 13 ~ 17 行代码:
// 导入 Vue 模块
import Vue from 'vue'
// 导入 Vue Router 模块
import VueRouter from 'vue-router'
// 导入首页组件
import Home from '@/views/Home/Home'
// 导入产品页组件
import Product from '@/views/Product/Product'

// 将 Vue Router 插件安装到 Vue 中
Vue.use(VueRouter)

// 压制 Vue Router 3.x+ 版本中,控制台报出的重复 push 同一画面错误
const originalPush = VueRouter.prototype.push
VueRouter.prototype.push = function push(location) {
  return originalPush.call(this, location).catch(err => err)
}

// 创建路由配置对象
const router = new VueRouter({

  // 全局指定 router-link 活跃时的样式名
  linkActiveClass: 'my-style',

  // 配置 URL 的修改方式,默认是 hash 模式, 因为不喜欢路径中的 # 号,所以改成 history 模式
  mode: 'history',

  // 配置路由表
  routes: [
    // 默认路径对应的组件
    {
      path: '/',
      // component: Home 用这种方式也可以实现默认路由, 但不建议使用,因为这种方式可能会让 router-link-active 无效
      redirect: '/home',
    },
    // /home 路径 对应的组件
    {
      path: '/home',
      component: Home
    },
    // /product 路径 对应的组件
    {
      path: '/product',
      component: Product
    }
  ]
})
// 导出路由配置对象
export default router
运行效果,控制台不再输出重复进入活跃组件的错误提示:
5. 路由嵌套
1) 先来一个示例
目标:以前例为基础,在 Product.vue 中添加一个路由链接,点击路由链接切换画面时,要求原 Product.vue 的内容
不能被覆盖,并且还要显示新组件的内容
① 修改 views->Product->Product.vue,在其中添加一个路由链接,和画面渲染区 <router-view>,第 4、5 行代码:
<template>
  <div>
    <h2>这是产品页</h2>
    <router-link to="/detail">苹果:详细</router-link>
    <router-view></router-view>
  </div>
</template>
② 新建一个商品详情页 views->Product->Detail.vue,该组件展示时,要求嵌套在 Product 组件内部展示:
<template>
  <div>
    <p>苹果</p>
    <p>价格:5元/斤</p>
  </div>
</template>
③ 修改 src->router->index.js,配置路由信息,将新组件 Detail.vue 用以往的方式注册到路由表中,详见
10、48 ~ 52 行代码:
// 导入 Vue 模块
import Vue from 'vue'
// 导入 Vue Router 模块
import VueRouter from 'vue-router'
// 导入首页组件
import Home from '@/views/Home/Home'
// 导入产品页组件
import Product from '@/views/Product/Product'
// 导入产品详情页组件
import Detail from '@/views/Product/Detail'

// 将 Vue Router 插件安装到 Vue 中
Vue.use(VueRouter)

// 压制 Vue Router 3.x+ 版本中,控制台报出的重复 push 同一画面错误
const originalPush = VueRouter.prototype.push
VueRouter.prototype.push = function push(location) {
  return originalPush.call(this, location).catch(err => err)
}

// 创建路由配置对象
const router = new VueRouter({

  // 全局指定 router-link 活跃时的样式名
  linkActiveClass: 'my-style',

  // 配置 URL 的修改方式,默认是 hash 模式, 因为不喜欢路径中的 # 号,所以改成 history 模式
  mode: 'history',

  // 配置路由表
  routes: [
    // 默认路径对应的组件
    {
      path: '/',
      // component: Home 用这种方式也可以实现默认路由, 但不建议使用,因为这种方式可能会让 router-link-active 无效
      redirect: '/home',
    },
    // /home 路径 对应的组件
    {
      path: '/home',
      component: Home
    },
    // /product 路径 对应的组件
    {
      path: '/product',
      component: Product
    },
    // /detail 路径 对应的组件
    {
      path: '/detail',
      component: Detail
    }
  ]
})
// 导出路由配置对象
export default router
④ 运行效果:
从上图中看,这个结果并不是我们想要的,虽然我们已经在 Product.vue 中加上了路由渲染区 <router-view>,但当画
面切换时,并没有将 Detail.vue 展示在该路由渲染区,而是将原 Product.vue 中的内容全部覆盖了
这是因为我们在配置路由表的时候,所有的路由都配置成了相同层级,而相同层级的路由,画面切换后只会渲染在
该级应该显示的 <router-view> 中,既示例中 App.vue 里的 <router-view> 区域,所以发生了覆盖
想让 Detail.vue 显示在 Product.vue 的 <router-view> 区域, 应该改变 Detail.vue 的路由层级, 既使用路由嵌套
2) 将示例改成路由嵌套
① 修改 views->Product->Product.vue 文件,注意第 4 行,要在路径 /detail 前加上父级路由路径,因为组件需要显示
在 Product 组件内,所以 Product 的路由路径 /product 就是父级路径 :
<template>
  <div>
    <h2>这是产品页</h2>
    <router-link to="/product/detail">苹果:详细</router-link>
    <router-view></router-view>
  </div>
</template>
② 修改 router->index.js 文件,重新配置路由表的层级,删除路由表中原 Detail 组件的配置信息,在父级路由内添加
属性 children,children 属性结构与 routes 属性相同,详见 47 ~ 53 行代码,注意第 50 行,子级路径不能以 / 开头 :
// 导入 Vue 模块
import Vue from 'vue'
// 导入 Vue Router 模块
import VueRouter from 'vue-router'
// 导入首页组件
import Home from '@/views/Home/Home'
// 导入产品页组件
import Product from '@/views/Product/Product'
// 导入产品详情页组件
import Detail from '@/views/Product/Detail'

// 将 Vue Router 插件安装到 Vue 中
Vue.use(VueRouter)

// 压制 Vue Router 3.x+ 版本中,控制台报出的重复 push 同一画面错误
const originalPush = VueRouter.prototype.push
VueRouter.prototype.push = function push(location) {
  return originalPush.call(this, location).catch(err => err)
}

// 创建路由配置对象
const router = new VueRouter({

  // 全局指定 router-link 活跃时的样式名
  linkActiveClass: 'my-style',

  // 配置 URL 的修改方式,默认是 hash 模式, 因为不喜欢路径中的 # 号,所以改成 history 模式
  mode: 'history',

  // 配置路由表
  routes: [
    // 默认路径对应的组件
    {
      path: '/',
      // component: Home 用这种方式也可以实现默认路由, 但不建议使用,因为这种方式可能会让 router-link-active 无效
      redirect: '/home',
    },
    // /home 路径 对应的组件
    {
      path: '/home',
      component: Home
    },
    // /product 路径 对应的组件
    {
      path: '/product',
      component: Product,
      children: [
        // /product/detail 路径 对应的组件
        {
          path: 'detail',
          component: Detail
        }
      ]
    }
  ]
})
// 导出路由配置对象
export default router
③ 运行效果:
6. 路由传参
有时我们切换画面后,需要前一个画面的数据,这就涉及到了路由传参的问题,本文记录两种路由传参的方式,均
以 Vue Router 注册到 Vue 中的全局对象属性 $route 为基础实现
1) 动态路由的方式传参
这种方式会将参数拼接到我们的路径中,具体使用可以分为三步:
① 配置路由表的路径属性时,在会出现参数的地方使用 : + 自定义参数名 的方式进行占位,当实际进行路由匹配时,
占位的内容会被忽略,从而达到动态路由的效果,修改 router->index.js 文件,配置动态路由,重点在第 40 行:
// 导入 Vue 模块
import Vue from 'vue'
// 导入 Vue Router 模块
import VueRouter from 'vue-router'
// 导入首页组件
import Home from '@/views/Home/Home'
// 导入产品页组件
import Product from '@/views/Product/Product'
// 导入产品详情页组件
import Detail from '@/views/Product/Detail'

// 将 Vue Router 插件安装到 Vue 中
Vue.use(VueRouter)

// 压制 Vue Router 3.x+ 版本中,控制台报出的重复 push 同一画面错误
const originalPush = VueRouter.prototype.push
VueRouter.prototype.push = function push(location) {
  return originalPush.call(this, location).catch(err => err)
}

// 创建路由配置对象
const router = new VueRouter({

  // 全局指定 router-link 活跃时的样式名
  linkActiveClass: 'my-style',

  // 配置 URL 的修改方式,默认是 hash 模式, 因为不喜欢路径中的 # 号,所以改成 history 模式
  mode: 'history',

  // 配置路由表
  routes: [
    // 默认路径对应的组件
    {
      path: '/',
      // component: Home 用这种方式也可以实现默认路由, 但不建议使用,因为这种方式可能会让 router-link-active 无效
      redirect: '/home/ares5k',
    },
    // /home 路径 对应的组件
    {
      path: '/home/:lastName',
      component: Home
    },
    // /product 路径 对应的组件
    {
      path: '/product',
      component: Product,
      children: [
        // /product/detail 路径 对应的组件
        {
          path: 'detail',
          component: Detail
        }
      ]
    }
  ]
})
// 导出路由配置对象
export default router
② 将实际参数拼接到路径中,修改 src->App.vue 文件,第 4 行中 ares5k 就是要传的值,因为已经将 Home 组件设
置成了默认路由,所以在上面代码 src->router->index.js 中的第 36 行,也进行了路径传值,实参也是 ares5k :
<template>
  <div id="app">
    <!-- 路由链接 -->
    <router-link to="/home/ares5k">首页</router-link>
    <router-link to="/product">产品页</router-link>

    <!-- 路由后的页面渲染在 router-view 的位置-->
    <router-view></router-view>
  </div>
</template>

<style scoped>
.my-style {
  color: red;
}
</style>
③ 使用 $route.params.自定义参数名 获取动态路径中的参数,修改 views->Home->Home.vue,:
<template>
  <h2>你好,{{$route.params.lastName}}, 这是首页, </h2>
</template>
④ 运行效果,不论是通过默认路由,还是点击 <router-link> 都能正确显示 Home 组件, 也能获取到路径中传的参数
2) 适合传多个参数的方式
虽然动态路由的方式也可以传递多个参数,但利用 $route.query.自定义参数属性名 的方式更方便,URL 的完整格式定
义为:scheme:[//[user[:password]@]host[:port]][/path][?query][#fragment],$route.query 的这种传参方式会将参
数添加到 [?query] 区域,该区域的内容不会影响路由时的路径匹配
具体使用可以分为两步:
① 传参,修改 src->App.vue 进行传参, 重点在第 7、10、17~28 行, 注意 <router-link> 中使用的是 v-bind:to:
<template>
  <div id="app">
    <!-- 路由链接 -->
    <router-link to="/home/ares5k">首页</router-link>

    <!-- 方式1:直接将路径参数对象写在标签内 -->
    <!-- <router-link v-bind:to="{ path: '/product', query: { fruit: '草莓', price: '100' } }">产品页</router-link> -->

    <!-- 方式2:将路径参数对象定义在 Vue 对象中 -->
    <router-link v-bind:to="pathWithParams">产品页</router-link>

    <!-- 路由后的页面渲染在 router-view 的位置-->
    <router-view></router-view>
  </div>
</template>

<script>
export default {
  data() {
    return {
      pathWithParams: {
        path: '/product',
        query: { fruit: '草莓', price: '100' }
      }
    }
  }
}
</script>

<style scoped>
.my-style {
  color: red;
}
</style>
② 获取参数,使用 $route.query.自定义参数属性名 来获取参数,修改 views->Product->Product.vue,重点在 4、5 行:
<template>
  <div>
    <h2>这是产品页</h2>
    <p>参数1:{{ $route.query.fruit }}</p>
    <p>参数2:{{ $route.query.price }}</p>
    <router-link to="/product/detail">苹果:详细</router-link>
    <router-view></router-view>
  </div>
</template>
运行效果:
注意注意注意:编程式路由使用的全局对象属性是 $router ,而路由传参使用的全局对象属性是 $route,$router 可
以理解为我们在 router->index.js 中配置的整个 VueRouter 对象,而 $route 属性是正在活跃的路由对象
7. 保证组件不被销毁
默认情况下,每次使用路由切换组件时,跳转前的组件会被销毁,即将显示的组件会被重新创建,我们使用生命周
期钩子函数来验证一下
1) 修改 views->Home->Home.vue,添加组件创建和组件销毁的钩子方法,重点在第 6 ~ 11 行:
<template>
  <h2>你好,{{ $route.params.lastName }}, 这是首页,</h2>
</template>
<script>
export default {
  created() {
    console.log('Home 组件被创建')
  },
  destroyed() {
    console.log('Home 组件被销毁')
  }
}
</script>
2) 修改 views->Product->Product.vue,添加组件创建和组件销毁的钩子方法,重点在第 12 ~ 17 行:
<template>
  <div>
    <h2>这是产品页</h2>
    <p>参数1:{{ $route.query.fruit }}</p>
    <p>参数2:{{ $route.query.price }}</p>
    <router-link to="/product/detail">苹果:详细</router-link>
    <router-view></router-view>
  </div>
</template>
<script>
export default {
  created() {
    console.log('Product 组件被创建')
  },
  destroyed() {
    console.log('Product 组件被销毁')
  }
}
</script>
3) 运行效果:

通过上图运行效果可以验证我们的观点,每次切换组件时,会先创建将要显示的组件并调用其生命周期钩子
函数 created,然后再销毁原来显示的组件并调用其生命周期函数 destroyed
使用 keep-alive
如果想保持组件的存活,我们可以使用 Vue 内置的功能 <keep-alive>,使用方式非常简单,只需要将 <router-view>
嵌套在该标签内,每次切换时,就不会销毁组件
修改 src->App.vue,使用 <keep-alive> 保证组件存活,重点代码在第 12 ~ 22 行:
<template>
  <div id="app">
    <!-- 路由链接 -->
    <router-link to="/home/ares5k">首页</router-link>

    <!-- 方式1:直接将路径参数对象写在标签内 -->
    <!-- <router-link v-bind:to="{ path: '/product', query: { fruit: '草莓', price: '100' } }">产品页</router-link> -->

    <!-- 方式2:将路径参数对象定义在 Vue 对象中 -->
    <router-link v-bind:to="pathWithParams">产品页</router-link>

     <!-- 保证特定组件不被销毁 -->
    <!-- 这种方式可以单独设置哪些组件要保证存活,哪些不保证存活 -->
    <!-- <keep-alive exclude="" include="">
      <router-view></router-view>
    </keep-alive> -->

    <!-- 保证所有组件不被销毁 -->
    <keep-alive>
      <!-- 路由后的页面渲染在 router-view 的位置-->
      <router-view></router-view>
    </keep-alive>
  </div>
</template>

<script>
export default {
  data() {
    return {
      pathWithParams: {
        path: '/product',
        query: { fruit: '草莓', price: '100' }
      }
    }
  }
}
</script>

<style scoped>
.my-style {
  color: red;
}
</style>
运行效果:
通过运行效果可以看出,组件只有第一次使用时会被创建,并执行其生命周期钩子函数 created,在进行路由切换
时,不会执行其销毁方法和生命周期钩子函数 destroyed
但这会有一个问题,有些情况下,我们需要在画面每次显示时做一些事情,如果不用 <keep-alive>,我们可以通过组
件的生命周期函数 created 来监听,但现在 created 只会执行一次,后续路由切换时的显示怎么办呢,其实当我们使用
<keep-alive> 后,我们会多增加两个回调函数,用来代替 created 和 destroyed,分别是画面活跃时的回调函数
activated 和 画面将要跳转时的回调函数 deactivated
修改 views->Home->Home.vue,添加画面即将活跃和即将进入非活跃状态的回调函数,重点在 12 ~ 17 行代码:
<template>
  <h2>你好,{{ $route.params.lastName }}, 这是首页,</h2>
</template>
<script>
export default {
  created() {
    console.log('Home 组件被创建')
  },
  destroyed() {
    console.log('Home 组件被销毁')
  },
  activated(){
    console.log('Home 组件处于活跃')
  },
  deactivated(){
    console.log('Home 组件即将进入非活跃')
  }
}
</script>
运行效果:

8. 导航守卫
在路由过程中, Vue Router 提供了多次机会,让我们决定是否真的要进行画面切换,或者对路由信息进行增强,
就像一个守卫一样,守护着我们的每次画面切换
先介绍下后面经常会出现的形参:
| 参数名 | 描述 |
|---|---|
| to 对象 | 待跳转的路径信息 |
| from 对象 | 原路径信息 |
| next 函数 | 直接调用:代表同意路由,例:next() 布尔调用:代表不同意路由,例: next(false)路径调用:代表不同意路由并转发到新路径,例: next( { path: '路径' } ) |
全局导航守卫
全局导航守卫,定义在 VueRouter 对象中,所有的路由跳转都会执行
| 回调函数 | 描述 |
|---|---|
| beforeEach | 可以取消路由的跳转,也可以增强路由信息 |
| afterEach | 无法取消路由的跳转,只能增强路由信息 |
修改 router->index.js 配置全局导航守卫,让所有跳转都执行守卫函数,重点代码在 57 ~ 67 行:
// 导入 Vue 模块
import Vue from 'vue'
// 导入 Vue Router 模块
import VueRouter from 'vue-router'
// 导入首页组件
import Home from '@/views/Home/Home'
// 导入产品页组件
import Product from '@/views/Product/Product'
// 导入产品详情页组件
import Detail from '@/views/Product/Detail'

// 将 Vue Router 插件安装到 Vue 中
Vue.use(VueRouter)

// 压制 Vue Router 3.x+ 版本中,控制台报出的重复 push 同一画面错误
const originalPush = VueRouter.prototype.push
VueRouter.prototype.push = function push(location) {
  return originalPush.call(this, location).catch(err => err)
}

// 创建路由配置对象
const router = new VueRouter({

  // 全局指定 router-link 活跃时的样式名
  linkActiveClass: 'my-style',

  // 配置 URL 的修改方式,默认是 hash 模式, 因为不喜欢路径中的 # 号,所以改成 history 模式
  mode: 'history',

  // 配置路由表
  routes: [
    // 默认路径对应的组件
    {
      path: '/',
      // component: Home 用这种方式也可以实现默认路由, 但不建议使用,因为这种方式可能会让 router-link-active 无效
      redirect: '/home/ares5k',
    },
    // /home 路径 对应的组件
    {
      path: '/home/:lastName',
      component: Home
    },
    // /product 路径 对应的组件
    {
      path: '/product',
      component: Product,
      children: [
        // /product/detail 路径 对应的组件
        {
          path: 'detail',
          component: Detail
        }
      ]
    }
  ]
})
// 全局前置守卫
router.beforeEach(function (to, from, next) {
  console.log('beforeEach 跳转路径为:' + to.fullPath)
  console.log('beforeEach 原路径为:' + from.fullPath)
  next() // 同意跳转
})
// 全局后置钩子
router.afterEach(function (to, from) {
  console.log('afterEach 跳转路径为:' + to.fullPath)
  console.log('afterEach 原路径为:' + from.fullPath)
})

// 导出路由配置对象
export default router
运行效果,所有路径都会执行全局守卫的函数:
路由独享守卫
路由独享守卫,定义在路由关系表中,为指定路径单独设置守卫
修改 router->index.js 配置路由守卫,让满足该路由条件的跳转执行守卫函数,重点代码在 47 ~ 52 行:
// 导入 Vue 模块
import Vue from 'vue'
// 导入 Vue Router 模块
import VueRouter from 'vue-router'
// 导入首页组件
import Home from '@/views/Home/Home'
// 导入产品页组件
import Product from '@/views/Product/Product'
// 导入产品详情页组件
import Detail from '@/views/Product/Detail'

// 将 Vue Router 插件安装到 Vue 中
Vue.use(VueRouter)

// 压制 Vue Router 3.x+ 版本中,控制台报出的重复 push 同一画面错误
const originalPush = VueRouter.prototype.push
VueRouter.prototype.push = function push(location) {
  return originalPush.call(this, location).catch(err => err)
}

// 创建路由配置对象
const router = new VueRouter({

  // 全局指定 router-link 活跃时的样式名
  linkActiveClass: 'my-style',

  // 配置 URL 的修改方式,默认是 hash 模式, 因为不喜欢路径中的 # 号,所以改成 history 模式
  mode: 'history',

  // 配置路由表
  routes: [
    // 默认路径对应的组件
    {
      path: '/',
      // component: Home 用这种方式也可以实现默认路由, 但不建议使用,因为这种方式可能会让 router-link-active 无效
      redirect: '/home/ares5k',
    },
    // /home 路径 对应的组件
    {
      path: '/home/:lastName',
      component: Home
    },
    // /product 路径 对应的组件
    {
      path: '/product',
      component: Product,
      // 路由守卫
      beforeEnter: function (to, from, next) {
        console.log('beforeEnter 跳转路径为:' + to.fullPath)
        console.log('beforeEnter 原路径为:' + from.fullPath)
        next() // 同意跳转
      },
      children: [
        // /product/detail 路径 对应的组件
        {
          path: 'detail',
          component: Detail
        }
      ]
    }
  ]
})

// 全局前置守卫
router.beforeEach(function (to, from, next) {
  console.log('beforeEach 跳转路径为:' + to.fullPath)
  console.log('beforeEach 原路径为:' + from.fullPath)
  next() // 同意跳转
})

// 全局后置钩子
router.afterEach(function (to, from) {
  console.log('afterEach 跳转路径为:' + to.fullPath)
  console.log('afterEach 原路径为:' + from.fullPath)
})

// 导出路由配置对象
export default router
运行效果,只有特定路径 /product才会执行路由守卫的函数:
组件内守卫
组件内守卫,定义在组件中
| 回调函数 | 描述 |
|---|---|
| beforeRouteEnter | 指定组件即将创建之前的守卫,因为在组件创建之前执行,所以函数内不能通过 this 获取组件对象 |
| beforeRouteLeave | 即将离开指定组件时的守卫 |
修改 views-> Product -> detail.js 配置全局导航守卫,让所有跳转都执行守卫函数,重点代码在 57 ~ 67 行:
<template>
  <div>
    <p>苹果</p>
    <p>价格:5元/斤</p>
  </div>
</template>
<script>
export default {
  beforeRouteEnter(to, from, next) {
    console.log('beforeRouteEnter 跳转路径为:' + to.fullPath)
    console.log('beforeRouteEnter 原路径为:' + from.fullPath)
    next() // 同意跳转
  },
  beforeRouteLeave(to, from, next) {
    console.log('beforeRouteLeave 跳转路径为:' + to.fullPath)
    console.log('beforeRouteLeave 原路径为:' + from.fullPath)
    next() // 同意跳转
  }
}
</script>
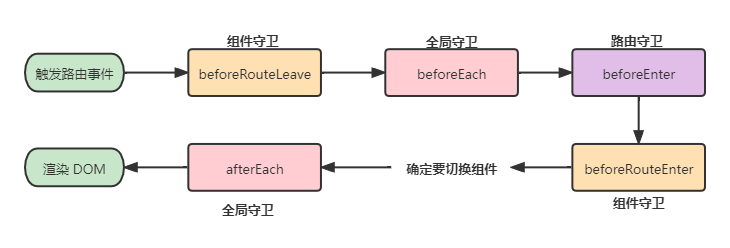
运行效果,进入组件时执行 beforeRouteEnter,离开组件时执行 beforeRouteLeave
守卫间的执行顺序
9. 路由懒加载
我们先对脚手架创建出来的项目进行打包
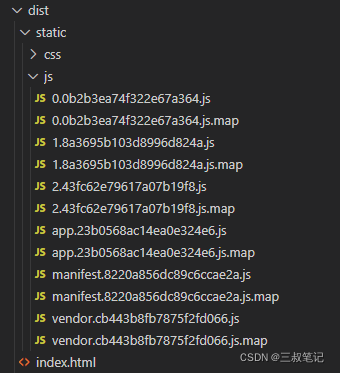
项目根目录中打开 CMD 窗口,运行 npm run build ,查看打包文件夹 dist 的目录结构:
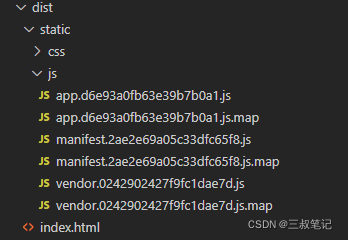
上图是 webpack 打包后的结构,我们只需要关注 .js 文件,.map 文件是方便我们浏览器调试的,不用管,好奇的
话可以查查 SourceMap 的作用,现在一共有三个 .js 文件,现在简单解释下它们的作用:
| 文件 | 描述 |
|---|---|
| app.js | App.vue 对应的内容,及项目中其他自己写的代码 ( .js .vue) 都会封装在这个文件中,可以i说是整个项目的业务代码都在这里 |
| vendor.js | 项目中使用的第三方依赖,既 node_modules 中的内容,都封装在这个文件中 |
| manifest.js | 用来控制是否懒加载,及懒加载时如何下载对应的 JS 分包文件 |
将项目中所有的业务代码都封装到 app.js 文件中的这种打包方式有一个缺点,如果项目特别大,画面特别多,那么
打包后的 app.js 的所占空间肯定也会随之而张,当用户第一次访问项目时,因为要下载 app.js 文件 (index.html 中引用的),
所以等待时间也会变长,既所谓的首屏过慢,体验感下降
懒加载模式
用懒加载模式能将项目中的模块分别打包到多个 JS 文件中,修改 router->index.js,配置组件的懒加载模式
// 导入 Vue 模块
import Vue from 'vue'
// 导入 Vue Router 模块
import VueRouter from 'vue-router'
// 导入首页组件
// import Home from '@/views/Home/Home'
// 导入产品页组件
// import Product from '@/views/Product/Product'
// 导入产品详情页组件
// import Detail from '@/views/Product/Detail'

// 将 Vue Router 插件安装到 Vue 中
Vue.use(VueRouter)

// 压制 Vue Router 3.x+ 版本中,控制台报出的重复 push 同一画面错误
const originalPush = VueRouter.prototype.push
VueRouter.prototype.push = function push(location) {
  return originalPush.call(this, location).catch(err => err)
}

// 创建路由配置对象
const router = new VueRouter({

  // 全局指定 router-link 活跃时的样式名
  linkActiveClass: 'my-style',

  // 配置 URL 的修改方式,默认是 hash 模式, 因为不喜欢路径中的 # 号,所以改成 history 模式
  mode: 'history',

  // 配置路由表
  routes: [
    // 默认路径对应的组件
    {
      path: '/',
      // component: Home 用这种方式也可以实现默认路由, 但不建议使用,因为这种方式可能会让 router-link-active 无效
      redirect: '/home/ares5k',
    },
    // /home 路径 对应的组件
    {
      path: '/home/:lastName',
      // 懒加载
      component: () => import('@/views/Home/Home')
    },
    // /product 路径 对应的组件
    {
      path: '/product',
      // 懒加载
      component: () => import('@/views/Product/Product'),
      // 路由守卫
      beforeEnter: function (to, from, next) {
        console.log('beforeEnter 跳转路径为:' + to.fullPath)
        console.log('beforeEnter 原路径为:' + from.fullPath)
        next() // 同意跳转
      },
      children: [
        // /product/detail 路径 对应的组件
        {
          path: 'detail',
          // 懒加载
          component: () => import('@/views/Product/Detail')
        }
      ]
    }
  ]
})

// 全局前置守卫
router.beforeEach(function (to, from, next) {
  console.log('beforeEach 跳转路径为:' + to.fullPath)
  console.log('beforeEach 原路径为:' + from.fullPath)
  next() // 同意跳转
})

// 全局后置钩子
router.afterEach(function (to, from) {
  console.log('afterEach 跳转路径为:' + to.fullPath)
  console.log('afterEach 原路径为:' + from.fullPath)
})

// 导出路由配置对象
export default router
第 5 ~ 10 行代码,我们注释掉了以前引入组件的代码,然后在 42、48、60 行分别使用懒加载的方式引入组件,
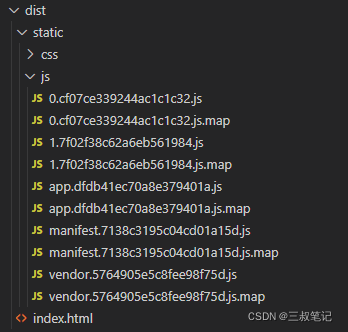
再次打包查看 dist 目录的结构:
依然只关注 .js 文件,我们发现除了 app.js、manifest.js、vendor.js 以外,又多了 0.js、1.js、2.js 文件
| 文件 | 描述 |
|---|---|
| vendor.js | 项目中使用的第三方依赖,既 node_modules 中的内容,都封装在这个文件中 |
| manifest.js | 用来控制是否懒加载,及懒加载时如何下载对应的 JS 分包文件 |
| app.js | 现在只有 App.vue 对应的内容 |
| 0.js、1.js、2.js | 分别对应 Product.vue、Detail.vue、Home.vue 的内容 |
通过这种分包的方式,就可以解决 app.js 过大导致的首屏慢的问题,每个分包出来的 JS 文件都是按需下载,
不触发对应路由时,不会向服务器下载对应的 JS 文件
按组分包
如果担心按模块分包,会分出太多 JS 文件,我们也可以按组分包,把功能相关的组件封到同一 JS 文件中
修改 router->index.js,配置打包时将 Product 和 Detail 写入到相同 JS 中,详见 48、60 行代码,为它们指定相同
的 webpackChunkName 就可以:
// 导入 Vue 模块
import Vue from 'vue'
// 导入 Vue Router 模块
import VueRouter from 'vue-router'
// 导入首页组件
// import Home from '@/views/Home/Home'
// 导入产品页组件
// import Product from '@/views/Product/Product'
// 导入产品详情页组件
// import Detail from '@/views/Product/Detail'

// 将 Vue Router 插件安装到 Vue 中
Vue.use(VueRouter)

// 压制 Vue Router 3.x+ 版本中,控制台报出的重复 push 同一画面错误
const originalPush = VueRouter.prototype.push
VueRouter.prototype.push = function push(location) {
  return originalPush.call(this, location).catch(err => err)
}

// 创建路由配置对象
const router = new VueRouter({

  // 全局指定 router-link 活跃时的样式名
  linkActiveClass: 'my-style',

  // 配置 URL 的修改方式,默认是 hash 模式, 因为不喜欢路径中的 # 号,所以改成 history 模式
  mode: 'history',

  // 配置路由表
  routes: [
    // 默认路径对应的组件
    {
      path: '/',
      // component: Home 用这种方式也可以实现默认路由, 但不建议使用,因为这种方式可能会让 router-link-active 无效
      redirect: '/home/ares5k',
    },
    // /home 路径 对应的组件
    {
      path: '/home/:lastName',
      // 懒加载
      component: () => import('@/views/Home/Home')
    },
    // /product 路径 对应的组件
    {
      path: '/product',
      // 分组懒加载
      component: () => import(/*webpackChunkName: "info"*/ '@/views/Product/Product'),
      // 路由守卫
      beforeEnter: function (to, from, next) {
        console.log('beforeEnter 跳转路径为:' + to.fullPath)
        console.log('beforeEnter 原路径为:' + from.fullPath)
        next() // 同意跳转
      },
      children: [
        // /product/detail 路径 对应的组件
        {
          path: 'detail',
          // 分组懒加载
          component: () => import(/*webpackChunkName: "info"*/ '@/views/Product/Detail')
        }
      ]
    }
  ]
})

// 全局前置守卫
router.beforeEach(function (to, from, next) {
  console.log('beforeEach 跳转路径为:' + to.fullPath)
  console.log('beforeEach 原路径为:' + from.fullPath)
  next() // 同意跳转
})

// 全局后置钩子
router.afterEach(function (to, from) {
  console.log('afterEach 跳转路径为:' + to.fullPath)
  console.log('afterEach 原路径为:' + from.fullPath)
})

// 导出路由配置对象
export default router
重新打包,查看目录结构可以发现比之前少了一个 JS 文件,就是因为 Product 和 Detail 输出到同一文件中了
执行命令 npm run dev 看一下懒加载的运行效果:
通过效果图可以发现,首屏只下载了我们的入口模块 App 对应的分包文件 app.js,但是因为我们设置了默认路由
,跳转到 /home,所以又下载了 Home 模块分包后对应的 JS 文件 1.js,然后再点击产品页后,去服务器下载 Product
对应的分包文件 0.js。
有人可能好奇,懒加载导致又需要频繁访问服务器了,这是不是跟单页面思想违背了,不如直接用后端路由做项目
了,我个人认为不是这样的,首先我们请求的只是一个 JS 文件,不会在后端执行逻辑处理,所以响应时间相对会
快一些,其次细心的会发现,上图中我最后点击详细页时,并没有发生下载,因为 Detail 和 Product 分到同一 JS
文件中了,而这个 JS 文件已经被下载过了, 这意味着只要组件对应的 JS 文件被下载过,那么就不会重复下载,
这点和后端路由每次都需要发起请求也是有是有区别的
二、Vue 的插件原理
1. 安装原理分析
肯定有人好奇,Vue Router 之类的插件是怎么搭配 Vue 的,插件安装的原理是什么,本章会对此简单分析一下,
首先我们知道安装插件的入口 API 是 Vue.use 函数,那么就可以打开 Vue 的源码文件,看看这个API 的具体实现
我在 node_modules -> vue -> dist -> vue.js 的 Vue.use 源码中添加了点注释如下:
// 参数为插件对象
Vue.use = function (plugin) {
  // 获取插件缓存数组,如果没有就创建一个空数组当作插件缓存数组
  var installedPlugins = (this._installedPlugins || (this._installedPlugins = []));

  // 判断实参的插件对象是否安装过,如果安装过就不再安装
  if (installedPlugins.indexOf(plugin) > -1) {
    return this
  }

  // Vue.use 我们可以这样调用 Vue.use(插件对象, 参数1, 参数2, 参数n)
  // toArray 是 Vue 自己封装的 Api,这个地方的意思是去掉 Vue.use 的第一个参数,既插件对象
  // 然后把其他参数变成一个参数数组
  var args = toArray(arguments, 1);

  // 把 Vue 类也放到参数数组里
  args.unshift(this);

  // 回调插件对象的 install 方法
  if (typeof plugin.install === 'function') {
    plugin.install.apply(plugin, args);
  }
  // 将插件对象存入插件缓存数组中
  installedPlugins.push(plugin);
  return this
}
再来看看 Vue.use 的大概流程图:

看完源码和流程图,我们可以发现 Vue 安装插件的原理非常简单,无非就是插件对象需要有一个回调方法
install,install 函数的参数列表中会有一个 Vue 类,那么我们就可以利用这个 Vue 类,向 Vue 中注册
全局组件,后面我们创建 Vue 对象后就可以使用这些组件,这样就完成了插件与 Vue 的整合
我们可以通过 Vue Router 插件的 install 函数,看看它都做了什么来验证一下我们的观点,我将 Vue Router
的源码做了删减只留下重要部分,可以清晰的看出和我们的思路是一样的,就是向 Vue 中添加全局组件和全局属性,
来达到安装的效果,代码如下:
// 源码路径为 node_modules -> vue-router -> dist -> vue-router.js
function install (Vue) {
  // 向 Vue 类的原型对象中添加 $router 属性
  Object.defineProperty(Vue.prototype, '$router', {
    get: function get () { return this._routerRoot._router }
  });
  // 向 Vue 类的原型对象中添加 $route 属性
  Object.defineProperty(Vue.prototype, '$route', {
    get: function get () { return this._routerRoot._route }
  });
  // 注册全局组件 RouterView,可以通过 <RouterView> 或 <router-view> 使用
  Vue.component('RouterView', View);
    // 注册全局组件 RouterLink,可以通过 <RouterLink> 或 <router-link> 使用
  Vue.component('RouterLink', Link);

}
2. 自定义插件
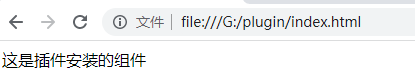
通过前面分析的原理,我们可以自定义一个插件,然后使用 Vue.use 安装感受下,要做的事情很简单,就是在插件内注册一个全局组件,然后使用 Vue.use 安装后,直接使用该组件
为了简单,我们就不用脚手架了,直接创建一个 HTML 文件来实现,代码也不复杂用心看看就懂:
<!DOCTYPE html>
<html lang="en">

<head>
  <meta charset="UTF-8">
  <meta http-equiv="X-UA-Compatible" content="IE=edge">
  <meta name="viewport" content="width=device-width, initial-scale=1.0">
  <title>Document</title>
</head>

<body>
  <!-- 此处自定义一个插件 -->
  <script>
    (function () {
      const plugin = {}
      const template = `<div>这是插件安装的组件</div>`
      plugin.install = function (Vue) {
        Vue.component("my-plugin", {
          template
        })
      }
      window.Plugin = plugin
    })()
  </script>

  <!-- Vue 管理的 div -->
  <div id="vm">
    <!-- 使用插件安装后注册的全局组件 -->
    <my-plugin></my-plugin>
  </div>

  <!-- 引入 Vue.js -->
  <script src="./js/vue.min.js"></script>
  <script>
    // 安装自定义插件
    Vue.use(window.Plugin)
    // 创建 Vue 对象,并设置要管理的 div
    new Vue({
      el: '#vm'
    })
  </script>
</body>
</html>
运行效果:


 被折叠的 条评论
为什么被折叠?
被折叠的 条评论
为什么被折叠?
 到【灌水乐园】发言


