


建立Java工程项目
依赖关系查询
http://mvnrepository.com/,在这个网站上可以查询依赖表。
当需要引入一个jar包,又不知道如何在pom.xml中写依赖关系时,可从该网站查询。
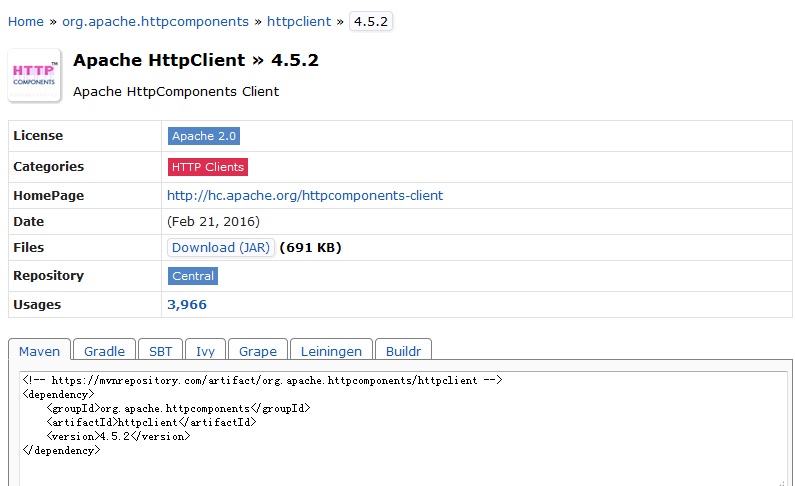
如要引入httpclient包,可以查询到各个版本的httpclient的依赖关系,我们使用最新的版本:
在pom.xml上增加:
<!-- https://mvnrepository.com/artifact/org.apache.httpcomponents/httpclient -->
<dependency>
<groupId>org.apache.httpcomponents</groupId>
<artifactId>httpclient</artifactId>
<version>4.5.2</version>
</dependency>

从这里可以看到,通过maven管理项目的一个优势:管理项目依赖包。在项目中引入包时,非常简单,在pom.xml中加一个依赖关系就可以了。避免了很多工作。
在pom.xml中有<version>0.0.1-SNAPSHOT</version>这样一段,工程的版本号,看起来不安逸,修改了<version>0.0.1</version>,将工程打包的话就会打成simple-weather-0.0.1.jar,比较适合我们平时的习惯。
建立一个多个模块的Java工程
simple-weather是一个Java工程,它的功能是有几块:
1、从中国气象网站上查询到天气情况,返回格式是Json格式,通过httpclient组件获取信息。
2、将返回数据进行解析,使用到org.apache.JSONObject组件。
3、使用velocity组件,将解析后的数据进行模版化。
4、日志打印使用slf4j和log4j共同完成。
工程建立
按前面一章的方式,建立一个 packing方式为jar的工程simple-weather
1、在pom.xml中增加依赖关系,本工程涉及的组件较多,并调整版本号。
<version>0.0.1</version>
<dependencies>
<dependency>
<groupId>junit</groupId>
<artifactId>junit</artifactId>
<version>4.12</version>
</dependency>
<dependency>
<groupId>org.slf4j</groupId>
<artifactId>slf4j-log4j12</artifactId>
<version>1.7.21</version>
</dependency>
<dependency>
<groupId>dom4j</groupId>
<artifactId>dom4j</artifactId>
<version>1.6.1</version>
</dependency>
<dependency>
<groupId>org.apache.velocity</groupId>
<artifactId>velocity</artifactId>
<version>1.7</version>
</dependency>
<dependency>
<groupId>jaxen</groupId>
<artifactId>jaxen</artifactId>
<version>1.1.6</version>
</dependency>
<dependency>
<groupId>org.json</groupId>
<artifactId>json</artifactId>
<version>20160810</version>
</dependency>
<!-- https://mvnrepository.com/artifact/org.apache.httpcomponents/httpclient -->
<dependency>
<groupId>org.apache.httpcomponents</groupId>
<artifactId>httpclient</artifactId>
<version>4.5.2</version>
</dependency>
</dependencies>
2、在main/src目录下增加log4j.properties的文件,内容为:
###appender###
log4j.rootLogger = debug,stdout,D,E
log4j.appender.stdout = org.apache.log4j.ConsoleAppender
log4j.appender.stdout.Target = System.out
log4j.appender.stdout.layout = org.apache.log4j.PatternLayout
log4j.appender.stdout.layout.ConversionPattern = [%-5p] %d{yyyy-MM-dd HH:mm:ss,SSS} method:%l%n%m%n
###${user.home}/logs/log.log###
log4j.appender.D = org.apache.log4j.DailyRollingFileAppender
log4j.appender.D.Encoding=UTF-8
log4j.appender.D.File = ${user.dir}/logs/log.log
log4j.appender.D.Append = true
log4j.appender.D.Threshold = DEBUG
log4j.appender.D.layout = org.apache.log4j.PatternLayout
log4j.appender.D.layout.ConversionPattern = %-d{yyyy-MM-dd HH:mm:ss} [ %t:%r:%C:%l ] - [ %p ] %m%n
### ${user.home}/logs/error.log ###
log4j.appender.E = org.apache.log4j.DailyRollingFileAppender
log4j.appender.E.File =${user.dir}/logs/error.log
log4j.appender.E.Encoding=UTF-8
log4j.appender.E.Append = true
log4j.appender.E.Threshold = ERROR
log4j.appender.E.layout = org.apache.log4j.PatternLayout
log4j.appender.E.layout.ConversionPattern =%-d{yyyy-MM-dd HH\:mm\:ss} [ %t\:%r\:%C\:%l ] - [ %p ] %m%n
3、在工程目录下增加velocity模牌weather.vm,内容如下:
<html>
<head></head>
<body>
<tr>
<td>城市</td><td>$weather.getCityid()</td>
<td>日期</td><td>$weather.getCityid()</td>
<td>天气</td><td>$weather.getCityid()</td>
<tr>
</body>
</html>
4、在src目录下新建包weather,新建各Java类(当然可以根据自己的喜好建立包和类)
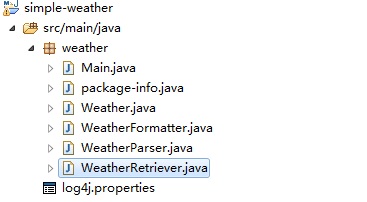
Main.java:主线程类。
Weather.java:天气对象类。
WeatherRetriever.java:天气信息获取类:
public String retrieve() throws Exception {
String url = "http://api.k780.com:88/?app=weather.today&weaid=1&appkey=10003&sign=b59bc3ef6191eb9f747dd4e83c99f2a4&format=json";
CloseableHttpClient httpclient = HttpClients.createDefault();
HttpGet httpget = new HttpGet(url);
CloseableHttpResponse response = httpclient.execute(httpget);
String retrunMsg = "";
try {
HttpEntity entity = response.getEntity();
if (entity != null) {
retrunMsg = EntityUtils.toString(entity);
}
} finally {
response.close();
httpget.releaseConnection();
httpclient.close();
}
logger.info(retrunMsg);
return retrunMsg;
}
WeatherParser.java:天气信息解析类:
public Weather parse(String inputData) throws Exception {
JSONObject json = new JSONObject(inputData);
Weather weather = new Weather();
weather.setCityid(((JSONObject) json.get("result")).getString("cityid"));
weather.setDays(((JSONObject) json.get("result")).getString("days"));
weather.setTemp_curr(((JSONObject) json.get("result")).getString("temp_curr"));
return weather;
}
WeatherParser.java:天气信息模版化。
public String format(Weather weather) throws Exception {
logger.info("Formatting Weather Data");
// 改变Velocity查找资源的路径,从source目录去找vm文件
String pathResources = WeatherFormatter.class.getResource("/").getPath();
logger.info("pathResources:" + pathResources);
Properties properties = new Properties();
properties.setProperty(VelocityEngine.FILE_RESOURCE_LOADER_PATH, pathResources);
// 初始化
Velocity.init(properties);
// 取得VelocityContext对象
VelocityContext context = new VelocityContext();
// 向context中放入要在模板中用到的数据对象
context.put("weather", weather);
Template template = Velocity.getTemplate("weather.vm", "gbk");
StringWriter writer = new StringWriter();
template.merge(context, writer);
return writer.toString();
}
Main.java:
public static void main(String[] args) throws Exception {
String dataReturn = new WeatherRetriever().retrieve();
Weather weather = new WeatherParser().parse(dataReturn);
logger.info(new WeatherFormatter().format(weather));
}
工程运行
运行Main.java,执行结果如下:
<html>
<head></head>
<body>
<tr>
<td>城市</td><td>101010100</td>
<td>日期</td><td>101010100</td>
<td>天气</td><td>101010100</td>
<tr>
</body>
</html>
工程打包
在工程目录下,有pom.xml一层,运行mvn install命令,工程打包后,在target目录下有simple-weather-0.0.1.jar的包,同时在E:\study\maven\repo\ch04\simple-weather\0.0.1目录下也有这个包,这个包就可以供其它工程使用(使用方法也是在pom.xml中增加依赖关系),后面会讲到如何使用包。
在这里也体现出用maven管理项目的另一个好处:多人共同开发一个项目时,可以更好地进行协作。
Maven Assembly
前面通过mvn install虽然可以生成jar包,而且可以在其它项目组引入并使用,在这个包不能单独拿来运行,此时必须使用Assembly插件来生成jar包。
首先在pom.xml中增加Assembly:
<build>
<pluginManagement>
<plugins>
<plugin>
<groupId>org.apache.maven.plugins</groupId>
<artifactId>maven-assembly-plugin</artifactId>
<version>2.3</version>
<configuration>
<appendAssemblyId>false</appendAssemblyId>
<descriptorRefs>
<descriptorRef>jar-with-dependencies</descriptorRef>
</descriptorRefs>
<archive>
<manifest>
<mainClass>weather.Main</mainClass>
</manifest>
</archive>
</configuration>
<executions>
<execution>
<id>make-assembly</id>
<phase>package</phase>
<goals>
<goal>assembly</goal>
</goals>
</execution>
</executions>
</plugin>
</plugins>
</pluginManagement>
</build>
将log4j.properties和weather.vm文件拷贝到targer目录下,执行命令:java -jar simple-weather-0.0.1.jar,可看到jar包可以正常执行:
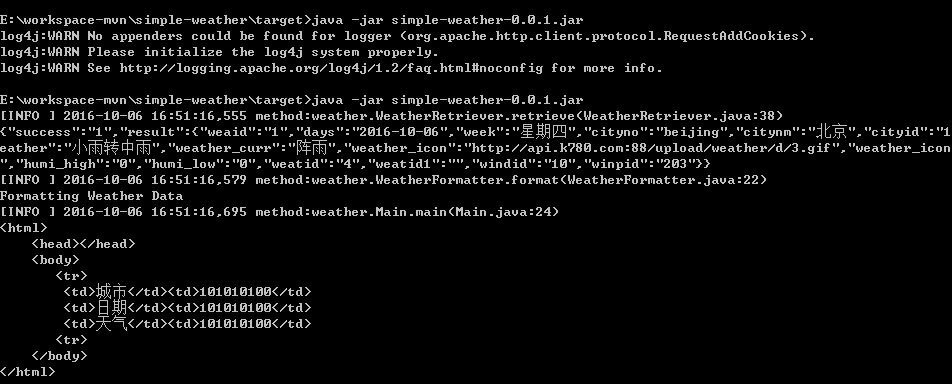
到这里,建立一个有多个模块的简单Java工程就演示完成了。


 695
695


 被折叠的 条评论
为什么被折叠?
被折叠的 条评论
为什么被折叠?
 到【灌水乐园】发言


