


场景
SpringBoot+Vue整合WebSocket实现前后端消息推送:
SpringBoot+Vue整合WebSocket实现前后端消息推送_霸道流氓气质的博客-CSDN博客
在上面集成Websocket实现消息推送的基础上。
除给web端页面进行推送数据,还需要给Android端推送数据。
在特殊的业务场景下,Android会经常性断网和关机,SpringBoot后台jar包部署在Windows服务器上。
当终端过多且累计一段时间后,因频繁断网和关机导致的与后台jar包tcp连接数不会关闭,
当超过最大连接数时(8000),则该服务会提示拒绝连接。
Windows上查看连接数除了使用命令之外,还可以借助于其它第三方工具比如Cports端口扫描工具等。
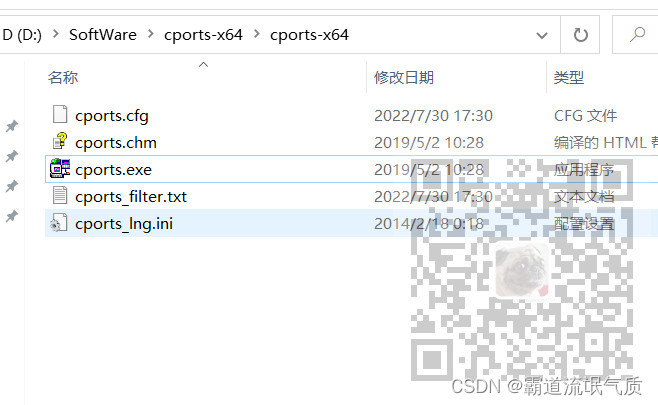
在jar包所在服务上运行exe,如果该服务器上还有其他端口服务存在,可进行筛选指定端口的连接
比如只筛选7777端口,在筛选器中输入
include:both:tcp:7777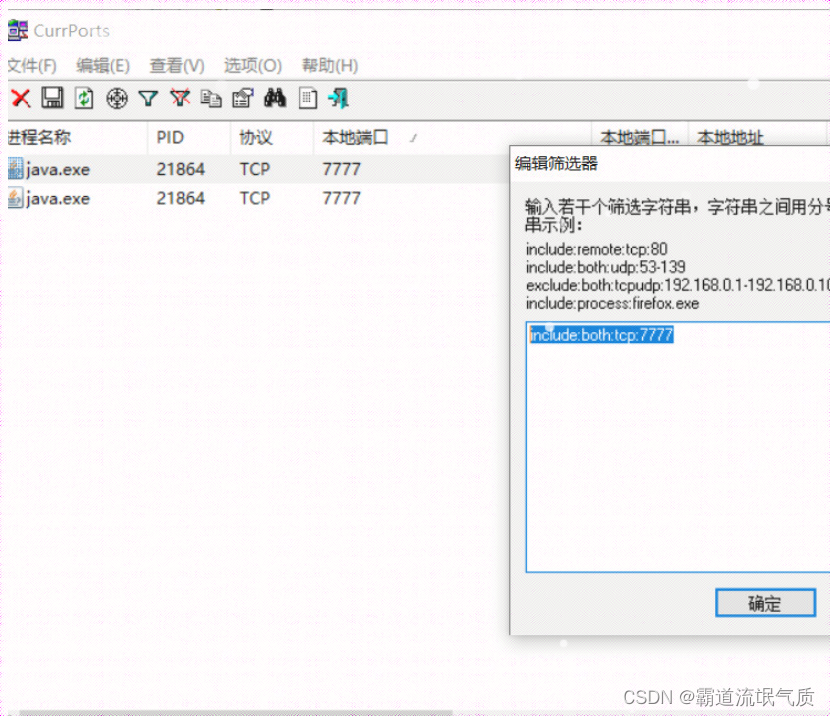
注:
博客:
https://blog.csdn.net/badao_liumang_qizhi
关注公众号
霸道的程序猿
获取编程相关电子书、教程推送与免费下载。
实现
1、用Android模拟器以及websocket测试软件来模拟上面异常关闭连接(断网)连接数不变的情况
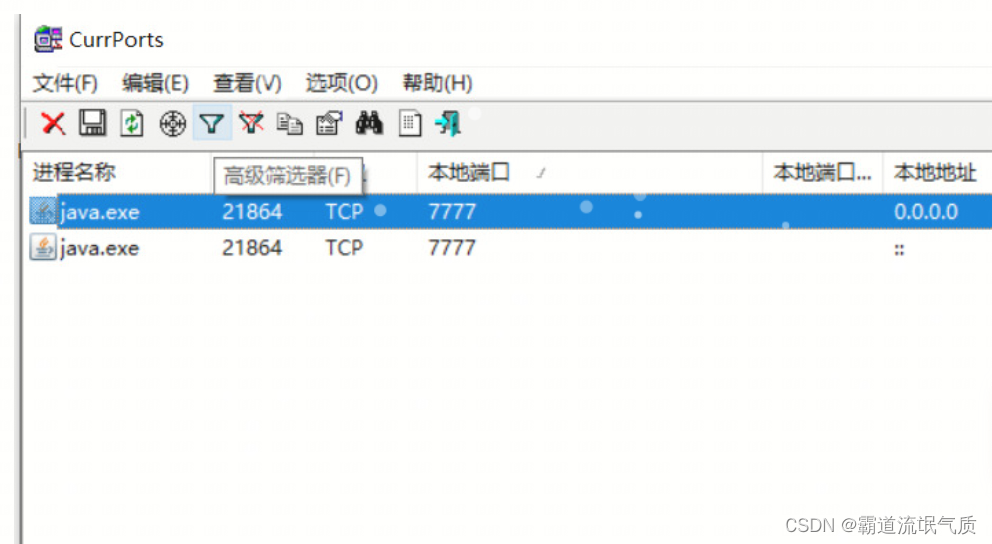
首先建立起多个连接,可以看到连接数会增多。
然后将APP的网络突然断掉,此时可以看到连接数并不会被关掉
当网络再次恢复时,连接数会持续增多
此时可以通过cports工具选中连接数并关闭

或者直接重启后台jar包,则连接会断开
2、Nginx配置Websocket代理
可以参考官网文档
To turn a connection between a client and server from HTTP/1.1 into WebSocket, the protocol switch mechanism available in HTTP/1.1 is used.
There is one subtlety however: since the “Upgrade” is a hop-by-hop header, it is not passed from a client to proxied server. With forward proxying, clients may use the CONNECT method to circumvent this issue. This does not work with reverse proxying however, since clients are not aware of any proxy servers, and special processing on a proxy server is required.
Since version 1.3.13, nginx implements special mode of operation that allows setting up a tunnel between a client and proxied server if the proxied server returned a response with the code 101 (Switching Protocols), and the client asked for a protocol switch via the “Upgrade” header in a request.
As noted above, hop-by-hop headers including “Upgrade” and “Connection” are not passed from a client to proxied server, therefore in order for the proxied server to know about the client’s intention to switch a protocol to WebSocket, these headers have to be passed explicitly:
location /chat/ {
proxy_pass http://backend;
proxy_http_version 1.1;
proxy_set_header Upgrade $http_upgrade;
proxy_set_header Connection "upgrade";
}
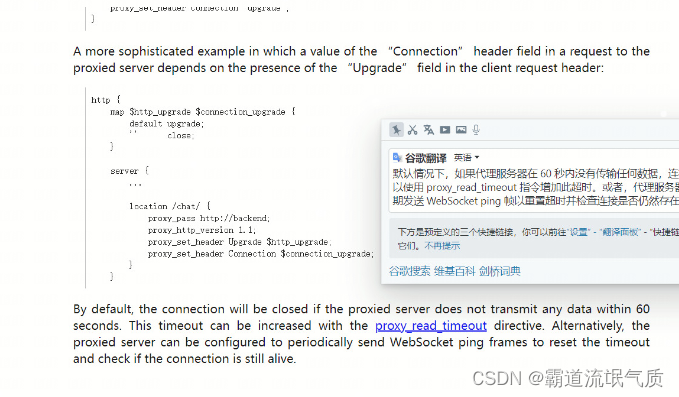
A more sophisticated example in which a value of the “Connection” header field in a request to the proxied server depends on the presence of the “Upgrade” field in the client request header:
http {
map $http_upgrade $connection_upgrade {
default upgrade;
'' close;
}
server {
...
location /chat/ {
proxy_pass http://backend;
proxy_http_version 1.1;
proxy_set_header Upgrade $http_upgrade;
proxy_set_header Connection $connection_upgrade;
}
}
By default, the connection will be closed if the proxied server does not transmit any data within 60 seconds. This timeout can be increased with the proxy_read_timeout directive. Alternatively, the proxied server can be configured to periodically send WebSocket ping frames to reset the timeout and check if the connection is still alive.
3、按照官方文档的示例和说明修改nginx的配置文件
按照示例配置,首先需要配置一个上游服务器upstream,示例配置中叫backend,这里叫websocket
 upstream websocket {
  server 10.229.36.139:7777;
 }
添加位置
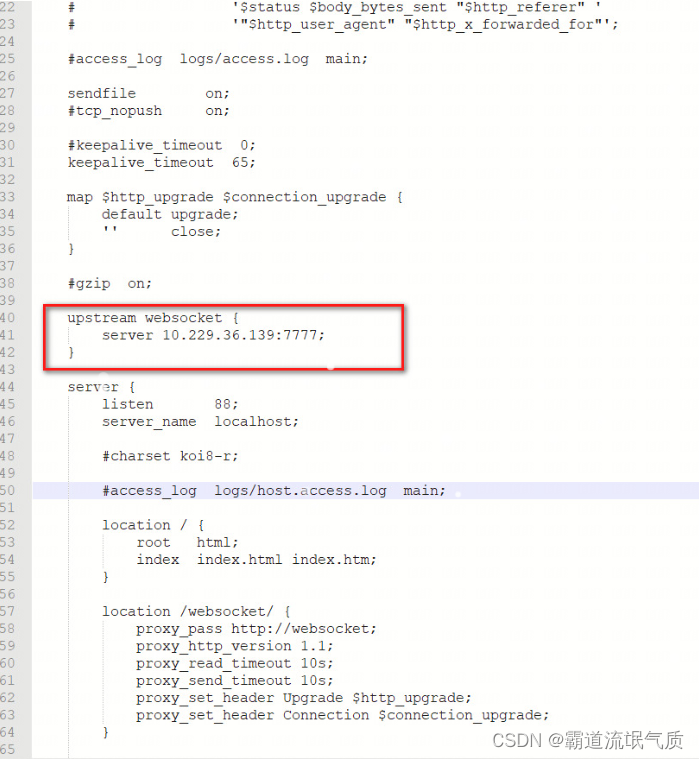
这里的server指定的是原来的ip和端口。
然后按照示例代码添加其他配置
map $http_upgrade $connection_upgrade {
default upgrade;
'' close;
}
#gzip on;
upstream websocket {
server 10.229.36.139:7777;
}
server {
listen 88;
server_name localhost;
#charset koi8-r;
#access_log logs/host.access.log main;
location / {
root html;
index index.html index.htm;
}
location /websocket/ {
proxy_pass http://websocket;
proxy_http_version 1.1;
proxy_read_timeout 10s;
proxy_send_timeout 10s;
proxy_set_header Upgrade $http_upgrade;
proxy_set_header Connection $connection_upgrade;
}
主要添加这两块
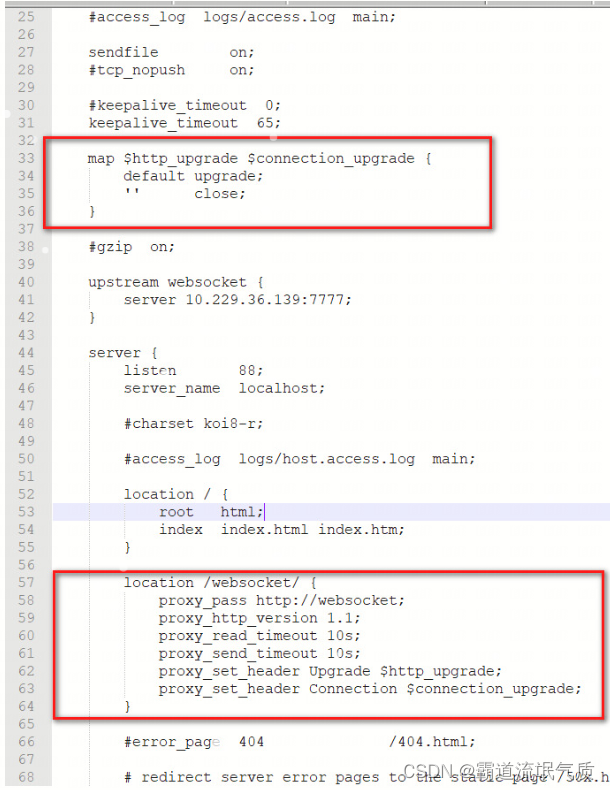
与示例代码不同的是,这里还按照官方说明添加了超时的时间设置,这里为10s,意思就是说十秒之内没有任何通讯和消息传输就会关闭该连接。
完整nginx.conf配置文件
#user nobody;
worker_processes 1;
#error_log logs/error.log;
#error_log logs/error.log notice;
#error_log logs/error.log info;
#pid logs/nginx.pid;
events {
worker_connections 1024;
}
http {
include mime.types;
default_type application/octet-stream;
#log_format main '$remote_addr - $remote_user [$time_local] "$request" '
# '$status $body_bytes_sent "$http_referer" '
# '"$http_user_agent" "$http_x_forwarded_for"';
#access_log logs/access.log main;
sendfile on;
#tcp_nopush on;
#keepalive_timeout 0;
keepalive_timeout 65;
map $http_upgrade $connection_upgrade {
default upgrade;
'' close;
}
#gzip on;
upstream websocket {
server 10.229.36.139:7777;
}
server {
listen 88;
server_name localhost;
#charset koi8-r;
#access_log logs/host.access.log main;
location / {
root html;
index index.html index.htm;
}
location /websocket/ {
proxy_pass http://websocket;
proxy_http_version 1.1;
proxy_read_timeout 10s;
proxy_send_timeout 10s;
proxy_set_header Upgrade $http_upgrade;
proxy_set_header Connection $connection_upgrade;
}
#error_page 404 /404.html;
# redirect server error pages to the static page /50x.html
#
error_page 500 502 503 504 /50x.html;
location = /50x.html {
root html;
}
# proxy the PHP scripts to Apache listening on 127.0.0.1:80
#
#location ~ \.php$ {
# proxy_pass http://127.0.0.1;
#}
# pass the PHP scripts to FastCGI server listening on 127.0.0.1:9000
#
#location ~ \.php$ {
# root html;
# fastcgi_pass 127.0.0.1:9000;
# fastcgi_index index.php;
# fastcgi_param SCRIPT_FILENAME /scripts$fastcgi_script_name;
# include fastcgi_params;
#}
# deny access to .htaccess files, if Apache's document root
# concurs with nginx's one
#
#location ~ /\.ht {
# deny all;
#}
}
# another virtual host using mix of IP-, name-, and port-based configuration
#
#server {
# listen 8000;
# listen somename:8080;
# server_name somename alias another.alias;
# location / {
# root html;
# index index.html index.htm;
# }
#}
# HTTPS server
#
#server {
# listen 443 ssl;
# server_name localhost;
# ssl_certificate cert.pem;
# ssl_certificate_key cert.key;
# ssl_session_cache shared:SSL:1m;
# ssl_session_timeout 5m;
# ssl_ciphers HIGH:!aNULL:!MD5;
# ssl_prefer_server_ciphers on;
# location / {
# root html;
# index index.html index.htm;
# }
#}
}
4、配置之后启动Nginx
此时websocket可以通过代理的88端口进行连接
并且在不断网情况下,超过10秒没有消息就会关闭连接。
 异常断网的情况也是如此


 3246
3246


 被折叠的 条评论
为什么被折叠?
被折叠的 条评论
为什么被折叠?
 到【灌水乐园】发言


