


01,项目搭建与启动
一,项目搭建
有多种方式可以搭建Spring Boot项目,包括:
- 使用Spring Boot CLI命令行工具
- 使用Spring Initializr网站或IDE插件生成项目模板
- 使用Maven或Gradle手动配置项目
每种方式都有其优缺点,具体选择应根据项目的需要和个人偏好来决定。
1)Spring Initializr创建

选择springweb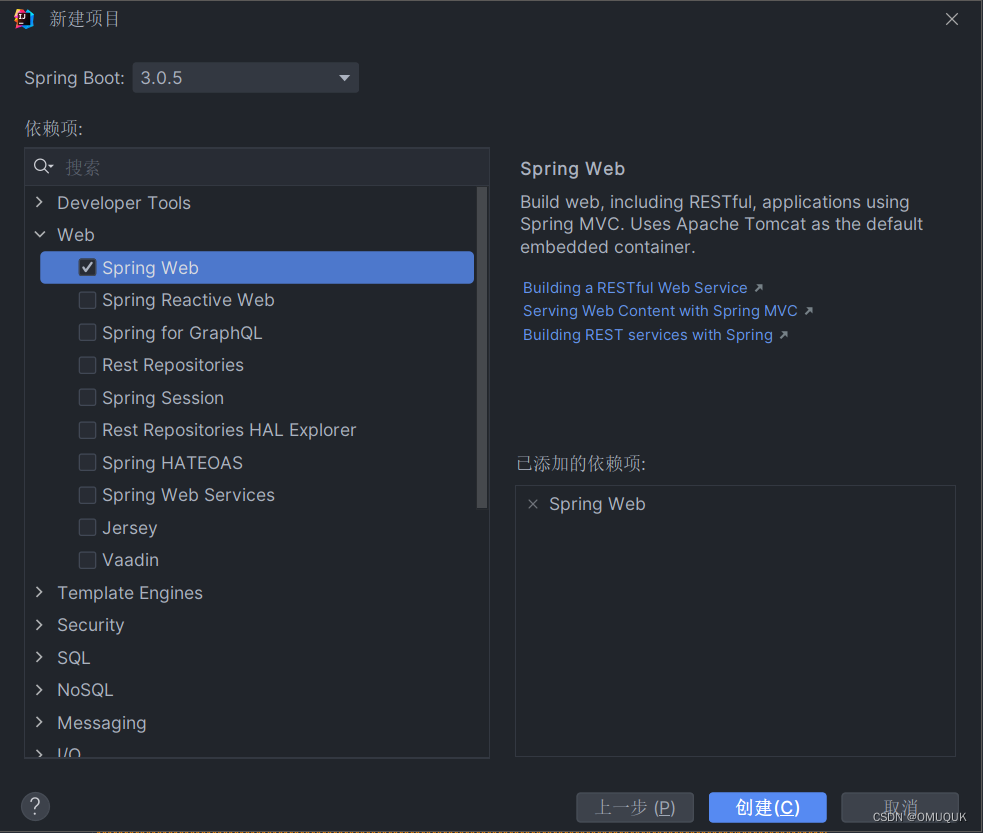
2)用Maven手动配置项目
以下是使用Maven手动配置Spring Boot项目的示例代码:
用Maven手动配置项目(一)
1.在 pom.xml 文件中添加 Spring Boot 依赖:
<?xml version="1.0" encoding="UTF-8"?>
<project xmlns="http://maven.apache.org/POM/4.0.0"
         xmlns:xsi="http://www.w3.org/2001/XMLSchema-instance"
         xsi:schemaLocation="http://maven.apache.org/POM/4.0.0 http://maven.apache.org/xsd/maven-4.0.0.xsd">
    <modelVersion>4.0.0</modelVersion>

    <groupId>org.example</groupId>
    <artifactId>springboot01</artifactId>
    <version>1.0-SNAPSHOT</version>

    <properties>
        <maven.compiler.source>11</maven.compiler.source>
        <maven.compiler.target>11</maven.compiler.target>
    </properties>

    <dependencyManagement>
        <dependencies>
            <dependency>
                <groupId>org.springframework.boot</groupId>
                <artifactId>spring-boot-dependencies</artifactId>
                <version>2.7.10</version>
                <type>pom</type>
                <scope>import</scope>
            </dependency>
        </dependencies>
    </dependencyManagement>

    <dependencies>
        <dependency>
            <groupId>org.springframework.boot</groupId>
            <artifactId>spring-boot-starter-web</artifactId>
        </dependency>
    </dependencies>
</project>
2.在主类上添加 @SpringBootApplication 注解:
@SpringBootApplication
public class DemoApplication {
    public static void main(String[] args) {
        SpringApplication.run(DemoApplication.class, args);
    }
}
3.配置应用程序的配置文件 application.properties 或 application.yml:
application.properties 文件示例:
server.port=8080
spring.datasource.url=jdbc:mysql://localhost:3306/mydb
spring.datasource.username=root
spring.datasource.password=123456
application.yml 文件示例:
server:
  port: 8080

spring:
  datasource:
    url: jdbc:mysql://localhost:3306/mydb
    username: root
    password: 123456
4.开始编写应用程序的代码:
@RestController
public class HelloWorldController {
    @GetMapping("/")
    public String helloWorld() {
        return "Hello, World!";
    }
}
用Maven手动配置项目(二)
添加spring boot父工程、spring依赖
<?xml version="1.0" encoding="UTF-8"?>
<project xmlns="http://maven.apache.org/POM/4.0.0"
         xmlns:xsi="http://www.w3.org/2001/XMLSchema-instance"
         xsi:schemaLocation="http://maven.apache.org/POM/4.0.0 http://maven.apache.org/xsd/maven-4.0.0.xsd">
    <modelVersion>4.0.0</modelVersion>
    <groupId>org.example</groupId>
    <artifactId>springboot01</artifactId>
    <version>1.0-SNAPSHOT</version>

    <parent>
        <artifactId>spring-boot-starter-parent</artifactId>
        <groupId>org.springframework.boot</groupId>
        <version>2.7.10</version>
    </parent>

    <properties>
        <maven.compiler.source>11</maven.compiler.source>
        <maven.compiler.target>11</maven.compiler.target>
    </properties>

    <dependencies>
        <dependency>
            <groupId>org.springframework.boot</groupId>
            <artifactId>spring-boot-starter-web</artifactId>
        </dependency>
    </dependencies>
</project>
必须在包中新建这个类,不能直接放入到java文件夹。
在com.buba下新建自定义名称的类(规范:XXXXApplication)
package com.buba;

import org.springframework.boot.SpringApplication;
import org.springframework.boot.autoconfigure.SpringBootApplication;

@SpringBootApplication
public class ApplicationStarter {
  public static void main(String[] args) {
      SpringApplication.run(ApplicationStarter.class,args);
  }
}


 2万+
2万+


 被折叠的 条评论
为什么被折叠?
被折叠的 条评论
为什么被折叠?
 到【灌水乐园】发言


