


jupyter notebook使用技巧
多conda环境中使用jupyter notebook
多个conda环境中使用jupyter notebook
默认的jupyter notebook是可以在默认的base环境中使用的,如果在其他环境中使用,则需要进行配置,否会会出现报错:

操作步骤如下:
# 新建并安装必要的包
conda create -n env-name python=3.9  # 新建python环境
conda activate env-name # 激活新环境
conda install ipykernel    # 在新python环境中安装内核,用于jupyter notebook
conda deactivate    # 释放新环境

# 将所有环境的kernel都配置好,并启动jupyter notebook
conda activate base
conda install nb_conda_kernels  # 用于启动jupyter notebook的内核
jupyter notebook
配置好之后,所有的conda环境都可以使用jupyter notebook,如下所示:

如果还是会出现500错误,那就需要更新一下nbconvert即可。
pip install --upgrade --user nbconvert
jupyter notebook实现目录结构
jupyter notebook默认没有目录结构,需要插件实现。
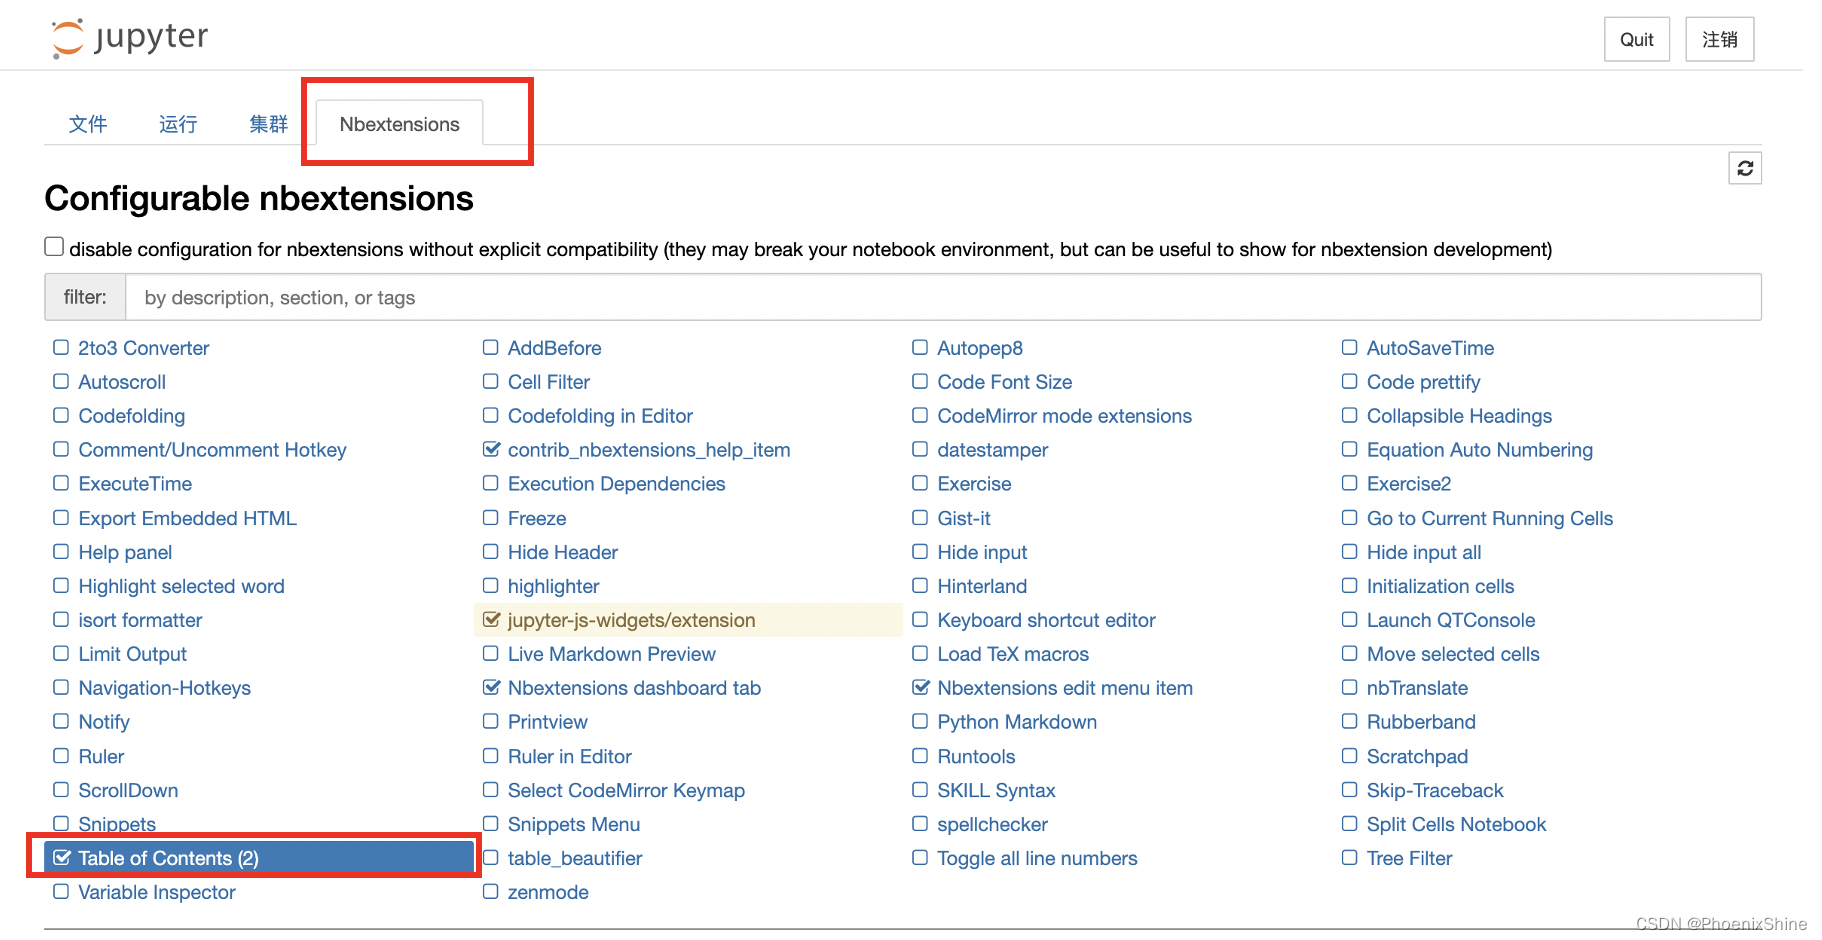
首先,安装jupyter_contrib_nbextensions包。
pip install jupyter_contrib_nbextensions
然后,配置下面的Table of Contents即可。
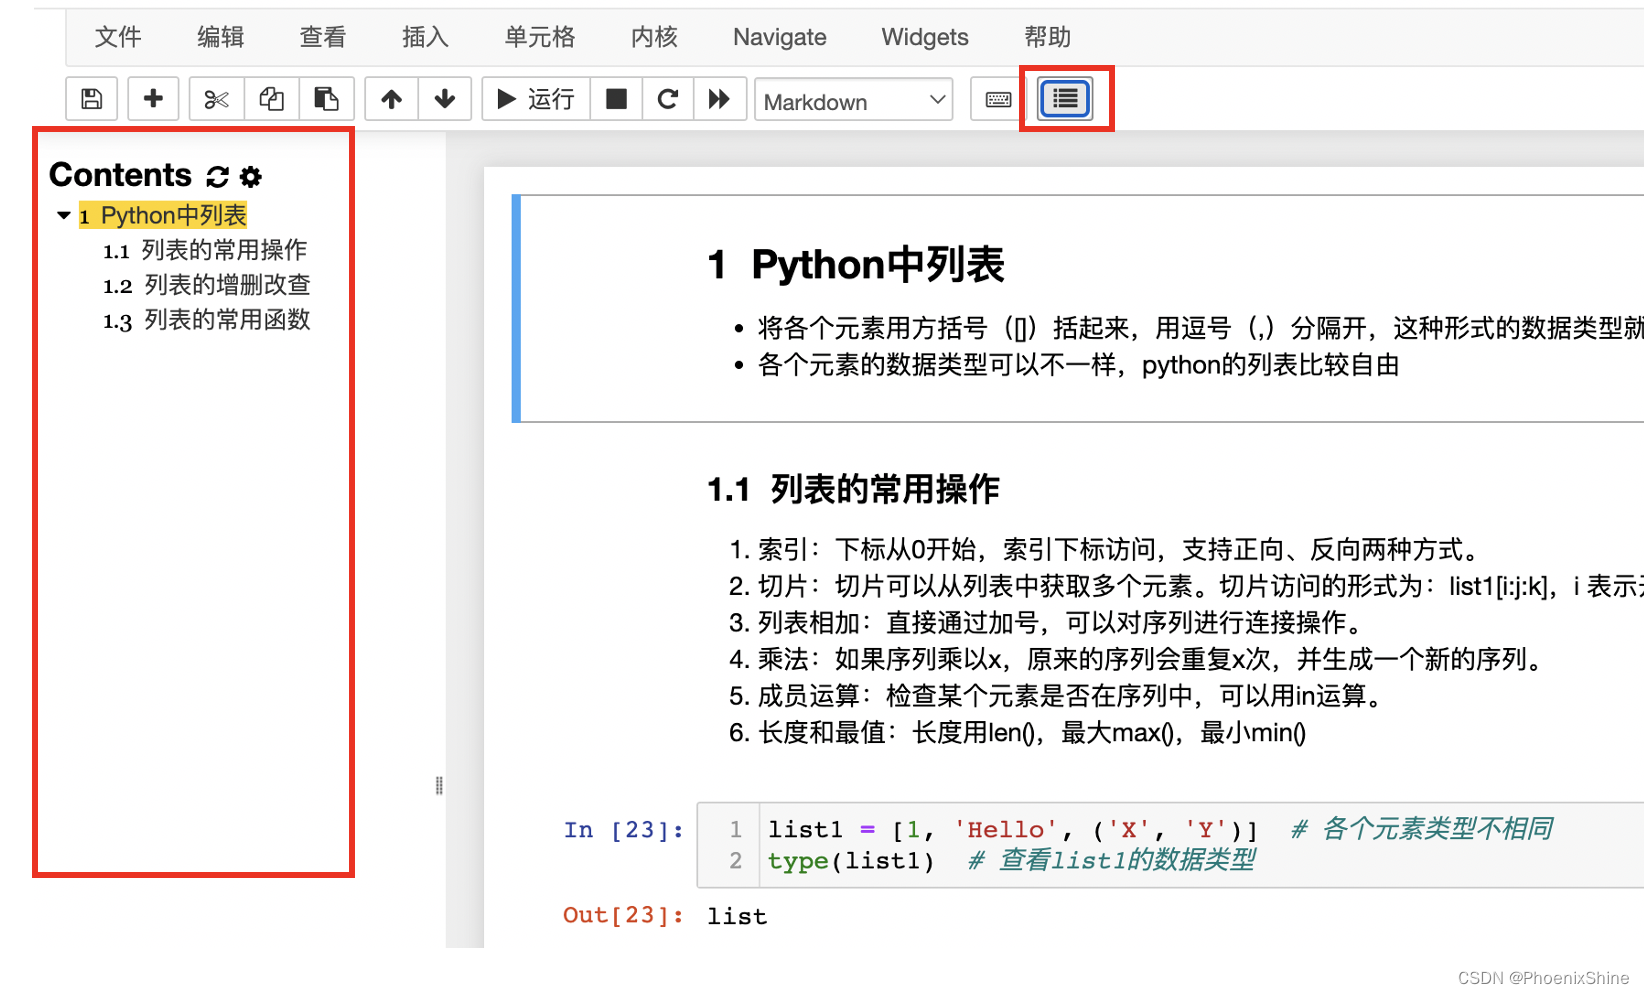
配置成功后,在编辑界面工具栏中,会出现目录按钮。如下所示:
参考:
- https://blog.csdn.net/u014264373/article/details/119390267?spm=1001.2014.3001.5506
- https://www.jianshu.com/p/a7684f520225


 4118
4118


 被折叠的 条评论
为什么被折叠?
被折叠的 条评论
为什么被折叠?
 到【灌水乐园】发言


