


第二种布局: TableLayout
TableLayout 允许我们使用表格的方式来排列控件,这种布局也不是很常用,你只需要 了解一下它的基本用法就可以了。既然是表格,那就一定会有行和列,在设计表格时我们 尽量应该让每一行都拥有相同的列数,这样的表格也是最简单的。不过有时候事情并非总会 顺从我们的心意,当表格的某行一定要有不相等的列数时,就需要通过合并单元格的方式来应对。
1. TableLayout相对父布局进行定位
1.1 xml文件代码
<?xml version="1.0" encoding="utf-8"?>
<TableLayout
    xmlns:android="http://schemas.android.com/apk/res/android"
    android:layout_width="match_parent"
    android:layout_height="match_parent" >

    <TableRow>
        <TextView
            android:layout_height="wrap_content"
            android:text="Account:" />
        <EditText
            android:id="@+id/account"
            android:layout_height="wrap_content"
            android:hint="Input your account" />
    </TableRow>

    <TableRow>
        <TextView
            android:layout_height="wrap_content"
            android:text="Password:" />
        <EditText
            android:id="@+id/password"
            android:layout_height="wrap_content"
            android:inputType="textPassword" />
    </TableRow>

    <TableRow>
        <Button android:id="@+id/login"
            android:layout_height="wrap_content"
            android:layout_span="2"
            android:text="Login" />
    </TableRow>

</TableLayout>
1.2 布局说明:
1.2.1 内部控件均在一行内每加一个TableRow则多出一行
1.2.2 EditText android:hint = “提示内容” 该内容可见,但不起作用
1.2.3 EditText android:inputType=”textPassword” 设置输入为密码格式,不可见
1.2.3 Button android:layout_span=”2” 设置控件占两个单元格。
注意:tablelayout布局与python的grid布局相似,所以可参考Python的grid布局
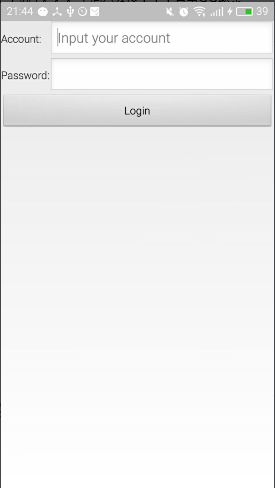
1.3 效果:
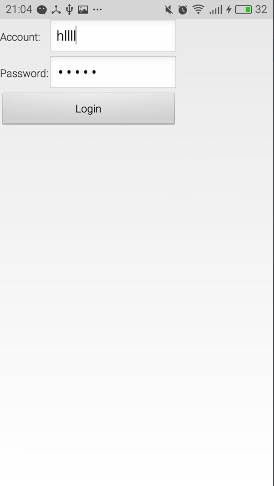
不足:
从图中可以看出,当前的登录界面并没有充分利用屏幕的宽度,右侧还空出了一块区域。因为在TableRow中我们无法指定控件的宽度。这时使用 android:stretchColumns属性就可以很好地解决这个问题,它允许将 TableLayout中的某一列 进行拉伸,以达到自动适应屏幕宽度的作用。
android:stretchColumns的使用:
<TableLayout xmlns:android="http://schemas.android.com/apk/res/android" android:layout_width="match_parent" android:layout_height="match_parent" android:stretchColumns="1" >
……
</TableLayout>
说明:android:stretchColumns的值指定为 1,表示如果表格不能完全占满屏幕宽度,就将第二列进行拉伸。没错!指定成 1就是拉伸第二列,指定成 0就是拉伸第一列,不要以为 这里我写错了哦。


 2398
2398

 被折叠的 条评论
为什么被折叠?
被折叠的 条评论
为什么被折叠?
 到【灌水乐园】发言


