


目录

跳转到店铺页面时 会携带商店id 组件一创建 就从路由中获取商店id 然后根据商店id获取店铺信息
created() {
	//根据路由query获得商店id
    this.restaurant_id = this.$route.query.id;
    //根据商店id获取店家信息
    this.$store.dispatch('getRestaurant', this.restaurant_id);
    //活动列表不停滚动播放 每隔4s positionY+1
    this.timer = setInterval(() => {
    	this.positionY++;
    }, 4000);
}

getRestaurant({commit}, restaurant_id) {
	getRestaurant({restaurant_id}).then((response) => {
		let poi_info = response.data.data;
      	commit('RECORD_RESTAURANT', poi_info)
    })
}

getRestaurants(data){
	let req = {data: data,url: 'v1/restaurants'};
  	return _get(req);
}

_get(req){
  return axios.get(req.url, {params: req.data})
}

const mutations = {
  //记录当前商店的信息
  [types.RECORD_RESTAURANT](state, poi_info) {
    state.poi_info = {...poi_info}
  }
};
空白页

如果vuex中不存在poi_info 即没有商店信息 则展示一张模板图片
<!--如果没有获取到商店的信息 那么展示一张模板图片-->
<div class="skeleton-loading" v-if="!poi_info.name">
	<img src="../../assets/restaurant.jpg">
</div>
顶部导航条:复用head组件

右边的。。。没有设置点击效果 点不动
<v-head :title="poi_info.name" goBack="true" color="#fff" bgColor="#333" more="true"></v-head>
店铺信息

展示商家信息 都是从vuex的poi_info中取出来展示的
<div class="store-info">
<!--展示商家图片-->
<div class="logo">
<img :src="poi_info.pic_url">
</div>
<!--起送价、配送价、配送时间等取出来展示出来-->
<div class="deliver-info">
<span>{{poi_info.min_price_tip}} | {{poi_info.shipping_fee_tip}} | {{poi_info.delivery_time_tip}}</span>
<!--喇叭图标是个iconfont 取出公告展示出来-->
<p><i class="iconfont icon-broadcast"></i>{{poi_info.bulletin}}</p>
</div>
</div>
喇叭后面的字:“理工短号615592(原大学生粗粮坊)做你身边最快的外卖!”没有显示完 后半部分用…省略了 用CSS实现:
p{
	// overflow定义当一个元素的内容太大而无法适应 块级格式化上下文 时候该做什么
	overflow: hidden;
	// text-overflow:如何向用户发出未显示的溢出内容信号。
	// 它可以被剪切clip,显示一个省略号ellipsis或显示一个自定义字符串"xx"。
    text-overflow: ellipsis;
    // white-space:用来设置如何处理元素中的空白
    white-space: nowrap;// 连续的空白符会被合并
}
活动列表

<div class="actives">
<!--
// 组件一创建 活动列表不停滚动播放 每隔4s positionY+1
this.timer = setInterval(() => {
  this.positionY++;
}, 4000)
然后利用transform: translateY移动折扣信息 每个折扣信息的高度是0.9rem
所以想要展示第几条折扣信息的时候就向上移动几 通过positionY % discountsLength实现
ul利用transition每2s执行一次过渡效果 这样就可以看到上移的效果 不然每次都是闪一下就下一条了
-->
	<ul :style=" 'transform: translateY('+ positionY % discountsLength * -0.9 +'rem)'">
    	<li v-for="(item, index) in poi_info.discounts2" :key="index">
        	<!--取出折扣图片展示-->
            <i class="icon"
               :style="{backgroundImage:'url('+ item.icon_url+')'}"></i>
            <!--取出折扣信息展示-->
            <span>{{item.info}}</span>
        </li>
	</ul>
    <span class="active-number" @click="showStoreDetail();">{{discountsLength}}个活动 > </span>
</div>
<script>
// 组件一创建 活动列表不停滚动播放 每隔4s positionY+1
this.timer = setInterval(() => {
	this.positionY++;
}, 4000);

showStoreDetail() {
	this.showDetail = true;
}
</script>
点击“3个活动”

展示下图

这是子组件store-detail 在store中使用:通过变量showDetail来决定该组件的展示与隐藏 上面点击“3个活动”后会更改showDetail的属性 展示store-detail组件
<!--
用transition包裹会有一个过渡效果 会把过渡效果应用到其包裹的内容
name:string,用于自动生成CSS过渡类名。例如:name: 'fade' 将自动拓展为 .fade-enter
-->
<transition name="fade">
	<!--父组件通过监听update:showFlag事件 将新值赋值给自己的属性showDetail 控制store-detail组件的展示与隐藏-->
    <store-detail
        class="store-detail"
        v-show="showDetail"
        :showFlag.sync="showDetail"
        :poi_info="poi_info">
    </store-detail>
</transition>
store-detail商店详情页
从vuex中的poi_info中取出店铺图片、店铺名称展示出来 复用v-star组件(传入分数)展示星级评分及分数 取出起送价、配送价、配送时间等展示出来 遍历poi_info.discounts2的折扣信息并展示出来 取出商家公告并展示出来
<div class="main">
	<div class="logo">
        <!--展示店铺图片-->
        <img :src="poi_info.pic_url">
    </div>
    <!--展示店铺名称-->
    <h2 class="name">{{poi_info.name}}</h2>
    <div class="score">
        <!--展示星级评分-->
        <v-star :score="poi_info.wm_poi_score"></v-star>
        <!--展示分数-->
        <span>{{poi_info.wm_poi_score}}</span>
    </div>
    <!--展示起送价、配送价、配送时间-->
    <span
        class="deliver-info">{{poi_info.min_price_tip}}  | {{poi_info.shipping_fee_tip}} | {{poi_info.delivery_time_tip}}</span>
    <div class="active-lists">
        <!--遍历折扣信息并展示出来-->
        <ul>
          	<li v-for="(item, index) in poi_info.discounts2" :key="index">
           	<!--折扣的图片-->
            	<i class="icon"
               		:style="{backgroundImage:'url('+ item.icon_url+')'}">
            	</i>
            	<!--折扣信息-->
            	<span>{{item.info}}</span>
          	</li>
    	</ul>
    </div>
    <div class="announcement">
        <h2>商家公告</h2>
        <!--商家公告-->
		<p>{{poi_info.bulletin}}</p>
	</div>
</div>

这是一个iconfont
<div class="close" @click="close();">
<i class="iconfont icon-close"></i>
</div>
<script>
close() {//关闭详情页
this.$emit('update:showFlag', false);
}
</script>
导航:点菜 评价 商家

<!--导航 有3个路由  点菜 评价 和商家 点击后会跳转到相应组件 所以各自用router-link包裹起来了-->
<div class="nav">
	<router-link :to="{path:'/store/menu',query:{id:restaurant_id}}" class="menu" active-class="active">
        <span class="active">点菜</span>
    </router-link>
    <router-link :to="{path:'/store/comment',query:{id:restaurant_id}}" class="comment" active-class="active">
        <span>评价</span>
    </router-link>
    <router-link :to="{path:'/store/seller',query:{id:restaurant_id}}" class="seller" active-class="active">
        <span>商家</span>
    </router-link>
</div>
menu菜单

组件一创建 先从路由中获取餐馆id 根据餐馆id获取食物 将事物保存在foodsData中 然后左右两边各创建一个better-scroll
created() {
    let restaurant_id = this.$route.query.id;// 从路由中获取餐馆id
    //根据餐馆id获取食物
    getFoods({restaurant_id}).then((response) => {
        this.foodsData = response.data.data;
        this.getInfoReady = true;
        this.$nextTick(() => {//初始化better-scroll 左右两边各一个better-scroll
          	this.leftScroll = new BScroll(this.$refs.left, {click: true});
          	this.rightScroll = new BScroll(this.$refs.right, {click: true, probeType: 3});
          	//取出节点并保存在数组中 遍历数组取出每个节点 获取该节点的offsetTop并保存在categoryPosition数组中
          	//childNodes属性返回所有的节点,包括文本节点、注释节点;
          	//children属性只返回元素节点;
          	let dom = (this.$refs.right.children)[0];//确定各分类categoryPosition,获取到article标签
          	let listsArr = Array.from(dom.childNodes);//获取到section标签
          	listsArr.forEach((item, index) => {
            	// 存放各个分类的位置 offsetTop返回当前元素相对于其offsetParent元素的顶部内边距的距离。
            	// offsetParent就是距离该子元素最近的进行过定位的父元素(position:absolute  relative fixed),
            	// 如果其父元素中不存在定位则offsetParent为:body元素。此处为body
            	this.categoryPosition[index] = item.offsetTop;
          	});
        this.listenScroll();    //监听滚动
      	this.lazyLoadImg(0);  //第一个分类首先加载图片  其它监听活动时懒加载
   	})
}

//获取食物
getFoods(data){
  	let req = {url: `v1/food/${data.restaurant_id}`};
  	return _get(req);
}
const _get(req){
  	return axios.get(req.url, {params: req.data})
}

listenScroll() {  //右侧监听滚动事件
	this.rightScroll.on('scroll', this.mappingScrolli)
},
mappingScrolli(pos) {//右侧滚动时  判断当前左侧是第几个分类
	for (let i = 0; i < this.categoryPosition.length; i++) {
		// 当前位置小于i+1分类的位置 那么当前位置处于i分类
    	if (this.categoryPosition[i] <= Math.ceil(Math.abs(pos.y)) && i === this.categoryPosition.length - 1 ||
    		this.categoryPosition[i + 1] > Math.ceil(Math.abs(pos.y))) {
            this.menuIndex = i;
            this.lazyLoadImg(i);
            this.lazyLoadImg(i + 1);  //下一页提前加载
            break;
    	}
	}
},
lazyLoadImg(index) {
	if (index > this.categoryPosition.length - 1 || this.hasLoadArr.indexOf(index) !== -1) return;
    //如果该分类已经调用过懒加载,就不用执行下面函数了 不再对该分类进行懒加载
    this.hasLoadArr.push(index)
    //先获取到所有的img标签 然后将img标签的xsrc属性的值赋值给其src属性 进行网络请求 加载图片
    //xsrc属性是我们自定义给img标签的属性 用来临时存放真实src
    let imgLists = this.$refs.categorys.children[index].querySelectorAll('.img');
    imgLists = Array.from(imgLists)
    imgLists.forEach((el) => {
    	let img = el.childNodes[0];
        let xsrc = img.getAttribute('xsrc');
        if (img.src === xsrc) return;
        img.src = xsrc;
     })
}

foodsData是个数组 数组中的一个个元素是对象
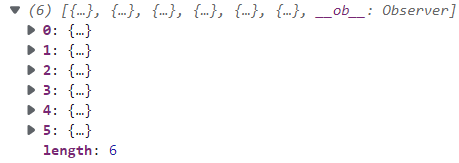
点开0 也就是第一个对象 里面有创建时间created-at、分类编号id、分类名称name、餐馆编号restaurant_id、该分类下的食品数量__v、spus存储该分类下的所有食品 是一个数组

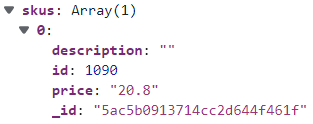
点开spus中的一个对象 包含的内容:分类编号category_id、创建时间created-at、id(?)、月销量month_saled、月销量month_saled_content、食品名称name、食品图片pic_url、praise_content(?)、praise_num(?)、餐馆编号restaurant_id、skus是个数组 里面保存着商品价格price和食品编号id

点开skus后
左侧分类栏
遍历foodsData取出其中的一个个对象category 将category.name(食品分类名称)展示出来 监听每个li标签的点击 点击后让右侧滚动到相应的位置 并为标签动态绑定class 当左侧某个分类的索引=左侧当前的分类menuIndex 则为标签新加上一个class 改变其样式
<div class="left" ref="left">
	<ul>
       	<li v-for="(category,index) in foodsData" :key="category.id" @click="mappingScroll(index)"
            :class="{'activity-menu': index === menuIndex}">
			<!--category.name食品分类名称-->
          	{{category.name}}
    	</li>
	</ul>
</div>
<script>
	mappingScroll(index) {//点击左侧  右侧滚动到对应的位置
		this.rightScroll.off('scroll', this.mappingScrolli)// 取消监听右侧的滚动
    	this.rightScroll.scrollTo(0, -this.categoryPosition[index], 500);// 右侧滚动到点击的位置
    	this.menuIndex = index;// 当前左侧是第Index个分类
    	this.lazyLoadImg(index);// 懒加载index页
    	setTimeout(this.listenScroll, 500);// 500ms后继续监听右侧滚动
	}
</script>
右侧菜单栏
<article>标签表示页面中与上下文不相关的独立的内容部分
<section>标签定义文档中的节(section、区段)。比如章节、页眉、页脚或文档中的其他部分。
<article ref="categorys">
	<!--遍历foodsData取出其中的一个个对象category 将category.name(食品分类名称)展示出来-->
	<section v-for="category in foodsData" :key="category.id">
		<!--展示食品分类名称-->
    	<h2>{{category.name}}</h2>
        <article>
        	<!--遍历category.spus取出食品数据展示出来-->
            <section v-for="spus in category.spus" :key="spus.id">
              	<div class="img">
					<!--展示食品图片-->
                	<img :xsrc="spus.pic_url" src="../../../assets/shoploading.png">
             	</div>
              	<div class="info">
					<!--展示食品名称-->
                	<div class="name">{{spus.name}}</div>
					<!--展示食品月销量-->
                	<div class="sell-num">月售 {{spus.month_saled_content}}</div>
					<!--展示食品价格-->
                	<span class="price"> ¥{{spus.skus[0].price}}</span>
              	</div>
            	<selector
                	@showDot="showDotFun"
                	:name="spus.name"
                	:food_id="spus.skus[0].id"
                	:price="spus.skus[0].price"
                	:pic="spus.pic_url">
            	</selector>
            </section>
		</article>
	</section>
</article>

这个是复用selector组件 并监听selector组件传过来的showDot事件 监听到后执行showDotFun
showDotFun(elRight, elBottom) { //触发购物车小球
	this.balls.push(true)
    this.elRight = elRight;
    this.elBottom = elBottom;
}
不知道加入购物车小球的抛物线效果怎么实现的
<transition appear
                @after-appear='afterEnter'
                @before-appear="beforeEnter" v-for="(ball,index) in balls" :key="index">
      <div class="balls" ref="balls" v-if="ball">
        <span class="ball"></span>
      </div>
</transition>
<script>
	beforeEnter(el) {// 过度前钩子
        let _this = this;
        this.fontSize = document.documentElement.style.fontSize.split("px")[0];
        el.style.transform = `translate3d(${this.elRight - this.fontSize * 1}px,${this.elBottom - this.fontSize * 1}px,0)`
        el.children[0].addEventListener('transitionend', function () {
          _this.balls.splice(0, 1);
          _this.$store.dispatch('ballInCart', true);
        })
      },
      afterEnter(el) {// 过度后钩子
        el.style.transform = `translate3d(${this.elRight - this.fontSize * 1}px,${window.innerHeight - 50}px,0)`
        el.children[0].style.transform = `translate3d(-${this.elRight - this.fontSize * 2}px,0px,0)`
        el.style.transition = 'transform .55s cubic-bezier(0.29,-0.25, 0.79,-0.14)';// 弹跳效果
        el.children[0].style.transition = 'transform .55s linear';
      },
</script>
商店底部购物栏:使用bottom组件
组件一创建就去获取数据 获取到了数据会把getInfoReady设为true 展示bottom组件
<Bottom v-if="getInfoReady"></Bottom>
bottom组件
组件一创建 从路由中获取餐馆id
created() {
	this.restaurant_id = this.$route.query.id;
}
虚拟DOM挂载到真实DOM上之后
mounted() {
	let _this = this
    // iconCartContainer是一个ref值
    // 在WebKit引擎的浏览器中,当CSS3的animation动画执行结束时,触发webkitAnimationEnd事件
    // CSS3的transition动画执行结束时,触发webkitTransitionEnd事件
    this.$refs['iconCartContainer'].addEventListener('webkitAnimationEnd', () => {
        _this.$store.dispatch('ballInCart', false);//触发底部小车晃动
	})
}
并一直监听数据的变化
watch: {
	totalPrice(val) { //totalPrice如果为0 就隐藏购物车底部点击后显示出来的商品
    	if (val === 0) this.cartDetail = false;
    },
    poi_info(val) {  //监听vuex的reataurant_info信息
        this.shipping_fee = val.shipping_fee;   //配送信息
        this.min_price = val.min_price          //最低价起送信息
        this.min_price_tip = val.min_price_tip
        this.shipping_fee_tip = val.shipping_fee_tip;
    }
}


<!--底部bar-->
<div class="bottom-bar">
<div class="left" @click="showCartDetail();">
<!--
cartActive:这家店铺有东西在购物车中 购物篮应该呈黄色 此时购物篮呈活跃状态
cartActive属性生效 将购物篮变黄色 购物车图标变黑色
商品添加进购物车会有一个小球过渡效果 过度执行完后购物车会放大1.2倍然后变回来 ballInCart用来控制购物车变大的动画
-->
<span class="shopping-cart" :class="{cartActive:totalPrice>0,ballInCart:ballInCart}" ref="iconCartContainer">
<!--购物车图标-->
<i class="iconfont icon-cart"></i>
<!--若购物车中没有这家店的商品 不显示购物车右上角的商品数量-->
<span class="food-num" v-if="foodNum">{{foodNum}}</span>
</span>
<div class="price-container">
<!--展示商品总价 若总价为0 则隐藏该标签-->
<span class="total-price" v-if="totalPrice">¥{{totalPrice}}</span>
<!--从vuex的poi_info中获取配送费信息 若配送费为0 则显示免配送费-->
<span class="deliver-fee" v-if="!shipping_fee">免配送费</span>
<!--若不为0 则展示配送费-->
<span class="deliver-fee" v-else>另需要配送费¥{{shipping_fee}}</span>
</div>
</div>
<!--若总价为0 展示最低起送价-->
<span class="submit" v-if="!totalPrice">{{min_price_tip}}</span>
<!--总价不为0 展示还差多少起送-->
<span class="submit" v-else-if="totalPrice < min_price">还差{{min_price - totalPrice}}</span>
<!--总价不为0且满足起送价 展示去结算-->
<span @click="prepareOrder()" class="submit go-buy" v-else>去结算</span>
</div>
<script>
showCartDetail() {//点击底部显示购物车详情
if (this.cartDetail) this.cartDetail = false;//如果当前是显示状态 再次点击为隐藏
else this.cartDetail = this.totalPrice > 0;//如果当前是关闭状态 判断购物车有没有商品 如果有才能显示详情
},
prepareOrder() { //准备下订单
let data = {
restaurant_id: this.restaurant_id,
foods: this.cartList[this.restaurant_id]
};
if(getInfo){// getInfo:从cookie中获取用户信息 若能获取到 getInfo为true 表示用户已登录
localStorage.setItem('confirmOrderData', JSON.stringify(data));// 将数据保存在localStorage中
this.$router.push({path: '/confirm_order'})// 跳转到确认订单页面
}else{
this.$router.push({path:'/login'})// 从cookie中没获取到用户信息 用户未登录 跳转到登录页面
}
},
</script>

<!--购物车详细列表-->
<transition name="fade">
<!--
cartDetail为true时展示购物车详细列表
cartDetail初始值为false 然后在点击购物栏 执行showCartDetail方法时
会去判断购物车中本商店的商品总价>0 表示有商品 将cartDetail设为true 此时才会展示购物车详情列表
-->
<article class="cart-list-container" v-show="cartDetail">
<section class="head">
<span>餐盒费0元</span>
<span><i class="iconfont"></i><span @click="emptyCart()">清空购物车</span></span>
</section>
<!--遍历restaurantCartList并展示出来-->
<section class="cart-list" v-for="item in restaurantCartList" :key="item.id">
<!--展示商品名称 价格-->
<span>{{item.name}} </span>
<span class="price">¥{{ Number((item.price * item.num).toFixed(2))}}</span>
<selector :name="item.name" :food_id="item.id" :price="item.price" style="bottom:0.3rem;"></selector>
</section>
</article>
</transition>
<script>
restaurantCartList() { //当前商店购物车商品
let lists = this.cartList[this.restaurant_id];// 获取购物车中该商店的所有商品
let p;
let arr = [];
for (p in lists) {
if (Number(p)) arr.push(lists[p]);
}
return arr;
}
emptyCart() {
this.$store.dispatch('emptyCart', {restaurant_id: this.restaurant_id});
this.cartDetail = false;// 隐藏购物车详细列表
}
</script>
comment评价

虚拟DOM挂载到真实DOM上面后 就开始获取数据
mounted() {
	let _this = this;
    _this.restaurant_id = _this.$route.query.id;// 从路由中获取餐馆id
    _this.fetchComment((response) => {
        _this.commentData = response.data.data;// 保存评论数据
        _this.$nextTick(() => {       //初始化better-scroll
          	_this.BScrollEvent = new BScroll(_this.$refs.comment, {click: true, probeType: 2});
          	_this.listenScroll();//监听scroll事件
        })
    })
    //根据商店id获取店家信息
    getRestaurant({restaurant_id: _this.restaurant_id}).then((response) => {
        _this.poi_info = response.data.data;
    })
}

fetchComment(callback) {   //获取评论 offset代表请求第几页的数据 初始值为0
	restaurantComment({restaurant_id: this.restaurant_id, offset: this.offset, limit: 5}).then((response) => {
		callback(response)
    })
}
//获取评论
restaurantComment(data){
  	let req = {data,url: 'v1/comment'};
  	return _get(req);
}
//获取某个商家具体信息
getRestaurant(data){
  let req = {url: `v1/restaurant/${data.restaurant_id}`};
  return _get(req);
}
_get(req){
  return axios.get(req.url, {params: req.data})
}

//监听better-scroll滚动事件  判断是否滑动到底部 加载更多
listenScroll() {
	let _this = this;
    let commmentDOM = _this.$refs.comment;
    _this.BScrollEvent.on('scroll', function (obj) {
    	//如果到达底部  请求加载更多数据 如何判断是否到达底部?
        if (Math.abs(obj.y) + commmentDOM.clientHeight >= commmentDOM.childNodes[0].clientHeight - 30) {
            if (!_this.loading) {   //避免加载过程中 重复请求
              	_this.loading = true;
              	_this.fetchComment(function (response) {//请求加载更多
                	if (!response.data.data.length || response.data.data.length < 5)  {
                  		// 若没获取到数据或你想取5条 取到的数据少于5条 则将noMore设为true 表示数据取完了
                  		_this.noMore = true;
                	}else {
                  		_this.offset++;// 下一次取下一页的数据
                  		_this.commentData = _this.commentData.concat(response.data.data);//保存数据
                  		_this.$nextTick(() => {
                    		_this.BScrollEvent.refresh();
                  		})
                	}
                	_this.loading = false;
              	})
        	}
    	}
	})
},
commentData是一个数组 数组中存放的是对象 因为我们这里规定了一次性获取5条数据 所以commentData中有5个对象
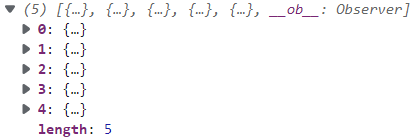
点开其中一个发现里面包含:商家回复评论add_comment_list(数组)、用户头像avatar、评论comment_data、评论时间comment_time、配送评分delivery_score、食物评分food_score、id(?)、订单编号order_id、评论图片pic_url(数组)、restaurant(?)、餐馆编号restaurant_id、用户编号user_id、用户名user_name

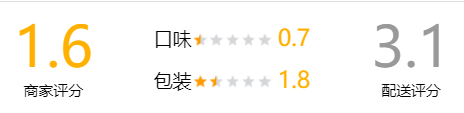
从vuex中的商店信息poi_info中取出相应的数据并展示出来 结合star组件展示星级评分
<div class="comment-score-container">
	<div>
    	<span class="comment-score">{{poi_info.wm_poi_score}}</span>
        <h3>商家评分</h3>
    </div>
    <div>
    	<div>
    		<span>口味</span>
        	<v-star :score="poi_info.food_score"></v-star>
        	<span class="food-score">{{poi_info.food_score}}</span>
     	</div>
     	<div>
     		<span>包装</span>
        	<v-star :score="poi_info.pack_score"></v-star>
        	<span class="pack-score">{{poi_info.pack_score}}</span>
      	</div>
	</div>
    <div>
    	<span class="delivery-score">{{poi_info.delivery_score}}</span>
        <h3>配送评分</h3>
	</div>
</div>

这一部分只是展示了一下 没设置任何功能
<ul class="comment-score-type-info">
<li class="active">全部</li>
<li>有图</li>
<li><i class="iconfont"></i> 点评(0.0分)</li>
</ul>

<div class="comment-main-part">
	<div>
    	<!--展示用户昵称和评论时间 评论时间在这里是字符串 不是时间戳 所以不需要格式化 下面有格式化代码-->
    	<span class="user-name">{{item.user_name}}</span>
    	<span class="comment-time">{{item.comment_time.slice(0, 10)}}</span>
	</div>
    <!--复用star组件展示评分-->
    <div class="order-comment-score">
    	<span>评分 <v-star :score="item.food_score"></v-star></span>
	</div>
    <!--展示评论-->
    <p class="comment">{{item.comment_data}}</p>
    <!--遍历评论图片并展示出来 如果没有评论图片 这里展示一片空白 点击图片后会展示大图-->
    <div class="comment-pic">
    	<div v-for="(pic,index) in item.pic_url" @click="show_big_pic_event(pic)" :key="index">
        	<img :src="pic">
        </div>
	</div>
	<!--如果有商家回复 取出展示-->
    <div class="poi-reply-contents-container" v-if="!item.add_comment_list">{{item.add_comment_list}}</div>
</div>
<script>
	show_big_pic_event(url) {     //显示大图
        this.big_pic_url = url;// 把图片的url赋值给大图的url
        this.show_big_pic = true;// 展示大图
      },
	date_format(time_stamp) {    //如果后端数据是时间戳 可以使用这个方法格式化
        let date = new Date(time_stamp * 1000);
        return date.getFullYear() + '.' + date.getMonth() + '.' + date.getDay()
    }
</script>
<!--图片大图:用CSS实现
    show-big-pic置于最顶层 背景为黑色 铺满整个页面
    img垂直居中 宽度100% 高度自适应
    show_big_pic为true 展示该标签
-->
<transition>
	<div class="show-big-pic" v-show="show_big_pic" @click="show_big_pic = false;">
    	<img :src="big_pic_url">
    </div>
</transition>
在下拉时 正在加载且还有数据 展示“正在努力加载中…” 否则展示“已经到底了”
<div class="loading-container" ref="loading">
    <span class="loading" v-show="loading && !noMore">正在努力加载中…</span>
    <span class="no-more" v-show="noMore">已经到底了</span>
</div>
seller商家信息

从vuex中的商家信息poi_info中取出数据展示出来 所有图标都是iconfont
<div class="seller-info">
<!--地址信息-->
<div class="position container">
<span class="location-icon icon"><i class="iconfont"></i></span>
<p class="address describe">{{poi_info.address}}</p>
<span class="phone-icon icon"><i class="iconfont"></i></span>
</div>
<!--安全档案-->
<div class="safe-file container">
<span class="safe-icon icon"><i class="iconfont"></i></span>
<span class="describe">查看食品安全档案</span>
<span class="entry-icon icon"><i class="iconfont"></i></span>
</div>
<!--配送服务-->
<div class="delivery-info container">
<span class="icon"><i class="iconfont"></i></span>
<span class="describe">配送服务:由 商家 提供配送服务</span>
</div>
<!--配送时间-->
<div class="delivery-time container">
<span class="icon"><i class="iconfont"></i></span>
<span class="describe">配送时间: {{poi_info.shopping_time_start}} - {{poi_info.shopping_time_end}}</span>
</div>
<!--公告-->
<div class="notification container" v-if="poi_info.bulletin">
<span class="icon"><i class="iconfont"></i></span>
<span class="describe ellipsis">{{poi_info.bulletin}}</span>
<span class="entry-icon icon"><i class="iconfont"></i></span>
</div>
<!--商家服务-->
<div class="poi-service container">
<span class="icon"><i class="iconfont"></i></span>
<span class="service">商家服务</span>
</div>
<div class="discount">
<ul>
<li v-for="(discount,index) in poi_info.discounts2" :key="index">
<span class="active-icon" :style="{backgroundImage:'url('+ discount.icon_url +')'}"></span>
<span>{{discount.info}}</span>
</li>
</ul>
</div>
</div>


 131
131


 被折叠的 条评论
为什么被折叠?
被折叠的 条评论
为什么被折叠?
 到【灌水乐园】发言


