


SpringBoot自动装配原理分析
一、SPI源码分析
为什么要讲SPI呢?因为在SpringBoot的自动装配中其实有使用到SPI机制,所以掌握了这部分对于SpringBoot的学习还是很有帮助的。
SPI ,全称为 Service Provider Interface,是一种服务发现机制。它通过在ClassPath路径下的 META-INF/services 文件夹查找文件,自动加载文件里所定义的类。这一机制为很多框架扩展提供了可能,比如在Dubbo、JDBC中都使用到了SPI机制。我们先通过一个很简单的例子来看下它是怎么用的。
案例介绍
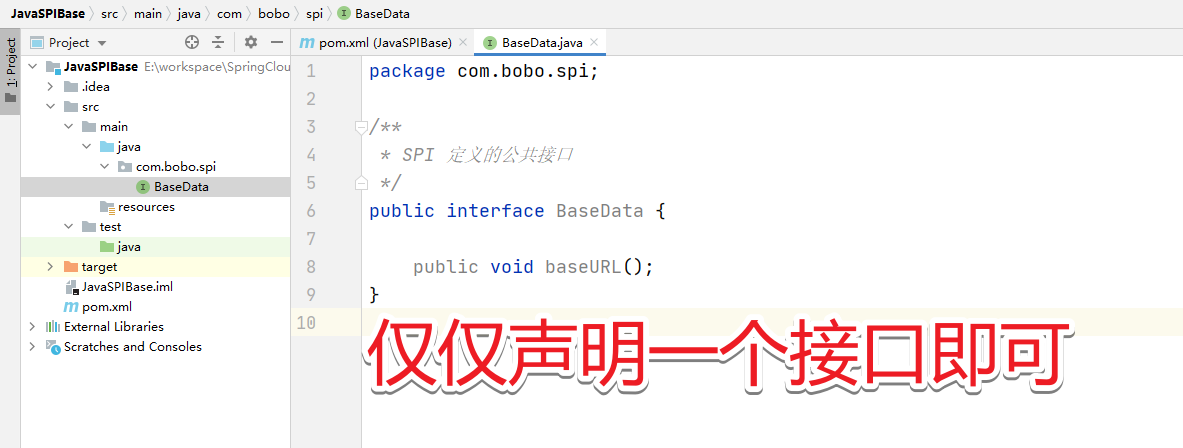
先定义接口项目
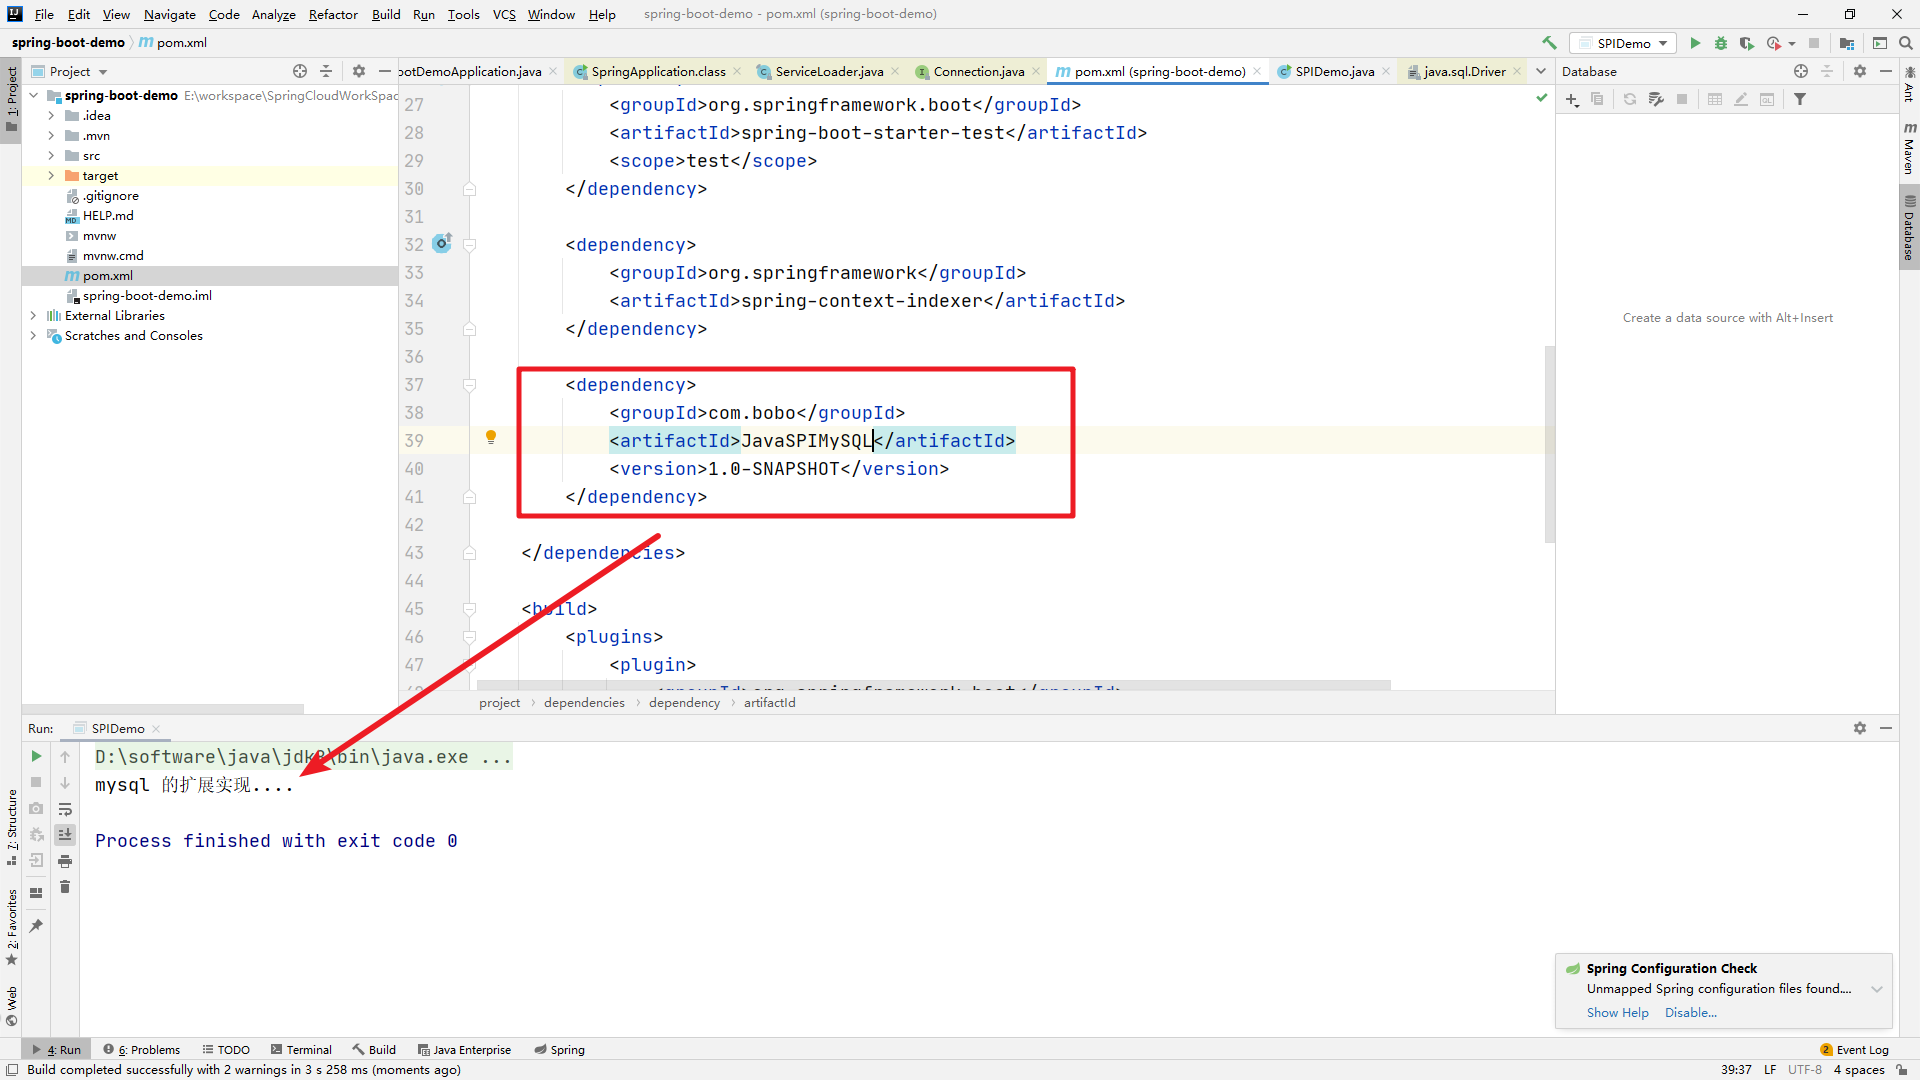
然后创建一个扩展的实现,先导入上面接口项目的依赖
    <dependencies>
        <dependency>
            <groupId>com.bobo</groupId>
            <artifactId>JavaSPIBase</artifactId>
            <version>1.0-SNAPSHOT</version>
        </dependency>
    </dependencies>
然后创建接口的实现
/**
 * SPI:MySQL对于 baseURL 的一种实现
 */
public class MySQLData implements BaseData {
    @Override
    public void baseURL() {
        System.out.println("mysql 的扩展实现....");
    }
}
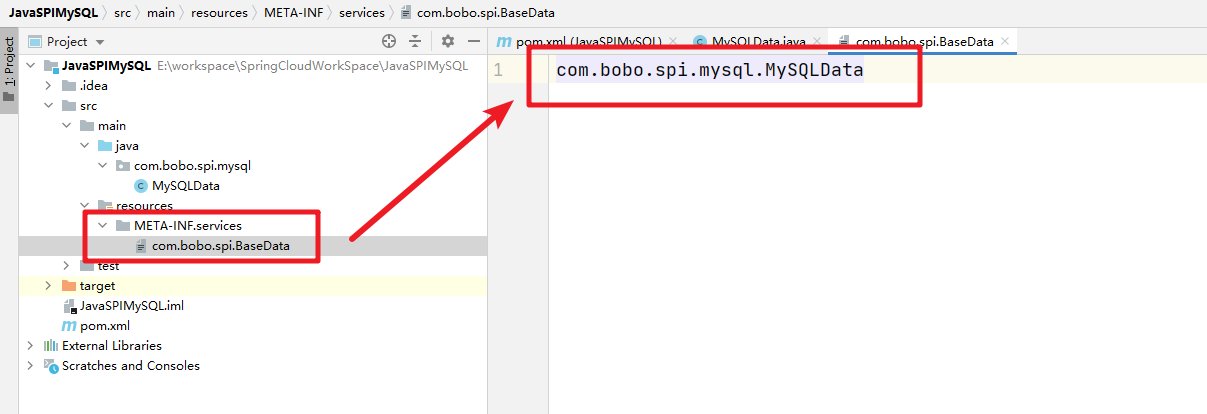
然后在resources目录下创建 META-INF/services 目录,然后在目录中创建一个文件,名称必须是定义的接口的全类路径名称。然后在文件中写上接口的实现类的全类路径名称。
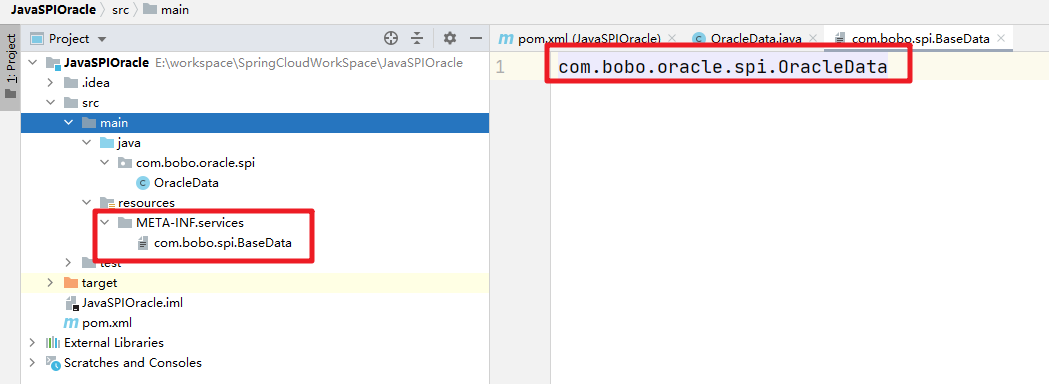
同样的再创建一个案例
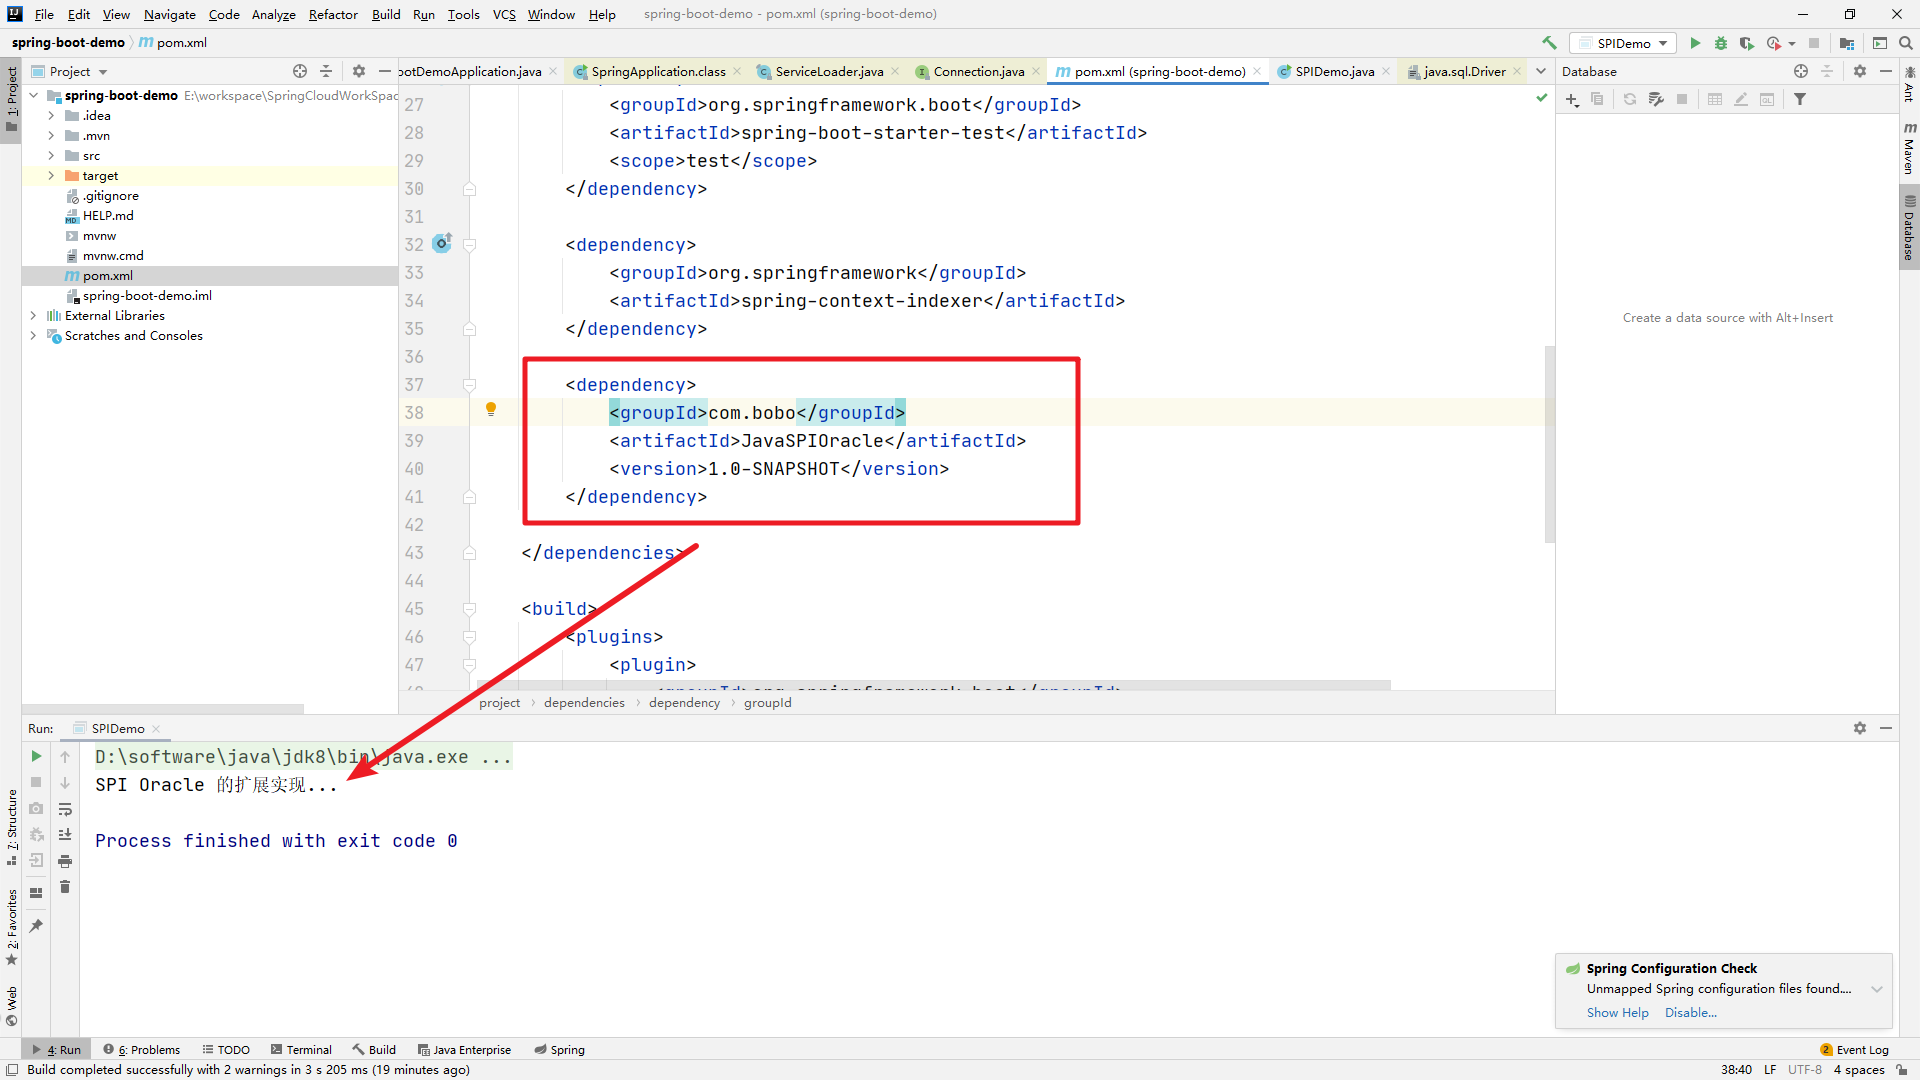
然后在测试的项目中测试
    public static void main(String[] args) {
        ServiceLoader<BaseData> providers = ServiceLoader.load(BaseData.class);
        Iterator<BaseData> iterator = providers.iterator();
        while(iterator.hasNext()){
            BaseData next = iterator.next();
            next.baseURL();
        }
    }
根据不同的导入,执行的逻辑会有不同
源码查看
ServiceLoader
首先来看下ServiceLoader的类结构
   // 配置文件的路径
    private static final String PREFIX = "META-INF/services/";

    // 加载的服务  类或者接口
    private final Class<S> service;

    // 类加载器
    private final ClassLoader loader;

    // 访问权限的上下文对象
    private final AccessControlContext acc;

    // 保存已经加载的服务类
    private LinkedHashMap<String,S> providers = new LinkedHashMap<>();

    // 内部类,真正加载服务类
    private LazyIterator lookupIterator;
load
load方法创建了一些属性,重要的是实例化了内部类,LazyIterator。
public final class ServiceLoader<S> implements Iterable<S>
    private ServiceLoader(Class<S> svc, ClassLoader cl) {
        //要加载的接口
        service = Objects.requireNonNull(svc, "Service interface cannot be null");
        //类加载器
        loader = (cl == null) ? ClassLoader.getSystemClassLoader() : cl;
        //访问控制器
        acc = (System.getSecurityManager() != null) ? AccessController.getContext() : null;
         reload();

    }
    public void reload() {
        //先清空
        providers.clear();
        //实例化内部类
        LazyIterator lookupIterator = new LazyIterator(service, loader);
    }
}
查找实现类和创建实现类的过程,都在LazyIterator完成。当我们调用iterator.hasNext和iterator.next方法的时候,实际上调用的都是LazyIterator的相应方法。
private class LazyIterator implements Iterator<S>{
    Class<S> service;
    ClassLoader loader;
    Enumeration<URL> configs = null;
    Iterator<String> pending = null;
    String nextName = null;
    private boolean hasNextService() {
        //第二次调用的时候,已经解析完成了,直接返回
        if (nextName != null) {
            return true;
        }
        if (configs == null) {
            //META-INF/services/ 加上接口的全限定类名,就是文件服务类的文件
            //META-INF/services/com.viewscenes.netsupervisor.spi.SPIService
            String fullName = PREFIX + service.getName();
            //将文件路径转成URL对象
            configs = loader.getResources(fullName);
        }
        while ((pending == null) || !pending.hasNext()) {
            //解析URL文件对象,读取内容,最后返回
            pending = parse(service, configs.nextElement());
        }
        //拿到第一个实现类的类名
        nextName = pending.next();
        return true;
    }
}
创建实例对象,当然,调用next方法的时候,实际调用到的是,lookupIterator.nextService。它通过反射的方式,创建实现类的实例并返回。
private class LazyIterator implements Iterator<S>{
    private S nextService() {
        //全限定类名
        String cn = nextName;
        nextName = null;
        //创建类的Class对象
        Class<?> c = Class.forName(cn, false, loader);
        //通过newInstance实例化
        S p = service.cast(c.newInstance());
        //放入集合,返回实例
        providers.put(cn, p);
        return p;
    }
}
看到这儿,我想已经很清楚了。获取到类的实例,我们自然就可以对它为所欲为了!
二、自动装配源码分析
在前面的分析中,Spring Framework一直在致力于解决一个问题,就是如何让bean的管理变得更简单,如何让开发者尽可能的少关注一些基础化的bean的配置,从而实现自动装配。所以,所谓的自动装配,实际上就是如何自动将bean装载到Ioc容器中来。
实际上在spring 3.x版本中,Enable模块驱动注解的出现,已经有了一定的自动装配的雏形,而真正能够实现这一机制,还是在spirng 4.x版本中,conditional条件注解的出现。ok,我们来看一下spring boot的自动装配是怎么一回事。
自动装配的演示
 <dependency>
     <groupId>org.springframework.boot</groupId>
     <artifactId>spring-boot-starter-data-redis</artifactId>
</dependency>
spring:
    redis:
      host: 127.0.0.1
      port: 6379
 @Autowired
    private RedisTemplate<String,String>redisTemplate;
按照下面的顺序添加starter,然后添加配置,使用RedisTemplate就可以使用了? 那大家想没想过一个问题,为什么RedisTemplate可以被直接注入?它是什么时候加入到Ioc容器的呢? 这就是自动装配。自动装配可以使得classpath下依赖的包相关的bean,被自动装载到Spring Ioc容器中,怎么做到的呢?
深入分析EnableAutoConfiguration
EnableAutoConfiguration的主要作用其实就是帮助springboot应用把所有符合条件的@Configuration配置都加载到当前SpringBoot创建并使用的IoC容器中。
再回到EnableAutoConfiguration这个注解中,我们发现它的import是这样
@Import(AutoConfigurationImportSelector.class)
public @interface EnableAutoConfiguration {
但是从EnableAutoCOnfiguration上面的import注解来看,这里面并不是引入另外一个Configuration。而是一个ImportSelector。这个是什么东西呢?
AutoConfigurationImportSelector是什么?
Enable注解不仅仅可以像前面演示的案例一样很简单的实现多个Configuration的整合,还可以实现一些复杂的场景,比如可以根据上下文来激活不同类型的bean,@Import注解可以配置三种不同的class
- 第一种就是前面演示过的,基于普通bean或者带有@Configuration的bean进行诸如
- 实现ImportSelector接口进行动态注入
实现ImportBeanDefinitionRegistrar接口进行动态注入
CacheService
public class CacheService {
}
LoggerService
public class LoggerService {
}
EnableDefineService
@Target(ElementType.TYPE)
@Retention(RetentionPolicy.RUNTIME)
@Documented
@Inherited  --允许被继承
@Import({MyDefineImportSelector.class})
public @interface EnableDefineService {

    String[] packages() default "";
}
MyDefineImportSelector
public class MyDefineImportSelector implements ImportSelector {
    @Override
    public String[] selectImports(AnnotationMetadata annotationMetadata) {
        //获得指定注解的详细信息。我们可以根据注解中配置的属性来返回不同的class,
        //从而可以达到动态开启不同功能的目的

annotationMetadata.getAllAnnotationAttributes(EnableDefineService.class.getName(),true)
            .forEach((k,v) -> {
                log.info(annotationMetadata.getClassName());
                log.info("k:{},v:{}",k,String.valueOf(v));
            });
        return new String[]{CacheService.class.getName()};
    }
}
EnableDemoTest
@SpringBootApplication
@EnableDefineService(name = "mashibing",value = "mashibing")
public class EnableDemoTest {
    public static void main(String[] args) {
        ConfigurableApplicationContext ca=SpringApplication.run(EnableDemoTest.class,args);
        System.out.println(ca.getBean(CacheService.class));
        System.out.println(ca.getBean(LoggerService.class));
    }
}
了解了selector的基本原理之后,后续再去分析AutoConfigurationImportSelector的原理就很简单了,它本质上也是对于bean的动态加载。
@EnableAutoConfiguration注解的实现原理
了解了ImportSelector和ImportBeanDefinitionRegistrar后,对于EnableAutoConfiguration的理解就容易一些了
它会通过import导入第三方提供的bean的配置类:AutoConfigurationImportSelector
@Import(AutoConfigurationImportSelector.class)
从名字来看,可以猜到它是基于ImportSelector来实现基于动态bean的加载功能。之前我们讲过Springboot @Enable*注解的工作原理ImportSelector接口selectImports返回的数组(类的全类名)都会被纳入到spring容器中。
那么可以猜想到这里的实现原理也一定是一样的,定位到AutoConfigurationImportSelector这个类中的selectImports方法
selectImports
public String[] selectImports(AnnotationMetadata annotationMetadata) {
   if (!isEnabled(annotationMetadata)) {
      return NO_IMPORTS;
   }
// 从配置文件(spring-autoconfigure-metadata.properties)中加载 AutoConfigurationMetadata
   AutoConfigurationMetadata autoConfigurationMetadata = AutoConfigurationMetadataLoader
         .loadMetadata(this.beanClassLoader);
// 获取所有候选配置类EnableAutoConfiguration
   AutoConfigurationEntry autoConfigurationEntry = getAutoConfigurationEntry(
         autoConfigurationMetadata, annotationMetadata);
   return StringUtils.toStringArray(autoConfigurationEntry.getConfigurations());
}
getAutoConfigurationEntry
protected AutoConfigurationEntry getAutoConfigurationEntry(
      AutoConfigurationMetadata autoConfigurationMetadata,
      AnnotationMetadata annotationMetadata) {
   if (!isEnabled(annotationMetadata)) {
      return EMPTY_ENTRY;
   }
//获取元注解中的属性
   AnnotationAttributes attributes = getAttributes(annotationMetadata);
//使用SpringFactoriesLoader 加载classpath路径下META-INF\spring.factories中,
//key= org.springframework.boot.autoconfigure.EnableAutoConfiguration对应的value
   List<String> configurations = getCandidateConfigurations(annotationMetadata,
         attributes);
//去重
   configurations = removeDuplicates(configurations);
//应用exclusion属性
   Set<String> exclusions = getExclusions(annotationMetadata, attributes);
   checkExcludedClasses(configurations, exclusions);
   configurations.removeAll(exclusions);
//过滤,检查候选配置类上的注解@ConditionalOnClass,如果要求的类不存在,则这个候选类会被过滤不被加载
   configurations = filter(configurations, autoConfigurationMetadata);
   //广播事件
fireAutoConfigurationImportEvents(configurations, exclusions);
   return new AutoConfigurationEntry(configurations, exclusions);
}
本质上来说,其实EnableAutoConfiguration会帮助springboot应用把所有符合@Configuration配置都加载到当前SpringBoot创建的IoC容器,而这里面借助了Spring框架提供的一个工具类SpringFactoriesLoader的支持。以及用到了Spring提供的条件注解@Conditional,选择性的针对需要加载的bean进行条件过滤
SpringFactoriesLoader
为了给大家补一下基础,我在这里简单分析一下SpringFactoriesLoader这个工具类的使用。它其实和java中的SPI机制的原理是一样的,不过它比SPI更好的点在于不会一次性加载所有的类,而是根据key进行加载。
首先,SpringFactoriesLoader的作用是从classpath/META-INF/spring.factories文件中,根据key来加载对应的类到spring IoC容器中。接下来带大家实践一下
创建外部项目jar
<dependency>
  <groupId>org.springframework</groupId>
  <artifactId>spring-context</artifactId>
  <version>4.3.13.RELEASE</version>
</dependency>
创建bean以及config
public class mashibingCore {
    public String study(){
        System.out.println("good good study, day day up");
        return "mashibingEdu.com";
    }
}
@Configuration
public class mashibingConfig {
    @Bean
    public mashibingCore mashibingCore(){
        return new mashibingCore();
    }
}
创建另外一个工程(spring-boot)
把前面的工程打包成jar,当前项目依赖该jar包
<dependency>
    <groupId>com.mashibingedu.practice</groupId>
    <artifactId>mashibing-Core</artifactId>
    <version>1.0-SNAPSHOT</version>
</dependency>
通过下面代码获取依赖包中的属性
运行结果会报错,原因是mashibingCore并没有被Spring的IoC容器所加载,也就是没有被EnableAutoConfiguration导入
@SpringBootApplication
public class SpringBootStudyApplication {
    public static void main(String[] args) throws IOException {
        ConfigurableApplicationContext ac=SpringApplication.run(SpringBootStudyApplication.class, args);
        mashibingCore Myc=ac.getBean(mashibingCore.class);
        System.out.println(Myc.study());
    }
}
解决方案
在mashibing-Core项目resources下新建文件夹META-INF,在文件夹下面新建spring.factories文件,文件中配置,key为自定配置类EnableAutoConfiguration的全路径,value是配置类的全路径
org.springframework.boot.autoconfigure.EnableAutoConfiguration=com.mashibingedu.practice.mashibingConfig
重新打包,重新运行SpringBootStudyApplication这个类。
可以发现,我们编写的那个类,就被加载进来了。
Spring Boot中的条件过滤
在分析AutoConfigurationImportSelector的源码时,会先扫描spring-autoconfiguration-metadata.properties文件,最后在扫描spring.factories对应的类时,会结合前面的元数据进行过滤,为什么要过滤呢? 原因是很多的@Configuration其实是依托于其他的框架来加载的,如果当前的classpath环境下没有相关联的依赖,则意味着这些类没必要进行加载,所以,通过这种条件过滤可以有效的减少@configuration类的数量从而降低SpringBoot的启动时间。
修改mashibing-Core
在META-INF/增加配置文件,spring-autoconfigure-metadata.properties。
com.mashibingedu.practice.mashibingConfig.ConditionalOnClass=com.mashibingedu.TestClass
格式:自动配置的类全名.条件=值
上面这段代码的意思就是,如果当前的classpath下存在TestClass,则会对mashibingConfig这个Configuration进行加载
演示过程(spring-boot)
-
沿用前面spring-boot工程的测试案例,直接运行main方法,发现原本能够被加载的mashibingCore,发现在ioc容器中找不到了。
public static void main(String[] args) throws IOException { ConfigurableApplicationContext ac=SpringApplication.run(SpringBootStudyApplication.class, args); mashibingCore Myc=ac.getBean(mashibingCore.class); System.out.println(Myc.study()); } -
在当前工程中指定的包com.mashibingedu下创建一个TestClass以后,再运行上面这段代码,程序能够正常执行
三、手写Starter
我们通过手写Starter来加深对于自动装配的理解
1.创建一个Maven项目,quick-starter
定义相关的依赖
<dependency>
    <groupId>org.springframework.boot</groupId>
    <artifactId>spring-boot-starter</artifactId>
    <version>2.1.6.RELEASE</version>
</dependency>
<dependency>
    <groupId>com.alibaba</groupId>
    <artifactId>fastjson</artifactId>
    <version>1.2.56</version>
    <!-- 可选 -->
    <optional>true</optional>
</dependency>
2.定义Formate接口
定义的格式转换的接口,并且定义两个实现类
public interface FormatProcessor {
    /**
     * 定义一个格式化的方法
     * @param obj
     * @param <T>
     * @return
     */
    <T> String formate(T obj);
}
public class JsonFormatProcessor implements FormatProcessor {
    @Override
    public <T> String formate(T obj) {
        return "JsonFormatProcessor:" + JSON.toJSONString(obj);
    }
}
public class StringFormatProcessor implements FormatProcessor {
    @Override
    public <T> String formate(T obj) {
        return "StringFormatProcessor:" + obj.toString();
    }
}
3.定义相关的配置类
首先定义格式化加载的Java配置类
@Configuration
public class FormatAutoConfiguration {

    @ConditionalOnMissingClass("com.alibaba.fastjson.JSON")
    @Bean
    @Primary // 优先加载
    public FormatProcessor stringFormatProcessor(){
        return new StringFormatProcessor();
    }

    @ConditionalOnClass(name="com.alibaba.fastjson.JSON")
    @Bean
    public FormatProcessor jsonFormatProcessor(){
        return new JsonFormatProcessor();
    }
}
定义一个模板工具类
public class HelloFormatTemplate {

    private FormatProcessor formatProcessor;


    public HelloFormatTemplate(FormatProcessor processor){
        this.formatProcessor = processor;
    }

    public <T> String doFormat(T obj){
        StringBuilder builder = new StringBuilder();
        builder.append("Execute format : ").append("<br>");
        builder.append("Object format result:" ).append(formatProcessor.formate(obj));
        return builder.toString();
    }
}
再就是整合到SpringBoot中去的Java配置类
@Configuration
@Import(FormatAutoConfiguration.class)
public class HelloAutoConfiguration {

    @Bean
    public HelloFormatTemplate helloFormatTemplate(FormatProcessor formatProcessor){
        return new HelloFormatTemplate(formatProcessor);
    }
}
4.创建spring.factories文件
在resources下创建META-INF目录,再在其下创建spring.factories文件
org.springframework.boot.autoconfigure.EnableAutoConfiguration=\
  org.mashibingedu.autoconfiguration.HelloAutoConfiguration
install 打包,然后就可以在SpringBoot项目中依赖改项目来操作了。
5.测试
在SpringBoot中引入依赖
<dependency>
    <groupId>org.example</groupId>
    <artifactId>format-spring-boot-starter</artifactId>
    <version>1.0-SNAPSHOT</version>
</dependency>
在controller中使用
@RestController
public class UserController {

    @Autowired
    private HelloFormatTemplate helloFormatTemplate;

    @GetMapping("/format")
    public String format(){
        User user = new User();
        user.setName("BoBo");
        user.setAge(18);
        return helloFormatTemplate.doFormat(user);
    }
}
6.自定义Starter关联配置信息
有些情况下我们可以需要用户在使用的时候动态的传递相关的配置信息,比如Redis的Ip,端口等等,这些信息显然是不能直接写到代码中的,这时我们就可以通过SpringBoot的配置类来实现。
首先引入依赖支持
<dependency>
    <groupId>org.springframework.boot</groupId>
    <artifactId>spring-boot-configuration-processor</artifactId>
    <version>2.2.6.RELEASE</version>
    <optional>true</optional>
</dependency>
然后创建对应的属性类
@ConfigurationProperties(prefix = HelloProperties.HELLO_FORMAT_PREFIX)
public class HelloProperties {

    public static final String HELLO_FORMAT_PREFIX="mashibing.hello.format";

    private String name;

    private Integer age;

    private Map<String,Object> info;

    public Map<String, Object> getInfo() {
        return info;
    }

    public void setInfo(Map<String, Object> info) {
        this.info = info;
    }

    public String getName() {
        return name;
    }

    public void setName(String name) {
        this.name = name;
    }

    public Integer getAge() {
        return age;
    }

    public void setAge(Integer age) {
        this.age = age;
    }
}
然后再Java配置类中关联
@Configuration
@Import(FormatAutoConfiguration.class)
@EnableConfigurationProperties(HelloProperties.class)
public class HelloAutoConfiguration {

    @Bean
    public HelloFormatTemplate helloFormatTemplate(HelloProperties helloProperties,FormatProcessor formatProcessor){
        return new HelloFormatTemplate(helloProperties,formatProcessor);
    }
}
调整模板方法
public class HelloFormatTemplate {

    private FormatProcessor formatProcessor;

    private HelloProperties helloProperties;

    public HelloFormatTemplate(HelloProperties helloProperties,FormatProcessor processor){
        this.helloProperties = helloProperties;
        this.formatProcessor = processor;
    }

    public <T> String doFormat(T obj){
        StringBuilder builder = new StringBuilder();
        builder.append("Execute format : ").append("<br>");
        builder.append("HelloProperties:").append(formatProcessor.formate(helloProperties.getInfo())).append("<br>");
        builder.append("Object format result:" ).append(formatProcessor.formate(obj));
        return builder.toString();
    }
}
增加提示
在这个工程的META-INF/下创建一个additional-spring-configuration-metadata.json,这个是设置属性的提示类型
{
  "properties": [
    {
      "name": "mashibing.hello.format.name",
      "type": "java.lang.String",
      "description": "账号信息",
      "defaultValue": "root"
    },{
      "name": "mashibing.hello.format.age",
      "type": "java.lang.Integer",
      "description": "年龄",
      "defaultValue": 18
    }
  ]
}
	protected AutoConfigurationEntry getAutoConfigurationEntry(AnnotationMetadata annotationMetadata) {
		if (!isEnabled(annotationMetadata)) {
			return EMPTY_ENTRY;
		}
		AnnotationAttributes attributes = getAttributes(annotationMetadata);
        // 加载当前系统下 META-INF/spring.factories 文件中声明的配置类
		List<String> configurations = getCandidateConfigurations(annotationMetadata, attributes);
        // 移除掉重复的
		configurations = removeDuplicates(configurations);
        // 移除掉显示排除的
		Set<String> exclusions = getExclusions(annotationMetadata, attributes);
		checkExcludedClasses(configurations, exclusions);
		configurations.removeAll(exclusions);
        // 过滤掉不需要载入的配置类
		configurations = getConfigurationClassFilter().filter(configurations);
		fireAutoConfigurationImportEvents(configurations, exclusions);
		return new AutoConfigurationEntry(configurations, exclusions);
	}


 8万+
8万+

 被折叠的 条评论
为什么被折叠?
被折叠的 条评论
为什么被折叠?
 到【灌水乐园】发言


