


简介
本文是《玩转Qml》系列文章的第十篇,涛哥将教大家,Qml自定义模块的知识。
特别是最近的研究结果:如何让Qml模块在Designer中拖拽使用。涛哥希望有更多的人学会这个技能。
源码
《玩转Qml》系列文章,配套了一个优秀的开源项目:TaoQuick
github https://github.com/jaredtao/TaoQuick
访问不了或者速度太慢,可以用国内的镜像网站gitee
https://gitee.com/jaredtao/TaoQuick
近期讯息
(先播点新闻)
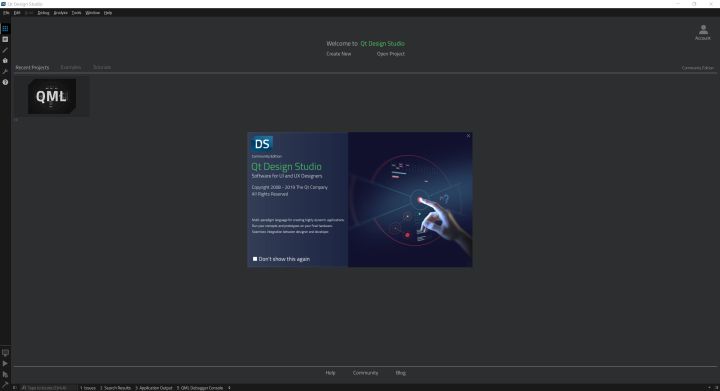
Qt Design Studio
2019年5月20的时候,Qt官方放出了Qt Design Studio的beta版, 免费使用/暂不开源。
下载地址在这:
http://download.qt.io/development_releases/qtdesignstudio/1.2/1.2.0-beta1-community/
Qt Design Studio是主要给美工使用的一款UI工具。
Qt在Photo Shop/Sketch这两款工具中,提供了QtBridge插件,可以将设计好的资源直接导出成Qml工程。
导出的工程可以用Qt Design Studio/QtCreator打开,用托托拽拽的方式,实现各种功能、动画等等。
QtDesignStudio目前还不成熟,但未来是一片光明。等Designer做好了,就不再需要手写Qml代码,托托拽拽就能搞定界面部分。
只剩下逻辑处理和后端功能才需要写代码/写js脚本。
Qt Design Studio目前与QtCreator的差异是,前者内置了一些特殊的模块:包括 Shapes图元、Effects等,
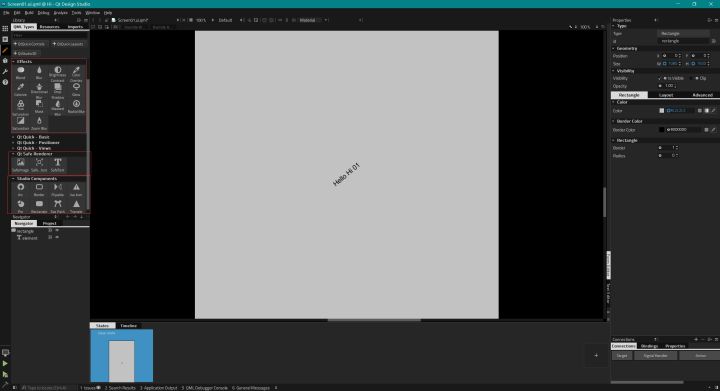
Qt Design Studio还使用了qmlproject文件作工程管理。
除此之外,功能都是一样的。帧动画编辑器在QtCreator中也是可以使用的。
TaoQuick
最新的TaoQuick (tag: 0.1.6), 已经支持在QtCreator中拖拽使用了

代码仓库在这:TaoQuick
(下面进入正题)
Qt资源管理
(有必要先说一下资源管理,这部分内容帮助文档都有,搜索关键词为”rcc” 或 “Qt Resource”)
Qt提供了一个资源管理工具rcc,可以将各种资源文件压缩、打包进二进制程序。
通常用来打包各种图片、Qml文件、配置文件或数据文件等等,只要将资源文件添加到qrc文件中即可。
qrc文件是xml格式的文本文件,里面记录着添加的各种资源。
qrc内容
示例 TaoResource.qrc:
<!DOCTYPE RCC><RCC version="1.0">
<qresource>
    <file>images/copy.png</file>
    <file>images/cut.png</file>
    <file>images/new.png</file>
    <file>images/open.png</file>
    <file>images/paste.png</file>
    <file>images/save.png</file>
</qresource>
</RCC>
编译和加载qrc
只要在pro文件中写上 RESOURCES = TaoResource.qrc就可以了。qmake会自动将资源压缩、打包进exe/dll程序
也可以使用命令行手动编译:
rcc -binary TaoResource.qrc -o TaoResource.rcc
或者
rcc -binary TaoResource.qrc -o TaoResource.dll
这种方式编译出来的,是一个纯粹的资源插件,扩展名写什么都无所谓的。
可以在代码中动态加载资源、卸载资源
QResource::registerResource("/path/to/TaoResource.rcc");
QResource::unRegisterResource("/path/to/TaoResource.rcc");
资源的引用
使用”:/“ 或者 “qrc:/“开头的路径即可,这两者的区别涛哥未作总结,大家自己实践吧。
cutAct = new QAction(QIcon(":/images/cut.png")
插件中注册资源
在Qt插件中,添加了资源的情况下,需要用宏Q_INIT_RESOURCE来注册资源
(Qt插件和前面的rcc编译出来的不一样,不是一个纯粹的资源插件,不能直接被QResource::registerResource识别)
TaoClass::TaoClass() : BaseClass()
{
    Q_INIT_RESOURCE(TaoResource);

    QFile file(":/images/save.png");
    ...
}
Qml模块
(这部分内容帮助文档也有,搜索关键词”QML Modules”)
设计Qml模块的大致步骤如下:
- 实现Qml组件
- 实现qmldir文件
- 导出Qml插件类
如果要支持designer,还要加上一步:
- 创建designer文件夹,编写metainfo文件
这一步暂时没有任何文档和工具,涛哥照猫画虎做出来的。以后文档肯定会出来的,现在有些功能不完善。
(参考Qt的支持Designer的Qml模块。更深入的了解,在QtCreator源码)
qmldir文件
(帮助文档搜索关键词 “qmldir” 或 “Module Definition qmldir…”)
示例
这里以TaoQuick中的为例,我顺手加了点注释:
TaoQuick/TaoQuick/qmldir:
#模块名称 import使用的地方,就用这个名称
module TaoQuick

#插件dll文件名称,即 TaoQuick.dll
plugin TaoQuick

#依赖的模块

depends QtQuick 2.12
depends QtQuick.Controls 2.12

# 这里一堆的组件
TGradientBtn 1.0 BasicComponent/Button/TGradientBtn.qml
TImageBtn 1.0 BasicComponent/Button/TImageBtn.qml
TImgTextBtn 1.0 BasicComponent/Button/TImgTextBtn.qml
TTextBtn 1.0 BasicComponent/Button/TTextBtn.qml

TMoveArea 1.0 BasicComponent/Mouse/TMoveArea.qml
TTransArea 1.0 BasicComponent/Mouse/TTransArea.qml

TNormalProgress 1.0 BasicComponent/Progress/TNormalProgress.qml
TCircleProgress 1.0 BasicComponent/Progress/TCircleProgress.qml

TBusyIndicator 1.0 BasicComponent/Others/TBusyIndicator.qml
TDragItem 1.0 BasicComponent/Others/TDragItem.qml
TResizeBorder 1.0 BasicComponent/Others/TResizeBorder.qml
TToolTip 1.0 BasicComponent/Others/TToolTip.qml
TDialog 1.0 BasicComponent/Others/TDialog.qml
TPopup 1.0 BasicComponent/Others/TPopup.qml
TFPS 1.0 BasicComponent/Others/TFPS.qml

# 支持designer
designersupported
还有单例singleton、内部类型internal、C++类型描述typeinfo, 这些用法TaoQuick没有用到,就不多说了。
plugin TaoQuick这一句,表示对应的dll文件名称。dll是要写一个C++类,继承自QQmlExtensionPlugin
看一下TaoQuick中的实现
//taoquick_plugin.h
#pragma once

#include <QQmlExtensionPlugin>

class TaoQuickPlugin : public QQmlExtensionPlugin
{
    Q_OBJECT
    Q_PLUGIN_METADATA(IID QQmlExtensionInterface_iid)

public:
    void registerTypes(const char *uri) override;
};
//taoquick_plugin.cpp
#include "taoquick_plugin.h"
void TaoQuickPlugin::registerTypes(const char *uri)
{
    Q_UNUSED(uri);
    Q_INIT_RESOURCE(Qml); //注册Qml.qrc
}
运行时候的bin路径文件结构是这样的:
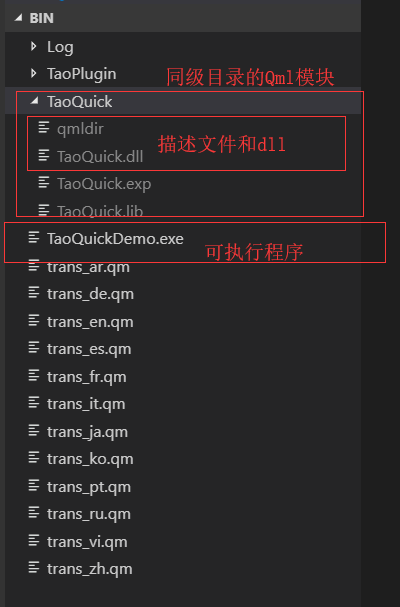
TaoQuick文件夹的名字就是模块名字
不用开放Qml源码
这里说一下,TaoQuick项目中还有一个qmldir文件:
TaoQuick/TaoQuick/Qml/qmldir:
TGradientBtn 1.0 BasicComponent/Button/TGradientBtn.qml
TImageBtn 1.0 BasicComponent/Button/TImageBtn.qml
TImgTextBtn 1.0 BasicComponent/Button/TImgTextBtn.qml
TTextBtn 1.0 BasicComponent/Button/TTextBtn.qml

TMoveArea 1.0 BasicComponent/Mouse/TMoveArea.qml
TTransArea 1.0 BasicComponent/Mouse/TTransArea.qml

TNormalProgress 1.0 BasicComponent/Progress/TNormalProgress.qml
TCircleProgress 1.0 BasicComponent/Progress/TCircleProgress.qml

TBusyIndicator 1.0 BasicComponent/Others/TBusyIndicator.qml
TDragItem 1.0 BasicComponent/Others/TDragItem.qml
TResizeBorder 1.0 BasicComponent/Others/TResizeBorder.qml
TToolTip 1.0 BasicComponent/Others/TToolTip.qml
TDialog 1.0 BasicComponent/Others/TDialog.qml
TPopup 1.0 BasicComponent/Others/TPopup.qml
TFPS 1.0 BasicComponent/Others/TFPS.qml
这里面module、plugin这些东西都没有,只有组件。而且这个文件是加入了qrc的,即编译进dll里面了。
前面那个qmldir,需要和dll放在同级目录,dll模块才能被Qml引擎导入。
后面这个qmldir的作用是,导出dll插件时,不用带上qml源码,直接import 这个qmldir的资源路径,就能够用里面的组件了。
也就是说,使用的地方,要写两句import
import TaoQuick 1.0
import "qrc:/Tao/Qml/"
这种用法不能在QtCreator高亮,运行没问题。(商业版似乎有更高级的资源内建功能,或许可以支持高亮,后续再研究)
具体的实现和用法,可以参考TaoQuick
TaoQuick中的qmake语法,可以参考另一篇文章 <Qt实用技能2-用好qmake>
Designer支持
再看一下效果:
要支持Designer,需要以下步骤:
首先要在Qml路径下,创建一个designer文件夹。必须叫这个名字
其次要放一个扩展名为.metainfo的文件,里面按格式写上组件信息。名字似乎没有要求。
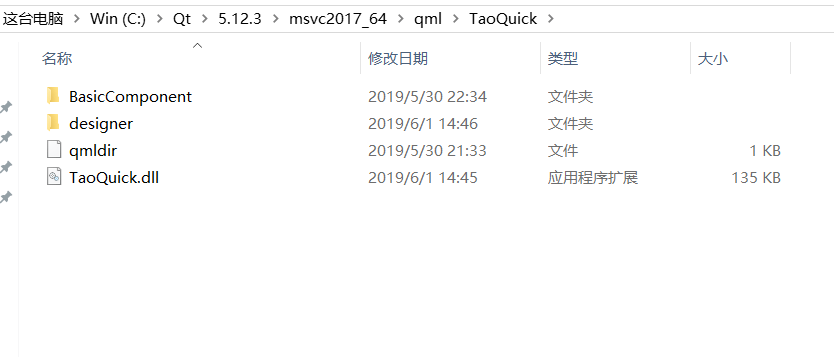
最后,将整个Qml文件夹拷贝到[QTDIR]/qml/路径下,并把文件夹名字改成模块名字。
TaoQuick项目的路径是这样的:
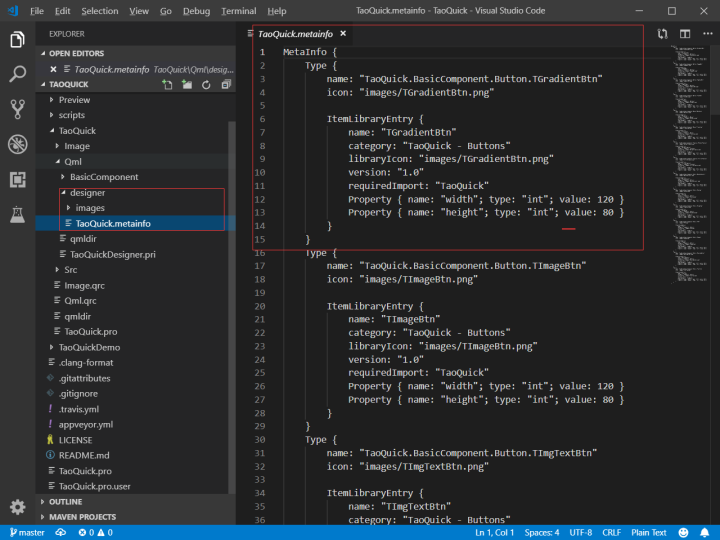
metainfo
metainfo文件,目前没有文档、没有自动生成工具,只能手动写,语法和qml语法类似。(可以参考QtCreator源码,里面有完整的解析器)
MetaInfo {
    Type {
        name: "TaoQuick.BasicComponent.Button.TGradientBtn"
        icon: "images/TGradientBtn.png"

        ItemLibraryEntry {
            name: "TGradientBtn"
            category: "TaoQuick - Buttons"
            libraryIcon: "images/TGradientBtn.png"
            version: "1.0"
            requiredImport: "TaoQuick"
            Property { name: "width"; type: "int"; value: 120 }
            Property { name: "height"; type: "int"; value: 80 }
        }
    }
}
顶层MetaInfo为固定写法
接下来一个Type就对应Designer中的一个可拖拽的组件:
* name应该算作Qml组件文件的路径,路径分隔符用"点", 路径默认从[QTDIR]/qml开始,如果有自定义qml 导入路径,应该可以从相应的路径开始查找(未尝试)。

* icon 就是小图标了,用来在Designer界面上预览。这里的images路径,默认从designer文件夹开始
ItemLibraryEntry 是对这个组件更详细的描述:
* name 显示在Designer上面的名字
* category 分组的名字
* libraryIcon 小图标,和前面那个一样(不懂有什么区别,先照抄)
* version 版本 (TaoQuick都是1.0)
* requiredImport 必要的导入的模块
* Property 属性。就是可以在Designer中调整、做帧动画的。
Property支持的关键字有 name type value三个。 type 的值,暂时没有完整的支持列表,源码里面能翻到Qml的基础类型[“boolean”, “int”, “real”, “string”, “url”, “color”], Qt发行的Qml中,还能看到”binding”。
(qtcreator-4.9.0\qt-creator-opensource-src-4.9.0\src\plugins\qmldesigner\designercore\metainfo\metainfo.cpp)
属性这里,应该是QtCreator还没有开发完整。Qml组件里,什么属性都不写,Designer里面一个属性都看不到。就写一个width属性,其它的导出属性也自动给列出来了。
但是Color这种,即使写了color,还是按照binding字符串处理的,不能用颜色选择器改颜色。只能等QtCreator后续版本了。
Qt自带的Rectangle一类,是从C++里面写的,Color属性是可以用颜色选择器的。Qt自带的Qml组件Color属性也是按binding处理的。
带资源的组件,需要用C++扩展注册资源
前面示例那个FPS组件,用到了一张图片。图片资源要么和Qml文件放一起,用”file:///./“的方式访问,要么放进资源里,用C++注册。
所以在前面的TaoQuick安装路径中,有一个dll文件。C:\Qt\5.12.3\msvc2017_64\qml\TaoQuick\TaoQuick.dll
然后封装这个组件的时候,还要再import一下TaoQuick.dll, 即import TaoQuick 1.0
图片路径就用资源路径
//TFPS.qml
import QtQuick 2.12
import QtQuick.Controls 2.12
import TaoQuick 1.0
Item {
    property int fps: 60

    property int frameCount: 0
    property color textColor: "#f7e08c"
    Image {
        id: spinner
        source: "qrc:/Core/Image/Others/spinner.png"
        width: 32
        height: 32
        anchors.verticalCenter: parent.verticalCenter
        anchors.left: parent.left
        RotationAnimation on rotation {
            from: 0
            to: 360
            running: true
            loops: Animation.Infinite
            duration: 1000
        }
        onRotationChanged: frameCount++
    }
    Text {
        anchors.left: spinner.right
        anchors.verticalCenter: parent.verticalCenter
        text: "FPS" + fps
        font.pixelSize: 20
        renderType: Text.NativeRendering
        color: textColor
    }
    Timer {
        interval: 1000
        repeat: true
        running: true
        onTriggered: {
            fps = frameCount
            frameCount = 0
        }
    }
}
安装
可以手动拷贝文件夹,也可以参考TaoQuick的自动化安装。
<Qt实用技能2-用好qmake>一文中已经说过了
只要增加一个pri文件,再执行make install即可
//TaoQuickDesigner.pri
taoquick_designer.files = $$PWD/designer/TaoQuick.metainfo
taoquick_designer.path = $$[QT_INSTALL_QML]/$${uri}/designer

toaquick_qmldir.files = $$PWD/qmldir
toaquick_qmldir.path = $$[QT_INSTALL_QML]/$${uri}

taoquick_qml_buttons.files = $$PWD/BasicComponent/Button/*.qml
taoquick_qml_buttons.path = $$[QT_INSTALL_QML]/$${uri}/BasicComponent/Button

taoquick_qml_mouse.files = $$PWD/BasicComponent/Mouse/*.qml
taoquick_qml_mouse.path = $$[QT_INSTALL_QML]/$${uri}/BasicComponent/Mouse

taoquick_qml_others.files = $$PWD/BasicComponent/Others/*.qml
taoquick_qml_others.path = $$[QT_INSTALL_QML]/$${uri}/BasicComponent/Others

taoquick_qml_progress.files = $$PWD/BasicComponent/Progress/*.qml
taoquick_qml_progress.path = $$[QT_INSTALL_QML]/$${uri}/BasicComponent/Progress

taoquick_degisner_images.files = $$PWD/designer/images/*.png
taoquick_degisner_images.path = $$[QT_INSTALL_QML]/$${uri}/designer/images

INSTALLS  += taoquick_designer toaquick_qmldir taoquick_qml_buttons taoquick_qml_mouse taoquick_qml_others taoquick_qml_progress taoquick_degisner_images


 1237
1237

 被折叠的 条评论
为什么被折叠?
被折叠的 条评论
为什么被折叠?
 到【灌水乐园】发言


