


前言
上一章内容我们初步了解了卷积、卷积神经网络、卷积神经网络的搭建过程以及经典的LeNet网络结构,本篇内容将基于LeNet网络结构,实现手势识别。
手势识别
数据集介绍
在开展手势识别之前,我们需要先下载并初步了解数据集的情况。
数据下载地址
下载地址:手势识别数据集
数据集解压后目录如下:
├── train                   # 训练集
    ├── G0                  # 手势0
        ├── IMG_1118.jpg    # 手势0的图片
        ├── ...
    ├── G1                  # 手势1
        ├── IMG_1119.jpg
        ├── ...
    ├── ...
    ├── G9                  # 手势9
├── test                    # 测试集
    ├── G0
    ├── ...
    ├── G9

项目流程
在《【课程总结】Day8(上):深度学习基本流程》中,我们已了解到深度学习的基本流程为:
- 数据预处理
1.1 数据读取
1.2 数据切分
1.3 数据规范化 - 批量化打包数据
- 模型搭建
- 筹备训练
- 训练模型
5.1 定义监控指标和方法
5.2 实现训练过程
5.3 开始训练
因此,本次项目也采用如上的基本流程。
数据预处理
由上述目录结构可知,我们需要在训练前使用DataLoader将数据集打包成适合训练的格式,因此需要解决2个问题:
问题1:如何记录标签数据和图片数据
解决方法:
- 获取标签:上述目录中的G0、G1、G2…G9文件夹名称即为手势标签,因此我们可以通过os.listdir()函数获取文件夹名称。
- 保存标签:将上述遍历的G0、G1、G2…G9文件夹名称保存到列表
label_train中,方便后续使用。 - 获取图片路径:通过os.listdir()函数获取文件夹中的图片名称,从而获取图片路径。
- 保存图片路径:将上述遍历的图片路径保存到列表
img_train中,方便后续使用。
# 读取gestures\train\G0目录下的所有图片路径,添加至list中
import os
import random
import numpy as np
import cv2


def load_img_label(train_root):
    img_train = []
    label_train = []
    for label in os.listdir(train_root):
        label_path = os.path.join(train_root, label)
        # 排除掉.开头的文件
        if label.startswith('.'):
            continue
        for img_name in os.listdir(label_path):
            img_path = os.path.join(label_path, img_name)
            img_train.append(img_path)
            label_train.append(label)
    return img_train, label_train

# 1,读取基图像的本信息
root = "gestures"

# 1,训练集
train_root = os.path.join(root, 'train')
train_img, train_label = load_img_label(train_root)


# 2,测试集
test_root = os.path.join(root, 'test')
test_img, test_label = load_img_label(test_root)

lable_list = list(set(train_label))
lable_list.sort()

# 3,构建标签字典
label2idx = {label: idx for idx, label in enumerate(lable_list)}
idx2label = {idx: label for idx, label in enumerate(lable_list)}
print(label2idx)
print(idx2label)
问题2:如何将图片和标签数据打包成适合训练的格式
解决方法:
- 构建自定义数据集类GesturesDataset
- 重写__getitem__(),len(),init()方法
- 在__getitem__()方法中:
- 使用cv2.imread()读取图片
- 使用cv2.resize()调整图片大小
- 将图像转为numpy数组
- 对矩阵数组中的数据进行归一化处理,规范化为[-1, 1]
- 使用torch将数据转为张量
- 将数据从图片数据的[H(高度), W(宽度), C(通道数)]转维度为[N(批量个数), H(高度), W(宽度), C(通道数)]
- 将标签转为数字,例如:G0 -> 0, G1 -> 1, G2 -> 2, …, G9 -> 9
- 将标签转为张量
import torch
from torch.utils.data import Dataset

class GesturesDataset(Dataset):
    """
    自定义数据集
    """
    def __init__(self, X, y):
        self.X = X
        self.y = y

    def __len__(self):
        return len(self.X)

    def __getitem__(self, idx):
        img_path = self.X[idx]
        img_label = self.y[idx]

        # 1,读取图像
        img = cv2.imread(img_path)

        # 2,图像转为32*32
        img = cv2.resize(img, (32, 32))

        # 3,图像转为numpy数组
        img = np.array(img)

        # 4,数据规范化到 [-1, 1]
        img = img / 255.0
        img = (img - 0.5) / 0.5

        # 5,数据转为torch张量
        img = torch.tensor(img, dtype=torch.float32)

        # 6,数据转维度 [H, W, C]
        img = img.permute(2, 0, 1)

        # 7,标签转为数字
        label = label2idx[img_label]
        label = torch.tensor(label, dtype=torch.long)

        return img, label
模型搭建
本次模型使用LeNet网络结构,相关结构已在《【课程总结】Day10:卷积网络的基本组件》阐述,本次过程不再赘述。
import torch
from torch import nn


class ConvBlock(nn.Module):
    """
        一层卷积:
            - 卷积层
            - 批规范化层
            - 激活层
    """
    def __init__(self, in_channels, out_channels,
                 kernel_size=3, stride=1, padding=1):
        super().__init__()
        self.conv = nn.Conv2d(in_channels=in_channels, out_channels=out_channels,
                             kernel_size=kernel_size, stride=stride,padding=padding)
        self.bn = nn.BatchNorm2d(num_features=out_channels)
        self.relu = nn.ReLU()

    def forward(self, x):
        x = self.conv(x)
        x = self.bn(x)
        x = self.relu(x)
        return x

class LeNet(nn.Module):
    def __init__(self, num_classes=10):
        super().__init__()
        # 1, 特征抽取部分
        self.feature_extractor = nn.Sequential(
            # 卷积层1
            ConvBlock(in_channels=3,
                      out_channels=6,
                      kernel_size=5,
                      stride=1,
                      padding=0),

            # 亚采样(池化)
            nn.MaxPool2d(kernel_size=2, stride=2, padding=0),

            # 卷积层2
            ConvBlock(in_channels=6,
                      out_channels=16,
                      kernel_size=5,
                      stride=1,
                      padding=0),

            # 亚采样(池化)
            nn.MaxPool2d(kernel_size=2, stride=2, padding=0),

        )

        # 2, 分类
        self.classifier = nn.Sequential(
            nn.Flatten(),
            nn.Linear(in_features=400, out_features=120),
            nn.ReLU(),
            nn.Linear(in_features=120, out_features=84),
            nn.ReLU(),
            nn.Linear(in_features=84, out_features=num_classes)
        )

    def forward(self, x):
        # 1, 提取特征
        x = self.feature_extractor(x)
        # 2, 分类输出
        x = self.classifier(x)
        return x
- 将以上代码单独封装为model.py文件,方便后续直接import。
- 在主程序中使用以下方式直接调用即可:
from models import LeNet
model = LeNet()
筹备训练
由于计算的数据量较大,所以我们需要借助torch以及GPU来提升训练速度。
# 检测是否有可用的CUDA设备,如果有则使用第一个可用的CUDA设备,否则使用CPU
device = "cuda:0" if torch.cuda.is_available() else "cpu"

# 将模型移动到指定的设备(CUDA或CPU)
model.to(device=device)

# 设置训练的总轮数
epochs = 80

# 设置学习率
lr = 1e-3

# 定义损失函数为交叉熵损失
loss_fn = nn.CrossEntropyLoss()

# 定义优化器为随机梯度下降(SGD),传入模型的参数和学习率
optimizer = torch.optim.SGD(params=model.parameters(), lr=lr)
模型评估
为了观察训练过程情况,定义模型评估函数:
# 准确率计算
def get_acc(data_loader):
    accs = []
    model.eval()
    with torch.no_grad():
        for X, y in data_loader:
            X = X.to(device=device)
            y = y.to(device=device)
            y_pred = model(X)
            y_pred = y_pred.argmax(dim=-1)
            acc = (y_pred == y).to(torch.float32).mean().item()
            accs.append(acc)
    final_acc = round(number=sum(accs) / len(accs), ndigits=5)
    return final_acc
实现训练过程
# 训练过程
def train():

    train_accs = []
    test_accs = []
    cur_test_acc = 0

    # 1,训练之前,检测一下准确率
    train_acc = get_acc(data_loader=train_dataloader)
    test_acc = get_acc(data_loader=test_dataloader)
    train_accs.append(train_acc)
    test_accs.append(test_acc)

    print(f"训练之前:train_acc: {train_acc},test_acc: {test_acc}")

    # 每一轮次
    for epoch in range(epochs):
        # 模型设置为 train 模式
        model.train()
        # 计时
        start_train = time.time()
        # 每一批量
        for X, y in train_dataloader:
            # 数据搬家
            X = X.to(device=device)
            y = y.to(device=device)
            # 1,正向传播
            y_pred = model(X)
            # 2,计算损失
            loss = loss_fn(y_pred, y)
            # 3,反向传播
            loss.backward()
            # 4,优化一步
            optimizer.step()
            # 5,清空梯度
            optimizer.zero_grad()
        # 计时结束
        stop_train = time.time()
        # 测试准确率
        train_acc = get_acc(data_loader=train_dataloader)
        test_acc = get_acc(data_loader=test_dataloader)
        train_accs.append(train_acc)
        test_accs.append(test_acc)
        # 保存模型
        if cur_test_acc < test_acc:
            cur_test_acc = test_acc
            # 保存最好模型
            torch.save(obj=model.state_dict(), f="lenet_best.pt")
        # 保存最后模型
        torch.save(obj=model.state_dict(), f="lenet_last.pt")

        # 格式化输出日志
        print(f"""
        当前是第 {epoch + 1} 轮:
        ------------------------------------------------------------
        | 训练准确率 (train_acc) | 测试准确率 (test_acc) | 运行时间 (elapsed_time) |
        ------------------------------------------------------------
        | {train_acc:<18} | {test_acc:<17} | {round(number=stop_train - start_train, ndigits=3)} 秒    |
        ------------------------------------------------------------
        """)
    return train_accs, test_accs
开始训练
train_accs, test_accs = train()
图形化监控数据
plt.plot(train_accs, label="train_acc")
plt.plot(test_accs, label="train_acc")
plt.legend()
plt.grid()
plt.xlabel(xlabel='epoch')
plt.ylabel(ylabel="acc")
plt.title(label="LeNet Training Process")
运行结果:
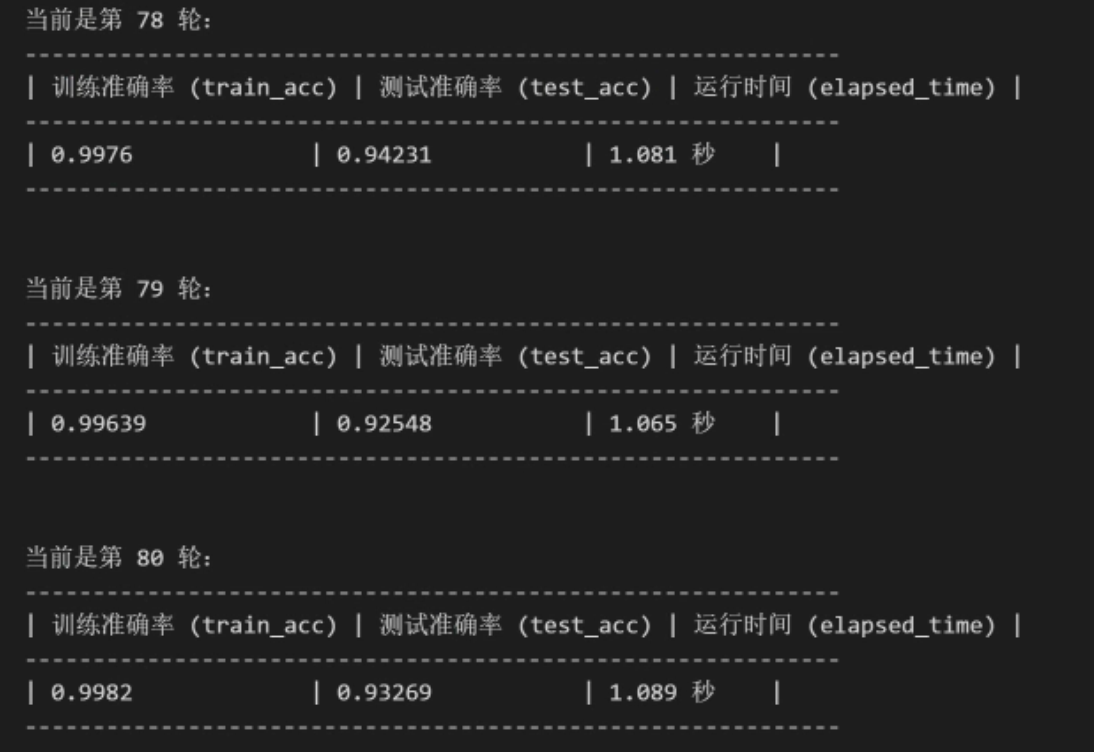
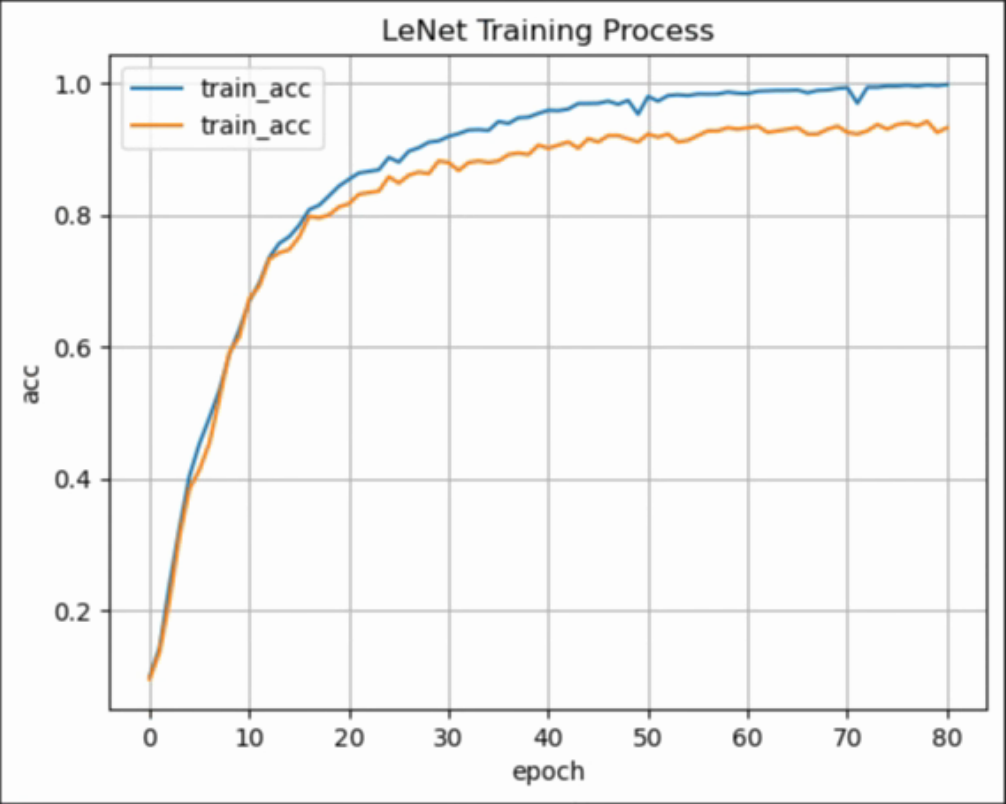
通过以上执行过程可以看到,经过80轮训练后,LeNet模型在训练集上的准确率达到99%,在测试集上的准确率达到94%。
模型预测
接下来,我们使用streamlit实现一个前端页面,用户在页面上输入图片,模型会自动识别图片中的手势。
整体实现流程:
- 创建一个streamlit应用,并导入相关依赖。
- 显示当前设备是GPU设备还是CPU
- 加载模型
- 使用streamlit.file_uploader显示上传图片控件
- 使用streamlit.image显示上传的图片
- 使用加载的模型进行预测
6.1 读取图像
6.2 图像预处理
6.3 图形转为张量
6.4 转换图形的维度为[C, H, W]
6.5 新建一个批量维度[N, C, H, W]
6.6 数据搬家
6.7 模型设为评估模式
6.8 模型预测
6.9 预测结果转为标签 0 → G0, 1 → G1, 2 → G2, 3 → G3, 4 → G4, 5 → G5
6.10 返回标签结果
import streamlit
import torch
import os
import numpy as np
from PIL import Image
from models import LeNet


# 生成idx2label字典,用于显示预测结果
idx2label = {
    0: 'G0',
    1: 'G1',
    2: 'G2',
    3: 'G3',
    4: 'G4',
    5: 'G5',
    6: 'G6',
    7: 'G7',
    8: 'G8',
    9: 'G9'
}

def infer(img_path, model, device, idx2label):
    """
        输入:图像地址
        输出:预测类别
    """
    # 1,读取图像
    if not os.path.exists(img_path):
        raise FileNotFoundError("文件没找到")

    # 2, 判断当前局部变量中是否有model
    # if "m1" not in globals() or not isinstance(globals()["m1"], LeNet):
    #     raise ValueError("m1模型不存在")

    # 3,读取图像
    img = Image.open(fp=img_path)

    # 4,预处理
    img = img.resize((32, 32))
    img = np.array(img)
    img = img / 255
    img = (img - 0.5) / 0.5

    # 5, 转张量
    img = torch.tensor(data=img, dtype=torch.float32)

    # 6, 转换维度
    img = img.permute(dims=(2, 0, 1))

    # 7, 新增一个批量维度
    img = img.unsqueeze(dim=0)

    # 8,数据搬家
    img = img.to(device=device)

    # 9,模型设为评估模式
    model.eval()

    # 10,无梯度环境
    with torch.no_grad():
        # 11,正向传播
        y_pred = m1(img)

        # 12, 解析结果
        y_pred = y_pred.argmax(dim=-1).item()

        # 13,标签转换
        label = idx2label.get(y_pred)

        # 14, 返回结果
        return label

if __name__ == "__main__":
    # 1, 显示当前设备是GPU设备还是CPU
    # 检测设备
    device = "cuda" if torch.cuda.is_available() else "cpu"
    streamlit.write(f"当前设备是{device}设备")


    # 2, 加载模型
    m1 = LeNet()
    m1.to(device=device)
    # 加载权重
    m1.load_state_dict(state_dict=torch.load(f="lenet_best.pt", map_location=device),
                    strict=False)
    if not isinstance(m1, LeNet):
        raise ValueError("模型加载失败")

    # 3, 上传一张图片
    img_path = streamlit.file_uploader(label="上传一张图片", type=["png", "jpg", "jpeg"])
    # 3.1, 将上传的图像文件保存到临时文件
    if img_path:
        with open(file="temp_img.jpg", mode="wb") as f:
            f.write(img_path.getvalue())
        img_path = "temp_img.jpg"
    # 4, 显示上传的图片
    if img_path:
        img = Image.open(fp=img_path)
        streamlit.image(image=img, caption="上传的图片", use_column_width=True)

    # 5, 加载本地的lenet_best.pt模型
    if img_path:
        label = infer(img_path=img_path, model=m1, device=device, idx2label=idx2label)
        streamlit.write(f"预测结果是{label}")
运行结果:

内容小结
- 回顾深度学习的整体流程,仍然是:数据预处理→批量化打包数据→模型搭建→训练模型→模型评估→模型预测
- 图片数据预处理时,批量化打包数据需要构造为[N, C, H, W]的格式
- 预处理的过程大致为:读取图片→调整图片大小→转为numpy数组→归一化→转为张量→调整维度→标签转为数字→转为张量,该过程需要在自定义数据集的__getitem__函数中完成
- 模型构建使用的是LeNet模型,该模型定义可以单独在models.py中实现,训练代码中直接import引用即可
- 训练过程以及训练时的监控过程,与前两章学习的深度学习训练过程是一样的


 被折叠的 条评论
为什么被折叠?
被折叠的 条评论
为什么被折叠?
 到【灌水乐园】发言


