


Lucene被索引文档的CRUD
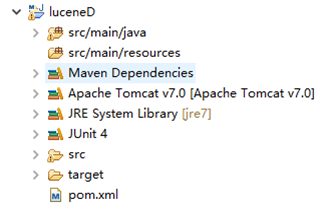
1.创建一个maven项目
2.配置pom.xml,代码此处省略,如有需要,请参考Lucene入门教程(一)中的pom.xml配置文件。
3.编写代码,如下:
import java.nio.file.Paths;
import org.apache.lucene.analysis.Analyzer;
import org.apache.lucene.analysis.standard.StandardAnalyzer;
import org.apache.lucene.document.Document;
import org.apache.lucene.document.Field;
import org.apache.lucene.document.StringField;
import org.apache.lucene.document.TextField;
import org.apache.lucene.index.DirectoryReader;
import org.apache.lucene.index.IndexReader;
import org.apache.lucene.index.IndexWriter;
import org.apache.lucene.index.IndexWriterConfig;
import org.apache.lucene.index.Term;
import org.apache.lucene.store.Directory;
import org.apache.lucene.store.FSDirectory;
import org.junit.Before;
import org.junit.Test;
/**
 * 对被索引的文章进行crud
 * @author admin
 *
 */
public class IndexDocument {

	//写测试数据,这些数据是写到索引文档里去的。
	private String ids[] = {"1","2","3"}; //标示文档
	private String citys[] = {"BeiJing","HeBei","ShanXi"};
	private String cityDes[] = {

		 "BeiJing is the captial of China!",
		 "HeBei is my hometown!",
		 "ShanXi is a beautiful city!"
	};

	private Directory dir;

	//每次启动的时候都会执行这个方法,写索引的东西都写在setUp方法里
	@Before
	public void setUp() throws Exception {

		//得到读取索引文件的路径
		dir = FSDirectory.open(Paths.get("E:\\luceneDemo2"));

		//获取IndexWriter实例
		IndexWriter writer = getWriter();

		for(int i=0;i<ids.length;i++){

			Document doc=new Document();

			doc.add(new StringField("id", ids[i], Field.Store.YES));
			doc.add(new StringField("city",citys[i],Field.Store.YES));
			doc.add(new TextField("desc", cityDes[i], Field.Store.NO));

			// 添加文档
			writer.addDocument(doc);
		}

		writer.close();
	}

	/**
	 * 获取IndexWriter实例
	 * @return
	 * @throws Exception
	 */
	private IndexWriter getWriter() throws Exception{

		//实例化分析器
		Analyzer analyzer = new StandardAnalyzer();

		//实例化IndexWriterConfig
		IndexWriterConfig con = new IndexWriterConfig(analyzer);

		//实例化IndexWriter
		IndexWriter writer = new IndexWriter(dir, con);

		return writer;
	}

	/**
	 * 测试写了几个文档(对应图片一)
	 * @throws Exception
	 */
	@Test
	public void testIndexWriter()throws Exception{

		//获取IndexWriter实例
		IndexWriter writer=getWriter();

		System.out.println("写入了"+writer.numDocs()+"个文档");

		//关闭writer
		writer.close();
	}

	/**
	 * 测试读取文档(对应图片二)
	 * @throws Exception
	 */
	@Test
	public void testIndexReader()throws Exception{

		//根据路径得到索引读取
		IndexReader reader=DirectoryReader.open(dir);

		//公共是多少文件,也就是最大文档数
		System.out.println("最大文档数:"+reader.maxDoc());

		//读取的实际文档数
		System.out.println("实际文档数:"+reader.numDocs());

		//关闭reader
		reader.close();
	}

	/**
	 * 测试删除 在合并前(对应图片三)
	 * @throws Exception
	 */
	@Test
	public void testDeleteBeforeMerge()throws Exception{

		//获取IndexWriter实例
		IndexWriter writer=getWriter();

		//统计删除前的文档数
		System.out.println("删除前:"+writer.numDocs());

		//Term:第一个参数是删除的条件,第二个是删除的条件值
		writer.deleteDocuments(new Term("id","1"));

		//提交writer(如果不提交,就不能删除)
		writer.commit();

		//显示删除在合并前的最大文档数量
		System.out.println("writer.maxDoc():"+writer.maxDoc());

		//显示删除在合并前的实际数量
		System.out.println("writer.numDocs():"+writer.numDocs());

		//关闭writer
		writer.close();
	}

	/**
	 * 测试删除 在合并后(对应图片四)
	 * @throws Exception
	 */
	@Test
	public void testDeleteAfterMerge()throws Exception{

		//获取IndexWriter实例
		IndexWriter writer=getWriter();

		//删除前的文档数
		System.out.println("删除前:"+writer.numDocs());

		//Term:第一个参数是删除的条件,第二个是删除的条件值
		writer.deleteDocuments(new Term("id","1"));

		// 强制删除
		writer.forceMergeDeletes();

		//提交writer
		writer.commit();

		//显示删除在合并后的最大文档数量
		System.out.println("writer.maxDoc():"+writer.maxDoc());

		//显示删除在合并后的实际数量
		System.out.println("writer.numDocs():"+writer.numDocs());

		//关闭writer
		writer.close();
	}

	/**
	 * 测试更新(对应图片五)
	 * @throws Exception
	 */
	@Test
	public void testUpdate()throws Exception{

		//获取IndexWriter实例
		IndexWriter writer=getWriter();

		//实例化文档
		Document doc=new Document();

		//向文档里添加值
		doc.add(new StringField("id", "1", Field.Store.YES));
		doc.add(new StringField("city","qingdao",Field.Store.YES));
		doc.add(new TextField("desc", "dsss is a city.", Field.Store.NO));

		//更新文档
		/**
		 * 第一个参数是根据id为1的更新文档,,
		 * 第二个是更改的内容
		 *
		 * 过程:先把查到的文档删掉,再添加。这就是更新。但是原来的数据还在;
		 */
		writer.updateDocument(new Term("id","1"), doc);

		//关闭writer
		writer.close();
	}


}
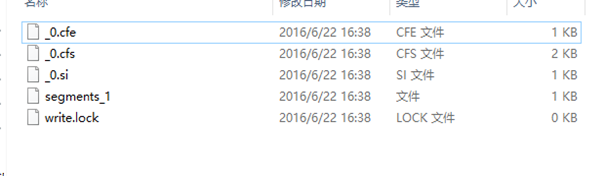
图片一:出现图一,就说明检索文件成功!
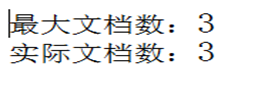
图片二:首先来解释一下是什么是最大文件数:指的是你一共索引了多少的文档,写了7个,就是7个,写了3个就是3个。实际文档数是真正3个被索引的文档。
在这可能大家对什么是在合并前和在合并后起了疑问,那么就来看一下效果,对比一下,就知道了:
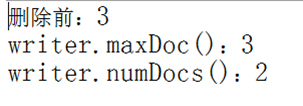
合并前(图片三):
合并后(图片四):
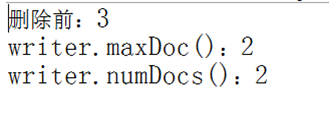
细心的可能已发现,在删除合并之前,删除前为3,最大文档数为3;而合并后的图片四中删除前仍为3,但是最大文档数为2.这说明了这两幅图都已删除成功,但是图片三没有真正的删除文档,但实际文档数是代表已经删除了一个文档。
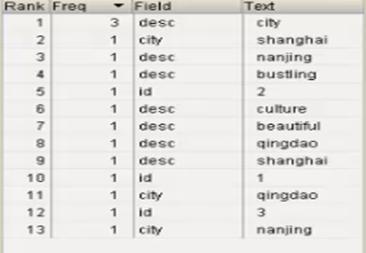
合并前在luke中显示的效果:
相反,图片四不管是最大文档数还是实际文档数都是2,更能看出已经强制删除了一个文档,合并后在luke中显示的效果:
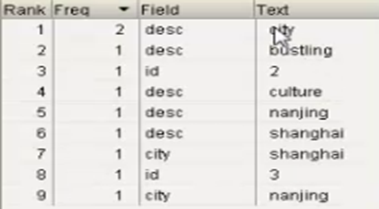
所以,个人觉得,合并后比较准确,直观的看出确实是删除了文档。
好了,这就是对被索引文档的一个CRUD。还有一个工具没给大家介绍,那就是Luke,那么什么是Luke呢?
复制URL:http://www.getopt.org/luke/,Luke就是Lucene全文检索的第三方工具,效果如下:
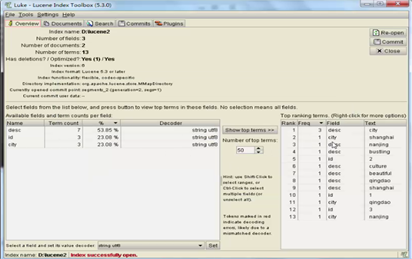
Luke使用步骤:
步骤一:解压luke-5.3.0-luke-release.zip;(卢克)
步骤二:双击luke.bat,出现如左图的效果(左下角的空白处和右下角的空白处没有东西);
步骤三:点击左上角的FIle,看见Open Lucene Index这个 选项,点击之后,就会出现你的路径,选择索引文档所在文件夹的全路径就可以了。最后的效果就和上图一模一样了。


 335
335


 被折叠的 条评论
为什么被折叠?
被折叠的 条评论
为什么被折叠?
 到【灌水乐园】发言


