


组件、过滤器、计算属性、方法、监听器、高级语法
一、过滤器、计算属性、方法、监听器
1. 计算属性
    computed:{ //数值改变数据就改变
        total(){
            return this.price * this.count;
        }
    },
vue3应用:
  const productList = computed(() => {
    const productList = cartList[shopId]?.productList || {}
    let productListHavingCount = []
    for (let i in productList) {
      if (productList[i].count > 0){
        productListHavingCount.push(productList[i]);
      }
    }
    return productListHavingCount
  })
2. 过滤器
          dataList =  dataList.filter(function(item){
            return item.resultScore <=2;
          });
3. 方法
//与computed区别刷新页面或触发方法才执行
	methods:{
        formater(string){
            return string.toUpperCase();
        },
        getTotal(){
            return this.price * this.count;
        }
    },
4. 监听器
    watch:{
      // 可以监听变量的改变 做一些异步操作
      price(){
          setTimeout(() => {console.log("111")}, 3000);
      },
    },
5. 示例
const app = Vue.createApp({
    data(){
        return:{
            message:'666',
            price:2,
            count:6,
            total: price * count//参数语义化,不能在data里这样写,要写在computed计算属性里
        }
    },
    watch:{
      // 可以监听变量的改变 做一些异步操作
      price(){
          setTimeout(() => {console.log("111")}, 3000);
      },

    },
    computed:{
        total(){
            return this.price * this.count;
        }
    },
    methods:{
        formater(string){
            return string.toUpperCase();
        },
        getTotal(){
            return this.price * this.count;
        }
    },
    template:'
    <div>{{formater(hello)}}</div>
    <div>{{total()}}</div>//计算依赖的值改变才会重新改变
    <div>{{message}} {{getTotal()}}</div>//页面只要重新渲染,就会重新计算,例如message值改变
    '
})
6. 总结Xmind

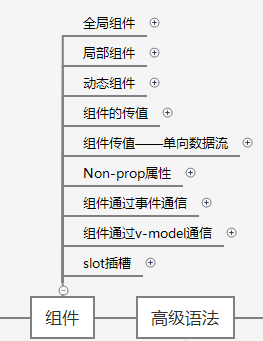
二、组件
1. 全局组件
直接挂载定义。全局组件具有复用性,互不影响。组件定义了处处可用,但很影响性能
//全局组件具有复用性,互不影响。组件定义了处处可用,但很影响性能
const app = Vue.createdApp({
    template:'
    <div><counter-parent/></div>
    <div><counter/></div>
    <div><counter/></div>'
});
app.component('counter',{
    data(){
        return:{
            count: 0
        }
    }
    template:'<div @click="counter += 1">{{count}}</div>'
});
app.component('counter-parent',{
    template:'<counter/>'
});
const vm = app.mount("#root";)
2. 局部组件
工作中常用局部组件,与全局组件不同的是要做名字的映射对象
const Counter = {
    data(){
        return:{
            count: 0
        }
    }
    template:'<div @click="counter += 1">{{count}}</div>'
};
const HelloWorld = {
    template:'<div>hello</div>'
};
const app = Vue.createdApp({
    components: {'counter': Counter, 'hello-world': HelloWorld}
    //挂载 局部组件,上下顺序很重要。可以直接简写为{counter}
    //components: {Counter, HelloWorld}
    template:'
    <div><counter/></div>
    <div><hello-world/></div>
    '
});
const vm = app.mount("#root");
3. 动态组件
<keep-alive>//缓存标签与component动态组件标签常一起使用,防止切换后input框内容消失
<component :is="nowComponet"></component> //动态组件写法,点击切换动态显示子组件
</keep-alive>
4. 组件的传值
4.1 props接收传值
被使用的组件用props: [‘传值参数1’,‘传值参数2’] 来接收传的值。值也可以是个函数。
props里可写接收的参数类型:String、Boolean、Array、Object、Function、Symbol。
const app = Vue.createdApp({
    data(){
        return:{
            num: '我是字符串',
            number: 345
        }
    }
    template:'<div><test :content1="num" :content2="number" /></div>'
});
app.component('test',{
    props:{
        content1: String,
        content2:{
            type: Number,
            //required: true,
            validator: function(value){
                return value < 1000;//深度校验
            }
            default: () => {return 123;}//可以直接赋值
        }
    },
    method:{
        handleClick1(){
            this.content1();//会打印 我是字符串
        }
        handleClic2k(){
            this.content2();//会打印 345
        }
    }
    template:'
    <div @click="handleClick1">{{content1}}</div>
    <div @click="handleClick2">{{content2}}</div>'
});
项目中的使用
	props: {
      params: {
        type: Object,
        default: {}
      }
    }
传递参数命名:<div><test :content-abc="content"/></div>传递需 props:['contentAbc']接收
4.2 父组件传多参到子组件,子组件接收
const app = Vue.createdApp({
    data(){
        return:{
            //当父组件要向子组件传递很多值时用param
            param: {
                content: 666,
                a: 1,
                b: 2,
                c: 3
            }
        }
    }
    template:'<div><test v-bind="param"/></div>'//父组件动态传多值传递给子组件
});
app.component('test',{
    props:['content', 'a', 'b', 'c']
    template:'<div>{{content}}-{{a}}-{{b}}-{{c}}</div>'
});
const vm = app.mount("#root");
4.3 Non-prop属性
如果父组件传递值给子组件,子组件没有使用props接收。可以在模板mounted:{this.$attrs}进行接收,模板$attrs进行使用
const app = Vue.createdApp({
    data(){
        return:{
            content: 123
        }
    }
    template:'<div><test :content1="content" content2="content"/></div>'
});
app.component('test',{
    mounted:{
        this.$attrs //(获得所有传值, 用一个自定义值接收)
    }
    template:'
    <div>1</div>
    <div v-bind="$attrs">2</div>//如果这样写,会把所有的传值绑定在这个dom上
    <div v-bind:content1="$attrs.content1">3</div>//指定某个传值绑定
    '
});
const vm = app.mount("#root");
5. 组件传值——单向数据流
什么是单向数据流?
单向数据流:父组件的数据可以流给子组件 但子组件不能改变父组件传递的数据
6 组件通过事件通信
props: ['content'],  获得传值
emits: ['addOne', 'add'] 获得事件

this.$emit('addOne');//固定写法调用父组件方法
son
<template>
  <div @click="handleClick">{{content}}</div>
</template>

<script>
export default {
  name: 'son',
  props: ['content'],
  emits: ['addOne', 'add'],//可能向外触发的事件
  // emits: {
  //   addOne: (content) => {
  //     if(content > 0){
  //       return true;
  //     }else {
  //       return false;
  //     }
  //   }//对是否可以往外传做出参数限定
  // },
  methods: {
    handleClick(){
      this.$emit('addOne');//固定写法通信父组件
      this.$emit('add', this.content + 2);
    }
  },
}
</script>
父组件
<template>
  <div>
    <son    :content="content"
            @add-one="handleAddOne"
            @add="handleAddTwo"
    />
  </div>

</template>

<script>
import son from './Son'
export default {
  name: 'TestPage',
  components: { son },
  data(){
    return {
      content: 1
    }
  },
  methods:{
    handleAddOne(){
      this.content = this.content + 1
      alert("handleAddOne>>>" + this.content) //alert 2
    },
    handleAddTwo(param1){
      alert("handleAddTwo>>>" + param1) // alert 3
      return param1;
    }
  }
}
</script>
7. 组件通过v-model通信
const app = Vue.createdApp({
    data(){
        return:{
            content: 1
        }
    },
    template:'<counter v-model="content" />'
});
app.component('son', {//modelValue 和 update:modelValue 是固定的使用值写法。
//重要:如果想换名字 v-model:othername="content" othername替换即可,
//这样也可以适用于父通过v-model传多个参数到子组件通信
    props: ['modelValue'],
    emits: {
        add: (content) => {
           alert("content.");
        }
    },
    methods: {
        handleClick(){
            this.$emit('update:modelValue', this.modelValue + 2);
        }
    },
    template:'
    <div @click="handleClick">{{modelValue}}</div>
    '
});
const vm = app.mount("#root");
8. slot插槽
8.1 什么是插槽
解释:slot插槽的出现是为了父组件可以堂而皇之地在子组件中加入内容。
有句话叫一个萝卜一个坑。父组件想要在子组件中种萝卜,需要在子组件中挖个坑,子组件中的就是一个【萝卜坑】。父组件想要给子组件添加的内容就是【萝卜】。
由此可见,萝卜种不种,种什么萝卜由父组件控制;萝卜坑在哪,由子组件控制。 换言之,插槽显不显示、怎样显示是由父组件来控制的,而插槽在哪里显示就由子组件来进行控制。
<!-- 这是子组件哦-->
<div class="child">
  <h2>Child的标题</h2>
  <slot>我是一个萝卜坑</slot>
</div>

<!-- 这是父组件哦-->
<div class="father">
  <h1>Father的标题</h1>
  <Child>
    我是个萝卜~
  </Child>
</div>

看一下运行效果:
Father的标题
Child的标题
我是个萝卜~
8.2 slot 与 props 的区别
通过props属性,父组件可以向子组件传递属性、方法,可是父组件不能通过属性传递带标签的内容、甚至是组件,而插槽可以。
<!-- 这是父组件哦-->
<div class="father">
  <h1>Father的标题</h1>
  <Child>
    <button>我是一个按钮</button>  <!-- 带标签的内容-->
    <Child2></Child2>             <!-- 组件-->
  </Child>
</div>
8.3 匿名插槽(单个插槽、默认插槽)
什么是匿名插槽?
匿名插槽就是没有设置name属性的插槽。
可以放置在组件的任意位置。
一个组件中只能有一个该类插槽。
作为找不到匹配的内容片段时的备用插槽。
匿名插槽只能作为没有slot属性的元素的插槽。
<div class="child">
    <h1>子组件</h1>
     <slot name="head">头部默认值</slot>
     <slot name="body">主体默认值</slot>
     <slot>这是个匿名插槽(没有name属性),这串字符是匿名插槽的默认值。</slot>
 </div>
<div class="parent">
 <h1>父组件</h1>
 <child>
     <p slot="body">我是主体</p>
     <p>我是其他内容</p>
     <p slot="footer">我是尾巴</p>
 </child>
 </div>
运行效果:
父组件
子组件
头部默认值 (head的默认值被渲染:默认值只会在没有提供内容的时候被渲染。)
我是主体 (body的默认值被覆盖)
我是其他内容 (名插槽的默认值被覆盖)
<p slot="footer">我是尾巴</p>—— 被丢弃了,因为子组件中没有name="footer"的插槽与之匹配。
如果子组件中的匿名插槽不存在,则<p>我是其他内容</p>也会被丢弃。
8.4 具名插槽
什么是具名插槽?
意思就是具有名字的插槽,名字通过属性name来定义。
一个组件中可以有很多具名插槽,出现在不同的位置。
<base-layout>
  <template v-slot:header>
    <h1>我是头header</h1>
  </template>

  <template v-slot:default>
    <p>我是main的内容111</p>
    <p>我也是main的内容222</p>
  </template>

  <template v-slot:footer>
      <p>我是footer</p>
  </template>
</base-layout>
<div class="container">
  <header>
    <h1>我是头header</h1>
  </header>
  <main>
     <p>我是main的内容111</p>
     <p>我也是main的内容222</p>
  </main>
  <footer>
    <p>我是footer</p>
  </footer>
</div>
8.5 作用域插槽
作用域插槽就是父组件使用子组件数值传递
<!-- <Child> 组件: -->
<template>
  <div>
    <h1>hey,我是组件Child的标题</h1>
    <slot></slot>
  </div>
</template>
<script>
export default {
  data() {
     return{
        childUser:{Name:"Tom",Age:23}
    }
}
</script>
<!-- 这是父组件<Father>哦-->
<div>
  <h1>hey,我是父组件Father的标题</h1>
  <Child>
    {{childUser.Name}},
    {{childUser.Age}}
  </Child>
</div>
然而上述代码不会正常工作
因为父级模板里的所有内容都是在父级作用域中编译的;子级模板里的所有内容都是在子作用域中编译的。
以下代码才会工作:
做法就是将 childUser 作为 <slot> 元素的一个属性绑定上去:
<template>
  <div>
    <h1>hey,我是组件Child的标题</h1>
    <slot v-bind:childData="childUser"></slot>
  </div>
</template>
<script>
export default {
  data() {
     return{
        childUser:{Name:"Tom",Age:23}
    }
}
</script>
绑定在 <slot> 元素上的 属性childData被称为插槽 prop。
现在在父级作用域中,我们可以使用带值的 v-slot 来定义 插槽 prop 的名字:
<!-- 这是父组件哦-->
<div>
  <h1>hey,我是父组件Father的标题</h1>
  <Child>
    <template v-slot:default="slotProps">
      {{ slotProps.childData.Name}}
      {{ slotProps.childData.Age}}
    </template>
  </Child>
</div>
9. 总结Xmind
三、高级语法
1. mixin 混入
组件data优先级高于mixin data优先级
生命周期函数,先执行mixin里面的,再执行组件里面的
methods方法内容,组件data优先级高于mixin methods优先级
自定义的属性,组件种的属性优先级高于mixin属性的优先级
const myMixin = {
    data: {
        return: {
            number: 1
        }
    },
    numberssss: 1//自定义属性
}
const app = Vue.createdApp({
    mixins: [myMixin],
    template:"
        <child />
    "
});
app.component("child", {
    //这里必须也混入才能使用number
    //mixins: [myMixin],
    numberssss: 1
    template:"<div>{{number}}</div>
    <div>{{this.$options.numberssss}}</div>
    "
})

//自定义属性优先级显示,这样就优先显示混入自定义属性
app.config.optionMergeStrategies.appValue= (mixinVal, appValue) => {
    return mixinVal || appValue;
}

也可以把定义全局的mixin,这样所有组件都可以使用mixin里的东西, 组件里也不用mixins: [myMixin],引入了
app.mixin = {
    data: {
        return: {
            number: 1
        }
    }
}
2. directive 自定义指令
//平时 input标签初始化时就加焦点
const app = Vue.createApp({
    mounted(){
        this.$refs.input.focus();
    },
    template:'
    <input ref="input" />
    '
});

自定义指令
const app = Vue.createApp({
    template:'
    <input v-focus />
    '
});
app.directive('focus', mounted(el){
    el.focus();
});

//自定义指令动态控制dom
<style>
  .header { position: absolute}
</style>
<script>
  const app = Vue.createApp({
    data(){
      return {
        distance: 110
      }
    },
    template:
      '<div v-pos:nameabs="distance" class="header">' +
      '<input />' +
      '</div>'
  });
  app.directive("pos", (el, binding) => {
    console.log(binding.arg, binding.value);//nameabs  110
    el.style[binding.arg] = (binding.value + 'px');
  });
  const vm = app.mount('#root');
</script>
3. Vue3 teleport 传送门
将dom挂在到其他标签上,如自定义的hello或者body标签,下面是一个自定义蒙层的例子
<style>
    .area {
      position: absolute;
      left: 50%;
      top: 50%;
      transform: translate(-50%, -50%);
      width: 200px;
      height: 300px;
      background: green;
    }
    .mask {
      position: absolute;
      left: 0;
      right: 0;
      top: 0;
      bottom: 0;
      background: #000;
      opacity: 0.5;
      color: #fff;
      font-size: 100px;
    }
  </style>
<body>
  <div id="root"></div>
  <div id="hello"></div>
</body>
<script>
  // teleport 传送门
  const app = Vue.createApp({
    data() {
      return {
        show: false,
        message: 'hello'
      }
    },
    methods: {
      handleBtnClick() {
        this.show = !this.show;
      }
    },
    template: `
      <div class="area">
        <button @click="handleBtnClick">按钮</button>
        <teleport to="#hello">
          <div class="mask" v-show="show">{{message}}</div>
        </teleport>
      </div>
    `
  });

  const vm = app.mount('#root');
</script>
4. Vue 插件定义与使用
const myPlugin = {
    install(app, options){
        app.provide('name', 'dell');
        app.directive('focus', {
            mounted(el){
                el.focus();
            }
        })
    }
};
const app = Vue.createApp({
    template:'<testcomponent />'
});
app.component('testcomponent',
inject: ['name'],
 template:'<div>{{message}}</div>'
 );
 app.use('myPlugin', {name: 'dell'});//对应install参数app, options
5. 总结Xmind


 374
374


 被折叠的 条评论
为什么被折叠?
被折叠的 条评论
为什么被折叠?
 到【灌水乐园】发言


