


vue-cli3.0脚手架、业务常用、项目实现
一、vue-cli 3.0脚手架
nodejs 官网安装包下载安装
安装npm
npm install
全局安装webpack
npm install webpack -g
安装vue-cli脚手架
npm install --g vue-cli
选择淘宝镜像源
单次使用
$  npm install --registry=https://registry.npm.taobao.org
永久使用
$ npm config set registry https://registry.npm.taobao.org

检测是否修改成功
// 配置后可通过下面方式来验证是否成功
npm config get registry
// 或
npm info express
vue create demo 选择一些初始化参数(vue-router、vuex)来创建vue项目
创建完成编译器打开 执行 npm run serve就可以访问了
二、业务常用
1. Vuex 全局存储数据
在store包下的index.js里的state定义全局变量
-
修改全局变量步骤:
- 组件里调用$store.dispatch方法,派发一个action,名字叫做change
- 感知到change这个action,执行store 中actions下面的change
- commit提交一个叫做change 的数据改变
- mutation感知到提交的change改变,执行change方法改变数据
代码实例:
import { useStore } from 'vuex'

  const store = useStore()
  const cartList = store.state.cartList;
  const changeCartItemInfo = (shopId, productId, productInfo, num) => {
    store.commit('changeCartItemInfo', {
      shopId, productId, productInfo, num
    })
  }

store包下的index.js
import Vuex from 'vuex'

const setLocalCartList = (state) => {
  const { cartList } = state
  const cartListString = JSON.stringify(cartList)
  localStorage.cartList = cartListString
}

const getLocaCartList = () => {
  // { shopId: {shopName:'', productList:{ productId: {} }}}
  if (localStorage.cartList) {
    return JSON.parse(localStorage.cartList)
  }else {
    return {}
  }
}

export default Vuex.createStore({
  state: {
    cartList: getLocaCartList()
  },
  mutations: {
    changeCartItemInfo(state, payload) {
      const { shopId, productId, productInfo } = payload
      let shopInfo = state.cartList[shopId] || {
        shopName: '', productList:{}
      }
      let product = shopInfo.productList[productId]
      if(!product) {
        productInfo.count = 0
        product = productInfo
      }
      product.count = product.count + payload.num
      if(payload.num > 0) { product.check = true }
      if(product.count < 0) { product.count = 0 }
      shopInfo.productList[productId] = product
      state.cartList[shopId] = shopInfo
      setLocalCartList(state)
    },
  }
})
2. 数据交互
一般使用axios请求后台接口获取数据进行交互
代码实例:
import axios from 'axios'

const instance = axios.create({
  baseURL: 'https://www.fastmock.site/mock/6947fbc0d50c9290c6ce02664c69daa3/jingdong2',
  timeout: 10000
})

export const get = (url, params = {}) => {
  return new Promise((resolve, reject) => {
    instance.get(url, { params }).then((response) => {
      resolve(response.data)
    }, err => {
      reject(err)
    })
  })
}

export const post = (url, data = {}) => {
  return new Promise((resolve, reject) => {
    instance.post(url, data, {
      headers: {
        'Content-Type': 'application/json'
      }
    }).then((response) => {
      resolve(response.data)
    }, err => {
      reject(err)
    })
  })
}
京东项目到家项目使用实例:
    const handleLogin = async () => {
        try {
            const result = await post('/api/user/login', {
                username: data.username,
                password: data.password
            })
            localStorage.isLogin = true
            router.push({ name: 'Home' })
        } catch (e) {
            showToast('请求失败')
        }
    }
真实项目实例:
  queryArea: (params, success, error) => {//地区查询
    axios.get(`${base}/enrisingcomponentbms/through/Area/list/${params.code}`)
    .then(response => success(response)).catch(er => error(er));
  },
methods: {
      ...mapActions({
        queryArea:'queryArea',
        queryType:'queryType'
      }),
}
3. 路由
3.1 模板方式跳转
template模板,标签指定跳转页面
<router-link to="/login">Login</router-link>

router包下的index.js跳转
import { createRouter, createWebHashHistory } from 'vue-router'

const routes = [{
    path: '/',
    name: 'Home',
    component: () => import(/* webpackChunkName: "home" */ '../views/home/Home')
  },{
    path: '/login',
    name: 'Login',
    component: () => import(/* webpackChunkName: "login" */ '../views/login/Login'),
    beforeEnter(to, from, next) {
      const { isLogin } = localStorage;
      isLogin ? next({ name: 'Home'}):  next();
    }
  }
]

const router = createRouter({
  history: createWebHashHistory(),
  routes
})

router.beforeEach((to, from ,next) => {
  const { isLogin } = localStorage;
  const { name } = to;
  const isLoginOrRegister = (name === "Login" || name === "Register");
  (isLogin || isLoginOrRegister) ? next() : next({ name: 'Login'});
})

export default router
3.2 js方式跳转
import { useRouter } from 'vue-router'
const router = useRouter()
router.push({ name: 'OrderList' })
4. 项目包结构分析

三、项目实现
1. css技巧
1.1 父子标签相对与绝对定位
div的定位。父一般定义position:relative相对。子定义position:absolute绝对,left、right、bottom、top数值进行定位。position不与float一起用
小技巧:对于一些图标可以设置transform:rotate(180deg);
1.2 class里没有驼峰的概念,需要用-替代
例如div-content
外层div叫docker,内层最好是docker__item, docker__title。对于此同级div的样式命名docker__item–active。在编写css时就可用&符号使用
<div class="docker">
<div class="docker__item docker__item--active">
<div class="iconfont"></div>
<div class="docker__title">首页</div>
</div>
</div>
1.3 normalize.css插件
不同浏览器之间html可能不同,所以要安装normalize.css插件
安装完成后在main.js引入import 'normalize.css'
npm install --save normalize.css
1.4 图标样式
页面需要图标,引入阿里的图标样式。在style包下,main.js要引入通用样式
1.5 定义一个Toast消息框组件用于消息弹出
1.6 定义些通用的css文件作为scss文件被引入使用
颜色scss
$content-fontcolor: #333;

工具类css:例如文字超出按三个点显示
mixins.scss
@mixin ellipsis {
  overflow: hidden;
  white-space: nowrap;
  text-overflow: ellipsis;
}

组件使用通用scss
@import './style/viriables.scss';
@import './style/mixins.scss';

@include ellipsis; //@import './style/mixins.scss';
color: $content-fontcolor; //@import './style/viriables.scss';
1.7 div的flex布局
对于一个div,btns里的两个按钮btn平行居中等可以使用flex布局
&__btns {
  display: flex;
  margin: .24rem .58rem;
}
&__btn {
  flex: 1;
}
1.8 防止点击冒泡触发事件
点击一个下=上层div,不执行下层div方法:@click.stop
2. setup函数、方法抽离进行业务分离
setup函数里的数据尽量只有业务,把方法分离出去,运用reactive、Refs来包装和解析对象
3. anios进行数据交互
npm install axios --save
import axios from 'axios'

//定义axios请求访问的固定项目前缀地址
const instance = axios.create({
  baseURL: 'https://www.fastmock.site/mock/6947fbc0d50c9290c6ce02664c69daa3/jingdong2',
  timeout: 10000
}
可传递请求url的参数
const getContentData = async (tab) => {
  const result = await get(`/api/shop/${route.params.id}/products`, { tab: tab})
  if(result?.code === 200 && result?.data.length){
    data.contentList = result.data;
  }
}
4. 路由使用
4.1 route和router区别
useRoute是用来获取url参数的: const shopId = route.params.id
useRouter 是用来做路由跳转的: router.back()
4.2 路由懒加载
在路由中使用懒加载,提高首页加载速度
4.3 路由逻辑性强的跳转
路由逻辑性强的跳转,router-link标签去掉自动a标签的下划线
4.4 路由接受路径传参
<div class="check__btn">
  <router-link :to="{path: `/orderConfirmation/${shopId}`}">
    去结算
  </router-link>
</div>

{
  path: '/orderConfirmation/:id',
  name: 'OrderConfirmation',
  component: () => import(
  /* webpackChunkName: "orderConfirmation" */
  '../views/orderConfirmation/OrderConfirmation')
},
5. watchEffect
watchEffect可定义一个监听某个方法执行或变化的行为
watchEffect(() => {
      getContentData(tab)
    })
6. 全局存储
对与购物车数据可以存到全局存储里,防止刷新消失。
- 全局存储要有合理的数据结构
- 数据的获取方式
{{cartList?.[shopId]?.[item._id]?.count || 0 }}
- 数据的改变
store.commit('addItemToCart', { shopId, productId, productInfo })
addItemToCart(state, payload) {
      const { shopId, productId, productInfo } = payload;
state.cartList[shopId] = shopInfo;
    }
- 对于全局变量的get/set
const setLocalCartList = (state) => {
  const { cartList } = state
  const cartListString = JSON.stringify(cartList)
  localStorage.cartList = cartListString
}

const getLocaCartList = () => {
  // { shopId: {shopName:'', productList:{ productId: {} }}}
  if (localStorage.cartList) {
    return JSON.parse(localStorage.cartList)
  }else {
    return {}
  }
}
7. 数值的边界值判断
商品数量不能为负数
数量商品上限
秒杀数量
数值取到小数点后两位:price.toFixed(2)
8. 利用计算属性作为 状态 判断
全选按钮是否勾选:可以通过一个计算属性allChecked判断
v-html="allChecked ? '' : ''
9. 发布与调试
9.1 调试手机上看页面
把手机和电脑处于同一局域网,手机访问网址就可以看到真正的手机访问效果,然后做一些适配改变
9.2 不同机型适配
public包下index.html的head标签下加
<script>
var width = document.documentElement.clientWidth || docum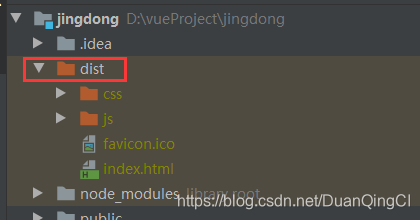
ent.body.clientWidth;
var ratio = width / 375;
var fontSize = 100 * ratio;
document.getElementsByTagName('html')[0].style['font-size'] = fontSize + 'px';
</script>
9.3 前端发布上线
// 1. npm run build 打包代码
// 这样index.html文件内的css和js地址才能正确映射linux上的地址
module.exports = {
  publicPath: './'
}
把dist项目目录放入服务器目录

nginx配置访问静态index.html

http://47.118.60.214:8080/ 即可访问


 6100
6100


 被折叠的 条评论
为什么被折叠?
被折叠的 条评论
为什么被折叠?
 到【灌水乐园】发言


