


🔒文章目录:
10.TreeSet和HashSet的本质+TreeSet和HashSet的区别
1.❤️❤️前言~🥳🎉🎉🎉
Hello, Hello~ 亲爱的朋友们👋👋,这里是E绵绵呀✍️✍️。
如果你喜欢这篇文章,请别吝啬你的点赞❤️❤️和收藏📖📖。如果你对我的内容感兴趣,记得关注我👀👀以便不错过每一篇精彩。
当然,如果在阅读中发现任何问题或疑问,我非常欢迎你在评论区留言指正🗨️🗨️。让我们共同努力,一起进步!
加油,一起CHIN UP!💪💪
🔗个人主页:E绵绵的博客
📚所属专栏:1. JAVA知识点专栏
深入探索JAVA的核心概念与技术细节
2.JAVA题目练习
实战演练,巩固JAVA编程技能
3.c语言知识点专栏
揭示c语言的底层逻辑与高级特性
4.c语言题目练习
挑战自我,提升c语言编程能力
📘 持续更新中,敬请期待❤️❤️

这篇文章就给大家带来map和set的详细讲解,同时还会讲解搜索树和哈希表的概念,超级详细,uu们可以认真观看下~

2. Map和Set的基础概念
Map和Set是一种专门用来进行搜索的容器或者数据结构,它的搜索效率与其具体的实例化例子有关。
Map和Set是动态查找相比较与静态查找(比如直接查找。二分查找等),其优点是可以在查找过程中对区间进行一些插入和删除的操作。
一般把搜索的数据称为关键字(Key),把关键字对应的称为值(Value),将其称为Key-value的键值对,一般模型有两种:
1. 纯 key 模型:Set中存储的就是key
比如查找 某本书中是否有一个名词
2. Key-Value模型:Map中存储的就是key-value的键值对
比如统计 某本书中某几个名词出现的次数
下面我们展示下在集合框架中的Map和Set
这里我们可知map和set都是接口,实例化对象可以是HashMap和TreeSet(HashMap和HashSet),那么肯定会有人有疑问了?它们两有什么区别呢?别急,它们本质是不同的,区别很大,待我后面叙叙道来~

3.Map的基础使用
Map是一个接口类,该类没有继承自Collection,该类中存储的是结构的键值对,并且K一定是唯一的,不能重复。
以下是Map的常用方法:
这里需要注意一些点:
1.Map是一个接口,不能直接实例化对象,如果要实例化对象只能实例化其实现类TreeMap或者HashMap,它们两存在区别,后面会讲~。
2. Map中存放键值对的Key是唯一的,value是可以重复的,所以用put放入同样的key,那就会覆盖之前的key的value。
3. get能够将put放入的key和Value都打印出来,如果没有就打印null,
getOrDefault能够能够设置一个默认的key的value,如果之前没有put这个默认的key,那就打印出这个key和设置的value
4.在TreeMap中插入键值对时,key不能为空,否则就会抛NullPointerException异常,value可以为空。但是HashMap的key和value都可以为空。关于这点可能大家现在还理解不了,等到这篇文章后面讲述它们的本质时大家就会懂了
5. Map中的Key可以通过keySet全部分离出来,存储到Set中来进行访问(因为Key不能重复)。
6. Map中的value可以通过values全部分离出来,存储在Collection的任何一个子集合中(value可能有重复)。
7. Map中键值对的Key不能直接修改,value可以修改,如果要修改key,只能先将该key删除掉,然后再来进行重新插入。
8.Map里面重写了toString,所以用println直接打印map,可以打印出其内部的内容。
9.在这些方法中,entrySet是个很重要的方法,Set<Map.Entry<K, V>> entrySet() 返回所有的 key-value 映射关系,Entry是Map接口中的内部接口,所以才用Map.Entry<k,v>表示,
Map.Entry 作为Map内部实现的用来存放键值对映射关系的内部接口,该内部接口中主要提供了key 的获取,value的获取,value的设置。
注意这个知识点很重要,以后做题时可能都会用到。


以下是Map的基础使用代码,还请认真观看:
public class Test1 {


    public static void main(String[] args) {
        Map<String, Integer> map = new TreeMap();
        map.put("key", 25);
        System.out.println(map.get("key"));
        System.out.println(map.getOrDefault("key", 15));
        map.put("key", 35);
        System.out.println(map.get("key"));
        System.out.println(map.getOrDefault("key", 15));
        map.remove("key");
        System.out.println(map.get("key"));
        System.out.println(map.getOrDefault("key", 15));
        map.put("a", 3);
        map.put("b", 4);
        map.put("c", 5);
        map.put("d", 6);
        map.put("e", 7);
        map.put("f", 7);
        map.put("g", 6);
        Set<String> set = map.keySet();
        System.out.println(set);
        Collection<Integer> collection = map.values();
        System.out.println(collection);
        System.out.println(map);
        System.out.println(map.containsKey("e"));
        System.out.println(map.containsValue(6));
        Set<Map.Entry<String, Integer>> set1 = map.entrySet();

        for (Map.Entry<String,Integer> entry:set1){
            entry.setValue(10);
            System.out.print(entry.getKey() + " " + entry.getValue());
            System.out.println();
        }
       //  map.put(null,null); 报错
        Map<String, Integer> map1 = new HashMap();
        map1.put(null, null);

    }
}

4.Set的基础使用
Set与Map主要的不同有两点:Set是继承自Collection的接口类,Set中只存储了Key。
以下是Set的常用方法:

注意:
1. Set是继承自Collection的一个接口类
2. Set中只存储了key,并且要求key一定要唯一
3. Set最大的功能就是对集合中的元素进行去重
4. 实现Set接口的常用类有TreeSet和HashSet
5. Set中的Key不能修改,如果要修改,先将原来的删除掉,然后再重新插入
6. TreeSet中不能插入null的key,HashSet可以,之所以这样,后面讲到其本质时会讲到。
对于这些方法都很简单,我们就不一一讲述了,直接上其方法的使用代码:
public class Test2 {


    public static void main(String[] args) {
        Set<String> set = new TreeSet();
        set.add("a");
        set.add("b");
        set.add("c");
        set.add("d");
        set.add("e");
        set.add("f");
        set.add("g");
        System.out.println(set.size());
        System.out.println(set.isEmpty());
        set.remove("a");
        System.out.println(set.contains("b"));
        System.out.println(set);
        ArrayList<String> arrayList = new ArrayList();
        arrayList.add("k");
        arrayList.add("t");
        arrayList.add("t");
        arrayList.add("t");
        arrayList.add("t");
        System.out.println(set.containsAll(arrayList));
        set.addAll(arrayList);
        System.out.println(set);
        set.clear();
        System.out.println(set);
        //set.add(null);报错
        Set<String> set1 = new HashSet();
        set1.add(null);
    }
}
5. TreeMap的本质——红黑树
下面我们要了解红黑树就要先了解二叉搜索树这个概念,因为准确来说红黑树是一颗高级的二叉搜索树。
5.1二叉搜索树的概念
二叉搜索树(又叫二叉排序树)它或者是一棵空树,或者是具有下列性质的二叉树:
(1) 若它的左子树不空,则左子树上所有结点的值均小于它的根节点的值;
(2)若它的右子树不空,则右子树上所有结点的值均大于它的根结点的值;
(3)它的左、右子树也分别为二叉搜索树。
二叉搜索树作为一种经典的数据结构,它既有链表的快速插入与删除操作的特点,又有数组快速查找的优势。主要用于在文件系统和数据库系统中一般会采用这种数据结构进行高效率的排序与检索操作。
并且在二叉搜索树给它进行中序遍历他是顺序递增的。

为了对二叉搜索树有更加深刻的认识,我们等会会对其进行模拟一颗二叉搜索树。
5.2二叉搜索树的模拟实现
先根据二叉搜索树写出它的结构
public class SearchTree {

    class Node{
        int value;
        Node left;
        Node right;

        public Node(int value) {
            this.value = value;
        }
    }
        Node  root;
接着我们模拟其二叉搜索树的各个方法。
二叉搜索树——查找
根据这图我们能设计出以下代码:
//搜索树的查找
    public  boolean search(int key){
        Node cur=root;
        while(cur!=null){
            if(cur!=null&&cur.value>key)
                cur=cur.left;
            if (cur!=null&&cur.value<key)
                cur=cur.right;
            if(cur!=null&&cur.value==key)
                return  true;
        }
        return  false;
    }

二叉搜索树——添加
根据这图我们能设计出以下代码:
    //搜索树的添加
       public  void  add(int key){
         Node cur=root;
         if(cur==null) {
             root = new Node(key);
             return;
         }
         Node parent=null;
         while(cur!=null){
             parent=cur;
             if(cur!=null&&cur.value>key)
                 cur=cur.left;
             if (cur!=null&&cur.value<key)
                 cur=cur.right;
         }
           if(parent.value>key)
               parent.left=new Node(key);
           if (parent.value<key)
               parent.right=new Node(key);
       }

二叉搜索树——删除
这个比较复杂,分为三种情况。
设待删除结点为 cur,其中有两个双亲结点。
(1)要删除结点如果一边为null,一边不为null的情况
(2)下面分析一下,两边都不为空的情况
需要使用替换法进行删除。
替换法的核心是:找到删除节点左子树中的最大值(即子树中的最右节点,这个节点一定没有右右子树),或者删除节点右子树中的最小值(即子树中的最左节点,这个节点一定没有左子树),用它的值填补到被删除节点中,再来处理该结点的删除问题。
以下讲解使用替换删除节点右子树的最小节点:
首先找到最小节点tmp,以及最小节点的父亲tmpPrev,如图所示结构,紧着cur.val = tmp.val替换值,然后删除tmp节点,删除步骤如图所示,即tmpPrev.left = tmp.right。
值得注意的是,有一种情况会被忽略,即当cur.right 节点无左子树时,此时tmpPrev仍然是cur,而tmp即为cur.right,此时删除tmp节点的步骤就变为了tmpPrev.right = tmp.right


所以根据这种思路可以设计出以下代码
 //搜索树的删除
    public boolean remove(int key){
        Node cur=root;
        Node parent=null;
        while(cur!=null){
            if(cur!=null&&cur.value>key){
                parent=cur;
                cur=cur.left;
            }
            if (cur!=null&&cur.value<key){
              parent=cur;
                cur=cur.right;
            }
            if (cur!=null&&cur.value==key)
                break;
        }
        if (cur==null)
            return  false;
     if(cur.left==null){
         if(root==cur)
            root=root.right;
         if(parent.right==cur)
             parent.right=cur.right;
         if (parent.left==cur)
             parent.left=cur.right;
         return true;
     }
        if(cur.right==null){
            if(root==cur)
                root=root.left;
            if(parent.right==cur)
                parent.right=cur.left;
            if (parent.left==cur)
                parent.left=cur.left;
            return true;
        }
        if(cur.right!=null&&cur.left!=null){
            Node minParentParent=null;
            Node min=cur.right;
            Node minParent=cur;
            while(min!=null){
                minParentParent=minParent;
                minParent=min;
                min=min.left;
            }
            int tmp=minParent.value;
            minParent.value=cur.value;
            cur.value=tmp;
            if(minParent==minParentParent.right)
                minParentParent.right=minParent.right;
            else
                minParentParent.left=minParent.right;
        }
        return  true;
    }
}
总代码及测试
public class SearchTree {

    class Node{
        int value;
        Node left;
        Node right;

        public Node(int value) {
            this.value = value;
        }
    }
        Node  root;
  //搜索树的查找
    public  boolean search(int key){
        Node cur=root;
        while(cur!=null){
            if(cur!=null&&cur.value>key)
                cur=cur.left;
            if (cur!=null&&cur.value<key)
                cur=cur.right;
            if(cur!=null&&cur.value==key)
                return  true;
        }
        return  false;
    }
    //搜索树的添加
       public  void  add(int key){
         Node cur=root;
         if(cur==null) {
             root = new Node(key);
             return;
         }
         Node parent=null;
         while(cur!=null){
             parent=cur;
             if(cur!=null&&cur.value>key)
                 cur=cur.left;
             if (cur!=null&&cur.value<key)
                 cur=cur.right;
         }
           if(parent.value>key)
               parent.left=new Node(key);
           if (parent.value<key)
               parent.right=new Node(key);
       }
     //搜索树的删除
    public boolean remove(int key){
        Node cur=root;
        Node parent=null;
        while(cur!=null){
            if(cur!=null&&cur.value>key){
                parent=cur;
                cur=cur.left;
            }
            if (cur!=null&&cur.value<key){
              parent=cur;
                cur=cur.right;
            }
            if (cur!=null&&cur.value==key)
                break;
        }
        if (cur==null)
            return  false;
     if(cur.left==null){
         if(root==cur)
            root=root.right;
         if(parent.right==cur)
             parent.right=cur.right;
         if (parent.left==cur)
             parent.left=cur.right;
         return true;
     }
        if(cur.right==null){
            if(root==cur)
                root=root.left;
            if(parent.right==cur)
                parent.right=cur.left;
            if (parent.left==cur)
                parent.left=cur.left;
            return true;
        }
        if(cur.right!=null&&cur.left!=null){
            Node minParentParent=null;
            Node min=cur.right;
            Node minParent=cur;
            while(min!=null){
                minParentParent=minParent;
                minParent=min;
                min=min.left;
            }
            int tmp=minParent.value;
            minParent.value=cur.value;
            cur.value=tmp;
            if(minParent==minParentParent.right)
                minParentParent.right=minParent.right;
            else
                minParentParent.left=minParent.right;
        }
        return  true;
    }
}
public class Test { public static void main(String[] args) { SearchTree searchTree=new SearchTree(); searchTree.add(10); searchTree.add(13); searchTree.add(12); searchTree.add(11); searchTree.add(2); searchTree.add(6); searchTree.add(1); searchTree.add(8); searchTree.add(5); searchTree.remove(11); searchTree.remove(1); searchTree.remove(13); searchTree.remove(6); searchTree.remove(2); searchTree.remove(8); System.out.println(searchTree.search(11)); System.out.println(searchTree.search(12)); System.out.println(searchTree.search(13)); System.out.println(searchTree.search(10)); System.out.println(searchTree.search(15)); System.out.println(searchTree.search(1)); System.out.println(searchTree.search(6)); System.out.println(searchTree.search(2)); System.out.println(searchTree.search(8)); System.out.println(searchTree.search(5)); } }

5.3 二叉搜索树的性能分析
插入和删除操作都必须先查找,查找效率代表了二叉搜索树中各个操作的性能。
对有n个结点的二叉搜索树,若每个元素查找的概率相等,则二叉搜索树平均查找长度是结点在二叉搜索树的深度的函数,即结点越深,则比较次数越多。比较次数越多证明其效率越低
所以
最优情况下,二叉搜索树为完全二叉树,其平均比较次数为:
最差情况下,二叉搜索树退化为单支树,其平均比较次数为:
所以如果退化成单支树,二叉搜索树的性能就失去了,而为了改进这一缺陷,就有了AVL树。
AVL树是最先发明的自平衡二叉搜索树。在AVL树中任何节点的两个子树的高度最大差别为1,所以它也被称为高度平衡树。增加和删除可能需要通过一次或多次树旋转来重新平衡这个树。
本篇博客的重点不在AVL树上,因此不对AVL树进行展开讲解,可自行搜索了解。

虽然AVL树已经很高效了,但因为AVL树的翻转会经历很多次,还是比较麻烦,所以我们可以使其变的更高效,那就是添加一些额外的颜色标记规则,即每个节点被标记为红色或黑色,这样翻转也就少了很多次,更加高效了,而这样的树就叫红黑树。
我们的TreeMap本质上就是红黑树
5.4TreeMap的本质——红黑树
对于红黑树如何模拟实现以及一些其他更多的细节,这里我们就不过多讲述,后面的文章会细讲。你现在只要知道TreeMap本质是红黑树就行。
因为本质是红黑树(二叉搜索树),在进行查找、插入和删除操作时,会对Map中的key类进行compareTo比较,从而确定新元素应该插入到哪个位置,使其更加高效。
所以这样就带来一个问题,如果一个key类没有重写compareTo方法(没实施comparable接口)就直接想要添加到TreeMap中,那就会报错,因为无法进行比较。所以我们的key类一定要实施comparable接口,重写compareTo方法,这样才能正常进行。(对于包装类像String,Integer都自动实施了comparable接口,无需担心,我们要担心的往往都是自定义类)
这也就能解释TreeMap为什么输入key为null的数据时会报错,因为null跟其他类根本比较不了,所以会直接报错。而HashMap本质为哈希桶,无需比较,所以可以输入key为null的数据。
6.TreeMap的高阶使用
那么在讲清楚本质后,我们就带来TreeMap的高阶使用——当Map中的key为自定义类时我们去操作TreeMap的代码演示:
//TreeMap的高阶使用,对于TreeSet的高阶使用也是如此,这里就不展示代码了
public class Test2 {

    public static void main(String[] args) {
        Map<Student1,Integer> map=new TreeMap<>();
        map.put(new Student1("123","456"),25);
        map.put(new Student1("125","457"),30);
        map.put(new Student1("123","456"),80);
        map.put(new Student1("129","457"),30);
        System.out.println(map.get(new Student1("123", "524")));
        map.remove(new Student1("123","25"));
        System.out.println(map.get(new Student1("123", "524")));
        System.out.println(map.get(new Student1("129", "524")));
        System.out.println(map.containsKey(new Student1("125", "524")));
    }
}


class  Student1 implements Comparable<Student1>{
    String id;
    String name;

    public Student1(String name, String id) {
        this.name = name;
        this.id = id;
    }

    @Override
    public int compareTo(Student1 o) {
        return  o.name.compareTo(this.name);
    }
}

7.HashMap的本质——哈希桶
下面我们要知道哈希桶这个概念前要先知道哈希表这个概念。
7.1哈希表的概念
顺序结构以及平衡树中,元素关键码与其存储位置之间没有对应的关系,因此在查找一个元素时,必须要经过关键码的多次比较。顺序查找时间复杂度为O(N),平衡树中为树的高度,即O( ),搜索的效率取决于搜索过程中元素的比较次数。
理想的搜索方法:可以不经过任何比较,一次直接从表中得到要搜索的元素。 如果构造一种存储结构,通过某种函数(hashFunc)使元素的存储位置与它的关键码之间能够建立一一映射的关系,那么在查找时通过该函数可以很快找到该元素。
当向该结构中:
插入元素:
根据待插入元素的关键码,以此函数计算出该元素的存储位置并按此位置进行存放
搜索元素:
对元素的关键码进行同样的计算,把求得的函数值当做元素的存储位置,在结构中按此位置取元素比较,若 关键码相等,则搜索成功
该方式即为哈希方法,哈希方法中使用的转换函数称为哈希函数,构造出来的结构称为哈希表
例如:数据集合{1,7,6,4,5,9); 哈希函数设置为:hash(key) = key % capacity; capacity为存储元素底层空间总的大小。
我们发现,用该方法进行搜索不必进行多次关键码的比较,因此搜索的速度比较快

那么现在出现了个问题:按照上述哈希方式,向集合中插入元素44,会出现什么问题?
会发生哈希冲突~
7.2哈希冲突的概念
对于两个数据元素的关键字
和
(i != j),有
这个现象是很不好的,往往会影响效率甚至结果。
7.3哈希冲突的避免
那我们应该怎么避免哈希冲突呢?
首先,我们需要明确一点,由于我们哈希表底层数组的容量往往是小于实际要存储的关键字的数量的,这就导致一个问题,冲突的发生是必然的,但我们能做的应该是尽量的降低冲突率。
哈希冲突的避免——哈希函数设计
引起哈希冲突的一个原因可能是:哈希函数设计不够合理。
哈希函数设计原则:
1.哈希函数的定义域必须包括需要存储的全部关键码,而如果散列表允许有m个地址时,其值域必须在0到m-1 之间
2.哈希函数计算出来的地址能均匀分布在整个空间中
3.哈希函数应该比较简单
常见哈希函数:
1. 直接定制法--(常用) 取关键字的某个线性函数为散列地址:Hash(Key)= A*Key + B
优点:简单,均匀
缺点:需要事先知道关键字的分布情况
使用场景:适合查找比较小且连续的情况
2. 除留余数法(常用) 设散列表中允许的地址数为m,取一个不大于m,但最接近或者等于m的质数p作为除数,按照哈希函数: Hash(key) = key% p(p<=m),将关键码转换成哈希地址。(注意这个是我们最常用的哈希函数法)除此之外还有平方取中法, 折叠法, 随机数法, 数学分析法,这些方法都不常用,可以自行去网上了解一下,这里就不多说了
注意:哈希函数设计的越精妙,产生哈希冲突的可能性就越低,但是无法避免哈希冲突
哈希冲突的避免——负载因子调节
负载因子和冲突率的关系粗略演示:
所以当冲突率达到一个无法忍受的程度时,我们需要通过降低负载因子来变相的降低冲突率。 已知哈希表中已有的关键字个数是不可变的,那我们能调整的就只有哈希表中的数组的大小。所以一般当负载因子(填入表中的个数/数组的长度)大于等于0.75时,我们就会将哈希表中的数组扩容,并把之前已经填入表中的数再次全部重新填入扩容后的数组中。


7.4哈希冲突的解决
解决哈希冲突两种常见的方法是:闭散列和开散列(我们又常把开散列叫成哈希桶)
哈希冲突的解决——闭散列
闭散列:也叫开放定址法,当发生哈希冲突时,如果哈希表未被装满,说明在哈希表中必然还有空位置,那么可以把key存放到冲突位置中的“下一个” 空位置中去。那如何寻找下一个空位置呢?
1. 线性探测
比如上面的场景,现在需要插入元素44,先通过哈希函数计算哈希地址,下标为4,因此44理论上应该插在该位置,但是该位置已经放了值为4的元素,即发生哈希冲突。
线性探测:从发生冲突的位置开始,依次向后探测,直到寻找到下一个空位置为止。
采用闭散列处理哈希冲突时,不能随便物理删除哈希表中已有的元素,若直接删除元素会影响其他 元素的搜索。比如删除元素4,如果直接删除掉,44查找起来可能会受影响。因此线性探测采用标 记的伪删除法来删除一个元素。

2. 二次探测
总而言之,二次探测就是将线性探测每次向后探测的步长由 1 步,变为 index + 1*1、index + 2*2、index + 3*3、index + 4*4 … 依次增加,直到找到未被占用的地方为止.


研究表明:当表的长度为质数且表装载因子a不超过0.5时,新的表项一定能够插入,而且任何一个位置都不会被探查两次。因此只要表中有一半的空位置,就不会存在表满的问题。在搜索时可以不考虑表装满的情况,但在插入时必须确保表的装载因子a不超过0.5,如果超出必须考虑增容。
因此闭散列最大的缺陷就是空间利用率比较低,而下面我们要讲的第二种方法:哈希桶(开散列)相比于闭散列更加完美,所以哈希桶是我们必须要重点掌握的方法。
哈希冲突的解决——哈希桶(开散列)
开散列法又叫链地址法(开链法),首先对关键码集合用散列函数计算散列地址,具有相同地址的关键码归于同一子集合,每一个子集合称为一个桶,各个桶中的元素通过一个单链表链接起来,各链表的头结点存储在哈希表中。
以下是哈希桶的特点
1.哈希桶由数组+链表+红黑树组成。
一般正常情况下是数组+链表,当链表的长度大于等于64的情况时,链表就会转化为红黑树,因为链表越长就会导致查询越慢,而红黑树恰好解决这一问题。而如果不存在链表的长度大于等于64的情况时,那又会变回来,变为数组+链表。
2.当哈希桶的负载因子(填入表中的个数/数组的长度)大于等于0.75时,会对数组自动进行扩容,把之前已经填入表中的数再次全部重新填入扩容后的数组中。
3.链表中的插入是用尾插法进行的,相比头插法更高效,安全
知道哈希桶以上特点,我们就自己模拟一个简易的哈希桶去实现map的一些功能。
7.5模拟一个简易的哈希桶实现map一些功能
我们需要模拟的哈希桶如上,其key属于int类型,通过key%capacity去得到对应的哈希值(地址位置)。这是其核心纲领,话不多说开始模拟吧~

在写哈希桶的每个方法之前我们要把准备工作做好,代码如下:
public class HashBucket {
    public Node[] array = new Node[10];
    public final double bound = 0.75;
    public int size;

    static class Node {
        int key;
        int value;
        Node next;

        public Node(int key, int value) {
            this.value = value;
            this.key = key;
        }
    }
插入
以下为其步骤:
定义索引(index): 使用取模运算符
%计算给定键值(key)对数组长度的索引,以便将元素插入到正确的存储位置。遍历链表: 初始化当前节点
cur为该索引处的元素。如果链表不为空,就遍历链表直到找到对应的键或者到达链表的末尾。a. 如果找到匹配的键,则更新其值(value),并增加大小(size),然后跳出循环。
b. 如果遇到空节点(
cur.next == null),说明链表结束,添加新节点并将size加一,然后也跳出循环。如果整个链表为空,就直接添加新节点,并增加size。
扩容检查: 当哈希表接近满载(这里设置的阈值为0.75),触发resize()方法,扩容数组从而降低负载因子。
public void put(int key, int value) {
        int index = key % this.array.length;
        Node cur;
        for(cur = this.array[index]; cur != null; cur = cur.next) {
            if (cur.key == key) {
                cur.value = value;
                break;
            }

            if (cur.next == null) {
                cur.next = new Node(key, value);
                size++;
                break;
            }
        }

        if (cur == null) {
            this.array[index] = new Node(key, value);
            size++;
        }

        if (size * 1.0 / array.length >= 0.75) {
            this.resize();
        }

    }
扩容
注意resize的一些扩容细节:
扩容后数组的长度会变为原本的两倍,因此其中每个key值根据新的哈希函数的计算结果跟原来的计算结果可能会不同,所以它们要全部重新填入到新的数组中,在填入完后,新的数组的引用要赋值给旧的数组的引用。
 public void resize() {
        Node[] arrayNew = new Node[2 * this.array.length];
        Node tmp=null;
        for(int i = 0; i < this.array.length; ++i) {
            for(Node node = this.array[i]; node != null; node = tmp) {
                int newIndex = node.key % arrayNew.length;
                Node newCur=null;
                for(newCur = arrayNew[newIndex]; newCur != null; newCur = newCur.next) {
                    if (newCur.next == null) {
                        newCur.next = node;
                        break;
                    }
                }

                if (newCur == null) {
                    arrayNew[newIndex] = node;
                }

                tmp = node.next;
                node.next = null;
            }
        }

        this.array = arrayNew;
    }
查找
- 首先计算键
key对数组长度取模的结果,作为在数组中查找的起始位置。- 接着,进入一个循环,从当前位置
this.array[index]开始,逐个检查链表中的节点。- 如果找到一个节点,其键等于给定的
key,那么就返回对应的value值。- 如果遍历完整个链表都没有找到匹配的键,说明该键不存在于当前哈希表中,此时就打印一条消息“找不到对应的数”,并返回
-1表示请求的键未找到。
   public int get(int key) {
        int index = key % this.array.length;
        for(Node cur = this.array[index]; cur != null; cur = cur.next) {
            if (cur.key == key) {
                return cur.value;
            }
        }

        System.out.println("找不到对应的数");
        return -1;
    }
总代码及测试
public class HashBucket {
    public Node[] array = new Node[10];
    public final double bound = 0.75;
    public int size;

    static class Node {
        int key;
        int value;
        Node next;

        public Node(int key, int value) {
            this.value = value;
            this.key = key;
        }
    }

    public void put(int key, int value) {
        int index = key % this.array.length;
        Node cur;
        for(cur = this.array[index]; cur != null; cur = cur.next) {
            if (cur.key == key) {
                cur.value = value;
                break;
            }

            if (cur.next == null) {
                cur.next = new Node(key, value);
                size++;
                break;
            }
        }

        if (cur == null) {
            this.array[index] = new Node(key, value);
            size++;
        }

        if (size * 1.0 / array.length >= 0.75) {
            this.resize();
        }

    }

    public void resize() {
        Node[] arrayNew = new Node[2 * this.array.length];
        Node tmp=null;
        for(int i = 0; i < this.array.length; ++i) {
            for(Node node = this.array[i]; node != null; node = tmp) {
                int newIndex = node.key % arrayNew.length;
                Node newCur=null;
                for(newCur = arrayNew[newIndex]; newCur != null; newCur = newCur.next) {
                    if (newCur.next == null) {
                        newCur.next = node;
                        break;
                    }
                }

                if (newCur == null) {
                    arrayNew[newIndex] = node;
                }

                tmp = node.next;
                node.next = null;
            }
        }

        this.array = arrayNew;
    }

    public int get(int key) {
        int index = key % this.array.length;
        for(Node cur = this.array[index]; cur != null; cur = cur.next) {
            if (cur.key == key) {
                return cur.value;
            }
        }

        System.out.println("找不到对应的数");
        return -1;
    }


}
public class Test {
public static void main(String[] args) {
HashBucket hashBucket = new HashBucket();
hashBucket.put(10, 10);
hashBucket.put(20, 5);
hashBucket.put(30, 15);
hashBucket.put(40, 25);
hashBucket.put(50, 35);
hashBucket.put(60, 45);
hashBucket.put(70, 55);
hashBucket.put(80, 65);
hashBucket.put(43, 61);
hashBucket.put(67, 32);
System.out.println(hashBucket.get(43));
System.out.println(hashBucket.get(50));
System.out.println(hashBucket.get(67));
System.out.println(hashBucket.get(70));
}
}
7.6 hashCode方法和equals方法
在模拟了一个简易的哈希桶后,我们就有个疑问了:
既然哈希值(地址位置)是整数,那么当我们的key类不为整形类时,为String类或自定义类等一些其他类,那么怎么确定key类的哈希值(地址位置)?
为了解决这个问题,Object类就存在一个hashCode方法,它能返回一个基本类型的整数作为类的哈希值(地址位置),下面我们直接看下代码及测试结果。
public class Test {
    public static void main(String[] args) {
        Student student1=new Student(10);
        Student student2=new Student(10);
        System.out.println(student1.hashCode());
        System.out.println(student2.hashCode());
    }
}
class Student{
    int a;

    public Student(int a) {
        this.a = a;
    }
}
由上我们发现在object类中的hashcode求出的哈希值是根据对象的地址去得出的,而这样我们往往很难定位到对象,所以一般情况下我们都会将hashCode重写,使哈希值依据对象的某个成员值去得出,这样能更加精确定位出对象。
这里我们的hashCode重写在idea中是可以用快捷键快速生成的,如下是一个例子:
随后我们可以选择哈希值以该类的什么成员为依据得出值,这里我们选择成员b为依据对象(当然也可以全选,不过全选后只有当a和b的值都全部相等哈希值才能相等)
public class Test {
    public static void main(String[] args) {
        Student student1=new Student(10,25);
        Student student2=new Student(30,25);
        System.out.println(student1.hashCode());
        System.out.println(student2.hashCode());
    }
}
class Student{
    int a;
    int b;
    public Student(int a,int b) {
        this.a = a;
        this.b=b;
    }

    @Override
    public boolean equals(Object o) {
        if (this == o) return true;
        if (o == null || getClass() != o.getClass()) return false;
        Student student = (Student) o;
        return b == student.b;
    }

    @Override
    public int hashCode() {
        return Objects.hashCode(b);
    }
}
所以我们现在就能搞清楚hashcode的机制了,那这里又有个疑问,在快捷键中hashcode为什么和equals是一块生成的,两者为什么有联系?
我们之前也模拟过哈希桶实现map的一些功能(HashMap的主旨思想跟其类似),其中不但会进行哈希值(地址位置)的生成,还会对key类进行比较判断是否相等。计算哈希值是调用的类的hashCode 方法,进行 key 的相等性比较是调用 key的equals方法,所以就需要对hashcode和equals都进行重写,并且还需注意hashcode所依据的类的成员必须跟equals所依据的类的成员一致,这样才不会对结果产生干扰。所以在快捷键中它们是一块生成的~


往往需要重写hashCode和equals的是自定义类,包装类如String类已经给hashcode和equals重写好了
7.7 HashMap的模拟实现(该哈希桶可存放任意类型)
那么在了解完上面的知识点之后,我们就能模拟出一个HashMap出来,这跟我们之前模拟的一个简易哈希桶不同,我们接下来要模拟的HashMap适用于任何类,而之前的那个哈希桶只是针对于int类型,较为简单,这个偏复杂,可存放任意类型。
这里的思路跟之前简易哈希桶的模拟一样,就不多说了,代码如下。
public class HashBucket<k,v> {
    public Node[] array = new Node[10];
    public final double bound = 0.75;
    public int size;

    static class Node<k,v> {
        k key;
        v value;
        Node next;

        public Node(k key, v value) {
            this.value = value;
            this.key = key;
        }
    }

    public void put(k key, v value) {
            int  key1=  key.hashCode();
        int index = key1 % this.array.length;
        Node cur;
        for(cur = this.array[index]; cur != null; cur = cur.next) {
            if (cur.key.equals(key) ) {
                cur.value = value;
                break;
            }

            if (cur.next == null) {
                cur.next = new Node(key, value);
                size++;
                break;
            }
        }

        if (cur == null) {
            this.array[index] = new Node(key, value);
            size++;
        }

        if (size * 1.0 / array.length >= 0.75) {
            this.resize();
        }

    }

    public void resize() {
        Node[] arrayNew = new Node[2 * this.array.length];
        Node tmp=null;
        for(int i = 0; i < this.array.length; ++i) {
            for(Node node = this.array[i]; node != null; node = tmp) {
                   int key1= node.key.hashCode();
                int newIndex = key1 % arrayNew.length;
                Node newCur=null;
                for(newCur = arrayNew[newIndex]; newCur != null; newCur = newCur.next) {
                    if (newCur.next == null) {
                        newCur.next = node;
                        break;
                    }
                }

                if (newCur == null) {
                    arrayNew[newIndex] = node;
                }

                tmp = node.next;
                node.next = null;
            }
        }

        this.array = arrayNew;
    }

    public Object get(k key) {
        int key1=key.hashCode();
        int index = key1 % this.array.length;
        for(Node cur = this.array[index]; cur != null; cur = cur.next) {
            if (cur.key.equals(key)) {
                return cur.value;
            }
        }

        return  null;
    }


}
但我们还是要多说三个点:
1.这里由于要适用任意类型,所以用到了泛型,更复杂了。
2.由于它适用任意类型,所以在求哈希值时我们都是用hashCode求,并不像之前简易的哈希桶因为只存放int类型,所以可以不用hashcode就能求哈希值。
3.之前的模拟因为是存放int类型,所以判断key相等时它们用==号就行;而我们是判断类是否相等,所以必须用equals。
我们现在对其进行测试:
public class Test {

    public static void main(String[] args) {
        HashBucket<String,Integer> hashBucket = new HashBucket<>();
        hashBucket.put("a", 10);
        hashBucket.put("b", 5);
        hashBucket.put("c", 15);
        hashBucket.put("d", 25);
        hashBucket.put("e", 35);
        hashBucket.put("f", 45);
        hashBucket.put("g", 55);
        hashBucket.put("h", 65);
        hashBucket.put("i", 61);
        hashBucket.put("g", 32);
        System.out.println(hashBucket.get("a"));
        System.out.println(hashBucket.get("i"));
        System.out.println(hashBucket.get("g"));
        System.out.println(hashBucket.get("e"));
        System.out.println(hashBucket.get("t"));
        System.out.println("=========================");
        HashBucket<Student,Integer> hashBucket1=new HashBucket<>();
        hashBucket1.put(new Student("123","123"),40);
        hashBucket1.put(new Student("126","123"),60);
        System.out.println(hashBucket1.get(new Student("123", "123")));
        System.out.println(hashBucket1.get(new Student("126", "123")));
        System.out.println(hashBucket1.get(new Student("126", "121")));

    }
}
 class  Student{
    String id;
    String name;

     public Student(String name, String id) {
         this.name = name;
         this.id = id;
     }

     @Override
     public boolean equals(Object o) {
         if (this == o) return true;
         if (o == null || getClass() != o.getClass()) return false;
         Student student = (Student) o;
         return Objects.equals(id, student.id) && Objects.equals(name, student.name);
     }

     @Override
     public int hashCode() {
         return Objects.hash(id, name);
     }
 }
由上可知测试结果跟我们预想结果一模一样,模拟成功~

7.8 HashMap的性能分析
虽然哈希桶一直在和冲突做斗争,但在实际使用过程中,我们认为哈希表的冲突率是不高的,冲突个数是可控的, 也就是每个桶中的链表的长度是一个常数,所以,通常意义下,我们认为哈希表的插入/删除/查找时间复杂度是 O(1) 。
8.HashMap的高阶使用
那么在讲清楚本质后,我们就带来HashMap的高阶使用——当Map中的key为自定义类时我们去操作HashMap的代码演示:
//HashMap的高阶使用,对于HashSet的高阶使用也是如此,这里就不展示代码了
public class Test1 {
    public static void main(String[] args) {
        Map<Student,Integer> map=new HashMap<>();
        map.put(new Student("123","456"),25);
        map.put(new Student("125","457"),30);
        map.put(new Student("123","456"),80);
        map.put(new Student("129","457"),30);
        System.out.println(map.get(new Student("123", "524")));
        map.remove(new Student("123","25"));
        System.out.println(map.get(new Student("123", "524")));
        System.out.println(map.get(new Student("129", "524")));
        System.out.println(map.containsKey(new Student("125", "524")));
    }
}
class  Student{
    String id;
    String name;

    public Student(String name, String id) {
        this.name = name;
        this.id = id;
    }

    @Override
    public boolean equals(Object o) {
        if (this == o) return true;
        if (o == null || getClass() != o.getClass()) return false;
        Student student = (Student) o;
        return Objects.equals(name, student.name);
    }

    @Override
    public int hashCode() {
        return Objects.hashCode(name);
    }
}

9.TreeMap和HashMap的区别
在彻底了解完了TreeMap和HashMap的本质之后,我们也就更容易清楚它们的区别,其区别如下,这里我就不多说了,讲了这么久,大家应该也能看懂了~
综上所述,作者个人认为HashMap比TreeMap要更高效,毕竟不用进行元素比较,时间复杂度更低。

10.TreeSet和HashSet的本质+TreeSet和HashSet的区别

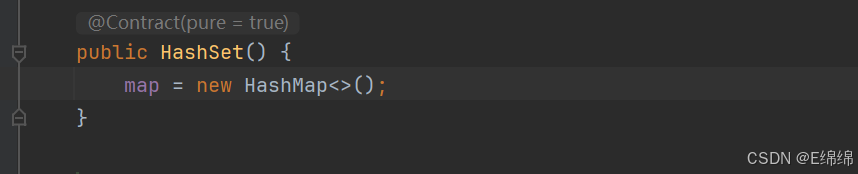
由上图中的源码可知,TreeSet的底层是使用TreeMap来实现的,其使用key与Object的一个默认对象作为键值对插入到TreeMap中,所以其实TreeSet和TreeMap的本质是一样的,都是红黑树,实现方式和思路也全都一样。
同理也由上图源码可知,HashSet的底层也是通过HashMap实现,其本质也都一样,都是哈希桶,其实现方式和思路一模一样。
由于TreeSet本质是红黑树,HashSet本质是哈希桶,所以它们之间的区别也就跟TreeMap和HashMap的区别一模一样。如下:
同样,作者个人认为HashSet比TreeSet也要更高效,毕竟也不用进行元素比较,时间复杂度也更低。

11.总结
所以我们的Map和Set就讲解完了,下篇文章将会讲解反射、枚举以及lambda表达式。在此,我们诚挚地邀请各位大佬们为我们点赞、关注,并在评论区留下您宝贵的意见与建议。让我们共同学习,共同进步,为知识的海洋增添更多宝贵的财富!🎉🎉🎉❤️❤️💕💕🥳👏👏👏
本人的一些废话:
这篇文章总共写了22000多个字,这也是本人第一次写这么长的文章 ,制作不易,还希望铁汁们点个赞互三下呀!大家一起加油!🥳🥳🥳


 986
986

 被折叠的 条评论
为什么被折叠?
被折叠的 条评论
为什么被折叠?
 到【灌水乐园】发言


