


Spring容器(Core Container)支持三种配置方式
一、基于XML配置文件:在XML文件中使用Spring命名空间所支持的标签与属性来配置Spring容器。
在XML配置文件中,我们使用<bean>标签来制定创建对象的类,并根据XML配置文件完成Springr的初始化。例如:
<?xml version="1.0" encoding="UTF-8"?>
<beans
    xmlns="http://www.springframework.org/schema/beans"
    xmlns:p="http://www.springframework.org/schema/p"
    xmlns:xsi="http://www.w3.org/2001/XMLSchema-instance"
    xmlns:context="http://www.springframework.org/schema/context"
    xmlns:tx="http://www.springframework.org/schema/tx"
    xmlns:aop="http://www.springframework.org/schema/aop"
    xmlns:mvc="http://www.springframework.org/schema/mvc"
    xmlns:util="http://www.springframework.org/schema/util"
    xmlns:jpa="http://www.springframework.org/schema/data/jpa"
    xsi:schemaLocation="
       http://www.springframework.org/schema/beans
       http://www.springframework.org/schema/beans/spring-beans-4.3.xsd
       http://www.springframework.org/schema/mvc
       http://www.springframework.org/schema/mvc/spring-mvc-4.3.xsd
       http://www.springframework.org/schema/tx
       http://www.springframework.org/schema/tx/spring-tx-4.3.xsd
       http://www.springframework.org/schema/aop
       http://www.springframework.org/schema/aop/spring-aop-4.3.xsd
       http://www.springframework.org/schema/util
       http://www.springframework.org/schema/util/spring-util-4.3.xsd
       http://www.springframework.org/schema/data/jpa
       http://www.springframework.org/schema/data/jpa/spring-jpa-1.3.xsd
       http://www.springframework.org/schema/context
       http://www.springframework.org/schema/context/spring-context-4.3.xsd">
	<!-- 以上属性 default-lazy-init="true"表示默认开启懒加载,其余属性指明Spring的命名空间 -->

	<!-- 使用bean标签创建实例
		1.id:该实例在容器中的名称,容器中唯一
		2.class:实例的类路径
		3.scope:作用域
		4.init-method:初始化方法的名称,在创建该实例后,会Spring容器会调用该方法
		5.destroy-method:在Spring容器释放资源时,销毁该实例前会调用此方法
		6.lazy-init:是否开启懒加载,bean标签中的懒加载优先级高于beans标签中的default-lazy-init属性
	 -->
	<bean
	id="test"
	class="beans.Test"
	scope="singleton"
	init-method="doInit"
	destroy-method="doDestroy"
	lazy-init="false"/>

</beans>
获取对象的方式:
package beans;

import org.springframework.context.support.ClassPathXmlApplicationContext;

public class Test {
    public static void main(String[] args) {
 	//通过XML配置文件初始化Spring容器,“test.xml”为配置文件的文件名与路径
	ClassPathXmlApplicationContext ctx=new ClassPathXmlApplicationContext("test.xml");
	//通过上下文对象获取类的实例,“test”为bean对象的id
	Test test=ctx.getBean("test", Test.class);
	//使用实例
	test.testMethod();
	//释放资源
	ctx.close();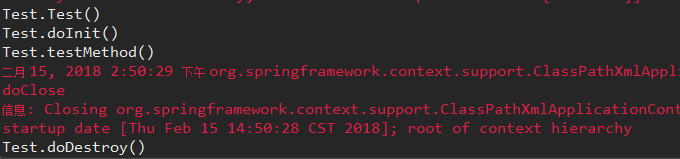
}输出结果:

二、基于注解:使用Spring提供的注解修饰特定的类,初始化Spring容器时基于注解创建对象完成初始化。
在Spring中,可以使用@Service(业务层对象)、@Controller(控制层对象)、@Repository(持久层对象)、@Component(其他一般类)注解来修饰要创建对象的类,并使用<centext:component-scan>标签或者@ComponentScan注解来指明要创建实例的包的路径(base-package或basePackages)。例如:
@Service//表示这是一个业务层对象
public class Test {
	...
}
获取对象的方式:
可使用纯注解的方式
package beans;

import javax.annotation.PostConstruct;
import javax.annotation.PreDestroy;

import org.springframework.context.annotation.AnnotationConfigApplicationContext;
import org.springframework.context.annotation.ComponentScan;
import org.springframework.stereotype.Service;

//开启扫描包创建实例
@ComponentScan("beans")
//表示该类是一个业务层类
@Service(value="test")
public class Test {

	public static void main(String[] args) {
		//通过全注解的形式创建对象,需将被@ComponentScan注解修饰的类的Class对象作为参数传递给Spring容器上下文对象
		AnnotationConfigApplicationContext ctx=new AnnotationConfigApplicationContext(Test.class);
		//通过上下文对象获取类的实例,“test”为bean对象的id
		Test test=ctx.getBean("test", Test.class);
		//使用实例
		test.testMethod();
		//释放资源
		ctx.close();
	}

	public Test() {
		super();
		System.out.println("Test.Test()");
	}
	//定义初始化方法
	@PostConstruct
	public void doInit() {
		System.out.println("Test.doInit()");
	}
	//定义销毁方法
	@PreDestroy
	public void doDestroy() {
		System.out.println("Test.doDestroy()");
	}
	//业务方法
	public void testMethod() {
		System.out.println("Test.testMethod()");
	}
}
输出结果与基于XML配置文件的方式相同。
也可以省去@ComponentScan注解,在XML文件中添加<context:component-scan>标签开启包扫描并指定包路径,使用上文提到的@Service、@Component等注解修饰要交由Spring容器创建实例的类,使用ClassPathXmlApplicationContext类加载XML配置文件并获取实例。
基于XML文件和基于注解是最常用的两种配置方式,并且可以混合使用。不过需要注意的是,如果XML文件中的bean对象与通过注解创建的对象的id或name相同的话,将只会创建一个对象。
test.xml文件内容:
...
        <!-- 开启扫描包创建对象 -->
        <context:component-scan base-package="beans"/>

	<bean
	id="test"
	class="beans.Test"
	scope="singleton"
	init-method="doInit"
	destroy-method="doDestroy"
	lazy-init="false"/>
...
Test类内容:
package beans;

import javax.annotation.PostConstruct;
import javax.annotation.PreDestroy;

import org.springframework.context.support.ClassPathXmlApplicationContext;
import org.springframework.stereotype.Service;

@Service(value="test")
public class Test {
	public static void main(String[] args) {
		ClassPathXmlApplicationContext ctx=new ClassPathXmlApplicationContext("test.xml");
		Test test=ctx.getBean("test", Test.class);
		test.testMethod();
		ctx.close();
	}
	public Test() {
		super();
		System.out.println("Test.Test()");
	}
	@PostConstruct
	public void doInit() {
		System.out.println("Test.doInit()");
	}
	@PreDestroy
	public void doDestroy() {
		System.out.println("Test.doDestroy()");
	}
	public void testMethod() {
		System.out.println("Test.testMethod()");
	}
}
输出结果:
三、基于JAVA配置:使用 @Configuration 和 @Bean 注解配合完成Spring容器的配置。
我们也可以使用@Configuration注解修饰一个类,并且在该类中使用@Bean注解修饰该类的方法,被修饰的方法执行后会返回一个对象,该对象在Spring容器中的id为方法名。例如:
@Configuration
public class TestConfig {
    @Bean
    public MyService myService() {
        return new MyServiceImpl();
    }
}
基于JAVA的配置方式与前两种方式类似,相当于把XML文件写在@Configuration修饰的配置类中,在配置类中使用@Bean注解代替XML文件中的<bean>标签。@Bean注解中有各种属性,类似于<bean>标签中的属性,不过作用域与延迟加载要使用单独的注解@Scope或@Lazy来声明。
package beans;

import org.springframework.context.annotation.AnnotationConfigApplicationContext;
import org.springframework.context.annotation.Bean;
import org.springframework.context.annotation.ComponentScan;
import org.springframework.context.annotation.Configuration;
import org.springframework.context.annotation.Lazy;
import org.springframework.context.annotation.Scope;

//开启扫描包创建实例
@ComponentScan("beans")
//基于JAVA配置创建对象
@Configuration
public class Test {

	public static void main(String[] args) {
		//通过全注解的形式创建对象,需将被@ComponentScan注解修饰的类的Class对象作为参数传递给Spring容器上下文对象
		AnnotationConfigApplicationContext ctx=new AnnotationConfigApplicationContext(Test.class);
		//通过上下文对象获取类的实例,“test”为bean对象的id
		Test test=ctx.getBean("test00", Test.class);
		test=ctx.getBean("test01", Test.class);
		//使用实例
		test.testMethod();
		//释放资源
		ctx.close();
	}

	@Bean(value={"test00","test01"},initMethod="doInit",destroyMethod="doDestroy")
	@Lazy(false)
	@Scope(value="singleton")
	public Test test() {
		return new Test();
	}

	public Test() {
		super();
		System.out.println("Test.Test()");
	}
	//定义初始化方法
	public void doInit() {
		System.out.println("Test.doInit()");
	}
	//定义销毁方法
	public void doDestroy() {
		System.out.println("Test.doDestroy()");
	}
	//业务方法
	public void testMethod() {
		System.out.println("Test.testMethod()");
	}
}基于JAVA的配置方式可以通过前两种的任意一种方式初始化Spring并且获取对象。
备注:该文章仅用于开发初学者学习交流使用,不代表任何机构或团体,如有侵权内容请联系博主删除。


 143
143


 被折叠的 条评论
为什么被折叠?
被折叠的 条评论
为什么被折叠?
 到【灌水乐园】发言


