


 本文详细介绍了如何在Windows11中安装和配置Ubuntu和CentOS子系统,以及如何安装和使用Docker。包括子系统安装步骤、Docker在Ubuntu和CentOS中的安装、创建和打包Docker镜像,以及遇到的常见问题如端口冲突、WSL名称解析和权限问题的解决方法。
人工智能算法Docker容器化部署
第一章 基于 WSL 的 Docker 环境搭建指南
Linux 作为服务器和容器的主流操作系统,凭借其高度的稳定性、可扩展性与开源生态,早已成为构建现代信息系统架构的技术基石。长期以来,由于 Windows 与 Linux 在系统内核、文件结构及命令接口等方面存在巨大差异,跨平台环境配置与工具链兼容性一直是限制开发效率和系统统一性的关键因素。
近年来,随着人工智能智能的快速发展,模型训练规模呈指数级增长,对底层系统环境的资源调度能力和运行效率提出了更高要求Windows 系统在处理大规模算例、并行任务调度和容器化部署等方面逐渐暴露出性能瓶颈和生态割裂的问题,难以胜任新一代智能计算场景的需求。
在这一背景下,微软推出了 Windows Subsystem for Linux(WSL),尤其是第二代架构 WSL 2 引入了真正的 Linux 内核与轻量级虚拟化技术,有效打通了 Windows 与 Linux 之间的生态壁垒,为开发者在 Windows平台上提供了近乎原生的 Linux 运行环境。该机制不仅提升了系统调用兼容性与 I/O 性能,也为在 Windows 上高效运行提供了可行路径。与此同时,容器技术已成为算法移植与环境一致性保障的核心手段。基于 WSL 2 构建 Docker 运行环境,不仅能够充分利用 Windows 与 Linux 的双重生态优势,还可在单一平台上高效完成开发、测试、部署等全生命周期操作,显著降低系统集成与环境迁移的复杂度。
本指南旨在系统性地介绍如何在 Windows 平台下,基于 WSL 2 构建稳定的 Linux 容器运行环境。内容涵盖从 WSL 系统启用与配置,到 Docker 引擎的集成与验证,力求为开发者、运维工程师及技术研究人员提供一套标准化、可复现的环境搭建方案,推动本地开发与容器化部署深度融合。
1.1 安装与配置 WSL
1.1.1 启用适用于 Linux 的 Windows 子系统
1.1.1.1 桌面开启
打开系统"设置",依次点击"系统" -> “可选功能” -> “更多Windows功能”。
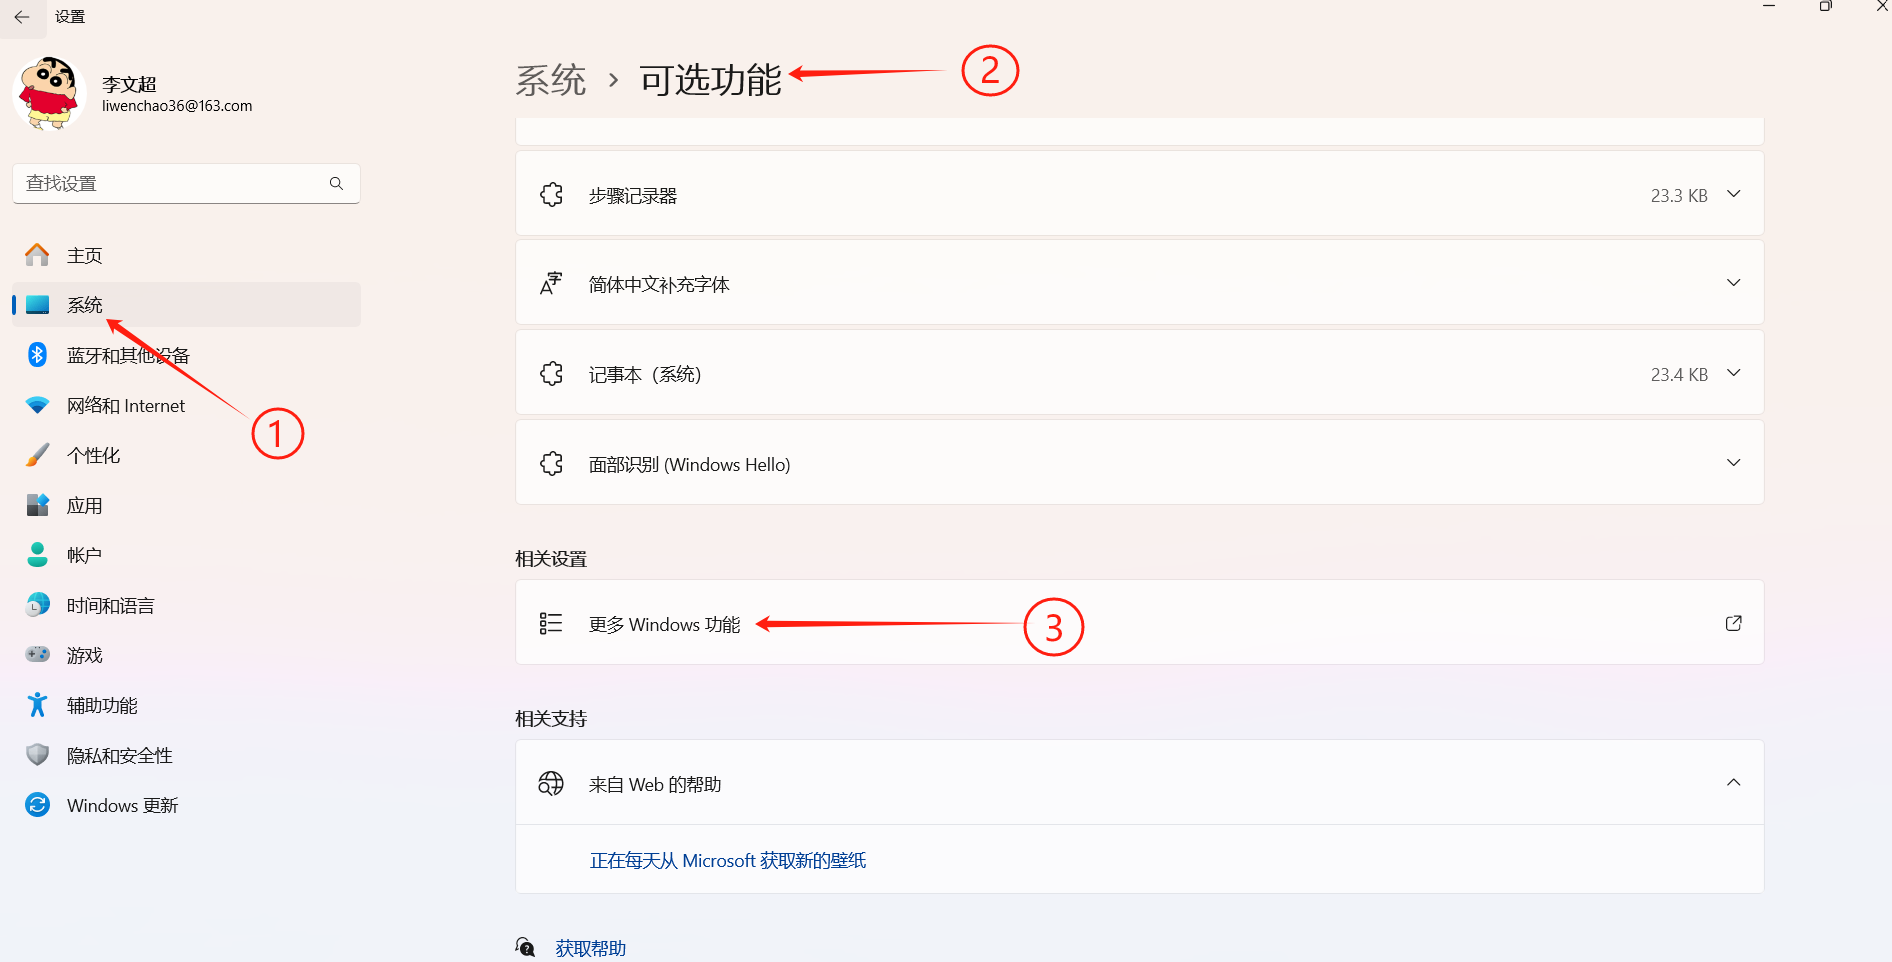
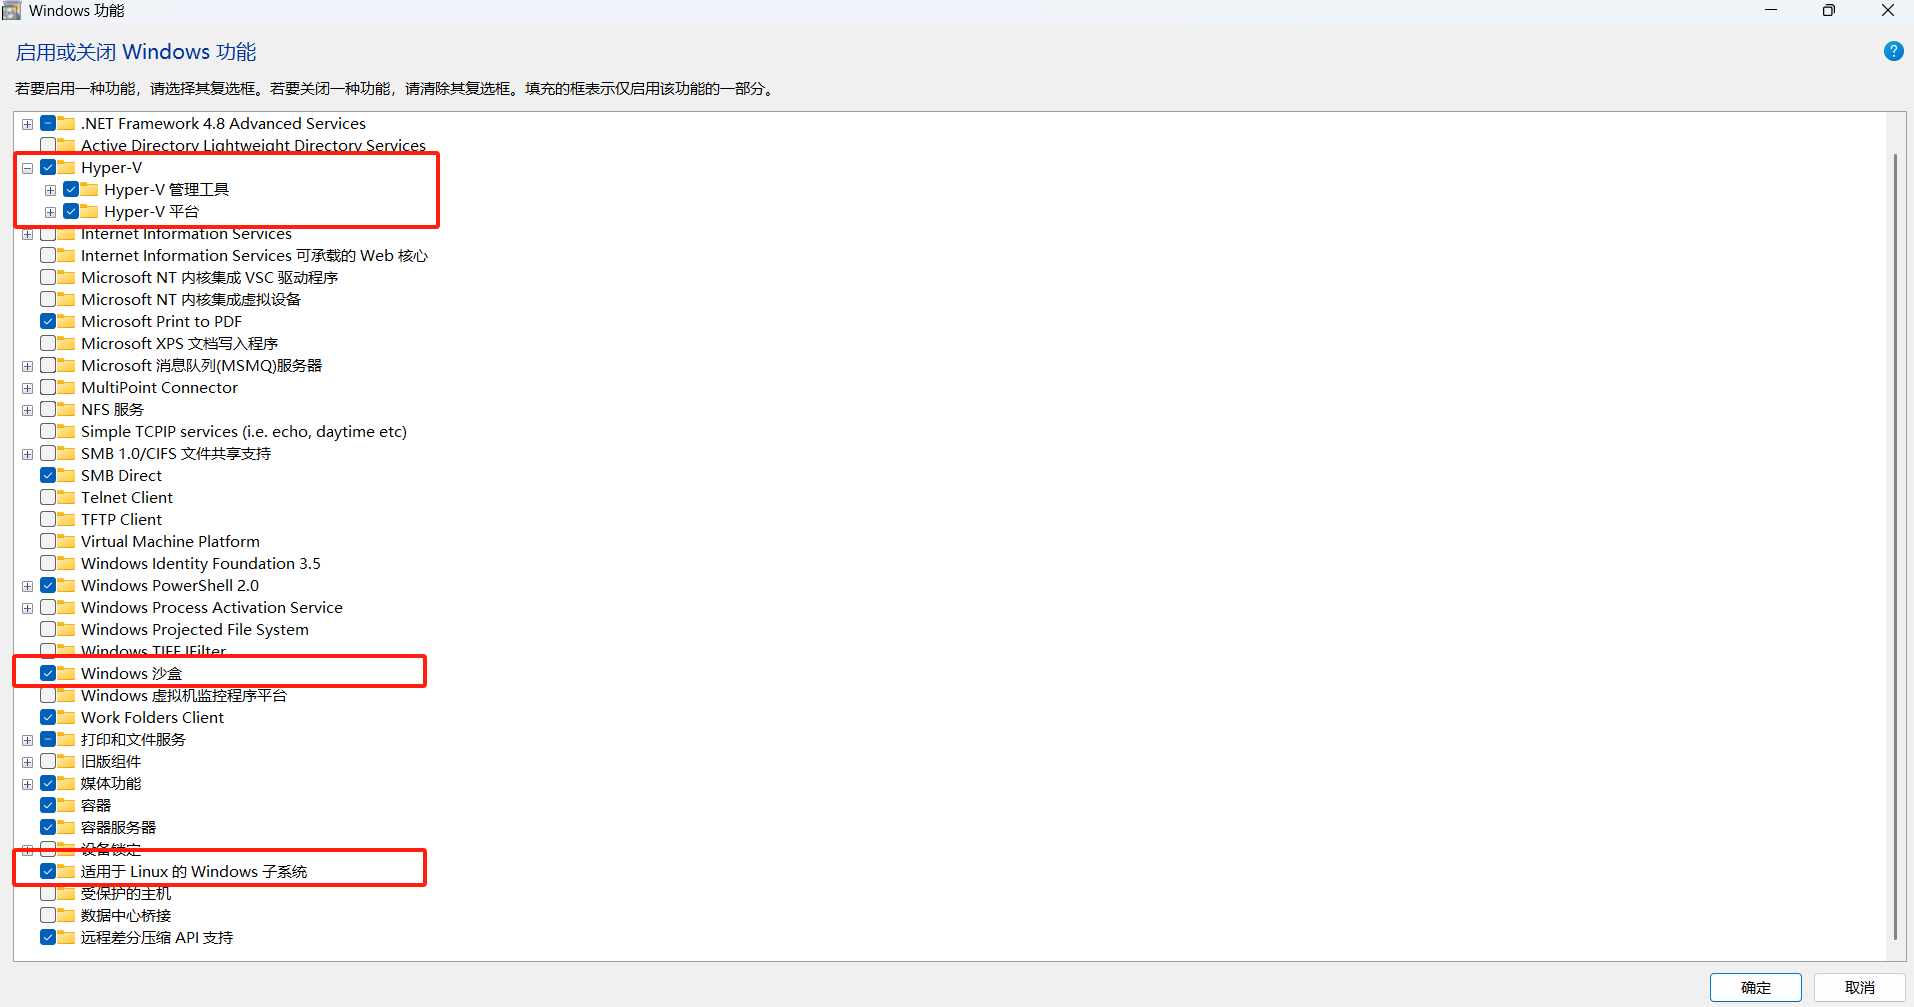
勾选适用于Linux 的 Windows 子系统和虚拟机平台。
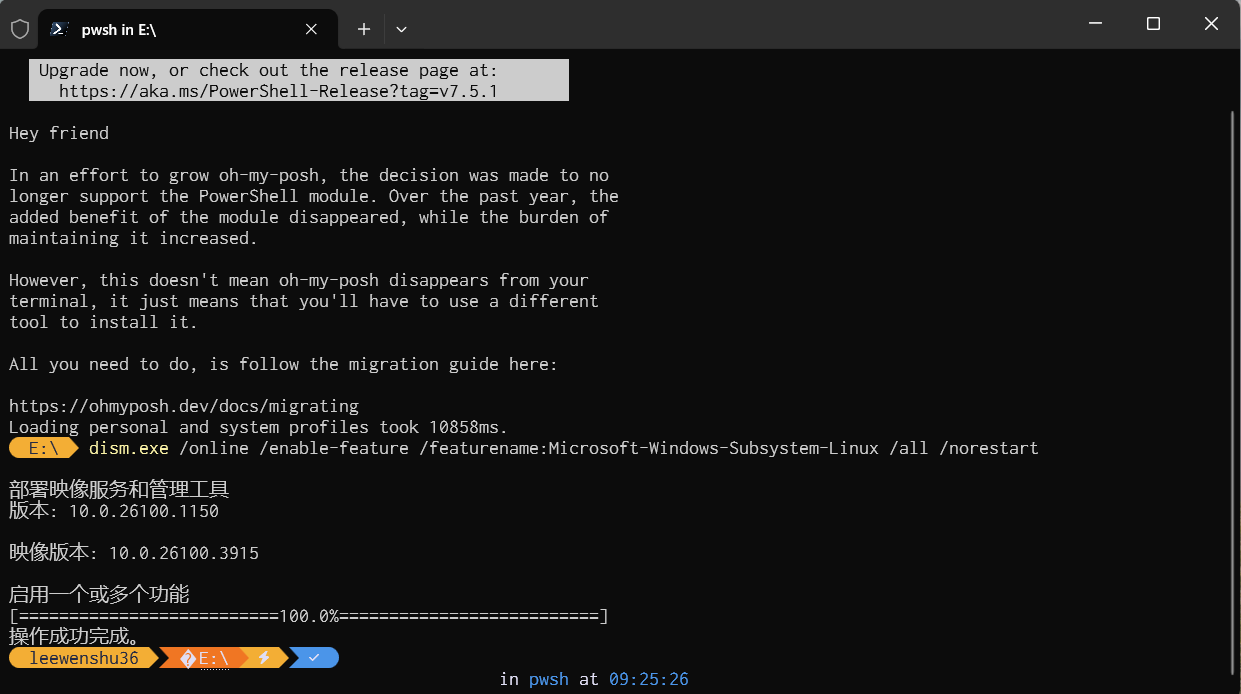
1.1.1.2 PowerShell 开启
以管理员身份打开 PowerShell (> PowerShell > 右键单击 > 以管理员身份运行) 并输入以下命令:
温馨提示:
本文使用的 PowerShell 版本为 7.4.7,若您的环境版本不同,通常不会影响命令的正常执行。请放心按照文中指令操作,命令语法在各主流版本中保持一致。
1.1.2 安装 WSL 2
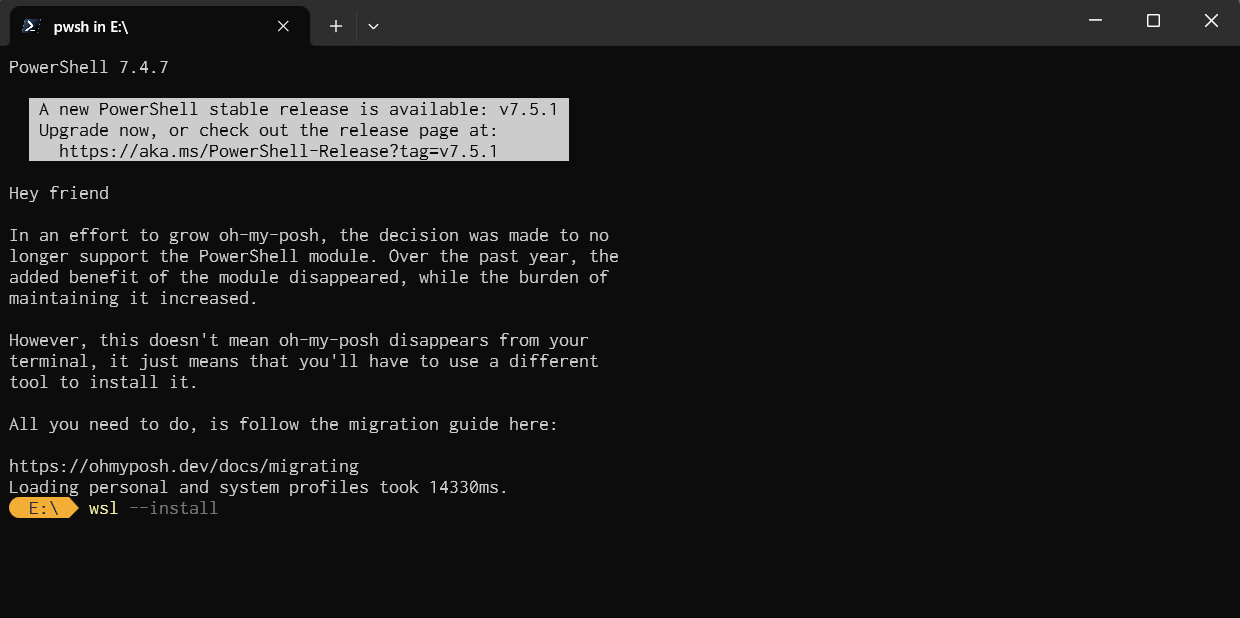
- PowerShell 安装WSL 2
在管理员模式下打开 PowerShell 或 Windows 命令提示符,方法是右键单击并选择“以管理员身份运行”,输入 wsl --install 命令,然后重启计算机。
 温馨提示:
温馨提示:
若要更新到 WSL 2,必须运行 Windows 10 或 Windows 11。对于 x64 系统:版本 1903 或更高版本,内部版本为 18362.1049 或更高版本,对于 ARM64 系统:版本 2004 或更高版本,内部版本为 19041 或更高版本。若要检查 Windows 版本及内部版本号,请按 Windows 徽标键 + R,键入"winver",然后选择“确定”。 - 将 WSL 2 设置为默认版本
打开 PowerShell 并运行以下命令,在安装新的 Linux 分发版时将 WSL 2 设置为默认版本:
wsl --set-default-version 2
1.1.3 安装所选 Linux 分发版
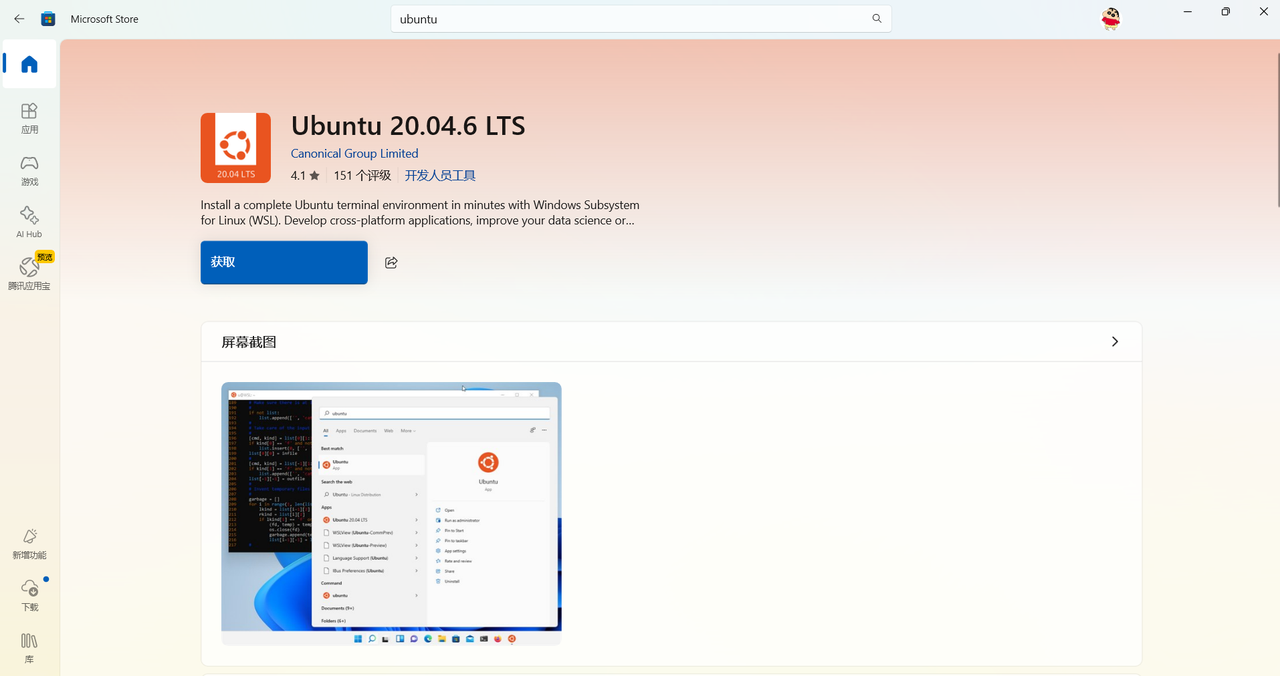
- 打开 Microsoft Store 并选择你喜欢的 Linux 分发版。
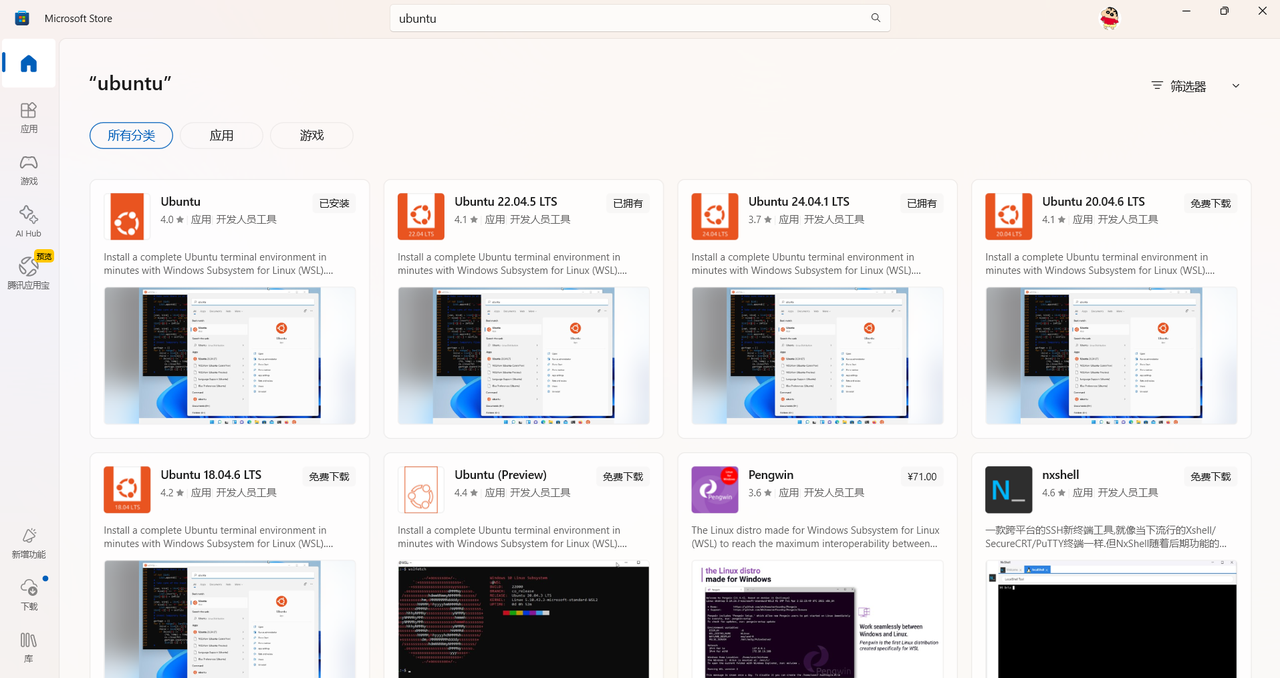
- 在分发页中,选择"获取"。
首次启动新安装的 Linux 分发版时,控制台窗口将打开,系统将要求你等待一到两分钟,以便文件取消压缩并存储在电脑上。 所有未来的发射应该需要不到一秒钟的时间。然后,需要为新的 Linux 分发版创建用户帐户和密码。

祝贺! 您已成功安装并设置了与 Windows 操作系统完全集成的 Linux 发行版!
1.1.4 基础配置与网络检查
1.1.4.1 更新国内阿里镜像源
- 备份源文件
sudo cp /etc/apt/sources.list /etc/apt/sources.list.backup
- 编辑/etc/apt/sources.list文件
vi /etc/apt/sources.list

# 添加阿里镜像源
deb http://mirrors.aliyun.com/ubuntu/ focal main restricted universe multiverse
deb-src http://mirrors.aliyun.com/ubuntu/ focal main restricted universe multiverse
deb http://mirrors.aliyun.com/ubuntu/ focal-security main restricted universe multiverse
deb-src http://mirrors.aliyun.com/ubuntu/ focal-security main restricted universe multiverse
deb http://mirrors.aliyun.com/ubuntu/ focal-updates main restricted universe multiverse
deb-src http://mirrors.aliyun.com/ubuntu/ focal-updates main restricted universe multiverse
deb http://mirrors.aliyun.com/ubuntu/ focal-proposed main restricted universe multiverse
deb-src http://mirrors.aliyun.com/ubuntu/ focal-proposed main restricted universe multiverse
deb http://mirrors.aliyun.com/ubuntu/ focal-backports main restricted universe multiverse
deb-src http://mirrors.aliyun.com/ubuntu/ focal-backports main restricted universe multiverse
- 执行更新命令
sudo apt-get update
sudo apt-get upgrade
1.1.4.2 安装 net-tools 工具
net-tools 是 Linux 系统中的一个传统网络管理工具包,包含了一组用于网络配置和排查的命令行工具。
# 安装网络管理工具
sudo apt install net-tools
ifconfig 是 Linux 系统中用于查看和配置网络接口信息的命令,属于 net-tools 套件。
# 查看网络接口信息
ifconfig

eth0: flags=4163<UP,BROADCAST,RUNNING,MULTICAST>  mtu 1500
        inet 172.21.160.184  netmask 255.255.240.0  broadcast 172.21.175.255
        inet6 fe80::215:5dff:fe72:b2e4  prefixlen 64  scopeid 0x20<link>
        ether 00:15:5d:72:b2:e4  txqueuelen 1000  (Ethernet)
        RX packets 58  bytes 9590 (9.5 KB)
        RX errors 0  dropped 0  overruns 0  frame 0
        TX packets 24  bytes 1640 (1.6 KB)
        TX errors 0  dropped 0 overruns 0  carrier 0  collisions 0
| 项目 | 含义 |
|---|---|
| eth0 | 网络接口名(WSL 中是虚拟网卡) |
| flags=4163<…> | 当前状态:已启动、可广播、正在运行、有多播功能 |
| inet 172.21.160.184 | 分配给子系统的 IPv4 地址(你可以通过这个 IP 远程访问子系统) |
| netmask 255.255.240.0 | 子网掩码 |
| broadcast 172.21.175.255 | 广播地址(通常不常用) |
| inet6 … | IPv6 地址(WSL 默认分配) |
| ether 00:15:5d:72:b2:e4 | MAC 地址 |
| RX/TX packets | 接收/发送的数据包数目与总字节 |
1.1.4.3 安装 ssh 服务
- 安装 ssh 工具
# 安装ssh服务
sudo apt-get install ssh
# 启动SSH服务
sudo /etc/init.d/ssh start
# 开机自启
sudo systemctl enable ssh
- 编辑 sshd_config
sudo vim /etc/ssh/sshd_config
- 修改
# 开启密码登录
PasswordAuthentication yes

# 将#PermitRootLogin prohibit-password修改为
PermitRootLogin yes
- 重启 ssh 服务
sudo systemctl restart ssh
1.2 搭建 Docker 运行环境
1.2.1 安装 Docker
- 删除旧版本 Docker 和相关组件。
for pkg in docker.io docker-doc docker-compose podman-docker containerd runc; do sudo apt-get remove $pkg; done
- 安装Docker在Ubuntu上依赖一些软件包。
sudo apt-get update
sudo apt-get install -y ca-certificates curl gnupg lsb-release
- 创建 Docker keyrings 存储目录
sudo mkdir -p /etc/apt/keyrings
- 获取阿里云的 GPG 公钥
curl -fsSL https://mirrors.aliyun.com/docker-ce/linux/ubuntu/gpg | sudo gpg --dearmor -o /etc/apt/keyrings/docker.gpg
- 添加 Docker 的 apt 软件源
echo \
"deb [arch=$(dpkg --print-architecture) signed-by=/etc/apt/keyrings/docker.gpg] \
https://mirrors.aliyun.com/docker-ce/linux/ubuntu jammy stable" | \
sudo tee /etc/apt/sources.list.d/docker.list > /dev/null
- 更新 apt 软件包索引
sudo apt update
- 安装 Docker 组件
sudo apt install docker-ce docker-ce-cli containerd.io docker-buildx-plugin docker-compose-plugin
1.2.2 添加国内镜像源
- 打开配置文件。
vi /etc/docker/daemon.json
- 将下面的代码块粘贴进去,保存退出。
{
    "registry-mirrors": [
        "https://proxy.1panel.live",                                                                        "https://docker.1ms.run",
        "https://hub.geekery.cn",                                                                           "https://docker.m.daocloud.io",
        "https://docker.rainbond.cc",                                                                       "https://docker.1panel.live",
        "https://mirror.baidubce.com",
        "https://ccr.ccs.tencentyun.com",
        "https://8t5pclva.mirror.aliyuncs.com",
        "https://registry.docker-cn.com",
        "https://hub-mirror.c.163.com",
        "https://mirror.ccs.tencentyun.com",
        "https://docker.m.daocloud.io",
        "https://noohub.ru",
        "https://huecker.io",
        "https://dockerhub.timeweb.cloud"
  ]
}
- 重启 Docker 服务。
sudo systemctl daemon-reload
sudo systemctl restart docker
1.2.3 安装 NVIDIA Docker
1.2.3.1 为什么要安装 NVIDIA Docker ?
Docker 容器无法直接访问宿主机的 NVIDIA GPU 资源,这对依赖 GPU 加速的深度学习等应用来说是个限制。NVIDIA Docker,即NVIDIA Container Toolkit提供了一套工具和驱动,使得 Docker 容器能够安全且高效地访问和管理宿主机上的 NVIDIA GPU,从而充分发挥 GPU 的计算能力。
1.2.3.2 安装 NVIDIA Container Toolkit
- 查看服务器是否安装 Docker。
docker -v
- 查看服务器是否安装 NVIDIA Docker。
dpkg -l | grep nvidia-docker
若有旧的 NVIDIA Docker,执行下面命令:
sudo apt-get remove -y nvidia-docker
- 查看服务器是否安装显卡驱动(不能在远程访问工具上显示)。
nvidia-smi
- 修改 Docker 配置文件,具体参考 1.2.2。
{
    "registry-mirrors": [
        "https://proxy.1panel.live",
        "https://docker.1ms.run",
        "https://hub.geekery.cn",
        "https://docker.m.daocloud.io",
        "https://docker.rainbond.cc",
        "https://docker.1panel.live",
        "https://mirror.baidubce.com",
        "https://ccr.ccs.tencentyun.com",
        "https://8t5pclva.mirror.aliyuncs.com",
        "https://registry.docker-cn.com",
        "https://hub-mirror.c.163.com",
        "https://mirror.ccs.tencentyun.com",
        "https://docker.m.daocloud.io",
        "https://noohub.ru",
        "https://huecker.io",
        "https://dockerhub.timeweb.cloud"
  ],
  "runtimes": {
        "nvidia": {
            "args": [],
            "path": "/usr/bin/nvidia-container-runtime"
        }
  }
}
- 重启 Docker 服务。
sudo systemctl daemon-reload
sudo systemctl restart docker
- 下载镜像 gpgkey。
curl -fsSL https://mirrors.ustc.edu.cn/libnvidia-container/gpgkey | sudo gpg --dearmor -o /usr/share/keyrings/nvidia-container-toolkit-keyring.gpg
- 配置中科大镜像 apt 源。
curl -s -L https://mirrors.ustc.edu.cn/libnvidia-container/stable/deb/nvidia-container-toolkit.list | \sed 's#deb https://nvidia.github.io#deb [signed-by=/usr/share/keyrings/nvidia-container-toolkit-keyring.gpg] https://mirrors.ustc.edu.cn#g' | \sudo tee /etc/apt/sources.list.d/nvidia-container-toolkit.list
- 更新apt包列表,并安装NVIDIA Container Toolkit。
curl -s -L https://mirrors.ustc.edu.cn/libnvidia-container/stable/deb/nvidia-container-toolkit.list | \sed 's#deb https://nvidia.github.io#deb [signed-by=/usr/share/keyrings/nvidia-container-toolkit-keyring.gpg] https://mirrors.ustc.edu.cn#g' | \sudo tee /etc/apt/sources.list.d/nvidia-container-toolkit.list
- 重启 Docker 服务。
sudo systemctl daemon-reload
sudo systemctl restart docker
- 拉去镜像。
docker pull pytorch/pytorch:2.4.1-cuda11.8-cudnn9-runtime
1.3 常见疑难杂症
1.3.1 wsl 2 无法安装
(1)问题描述
wsl --install
无法从“https://raw.githubusercontent.com/microsoft/WSL/master/distributions/DistributionInfo.json”中提取列表分发。操作超时
错误代码: Wsl/InstallDistro/0x80072ee2
(2)解决方案
该问题由于网络环境限制导致无法访问 WSL 安装所需的在线分发列表资源。为解决访问 GitHub 原始资源超时的问题,推荐使用 FastGithub 工具,解决效果如下。
wsl --install
Ubuntu 已安装。
正在启动 Ubuntu...
Welcome to Ubuntu 24.04.1 LTS (GNU/Linux 5.15.167.4-microsoft-standard-WSL2 x86_64)

 * Documentation:  https://help.ubuntu.com
 * Management:     https://landscape.canonical.com
 * Support:        https://ubuntu.com/pro

 System information as of Sun May 18 06:34:10 CST 2025

  System load:  0.54                Processes:             49
  Usage of /:   0.3% of 1006.85GB   Users logged in:       0
  Memory usage: 5%                  IPv4 address for eth0: 172.21.160.184
  Swap usage:   0%

 * Strictly confined Kubernetes makes edge and IoT secure. Learn how MicroK8s
   just raised the bar for easy, resilient and secure K8s cluster deployment.

   https://ubuntu.com/engage/secure-kubernetes-at-the-edge

This message is
1.3.2 cuda-toolkit-12-4安装问题
(1)问题描述
sudo apt-get -y install cuda-toolkit-12-4

Reading package lists... Done
Building dependency tree... Done
Reading state information... Done
Some packages could not be installed. This may mean that you have
requested an impossible situation or if you are using the unstable
distribution that some required packages have not yet been created
or been moved out of Incoming.
The following information may help to resolve the situation:
The following packages have unmet dependencies:
 nsight-systems-2023.4.4 : Depends: libtinfo5 but it is not installable
E: Unable to correct problems, you have held broken packages.
(2)解决方案
- For Ubuntu 23.10
sudo nano /etc/apt/sources.list
deb http://old-releases.ubuntu.com/ubuntu/ lunar universe
sudo apt update
sudo apt-get -y install cuda-toolkit-12-4
- For Ubuntu 24.04 or newer
- 打开ubuntu.sources
sudo nano /etc/apt/sources.list.d/ubuntu.sources
- 复制粘贴
Types: deb
URIs: http://old-releases.ubuntu.com/ubuntu/
Suites: lunar
Components: universe
Signed-By: /usr/share/keyrings/ubuntu-archive-keyring.gpg
- 更新、安装
 sudo apt update
 sudo apt-get -y install cuda-toolkit-12-4
1.3.3 wsl无法解析服务器的名称或地址
(1)问题描述
wsl --install 无法解析服务器的名称或地址
(2)解决方案
- 启用虚拟机平台可选组件
Enable-WindowsOptionalFeature -Online -FeatureName Microsoft-Windows-Subsystem-Linux
- 重启电脑
- 更新wsl
PS C:\Users\ef_lee> wslconfig /l
适用于 Linux 的 Windows 子系统没有已安装的分发版。
可以通过访问 Microsoft Store 来安装分发版:
https://aka.ms/wslstore

PS C:\Users\ef_lee> wsl --update
正在安装: 适用于 Linux 的 Windows 子系统
已安装 适用于 Linux 的 Windows 子系统。
第二章 python文件加密
2.1 pyarmor安装
# 安装pyarmor依赖
pip install pyarmor==7.3.4
2.1.1 普通加密
# 普通项目加密
pyarmor obfuscate --recursive --platform windows.x86_64 --platform linux.x86_64 --output <目标路径> <主程序.py>
2.1.2 有效期认证文件加密
# 生成带有有效期认证文件
pyarmor licenses --expired 2022-1-30 r001

# 加密
pyarmor obfuscate --with-license licenses/r001/license.lic --recursive --platform windows.x86_64 --platform linux.x86_64 --output defect_dist detect_server_img_multi.py
2.2 常见疑难杂症
2.2.1 Python 版本兼容
(1)问题描述
在 Docker 容器中运行加密后的 Python 脚本时,出现如下报错:
NameError: name 'pyarmor' is not defined
(2)解决方案
该问题是加密时所使用的 Python 环境与 Docker 容器内运行脚本的 Python 解释器版本或依赖不一致,导致 pyarmor_runtime 初始化失败。为确保加密环境与运行环境保持一致,建议采用如下步骤进行排查与处理:
# 第一步:查看docker内部python环境
docker run -it <镜像名称> /bin/bash  或 docker exec -it <镜像名称> sh

# 第二步:退出dockers内部环境
exit

# 第三步:在相同python环境下,重新加密,具体可参考1.1.2
第三章 机器学习模型部署
3.1 dockerfile文件编写
FROM python:3.6.5-slim       # 指出构建Docker镜像时使用的基础镜像

WORKDIR /app                 # 设置工作目录,即在容器内部执行命令的默认目录

COPY ./<算法目录名称>/ /app
COPY ./requirements.txt /app/      # 将当前目录下的算法文件复制到容器目录下

RUN pip config set global.index-url https://pypi.tuna.tsinghua.edu.cn/simple  # 置换镜像
RUN pip install --upgrade pip              # 升级pip
RUN pip install -r /app/requirements.txt   # 批量安装python依赖

CMD ["python", "/app/service.py", "0.0.0.0", "8000"]
3.2 启动镜像
docker run -itd -p 8080:8080 --name efi xx_image:0.0.0
├─ itd
   ├─ i: 以交互模式运行容器.
   ├─ t: 为容器分配一个终端.
   ├─ d: 以后台守护进程模式运行容器.
├─ p: 将容器端口映射导宿主机端口.
├─ name: 指定容器名称.
└─ xx_image:0.0.0: 镜像
3.3 查看 Docker启动日志
docker logs -f efi
3.4 保存镜像
在 Docker 中,保存镜像常用于备份、迁移或在离线环境中分发镜像,常见的保存格式有 .tar 和 .tar.gz。 .tar 格式未压缩,体积大,但加载速度快。.tar.gz使用 gzip 压缩,体积小,适合传输。
3.4.1 保存为 .tar
docker save -o dp_learn.tar xx_image:0.0.0
3.4.2 保存为 .tar.gz
docker save xx_image:0.0.0 | gzip > dp_learn.tar.gz
3.4 更改文件权限
sudo chmod 777 algorithm-image.tar
3.5 加载 Docker 镜像
# 加载docker镜像
docker load -i xx_image:0.0.0
├─ docker load:用于执行各种 Docker 加载命令.
├─ i: 这是一个选项,表示接下来的参数是一个输入文件(input file);
└─ xx_image:0.0.0 指定加载的 Docker 镜像文件.
第四章 深度学习模型加密及部署
4.1 dockerfile文件编写
# 基础镜像(pytorch 2.1.0,gpu加速cuda11.8,深度学习加速库cudnn0,python为:3.10.13)
FROM pytorch/pytorch:2.1.0-cuda11.8-cudnn8-runtime

# 安装系统依赖
RUN apt update
RUN TZ=Etc/UTC apt install -y tzdata
RUN apt install --no-install-recommends -y gcc git zip curl htop libgl1 \
        libglib2.0-0 libpython3-dev gnupg

# 安全更新
RUN apt upgrade --no-install-recommends -y openssl

# 设置工作目录
# RUN rm -rf /usr/src/app && mkdir -p /usr/src/app
WORKDIR /usr/src/app

# 安装Python依赖
COPY ./requirements.txt .
RUN pip config set global.index-url https://pypi.tuna.tsinghua.edu.cn/simple && \
    pip install --upgrade pip && pip install -r ./requirements.txt

# 复制代码
COPY ./defect_dist /usr/src/app

# 暴露端口
EXPOSE 8501

CMD ["python", "/usr/src/app/detect_server_img_multi.py"]
4.2 启动镜像
docker run -d --gpus=all --name dd03 -v /mnt/f/liwenchao/intelligent_defect/docker_yolov5/input_picture/:/usr/src/app/input_picture -e INPUTDIR=/usr/src/app/input_picture -itd -p 8501:8501 dp_learn_image:0.0.0
├─ itd
   ├─ i: 以交互模式运行容器.
   ├─ t: 为容器分配一个终端.
   ├─ d: 以后台守护进程模式运行容器.
├─ gpus
   ├─ gpus: 容器分配所有可用的 NVIDIA GPU.
├─ v /host/path:/container/path
   ├─ v: 将主机目录映射到容器内部路径.
├─ e INPUTDIR=/usr/src/app/input_picture
   ├─ e: 设置环境变量INPUTDIR, 容器内的程序可以通过这个环境变量获取输入目录路径.
├─ p: 将容器端口映射导宿主机端口.
├─ name: 指定容器名称.
└─ xx_image:0.0.0: 镜像
4.3 查看 Docker 启动日志
具体可参考 3.3 。
4.4 保存镜像
具体可参考 3.4 。
4.5 常见疑难杂症
4.5.1 端口占用
(1)问题描述
ef@ef-AI:Anhui_project$ docker run -itd -p 8080:5000 --name ef7 efalgorithm_pl:1.0.0.0
dfa377b4715efc364a807e7a8a39311cb75e86fdbd214270c50f1c90ba635088
docker: Error response from daemon: driver failed programming external connectivity on endpoint ef7 (240183f85d772733c0986676ab829c5c7344c4a5b1c71e6e74746833ea0cea08): Bind for 0.0.0.0:8080 failed: port is already allocated.
(2)解决方案
该问题由 Docker 容器端口已被占用引起,导致新容器无法绑定相同端口。
# 第一步:查看镜像
docker ps -a

# 第二步:停止镜像
docker stop dd05

# 第三步:移除镜像
docker remove dd05 或 docker rm ef7
4.5.2 Docker权限
(1)问题描述
liwenchao@DESKTOP-3DHSO32:~/workspace/中冶$ docker build -t base_image:0.0.0 -f base_image.dockerfile .
DEPRECATED: The legacy builder is deprecated and will be removed in a future release.
            Install the buildx component to build images with BuildKit:
            https://docs.docker.com/go/buildx/

permission denied while trying to connect to the Docker daemon socket at unix:///var/run/docker.sock: Post "http://%2Fvar%2Frun%2Fdocker.sock/v1.24/build?buildargs=%7B%7D&cachefrom=%5B%5D&cgroupparent=&cpuperiod=0&cpuquota=0&cpusetcpus=&cpusetmems=&cpushares=0&dockerfile=base_image.dockerfile&labels=%7B%7D&memory=0&memswap=0&networkmode=default&rm=1&shmsize=0&t=base_image%3A0.0.0&target=&ulimits=null&version=1": dial unix /var/run/docker.sock: connect: permission denied
(2)解决方案
根据报错信息dial unix /var/run/docker.sock: connect: permission denied可以看出,当前用户对docker使用的unix domain socket文件/var/run/docker.sock无权限。
liwenchao@DESKTOP-3DHSO32:~/workspace/中冶$ sudo docker build -t base_image:0.0.0 -f base_image.dockerfile .
DEPRECATED: The legacy builder is deprecated and will be removed in a future release.
            Install the buildx component to build images with BuildKit:
            https://docs.docker.com/go/buildx/
4.5.3 加载docker镜像
(1)问题描述
如何将别人发的docker镜像加载到服务器上, 并查看docker目录,将docker目录文件copy到本地。
(2)解决方案
- 查看 Docker 目录
docker exec -it <容器名称或id>
|—— docker exec:进入容器命令;
|—— i:允许你在容器中输入命令;
|—— t:分配一个伪终端(TTY),使得可以与容器中的命令进行交互。
- 拷贝docker目录
docker cp <容器名称或id>:/app ./
|—— docker cp:用复制Docker容器下文件或目录命令;
|—— <容器名称或ID>:制定复制文件的 Docker 容器的名称或容器 ID;
|—— :/app:表示要复制的容器内路径;
|—— ./ 将文件或目录复制到当前工作目录。


 1251
1251

 被折叠的 条评论
为什么被折叠?
被折叠的 条评论
为什么被折叠?
 到【灌水乐园】发言


