


目录
前言
在Android开发中,不同的布局(Layout)管理组件的显示方式,每种布局都适合特定的场景。以下是对常见布局的详细介绍,包括线性布局、约束布局、表格布局、帧布局和相对布局。UI界面的交互功能实现涉及按钮点击、列表项选择、滑动操作、菜单项和对话框等。以下是对这些交互功能的总结及实现方法。
安卓开发中各种布局的理解
1.1 线性布局(LinearLayout)
特点
方向控制: 通过 `android:orientation` 属性指定排列方向为水平(`horizontal`)或垂直(`vertical`)。
子视图顺序: 子视图按添加顺序排列。
均分空间: 使用 `android:layout_weight` 属性按比例分配空间,适合需要均匀分布的场景。
嵌套问题: 深度嵌套会影响性能和维护性。
适用场景
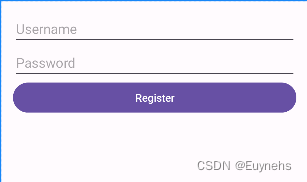
表单布局: 输入表单(如登录表单、注册表单),垂直排列输入框和按钮。
按钮组: 水平排列按钮(如导航按钮、操作按钮)。
实际应用
在一个用户注册页面上,垂直线性布局可用来堆叠文本框和按钮。
示例代码
<LinearLayout
    xmlns:android="http://schemas.android.com/apk/res/android"
    android:layout_width="match_parent"
    android:layout_height="wrap_content"
    android:orientation="vertical"
    android:padding="16dp">

    <EditText
        android:layout_width="match_parent"
        android:layout_height="wrap_content"
        android:hint="Username" />

    <EditText
        android:layout_width="match_parent"
        android:layout_height="wrap_content"
        android:hint="Password"
        android:inputType="textPassword" />

    <Button
        android:layout_width="match_parent"
        android:layout_height="wrap_content"
        android:text="Register" />
</LinearLayout>
1.2 约束布局(ConstraintLayout)
特点
灵活性: 允许在视图之间或视图与父布局之间创建复杂的约束关系(alignment, positioning, chaining)。
性能优化: 减少嵌套层次,优化性能。可以替代嵌套的 `LinearLayout`、`RelativeLayout`。
直观性: 支持使用设计工具(如 Android Studio 的 Layout Editor)进行可视化布局。
高级功能: 支持自动布局优化、动态约束调整、`Guideline` 和 `Barrier`。
适用场景
复杂布局: 复杂的屏幕设计和需要精确控制视图相对位置的场景。
响应式设计: 需要在不同屏幕尺寸和方向上保持一致的布局。
实际应用
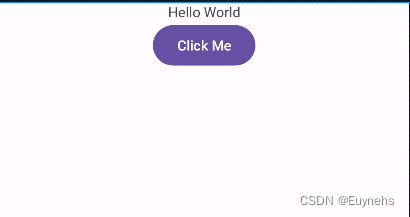
用于创建复杂的仪表盘界面,包含多种视图元素,如图表、指标显示等。
示例代码:
<androidx.constraintlayout.widget.ConstraintLayout
    xmlns:android="http://schemas.android.com/apk/res/android"
    xmlns:app="http://schemas.android.com/apk/res-auto"
    android:layout_width="match_parent"
    android:layout_height="match_parent">

    <TextView
        android:id="@+id/textView"
        android:layout_width="wrap_content"
        android:layout_height="wrap_content"
        android:text="Hello World"
        app:layout_constraintTop_toTopOf="parent"
        app:layout_constraintLeft_toLeftOf="parent"
        app:layout_constraintRight_toRightOf="parent"/>

    <Button
        android:id="@+id/button"
        android:layout_width="wrap_content"
        android:layout_height="wrap_content"
        android:text="Click Me"
        app:layout_constraintTop_toBottomOf="@id/textView"
        app:layout_constraintLeft_toLeftOf="parent"
        app:layout_constraintRight_toRightOf="parent"/>
</androidx.constraintlayout.widget.ConstraintLayout>
1.3 表格布局(TableLayout)
特点
行列布局: 按行和列组织子视图,类似HTML的表格结构。
灵活性: 可以设置列的跨距(`colspan`),指定特定列自动扩展。
适应性: 可以通过 `TableRow` 控制每一行的子视图排列。
适用场景
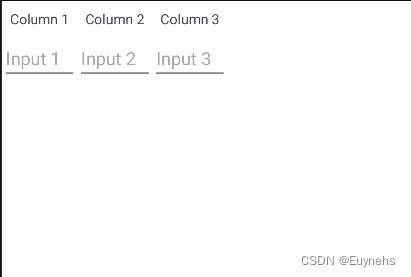
数据表格: 展示结构化的数据,如成绩表、财务报表。
网格布局: 创建表单和其他网格状布局的UI。
实际应用
用于构建展示成绩的表格,每行显示学生的不同科目分数。
示例代码
<TableLayout
    xmlns:android="http://schemas.android.com/apk/res/android"
    android:layout_width="match_parent"
    android:layout_height="wrap_content">

    <TableRow>
        <TextView
            android:text="Name"
            android:padding="8dp"/>
        <TextView
            android:text="Math"
            android:padding="8dp"/>
        <TextView
            android:text="Science"
            android:padding="8dp"/>
    </TableRow>
    <TableRow>
        <TextView
            android:text="Alice"
            android:padding="8dp"/>
        <TextView
            android:text="90"
            android:padding="8dp"/>
        <TextView
            android:text="85"
            android:padding="8dp"/>
    </TableRow>
</TableLayout>
1.4 帧布局(FrameLayout)
特点
简单性: 通常只会显示一个子视图,后添加的视图覆盖在先添加的视图之上。
层叠效果: 适用于简单的层次化视图,允许视图层叠。
适用场景
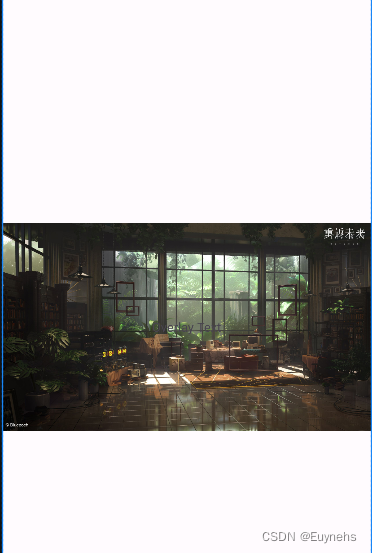
简单层叠: 用于简单的叠加视图,如背景图片叠加文本或按钮。
占位符: 用于在运行时动态添加视图组件,例如片段(Fragment)的容器。
实际应用
用于显示全屏图片,并在其上覆盖标题或按钮。
示例代码
<FrameLayout
    xmlns:android="http://schemas.android.com/apk/res/android"
    android:layout_width="match_parent"
    android:layout_height="match_parent">

    <ImageView
        android:layout_width="match_parent"
        android:layout_height="match_parent"
        android:src="@drawable/image"/>

    <TextView
        android:layout_width="wrap_content"
        android:layout_height="wrap_content"
        android:text="Overlay Text"
        android:layout_gravity="center"/>
</FrameLayout>
1.5 相对布局(RelativeLayout)
特点
相对定位: 子视图可以相对于彼此或父视图进行定位,使用 `android:layout_align*` 系列属性。
灵活性: 允许灵活排列视图,减少嵌套层次。
旧版本支持: 适合需要支持较早版本Android设备的应用。
适用场景
简单对齐: 需要相对对齐的布局场景,如按钮相对于文本框下方排列。
响应式设计: 适用于在不同屏幕方向和尺寸下简单响应布局的场景。
实际应用
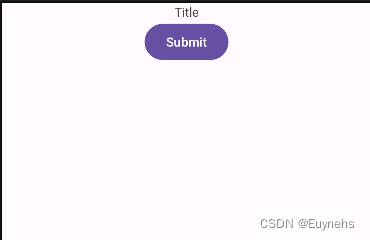
用于创建简单的标题与内容的相对布局,比如标题和提交按钮的页面。
示例代码
<RelativeLayout
    xmlns:android="http://schemas.android.com/apk/res/android"
    android:layout_width="match_parent"
    android:layout_height="match_parent">

    <TextView
        android:id="@+id/textView"
        android:layout_width="wrap_content"
        android:layout_height="wrap_content"
        android:text="Title"
        android:layout_alignParentTop="true"
        android:layout_centerHorizontal="true"/>

    <Button
        android:id="@+id/button"
        android:layout_width="wrap_content"
        android:layout_height="wrap_content"
        android:text="Submit"
        android:layout_below="@id/textView"
        android:layout_centerHorizontal="true"/>
</RelativeLayout>
UI界面交互功能的实现方法总结
2.1 按钮点击事件
实现方法
布局: 在布局文件 (activity_main.xml) 中定义一个按钮。
绑定事件: 在活动 (MainActivity.java) 中,通过 findViewById 获取按钮的引用,并调用 setOnClickListener 方法为按钮设置点击事件监听器。
处理点击: 在 onClick 方法中定义按钮被点击时的处理逻辑。
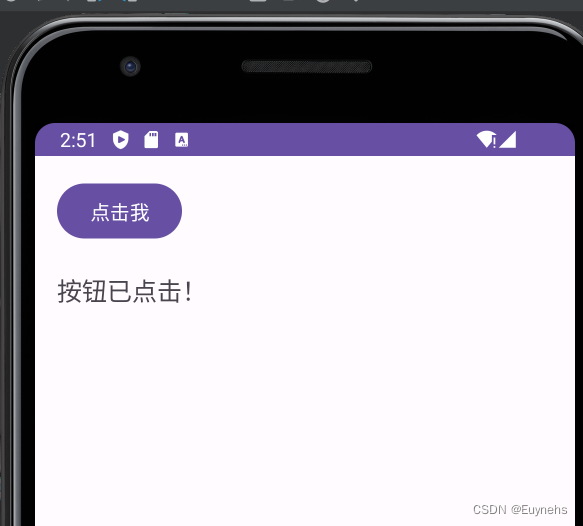
实际案例
简单按钮点击
示例代码
<RelativeLayout xmlns:android="http://schemas.android.com/apk/res/android"
      android:layout_width="match_parent"
      android:layout_height="match_parent"
      android:padding="16dp">

      <Button
          android:id="@+id/myButton"
          android:layout_width="wrap_content"
          android:layout_height="wrap_content"
          android:text="点击我"/>

      <TextView
          android:id="@+id/resultTextView"
          android:layout_width="wrap_content"
          android:layout_height="wrap_content"
          android:textSize="18sp"
          android:layout_below="@id/myButton"
          android:layout_marginTop="20dp"/>
  </RelativeLayout>
 package com.example.app;

  import android.os.Bundle;
  import android.view.View;
  import android.widget.Button;
  import android.widget.TextView;
  import androidx.appcompat.app.AppCompatActivity;

  public class MainActivity extends AppCompatActivity {
      private TextView resultTextView;

      @Override
      protected void onCreate(Bundle savedInstanceState) {
          super.onCreate(savedInstanceState);
          setContentView(R.layout.activity_main);

          Button myButton = findViewById(R.id.myButton);
          resultTextView = findViewById(R.id.resultTextView);

          myButton.setOnClickListener(new View.OnClickListener() {
              @Override
              public void onClick(View v) {
                  resultTextView.setText("按钮已点击!");
              }
          });
      }
  }
2.2 列表项点击事件
实现方法
布局: 在布局文件中定义一个 ListView。
绑定数据: 在活动中创建一个 ArrayAdapter 来适配数据并设置给 ListView。
绑定事件: 为 ListView 设置 OnItemClickListener 监听器来处理列表项的点击事件
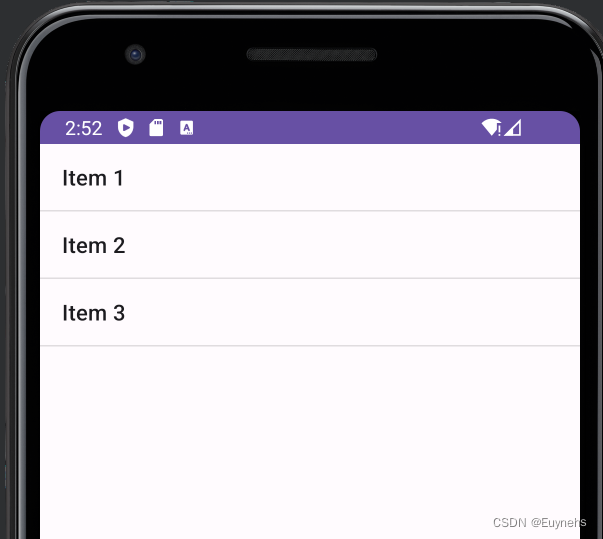
实际案例
点击列表项显示选择项
示例代码
<RelativeLayout xmlns:android="http://schemas.android.com/apk/res/android"
      android:layout_width="match_parent"
      android:layout_height="match_parent">

      <ListView
          android:id="@+id/myListView"
          android:layout_width="match_parent"
          android:layout_height="match_parent"/>
  </RelativeLayout>
 package com.example.app;

  import android.os.Bundle;
  import android.view.View;
  import android.widget.AdapterView;
  import android.widget.ArrayAdapter;
  import android.widget.ListView;
  import android.widget.Toast;
  import androidx.appcompat.app.AppCompatActivity;

  public class MainActivity extends AppCompatActivity {

      @Override
      protected void onCreate(Bundle savedInstanceState) {
          super.onCreate(savedInstanceState);
          setContentView(R.layout.activity_main);

          ListView listView = findViewById(R.id.myListView);
          String[] items = {"Item 1", "Item 2", "Item 3"};

          ArrayAdapter<String> adapter = new ArrayAdapter<>(this, android.R.layout.simple_list_item_1, items);
          listView.setAdapter(adapter);

          listView.setOnItemClickListener(new AdapterView.OnItemClickListener() {
              @Override
              public void onItemClick(AdapterView<?> parent, View view, int position, long id) {
                  String selectedItem = (String) parent.getItemAtPosition(position);
                  Toast.makeText(MainActivity.this, "Selected: " + selectedItem, Toast.LENGTH_SHORT).show();
              }
          });
      }
  }
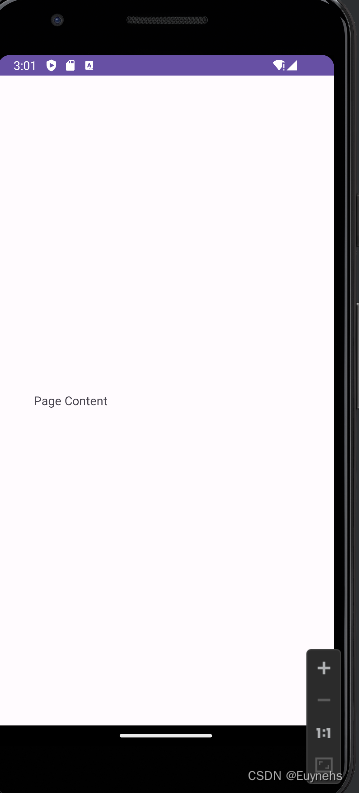
2.3 滑动操作
实现方法
布局: 在布局文件中定义一个 ViewPager2。
片段: 创建一个片段类 (PageFragment) 来表示每个页面。
适配器: 在活动中实现一个 FragmentStateAdapter,用于管理 ViewPager2 中的片段。
绑定适配器: 将适配器设置给 ViewPager2。
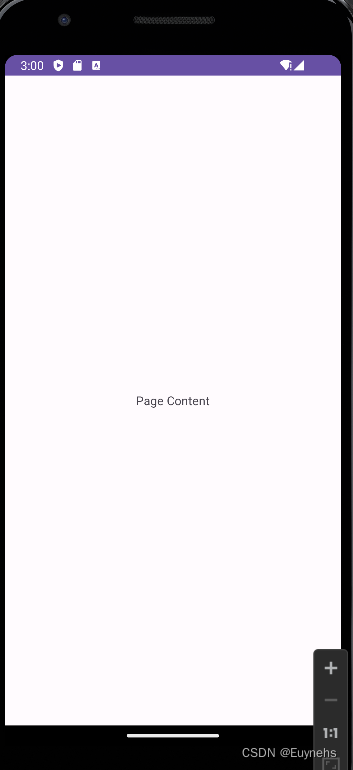
实际案例
ViewPager滑动切换页面
示例代码
dependencies {
      implementation 'androidx.viewpager2:viewpager2:1.0.0'
  }
<RelativeLayout xmlns:android="http://schemas.android.com/apk/res/android"
      android:layout_width="match_parent"
      android:layout_height="match_parent">

      <androidx.viewpager2.widget.ViewPager2
          android:id="@+id/viewPager"
          android:layout_width="match_parent"
          android:layout_height="match_parent"/>
  </RelativeLayout>
package com.example.app;

  import android.os.Bundle;
  import androidx.appcompat.app.AppCompatActivity;
  import androidx.fragment.app.Fragment;
  import androidx.viewpager2.adapter.FragmentStateAdapter;
  import androidx.viewpager2.widget.ViewPager2;

  public class MainActivity extends AppCompatActivity {

      @Override
      protected void onCreate(Bundle savedInstanceState) {
          super.onCreate(savedInstanceState);
          setContentView(R.layout.activity_main);

          ViewPager2 viewPager = findViewById(R.id.viewPager);
          viewPager.setAdapter(new MyPagerAdapter(this));
      }

      private static class MyPagerAdapter extends FragmentStateAdapter {

          public MyPagerAdapter(MainActivity fa) {
              super(fa);
          }

          @Override
          public Fragment createFragment(int position) {
              return new PageFragment();
          }

          @Override
          public int getItemCount() {
              return 3;
          }
      }
  }
 package com.example.app;

  import android.os.Bundle;
  import android.view.LayoutInflater;
  import android.view.View;
  import android.view.ViewGroup;
  import androidx.annotation.NonNull;
  import androidx.annotation.Nullable;
  import androidx.fragment.app.Fragment;

  public class PageFragment extends Fragment {

      @Nullable
      @Override
      public View onCreateView(@NonNull LayoutInflater inflater, @Nullable ViewGroup container, @Nullable Bundle savedInstanceState) {
          return inflater.inflate(R.layout.fragment_page, container, false);
      }
  }
 <?xml version="1.0" encoding="utf-8"?>
  <RelativeLayout xmlns:android="http://schemas.android.com/apk/res/android"
      android:layout_width="match_parent"
      android:layout_height="match_parent">

      <TextView
          android:layout_width="wrap_content"
          android:layout_height="wrap_content"
          android:text="Page Content"
          android:layout_centerInParent="true"/>
  </RelativeLayout>
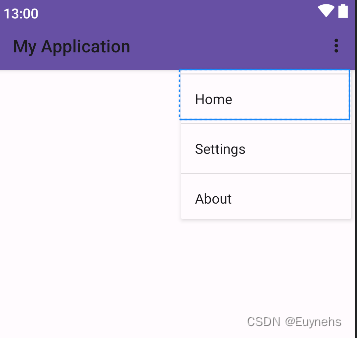
2.4 菜单项
实现方法
创建一个菜单资源文件(res/menu/simple_menu.xml),定义菜单项。
在活动的布局文件(res/layout/activity_main.xml)中设置 Toolbar 作为应用栏。
在活动的 Java 文件(MainActivity.java)中,设置 Toolbar 作为支持应用栏,并加载菜单。
实际案例
实现一个基本的应用栏菜单,包含几个菜单项,可以响应点击事件。
示例代码
<!-- res/menu/simple_menu.xml -->
<menu xmlns:android="http://schemas.android.com/apk/res/android">
    <item
        android:id="@+id/menu_home"
        android:title="Home"
        android:icon="@drawable/ic_home" />
    <item
        android:id="@+id/menu_settings"
        android:title="Settings"
        android:icon="@drawable/ic_settings" />
    <item
        android:id="@+id/menu_about"
        android:title="About"
        android:icon="@drawable/ic_info" />
</menu>
<!-- res/layout/activity_main.xml -->
<RelativeLayout xmlns:android="http://schemas.android.com/apk/res/android"
    xmlns:tools="http://schemas.android.com/tools"
    android:layout_width="match_parent"
    android:layout_height="match_parent"
    tools:context=".MainActivity">

    <androidx.appcompat.widget.Toolbar
        android:id="@+id/toolbar"
        android:layout_width="match_parent"
        android:layout_height="?attr/actionBarSize"
        android:background="?attr/colorPrimary"
        android:theme="@style/ThemeOverlay.AppCompat.Dark.ActionBar" />

    <!-- Main content goes here -->
    <FrameLayout
        android:id="@+id/container"
        android:layout_width="match_parent"
        android:layout_height="match_parent"
        android:layout_below="@id/toolbar" />

</RelativeLayout>
package com.example.simplemenu;

import androidx.annotation.NonNull;
import androidx.appcompat.app.AppCompatActivity;
import androidx.appcompat.widget.Toolbar;

import android.os.Bundle;
import android.view.Menu;
import android.view.MenuItem;
import android.widget.Toast;

public class MainActivity extends AppCompatActivity {

    @Override
    protected void onCreate(Bundle savedInstanceState) {
        super.onCreate(savedInstanceState);
        setContentView(R.layout.activity_main);

        Toolbar toolbar = findViewById(R.id.toolbar);
        setSupportActionBar(toolbar);
    }

    @Override
    public boolean onCreateOptionsMenu(Menu menu) {
        getMenuInflater().inflate(R.menu.simple_menu, menu);
        return true;
    }

    @Override
    public boolean onOptionsItemSelected(@NonNull MenuItem item) {
        switch (item.getItemId()) {
            case R.id.menu_home:
                Toast.makeText(this, "Home selected", Toast.LENGTH_SHORT).show();
                return true;
            case R.id.menu_settings:
                Toast.makeText(this, "Settings selected", Toast.LENGTH_SHORT).show();
                return true;
            case R.id.menu_about:
                Toast.makeText(this, "About selected", Toast.LENGTH_SHORT).show();
                return true;
            default:
                return super.onOptionsItemSelected(item);
        }
    }
}
package com.example.myapplication;

public abstract class MenuConstants {
    public static final int MENU_HOME = 1000001;
    public static final int MENU_SETTINGS = 1000002;
    public static final int MENU_ABOUT = 1000003;
}
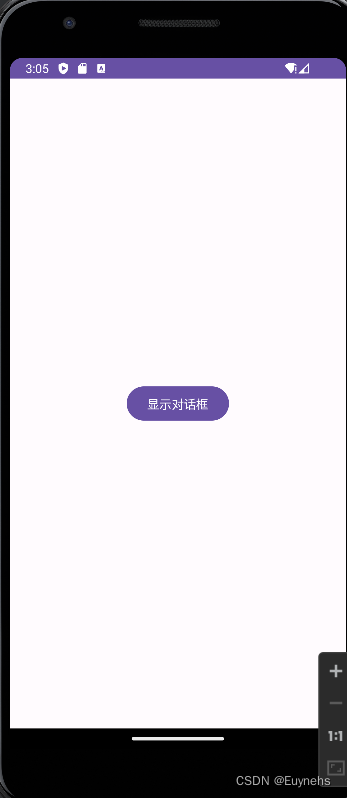
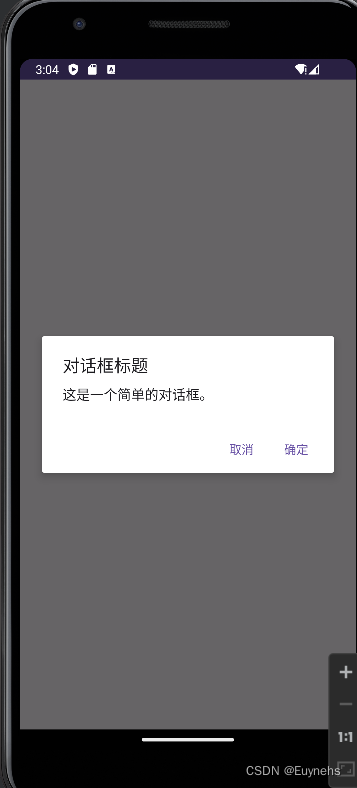
2.5 对话框
实现方法
布局: 在布局文件中定义一个按钮。
绑定事件: 在活动中为按钮设置点击事件监听器。
显示对话框: 使用 AlertDialog.Builder 创建和显示对话框。
实际案例
显示对话框
示例代码
<?xml version="1.0" encoding="utf-8"?>
<RelativeLayout xmlns:android="http://schemas.android.com/apk/res/android"
    android:layout_width="match_parent"
    android:layout_height="match_parent"
    android:padding="16dp">

    <Button
        android:id="@+id/showDialogButton"
        android:layout_width="wrap_content"
        android:layout_height="wrap_content"
        android:text="显示对话框"
        android:layout_centerInParent="true"/>
</RelativeLayout>
package com.example.dialogexample;

import android.os.Bundle;
import android.view.View;
import android.widget.Button;
import androidx.appcompat.app.AlertDialog;
import androidx.appcompat.app.AppCompatActivity;

public class MainActivity extends AppCompatActivity {

    @Override
    protected void onCreate(Bundle savedInstanceState) {
        super.onCreate(savedInstanceState);
        setContentView(R.layout.activity_main);

        Button showDialogButton = findViewById(R.id.showDialogButton);
        showDialogButton.setOnClickListener(new View.OnClickListener() {
            @Override
            public void onClick(View v) {
                showAlertDialog();
            }
        });
    }

    private void showAlertDialog() {
        new AlertDialog.Builder(this)
            .setTitle("对话框标题")
            .setMessage("这是一个简单的对话框。")
            .setPositiveButton("确定", null)
            .setNegativeButton("取消", null)
            .show();
    }
}
学习过程
在实现这些功能的过程中,我会先了解官方文档或参考可靠的教程,然后在我的项目中进行实践。如果遇到问题,我会查阅相关文档或在开发者社区中寻求帮助。在实践过程中,我不断调试和优化代码,以确保功能的正确性和用户体验。
学习反思与持续改进
反思
在实际项目中反复实践各类UI交互方式,积累经验。
对遇到的问题进行调试分析,了解UI交互中的常见坑和解决方案。
持续改进措施
经常查阅官方文档和社区资源,学习新技术和最佳实践。
在开发者社区参与讨论,解决问题并帮助他人。
不断学习新的UI框架和工具,提升技能水平。
官方文档是最权威的信息来源,帮助理解最新的API和最佳实践。
通过实际项目的开发,不断检验和提升自己的技能。
结语
通过本博客,我们详细探讨了不同的布局(Layout)管理组件的显示方式,每种布局都适合特定的场景。以下是对常见布局的详细介绍,包括线性布局、约束布局、表格布局、帧布局和相对布局。UI界面的交互功能实现涉及按钮点击、列表项选择、滑动操作、菜单项和对话框等。以下是对这些交互功能的总结及实现方法。


 1876
1876

 被折叠的 条评论
为什么被折叠?
被折叠的 条评论
为什么被折叠?
 到【灌水乐园】发言


