


目录
一. 变量的定义
1. 定义本身
变量就是内存一片区域的地址

2. 变量存在的意义
命令无法操作一直变化的目标
用一串固定的字符来表示不固定的目标可以解决此问题
二. shell脚本中变量的定义方法
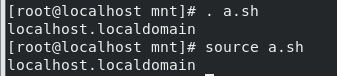
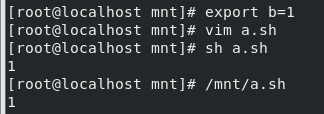
1. 环境级别
注:仅在当前环境中生效
export a=1
在环境关闭后变量失效
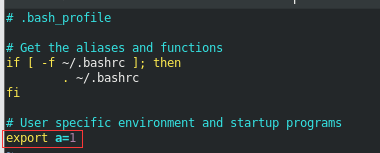
2. 用户级别
注:仅在当前用户下生效
vim ~/.bash_profile
export a=1![]()

3. 系统级别
vim /etc/profile
export a=2

vim /etc/profile.d/westos.sh
export b=3


4. 变量名称
"字符" "_" "数字"
不能用数字开头
建议:
变量名称短全用大写字符
变量名称长用_区分子类
WESTOS
Westos_Linux
westoS_Linux
三. 变量的转译
1. 转译
\      #转译单个字符
""     #弱引用,批量转译特殊字符 不能转译"\" "`" "$" "!"
''     #强引用

2. 声明
{}                        ##声明
a=1
echo $ab
echo ${a}b
3. 变量的数组
a=(1 2 3 4 5)
echo $a        ## 默认下标为0
echo ${a[0]}   ## 输出数组第一个字符
echo ${a[1]}   ## 输出数组第二个字符
echo ${a[*]}   ## 输出数组所有字符
echo ${a[@]}   ## 输出数组所有字符
               ###输出数组所有字符的*和@的区别###
a=(1 2 3)
a[*] = "1 2 3"            ##表示一个整体
a[@] = "1" "2" "3"        ##单独
四. Linux中命令的别名设定
alias xie='vim'##临时设定
![]()
vim ~/.bashrc
alias xie='vim'##只针对与用户生效
![]()

![]()
vim /etc/bashrc##针对系统所以用户生效
alias xie='vim'
![]()

![]()
unalias xie##删除当前环境中的alias

五. 用户环境变量的更改
环境变量:
用户在操作系统时使用到的命令搜索路径
![]()
设定方式:
vim ~/.bash_profile
export PATH=$PATH:/mnt![]()

![]()
vim /etc/bash_profile
export PATH=$PATH:/mnt![]()


六. 利用命令的执行结果设定变量
1. 直接利用命令执行结果
$() | `` ##优先执行TEST=`hostname` TEST=$(hostname)

2. 脚本中的传参
非交互模式:
$0 is /mnt/test.sh              ##脚本本身
$1 is westos                    ##脚本后所输入的第一串字符
$2 is linux
$3 is redhat
$* is westos linux redhat       ##脚本后所输入的所有字符"westos linux redhat"
$@ is westos linux redhat       ##脚本后所输入的所有字符'westos' 'linux' 'redhat'
$# is 3                         ##脚本后所输入的字符串个数

交互模式传参:
read  WESTOS                    ##对westos赋值
read -p "please input word:"    ##输出提示语
     -s                         ##隐藏输入内容


七. 脚本函数
定义:
程序的别名
设定方式:
WORD()
{
action1
action2
}

WORD 在脚本中就代表action1 action2这两个动作
课下脚本
create_user.sh userfile passfile
userfile用的用户会被全部建立
passfile中的密码会被全部设定
#!/bin/bash
[ -z $1 ] && {
	echo "未指定用户文件"
	exit
}
[ -z $2 ] && {
	echo "未指定密码文件"
	exit
}

N=`awk 'BEGIN{n=0}{n++}END{print n}' userfile`
M=`awk 'BEGIN{m=0}{m++}END{print m}' passfile`
[ "$N" != "$M" ] && {
	echo "用户与密码不匹配"
	exit
}

for I in `seq 1 $N`
do
# 创建变量UserName和PassName
	UserName=`sed -n ${I}P userfile`
	PassName=`sed -n ${I}P passfile`
# 判断系统中是否已经存在该用户,如果存在,报错,反之则进行创建
	if id $UserName > /dev/null 2>&1
	then
		echo $UserName 已经存在
	else
		useradd $UserName
		echo $PassName | passwd --stdin $UserName
		echo $UserName 创建成功
	fi
done


 356
356


 被折叠的 条评论
为什么被折叠?
被折叠的 条评论
为什么被折叠?
 到【灌水乐园】发言


