一、前言
- 最近遇到了一个新的情景,需要将彩色图片转化为黑白图片,如果手动地去转化一张一张图片,那就真的太原始,效率太低。

- 用 Python,只需要几行代码就可以在几秒内转化上千张图片。而且,这个功能的用途相当广泛,不仅能使图片变得深邃,而且还可以简化一些复杂模型的数学计算。
二、准备
① Python 安装
- 在 windows 上安装 Python:
-
- 下载 Python 的最新版本:访问链接 Python 官网,在 Windows 操作系统上安装 Python 3.10.0,大家也可以自行选择最新版的下载。

-
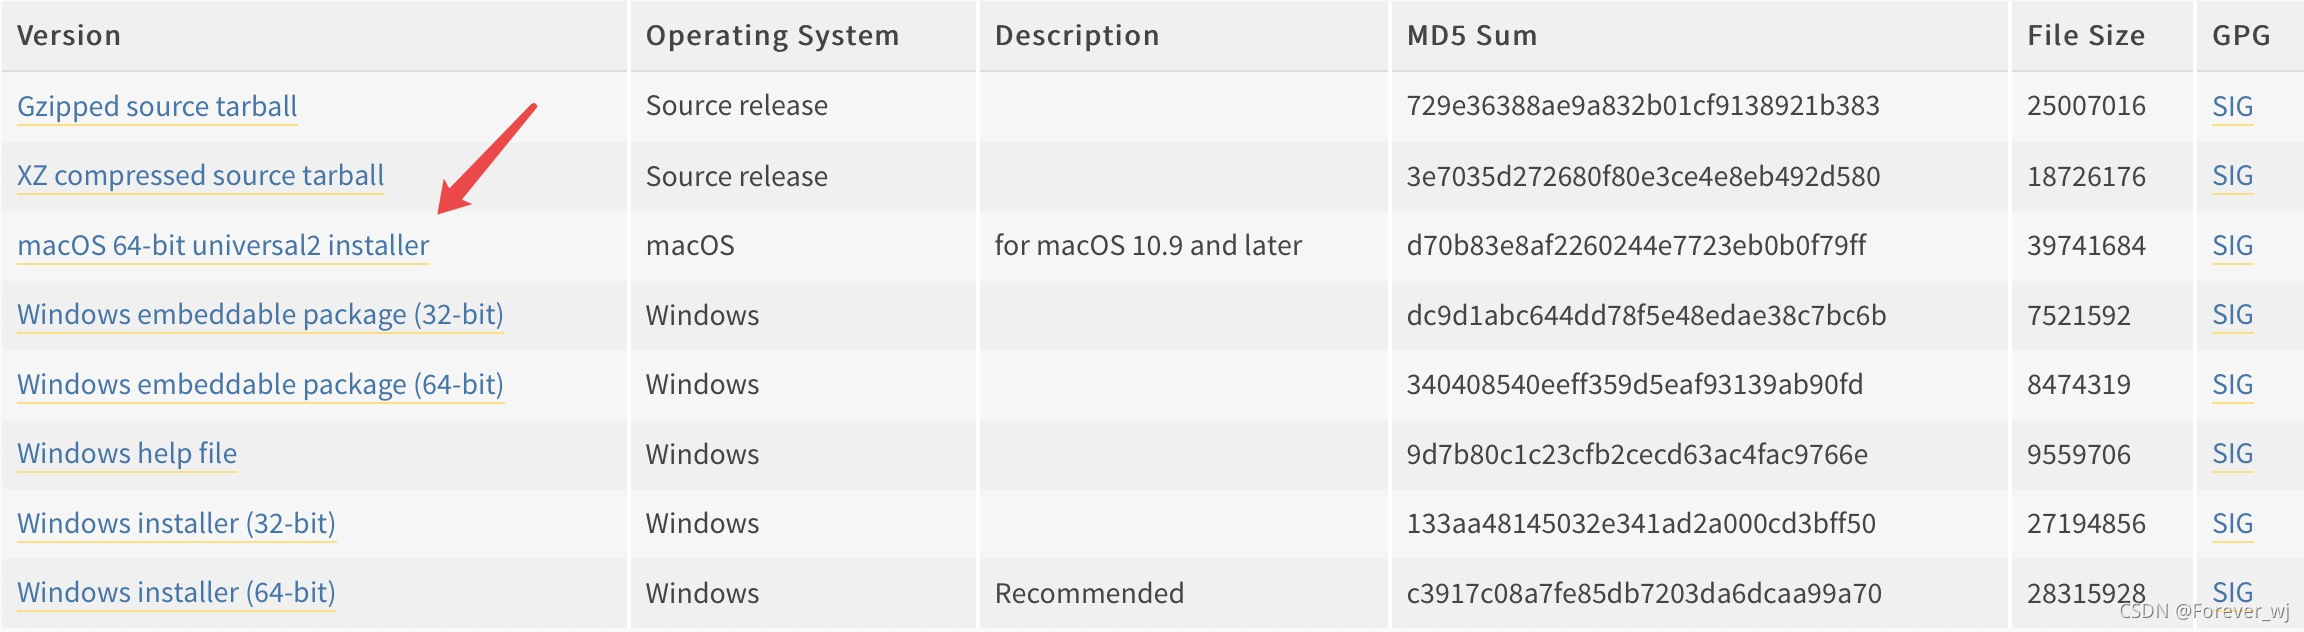
- 进入下一个页面后,拉到最下面,选择 Windows embeddable package (64-bit) 下载:

-
- 双击下载完成的应用程序,记得一定要勾选 ADD Python 3.7 to PATH,否则 cmd 无法运行 Python,然后选择 Install Now 进行安装,默认会安装 pip,而且将安装到 C 盘(推荐)。如果希望换一个盘安装,可以点击 Customize installation 在里面选择其他的盘。
- 在 macOS 上安装 Python:
-
- 其实 macOS 上是默认安装了 Python 的,只不过版本是 Python2.7,其相对于现在的 Python 3 缺少了很多特性,而且速度也比 Python 3 慢,因此还是建议大家装 Python 3。
-
- 同样地,下载 Python 的最新版本,访问链接:Python 官网,在 macOS 操作系统上安装 Python 3.7.4,大家也可以自行选择最新版的下载。
-
- 进入下一个页面后,拉到最下面,选择 macOS 64-bit universal2 installer 下载:
-
- 下载完成后得到一个 pkg 文件,双击打开,按照指示步骤进行安装即可。
② 安装依赖
- 确保 Python 和 pip 已经成功安装在电脑上,Windows 环境下打开 Cmd(开始—运行—CMD),苹果系统环境下请打开 Terminal(command+空格输入Terminal),准备开始输入命令安装依赖。
- 当然,我更推荐大家用 VS Code 编辑器,把本文代码 Copy 下来,在编辑器下方的终端装依赖模块。
- 在终端输入以下命令,安装所需要的依赖模块:
pip install pillow -i https://pypi.tuna.tsinghua.edu.cn/simple some-package
- 看到 Successfully installed xxx 则说明安装成功。
三、编码实现
- 首先编写一下彩色图转单色图的转化函数,接收两个参数,一个是输入文件的路径,一个是输出文件路径:
from PIL import Image
def colorful to_ single(input_ img path, output_ img path):
""""""
彩色图转单色图
:param input_img_path: 图片路径
:param output_img_path: 输出图片路径
img = Image.open(input_img_path)
img = img.convert("L")
img.save(output_img_path)
- 然后将需要转化的图片放到一个文件夹中,我这里命名该文件夹为 imgs,然后指定一个输出文件夹 output,如下:
dataset_dir = 'imgs'
output_dir = 'output'
image_filenames = [(
os.path.join(dataset_ dir, file_ _dir),
os.path.join(output_ _dir, file_ dir)
) for file_dir in os.listdir(dataset_ dir)]
for path in image_filenames:
colorful_to_single(path[0], path[1])
- 这里比较难理解的可能是 image_filenames,用到了列表推导式,即遍历所有 dataset_dir 里的文件:
for file_dir in os.listdir(dataset_dir)
os.path.join(output_dir, file_dir)
- 最终生成一个数组,第一个元素是输入路径,第二个元素是输出路径:
image_filenames = [(
    os.path.join(dataset_dir, file_dir),
    os.path.join(output_dir, file_dir)
) for file_dir in os.listdir(dataset_dir)]
四、效果及用途

- 用途当然很多,比如:
-
- 在深度学习分类图像的时候,如果并不需要考虑颜色的维度,可以先将图片转化为黑白图,简化运算复杂度;
-
- 黑白图片有的时候比彩色图片更具备冲击力,能够更加突出主题;
-
- 黑白图片有些时候也有美颜的作用,因为此时注意力的重点在于脸型,如果那个人的脸型特别好看,但是肤色比较差,这时候黑白照片就很有效果。


 2969
2969


 被折叠的 条评论
为什么被折叠?
被折叠的 条评论
为什么被折叠?
 到【灌水乐园】发言


