


以下用helloworld来使用DNK
第一步,安装NDK
1、首先下载NDK。
http://www.cnblogs.com/yaotong/archive/2011/01/25/1943615.html
解压出来即可。
2、配置环境变量
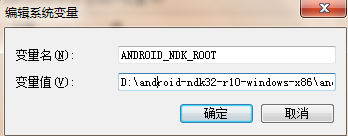
I. 新建一个系统环境变量,变量名为ANDROID_NDK_ROOT, 变量值为你的NDK所在的路径,比如我的就是D:\android-ndk32-r10-windows-x86\android-ndk-r10
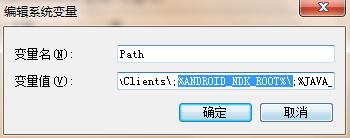
II. 在系统变量 Path 中添加%ANDROID_NDK_ROOT%\;
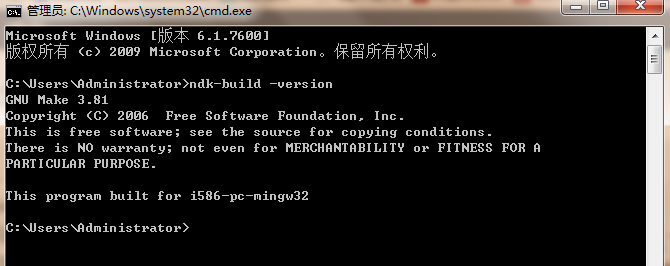
3、 NDK 安装验证
完成上面的步骤之后,NDK的安装到此就完成了,下面我们来验证一下NDK安装成功与否. 打开cmd.exe,在里面输入ndk-build -version,输出以下内容,表示安装成功。
第二步,新建一个android工程来测试,采用最简单的HelloWorld工程
1、新建helloworld工程,修改里面的代码,载入本地库代码修改如下
public class HelloWorldActivity extends Activity {
    //natvie必须声明,用于生成C/C++代码
    public native String HelloWorld();
    ……
    static{
        System.loadLibrary("HelloWorld");
    }
}
2、编译上述修改的代码,然后生成ndk h文件,步骤如下:
进入src目录,使用javah -d ../jni com.test.helloworld.HelloWorldActivity 指令。
其中 -d:建立一个目录。
其中../jni :在上级目录的jni文件下生成头文件。
原理:.java文件也不用编译可以直接生成.h文件。

会在E:\workspace\HelloWorld\jni的目录下生成
com_test_helloworld_HelloWorldActivity.h
看看h都有些什么内容
/* DO NOT EDIT THIS FILE - it is machine generated */
#include <jni.h>
/* Header for class com_test_helloworld_HelloWorldActivity */
#include <android/log.h>

#ifdef LOG_TAG
#undef LOG_TAG
#endif
#define LOG_TAG "VM JNI"
#define JNI_ERROR(...) __android_log_print(ANDROID_LOG_ERROR, LOG_TAG, __VA_ARGS__)

#if 1
#define JNI_DEBUG(...) __android_log_print(ANDROID_LOG_INFO, LOG_TAG, __VA_ARGS__)
#else
#define JNI_DEBUG(...)
#endif
#ifndef _Included_com_test_helloworld_HelloWorldActivity
#define _Included_com_test_helloworld_HelloWorldActivity
#ifdef __cplusplus
extern "C" {
#endif
/*
 * Class:     com_test_helloworld_HelloWorldActivity
 * Method:    HelloWorld
 * Signature: ()Ljava/lang/String;
 */
JNIEXPORT jstring JNICALL Java_com_test_helloworld_HelloWorldActivity_HelloWorld
  (JNIEnv *, jobject);

#ifdef __cplusplus
}
#endif
#endif
Java_com_test_helloworld_HelloWorldActivity_HelloWorld是函数名称,因为我们在android工程中定义的native函数为HelloWorld(),所以JNI的名称是Java+包名+类名+函数名
3、根据生成的h文件,写需要实现的c文件,放在同一文件目录下
#include <string.h>
#include <jni.h>
#include "com_test_helloworld_HelloWorldActivity.h"
jstring
Java_com_test_helloworld_HelloWorldActivity_HelloWorld
  (JNIEnv* env, jobject thiz){
        JNI_DEBUG("JNI Java_com_test_helloworld_HelloWorldActivity_HelloWorld!!!");
        return (*env)->NewStringUTF(env, "123456!");
}
由上述代码,我们可以发现,增加了在Android中的打印函数,具体定义可以查看h中的定义,注意:需要增加#include
# Copyright (C) 2009 The Android Open Source Project
#
# Licensed under the Apache License, Version 2.0 (the "License");
# you may not use this file except in compliance with the License.
# You may obtain a copy of the License at
#
#      http://www.apache.org/licenses/LICENSE-2.0
#
# Unless required by applicable law or agreed to in writing, software
# distributed under the License is distributed on an "AS IS" BASIS,
# WITHOUT WARRANTIES OR CONDITIONS OF ANY KIND, either express or implied.
# See the License for the specific language governing permissions and
# limitations under the License.
#
LOCAL_PATH := $(call my-dir)

include $(CLEAR_VARS)

LOCAL_MODULE    := HelloWorld
LOCAL_SRC_FILES := com_test_helloworld_HelloWorldActivity.c

LOCAL_LDLIBS := -llog -lc -ldl  -lstdc++ -lm

include $(BUILD_SHARED_LIBRARY)
注意:有这样一句LOCAL_LDLIBS := -llog -lc -ldl -lstdc++ -lm,这句话中-llog的作用就是增加打印,此处为第二次需要注意的地方。
仅仅添加mk文件不够,我们需要制定lib的类型。再增加一个
Application.mk
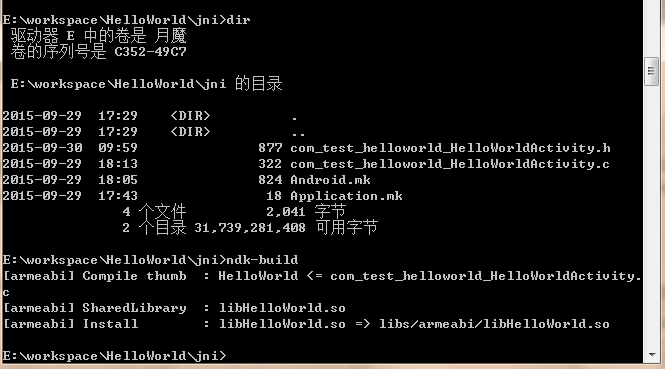
APP_ABI := armeabi至此,lib 的工作全部完成,cmd中cd 到该目录下
第三步,写测试code
……
    protected void onCreate(Bundle savedInstanceState) {
        super.onCreate(savedInstanceState);
        //setContentView(R.layout.hello_world_layout);
        Log.d("VM JNI", "on create execute"+HelloWorld());
        TextView tv = new TextView(this);
        tv.setText(HelloWorld()); // call LIB C
        setContentView(tv);
    }
……
运行,就可以打印出lib中需要显示的字符了。注意:有的无法显示汉字,采用英文字符测试下。


 477
477

 被折叠的 条评论
为什么被折叠?
被折叠的 条评论
为什么被折叠?
 到【灌水乐园】发言


