


问题陈述
使用计算机视觉技术和英特尔® AI 分析工具套件为自动驾驶车辆开发实时对象检测模型。参赛团队需要创建一个深度学习模型,用于准确检测行人、车辆、交通标志和交通信号等对象。该模型需要具有高准确度和低延迟,能够满足自动驾驶车辆安全导航的需求。
环境信息
- GPU:RTX 3080 Ti(12GB) * 1
- CPU:12 vCPU Intel® Xeon® Silver 4214R CPU @ 2.40GHz
- 内存:90GB
- PyTorch 2.0.0 Python3.8 Ubuntu20.04 Cuda 11.8
用到的Python库
import torch
import cv2 as cv
import numpy as np
from torch.utils.data import Dataset
from torch.utils.data import DataLoader
import torch.nn as nn
import torch.nn.functional as F
import argparse
import torchvision
from PIL import Image
import time
数据集介绍及处理
原数据集介绍
城市景观数据集:这个数据集包含高分辨率的城市场景图像,专门用于城市场景语义理解任务。该数据集包含 30 类对象(行人、汽车、公共汽车、自行车等)的 5,000 幅图像,并带有精细注释,本文使用原始图片集leftImg8bit与标记文件gtFine。
数据处理
生成标签
参考cityscrape官方给出的数据预处理代码,依据我们训练中需要用到的分类标签(0~33)生成新的标签集
#!/usr/bin/python
#
# Converts the polygonal annotations of the Cityscapes dataset
# to images, where pixel values encode ground truth classes.
#
# The Cityscapes downloads already include such images
#   a) *color.png             : the class is encoded by its color
#   b) *labelIds.png          : the class is encoded by its ID
#   c) *instanceIds.png       : the class and the instance are encoded by an instance ID
#
# With this tool, you can generate option
#   d) *labelTrainIds.png     : the class is encoded by its training ID
# This encoding might come handy for training purposes. You can use
# the file labels.py to define the training IDs that suit your needs.
# Note however, that once you submit or evaluate results, the regular
# IDs are needed.
#
# Uses the converter tool in 'json2labelImg.py'
# Uses the mapping defined in 'labels.py'
#

# python imports
from __future__ import print_function, absolute_import, division
import os, glob, sys

# cityscapes imports
from cityscapesscripts.helpers.csHelpers import printError
from cityscapesscripts.preparation.json2labelImg import json2labelImg

# The main method
def main():
    # Where to look for Cityscapes
    if 'CITYSCAPES_DATASET' in os.environ:
        cityscapesPath = os.environ['CITYSCAPES_DATASET']
    else:
        cityscapesPath = os.path.join(os.path.dirname(os.path.realpath(r"D:\data\gtFine")))
    # how to search for all ground truth
    searchFine   = os.path.join( cityscapesPath , "gtFine"   , "*" , "*" , "*_gt*_polygons.json" )
    print(searchFine)
    # search files
    filesFine = glob.glob( searchFine )
    filesFine.sort()

    # concatenate fine and coarse
    files = filesFine
    # files = filesFine # use this line if fine is enough for now.

    # quit if we did not find anything
    if not files:
        printError( "Did not find any files. Please consult the README." )

    # a bit verbose
    print("Processing {} annotation files".format(len(files)))

    # iterate through files
    progress = 0
    print("Progress: {:>3} %".format( progress * 100 / len(files) ), end=' ')
    for f in files:
        # create the output filename
        dst = f.replace( "_polygons.json" , "_labelTrainIds.png" )

        # do the conversion
        try:
            json2labelImg( f , dst , "ids" )
        except:
            print("Failed to convert: {}".format(f))
            raise

        # status
        progress += 1
        print("\rProgress: {:>3} %".format( progress * 100 / len(files) ), end=' ')
        sys.stdout.flush()


# call the main
if __name__ == "__main__":
    main()
裁剪数据集
由于原始图片大小为10242048,非常大,我们的设备内存不支持直接训练这样大的数据,需要对图片进行裁剪处理。我们随机选取区域进行裁剪,裁剪后大小为224224
**注意!!!**在图像分割任务中不可以使用resize调整图片大小,因为resize过程中会对像素点进行插值,但是语义分割的标签图像中的每个像素点都对应一个标签,插值会产生标签的错乱,只能使用裁剪对图片大小进行调整
def voc_rand_crop(feature, label, height=224, width=224):
    """随机裁剪特征feature和标签图像label"""

    """
    get_params允许裁剪之后的区域返回边框的坐标数值(边界框)
    *rect就是把边界框四个坐标展开,这样对图片和标号做同样的裁剪
	"""
    rect = torchvision.transforms.RandomCrop.get_params(
        feature, (height, width))
    feature = torchvision.transforms.functional.crop(feature, *rect)
    label = torchvision.transforms.functional.crop(label, *rect)
    #print('crop',type(feature))
    return feature, label
image_list_=[]
label_list_=[]
for i in range(2000):
    image=image_list[i]
    image = torch.Tensor(image)
    #print("imageshape",image.shape)
    label = label_list[i]
    label = torch.Tensor(label)
    #print(label.shape)
    image = image.permute(2, 0, 1)  # 将图片的维度转换成网络输入的维度(channel, width, height)
    #label = label.permute(2, 0, 1)
    image, label=voc_rand_crop(image, label, 224, 224)

    image = image/255.0  # 归一化输入
    #print(type(image))

    image_list_.append(image)
    label_list_.append(label)

image_list_=torch.stack(image_list_)
print(image_list_.shape)
label_list_=torch.stack(label_list_)
label_list_=label_list_.unsqueeze(1)
print(label_list_.shape)
生成Dataset
import torch
from torch.utils.data import Dataset, DataLoader

class CustomDataset(Dataset):
    def __init__(self, image_list, label_list, transform=None):
        self.images = image_list
        self.labels = label_list
        self.transform = transform

    def __len__(self):
        return len(self.images)

    def __getitem__(self, index):
        image = self.images[index]
        #print('1111',type(image))
        label = self.labels[index]
        #print('2222',label.shape)
        # 如果定义了数据变换,可以在这里应用
        if self.transform:
            image = self.transform(image)

        return image, label

# 创建自定义数据集对象
train_data = CustomDataset(image_list_, label_list_)
SegNet模型介绍及代码分析
SegNet(Semantic Segmentation Network)是一种用于语义分割任务的深度学习网络结构。它旨在将输入图像的每个像素分配给特定的语义类别,从而实现像素级别的图像分割。
网络结构
SegNet是一个基于编码器-解码器结构的深度卷积神经网络。编码器部分由一系列卷积和池化层组成,用于提取图像的特征。解码器部分通过上采样和反卷积操作将特征图恢复到原始图像尺寸,并生成像素级别的预测。
编码器
SegNet的编码器由多个卷积块组成。每个卷积块通常由卷积层、批归一化层和激活函数组成。这些卷积块逐渐减小特征图的空间分辨率并增加通道数,以捕捉不同层次的语义信息。
编码层的架构是VGG16的前13层,比较简单,通过叠加卷积-批标准化-ReLu激活一套操作来提取特征,随后用一个核为2步长为2的MaxPool来降采样,并实现输入图像的平移不变性。
- 输入图像通过一系列卷积层和池化层来逐渐减小空间分辨率,并增加特征通道的数量。
- 每个编码器阶段包含一个卷积层和一个池化层。卷积层用于提取特征,池化层用于减小特征图的空间尺寸。
- 编码器的输出是一系列不同分辨率的特征图,其中低分辨率特征图包含更全局的语义信息,而高分辨率特征图包含更局部的细节信息。
class Encoder(nn.Module):
    def __init__(self, input_channels=3):
        super(Encoder, self).__init__()

        self.enco1 = nn.Sequential(
            nn.Conv2d(input_channels, 64, kernel_size=3, stride=1, padding=1),
            nn.BatchNorm2d(64, momentum=bn_momentum),
            nn.ReLU(),
            nn.Conv2d(64, 64, kernel_size=3, stride=1, padding=1),
            nn.BatchNorm2d(64, momentum=bn_momentum),
            nn.ReLU()
        )
        self.enco2 = nn.Sequential(
            nn.Conv2d(64, 128, kernel_size=3, stride=1, padding=1),
            nn.BatchNorm2d(128, momentum=bn_momentum),
            nn.ReLU(),
            nn.Conv2d(128, 128, kernel_size=3, stride=1, padding=1),
            nn.BatchNorm2d(128, momentum=bn_momentum),
            nn.ReLU()
        )
        self.enco3 = nn.Sequential(
            nn.Conv2d(128, 256, kernel_size=3, stride=1, padding=1),
            nn.BatchNorm2d(256, momentum=bn_momentum),
            nn.ReLU(),
            nn.Conv2d(256, 256, kernel_size=3, stride=1, padding=1),
            nn.BatchNorm2d(256, momentum=bn_momentum),
            nn.ReLU(),
            nn.Conv2d(256, 256, kernel_size=3, stride=1, padding=1),
            nn.BatchNorm2d(256, momentum=bn_momentum),
            nn.ReLU()
        )
        self.enco4 = nn.Sequential(
            nn.Conv2d(256, 224, kernel_size=3, stride=1, padding=1),
            nn.BatchNorm2d(224, momentum=bn_momentum),
            nn.ReLU(),
            nn.Conv2d(224, 224, kernel_size=3, stride=1, padding=1),
            nn.BatchNorm2d(224, momentum=bn_momentum),
            nn.ReLU(),
            nn.Conv2d(224, 224, kernel_size=3, stride=1, padding=1),
            nn.BatchNorm2d(224, momentum=bn_momentum),
            nn.ReLU()
        )
        self.enco5 = nn.Sequential(
            nn.Conv2d(224, 224, kernel_size=3, stride=1, padding=1),
            nn.BatchNorm2d(224, momentum=bn_momentum),
            nn.ReLU(),
            nn.Conv2d(224, 224, kernel_size=3, stride=1, padding=1),
            nn.BatchNorm2d(224, momentum=bn_momentum),
            nn.ReLU(),
            nn.Conv2d(224, 224, kernel_size=3, stride=1, padding=1),
            nn.BatchNorm2d(224, momentum=bn_momentum),
            nn.ReLU()
        )

    def forward(self, x):
        id = []

        x = self.enco1(x)
        x, id1 = F.max_pool2d(x, kernel_size=2, stride=2, return_indices=True)  # 保留最大值的位置
        id.append(id1)
        x = self.enco2(x)
        x, id2 = F.max_pool2d(x, kernel_size=2, stride=2, return_indices=True)
        id.append(id2)
        x = self.enco3(x)
        x, id3 = F.max_pool2d(x, kernel_size=2, stride=2, return_indices=True)
        id.append(id3)
        x = self.enco4(x)
        x, id4 = F.max_pool2d(x, kernel_size=2, stride=2, return_indices=True)
        id.append(id4)
        x = self.enco5(x)
        x, id5 = F.max_pool2d(x, kernel_size=2, stride=2, return_indices=True)
        id.append(id5)

        return x, id
编码器+解码器(SegNet)
SegNet的解码器与编码器对应,通过上采样和反卷积操作逐渐将特征图恢复到原始图像尺寸。解码器中的每个卷积块通常包含反卷积层、卷积层、批归一化层和激活函数。解码器的目标是通过上采样操作保留细节信息,并生成与输入图像相同尺寸的预测。解码器也是13层,对应编码器的13层上采样时输入编码器下采样时保留的位置。
- 将编码器输出的多尺度特征图转换为像素级别的分割。
- 每个阶段包含一个上采样层和一个卷积层,上采样层用于逐渐增加特征图的空间尺寸,卷积层用于细化特征并生成分割结果。
- 每个阶段还会使用编码器相应阶段的池化层输出进行跳跃连接(skip connection),以融合不同分辨率的特征信息。
- 最终的解码器输出是与输入图像尺寸相同的像素级别的语义分割结果。
class SegNet(nn.Module):
    def __init__(self, channels):
        super(SegNet, self).__init__()
        input_channels=channels[0]
        output_channels=channels[1]

        self.weights_new = self.state_dict()
        self.encoder = Encoder(input_channels)

        self.deco1 = nn.Sequential(
            nn.Conv2d(224, 224, kernel_size=3, stride=1, padding=1),
            nn.BatchNorm2d(224, momentum=bn_momentum),
            nn.ReLU(),
            nn.Conv2d(224, 224, kernel_size=3, stride=1, padding=1),
            nn.BatchNorm2d(224, momentum=bn_momentum),
            nn.ReLU(),
            nn.Conv2d(224, 224, kernel_size=3, stride=1, padding=1),
            nn.BatchNorm2d(224, momentum=bn_momentum),
            nn.ReLU()
        )
        self.deco2 = nn.Sequential(
            nn.Conv2d(224, 224, kernel_size=3, stride=1, padding=1),
            nn.BatchNorm2d(224, momentum=bn_momentum),
            nn.ReLU(),
            nn.Conv2d(224, 224, kernel_size=3, stride=1, padding=1),
            nn.BatchNorm2d(224, momentum=bn_momentum),
            nn.ReLU(),
            nn.Conv2d(224, 256, kernel_size=3, stride=1, padding=1),
            nn.BatchNorm2d(256, momentum=bn_momentum),
            nn.ReLU()
        )
        self.deco3 = nn.Sequential(
            nn.Conv2d(256, 256, kernel_size=3, stride=1, padding=1),
            nn.BatchNorm2d(256, momentum=bn_momentum),
            nn.ReLU(),
            nn.Conv2d(256, 256, kernel_size=3, stride=1, padding=1),
            nn.BatchNorm2d(256, momentum=bn_momentum),
            nn.ReLU(),
            nn.Conv2d(256, 128, kernel_size=3, stride=1, padding=1),
            nn.BatchNorm2d(128, momentum=bn_momentum),
            nn.ReLU()
        )
        self.deco4 = nn.Sequential(
            nn.Conv2d(128, 128, kernel_size=3, stride=1, padding=1),
            nn.BatchNorm2d(128, momentum=bn_momentum),
            nn.ReLU(),
            nn.Conv2d(128, 64, kernel_size=3, stride=1, padding=1),
            nn.BatchNorm2d(64, momentum=bn_momentum),
            nn.ReLU()
        )
        self.deco5 = nn.Sequential(
            nn.Conv2d(64, 64, kernel_size=3, stride=1, padding=1),
            nn.BatchNorm2d(64, momentum=bn_momentum),
            nn.ReLU(),
            nn.Conv2d(64, output_channels, kernel_size=3, stride=1, padding=1),
        )

    def forward(self, x):
        x, id = self.encoder(x)

        x = F.max_unpool2d(x, id[4], kernel_size=2, stride=2)
        x = self.deco1(x)
        x = F.max_unpool2d(x, id[3], kernel_size=2, stride=2)
        x = self.deco2(x)
        x = F.max_unpool2d(x, id[2], kernel_size=2, stride=2)
        x = self.deco3(x)
        x = F.max_unpool2d(x, id[1], kernel_size=2, stride=2)
        x = self.deco4(x)
        x = F.max_unpool2d(x, id[0], kernel_size=2, stride=2)
        x = self.deco5(x)

        return x

    #加载预训练权重
    def load_weights(self, weights_path):
        weights = torch.load(weights_path)
        del weights["classifier.0.weight"]
        del weights["classifier.0.bias"]
        del weights["classifier.3.weight"]
        del weights["classifier.3.bias"]
        del weights["classifier.6.weight"]
        del weights["classifier.6.bias"]

        names = []
        for key, value in self.encoder.state_dict().items():
            if "num_batches_tracked" in key:
                continue
            names.append(key)

        for name, dict in zip(names, weights.items()):
            self.weights_new[name] = dict[1]

        self.encoder.load_state_dict(self.weights_new)
损失函数
使用nn.CrossEntropyLoss()作为损失函数,CrossEntropyLoss结合了Softmax函数和交叉熵损失。Softmax函数将网络的原始输出转换为概率分布,使得每个类别的预测结果处于0到1之间且总和为1。交叉熵损失则用于比较预测概率分布与真实标签之间的差异。
训练部分
- 定义像素级别的交叉熵损失函数
- 选择随机梯度下降(SGD)作为优化器
- 设置epoch为50,batch_size为25
def train(SegNet):
SegNet = SegNet.cuda()
#SegNet.load_weights("data/data/vgg16_bn-6c64b313.pth")
train_loader = DataLoader(train_data, batch_size=BATCH_SIZE, shuffle=True, drop_last=True)
optimizer = torch.optim.SGD(SegNet.parameters(), lr=LR, momentum=MOMENTUM)
loss_func = nn.CrossEntropyLoss(
#weight=torch.from_numpy(np.array(CATE_WEIGHT)).float()
).cuda()
SegNet.train()
for epoch in range(EPOCH):
for step, (b_x, b_y) in enumerate(train_loader):
#print('b_x',b_x.shape)
b_x = b_x.cuda()
b_y = b_y.cuda()
#print('b_y',b_y.shape)
b_y = b_y.view(BATCH_SIZE, 224, 224)
output = SegNet(b_x)
#print("outputshape",output.shape,"b_yshape",b_y.shape)
#print(b_y)
loss = loss_func(output ,b_y.long())
loss = loss.cuda()
optimizer.zero_grad()
loss.backward()
optimizer.step()
if step % 1 == 0:
print("Epoch:{0} || Step:{1} || Loss:{2}".format(epoch, step, format(loss, ".4f")))
torch.save(SegNet.state_dict(), WEIGHTS + "SegNet_weights" + str(time.time()) + ".pth")
start_time = time.time()
parser = argparse.ArgumentParser()
parser.add_argument("--class_num", type=int, default=20, help="训练的类别的种类")
parser.add_argument("--epoch", type=int, default=50, help="训练迭代次数")
parser.add_argument("--batch_size", type=int, default=25, help="批训练大小")
parser.add_argument("--learning_rate", type=float, default=0.01, help="学习率大小")
parser.add_argument("--momentum", type=float, default=0.9)
#parser.add_argument("--category_weight", type=float, default=[0.7502381287857225, 1.4990483912788268], help="损失函数中类别的权重")
#parser.add_argument("--train_txt", type=str, default="train.txt", help="训练的图片和标签的路径")
parser.add_argument("--pre_training_weight", type=str, default="vgg16_bn-6c64b313.pth", help="编码器预训练权重路径")
parser.add_argument("--weights", type=str, default="./weights/", help="训练好的权重保存路径")
opt = parser.parse_known_args()[0]
print(opt)
CLASS_NUM = opt.class_num
EPOCH = opt.epoch
BATCH_SIZE = opt.batch_size
LR = opt.learning_rate
MOMENTUM = opt.momentum
#CATE_WEIGHT = opt.category_weight
#TXT_PATH = opt.train_txt
PRE_TRAINING = opt.pre_training_weight
WEIGHTS = opt.weights
#train_data = MyDataset(txt_path='train.txt')
channel=[3,34]
SegNet = SegNet(channel)
train(SegNet)
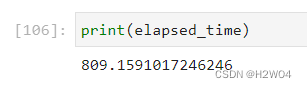
# 记录结束时间
end_time = time.time()
# 计算代码块的运行时间(以秒为单位)
elapsed_time = end_time - start_time
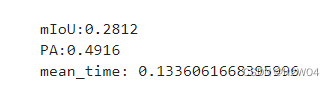
计算评价指标
我们选取了100张图片进行验证,计算这100张图片的IoU/PA以及单张预测时间的均值
IoU/PA
| IoU | PA |
|---|---|
| 0.2166 | 0.4143 |
单张图片预测时间
SegNet在每张图片的识别速度为0.1172秒,表现出卓越的实时性能。这意味着它能够在瞬间内对单张图像进行语义分割,适用于需要快速反馈或实时分析的应用场景。

模型训练用时
我们使用了GPU训练模型,用时较短
Intel优化结果
Intel Neural Compressor
Intel Neural Compressor执行模型压缩,以减小模型大小并提高在 CPU 或 GPU 上部署的深度学习推理速度。
- 首先使用
pip install neural-compressor安装组件 - 使用以下代码:
from neural_compressor.experimental import Quantization

start_time = time.time()
quantizer = Quantization("conf.yaml")
quantizer.model = SegNet
quantizer.q_func = train
quantizer.eval_dataloader = train_loader
q_model = quantizer()
q_model.save('./output')

# 记录结束时间
end_time = time.time()
- 结果:
训练用时
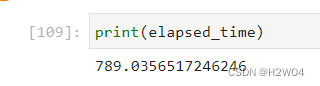
可见使用组件优化后训练用时相对减少,同时保证了模型的准确性没有损失
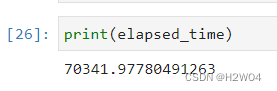
Intel Extension for PyTorch*
Intel Extension for PyTorch*执行模型压缩,以减小模型大小并提高在 CPU 或 GPU 上部署的深度学习推理速度。
- 首先使用如下命令安装组件

- 使用以下代码:
import intel_extension_for_pytorch as ipex
SegNet = ipex.optimize(SegNet)
- 结果:
由于Extension优化模块只支持Intel的硬件,而我们没有Intel的GPU资源,故只在CPU上进行了模型的训练,训练的epoch也降为20
训练用时(单位:秒)
| IoU | PA |
|---|---|
| 0.1817 | 0.3943 |
总结
收获
- 第一次接触了图像分割的任务,学习了很多关于图像分割的知识
- 使用了云服务器训练模型,对云服务器平台的使用有了更多的了解
- 学习了intel的oneAPI的使用,能够使用AI相关的组件对模型进行优化,能提高模型的训练速度
不足
- 由于时间有限,我们并没有对神经网络架构进行过多的调整,也没有进行超参数的寻优,改进这两点应该能使模型具有更好的效果
- 由于CPU训练时间过长,我们没有做intel extension组件的对比。进行一次不使用组件的实验能更好地体现组件在模型训练过程中的优化效果。


 被折叠的 条评论
为什么被折叠?
被折叠的 条评论
为什么被折叠?
 到【灌水乐园】发言


