


事物是什么?
事物指多个逻辑单元进行的一系列操作,要么同时成功,要么同时失败。
在我们日常生活中,事物涉及的场景还是比较多的,不过最经典的案例,其实就是转账!
事物的四性!
原子性:一个事物中的所有操作,要么同时完成,要么全部不完成,不会说只完成一半。
一致性:事物开始与结束,数据库的完整性没有遭到破坏。
隔离性:数据库允许多个并发事物同时进行读写,隔离性可以解决多个事物并发时,数据不一致问题(读未提交,读已提交,可重复度,串行化)。
持久性:事物处理结束后,对数据的修改是永久的,计时系统故障,也不会丢失。
Spring中的事物!
Spring中事物应用可以分为两种,声明式事物和编程式事物。
Spring中对事物的支持提供了三大基础设施。
PlatformTransactionManager 事物处理的核心
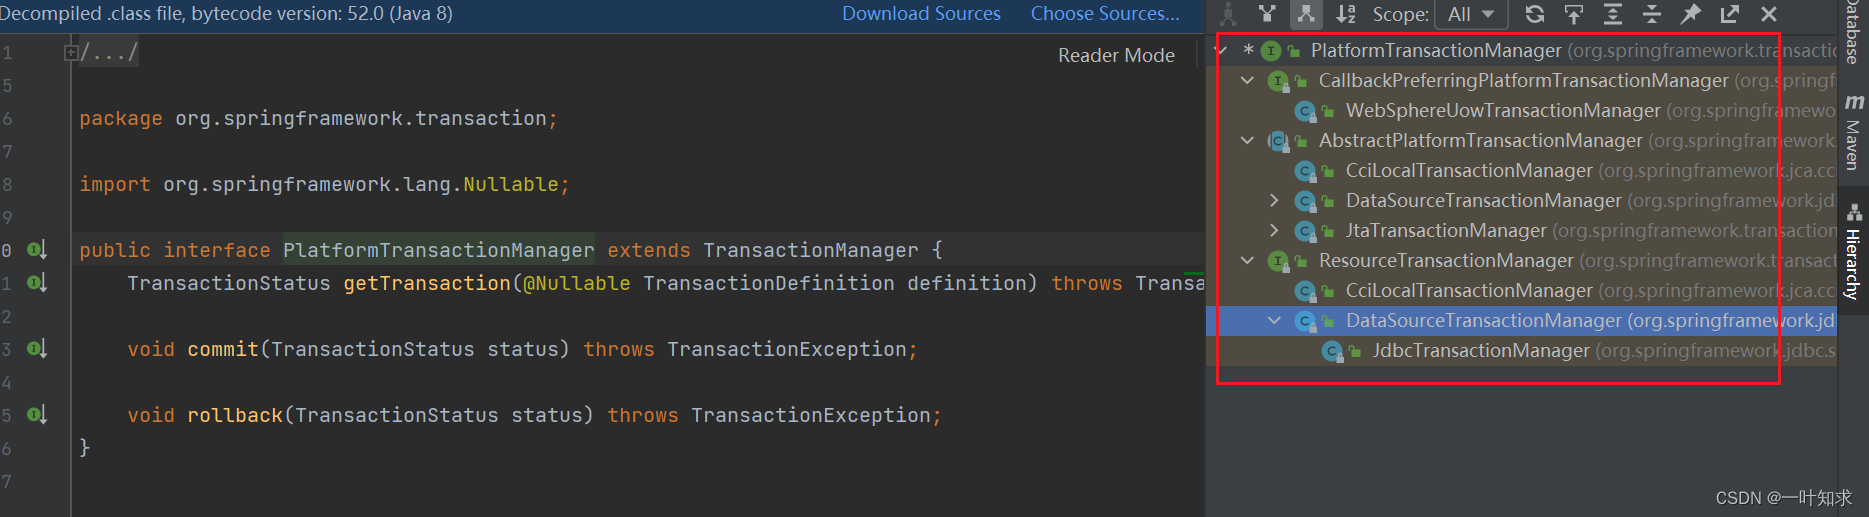
可以看到,PlatformTransactionManager 中定义了基本的事物操作方法,这些食物的操作方法都是与平台无关的,具体的实现方式也是由子类来实现的。
如同jdbc一样,SUN公司制定标准,其他数据库厂商负责集体的实现,好处就是,我们只需要掌握这套标准,不用去管接口的实现。
例如,你使用了jdbc,则可以使用DataSourceTransactionManager作为事物的管理器,如果使用的是Hibernate,则可以使用HibernateTransactionManager作为事物的管理器!
我们只需要掌握PlatformTransactionManager 中的三个方法即可
    TransactionStatus getTransaction(@Nullable TransactionDefinition definition) throws TransactionException;

    void commit(TransactionStatus status) throws TransactionException;

    void rollback(TransactionStatus status) throws TransactionException;
getTransaction(@Nullable TransactionDefinition definition) 根据传入的definition,获取一个事物对象,在这里面,它定义了一些事物的基本规则,如传播性,隔离级别等。
commit(TransactionStatus status) 则用来提交事务
rollback(TransactionStatus status) 用来回滚事务
TransactionDefinition
用于描述事物的具体规则,如传播性,隔离性,回滚规则,超时时间,是否只读。
这个类有如下方法
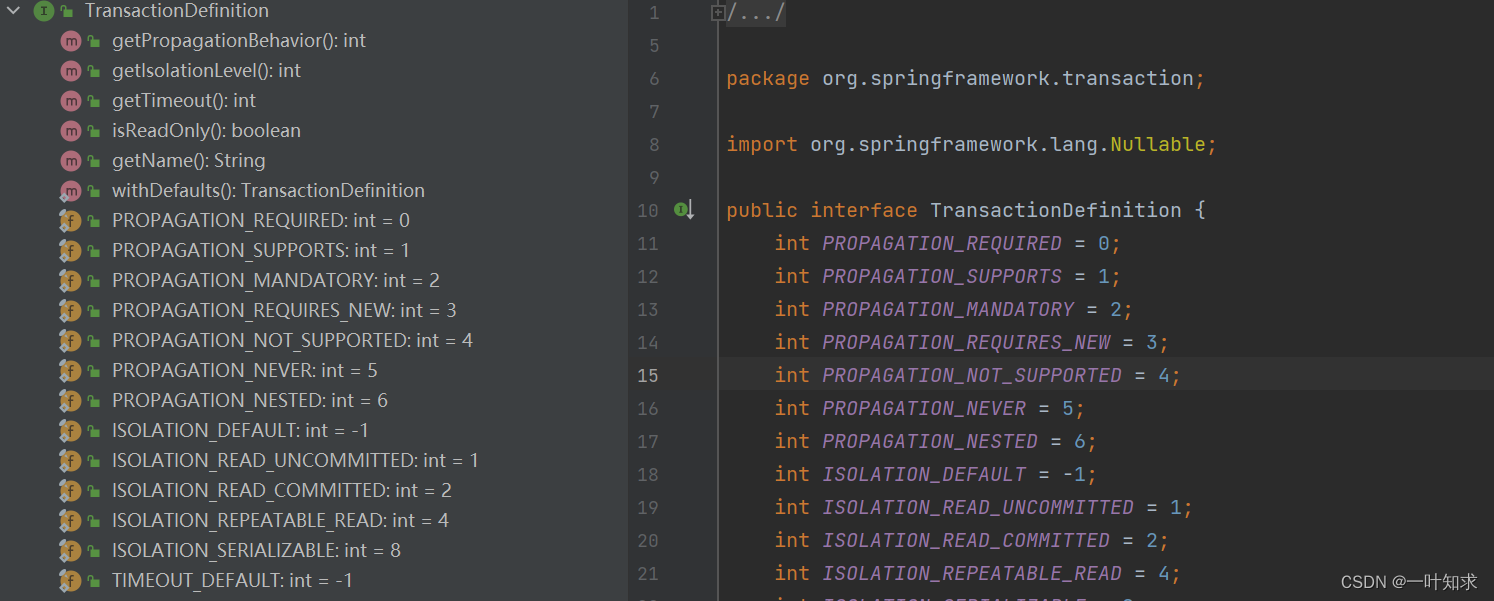
可以看到,一共五个,分别是
getPropagationBehavior() 获取事物的传播性
getIsolationLevel() 获取事物的隔离级别
getTimeout() 获取事物的超时时间
isReadOnly() 事物是否只读
getName() 获取事物的名称
他自身也有需要的实现类,如下
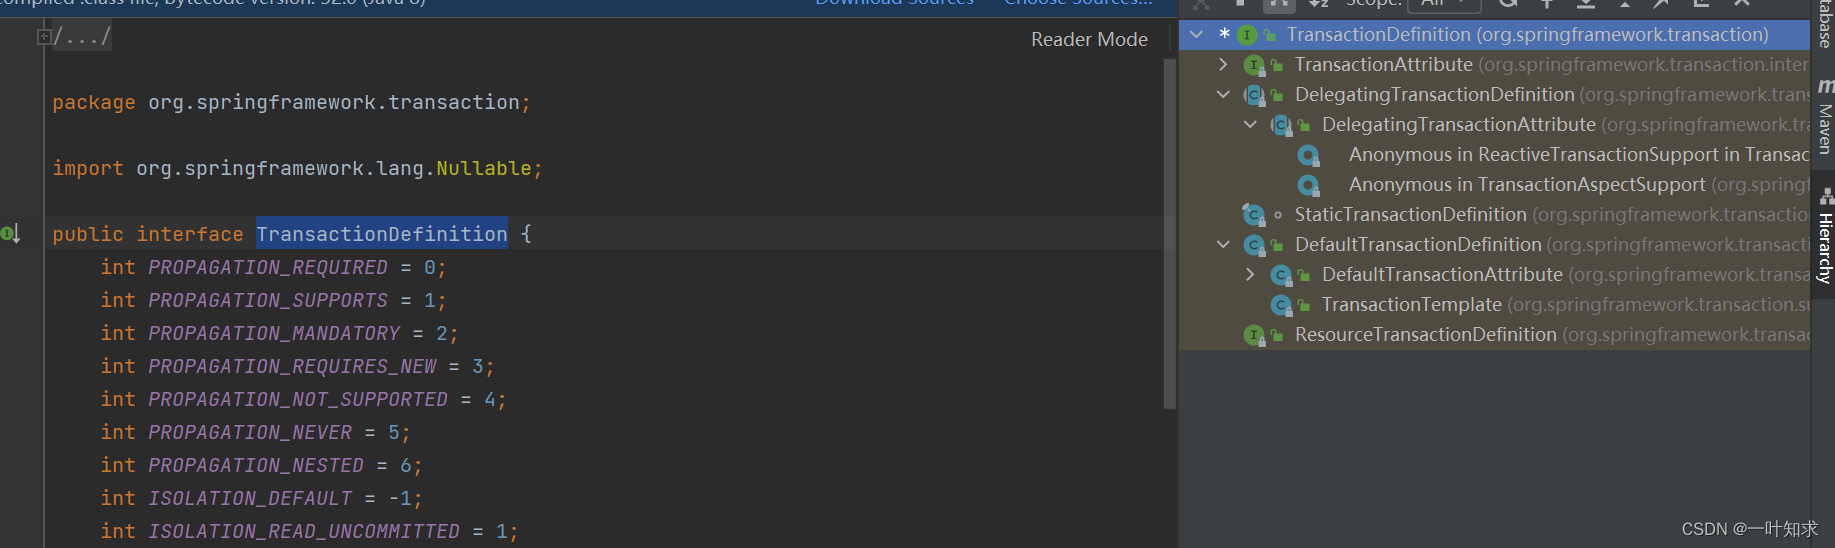
如果考虑使用编程式事物,则只需要直接使用DefaultTransactionDefinition即可
TransactionStatus
这个则可以理解为事物的本身,如下
   boolean hasSavepoint();

    void flush();
hasSavepoint() 是否存在savePoint()
flush() 将底层会话中的修改刷新到数据库中。
编程式事物
这种事物使用类似于jdbc写法,需要将事物嵌入到业务逻辑中,耦合度比较高,实际开发中很少用到这种。
如果在Spring Boot项目中,这两个PlatformTransactionManager,TransactionTemplate类Spring会自动提供,但在SSM项目中,则需要我们自己配置一下,简单起见,这里数据操作使用JdbcTemplate.
xml方式
<context:property-placeholder location="classpath:db.properties" />
    <context:component-scan base-package="com.tongzhou.transaction_test" />

    <bean class="org.springframework.jdbc.datasource.DriverManagerDataSource" id="dataSource">
        <property name="driverClassName" value="com.mysql.cj.jdbc.Driver"/>
        <property name="url" value="${db.url}"/>
        <property name="username" value="${db.username}"/>
        <property name="password" value="${db.password}"/>
    </bean>

    <bean class="org.springframework.jdbc.datasource.DataSourceTransactionManager" id="transactionManager">
        <property name="dataSource" ref="dataSource"/>
    </bean>

    <bean class="org.springframework.transaction.support.TransactionTemplate" id="template">
        <property name="transactionManager" ref="transactionManager"/>
    </bean>

    <bean class="org.springframework.jdbc.core.JdbcTemplate" id="jdbcTemplate">
        <property name="dataSource" ref="dataSource"/>
    </bean>
简单解释一下上面的配置,第一个是注入数据库连接信息的一些资源,第二个则是包扫描。
接下来,则是生命DriverManagerDataSource连接
紧接着,将数据源注入到DataSourceTransactionManager中,使用TransactionTemplate则将transactionManager放入
最后,我们本次使用的是JdbcTemplate,所以再加一个JdbcTemplatep配置。
一个简单的案例,就不细说了
@Service
public class TransferService {


    @Autowired
    JdbcTemplate jdbcTemplate;

    @Autowired
    PlatformTransactionManager platformTransactionManager;

    @Autowired
    TransactionTemplate transactionTemplate;

    public void transferT(){
        transactionTemplate.execute(new TransactionCallbackWithoutResult() {
            @Override
            protected void doInTransactionWithoutResult(TransactionStatus status) {
                try {
                    jdbcTemplate.update("update user set account=account+100 where username='张三'");
                    int i =1/0;

                    jdbcTemplate.update("update user set account=account-100 where username='李四'");

                }catch (DataAccessException e){
                    status.setRollbackOnly();
                }
            }
        });
    }
    public void transfer(){
        DefaultTransactionDefinition defaultTransactionDefinition = new DefaultTransactionDefinition();
        TransactionStatus transaction = platformTransactionManager.getTransaction(defaultTransactionDefinition);
        try {
            jdbcTemplate.update("update user set account=account+100 where username='张三'");
            int i =1/0;

            jdbcTemplate.update("update user set account=account-100 where username='李四'");

            platformTransactionManager.commit(transaction);
        }catch (DataAccessException e){
            platformTransactionManager.rollback(transaction);
        }
    }
}
紧接着,则进行调用
public static void main(String[] args) {
        ClassPathXmlApplicationContext classPathXmlApplicationContext = new ClassPathXmlApplicationContext("beans.xml");
        TransferService bean = classPathXmlApplicationContext.getBean(TransferService.class);
        bean.transfer();
        }
采用java配置,则如下。
@Configuration
@ComponentScan
@PropertySource("classpath:db.properties")
public class JavaConfig {

    @Value("${db.url}")
    String url;

    @Value("${db.password}")
    String password;

    @Value("${db.username}")
    String username;


    @Bean
    TransactionTemplate transactionTemplate(){
        return new TransactionTemplate(platformTransactionManager());
    }
    @Bean
    PlatformTransactionManager platformTransactionManager(){
        return new DataSourceTransactionManager(dataSource());
    }
    @Bean
    JdbcTemplate jdbcTemplate(){
        return new JdbcTemplate(dataSource());
    }

    @Bean
    DataSource dataSource(){
        DruidDataSource druidDataSource = new DruidDataSource();
        druidDataSource.setUrl(url);
        druidDataSource.setPassword(password);
        druidDataSource.setUsername(username);
        return druidDataSource;
    }
}
最后,进行调用。
    public static void main(String[] args) {
       AnnotationConfigApplicationContext annotationConfigApplicationContext = new AnnotationConfigApplicationContext(JavaConfig.class);
       TransferService bean = annotationConfigApplicationContext.getBean(TransferService.class);
       bean.transferT();
    }
声明式事物
如果使用xml配置的话,则可以做到无侵入,如果使用java配置,则需要使用一个@Transactional.
使用xml
先配置事务管理器。
 <bean class="org.springframework.jdbc.datasource.DriverManagerDataSource" id="dataSource">
        <property name="driverClassName" value="com.mysql.cj.jdbc.Driver"/>
        <property name="url" value="${db.url}"/>
        <property name="username" value="${db.username}"/>
        <property name="password" value="${db.password}"/>
    </bean>

    <bean class="org.springframework.jdbc.datasource.DataSourceTransactionManager" id="transactionManager">
        <property name="dataSource" ref="dataSource"/>
    </bean>
紧接着,配置事物的通知。
    <tx:advice transaction-manager="transactionManager" id="txAdvice">
        <tx:attributes>
            <tx:method name="m3"/>
            <tx:method name="m4"/>
        </tx:attributes>
    </tx:advice>
配置AOP
    <aop:config>
        <aop:pointcut id="pc1" expression="execution(* com.tongzhou.transaction_test.*.*(..))"/>
        <aop:advisor advice-ref="txAdvice" pointcut-ref="pc1"/>
    </aop:config>
完成后,就具备自动事物了。如下。
   public static void main(String[] args) {
        ClassPathXmlApplicationContext classPathXmlApplicationContext = new ClassPathXmlApplicationContext("beans.xml");
        TransferService bean = classPathXmlApplicationContext.getBean(TransferService.class);
        bean.transfer();
        }
使用java配置
@Configuration
@ComponentScan
@PropertySource("classpath:db.properties")
@EnableTransactionManagement
public class JavaConfig {

}
注意,这里@EnableTransactionManagement是开启事物支持,然后再所需要的方法上加上注解 @Transactional(noRollbackFor = ArithmeticException.class)
    @Transactional(noRollbackFor = ArithmeticException.class)
    public void transfer(){
        jdbcTemplate.update("update user set account=account+100 where username='张三'");
        int i =1/0;

        jdbcTemplate.update("update user set account=account-100 where username='李四'");

    }
也可以在xml中加上 <tx:annotation-driven />
通过混合java配置的方式开启
<tx:annotation-driven />
在java配置中导入
@ImportResource(locations = "classpath:beans.xml")


 873
873


 被折叠的 条评论
为什么被折叠?
被折叠的 条评论
为什么被折叠?
 到【灌水乐园】发言


