


Redis介绍及安装
Redis介绍
- Redis是Key-Value型NoSQL数据库(NotOnlySQL)
- Redis将数据存储在内存中,同时也能持久化到磁盘中
- Redis常用于缓存,利用内存的高效提高程序的处理速度
Redis特点
- 速度快
- 广泛的预言支持
- 持久化(Rdb全量备份、AOF日志更新 )
- 多种数据结构(String,list,map,set)
- 主从复制
- 分布式与高可用
Redis的安装与启动
Linux安装Redis

Linux启动Redis
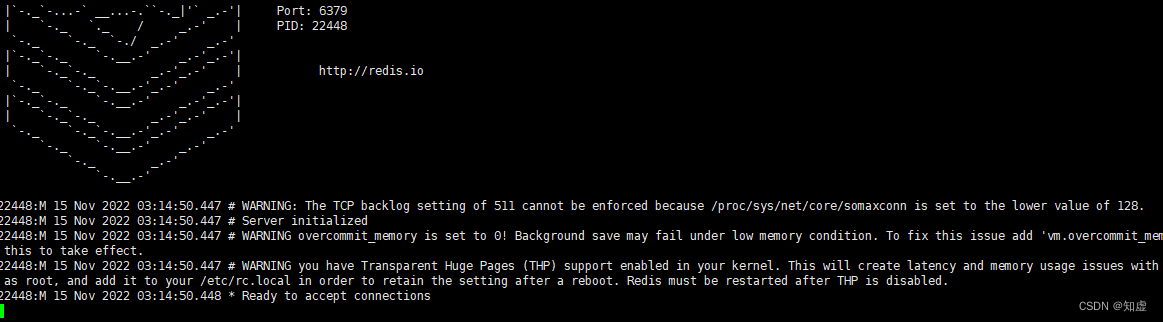
进入Redis安装目录,执行./src/redis-server redis.conf,看到下面这个界面就启动成功了
Widows安装Redis
用下面的地址下载redis压缩包,本地解压,然后在解压出的文件夹路径下执行redis-server redis.windows.conf命令
Redis
掌握Redis常用命令及数据类型
Redis的常用基本配置

配置Redis后台启动
修改redis.config中 daemonize yes 来启动后台启动
后台启动的Redis关闭
执行 ./src/redis-cli shutdown 命令
Redis数据类型
- String——字符串类型
- Hash——Hash类型
- List——列表类型
- Set——集合类型
- Zset——有序集合类型
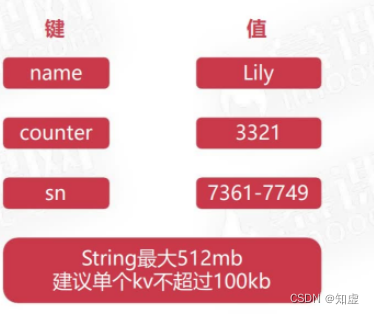
String字符串类型
String最大为512mb,建议单个最大kv不超过100kb
字符串命令:

Hash键值类型
- Hash类型用于保存结构化数据

Hash命令

List列表类型
- List列表就是一系列字符串的“数组”,按插入顺序排序
-List列表最大长度为2的32次方-1,可以包含40亿个元素
List命令
- rpush listkey c b a -右侧插入
- lpush listkey f e d -左侧插入
- rpop listkey -右侧弹出
- lpop listkey -左侧弹出
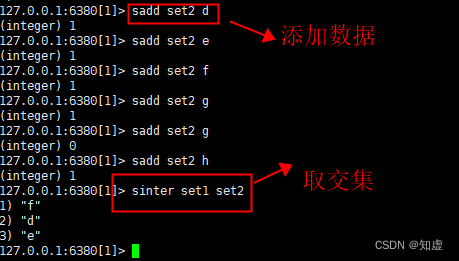
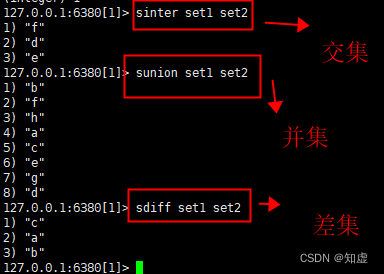
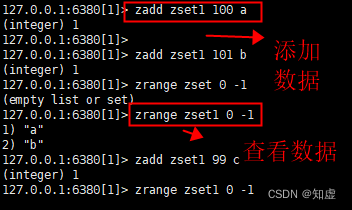
Set 与 Zset集合类型
- Set集合是字符串的无序集合,集合成员是唯一的
- Zset集合是字符串的有序集合,集合成员是唯一的
Zset用法

掌握在Java中使用Redis
JAVA客户端——Jedis
操作步骤
- 首先我们需要手动修改redis.config的配置:关闭保护模式以及设置bind为指定ip,然后打开防火墙对6379的限制。
- 接着我们就可以编写对应的测试代码,具体实现如下:
package com.imooc.jedis;

import redis.clients.jedis.Jedis;

import java.util.List;

/**
 * todo {类简要说明}
 *
 * @Author wangw
 * @Date 2022/11/20 22:55
 * @Version 1.0
 */
public class JedisTestor {
    public static void main(String[] args) {
        Jedis jedis = null;
        try {
            jedis = new Jedis("192.168.44.128", 6380);
            jedis.auth("123456");
            jedis.select(2);
            System.out.println("redis链接成功");
            jedis.set("sn", "77819538");
            jedis.mset(new String[]{"title", "t", "num", "20"});
            List<String> list = jedis.mget(new String[]{"sn", "title", "num"});
           Long num = jedis.incr("num");
            System.out.println(num);
            for (String str : list
            ) {
                System.out.println(str);

            }
            System.out.println(jedis.get("sn"));

            // list
            jedis.del("letter");
            jedis.rpush("letter",new String[] {"d","e","f"});
            jedis.lpush("letter","c","b","a");
            List<String> letters = jedis.lrange("letter",0,-1);
            System.out.println(letters);
            jedis.lpop("letter");
            letters = jedis.lrange("letter",0,-1);
            System.out.println(letters);
        } catch (Exception e) {
            e.printStackTrace();
        } finally {
            jedis.close();
        }
    }
}
下面给出具体使用示例:
public class CacheSample {
    public static void main(String[] args) {
        new CacheSample();
        System.out.println("请输入查询的商品编号");
        String goodsId =new Scanner(System.in).next();
        Jedis jedis =new Jedis("192.168.44.131",6380);
        try {
            jedis.auth("123456");
            jedis.select(3);
            String key ="goods:"+goodsId;
            if (jedis.exists(key)){
                String json = jedis.get(key);
                System.out.println(json);
                Goods goods =JSON.parseObject(json,Goods.class);
                System.out.println(goods);
            }else {
                System.out.println("查询结果为空");
            }
        }catch (Exception e){
            e.printStackTrace();
        }finally {
            jedis.close();
        }

    }
    public CacheSample() {

        Jedis jedis =new Jedis("192.168.44.131",6380);
        try {
            List<Goods> goodsList = new ArrayList<>();
            goodsList.add(new Goods(1000, "apple", "yantai", 100f));
            goodsList.add(new Goods(1001, "pear", "jinan", 200f));
            goodsList.add(new Goods(1002, "watermelon", "tulufan", 300f));
            jedis.auth("123456");
            jedis.select(3);
            for (Goods goods :goodsList) {
                String json = JSON.toJSONString(goods);
                System.out.println(json);
                jedis.set("goods:"+goods.getGoodsId(),json);
            }
        }catch (Exception e) {
            e.printStackTrace();
        }finally {
            jedis.close();
        }
    }
}


 21万+
21万+


 被折叠的 条评论
为什么被折叠?
被折叠的 条评论
为什么被折叠?
 到【灌水乐园】发言


