


老铁们是不是经常为写一些实体转换的原始代码感到头疼,尤其是实体字段特别多的时候。介绍一个开源项目 mapstruct ,可以轻松优雅的进行转换,简化你的代码。当然有的人喜欢写get set,或者用BeanUtils 进行复制,代码只是工具,本文只是提供一种思路。
先贴下官网地址吧:https://mapstruct.org/
废话不多说,上代码:
pom 配置:
<properties>
        <project.build.sourceEncoding>UTF-8</project.build.sourceEncoding>
        <maven.compiler.source>1.8</maven.compiler.source>
        <maven.compiler.target>1.8</maven.compiler.target>
        <org.mapstruct.version>1.4.1.Final</org.mapstruct.version>
        <org.projectlombok.version>1.18.12</org.projectlombok.version>
</properties>

<dependencies>
        <dependency>
            <groupId>org.mapstruct</groupId>
            <artifactId>mapstruct</artifactId>
            <version>${org.mapstruct.version}</version>
        </dependency>

        <!-- lombok dependencies should not end up on classpath -->
        <dependency>
            <groupId>org.projectlombok</groupId>
            <artifactId>lombok</artifactId>
            <version>${org.projectlombok.version}</version>
            <scope>provided</scope>
        </dependency>

        <!-- idea 2018.1.1 之前的版本需要添加下面的配置,后期的版本就不需要了,可以注释掉,
我自己用的2019.3 -->
     <dependency>
            <groupId>org.mapstruct</groupId>
            <artifactId>mapstruct-processor</artifactId>
            <version>${org.mapstruct.version}</version>
            <scope>provided</scope>
        </dependency>

</dependencies>

<build>
        <plugins>
            <plugin>
                <groupId>org.apache.maven.plugins</groupId>
                <artifactId>maven-compiler-plugin</artifactId>
                <version>3.8.1</version>
                <configuration>
                    <source>1.8</source>
                    <target>1.8</target>
                    <annotationProcessorPaths>
                        <path>
                            <groupId>org.projectlombok</groupId>
                            <artifactId>lombok</artifactId>
                            <version>${org.projectlombok.version}</version>
                        </path>
                        <path>
                            <groupId>org.mapstruct</groupId>
                            <artifactId>mapstruct-processor</artifactId>
                            <version>${org.mapstruct.version}</version>
                        </path>
                    </annotationProcessorPaths>
                </configuration>
            </plugin>
        </plugins>
    </build>
关于lombok和mapstruct的版本兼容问题多说几句,maven插件要使用3.6.0版本以上、lombok使用1.16.16版本以上,另外编译的lombok mapstruct的插件不要忘了加上。否则会出现下面的错误:No property named "aaa" exists in source parameter(s). Did you mean "null"?
这种异常就是lombok编译异常导致缺少get setter方法造成的。还有就是缺少构造函数也会抛异常。
@Data
@Builder
@AllArgsConstructor
@NoArgsConstructor
public class Student {

    private String name;
    private int age;
    private GenderEnum gender;
    private Double height;
    private Date birthday;

}
public enum GenderEnum {
    Male("1", "男"),
    Female("0", "女");

    private String code;
    private String name;

    public String getCode() {
        return this.code;
    }

    public String getName() {
        return this.name;
    }

    GenderEnum(String code, String name) {
        this.code = code;
        this.name = name;
    }
}
@Data
@Builder
@AllArgsConstructor
@NoArgsConstructor
public class StudentVO {
    private String name;
    private int age;
    private String gender;
    private Double height;
    private String birthday;
}
@Mapper
public interface StudentMapper {

    StudentMapper INSTANCE = Mappers.getMapper(StudentMapper.class);

    @Mapping(source = "gender.name", target = "gender")
    @Mapping(source = "birthday", target = "birthday", dateFormat = "yyyy-MM-dd HH:mm:ss")
    StudentVO student2StudentVO(Student student);

}
实体类是开发过程少不了的,就算是用工具生成肯定也是要有的,需要手写的部分就是这个Mapper的接口,编译完成后会自动生成相应的实现类
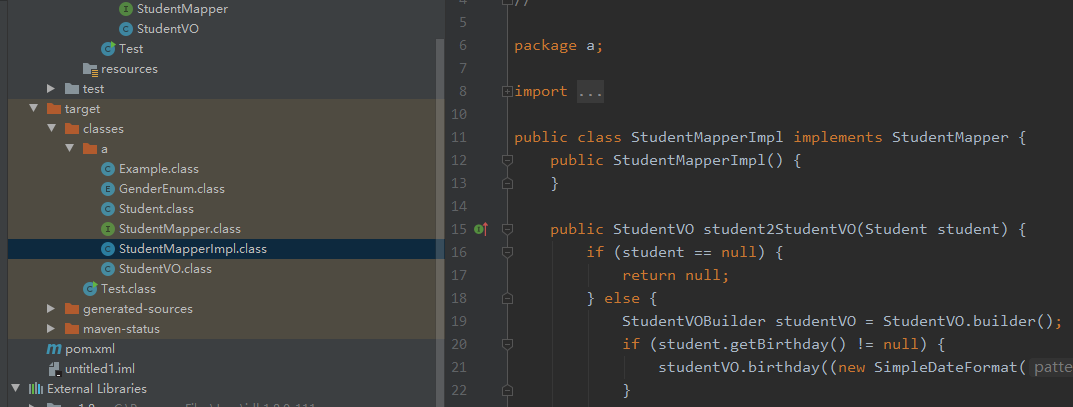
然后就可以直接用mapper进行实体的转换了
public class Test {

    public static void main(String[] args) {

        Student student = Student.builder().name("小明").age(6).gender(GenderEnum.Male).height(121.1).birthday(new Date()).build();
        System.out.println(student);
        //这行代码便是实际要用的代码
        StudentVO studentVO = StudentMapper.INSTANCE.student2StudentVO(student);
        System.out.println(studentVO);

    }

}

mapper可以进行字段映射,改变字段类型,指定格式化的方式,包括一些日期的默认处理。
可以手动指定格式化的方法:
@Mapper
public interface StudentMapper {

    StudentMapper INSTANCE = Mappers.getMapper(StudentMapper.class);

    @Mapping(source = "gender", target = "gender")
    @Mapping(source = "birthday", target = "birthday", dateFormat = "yyyy-MM-dd HH:mm:ss")
    StudentVO student2StudentVO(Student student);

    default String getGenderName(GenderEnum gender) {
        return gender.getName();
    }

}
上面只是最简单的实体映射处理,下面介绍一些高级用法
1、List 转换
属性映射基于上面的mapping配置
@Mapper
public interface StudentMapper {

    StudentMapper INSTANCE = Mappers.getMapper(StudentMapper.class);

    @Mapping(source = "gender.name", target = "gender")
    @Mapping(source = "birthday", target = "birthday", dateFormat = "yyyy-MM-dd HH:mm:ss")
    StudentVO student2StudentVO(Student student);


    List<StudentVO> students2StudentVOs(List<Student> studentList);

}
public static void main(String[] args) {

    Student student = Student.builder().name("小明").age(6).gender(GenderEnum.Male).height(121.1).birthday(new Date()).build();

    List<Student> list = new ArrayList<>();
    list.add(student);
    List<StudentVO> result = StudentMapper.INSTANCE.students2StudentVOs(list);
    System.out.println(result);
}

2、多对象转换到一个对象
@Data
@Builder
@AllArgsConstructor
@NoArgsConstructor
public class Student {

    private String name;
    private int age;
    private GenderEnum gender;
    private Double height;
    private Date birthday;

}
@Data
@AllArgsConstructor
@Builder
@NoArgsConstructor
public class Course {

    private String courseName;
    private int sortNo;
    private long id;

}
@Data
@Builder
@AllArgsConstructor
@NoArgsConstructor
public class StudentVO {
    private String name;
    private int age;
    private String gender;
    private Double height;
    private String birthday;
    private String course;
}
@Mapper
public interface StudentMapper {

    StudentMapper INSTANCE = Mappers.getMapper(StudentMapper.class);

    @Mapping(source = "student.gender.name", target = "gender")
    @Mapping(source = "student.birthday", target = "birthday", dateFormat = "yyyy-MM-dd HH:mm:ss")
    @Mapping(source = "course.courseName", target = "course")
    StudentVO studentAndCourse2StudentVO(Student student, Course course);

}
public class Test {

    public static void main(String[] args) {

        Student student = Student.builder().name("小明").age(6).gender(GenderEnum.Male).height(121.1).birthday(new Date()).build();
        Course course = Course.builder().id(1L).courseName("语文").build();

        StudentVO studentVO = StudentMapper.INSTANCE.studentAndCourse2StudentVO(student, course);
        System.out.println(studentVO);
    }

}

3、默认值
@Mapper
public interface StudentMapper {

    StudentMapper INSTANCE = Mappers.getMapper(StudentMapper.class);

    @Mapping(source = "student.gender.name", target = "gender")
    @Mapping(source = "student.birthday", target = "birthday", dateFormat = "yyyy-MM-dd HH:mm:ss")
    @Mapping(source = "course.courseName", target = "course")
    @Mapping(target = "name", source = "student.name", defaultValue = "张三")
    StudentVO studentAndCourse2StudentVO(Student student, Course course);

}


 4万+
4万+


 被折叠的 条评论
为什么被折叠?
被折叠的 条评论
为什么被折叠?
 到【灌水乐园】发言


