


目录
vue3 的生命周期:
setup、onBeforeMount、onMounted、onBeforeUpdate、onUpdated、onBeforeUnmount、onUnmounted。
setup 语法糖
vue3.2版本以后可以使用语法糖,不用导出、不用写return 、组件也不用注册,直接引入使用
普通写法
<template>

</template>
<script>
export default {
  setup() {
    return {}
  }
}
</script>
简写写法
<template>

</template>

<script setup>

</script>

<style scoped>
</style>
<template>
<HeaderBox></HeaderBox>
</template>
<script setup>
import HeaderBox from "@/components/HeaderBox.vue";
// export default {
// name: "App",
// components: {
// HeaderBox,
// },
// };
</script>ref reactive toRef toRefs
都是将数据变成响应式数据
若要包裹的数据是对象就推荐使用reactive,其他情况使用ref(简单数据类型)
注意:ref 其实也可以包裹复杂数据类型为响应式数据,一般对于数据类型未确定的情况下推荐使用 ref,例如后端返回的数据。
toRef 转换响应式对象中某个属性为单独响应式数据,转换后的值和之前是关联的
toRefs 转换响应式对象中所有属性为单独响应式数据,转换后的值和之前是相关联的
<template>
  <h2>{{ name }}</h2>
  <button >-</button>
  <input type="text" v-model.number="count">
  <button >+</button>
  <h3>{{num }}</h3>
  <h3>{{con}}</h3>
</template>

<script setup>
import { reactive, toRef, toRefs ,ref} from "vue";

// 声明变量
const state = reactive({
  name: "张三",
  count: 0,
});

const num = ref(5)

const state1 = reactive({
  con : "叫张三",
  age : 10
})

// 解构赋值
const {count, name} = toRefs(state)
// 这里相当于const count = toRef(state,"count") const
// name= toRef(state,"name")

const con = toRef(state1,"con")

</script>

<style lang="less" scoped>
</style>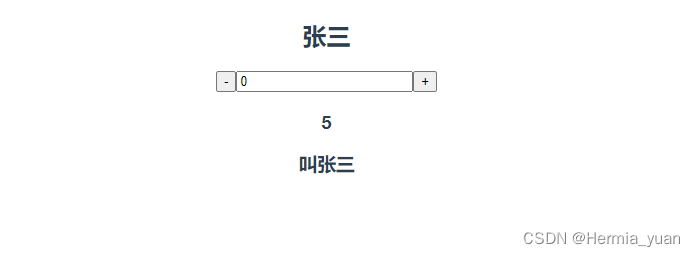
加入方法methods的写法
<template>
  <h2>{{ name }}</h2>
  <button @click="reduce">-</button>
  <input type="text" v-model.number="count">
  <button >+</button>
  <h3>{{num }}</h3>
  <h3 @click="add">{{con}}</h3>
</template>

<script setup>
import { reactive, toRef, toRefs ,ref} from "vue";

// 声明变量
const state = reactive({
  name: "张三",
  count: 0,
});

const num = ref(5)

const state1 = reactive({
  con : "叫张三",
  age : 10
})

// 解构赋值 因为是个对象 需要解构赋值才可以在template中直接使用变量名;num不是就可以直接赋值
const {count, name} = toRefs(state)
// 这里相当于const count = toRef(state,"count") const
// name= toRef(state,"name")
const con = toRef(state1,"con")

// 方法 改变值时需要 变量名.vlaue
const add = () => {
  name.value = "李四";
  count.value++;
  num.value++
  con.value = "叫李四"
};
const reduce = () =>{
  count.value --
}
</script>

<style lang="less" scoped>
</style>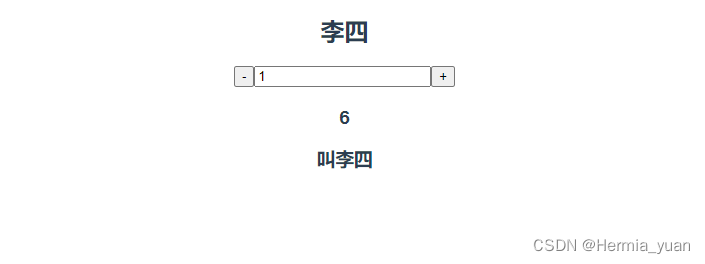
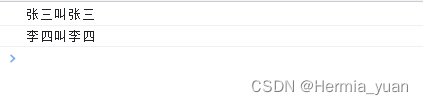
watchEffect
与watch相似都可以监听一个数据源。
但是watchEffect会在初始化的时候调用一次,相当于设置了immediate: true的watch。
建议在大部分时间里使用watch,避免一些不必要的重复触发。
watchEffect(() => {
  console.log(name.value + con.value);
})
初次调用

点击监听调用
watch
1、监听基础类型
const state = reactive({
  count: 0,
  name: "张三",
});

// immediate: true 代表进入页面就执行一次,改变值也会触发,不加则只会在改变时触发
watch(name,(newValue, oldValue)=>{
  console.log("name新值:"+newValue,"name旧值:"+oldValue);
},{immediate: true}
)
// name新值:张三 name旧值:undefined  第一次打印
// name新值:李四 name旧值:张三       值改变打印
2、监听复杂类型
- 监听数据中的某一个属性
watch(()=> state.name,(newValue,oldValue)=>{
 console.log("newValue:"+newValue,"oldValue:"+oldValue);
})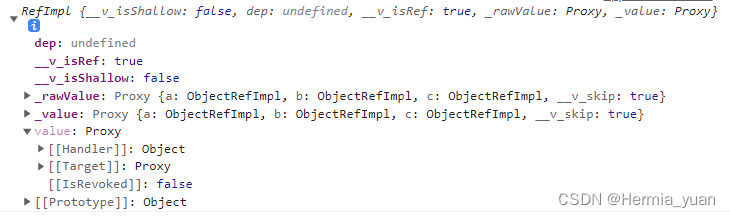
// newValue:李四 oldValue:张三- 监听整个对象
watch(state,(newValue, oldValue)=>{
  console.log(newValue,oldValue);
  }
)![]()
- 监听对象的子属性
只有state 的子属性改变时才会触发watch监听,孙属性、曾孙属性发生变化不会触发,也就是child里的属性
const state = reactive({
  count: 0,
  name: "张三",
  child:{
    first:"zz",
    last:"123"
  }
});
watch(()=> ({...state}),(newValue,oldValue)=>{
  console.log(newValue,oldValue);
})
3、组合监听
- 同时监听不同的数据
// 同时监听num 和 state的count 的属性
watch([num,()=> state.count],([newName, newAge],[oldName, oldAge]) =>{
  console.log([newName, newAge],[oldName, oldAge]);
})
computed计算属性的使用
// 简写
state.fullName = computed(()=>{
  return name.value + count.value+'岁'
})
console.log(state.fullName); // 张三0岁
传值
props父子传值
子组件
<template>
    <div class="hello">
      <h1>{{ props.name }}--{{ props.con }}</h1>
    </div>
</template>

<script setup>

// 接收从父组件中传过来的属性值

// 声明props defineProps和props 的用法一致

// const props = defineProps(['name','con'])

// 或者 设置默认值定义数据类型
const props = defineProps({
  name:{
    type:String,
    default:"你好"
  },
  con:{
    type:Number,
    default:123
  }
})
</script>
父组件
<template>
  // 引入子组件 绑定属性传给子组件
  <HeaderBox :name = 'name' :con="con"></HeaderBox>
</template>
<script setup>
import {reactive, ref, toRefs} from "vue"
import HeaderBox from "@/components/HeaderBox.vue";

// const name = ref('Hellow')
// const con = ref(456)
// 或者
const state  = reactive({
  name:"Hellow",
  con:456
})
const {name ,con} = toRefs(state)

</script>
emit子父传值
子组件
<template>
  <button @click="change">按钮</button>
</template>

<script setup>

// 将事件自定义名传递给父组件

// 点击按钮方法
const change = () =>{
  emit('changeBtn')   // changeBtn为自定义名
}
const emit = defineEmits(['changeBtn'])
</script>
父组件
<template>
    <HeaderBox @change-btn="changeBtn" ></HeaderBox>
</template>
<script setup>
    import {reactive, ref, toRefs} from "vue"
    import HeaderBox from "@/components/HeaderBox.vue";
    const changeBtn = ()=> {
      console.log("通过方法名接收");
    }
</script>
祖孙传值provide inject
也可用于父子传值使用
provide可以用于向子组件、孙组件传递值或方法
inject 用于获取子组件的值或方法
祖组件
<template>
    <div class="container">
        <h2>App {{ money }}</h2>
        <button @click="money = 1000">发钱</button>
        <hr />
        <Parent />
    </div>
</template>
<script setup>
    import { provide, ref } from 'vue'
    import Parent from './Parent.vue'

       // 提供数据
       const money = ref(100)
       provide('money', money)
       // 提供修改数据的方法
       const changeMoney = (m) => (money.value -= m)
       provide('changeMoney', changeMoney)
</script>
父组件
<template>
    <div>
        Parent
        <hr />
        <Child />
    </div>
</template>

<script setup>
    import Child from './Child.vue'
</script>
孙组件
<template>
    <div>
        Child
        <p>{{ money }}</p>
        <button @click="changeMoney(1)">花 1 块钱</button>
    </div>
</template>

<script setup>
    import { inject } from 'vue'

    const money = inject('money')
    const changeMoney = inject('changeMoney')
    return { money, changeMoney }
</script>
获取子组件ref变量和defineExpose暴露
在父组件中获取子组件的ref,并改变子组件中的值
子组件
<p>{{ state }}</p>

const state = reactive({
  a: false,
  b: false,
  c: false,
})
defineExpose({
  ...toRefs(state)
})
父组件
<HeaderBox ref='refs'></HeaderBox>  // 子组件
<button @click="onClickSetUp">onClickSetUp</button>

const refs = ref('refs')
const onClickSetUp = ({key})=> {
  refs.value.a = true  // 改变子组件的属性值
  console.log(key,refs); // 获取子组件的ref
}
路由useRoute useRouter
useRoute 相当于vue2 的 this.$route
useRouter 相当于 vue2 的 this.$router
import { useRoute ,useRouter} from "vue-router";
const router = useRouter()
const route =  useRoute()

//  product?id=1
console.log("接收显式传参数",route.query); // id:'1'
console.log("当前路由地址:",router.currentRoute.value.name); //product
query 和 params 的区别:
1.首先就是写法得不同,query 得写法是 用 path 来编写传参地址,而 params 得写法是用 name 来编写传参地址,你可以看一下编写路由时候得相关属性,你也可以输出一下 路由对象信息 看一下
2.接收方法不同, 一个用 query 来接收, 一个用 params 接收 ,总结就是谁发得 谁去接收
3.query 在刷新页面得时候参数不会消失,而 params 刷新页面得时候会参数消失,可以考虑本地存储解决
4.query 传得参数都是显示在url 地址栏当中,而 params 传参不会显示在地址栏
params是路由的一部分,必须要在路由后面添加参数名。query是拼接在url后面的参数,没有也没关系。 二者还有点区别,直白的来说query相当于get请求,页面跳转的时候,可以在地址栏看到请求参数,而params相当于post请求,参数不会再地址栏中显示。
path 和 query 搭配使用
name 和 params 搭配使用
// 路由跳转
// query 写法
router.push({path:'/home',query:{id:"123"}}) // path 路由地址 query 传递参数
route.query.id // 接收参数

// params 写法
router.push({name:'/home',params:{id:"123"}}) // name 路由地址 params 传递参数
route.params.id // 接收参数
pinia
存储库,允许跨组件/页面共享状态
与vuex的区别:
1、去掉了vuex中的mutation
2、action支持同步和异步,vuex中支持异步的操作
3、更好的支持TS
4、更轻量
核心概念:
- state:状态
- actions:修改状态(包括同步和异步)
- getters:计算属性
安装与使用
1、安装
yarn add pinia
# or
npm i pinia
2、挂载pinia
main.js
import { createPinia } from 'pinia'
const pinia = createPinia()

createApp(App).use(store).use(router).use(pinia).mount('#app')
3、创建模块
store/counter.js
import { defineStore } from 'pinia'
// 创建 store,命名规则:useXxxxStore
// 参数 1:store 的唯一标识
// 参数 2:对象,可以提供 state actions getters
const useCounterStore = defineStore('counter', {
    // 推荐函数:避免服务端渲染导致的数据状态污染
    // 箭头函数:为了更好的TS推导
    state: () => {
        return {
            count: 10,
        }
    },
    actions: {},
    getters: {},
})

export default useCounterStore
4、在组件中使用
APP.vue
<script setup>
    import useCounterStore from './store/counter'
    const counter = useCounterStore()
</script>
<template>
    <div>{{ counter.count }}</div>
</template>
action 的使用
在 Pinia 中没有 mutations,只有 actions,不管是同步还是异步的代码,都可以在 actions 中完成。
1、在 actions 中提供方法并且修改数据,store/counter.js
import { defineStore } from 'pinia'
const useCounterStore = defineStore('counter', {
    state: () => {
        return {
            count: 0,
        }
    },
    actions: {
        increment() {
            this.count++
        },
        incrementAsync() {
            setTimeout(() => {
                this.count++
            }, 1000)
        },
    },
})

export default useCounterStore
2、在组件中使用
<template>
    <div>counter: {{ counter.count }}</div>
    <button @click="counter.increment">add 1</button>
    <button @click="counter.incrementAsync">async add 1</button>
</template>
<script setup>
    import useCounterStore from './store/counter'
    const counter = useCounterStore()
</script>
getters 的使用
Pinia 和 Vuex 中的 getters 基本是一样的,也带有缓存的功能。
1、在getters中提供计算属性
import { defineStore } from 'pinia'
const useCounterStore = defineStore('counter', {
    state: () => {
        return {
            count: 0,
        }
    },
    actions: {
        increment() {
            this.count++
        },
        incrementAsync() {
            setTimeout(() => {
                this.count++
            }, 1000)
        },
    },
    getters: {
        double() {
            return this.count * 2
        },
    },
})

export default useCounterStore
2、在组件中使用
<script setup>
    import useCounterStore from './store/counter'
    const counter = useCounterStore()
</script>
<template>
    <div>counter: {{ counter.count }}</div>
    <div>double: {{ counter.double }}</div>
    <button @click="counter.increment">add 1</button>
    <button @click="counter.incrementAsync">async add 1</button>
</template>
storeToRefs 的使用
如果直接从 Pinia 中解构数据,会丢失响应式,使用 storeToRefs 可以保证解构出来的数据也是响应式的。
<template>
    <div>counter: {{ count }}</div>
    <div>double: {{ double }}</div>
    <button @click="increment">add 1</button>
    <button @click="incrementAsync">async add 1</button>
</template>
<script setup>
    import { storeToRefs } from 'pinia'
    import useCounterStore from './store/counter'
    const counter = useCounterStore()
    // !数据解构会丢失响应式
    // const { count, double } = counter
    // 方法可以正常解构
    const { increment, incrementAsync } = counter
    // 被 storeToRefs 包裹后的 counter,解构出来的数据是响应式的
    const { count, double } = storeToRefs(counter)
</script>
Pinia 模块化
在复杂项目中,一般来说应该每一个功能模块对应一个 store,最后通过一个根 store 进行整合。
1、user 模块,store/user.js
import { defineStore } from 'pinia'

const useUserStore = defineStore('user', {
    state: () => {
        return {
            name: 'ifer',
            age: 18,
        }
    },
})

export default useUserStore
2、关联 user 和 counter 模块到根 store,store/index.js
import useCounterStore from './counter'
import useUserStore from './user'

export default function useStore() {
    return {
        user: useUserStore(),
        counter: useCounterStore(),
    }
} 3、在组件中使用,App.vue
<template>
    <div>name: {{ name }}</div>
    <div>age: {{ age }}</div>
</template>
<script setup>
    import { storeToRefs } from 'pinia'
    import useStore from './store'
    const { user } = useStore()
    const { name, age } = storeToRefs(user)
</script>


 960
960


 被折叠的 条评论
为什么被折叠?
被折叠的 条评论
为什么被折叠?
 到【灌水乐园】发言


