


 本文详细介绍了如何为Raspberry Pi配置无线网络,包括使用USB适配器的方法、检查设备识别、设置桌面环境下的无线连接以及命令行方式的网络配置步骤。
Raspberry Pi
Although the Raspberry Pi Model B comes with built-in 100Mbps wired Ethernet, it can also use WiFi via a USB dongle. The Model A doesn’t come with Ethernet at all, so using a WiFi adapter is a good way to get networking on that model. In both cases, simply plugging in a supported USB dongle and doing a simple bit of configuration will give your Pi access to wireless.
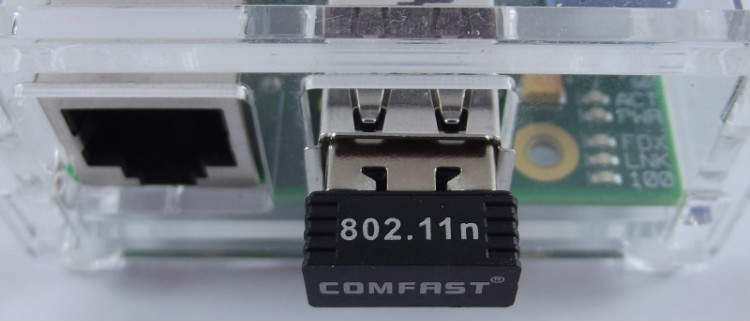
You can get yourself a USB adapter for less than $10 but it is important to buy one which is supported by the Raspberry Pi and Linux. For this tutorial, I will be using a dongle based on the Realtek RTL8188CUS chipset. The Realtek chipset is supported by Raspbian out-of-the-box and no additional configuration is needed for it to be recognized during boot.
The RPi USB Wi-Fi Adapters page has a comprehensive list of supported wireless adapters. If you are considering buying a dongle, you should check that page for compatibility.
Plug in the USB adapter and boot your Raspberry Pi. There are several ways to check if the adapter has been recognized. The easiest is to type:
ifconfig

You should see a listing for eth0 – the built-in wired Ethernet port; for lo – the loop back device; and wlan0 – the wireless adapter.
Alternatively you can list the current USB devices attached to the Pi using:
sudo lsusb
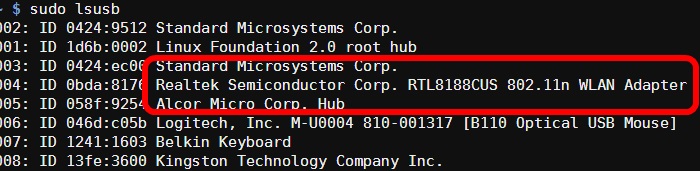
The list should contain your wireless dongle. On my setup, the list shows a “Realtek Semiconductor Corp. RTL8188CUS 802.11n WLAN Adapter”.
Desktop set up
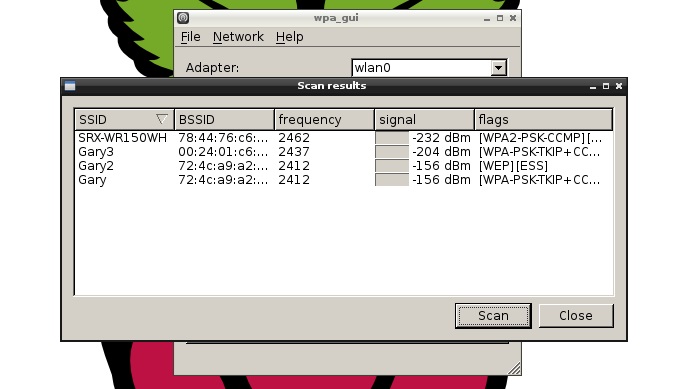
If you are using the desktop on Raspbian than connecting to a wireless network is quite easy. Double click the “WiFi Config” icon on the desktop to start the wireless configuration program. The “Adapter:” field will show your USB dongle (i.e. wlan0) and the “Network:” field will be empty (unless you have previously configured a wireless network). Click the “Scan” button. Now click “Scan” on the “Scan results” window. A list of the available wireless networks will be shown along with their signal strengths etc. To connect to one of the listed networks, double click on the SSID.
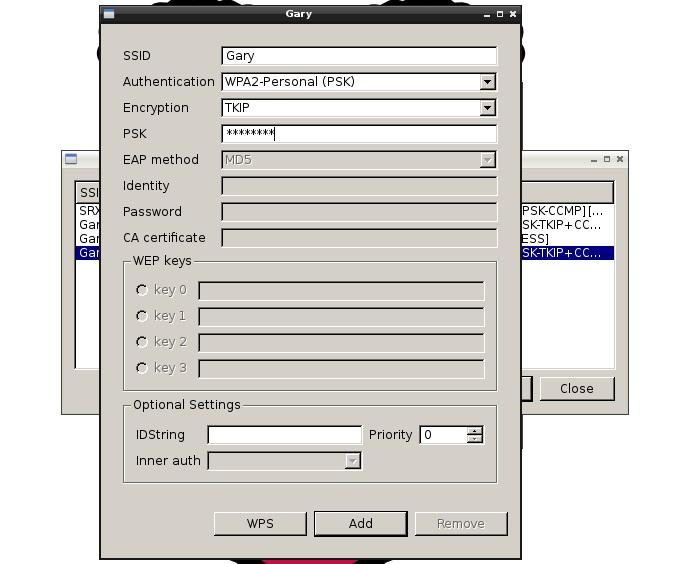
On the connection window, verify the “Authentication” and “Encryption” fields and enter the password in the “PSK” field. Now Click “Add”. Close the “Scan results” window. The configuration program will automatically connect to the newly configured network.
You can add multiple networks by repeating the same steps. You can select the desired network using the “Network:” drop down list. You can also connect and disconnect using the relevant buttons. You can use the “Managed Networks” tab to edit and remove networks.
Command line set up
If you aren’t using the desktop then the WiFi can be configured using the command line. Raspbian should come with all the correct packages pre-installed but if any of the commands or files mentioned below aren’t available, then run this command to install them:
sudo apt-get install wpasupplicant wireless-tools
The general network settings are configured in “/etc/network/interfaces” while the Wi-Fi details are set in the “/etc/wpa_supplicant/wpa_supplicant.conf” file. First edit the “interfaces” file:
sudo nano /etc/network/interfaces
Ensure that the section about wlan0 (typically found at the end of the file) reads as follows:
allow-hotplug wlan0
iface wlan0 inet manual
wpa-roam /etc/wpa_supplicant/wpa_supplicant.conf
iface default inet dhcp
If there are difference then change them to accordingly. Don’t alter any of the lines about the lo adapter or the eth0 adapter. Press “CTRL + X” to exit nano (press Y and then press ENTER when prompted).
To get a list of the currently available wireless networks, use the iwlist command:
sudo iwlist wlan0 scan
If there is too much information, use grep to find the fields you need. For example to see just the ESSIDs, use:
sudo iwlist wlan0 scan | grep ESSID

Pick a network and add the network authentication information in the “wpa_supplicant.conf” file:
sudo nano /etc/wpa_supplicant/wpa_supplicant.conf
The first two lines should already read:
ctrl_interface=DIR=/var/run/wpa_supplicant GROUP=netdev
update_config=1
Now add the following:
network={
        ssid="YourSSID"
        psk="password"
        key_mgmt=WPA-PSK
}
If your router is configured using WEP for encryption then the network information will look like this:
network={
        ssid="YourSSID"
        wep_key0="password12345"
        key_mgmt=NONE
}
For those of you familiar with advanced WiFi configurations, the network information can also include the following fields:
- proto – Protocol type can be: RSN (for WP2) and WPA (for WPA1).
- pairwise – CCMP or TKIP (for WPA2 or WPA1).
- auth_alg – authentication algorithm, can be OPEN for both WPA1/WPA2 and less commonly SHARED or LEAP.
Press “CTRL + X” to exit nano and save the file, press Y and then press ENTER when prompted. Finally reboot your Pi:
sudo reboot
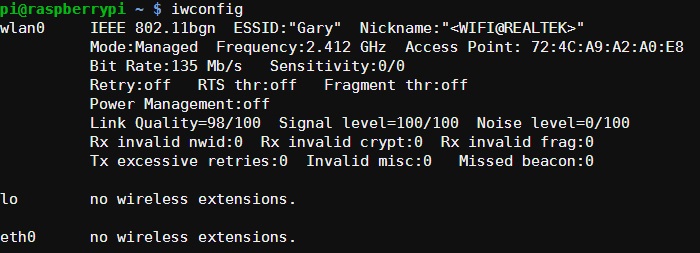
You can check the status of the wireless connection using ifconfig (to see if wlan0 has acquired an IP address) and iwconfig to check which network the wireless adapter is using.
Reference
From: http://www.maketecheasier.com/setup-wifi-on-raspberry-pi/


 2177
2177

 被折叠的 条评论
为什么被折叠?
被折叠的 条评论
为什么被折叠?
 到【灌水乐园】发言


