


前言
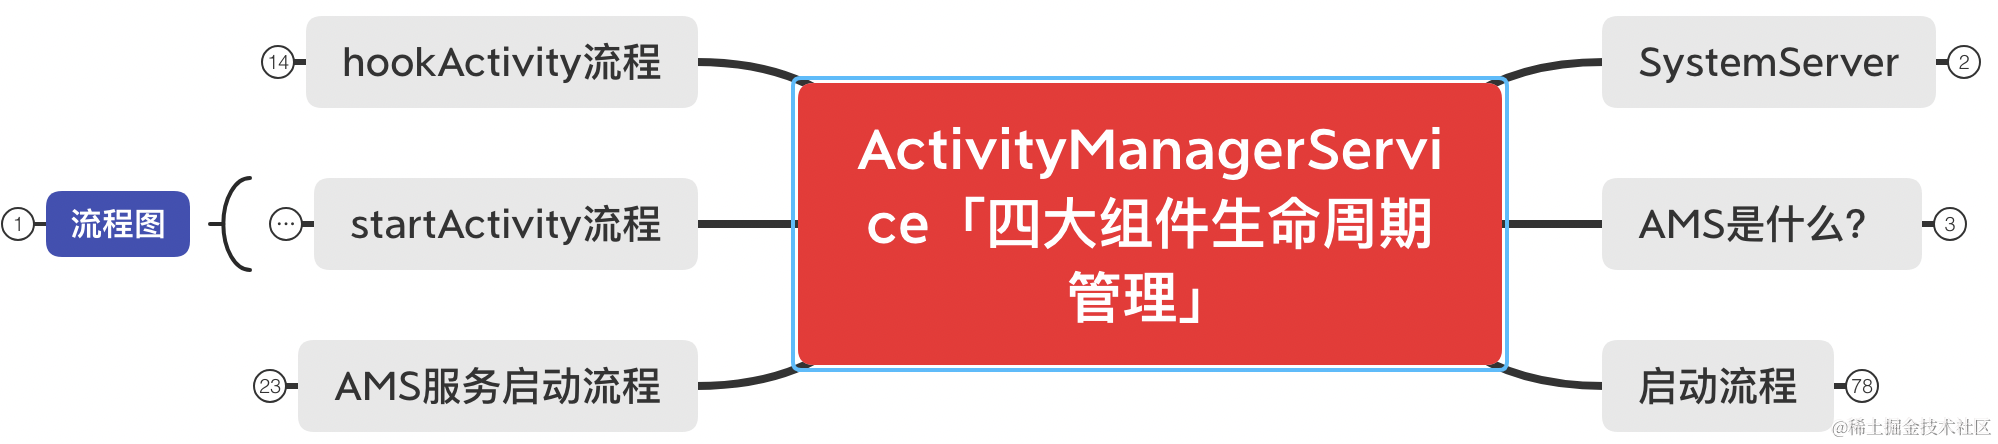
本章主要讲解下 什么是 AMS,以及它是如何启动的;
SystemServer
SystemServer 通过按下电源键接通电源之后就会启动 BootRoom,BootRoom 就会拉起一个 BootLoader 程序,此程序会拉起 Linux Kernel「系统内核」,我们的 Android 系统就会初始化一个用户态进程也就是 init 进程,init 进程会执行 initZygote.rc 创建 zygote 进程,zygote 进程会 fork「孵化」出 SystemServer「系统服务进程,这是 zygote 进程的最大的一个儿子,Android 上层需要的所有服务例如 AMS,WMS,PMS,PKMS 等等都会在 SystemServer 初始化起来」 SystemServer 进程就会拉起我们的第一个应用程序「也就是桌面程序 Launcher 进程」;
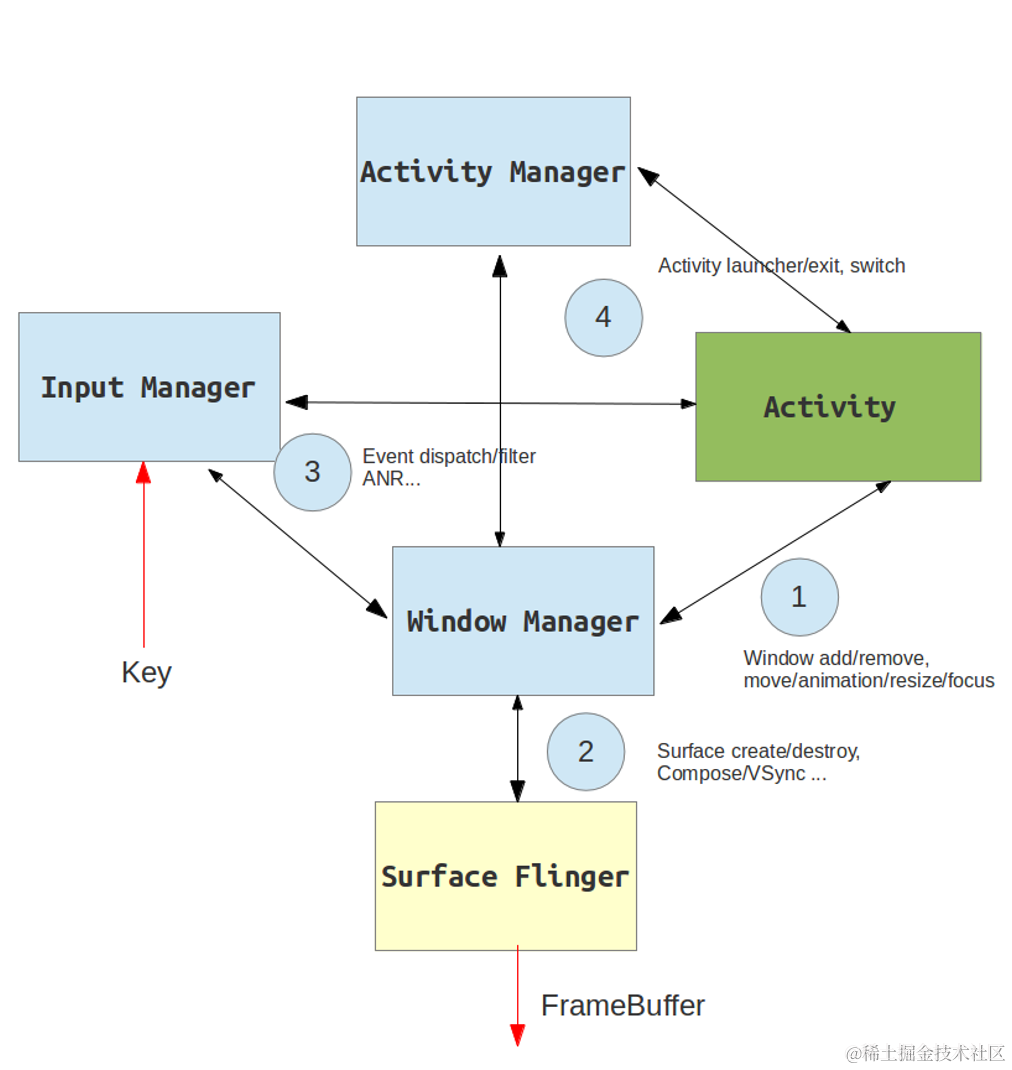
这是一个 Android GUI 关系图;
AMS 是什么?
从 java 角度来看,AMS 就是一个 java 对象,实现了 Ibinder 接口,所以它是一个用于进程之间通信的接口,这个对象初始化是在 SystemServer.java 的 run() 方法里面;
ActivityManagerService 从名字就可以看出,它是一个服务,用来管理 Activity,而且是一个系统服务,就是包管理服务,电池管理服务,震动管理服务等;
AMS 实现了 Ibinder 接口,所以它是一个 Binder,这意味着他不但可以用于进程间通信,还是一个线程,因为一个 Binder 就是一个线程;
总得来说:ActivityManagerService 是 Android 系统中一个特别重要的系统服务,也是我们上层 APP 打交道最多的系统服务之一。ActivityManagerService(以下简称AMS) 主要负责四大组件的启动、切换、调度以及应用进程的管理和调度工作。所有的 APP 应用都需要与 AMS 打交道 ActivityManager 的组成主要分为以下几个部分:
1.服务代理:由 ActivityManagerProxy 实现,用于与 Server 端提供的系统服务进行进程间通信;
2.服务中枢:ActivityManagerNative 继承自 Binder 并实现 IActivityManager,它提供了服务接口和Binder 接口的相互转化功能,并在内部存储服务代理对象,并提供了 getDefault 方法返回服务代理;
3.Client:由 ActivityManager 封装一部分服务接口供 Client 调用。ActivityManager 内部通过调用ActivityManagerNative 的 getDefault 方法,可以得到一个 ActivityManagerProxy 对象的引用,进而通过该代理对象调用远程服务的方法;
4.Server:由 ActivityManagerService 实现,提供 Server 端的系统服务;
AMS 启动流程
SystemServer 创建之后,就会调研 run 方法,这个 run 方法就会启动 AMS;
createSystemContext
创建进程,启动launcher,把界面显示出来,会需要大量的资源,例如「文字,图片」,想要获取这些资源,都需要context,而系统的资源获取 也需要一个 context 对象,所以创建一个系统级别的 context 来获取资源,系统资源的加载都是在这个时候被加载的。例如「@android/xxx等都属于系统资源」;
private void createSystemContext() {
    ActivityThread activityThread = ActivityThread.systemMain();
    mSystemContext = activityThread.getSystemContext();
    mSystemContext.setTheme(DEFAULT_SYSTEM_THEME);

    final Context systemUiContext = activityThread.getSystemUiContext();
    systemUiContext.setTheme(DEFAULT_SYSTEM_THEME);
}
这里重点关注的时候 ActivityThread.systemMain() 方法,我们进入这个方法看下:
public static ActivityThread systemMain() {
    ThreadedRenderer.initForSystemProcess();
    ActivityThread thread = new ActivityThread();
    thread.attach(true, 0);
    return thread;
}
这里创建了 ActivityThread 已经进行了 attach 操作;
ActivityThread() {
    mResourcesManager = ResourcesManager.getInstance();
}
获取资源管理实例;
private void attach(boolean system, long startSeq) {

    if (!system) {
        // 省略部分代码
    } else {
        try {
            mInstrumentation = new Instrumentation();
            mInstrumentation.basicInit(this);
            ContextImpl context = ContextImpl.createAppContext(
                    this, getSystemContext().mPackageInfo);
            mInitialApplication = context.mPackageInfo.makeApplication(true, null);
            mInitialApplication.onCreate();
        } catch (Exception e) {
            throw new RuntimeException(
                    "Unable to instantiate Application():" + e.toString(), e);
        }
    }
    // 省略部分代码
}
这里做了三件事情
- new Instrumentation(); 创建 Instrumentation;
- ContextImpl.createAppContext(this, getSystemContext().mPackageInfo) 根据 LoadApk 对象创建 Context;
- context.mPackageInfo.makeApplication(true, null); 初始化 Application;
getSystemContext
其中 createAppContext 需要获取 SystemContext 作为入参,我们进入这个方法看下:
public ContextImpl getSystemContext() {
    synchronized (this) {
        if (mSystemContext == null) {
            mSystemContext = ContextImpl.createSystemContext(this);
        }
        return mSystemContext;
    }
}
我们进入这个 createSystemContext 看下:
static ContextImpl createSystemContext(ActivityThread mainThread) {
    LoadedApk packageInfo = new LoadedApk(mainThread);
    ContextImpl context = new ContextImpl(null, mainThread, packageInfo,
            ContextParams.EMPTY, null, null, null, null, null, 0, null, null);
    context.setResources(packageInfo.getResources());
    context.mResources.updateConfiguration(context.mResourcesManager.getConfiguration(),
            context.mResourcesManager.getDisplayMetrics());
    context.mContextType = CONTEXT_TYPE_SYSTEM_OR_SYSTEM_UI;
    return context;
}
这个方法做了两件事情,
- 创建 LoadedApk 对象,通过 LoadeApk 获取每一个安装在手机上的 APK 信息;
- 创建ContextImpl,首次执行getSystemContext会执行createSystemContext创建LoadedApk和contextImpl对象,利用刚创建的LoadedApk创建contextImpl;
createAppContext
ContextImpl context = new ContextImpl(null, mainThread, packageInfo, null, null, null, 0,null);
context.setResources(packageInfo.getResources());
startBootstrapService
启动一系列相关引导服务,我们进入源码看下:
private void startBootstrapServices(@NonNull TimingsTraceAndSlog t) {

    // 省略部分代码

    // 启动 APK 安装服务
    Installer installer = mSystemServiceManager.startService(Installer.class);
    // 省略部分代码

    // 启动 AMS 服务
    ActivityTaskManagerService atm = mSystemServiceManager.startService(
            ActivityTaskManagerService.Lifecycle.class).getService();
    mActivityManagerService = ActivityManagerService.Lifecycle.startService(
            mSystemServiceManager, atm);
    // 设置 SystemServiceManager
    mActivityManagerService.setSystemServiceManager(mSystemServiceManager);
    // 设置 APK 安装器
    mActivityManagerService.setInstaller(installer);

    // 初始化 AMS 相关的PMS
    mActivityManagerService.initPowerManagement();
    // 设置 SystemServer
    mActivityManagerService.setSystemProcess();
}
startCoreServices();
启动核心服务,我们进入这个源码看下:
private void startCoreServices(@NonNull TimingsTraceAndSlog t) {

    mSystemServiceManager.startService(SystemConfigService.class);

    mSystemServiceManager.startService(BatteryService.class);

    mSystemServiceManager.startService(UsageStatsService.class);
    // 启动用户统计服务
    mActivityManagerService.setUsageStatsManager(
            LocalServices.getService(UsageStatsManagerInternal.class));

    if (mPackageManager.hasSystemFeature(PackageManager.FEATURE_WEBVIEW)) {
        mWebViewUpdateService = mSystemServiceManager.startService(WebViewUpdateService.class);
    }

    mSystemServiceManager.startService(CachedDeviceStateService.class);

    mSystemServiceManager.startService(BinderCallsStatsService.LifeCycle.class);

    mSystemServiceManager.startService(LooperStatsService.Lifecycle.class);

    mSystemServiceManager.startService(ROLLBACK_MANAGER_SERVICE_CLASS);

    mSystemServiceManager.startService(NativeTombstoneManagerService.class);

    mSystemServiceManager.startService(BugreportManagerService.class);

    mSystemServiceManager.startService(GpuService.class);
}
startOtherServices()
启动其他服务,我们进入这个方法看下:
private void startOtherServices(@NonNull TimingsTraceAndSlog t) {
    // 省略部分代码

    // 安装系统的 provider
    mActivityManagerService.installSystemProviders();

    // 设置 windowManager
    wm = WindowManagerService.main(context, inputManager,
                    mFactoryTestMode != FactoryTest.FACTORY_TEST_LOW_LEVEL,
                    !mFirstBoot, mOnlyCore, new PhoneWindowManager());
            ServiceManager.addService(Context.WINDOW_SERVICE, wm);
    mActivityManagerService.setWindowManager(wm);
    // 设置 inputManager
    inputManager = new InputManagerService(context);
    ServiceManager.addService(Context.INPUT_SERVICE, inputManager);
    // 通知
    mSystemServiceManager.startService(NotificationManagerService.class);

    mActivityManagerService.systemReady();
}
AMS 服务启动流程
这里额外插一句,service_manager 和 SystemServiceManager 的区别,service_manager 是 C/C++ 层的,用来管理 binder 服务的大管家,而 SystemServiceManager 是用来管理各种服务的启动,每启动一个服务,都会收集到一个 mServices 的集合中;
mActivityManagerService = ActivityManagerService.Lifecycle.startService(
        mSystemServiceManager, atm);
这里并不是直接 new 出来 AMS,而是通过 LifeCycle 这个代理类来创建 AMS,而 LifeCycle 的创建是通过反射来实现的,LifeCycle 在初始化的时候会初始化 AMS,我们进入这个 LifeCycle 看下:
public static final class Lifecycle extends SystemService {

    public Lifecycle(Context context) {
        super(context);
        mService = new ActivityManagerService(context, sAtm);
    }


    public static ActivityManagerService startService(
            SystemServiceManager ssm, ActivityTaskManagerService atm) {
        sAtm = atm;
        return ssm.startService(ActivityManagerService.Lifecycle.class).getService();
    }

    @Override
    public void onBootPhase(int phase) {
        mService.mBootPhase = phase;
        if (phase == PHASE_SYSTEM_SERVICES_READY) {
            mService.mBatteryStatsService.systemServicesReady();
            mService.mServices.systemServicesReady();
        } else if (phase == PHASE_ACTIVITY_MANAGER_READY) {
            mService.startBroadcastObservers();
        } else if (phase == PHASE_THIRD_PARTY_APPS_CAN_START) {
            mService.mPackageWatchdog.onPackagesReady();
        }
    }

    // 返回 AMS
    public ActivityManagerService getService() {
        return mService;
    }
}
LifeCycle 继承 SystemService,这个 com.android.server.SystemService 中包含了系统服务启动的各个阶段;
public abstract class SystemService {

    /** @hide */
    protected static final boolean DEBUG_USER = false;

    /**
     * The earliest boot phase the system send to system services on boot.
     */
    public static final int PHASE_WAIT_FOR_DEFAULT_DISPLAY = 100;

    /**
     * Boot phase that blocks on SensorService availability. The service gets started
     * asynchronously since it may take awhile to actually finish initializing.
     *
     * @hide
     */
    public static final int PHASE_WAIT_FOR_SENSOR_SERVICE = 200;

    /**
     * After receiving this boot phase, services can obtain lock settings data.
     */
    public static final int PHASE_LOCK_SETTINGS_READY = 480;

    /**
     * After receiving this boot phase, services can safely call into core system services
     * such as the PowerManager or PackageManager.
     */
    public static final int PHASE_SYSTEM_SERVICES_READY = 500;

    /**
     * After receiving this boot phase, services can safely call into device specific services.
     */
    public static final int PHASE_DEVICE_SPECIFIC_SERVICES_READY = 520;

    /**
     * After receiving this boot phase, services can broadcast Intents.
     */
    public static final int PHASE_ACTIVITY_MANAGER_READY = 550;

    /**
     * After receiving this boot phase, services can start/bind to third party apps.
     * Apps will be able to make Binder calls into services at this point.
     */
    public static final int PHASE_THIRD_PARTY_APPS_CAN_START = 600;

    /**
     * After receiving this boot phase, services can allow user interaction with the device.
     * This phase occurs when boot has completed and the home application has started.
     * System services may prefer to listen to this phase rather than registering a
     * broadcast receiver for {@link android.content.Intent#ACTION_LOCKED_BOOT_COMPLETED}
     * to reduce overall latency.
     */
    // 代表着 服务 启动完成
    public static final int PHASE_BOOT_COMPLETED = 1000;
}
我们接着拐回去看 LifeCycle 的 startService 方法,这个方法直接调用 SystemServiceManager 的 startService 方法,我们进入这个方法看下:
public <T extends SystemService> T startService(Class<T> serviceClass) {
    try {
        if (!SystemService.class.isAssignableFrom(serviceClass)) {
            throw new RuntimeException("Failed to create " + name
                    + ": service must extend " + SystemService.class.getName());
        }
        final T service;
        try {
            // 使用反射创建 LifeCycle 对象;
            Constructor<T> constructor = serviceClass.getConstructor(Context.class);
            service = constructor.newInstance(mContext);
        } catch (InstantiationException ex) {
            throw new RuntimeException("Failed to create service " + name
                    + ": service could not be instantiated", ex);
        } catch (IllegalAccessException ex) {
            throw new RuntimeException("Failed to create service " + name
                    + ": service must have a public constructor with a Context argument", ex);
        } catch (NoSuchMethodException ex) {
            throw new RuntimeException("Failed to create service " + name
                    + ": service must have a public constructor with a Context argument", ex);
        } catch (InvocationTargetException ex) {
            throw new RuntimeException("Failed to create service " + name
                    + ": service constructor threw an exception", ex);
        }

        startService(service);
        return service;
    } finally {
        Trace.traceEnd(Trace.TRACE_TAG_SYSTEM_SERVER);
    }
}
这里使用反射的方式来创建 LifeCycle 对象,当创建的,就会调用其构造方法,构造方法中就会创建 AMS,然后通过 getService 返回;
这个 LifeCycle 中创建的 mService 就是正儿八经的 ActivityManagerService,也就是我们需要的 AMS,这样做就会让 AMS 有一个生命周期;
SystemService 有各个阶段的状态分发,最终通过 LifeCycle 重写的 onBootPhase 分发具体逻辑,当分发PHASE_SYSTEM_SERVICES_READY 的时候,会执行 AMS 中的 ActiveServices 的 systemServiceReady 方法,这个 ActiveServices 就是用来管理四大组件的,就是说 AMS 通过操作 ActiveServices 来间接管理四大组件;
到此 AMS 就创建了出来了,接下来看下它在创建的时候都做了哪些事情,我们进入 AMS 的构造方法看下:
public ActivityManagerService(Context systemContext, ActivityTaskManagerService atm) {
    LockGuard.installLock(this, LockGuard.INDEX_ACTIVITY);
    mInjector = new Injector(systemContext);
    mContext = systemContext;

    mFactoryTest = FactoryTest.getMode();
    // 1. 创建 Android UI 线程
    mSystemThread = ActivityThread.currentActivityThread();
    mUiContext = mSystemThread.getSystemUiContext();

    mHandlerThread = new ServiceThread(TAG,
            THREAD_PRIORITY_FOREGROUND, false /*allowIo*/);
    mHandlerThread.start();
    mHandler = new MainHandler(mHandlerThread.getLooper());
    mUiHandler = mInjector.getUiHandler(this);

    mProcStartHandlerThread = new ServiceThread(TAG + ":procStart",
            THREAD_PRIORITY_FOREGROUND, false /* allowIo */);
    mProcStartHandlerThread.start();
    mProcStartHandler = new Handler(mProcStartHandlerThread.getLooper());

    mConstants = new ActivityManagerConstants(mContext, this, mHandler);
    final ActiveUids activeUids = new ActiveUids(this, true /* postChangesToAtm */);
    mPlatformCompat = (PlatformCompat) ServiceManager.getService(
            Context.PLATFORM_COMPAT_SERVICE);
    mProcessList = mInjector.getProcessList(this);
    mProcessList.init(this, activeUids, mPlatformCompat);
    mAppProfiler = new AppProfiler(this, BackgroundThread.getHandler().getLooper(),
            new LowMemDetector(this));
    mPhantomProcessList = new PhantomProcessList(this);
    mOomAdjuster = new OomAdjuster(this, mProcessList, activeUids);

    final BroadcastConstants foreConstants = new BroadcastConstants(
            Settings.Global.BROADCAST_FG_CONSTANTS);
    foreConstants.TIMEOUT = BROADCAST_FG_TIMEOUT;

    final BroadcastConstants backConstants = new BroadcastConstants(
            Settings.Global.BROADCAST_BG_CONSTANTS);
    backConstants.TIMEOUT = BROADCAST_BG_TIMEOUT;

    final BroadcastConstants offloadConstants = new BroadcastConstants(
            Settings.Global.BROADCAST_OFFLOAD_CONSTANTS);
    offloadConstants.TIMEOUT = BROADCAST_BG_TIMEOUT;
    offloadConstants.SLOW_TIME = Integer.MAX_VALUE;

    mEnableOffloadQueue = SystemProperties.getBoolean(
            "persist.device_config.activity_manager_native_boot.offload_queue_enabled", false);

    mFgBroadcastQueue = new BroadcastQueue(this, mHandler,
            "foreground", foreConstants, false);
    mBgBroadcastQueue = new BroadcastQueue(this, mHandler,
            "background", backConstants, true);
    mOffloadBroadcastQueue = new BroadcastQueue(this, mHandler,
            "offload", offloadConstants, true);
    mBroadcastQueues[0] = mFgBroadcastQueue;
    mBroadcastQueues[1] = mBgBroadcastQueue;
    mBroadcastQueues[2] = mOffloadBroadcastQueue;
    // 2. 创建 ActiveServices 用来管理四大组件
    mServices = new ActiveServices(this);
    mCpHelper = new ContentProviderHelper(this, true);
    mPackageWatchdog = PackageWatchdog.getInstance(mUiContext);
    mAppErrors = new AppErrors(mUiContext, this, mPackageWatchdog);
    mUidObserverController = new UidObserverController(mUiHandler);

    final File systemDir = SystemServiceManager.ensureSystemDir();
    // 电量统计相关服务
    mBatteryStatsService = new BatteryStatsService(systemContext, systemDir,
            BackgroundThread.get().getHandler());
    mBatteryStatsService.getActiveStatistics().readLocked();
    mBatteryStatsService.scheduleWriteToDisk();
    mOnBattery = DEBUG_POWER ? true
            : mBatteryStatsService.getActiveStatistics().getIsOnBattery();
    mBatteryStatsService.getActiveStatistics().setCallback(this);
    mOomAdjProfiler.batteryPowerChanged(mOnBattery);
    // 进程统计相关服务
    mProcessStats = new ProcessStatsService(this, new File(systemDir, "procstats"));

    mAppOpsService = mInjector.getAppOpsService(new File(systemDir, "appops.xml"), mHandler);

    mUgmInternal = LocalServices.getService(UriGrantsManagerInternal.class);

    mUserController = new UserController(this);

    mPendingIntentController = new PendingIntentController(
            mHandlerThread.getLooper(), mUserController, mConstants);

    mUseFifoUiScheduling = SystemProperties.getInt("sys.use_fifo_ui", 0) != 0;

    mTrackingAssociations = "1".equals(SystemProperties.get("debug.track-associations"));
    mIntentFirewall = new IntentFirewall(new IntentFirewallInterface(), mHandler);

    mActivityTaskManager = atm;
    // 创建 recentTasks、ActivityStartController
    mActivityTaskManager.initialize(mIntentFirewall, mPendingIntentController,
            DisplayThread.get().getLooper());
    mAtmInternal = LocalServices.getService(ActivityTaskManagerInternal.class);

    mHiddenApiBlacklist = new HiddenApiSettings(mHandler, mContext);

    Watchdog.getInstance().addMonitor(this);
    Watchdog.getInstance().addThread(mHandler);

    updateOomAdjLocked(OomAdjuster.OOM_ADJ_REASON_NONE);
    try {
        Process.setThreadGroupAndCpuset(BackgroundThread.get().getThreadId(),
                Process.THREAD_GROUP_SYSTEM);
        Process.setThreadGroupAndCpuset(
                mOomAdjuster.mCachedAppOptimizer.mCachedAppOptimizerThread.getThreadId(),
                Process.THREAD_GROUP_SYSTEM);
    } catch (Exception e) {
        Slog.w(TAG, "Setting background thread cpuset failed");
    }

    mInternal = new LocalService();
    mPendingStartActivityUids = new PendingStartActivityUids(mContext);
    mTraceErrorLogger = new TraceErrorLogger();
}
AMS的创建做了五个比较重要的事情
- 创建 Android UI 线程;mSystemThread = ActivityThread.currentActivityThread();
- 创建 ActiveService;mServices = new ActiveServices(this);
- 创建管理 Activity 的 ActivityStackSupervisor 对象;mStackSupervisor = new ActivityStackSupervisor(this, mHandler.getLooper());
- 创建最近任务列表;mRecentTasks = new RecentTasks(this, mStackSupervisor);
- 创建 App的 Activity 生命周期管理类;mLifeCycleManager = n ew ClientLifeCycleManager();
初始之后,我们来看下 start 逻辑
private void start() {
    // AMS 启动的时候会把所有的应用进程移除掉
    removeAllProcessGroups();
    // 启动电池统计服务
    mBatteryStatsService.publish();
    mAppOpsService.publish();
    LocalServices.addService(ActivityManagerInternal.class, mInternal);
    LocalManagerRegistry.addManager(ActivityManagerLocal.class,
            (ActivityManagerLocal) mInternal);
    mActivityTaskManager.onActivityManagerInternalAdded();
    mPendingIntentController.onActivityManagerInternalAdded();
    mAppProfiler.onActivityManagerInternalAdded();
}
整个的 start 大致过程就结束了;
初始化 AMS 相关的 PMS
AMS 在 start 之后,会调用 mActivityManagerService.initPowerManagement(); 来初始化 PowerManagerService 服务,我们来看下这里面都做了什么
public void initPowerManagement() {
    mActivityTaskManager.onInitPowerManagement();
    mBatteryStatsService.initPowerManagement();
    mLocalPowerManager = LocalServices.getService(PowerManagerInternal.class);
}
逻辑还是比较简单的,初始化 PMS 相关服务;
设置 SystemServer
AMS 在 start 之后,会调用 mActivityManagerService.setSystemProcess(); 来设置 SystemServer
public void setSystemProcess() {
    try {
        ServiceManager.addService(Context.ACTIVITY_SERVICE, this, /* allowIsolated= */ true,
                DUMP_FLAG_PRIORITY_CRITICAL | DUMP_FLAG_PRIORITY_NORMAL | DUMP_FLAG_PROTO);
        ServiceManager.addService(ProcessStats.SERVICE_NAME, mProcessStats);
        ServiceManager.addService("meminfo", new MemBinder(this), /* allowIsolated= */ false,
                DUMP_FLAG_PRIORITY_HIGH);
        ServiceManager.addService("gfxinfo", new GraphicsBinder(this));
        ServiceManager.addService("dbinfo", new DbBinder(this));
        mAppProfiler.setCpuInfoService();
        ServiceManager.addService("permission", new PermissionController(this));
        ServiceManager.addService("processinfo", new ProcessInfoService(this));
        ServiceManager.addService("cacheinfo", new CacheBinder(this));

        ApplicationInfo info = mContext.getPackageManager().getApplicationInfo(
                "android", STOCK_PM_FLAGS | MATCH_SYSTEM_ONLY);
        mSystemThread.installSystemApplicationInfo(info, getClass().getClassLoader());

        synchronized (this) {
            ProcessRecord app = mProcessList.newProcessRecordLocked(info, info.processName,
                    false,
                    0,
                    new HostingRecord("system"));
            app.setPersistent(true);
            app.setPid(MY_PID);
            app.mState.setMaxAdj(ProcessList.SYSTEM_ADJ);
            app.makeActive(mSystemThread.getApplicationThread(), mProcessStats);
            addPidLocked(app);
            updateLruProcessLocked(app, false, null);
            updateOomAdjLocked(OomAdjuster.OOM_ADJ_REASON_NONE);
        }
    } catch (PackageManager.NameNotFoundException e) {
        throw new RuntimeException(
                "Unable to find android system package", e);
    }

    // Start watching app ops after we and the package manager are up and running.
    mAppOpsService.startWatchingMode(AppOpsManager.OP_RUN_IN_BACKGROUND, null,
            new IAppOpsCallback.Stub() {
                @Override public void opChanged(int op, int uid, String packageName) {
                    if (op == AppOpsManager.OP_RUN_IN_BACKGROUND && packageName != null) {
                        if (getAppOpsManager().checkOpNoThrow(op, uid, packageName)
                                != AppOpsManager.MODE_ALLOWED) {
                            runInBackgroundDisabled(uid);
                        }
                    }
                }
            });

    final int[] cameraOp = {AppOpsManager.OP_CAMERA};
    mAppOpsService.startWatchingActive(cameraOp, new IAppOpsActiveCallback.Stub() {
        @Override
        public void opActiveChanged(int op, int uid, String packageName, String attributionTag,
                boolean active, @AttributionFlags int attributionFlags,
                int attributionChainId) {
            cameraActiveChanged(uid, active);
        }
    });
}
这里主要关注三点:
第一个是添加各种服务;
- activity AMS;ServiceManager.addService(Context.ACTIVITY_SERVICE, this, true);
- procstats 进程统计;ServiceManager.addService(ProcessStats.SERVICE_NAME, mProcessStats);
- meminfo 内存;ServiceManager.addService(“meminfo”, new MemBinder(this));
- gfxinfo 图像信息;ServiceManager.addService(“gfxinfo”, new GraphicsBinder(this));
- dbinfo 数据库;ServiceManager.addService(“dbinfo”, new DbBinder(this));
- cpuinfo CPU;ServiceManager.addService(“cpuinfo”, new CpuBinder(this));
- permission 权限;ServiceManager.addService(“permission”, new PermissionController(this));
- processinfo 进程服务;ServiceManager.addService(“processinfo”, new ProcessInfoService(this));
- usagestats 应用的使用情况;
adb shell dumpsys 的各种服务的来源就是从这里添加进去的;
第二个是创建用于性能统计的Profiler对象;
ApplicationInfo info = mContext.getPackageManager().getApplicationInfo(
“android”, STOCK_PM_FLAGS | MATCH_SYSTEM_ONLY);mSystemThread.installSystemApplicationInfo(info, getClass().getClassLoader());
第三个是创建ProcessRecord对象;
ProcessRecord app = newProcessRecordLocked(info, info.processName, false, 0);
安装系统的 provider
在 startOtherService 方法中,会调用 mActivityManagerService.installSystemProviders(); 来安装系统的 provider
设置 WindowManager
在 startOtherService 方法中,会调用 mActivityManagerService.setWindowManager(wm); 设置窗口管理器;
public void setWindowManager(WindowManagerService wm) {
    synchronized (this) {
        mWindowManager = wm;
        mWmInternal = LocalServices.getService(WindowManagerInternal.class);
        mActivityTaskManager.setWindowManager(wm);
    }
}
设置windowManager
wm = WindowManagerService.main(context, inputManager,
                    mFactoryTestMode != FactoryTest.FACTORY_TEST_LOW_LEVEL,
                    !mFirstBoot, mOnlyCore, new PhoneWindowManager());
            ServiceManager.addService(Context.WINDOW_SERVICE, wm);
mActivityManagerService.setWindowManager(wm);
setWindowManager 中创建核心 Settings Observer,用于监控 Settings「系统设置」
mCoreSettingsObserver = new CoreSettingsObserver(this);
服务启动完成
当执行到 mActivityManagerService.systemReady 的时候,表示前面创建的80多个服务都已经启动完成了;
接下来需要启动系统UI、执行一系列服务的systemReady、启动 Luancher;
startSystemUi(context, windowManagerF); 启动 systemui 服务;
private static void startSystemUi(Context context, WindowManagerService windowManager) {
    PackageManagerInternal pm = LocalServices.getService(PackageManagerInternal.class);
    Intent intent = new Intent();
    intent.setComponent(pm.getSystemUiServiceComponent());
    intent.addFlags(Intent.FLAG_DEBUG_TRIAGED_MISSING);
    //Slog.d(TAG, "Starting service: " + intent);
    context.startServiceAsUser(intent, UserHandle.SYSTEM);
    windowManager.onSystemUiStarted();
}
mSystemServiceManager.startBootPhase(SystemService.PHASE_ACTIVITY_MANAGER_READY); 调用AMS服务的ready -> service.onBootPhase();
public void startBootPhase(@NonNull TimingsTraceAndSlog t, int phase) {
    mCurrentPhase = phase;
    try {
        final int serviceLen = mServices.size();
        for (int i = 0; i < serviceLen; i++) {
            final SystemService service = mServices.get(i);
            long time = SystemClock.elapsedRealtime();
            try {
                service.onBootPhase(mCurrentPhase);
            } catch (Exception ex) {
            }
            warnIfTooLong(SystemClock.elapsedRealtime() - time, service, "onBootPhase");
        }
    } finally {
    }

    if (phase == SystemService.PHASE_BOOT_COMPLETED) {
        final long totalBootTime = SystemClock.uptimeMillis() - mRuntimeStartUptime;
        SystemServerInitThreadPool.shutdown();
    }
}
startHomeActivityLocked(currentUserId, “systemReady”); 启动Launcher Android开机过程结束,就可以看到桌面使用手机;
到这里,AMS 的启动流程就结束了;
下一章预告
Activity 启动流程
欢迎三连
来都来了,点个关注,点个赞吧,你的支持是我最大的动力~


 418
418


 被折叠的 条评论
为什么被折叠?
被折叠的 条评论
为什么被折叠?
 到【灌水乐园】发言


