


上一篇:Spring Cloud Alibaba学习(二):统一管理依赖
下一篇:Spring Cloud Alibaba学习(四):服务消费者
在IDEA中右键父模块,选择New→Module,按照提示创建名为Provider的子模块
以一个web项目的方式来编写这个子模块。
pom.xml
引入两个依赖:
- spring-boot-starter-web:提供模块web方式启动的能力
- spring-cloud-starter-alibaba-nacos-discovery:向nacos注册自身成为一个服务
<?xml version="1.0" encoding="UTF-8"?>
<project xmlns="http://maven.apache.org/POM/4.0.0"
         xmlns:xsi="http://www.w3.org/2001/XMLSchema-instance"
         xsi:schemaLocation="http://maven.apache.org/POM/4.0.0 http://maven.apache.org/xsd/maven-4.0.0.xsd">
    <parent>
        <artifactId>spring-cloud-alibaba-icydate</artifactId>
        <groupId>com.icydate</groupId>
        <version>1.0.0-SNAPSHOT</version>
    </parent>
    <modelVersion>4.0.0</modelVersion>

    <artifactId>provider</artifactId>

    <properties>
        <project.build.sourceEncoding>UTF-8</project.build.sourceEncoding>
        <project.reporting.outputEncoding>UTF-8</project.reporting.outputEncoding>
        <java.version>1.8</java.version>
    </properties>

    <dependencies>
        <!-- Spring Boot Begin -->
        <dependency>
            <groupId>org.springframework.boot</groupId>
            <artifactId>spring-boot-starter-web</artifactId>
        </dependency>
        <!-- Spring Boot End -->

        <!-- Spring Cloud Begin -->
        <dependency>
            <groupId>com.alibaba.cloud</groupId>
            <artifactId>spring-cloud-starter-alibaba-nacos-discovery</artifactId>
        </dependency>
        <!-- Spring Cloud End-->
    </dependencies>

    <build>
        <plugins>
            <plugin>
                <groupId>org.springframework.boot</groupId>
                <artifactId>spring-boot-maven-plugin</artifactId>
                <configuration>
                    <mainClass>com.icydate.ProviderApplication</mainClass>
                </configuration>
            </plugin>
        </plugins>
    </build>

</project>
application.yml
spring:
  application:
    name: icydate-provider # 服务名
  cloud:
    nacos:
      discovery:
        server-addr: localhost:8848 # nacos的地址

server:
  port: 8080
SpringBoot启动类
@EnableDiscoveryClient:表明成为一个Nacos客户端
@SpringBootApplication
@EnableDiscoveryClient
public class ProviderApplication {
    public static void main(String[] args) {
        SpringApplication.run(ProviderApplication.class, args);
    }
}
接口(用于Consumer调用)
@Controller
@RestController
public class NacosProviderController {
@Value("${server.port}")
private String port;
@GetMapping(value = "/get/{caller}")
public String getCaller(@PathVariable String caller) {
String str = String.format("Hello Consumer【%s】, I am from provider with port【%s】", caller, port);
return str;
}
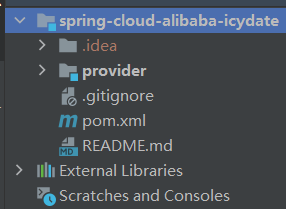
}目录结构

启动项目后,会在日志中观察到,provider已经被注册到nacos中
nacos registry, DEFAULT_GROUP icydate-provider 192.168.1.103:8080 register finished访问nacos,会看到服务管理→服务列表中已经出现provider


 404
404


 被折叠的 条评论
为什么被折叠?
被折叠的 条评论
为什么被折叠?
 到【灌水乐园】发言


