Laravel 实战 - 登录注册功能的实现( 自定义Auth + 验证码 + 表单验证 )


1 Auth

  1. 安装
1. laravel 6 以下版本用下面指令
// vendor\laravel\framework\src\Illuminate\Auth
php artisan make:auth

2. laravel 6 以上版本用下面指令,需要先安装 laravel/ui
composer require laravel/ui --dev
php artisan ui vue --auth
  1. 配置文件路径: config\auth.php,默认使用的守卫是 web,而 web 守卫使用的认证驱动是 session,用户提供器是 users
<?php

return [

    /*
    |--------------------------------------------------------------------------
    | Authentication Defaults
    |--------------------------------------------------------------------------
    |
    | This option controls the default authentication "guard" and password
    | reset options for your application. You may change these defaults
    | as required, but they're a perfect start for most applications.
    |
    */

    'defaults' => [
        'guard' => 'web',
        'passwords' => 'users',
    ],

    /*
    |--------------------------------------------------------------------------
    | Authentication Guards
    |--------------------------------------------------------------------------
    |
    | Next, you may define every authentication guard for your application.
    | Of course, a great default configuration has been defined for you
    | here which uses session storage and the Eloquent user provider.
    |
    | All authentication drivers have a user provider. This defines how the
    | users are actually retrieved out of your database or other storage
    | mechanisms used by this application to persist your user's data.
    |
    | Supported: "session"
    |
    */

    'guards' => [
        'web' => [
            'driver' => 'session',
            'provider' => 'users',
        ],
    ],

    /*
    |--------------------------------------------------------------------------
    | User Providers
    |--------------------------------------------------------------------------
    |
    | All authentication drivers have a user provider. This defines how the
    | users are actually retrieved out of your database or other storage
    | mechanisms used by this application to persist your user's data.
    |
    | If you have multiple user tables or models you may configure multiple
    | sources which represent each model / table. These sources may then
    | be assigned to any extra authentication guards you have defined.
    |
    | Supported: "database", "eloquent"
    |
    */

    'providers' => [
        'users' => [
            'driver' => 'eloquent',
            'model' => App\Models\User::class,
        ],

        // 'users' => [
        //     'driver' => 'database',
        //     'table' => 'users',
        // ],
    ],

    /*
    |--------------------------------------------------------------------------
    | Resetting Passwords
    |--------------------------------------------------------------------------
    |
    | You may specify multiple password reset configurations if you have more
    | than one user table or model in the application and you want to have
    | separate password reset settings based on the specific user types.
    |
    | The expire time is the number of minutes that each reset token will be
    | considered valid. This security feature keeps tokens short-lived so
    | they have less time to be guessed. You may change this as needed.
    |
    */

    'passwords' => [
        'users' => [
            'provider' => 'users',
            'table' => 'password_resets',
            'expire' => 60,
            'throttle' => 60,
        ],
    ],

    /*
    |--------------------------------------------------------------------------
    | Password Confirmation Timeout
    |--------------------------------------------------------------------------
    |
    | Here you may define the amount of seconds before a password confirmation
    | times out and the user is prompted to re-enter their password via the
    | confirmation screen. By default, the timeout lasts for three hours.
    |
    */

    'password_timeout' => 10800,

];
  1. datebase结构:按照组件的要求,创建users
CREATE TABLE `users` (
  `id` int(10) NOT NULL AUTO_INCREMENT,
  -- `name` varchar(50) DEFAULT NULL,
  `email` varchar(100) DEFAULT NULL,
  `password` varchar(100) DEFAULT NULL,
  `remember_token` varchar(100) DEFAULT NULL,
  `CreatedBy` int(10) DEFAULT NULL,
  `CreatedDate` datetime DEFAULT NULL,
  `LastModifiedBy` int(10) DEFAULT NULL,
  `LastModifiedDate` datetime DEFAULT NULL,
  PRIMARY KEY (`id`),
  UNIQUE KEY `id` (`id`),
  UNIQUE KEY `email` (`email`)
) ENGINE=InnoDB AUTO_INCREMENT=113 DEFAULT CHARSET=utf8 ROW_FORMAT=COMPACT COMMENT='用户表'
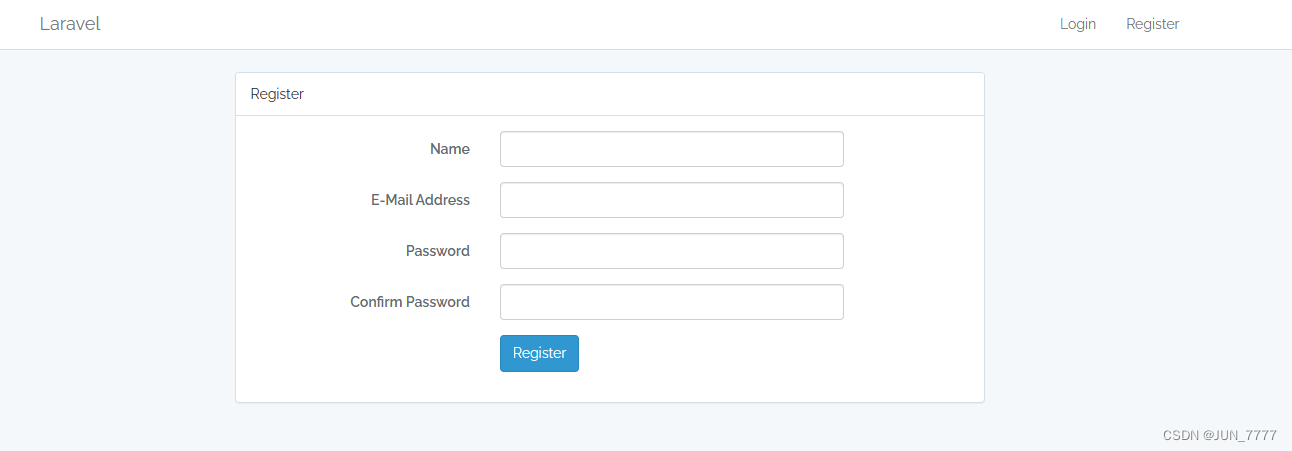
  1. 输入http://127.0.0.1:8000/register后进入页面,注册信息。写一条信息后点击注册按钮,检查库运行结果,有数据进入,代表成功。
    在这里插入图片描述

  2. 路由 - Auth::routes()

组件下载后我们会看到路由文件会自动出现一行代码,下面记载了其出处(Auth相关的路由)

// 1. web.php   注册了常见的验证路径,例如注册,登录登出,以及密码修改
Auth::routes();

// 2. vendor\laravel\framework\src\Illuminate\Support\Facades\Auth.php
    public static function routes()
    {
   
        static::$app->make('router')->auth();
    }
// 3. vendor\laravel\framework\src\Illuminate\Routing\Router.php
    public function auth()
    {
   
        // Authentication Routes...
        $this->get('login', 'Auth\LoginController@showLoginForm')->name('login');
        $this->post('login', 'Auth\LoginController@login');
        $this->post('logout', 'Auth\LoginController@logout')->name('logout');

        // Registration Routes...
        $this->get('register', 'Auth\RegisterController@showRegistrationForm')->name('register');
        $this->post('register', 'Auth\RegisterController@register');

        // Password Reset Routes...
        $this->get('password/reset', 'Auth\ForgotPasswordController@showLinkRequestForm')->name('password.request');
        $this->post(
  • 3
    点赞
  • 2
    收藏
    觉得还不错? 一键收藏
  • 0
    评论
首先,需要了解什么是拦截器和 JWT。 拦截器是一个在请求处理之前或之后进行拦截拦截的组件,类似于过滤器,可以对请求进行预处理、后处理等。在 Spring 框架中,可以使用拦截器来实现一些通用的处理逻辑,例如身份验证、日志记录等。 JWT(JSON Web Token)是一种用于身份验证的标准,它可以在用户和服务器之间传递安全可靠的信息,并且不需要在服务器端存储用户的信息。JWT 由三部分组成:头部、载荷和签名。头部包含加密算法和类型,载荷包含用户信息和过期时间等,签名用于验证数据的完整性和真实性。 接下来,我们来实现自定义拦截器和 JWT 身份验证。 1. 创建 Auth0 账号并创建应用 在 Auth0 官网注册账号并创建一个应用,获取应用的客户端 ID 和客户端密钥。 2. 添加 Auth0 Spring Security 集成依赖 在 Maven 或 Gradle 中添加 Auth0 Spring Security 集成依赖,以 Maven 为例: ```xml <dependency> <groupId>com.auth0</groupId> <artifactId>auth0-spring-security-api</artifactId> <version>1.5.0</version> </dependency> ``` 3. 创建 JWTUtils 工具类 在项目中创建 JWTUtils 工具类,用于生成和解析 JWT。 ```java import com.auth0.jwt.JWT; import com.auth0.jwt.algorithms.Algorithm; import com.auth0.jwt.interfaces.DecodedJWT; import java.util.Date; public class JWTUtils { private static final long EXPIRE_TIME = 30 * 60 * 1000; // 过期时间,单位毫秒 private static final String TOKEN_SECRET = "secret"; // 密钥 /** * 生成 token * * @param userId 用户 ID * @return token */ public static String createToken(String userId) { Date expireAt = new Date(System.currentTimeMillis() + EXPIRE_TIME); return JWT.create() .withIssuer("auth0") .withClaim("userId", userId) .withExpiresAt(expireAt) .sign(Algorithm.HMAC256(TOKEN_SECRET)); } /** * 验证 token * * @param token token * @return 用户 ID */ public static String verifyToken(String token) { DecodedJWT jwt = JWT.require(Algorithm.HMAC256(TOKEN_SECRET)) .withIssuer("auth0") .build() .verify(token); return jwt.getClaim("userId").asString(); } } ``` 4. 创建 Auth0Config 配置类 在项目中创建 Auth0Config 配置类,用于配置 Auth0 的参数。 ```java import com.auth0.spring.security.api.JwtWebSecurityConfigurer; import org.springframework.beans.factory.annotation.Value; import org.springframework.context.annotation.Configuration; import org.springframework.security.config.annotation.web.builders.HttpSecurity; import org.springframework.security.config.annotation.web.configuration.EnableWebSecurity; @Configuration @EnableWebSecurity public class Auth0Config { @Value(value = "${auth0.apiAudience}") private String apiAudience; @Value(value = "${auth0.issuer}") private String issuer; /** * 配置 Auth0 参数 */ public void configure(HttpSecurity http) throws Exception { JwtWebSecurityConfigurer.forRS256(apiAudience, issuer) .configure(http) .authorizeRequests() .antMatchers("/api/public/**").permitAll() .anyRequest().authenticated(); } } ``` 5. 创建 Auth0Interceptor 拦截器 在项目中创建 Auth0Interceptor 拦截器,用于拦截请求并进行身份验证。 ```java import org.springframework.beans.factory.annotation.Autowired; import org.springframework.stereotype.Component; import org.springframework.web.servlet.HandlerInterceptor; import org.springframework.web.servlet.ModelAndView; import javax.servlet.http.HttpServletRequest; import javax.servlet.http.HttpServletResponse; @Component public class Auth0Interceptor implements HandlerInterceptor { @Autowired private Auth0Client auth0Client; @Override public boolean preHandle(HttpServletRequest request, HttpServletResponse response, Object handler) throws Exception { String authorizationHeader = request.getHeader("Authorization"); if (authorizationHeader != null && authorizationHeader.startsWith("Bearer ")) { String token = authorizationHeader.substring(7); String userId = JWTUtils.verifyToken(token); if (userId != null) { request.setAttribute("userId", userId); return true; } } response.setStatus(401); return false; } @Override public void postHandle(HttpServletRequest request, HttpServletResponse response, Object handler, ModelAndView modelAndView) throws Exception { } @Override public void afterCompletion(HttpServletRequest request, HttpServletResponse response, Object handler, Exception ex) throws Exception { } } ``` 6. 创建 Auth0Client 客户端 在项目中创建 Auth0Client 客户端,用于与 Auth0 进行交互,例如获取用户信息等。 ```java import com.auth0.client.auth.AuthAPI; import com.auth0.client.mgmt.ManagementAPI; import com.auth0.exception.Auth0Exception; import com.auth0.json.auth.TokenHolder; import com.auth0.json.mgmt.users.User; import org.springframework.beans.factory.annotation.Value; import org.springframework.stereotype.Component; @Component public class Auth0Client { @Value(value = "${auth0.domain}") private String domain; @Value(value = "${auth0.clientId}") private String clientId; @Value(value = "${auth0.clientSecret}") private String clientSecret; /** * 获取访问令牌 * * @return 访问令牌 * @throws Auth0Exception Auth0 异常 */ public String getAccessToken() throws Auth0Exception { AuthAPI authAPI = new AuthAPI(domain, clientId, clientSecret); TokenHolder tokenHolder = authAPI.requestToken("https://" + domain + "/api/v2/"); return tokenHolder.getAccessToken(); } /** * 根据用户 ID 获取用户信息 * * @param userId 用户 ID * @return 用户信息 * @throws Auth0Exception Auth0 异常 */ public User getUserById(String userId) throws Auth0Exception { ManagementAPI managementAPI = new ManagementAPI(domain, getAccessToken()); return managementAPI.users().get(userId, null).execute(); } } ``` 7. 配置拦截器和认证管理器 在 Spring 配置文件中配置拦截器和认证管理器。 ```xml <!-- 配置拦截器 --> <mvc:interceptor> <mvc:mapping path="/api/**"/> <bean class="com.example.demo.interceptor.Auth0Interceptor"/> </mvc:interceptor> <!-- 配置认证管理器 --> <bean class="org.springframework.security.authentication.AuthenticationManager"/> ``` 8. 创建登录和登出接口 在控制器中创建登录和登出接口,用于生成和验证 JWT。 ```java import com.auth0.exception.Auth0Exception; import com.auth0.json.mgmt.users.User; import org.springframework.beans.factory.annotation.Autowired; import org.springframework.web.bind.annotation.*; @RestController @RequestMapping("/api/auth") public class AuthController { @Autowired private Auth0Client auth0Client; /** * 登录接口 * * @param username 用户名 * @param password 密码 * @return token * @throws Auth0Exception Auth0 异常 */ @PostMapping("/login") public String login(@RequestParam String username, @RequestParam String password) throws Auth0Exception { // 根据用户名和密码验证用户身份,并获取用户 ID String userId = "user123"; return JWTUtils.createToken(userId); } /** * 登出接口 */ @PostMapping("/logout") public void logout() { // 清除 token } } ``` 以上就是使用自定义拦截器和 Auth0 JWT 实现登录、登出的步骤。通过这种方式,可以实现简单、安全、可靠的用户身份验证,有效地保护用户的数据安全。

“相关推荐”对你有帮助么?

  • 非常没帮助
  • 没帮助
  • 一般
  • 有帮助
  • 非常有帮助
提交
评论
添加红包

请填写红包祝福语或标题

红包个数最小为10个

红包金额最低5元

当前余额3.43前往充值 >
需支付:10.00
成就一亿技术人!
领取后你会自动成为博主和红包主的粉丝 规则
hope_wisdom
发出的红包
实付
使用余额支付
点击重新获取
扫码支付
钱包余额 0

抵扣说明:

1.余额是钱包充值的虚拟货币,按照1:1的比例进行支付金额的抵扣。
2.余额无法直接购买下载,可以购买VIP、付费专栏及课程。

余额充值