


All you need is the plan, the road map, and the courage to press on to your destination.
你所需要的只是计划,路线图,以及朝着目标前进的勇气。
Spring 实例化 bean 的方式
- 构造器的方式
- 静态工厂方式
- 实例化工厂方式
1、使用构造器实例化bean 也是最常用的
ps:注意:Hello的无参构造器必须存在
【application.xml:】
<?xml version="1.0" encoding="UTF-8"?>
<beans xmlns="http://www.springframework.org/schema/beans"
       xmlns:xsi="http://www.w3.org/2001/XMLSchema-instance"
       xsi:schemaLocation="http://www.springframework.org/schema/beans http://www.springframework.org/schema/beans/spring-beans.xsd">

    <bean id="test-demo" class="com.jarvan.spring.Demo"/>
</beans>

【Demo:】
public class Demo {
    public Demo() {
        System.out.println("demo init .....");
    }
}
【Test:】
package com.jarvan.spring;

import org.junit.Test;
import org.junit.runner.RunWith;
import org.springframework.context.ApplicationContext;
import org.springframework.context.support.ClassPathXmlApplicationContext;
import org.springframework.test.context.ContextConfiguration;
import org.springframework.test.context.junit4.SpringJUnit4ClassRunner;

@RunWith(SpringJUnit4ClassRunner.class)
@ContextConfiguration(locations = {"classpath:application.xml"})
public class DemoTest {

    @Test
    public void test() {
        ApplicationContext context = new ClassPathXmlApplicationContext("application.xml");
        Demo demo = (Demo) context.getBean("test-demo");
        System.out.println(demo.getName());
    }
}
2、使用静态工厂方式实例化Bean
public class Demo1Factory {
    public static Demo1 getInstance() {
        return new Demo1();
    }
}

class Demo1 {
    public Demo1() {
        System.out.println("demo1 init .....");
    }
}

<bean id="test-demo1" class="com.jarvan.spring.Demo1Factory" factory-method="getInstance"/>
3、使用实例工厂实例化Bean
public class Demo2Factory {
    public Demo2 getDemo2() {
        return new Demo2();
    }
}

class Demo2{
    public Demo2() {
        System.out.println("Demo2 init ....");
    }
}

<bean id="test-demo2" factory-bean="demo2Factory" factory-method="getDemo2"/>
4、用setter 方式
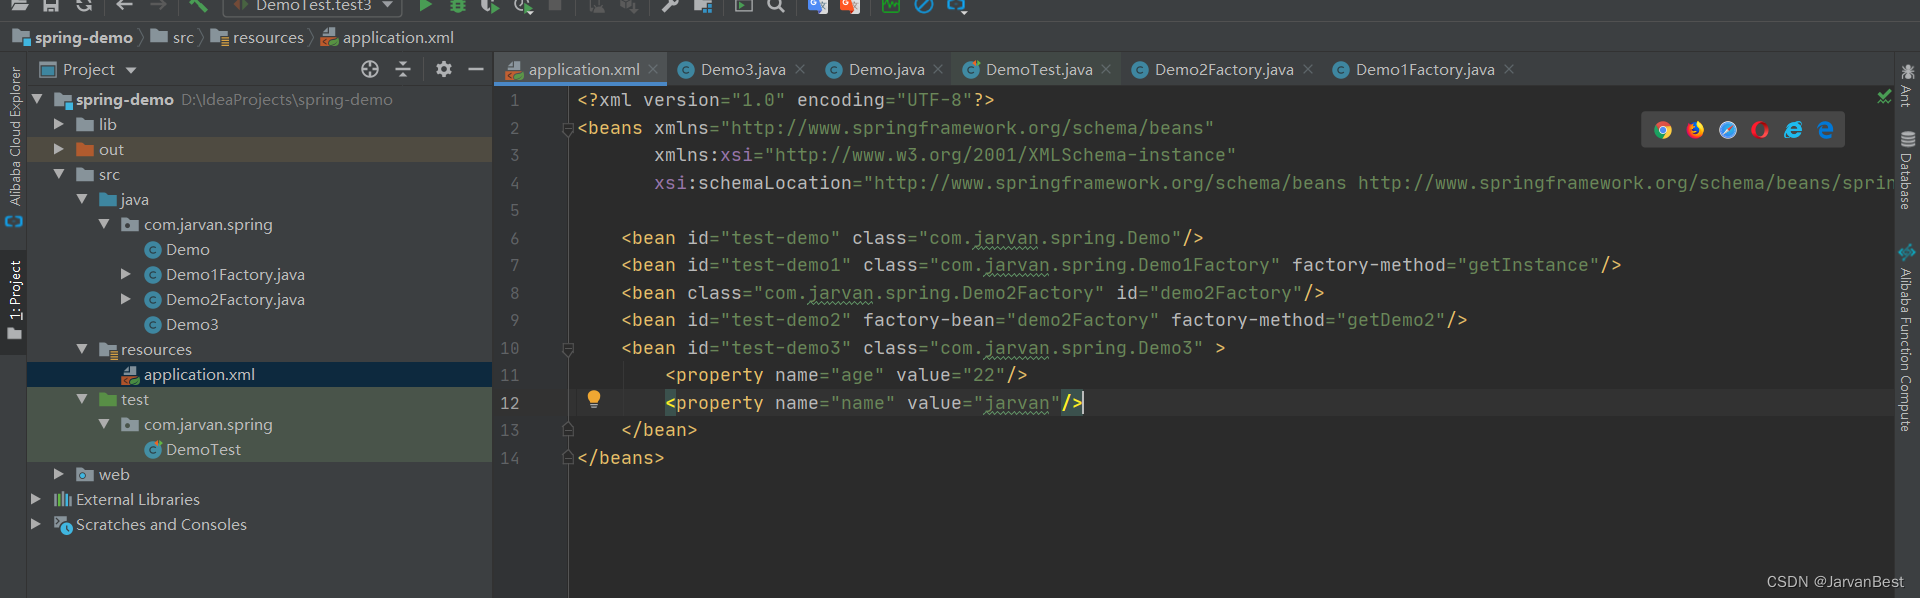
<bean id="test-demo3" class="com.jarvan.spring.Demo3" >
        <property name="age" value="22"/>
        <property name="name" value="jarvan"/>
    </bean>

public class Demo3 {

    private String name;
    private int age;

    public String getName() {
        return name;
    }

    public void setName(String name) {
        this.name = name;
    }

    public int getAge() {
        return age;
    }

    public void setAge(int age) {
        this.age = age;
    }

    @Override
    public String toString() {
        return "Demo3{" +
                "name='" + name + '\'' +
                ", age=" + age +
                '}';
    }
}

@Test
    public void test3() {
        ApplicationContext context = new ClassPathXmlApplicationContext("application.xml");
        Demo3 demo = (Demo3) context.getBean("test-demo3");
        System.out.println(demo.toString());
    }
5、测试项目结构


 219
219


 被折叠的 条评论
为什么被折叠?
被折叠的 条评论
为什么被折叠?
 到【灌水乐园】发言


