


最近需要把hikvision的rtsp流播放在浏览器中,由于rtmp和flv都需要flash支持,故定了rtsp转hls的解决方案。
环境为ubuntu18,linux下手动编译安装用户软件,源码放在/usr/local/src中,安装路径在/usr/local下。权限问题可使用sudo命令。
/usr/local/nginx/html/live
准备
安装编译需要用到的库和工具
apt-get install build-essential libtool gcc automake autoconf make
安装pcre,支持rewrite功能
源码地址:https://ftp.pcre.org/pub/pcre/
wget https://ftp.pcre.org/pub/pcre/pcre-8.40.tar.gz
tar -zxvf pcre-8.40.tar.gz
cd pcre-8.40.tar.gz
./configure
sudo make
sudo make install
安装zlib,支持gzip压缩
源码地址:http://zlib.net/
wget http://zlib.net/zlib-1.2.11.tar.gz
tar -zxvf zlib-1.2.11.tar.gz
cd zlib-1.2.11
./configure
sudo make
sudo make install
安装ssl
源码地址:https://www.openssl.org/source/
wget https://www.openssl.org/source/openssl-1.0.2o.tar.gz
tar -zxvf openssl-1.0.2o.tar.gz
cd openssl-1.0.2o
./config
sudo make
sudo make install
nginx的搭建
1. 下载编译nginx源码及rtmp模块
源码地址:http://nginx.org/en/download.html
rtmp模块源码:https://github.com/arut/nginx-rtmp-module
wget http://nginx.org/download/nginx-1.18.0.tar.gz
tar -zxvf nginx-1.18.0.tar.gz
cd nginx-1.18.0.tar.gz

./configure --sbin-path=/usr/local/nginx/nginx
--conf-path=/usr/local/nginx/nginx.conf \
--pid-path=/usr/local/nginx/nginx.pid \
--with-http_ssl_module \
--with-pcre=/usr/local/src/pcre-8.40 \
--with-zlib=/usr/local/src/zlib-1.2.11 \
--with-openssl=/usr/local/src/openssl-1.0.2o \
--add-module=/[path:源码地址]/nginx-rtmp-module

sudo make
sudo make install
编译完成后,通过命令nginx -V查看版本及配置参数。

2. 检查80端口是否被占用
使用命令:
netstat -ano | grep 80
lsop -i:80
3. 启动配置
nginx命令添加到全局命令:
sudo cp /usr/local/nginx/nginx /user/local/sbin/
在nginx的配置文件nginx.conf中http模块上面加入下面内容:
rtmp {
    server {

		listen 1935;
		chunk_size 4000;

		application hls {
			live on;
			hls on;
			hls_path /user/local/nginx/html/live;
			hls_fragment 5s;
		}
	}
}
编写index
接下来进入html文件夹,index.html:
<!DOCTYPE html>
<html>
<head>
<meta charset="UTF-8">
<title>Live Cam</title>
</head>
<script src="https://cdn.jsdelivr.net/npm/hls.js@latest"></script>

<video id="video" autoplay="true" controls="controls" style="width:500px;height:300px"></video>

<script>
    if (Hls.isSupported()) {
      var video = document.getElementById('video');
      var hls = new Hls();
      // bind them together
      hls.attachMedia(video);
      hls.on(Hls.Events.MEDIA_ATTACHED, function () {
        console.log("video and hls.js are now bound together !");
        hls1.loadSource("http://localhost/live/mystream.m3u8");
        hls1.on(Hls.Events.MANIFEST_PARSED, function (event, data) {
          console.log("manifest loaded, found " + data.levels.length + " quality level");
        });
      });
    }
</script>

</html>
编写运行脚本
html文件夹下新建live文件夹,chmod命令更改权限。
新建ffmpeg转码脚本stream.sh:
#!/bin/bash
VIDSOURCE="rtsp://[username]:[password]@[ip]:554/"
AUDIO_OPTS="-c:a libfaac -b:a 32k -ac 2"
VIDEO_OPTS="-s 854*480 -vcodec copy -b:v 800000"
OUTPUT_HLS="-hls_time 5 -hls_list_size 10 -start_number 1"
ffmpeg -i "$VIDSOURCE" -y $AUDIO_OPTS $VIDEO_OPTS $OUTPUT_HLS mystream.m3u8
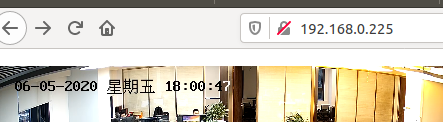
通过命令./stream.sh,开始转码。浏览器中输入本地地址即可
如有其他问题欢迎留言交流。
 欢迎关注公众号获取源码。


 1406
1406


 被折叠的 条评论
为什么被折叠?
被折叠的 条评论
为什么被折叠?
 到【灌水乐园】发言


