


1.使用这个插件需要安装swiper8(安装最新的swiper目前最新的是swiper8)
npm install swiper --save
2.在script中引用swiper 例如:import { Swiper, SwiperSlide } from 'swiper/vue';
<script setup lang="ts">
import { ref, reactive } from 'vue'
import { Swiper, SwiperSlide } from 'swiper/vue';
// Import Swiper styles
import 'swiper/css';
import "swiper/css/free-mode"
import "swiper/css/navigation"
import "swiper/css/thumbs"
import { FreeMode, Navigation, Thumbs } from 'swiper'
const modules = [Thumbs, FreeMode]
const bigImg = reactive([
'https://t7.baidu.com/it/u=3165657288,4248157545&fm=193&f=GIF',
'https://t7.baidu.com/it/u=2942499027,2479446682&fm=193&f=GIF',
'https://t7.baidu.com/it/u=2610975262,3538281461&fm=193&f=GIF',
'https://t7.baidu.com/it/u=4138158235,3956816634&fm=193&f=GIF',
'https://t7.baidu.com/it/u=2942499027,2479446682&fm=193&f=GIF',
'https://t7.baidu.com/it/u=2610975262,3538281461&fm=193&f=GIF',
'https://t7.baidu.com/it/u=4138158235,3956816634&fm=193&f=GIF'
])
const thumbsSwiper = ref(null);
const setThumbsSwiper = (swiper: any) => {
thumbsSwiper.value = swiper;
};
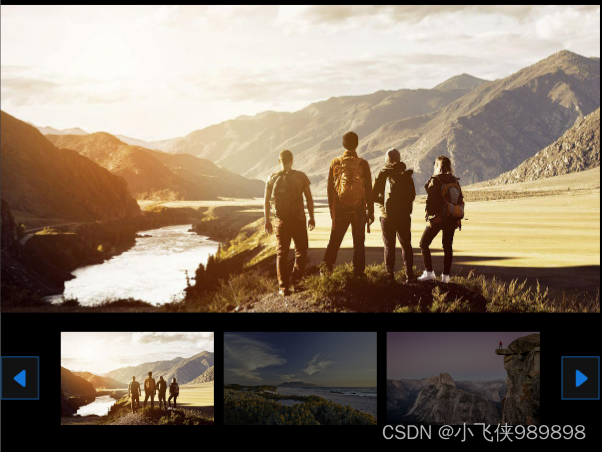
</script>3.以下用两个swiper,通过thumbs属性实现联动 做到的效果:大图小图同时展示在屏幕上。大图切换,小图居中显示。小图点击,显示对应大图。
 <swiper
               :spaceBetween="10" :thumbs="{ swiper: thumbsSwiper }" :modules="modules" class="mySwiper2" :navigation="{
                            nextEl: '.swiper-button1-next',
                            prevEl: '.swiper-button1-prev'
                        }">
                    <swiper-slide v-for="(item, index) of bigImg" :key="index"> <img class="img" :src="item" />
                    </swiper-slide>

                </swiper>
                <swiper @swiper="setThumbsSwiper" :spaceBetween="10" :slidesPerView="3" :freeMode="true"
                    :watchSlidesProgress="true" :modules="modules" class="mySwiper">
                   <swiper-slide v-for="(item, index) of bigImg" :key="index"> <img class="img" :src="item" />
                    </swiper-slide>
                </swiper>
4.swiper样式编辑
.swiper-button-next {
    /*先将原始箭头的颜色设置为透明的  然后设置一个背景图片  达到修改按钮样式的目的*/
    right: 1.5%;
    left: auto;
    color: rgba(0, 0, 0, 0) !important;
    background: url("../../assets/images/start/left.png") center center no-repeat;
    background-size: 100% 100%;
}

.swiper-button-prev {
    left: 1.5%;
    right: auto;
    color: rgba(0, 0, 0, 0) !important;
    background: url("../../assets/images/start/right.png") center center no-repeat;
    background-size: 100% 100%;
}

/* swiper样式 */
.swiper {
    width: 100%;
    height: 100%;
}

.swiper-slide {
    text-align: center;
    font-size: 18px;
    background: #fff;

    /* Center slide text vertically */
    display: -webkit-box;
    display: -ms-flexbox;
    display: -webkit-flex;
    display: flex;
    -webkit-box-pack: center;
    -ms-flex-pack: center;
    -webkit-justify-content: center;
    justify-content: center;
    -webkit-box-align: center;
    -ms-flex-align: center;
    -webkit-align-items: center;
    align-items: center;
}

.swiper-slide img {
    display: block;
    width: 100%;
    height: 100%;
    object-fit: cover;
}


.swiper {
    width: 100%;
    height: 100%;
    margin-left: auto;
    margin-right: auto;
}

.swiper-slide {
    background-size: cover;
    background-position: center;
}

.mySwiper2 {
    position: relative;
    float: left;
    height: 100%;
    width: 80%;

    border-radius: 12px;
}

.mySwiper {
    position: relative;
    margin-top: 5%;
    float: left;
    margin-left: 3%;
    width: 17%;
    height: 80%;
    box-sizing: border-box;
    padding: 10px 0;

}

.swiper-cover {
    position: absolute;
    width: 100%;
    height: 30%;
    background-color: rgba(0, 0, 0, 0.6);
    bottom: 0%;
    right: 0%;
    z-index: 100;

}

.swipercover-top {
    margin-left: 5%;
    margin-right: 5%;
    width: 90%;
    height: 30%;
    color: white;
    border-bottom: 2px solid dodgerblue
}

.swipercover-top-text {
    width: 15%;
    height: 100%;
    border-bottom: 2px solid red;
    display: flex;
    align-items: center;
    justify-content: center;
}

.swipercover-bottom {
    margin-left: 10%;
    width: 100%;
    height: 70%
}

.mySwiper .swiper-slide {
    width: 100%;
    height: 33%;
    opacity: 0.4;
    border-radius: 4%;
}

.mySwiper .swiper-slide-thumb-active {
    opacity: 1;
}

.swiper-slide img {
    display: block;
    width: 100%;
    height: 100%;
    object-fit: cover;
}
5.这样一个swiper缩略图就完成啦!如下图
如果有问题可以私信我哦!免费帮忙解答疑惑
附赠Swiper8的官方文档Swiper Demos


 1585
1585


 被折叠的 条评论
为什么被折叠?
被折叠的 条评论
为什么被折叠?
 到【灌水乐园】发言


